“This was going to be a huge undertaking but since COVID19 came to the US I found myself quarantined and looking to keep myself busy. See what I can do.......””
In the beginning there was an ambulance……
I am the Training Coordinator for an ambulance company in Los Angeles/Orange County. The company I work for had purchased (2) 2010 F350 Type One ambulances. My first day on the job I was doing a ride along in the back of one of these units and thought, “this thing has got a ton of space!” When I found out it was 4 WD it was on! Then I found out it had a twin that they also owned. I immediately called my brother. “Hey! You wanna buy an ambulance?'“ He was a bit unsure until I took photos of the other ambulance and he too said, “oh yeah!” So he too is building a camper. We have different ideas so the cool part is that we are starting off with identical ambulances and the end result will only be dictated by our imaginations.
I asked the owner if, when the time came, I could purchase the ambulance from them. It was going to age-out (ambulances are limited to a 10 year service life). She answered YES. I left it alone for 6 months and didn’t want to pressure anyone. To be honest I still wasn’t sure if I was going to do it. When June 2020 approached we were amidst the quarantine and I was bored out of my mind. Sitting at home. Not able to go fly fishing, climbing, camping, etc. All of the Ektos Unlimited events were cancelled. I wasn’t generating any business with Ektos Unlimited so I decided I needed something to do. I made the purchase on June 18th, 2020.
The owner offered it to me at a reduced cost of $4000 and I began the process. She was kind enough to allow me to gut the inside in the parking lot of the ambulance company for about 3 weeks. That allowed me to gut the inside as soon as I got off work. 5 days a week from 4pm-8pm I tore out the inside rear of the unit. I also sent the ambulance to Upland Ford to have the AC and Heater Core hoses disconnected from the back. They were connected to the front cab’s AC system and I wanted it completely separated.
I took it to SoundScape, a local automotive audio shop, and asked them to install a new radio unit and a backup camera. While there, multiple people would ask, what the heck are you doing with that thing. My canned response as I was soaked in sweat working on, in and under it, “building a camper”. Typical response ooooohhhhh thats so cool!
I took it to a local auto tint shop and had them tint the front windows. Interestingly enough while I was at the tint shop I witnessed a stabbing and rendered aid to the victim, but thats a separate story. Shit tends to follow you around when you’re a medic in LA.
EMT’s, medics, nurses, management, mechanics and folks that lived nearby would ask me, what the hell are you doing?” Only answer I could come up with was, “I’m building a camper”. Most would laugh, some said it was interesting but the best responses I got were from new EMT’s and staff members that had never seen the inner workings of an ambulance. “Damn there’s a lot of wiring!” To be honest I've been in EMS for 20+ years and hadn’t seen the inner workings of an ambulance either. It was pretty damn cool.
All good things come to an end and management asked me to get out the hell out of their parking lot! LOL. At first I was pissed but soon realized that it was a good idea to make haste and find a new place to begin the build out.
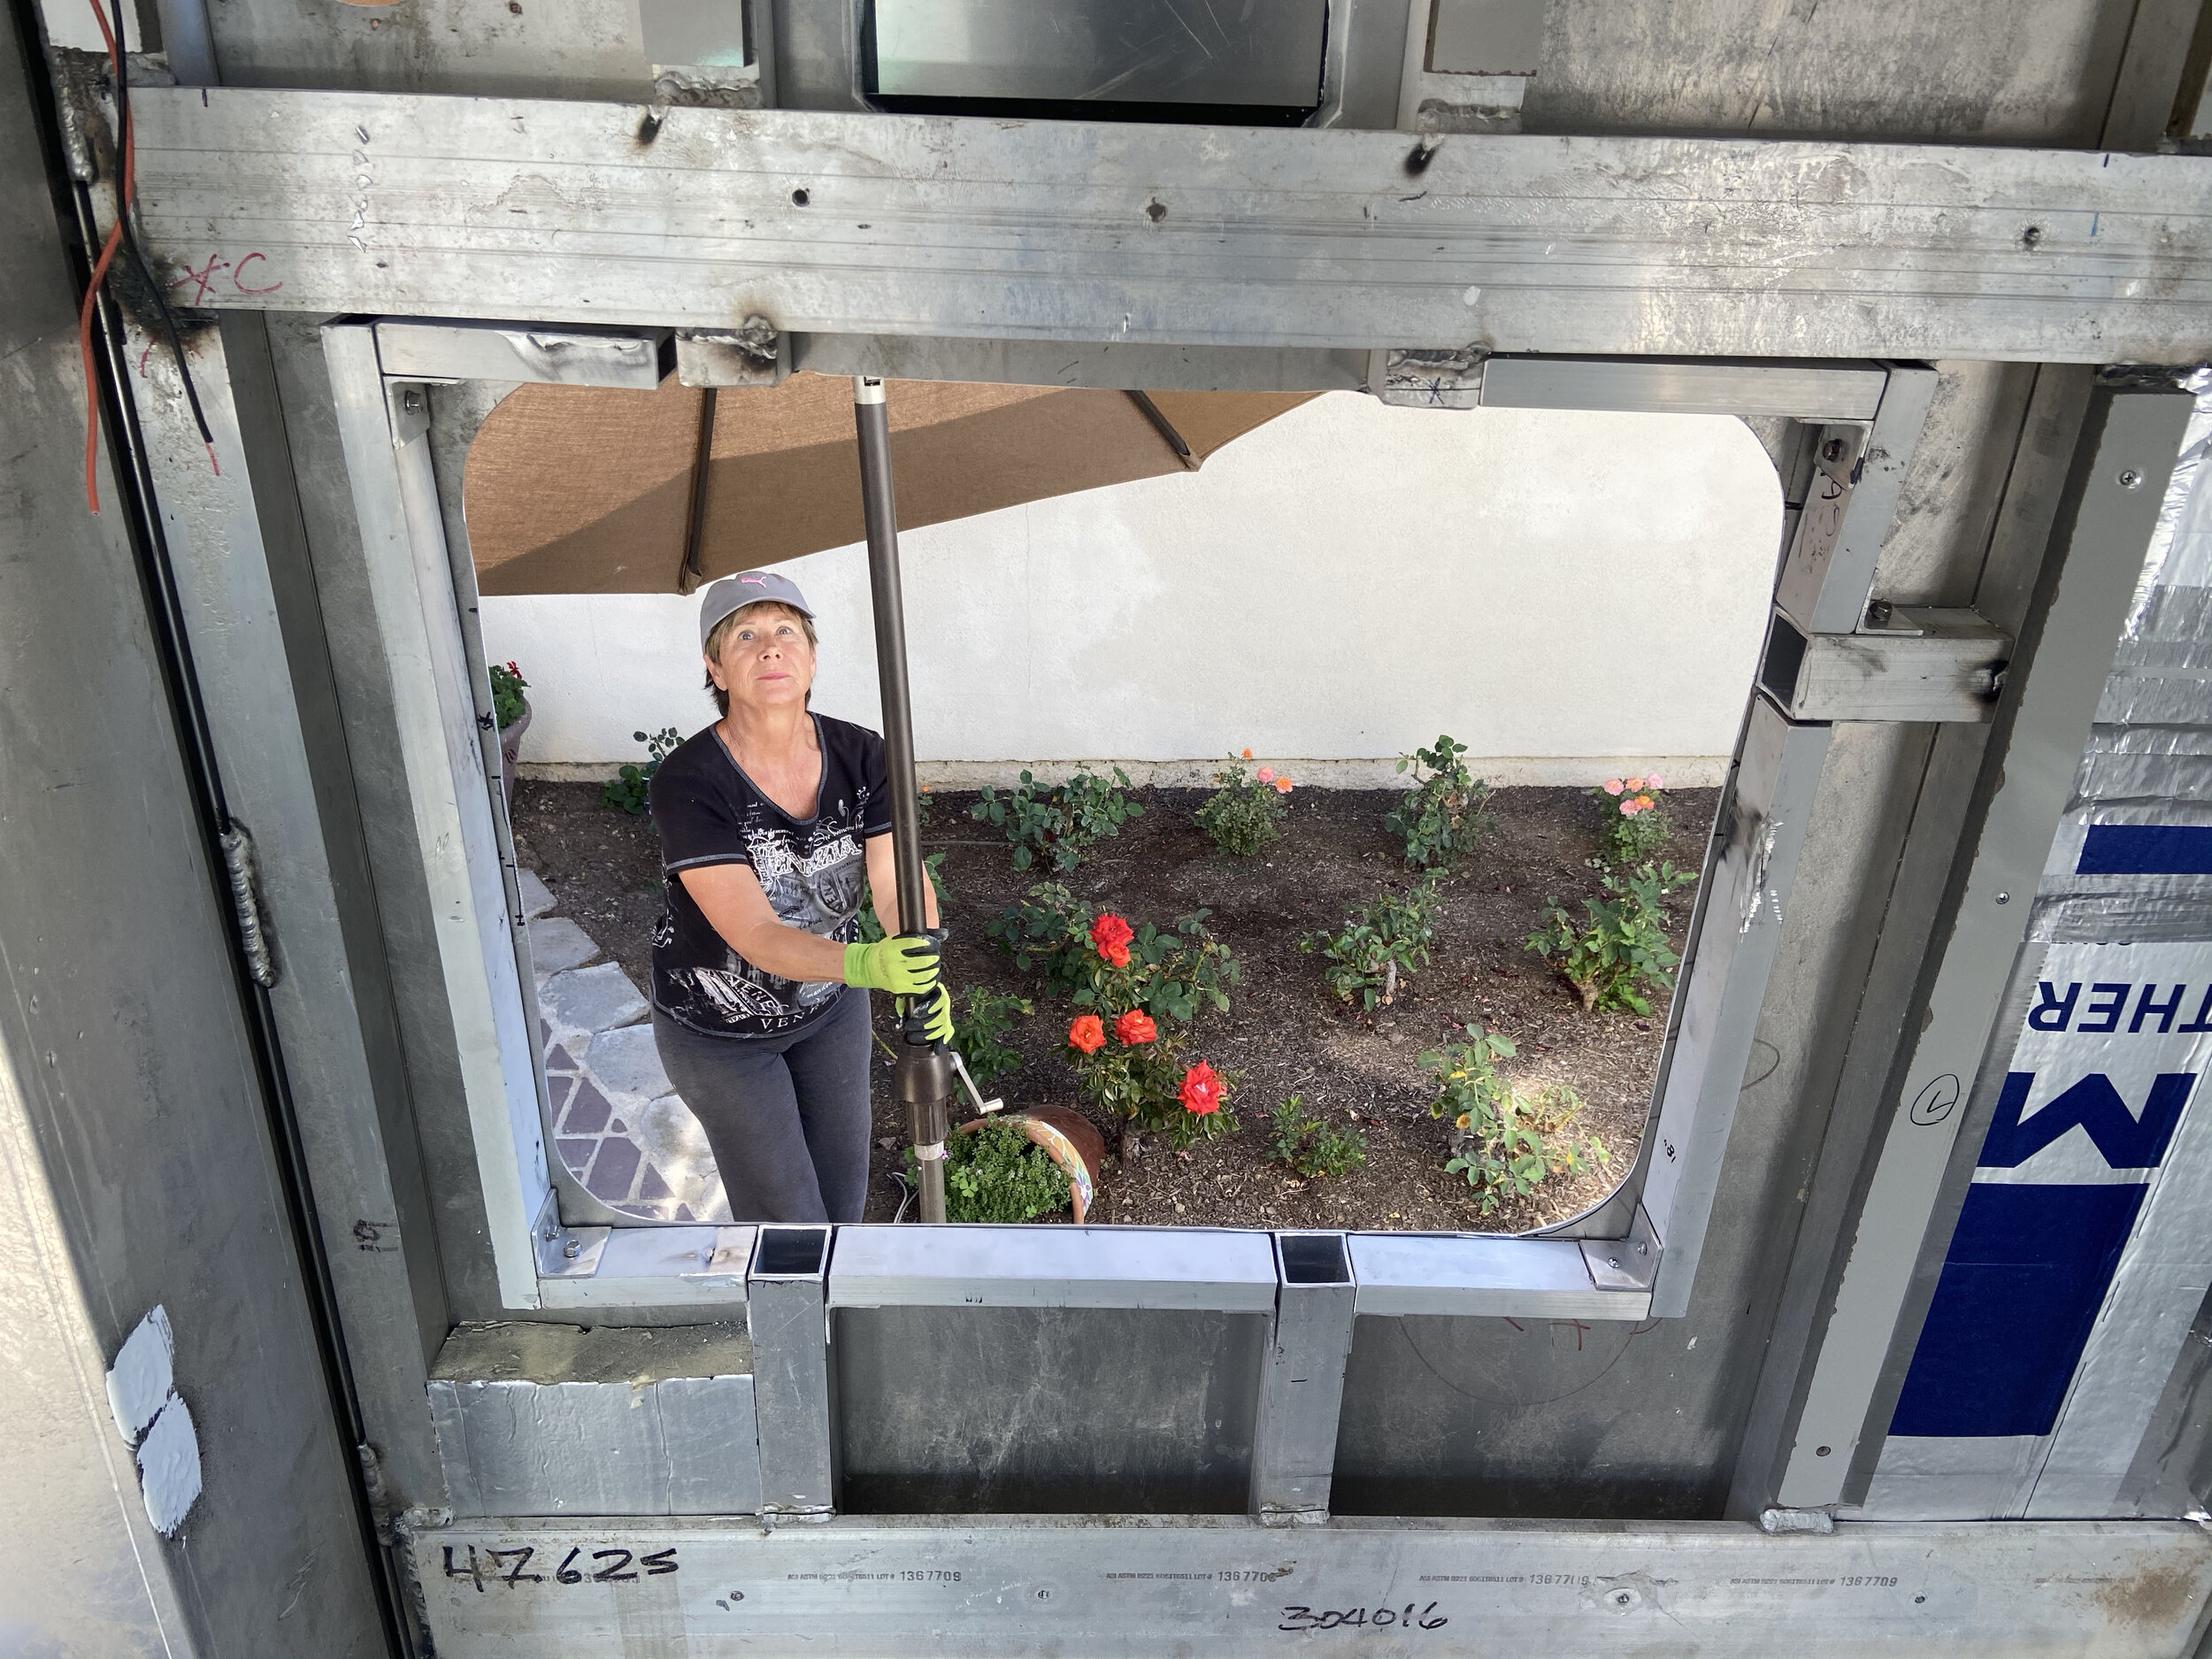
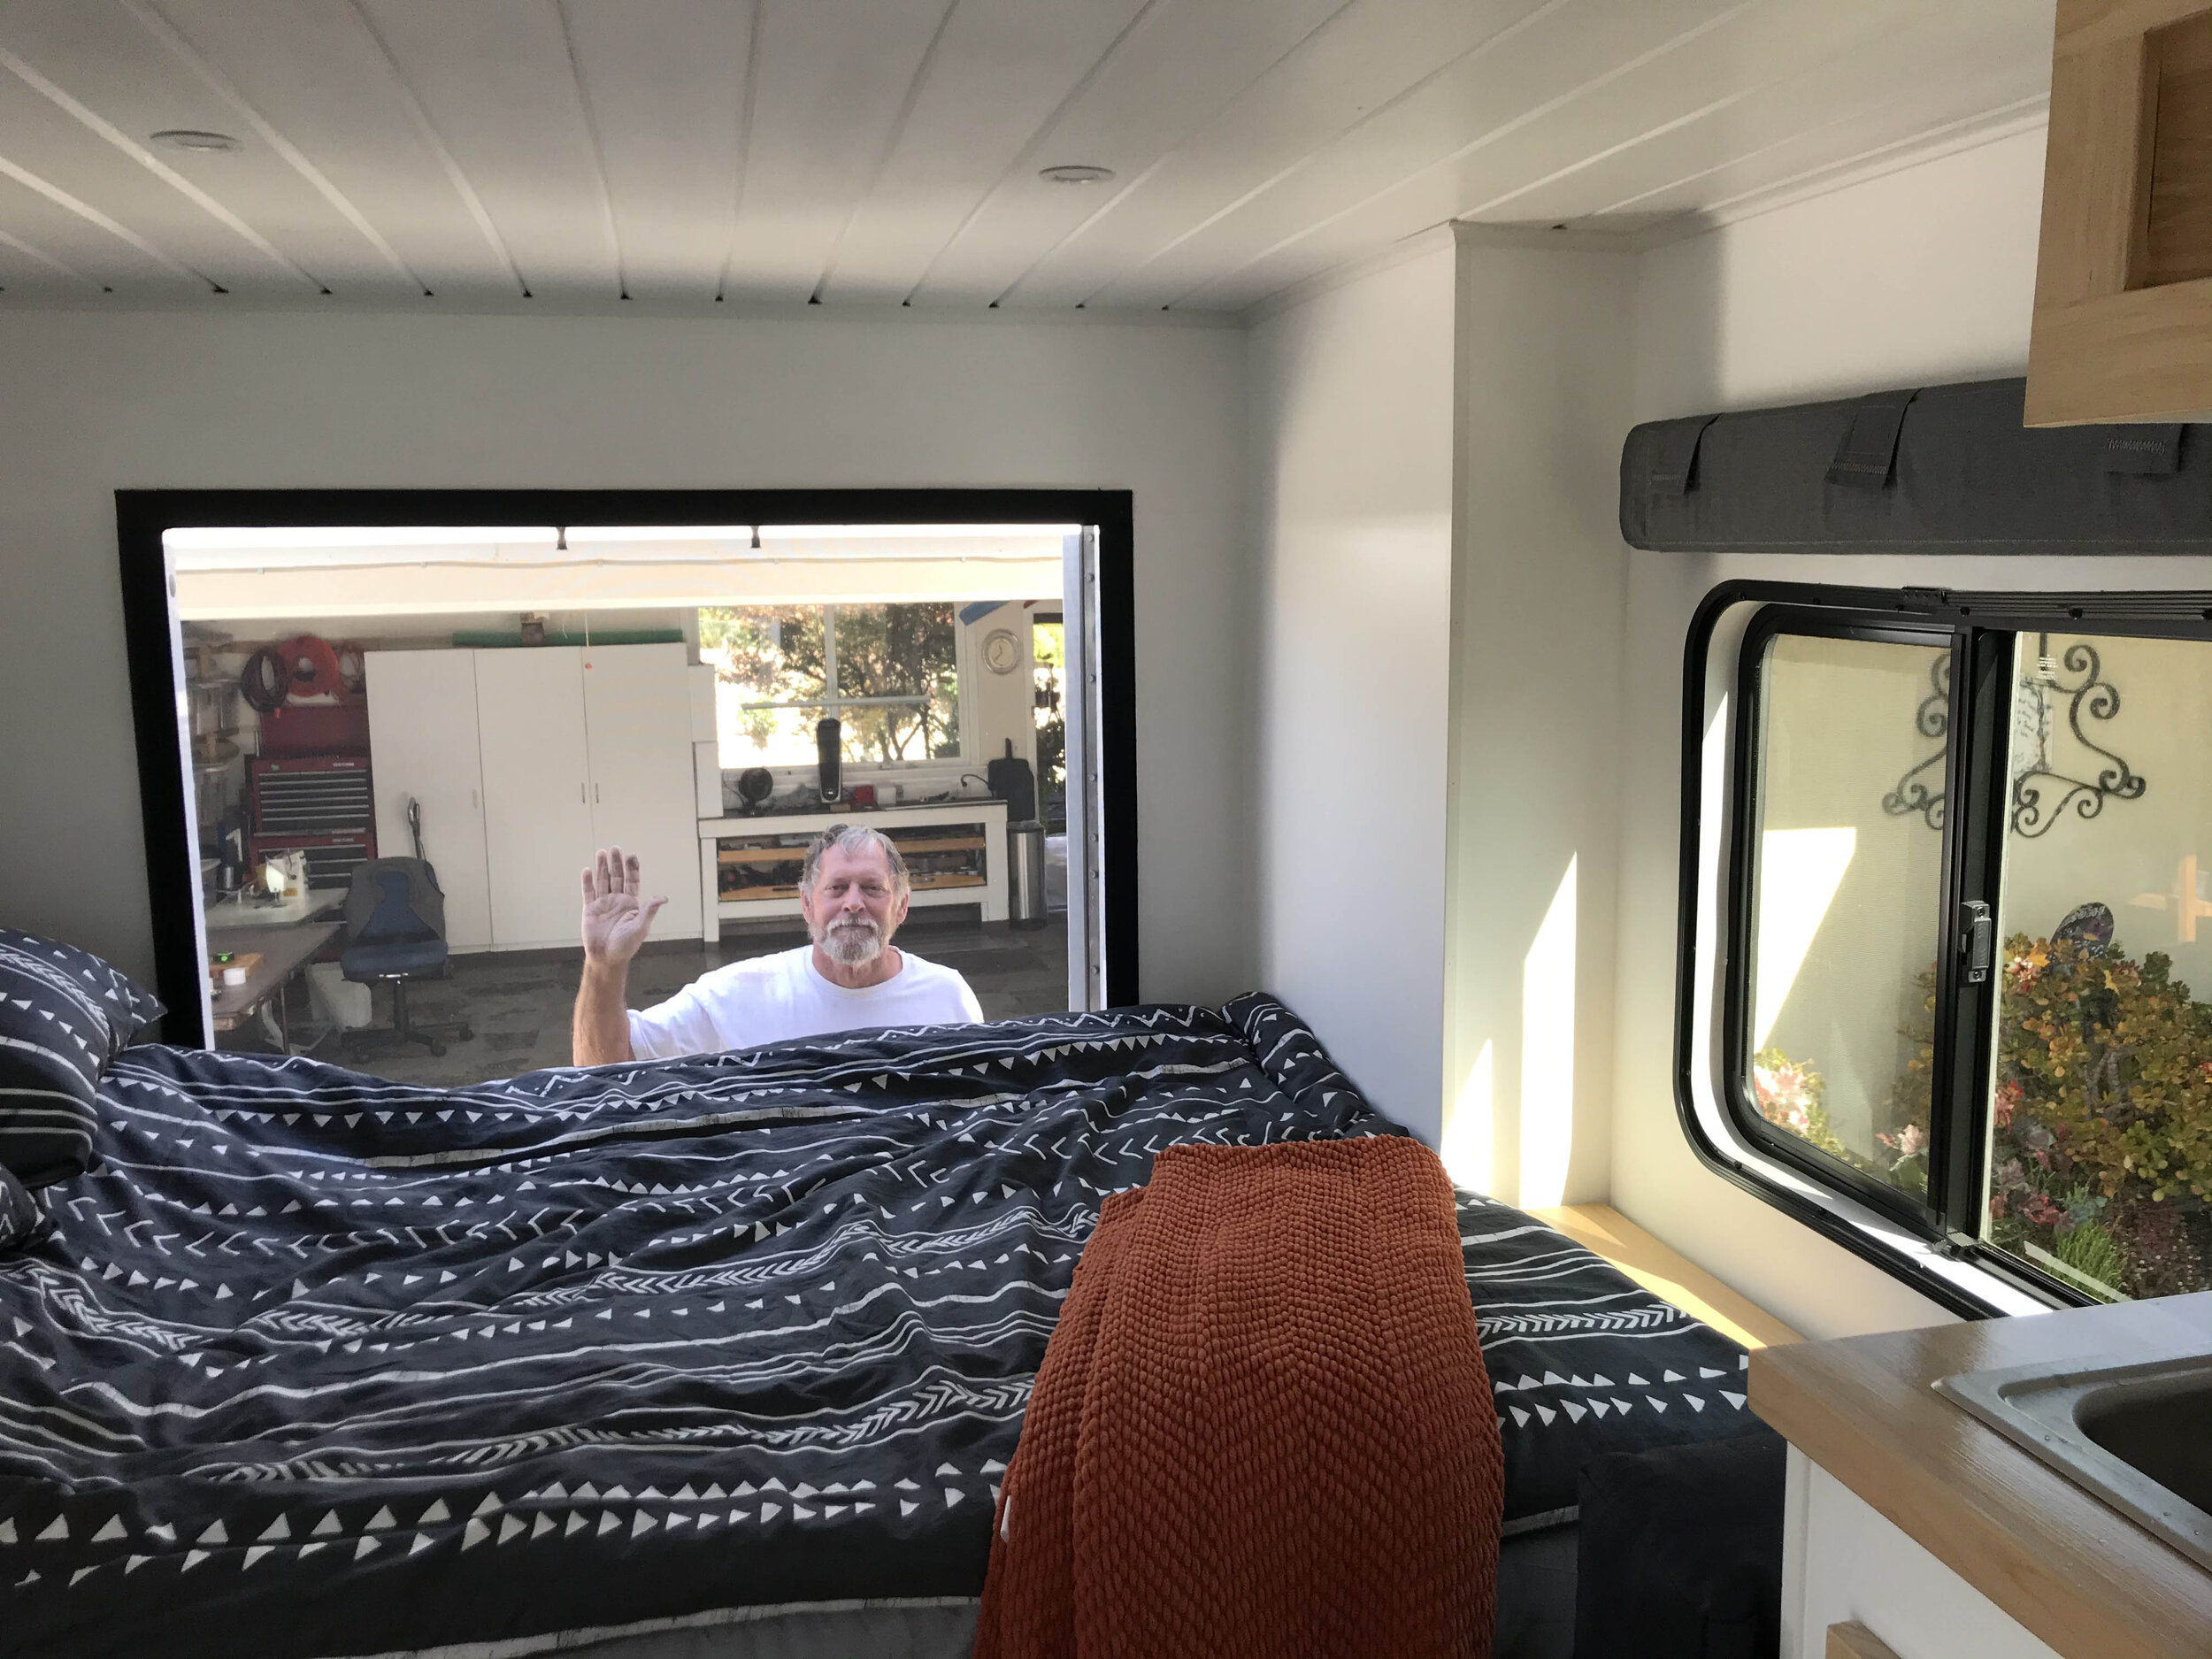
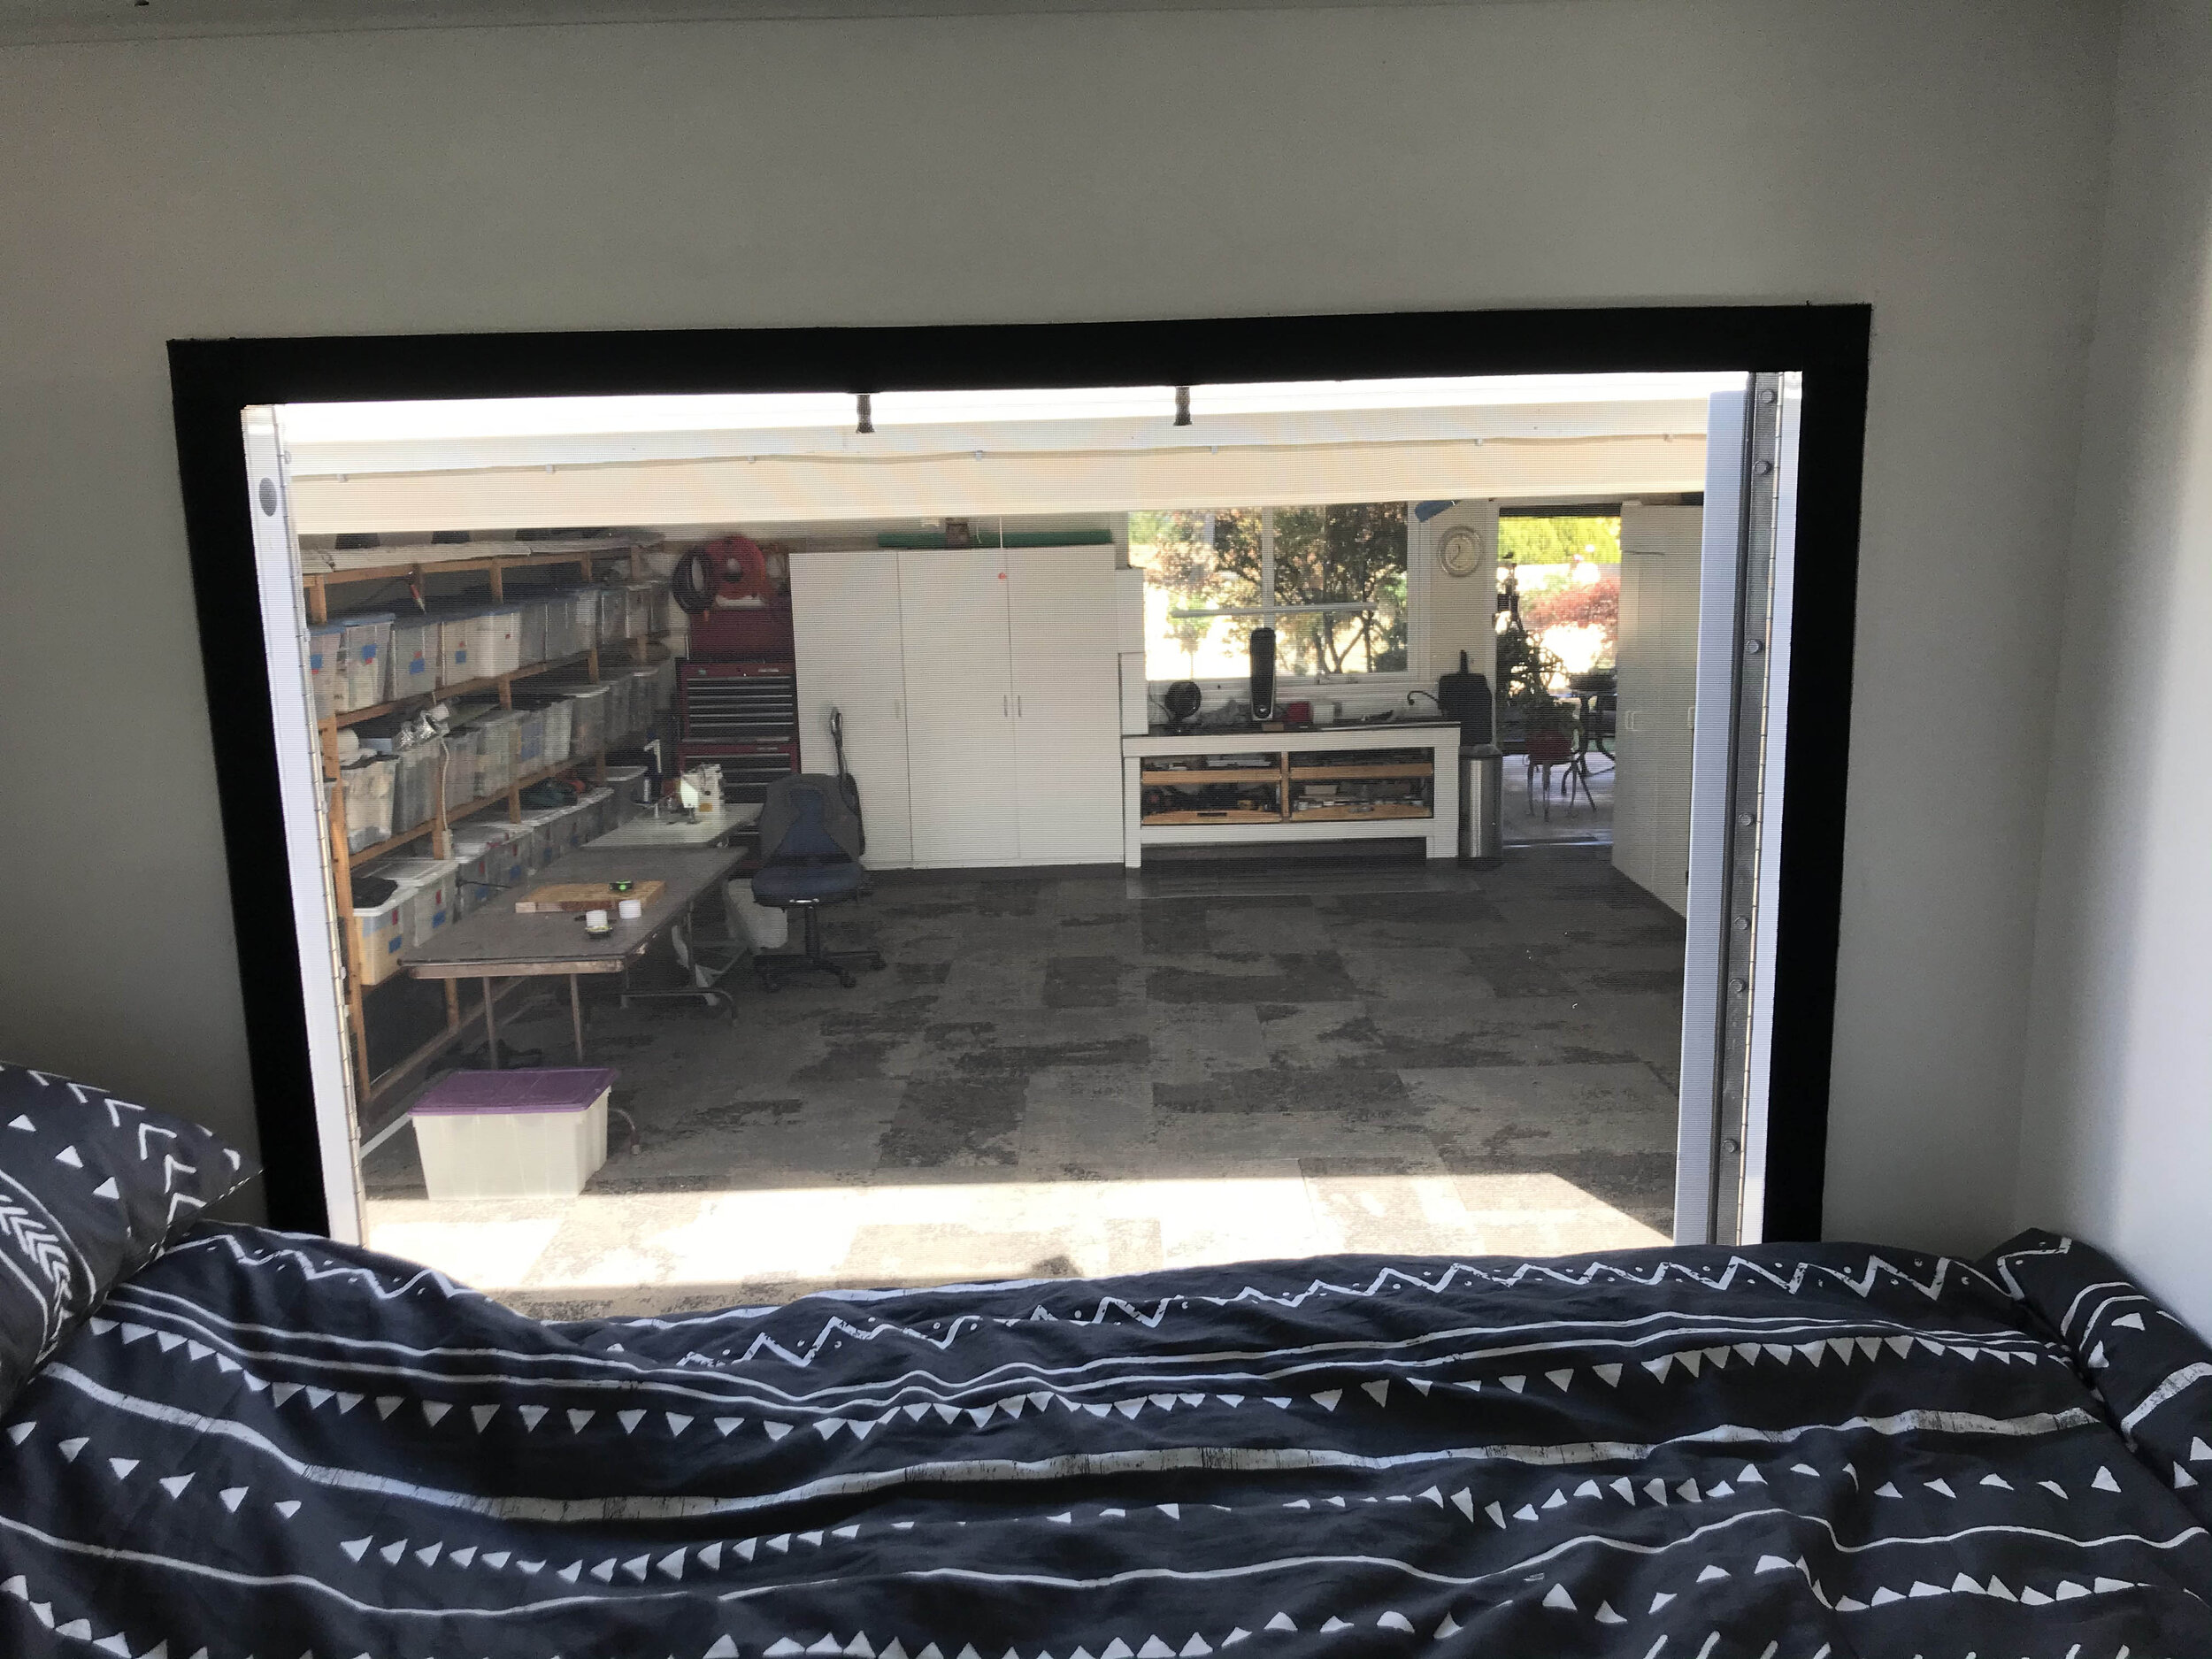
As most folks now a days I don’t own a home and my folks were more than happy to spend time with their son and partake in this project with me. The next 3 months I spent every Friday afternoon, Saturday and Sunday building the perfect camper for me with my extremely hard working parents. Below is the chronological order of the build. Enjoy. :-)
Breaking it down and building the interior
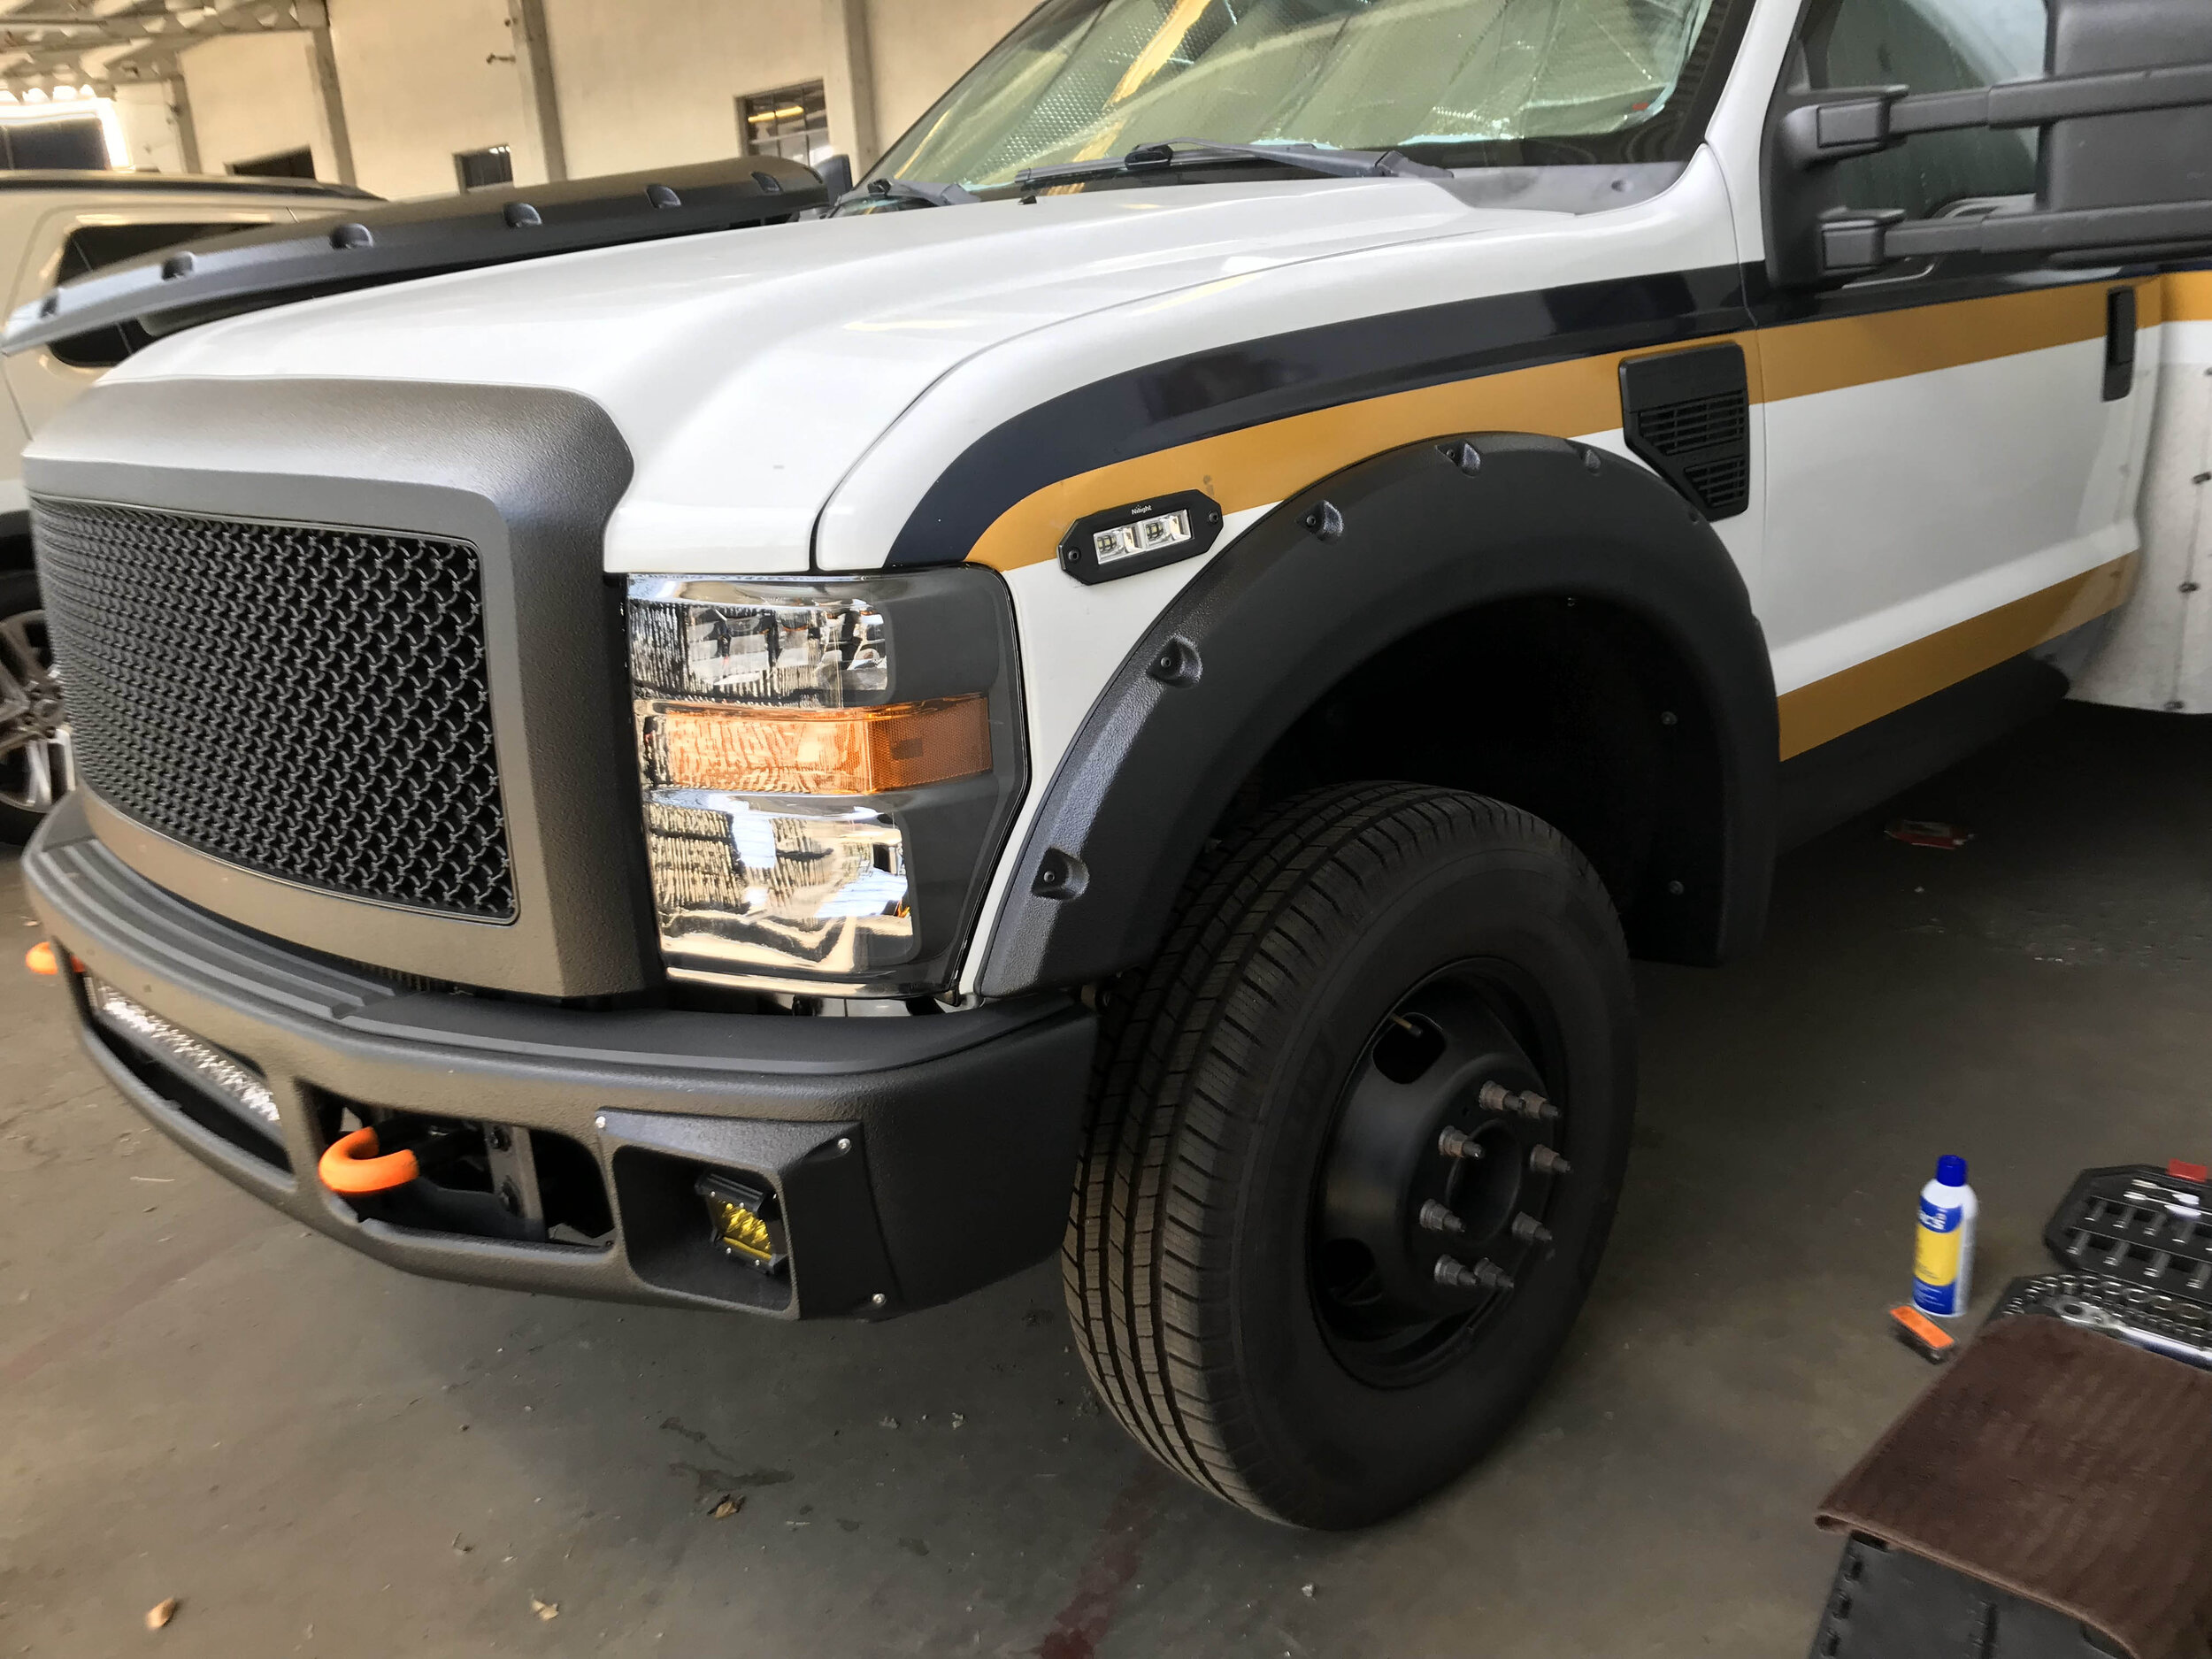
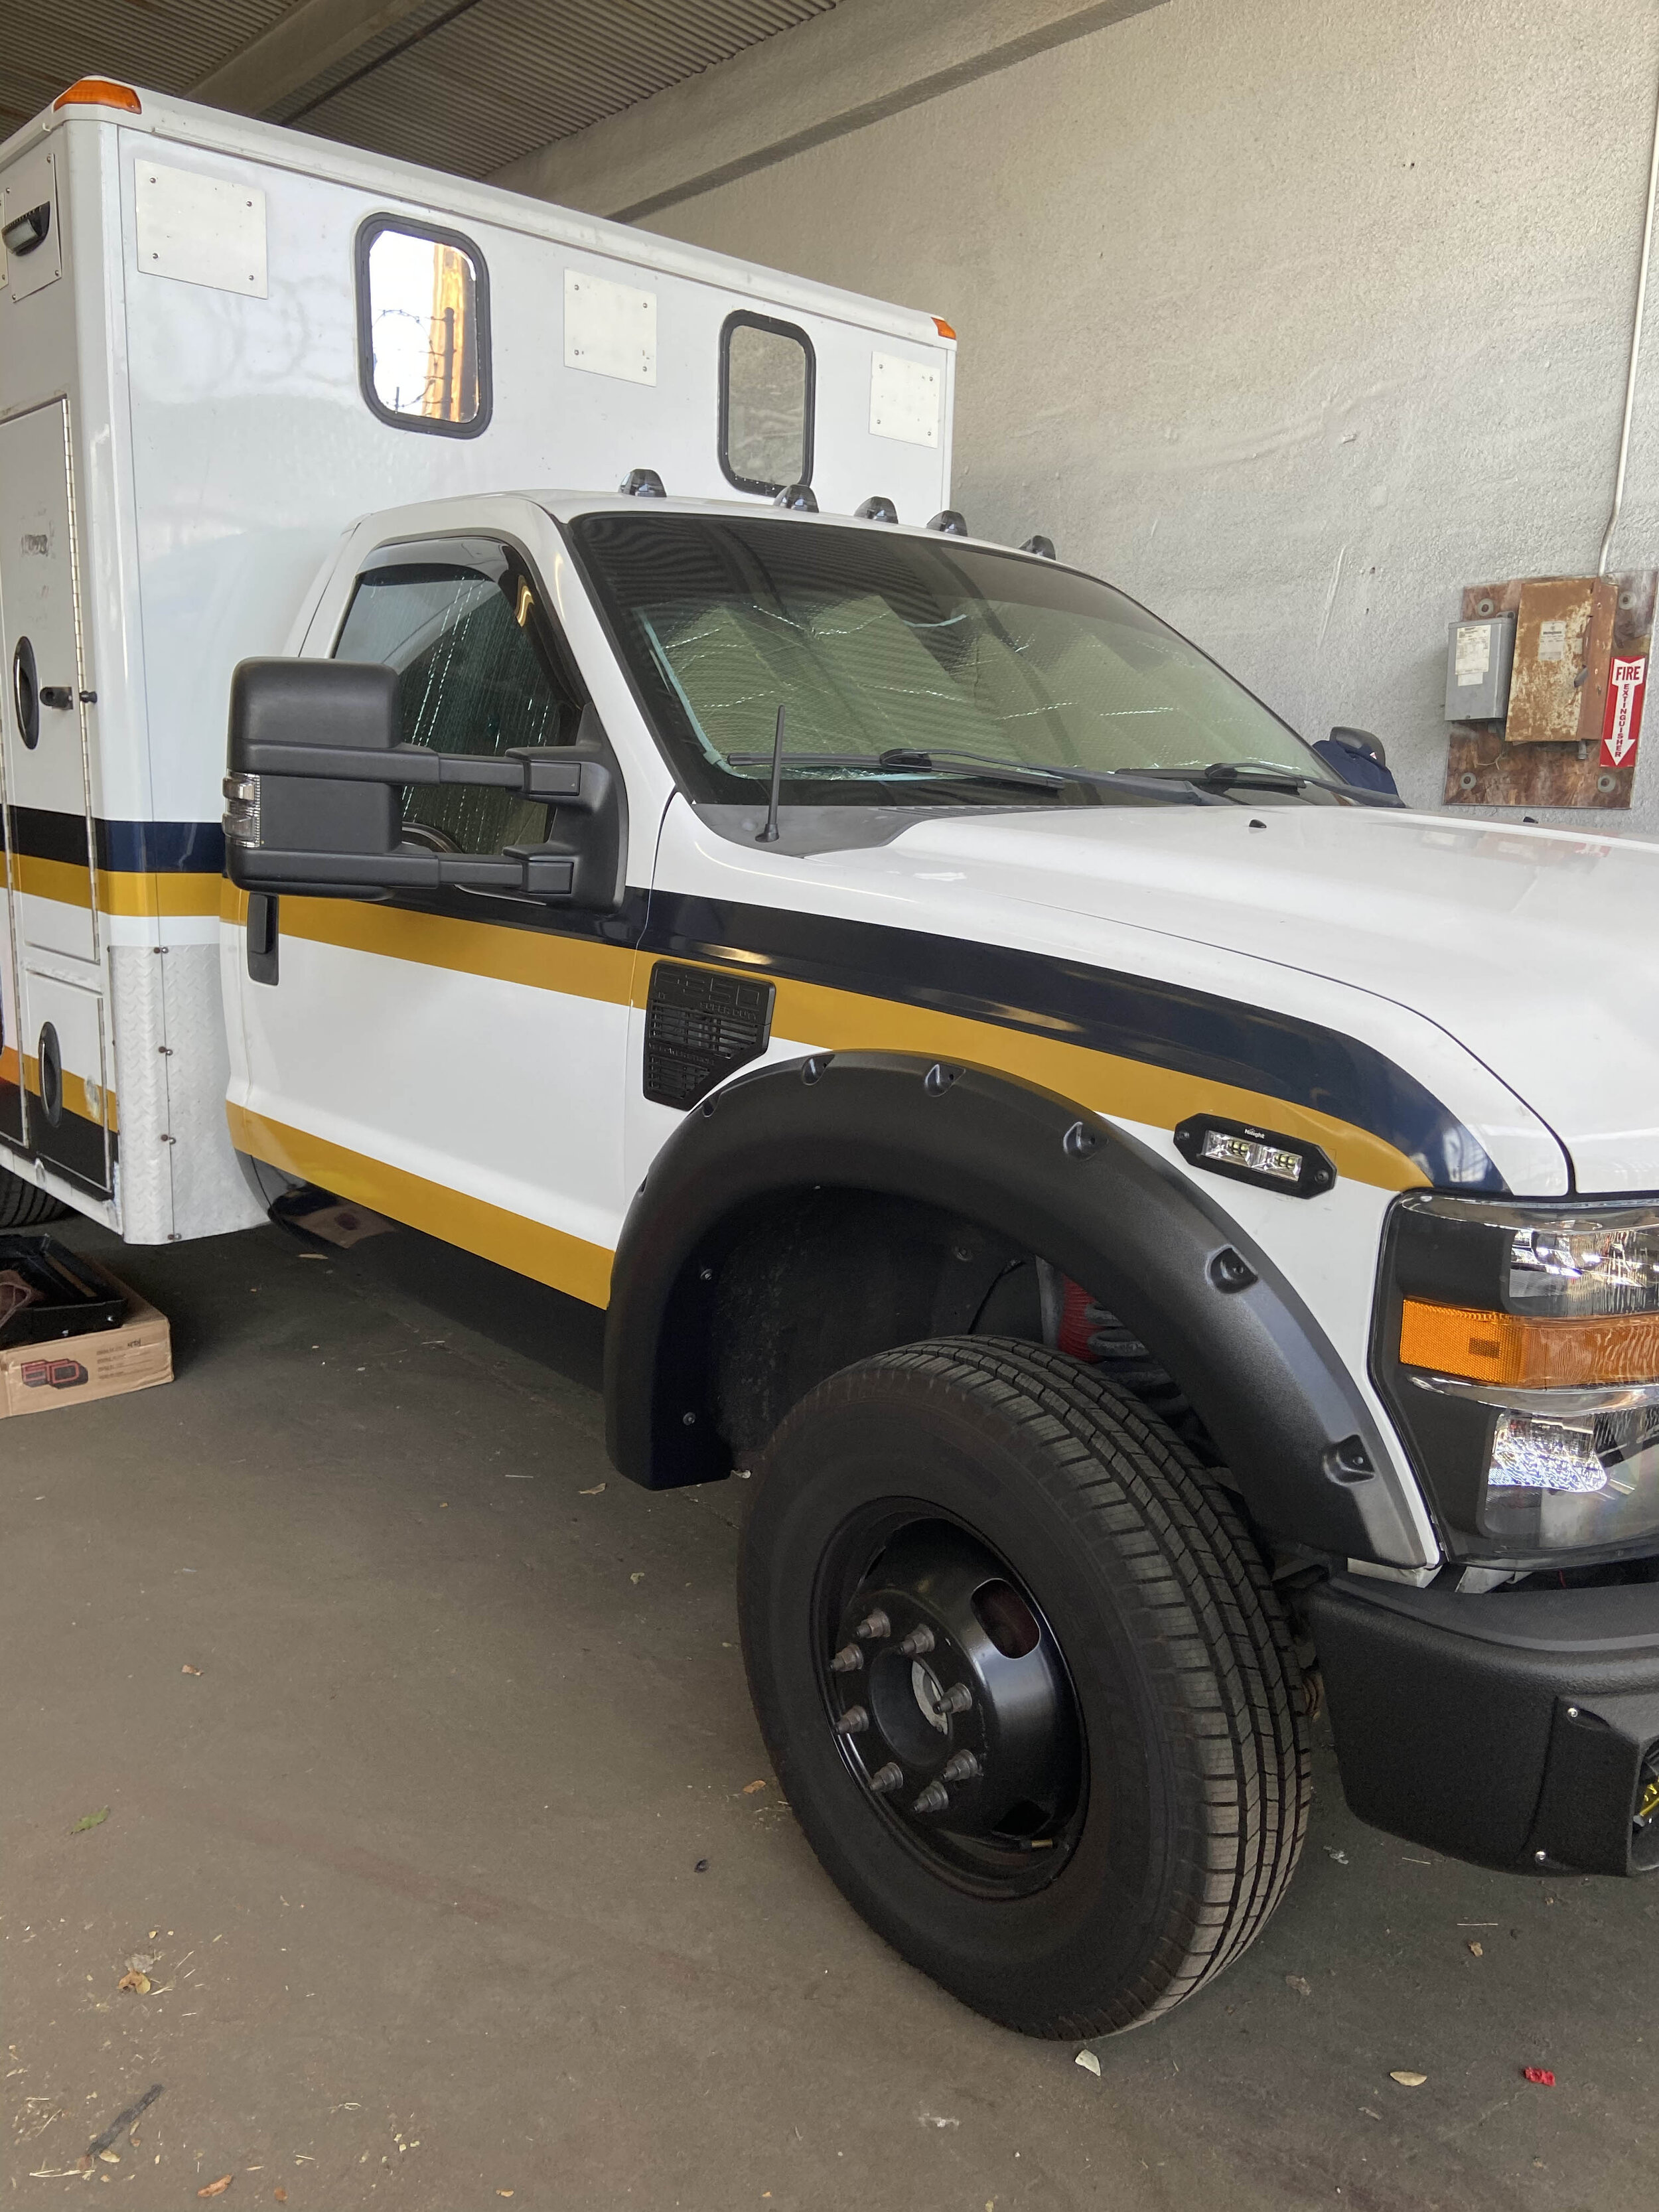
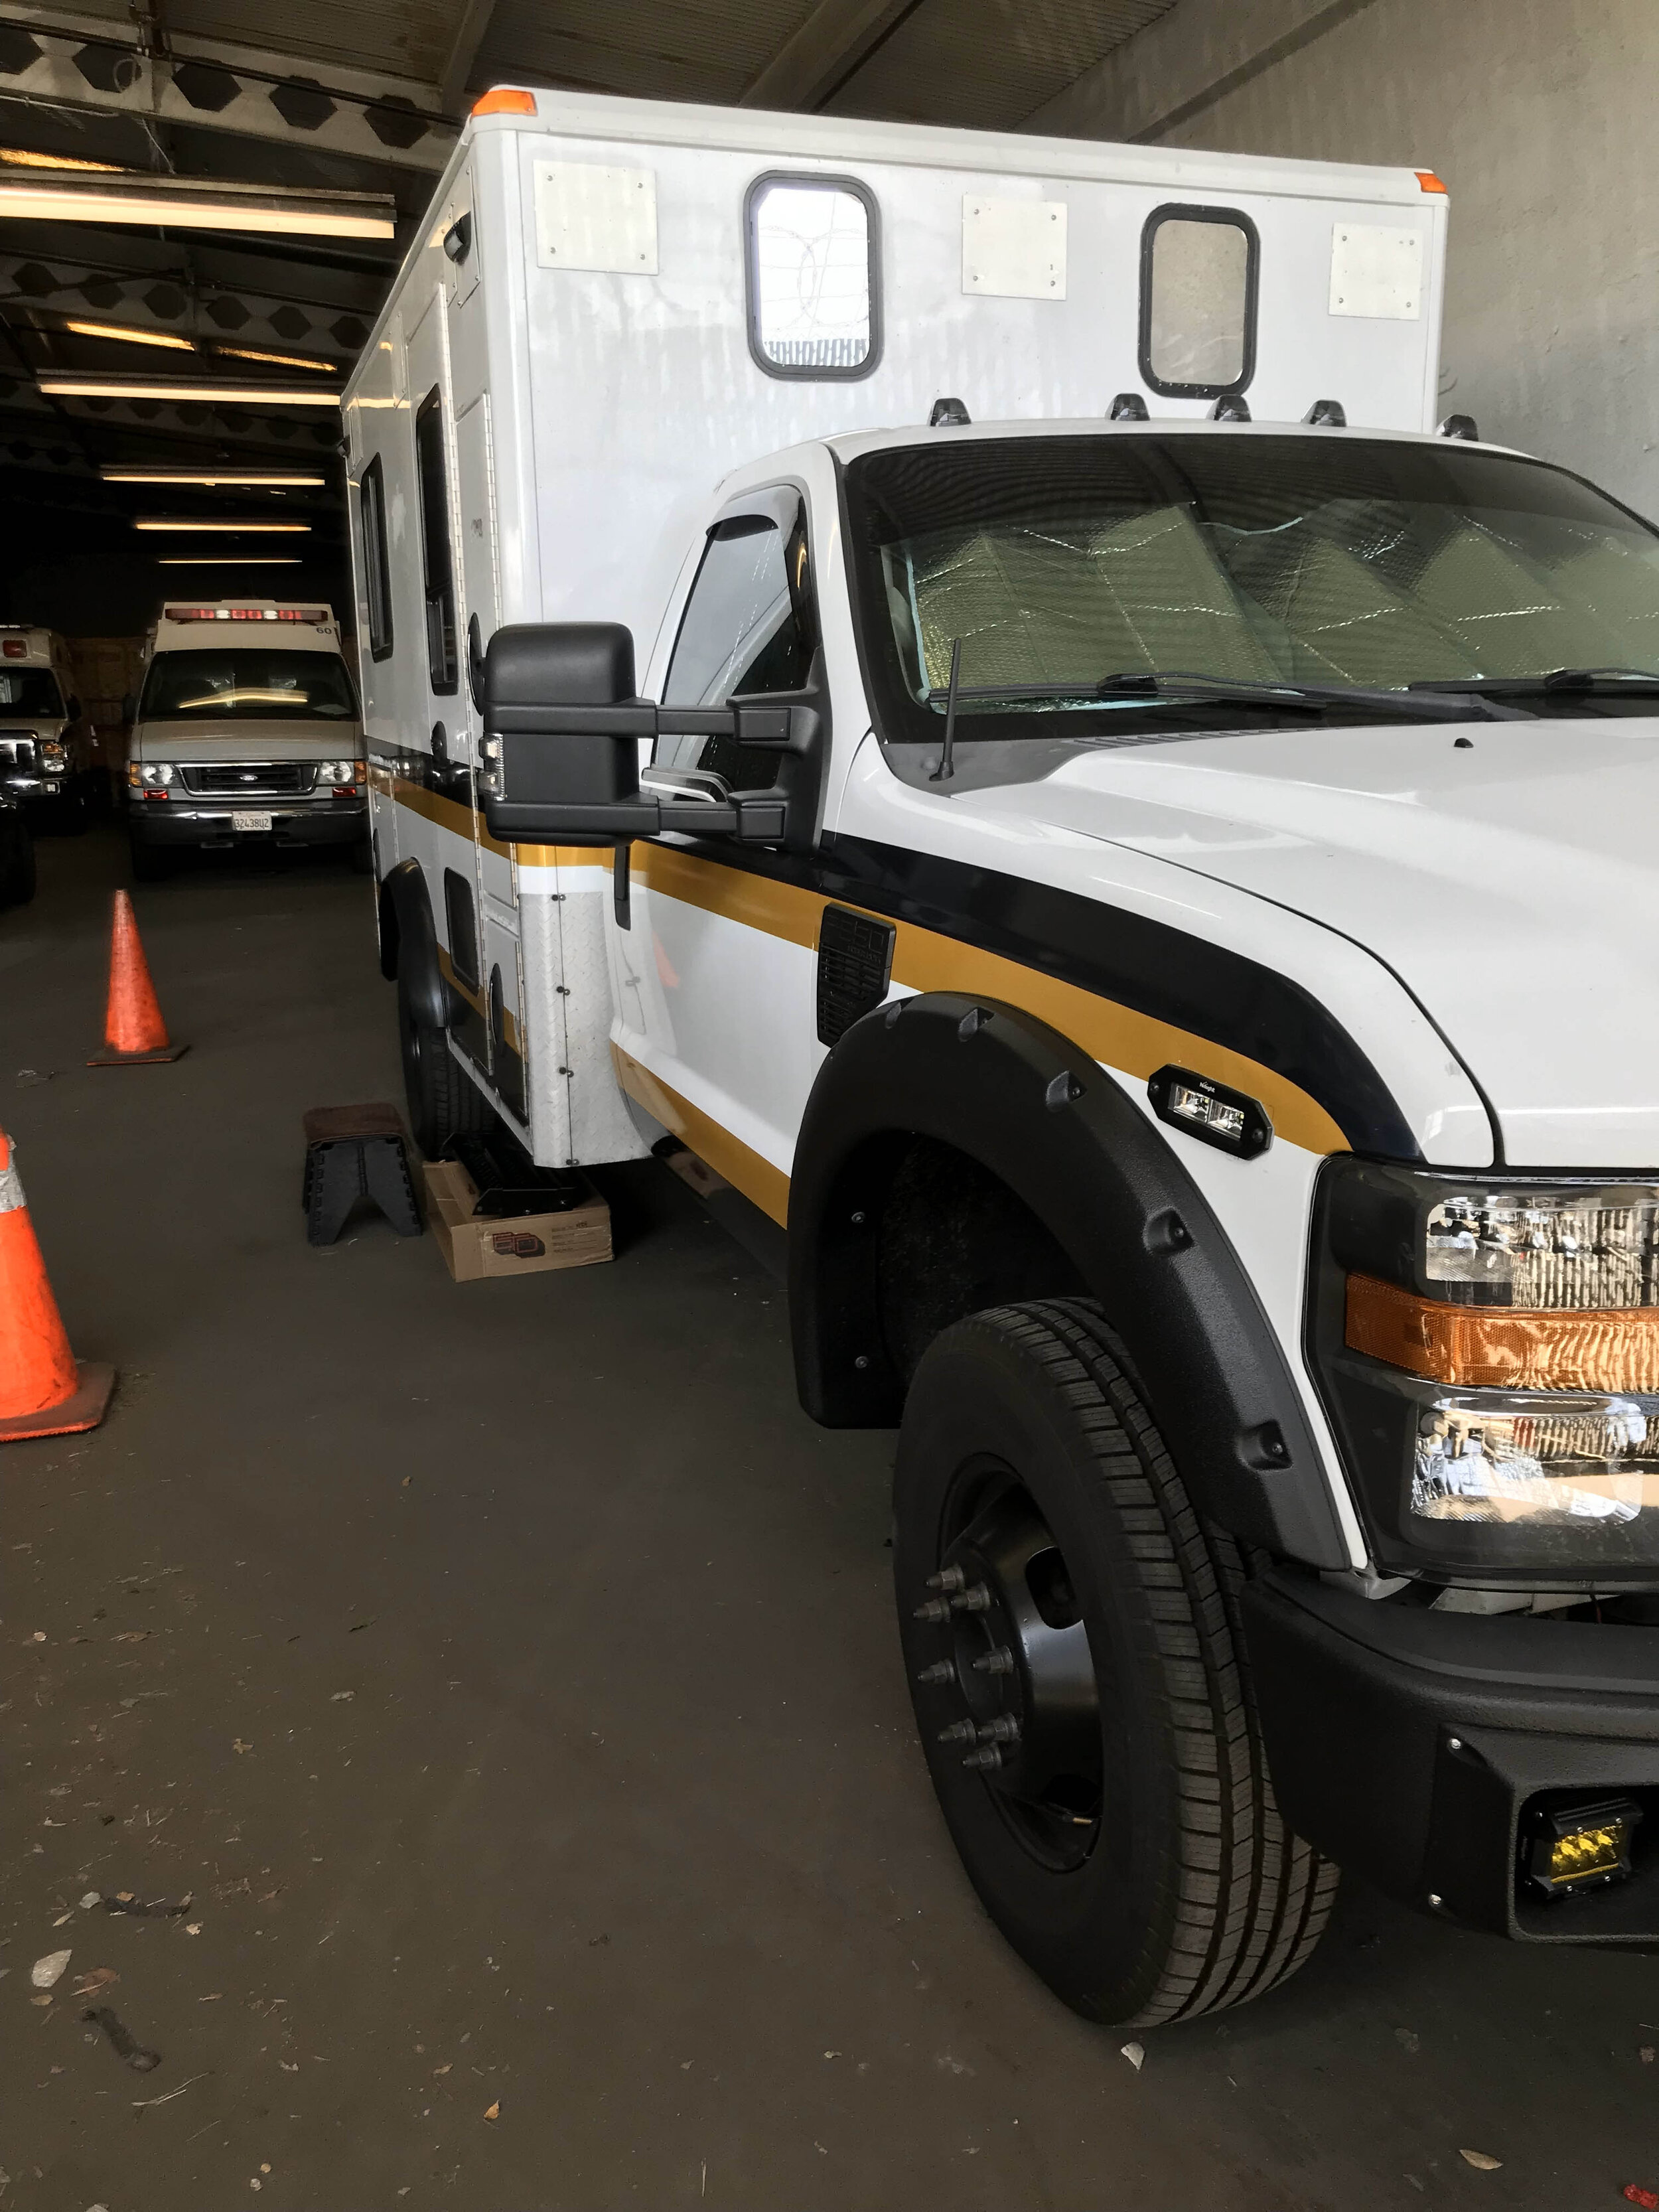
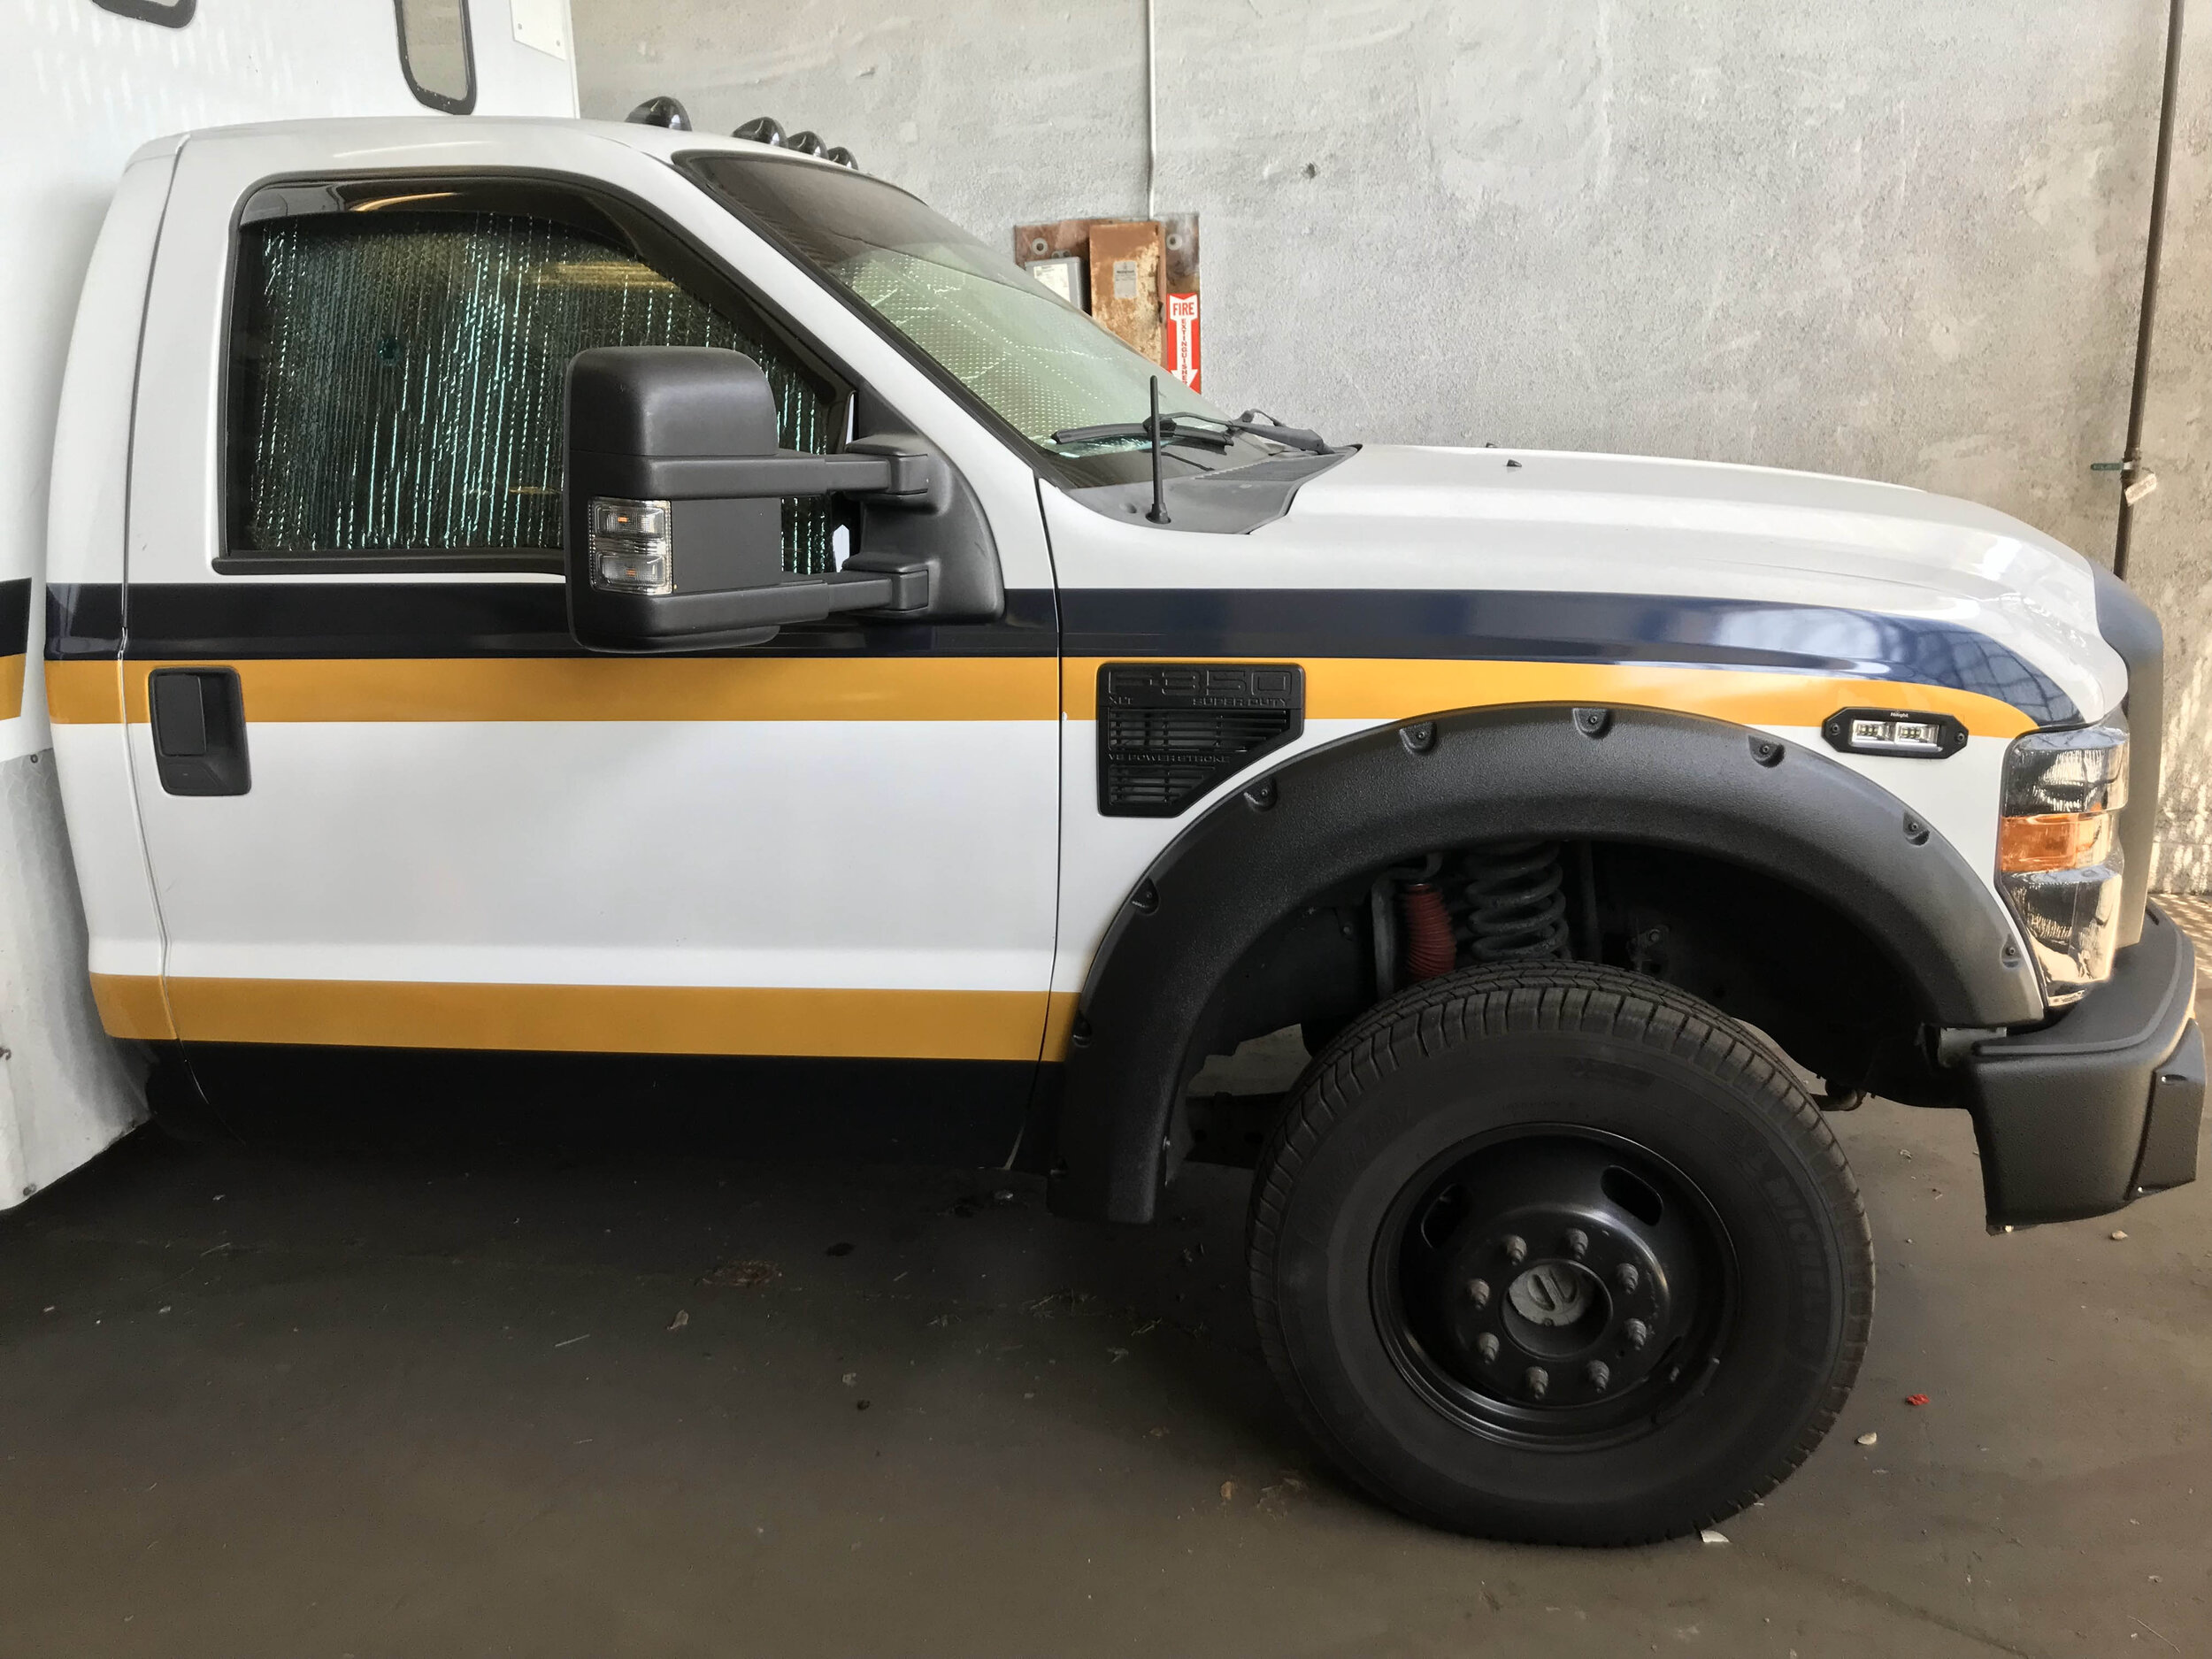
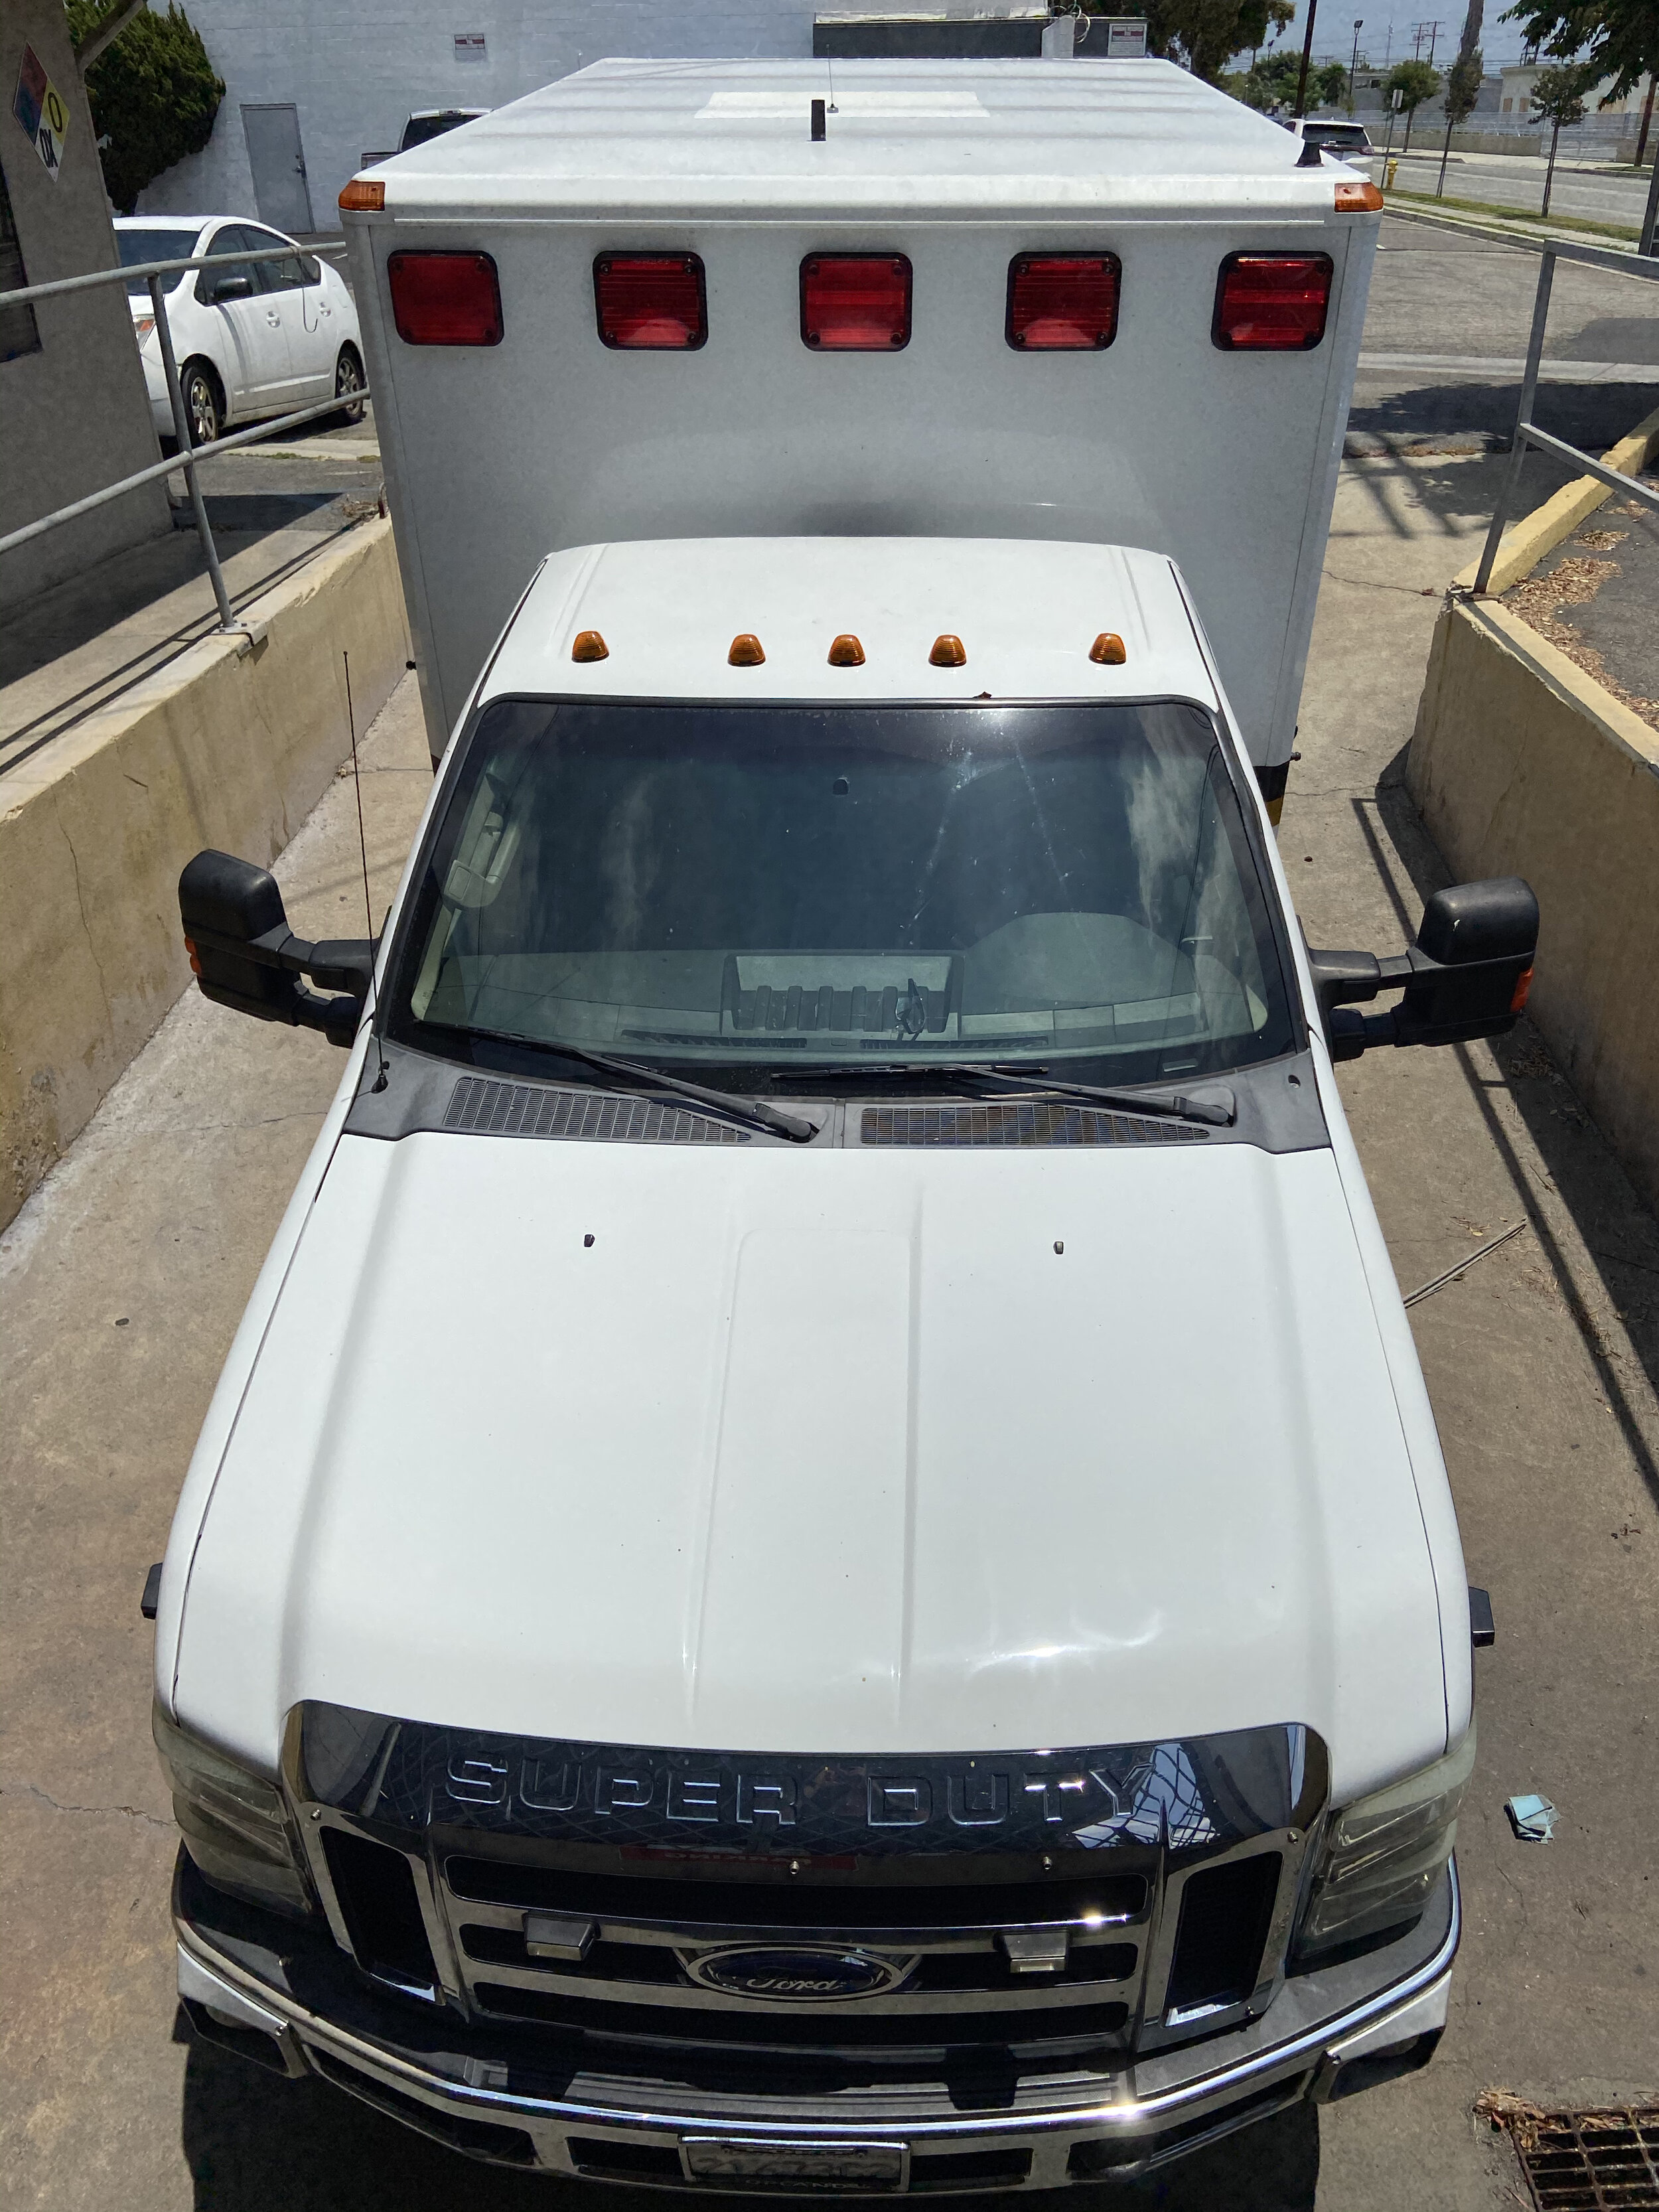
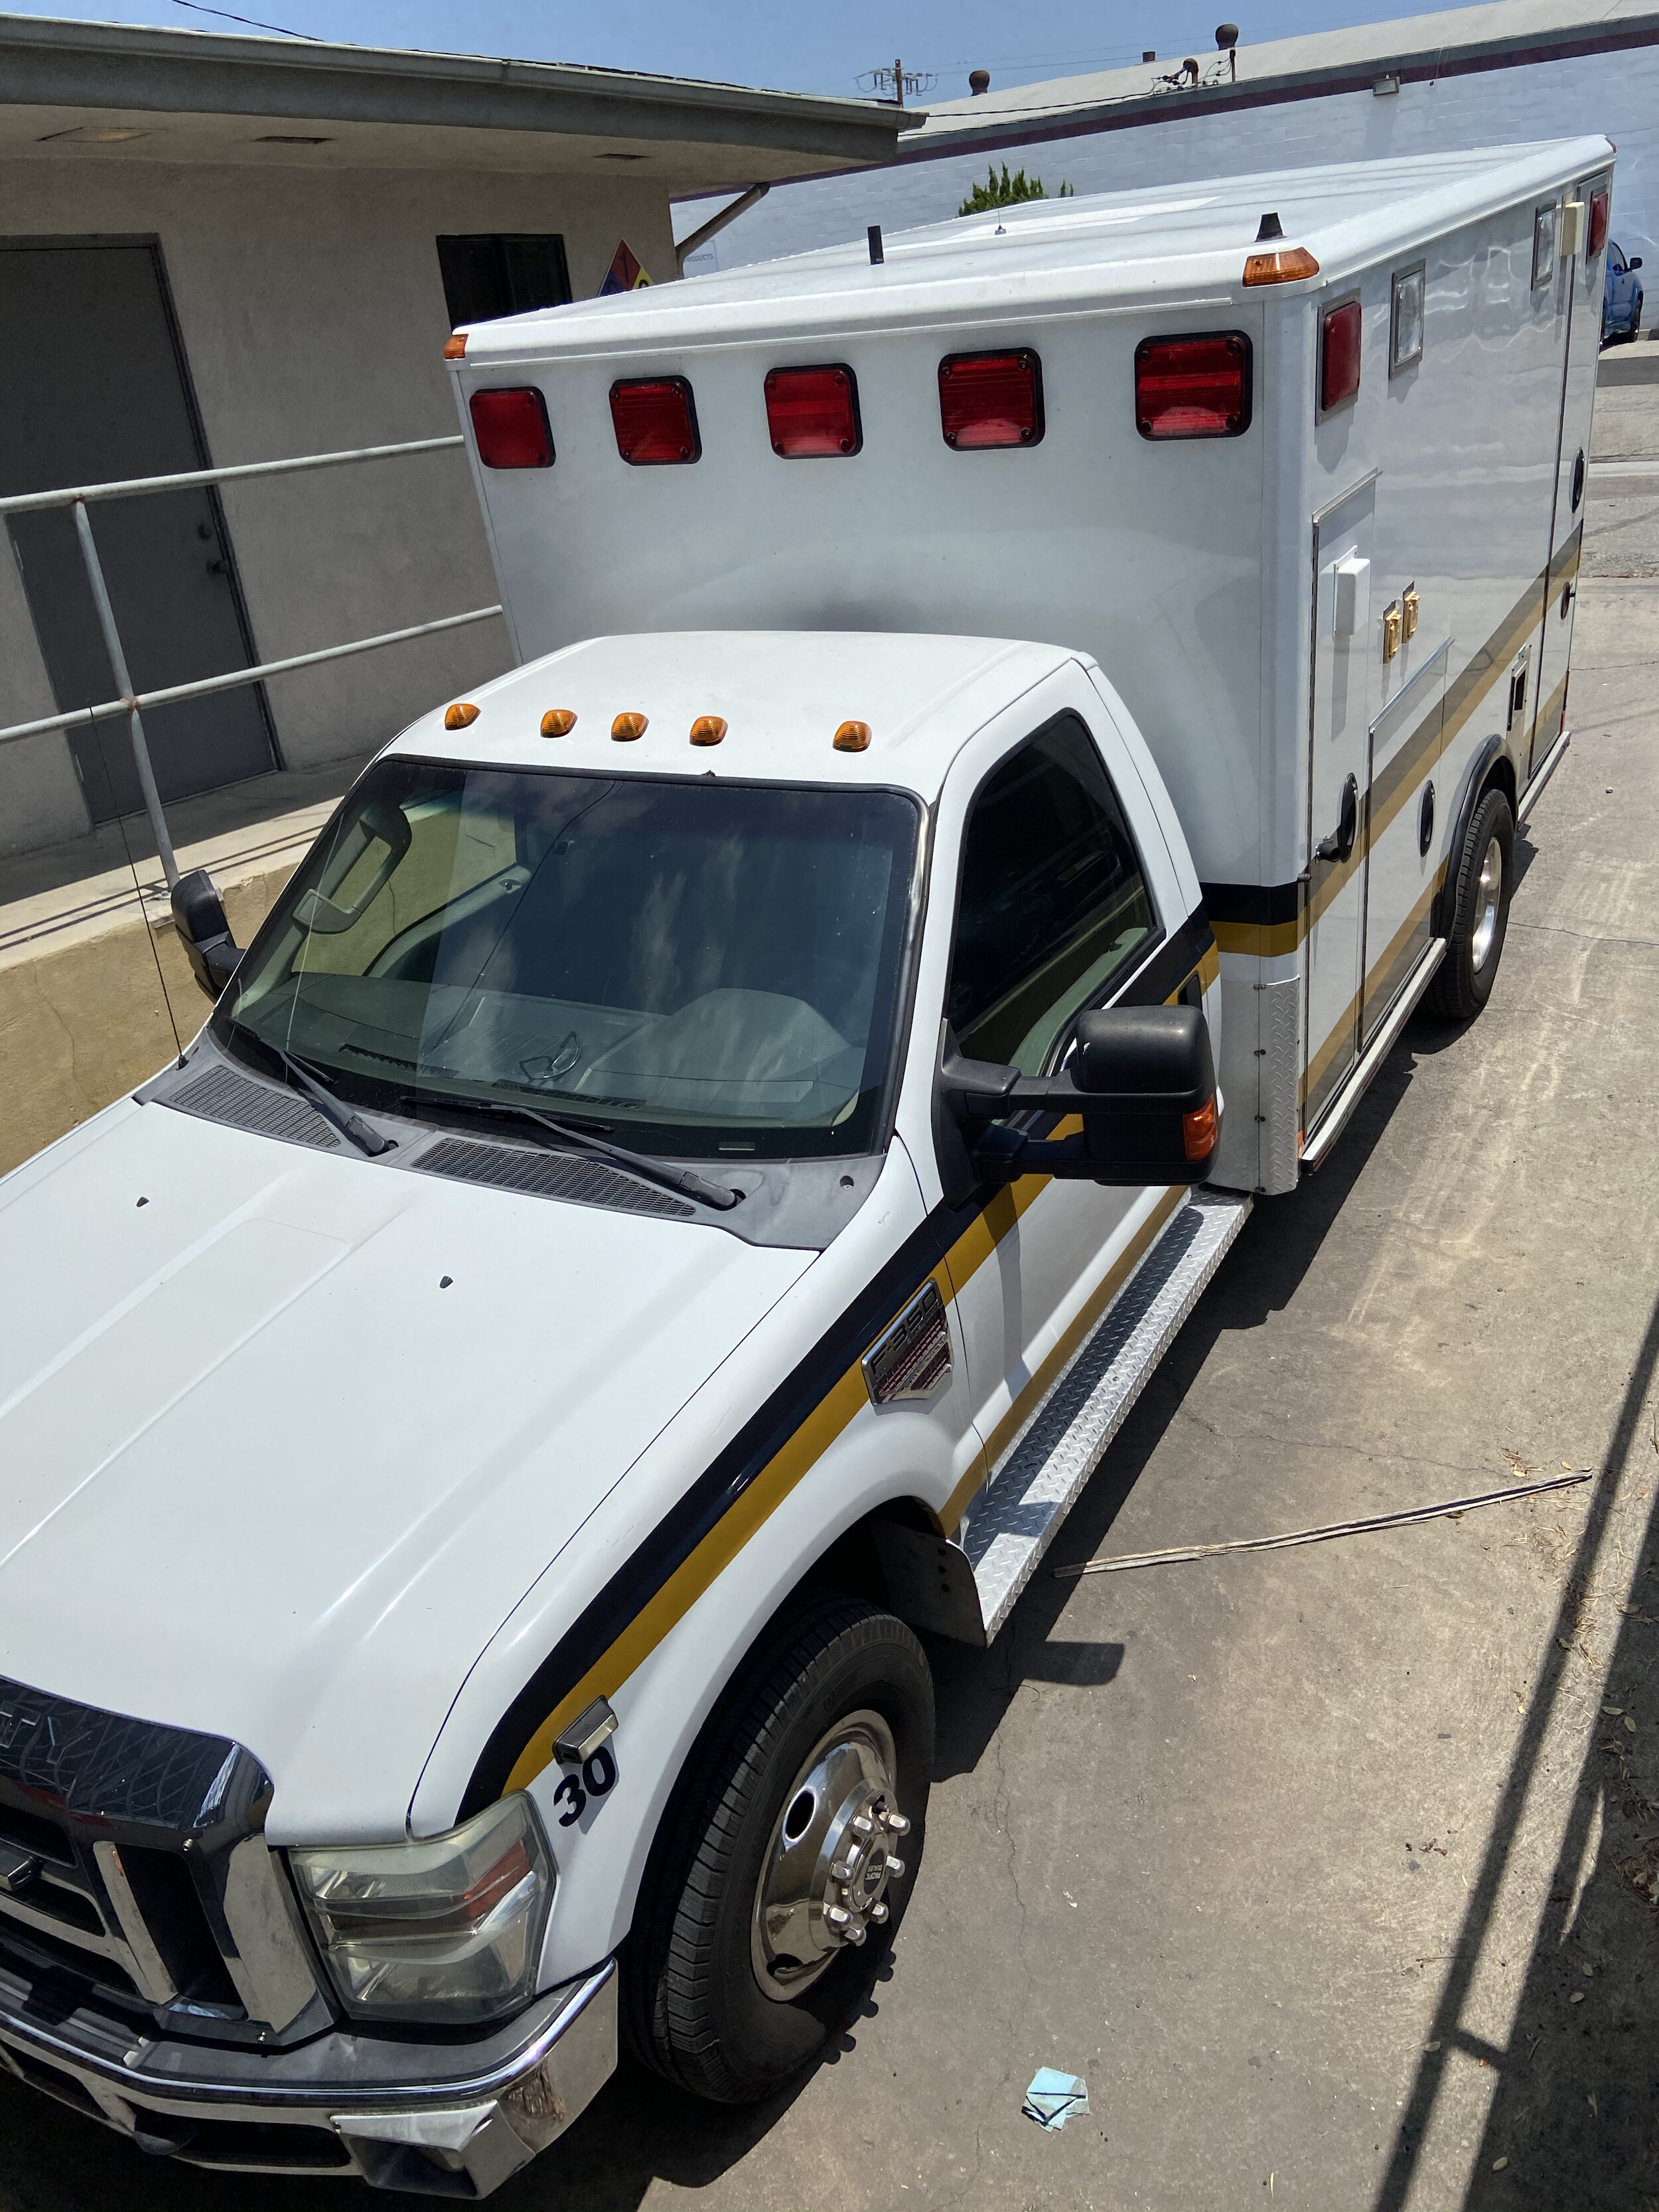
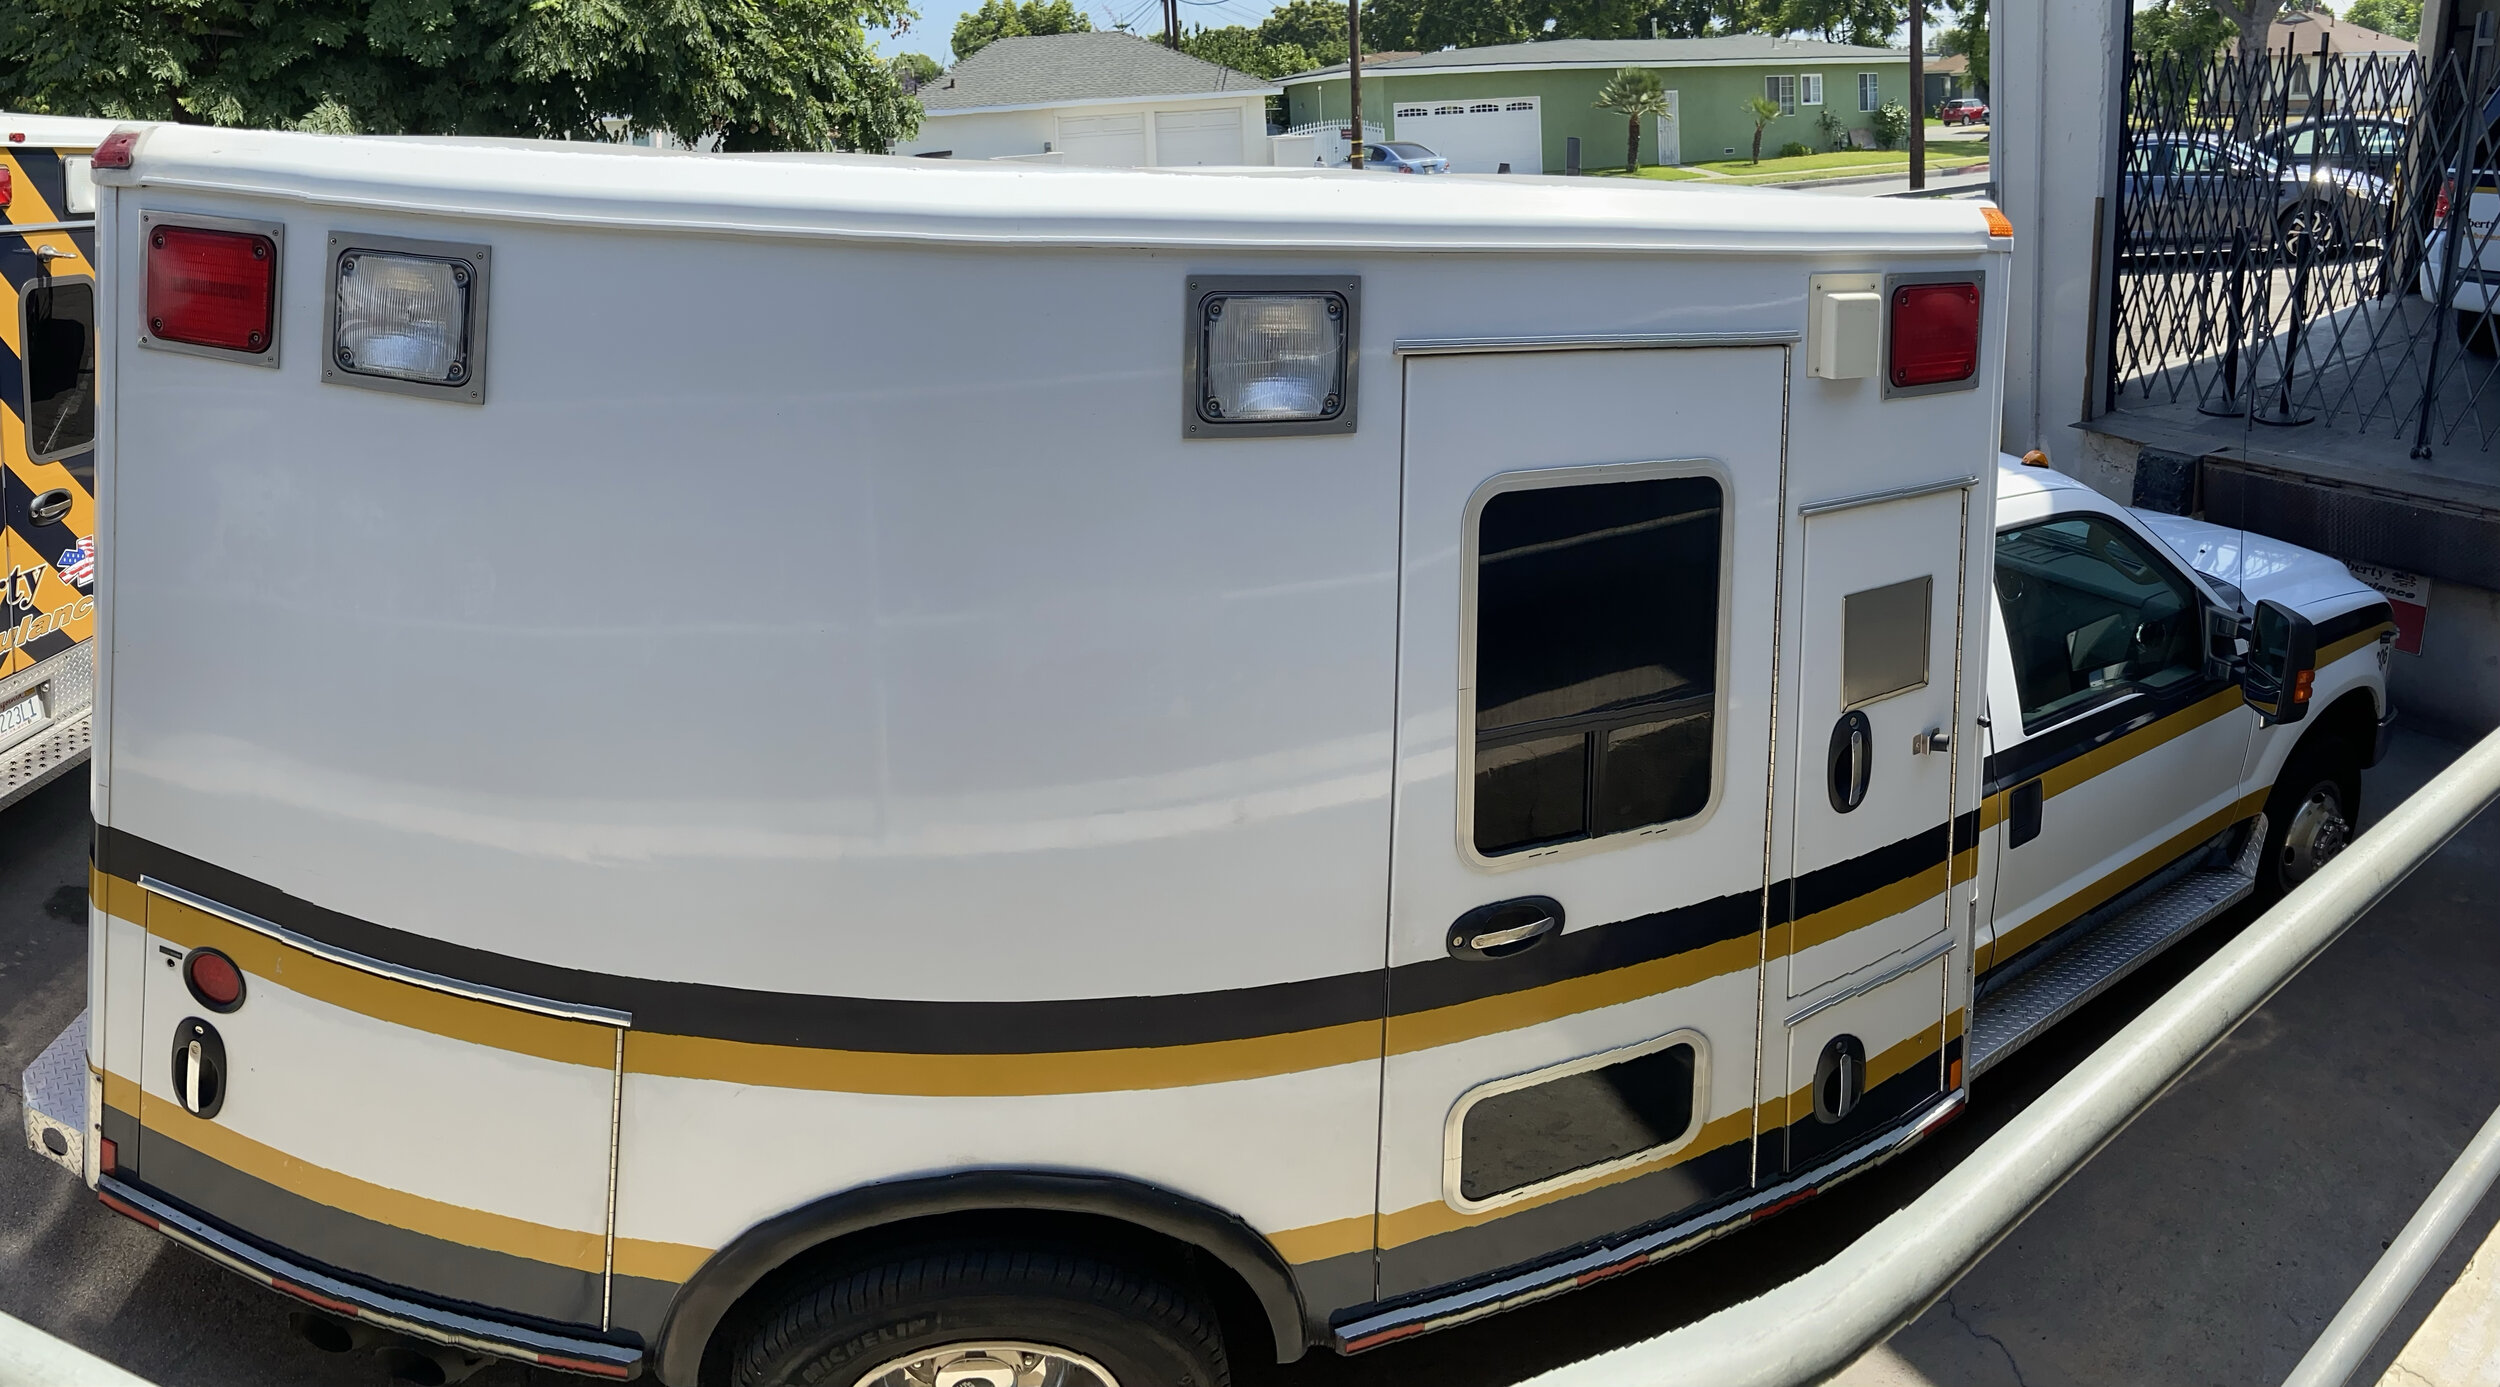
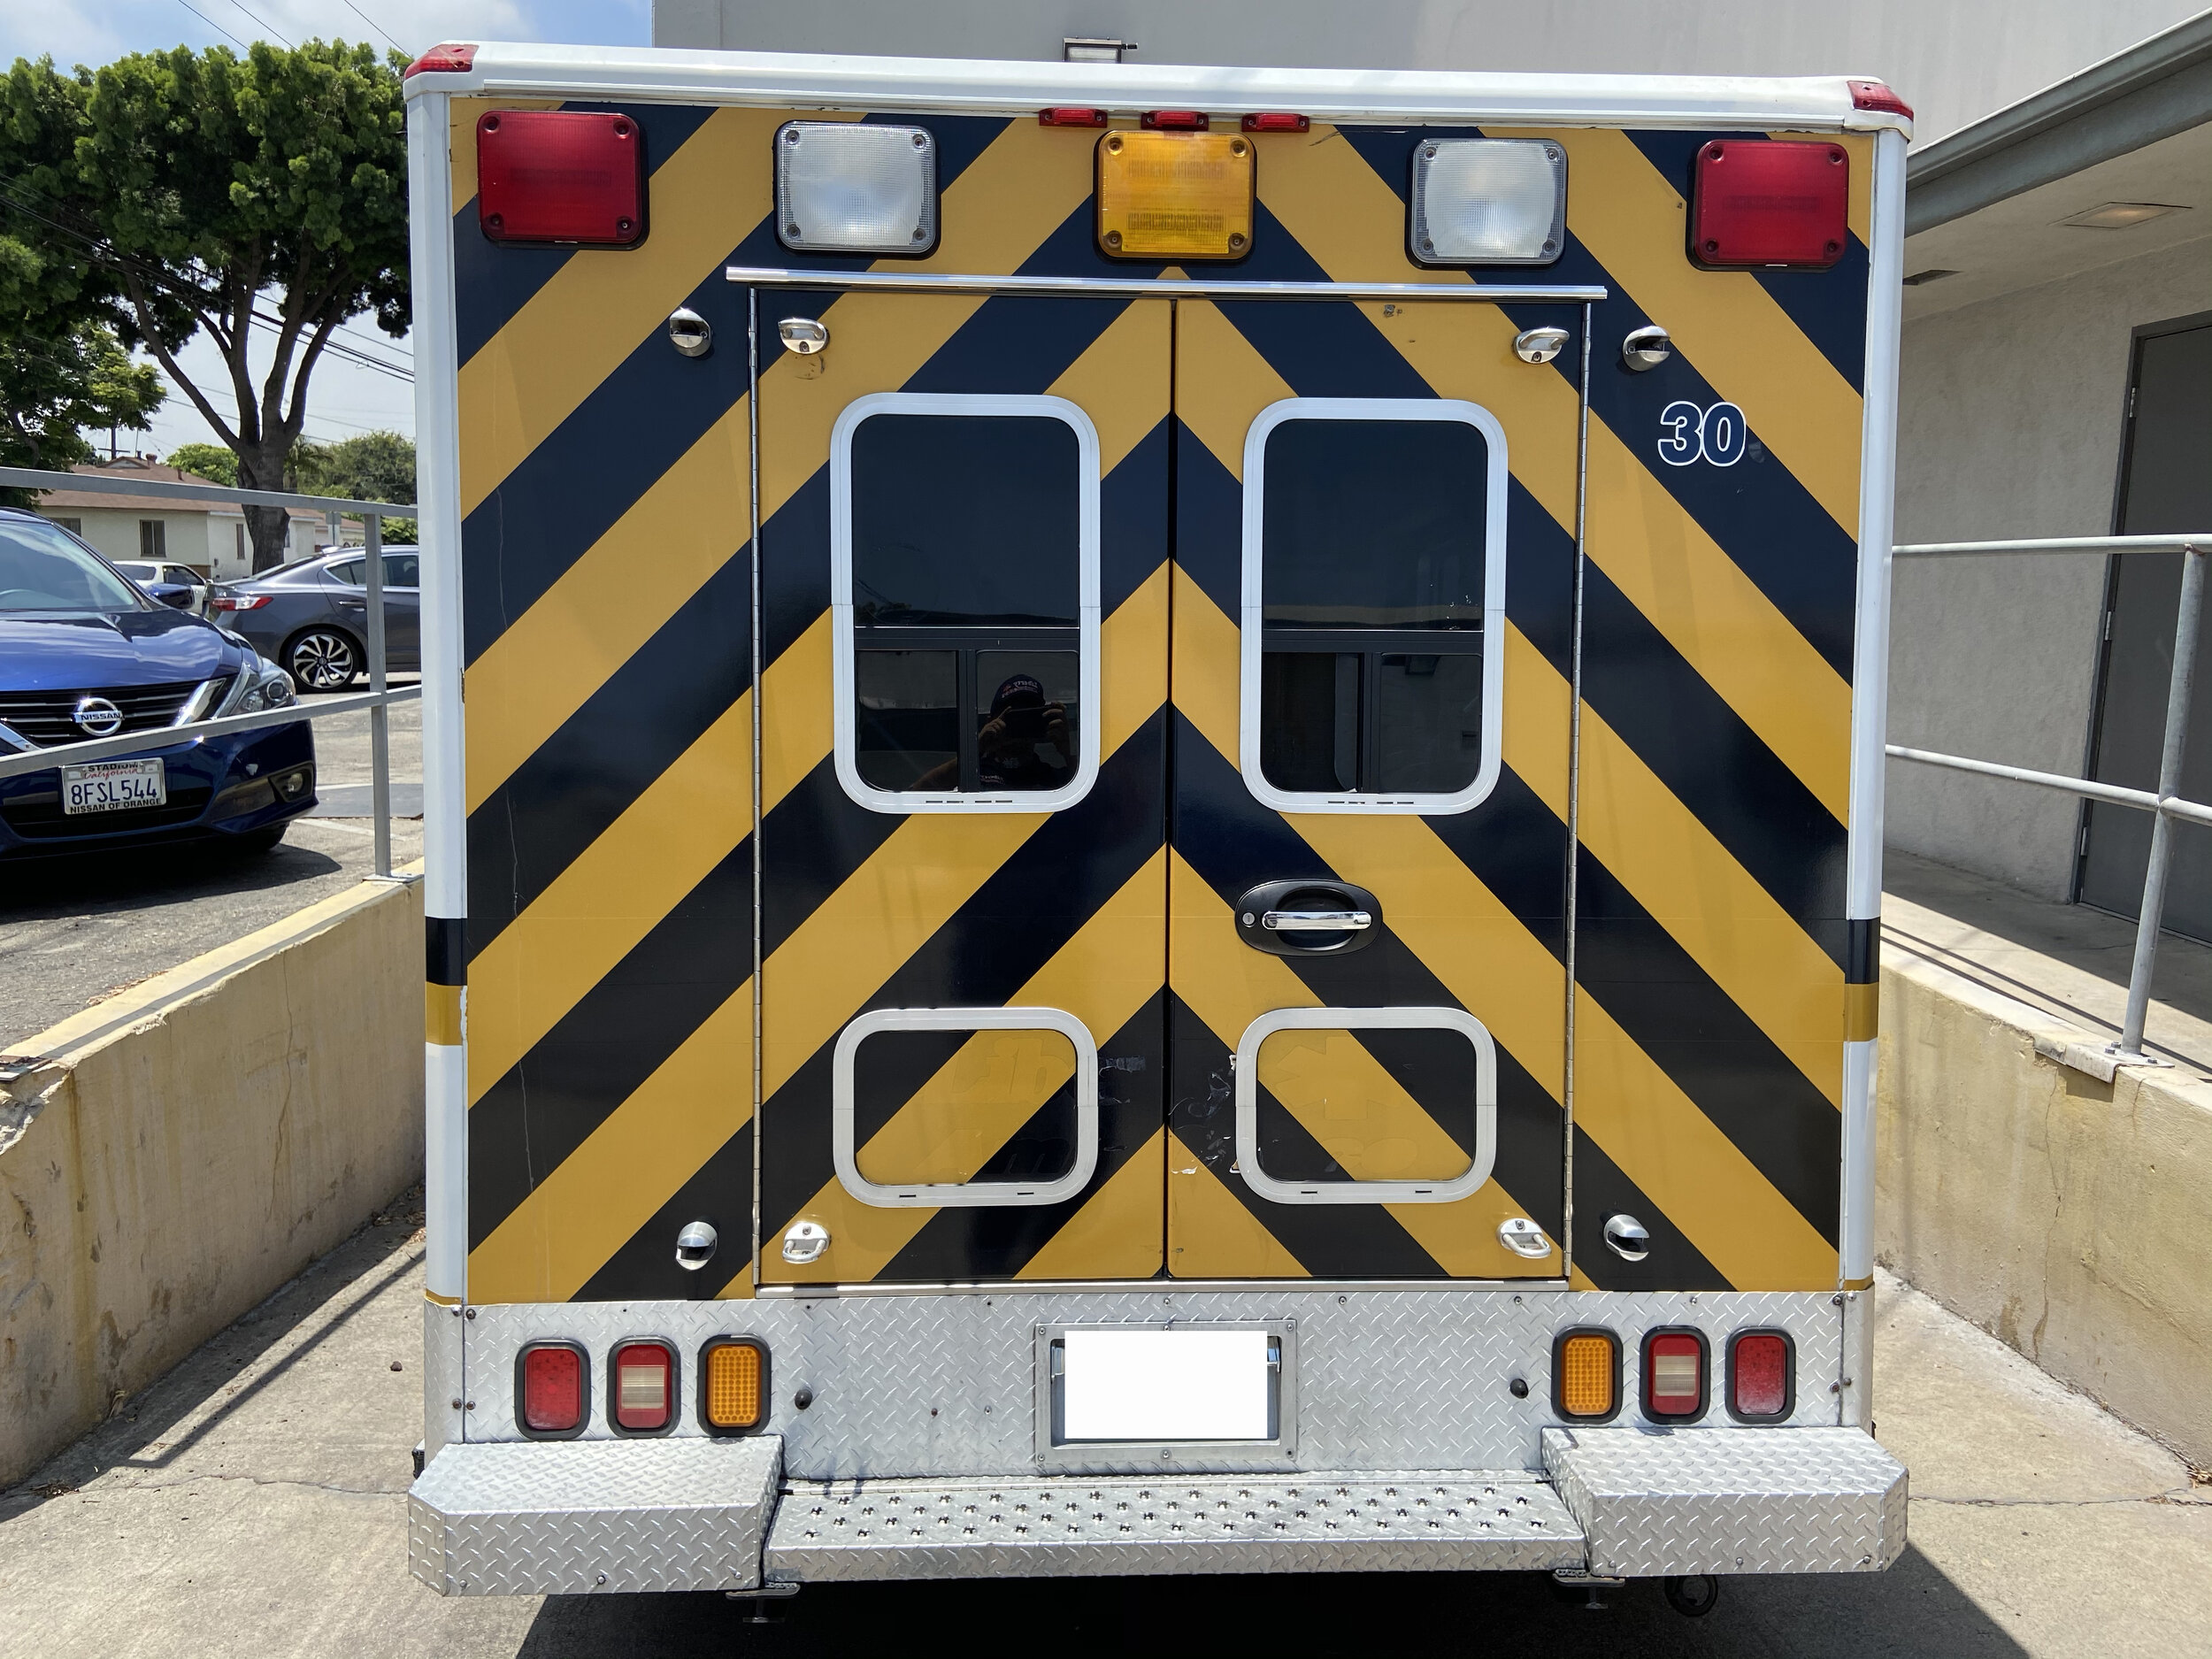
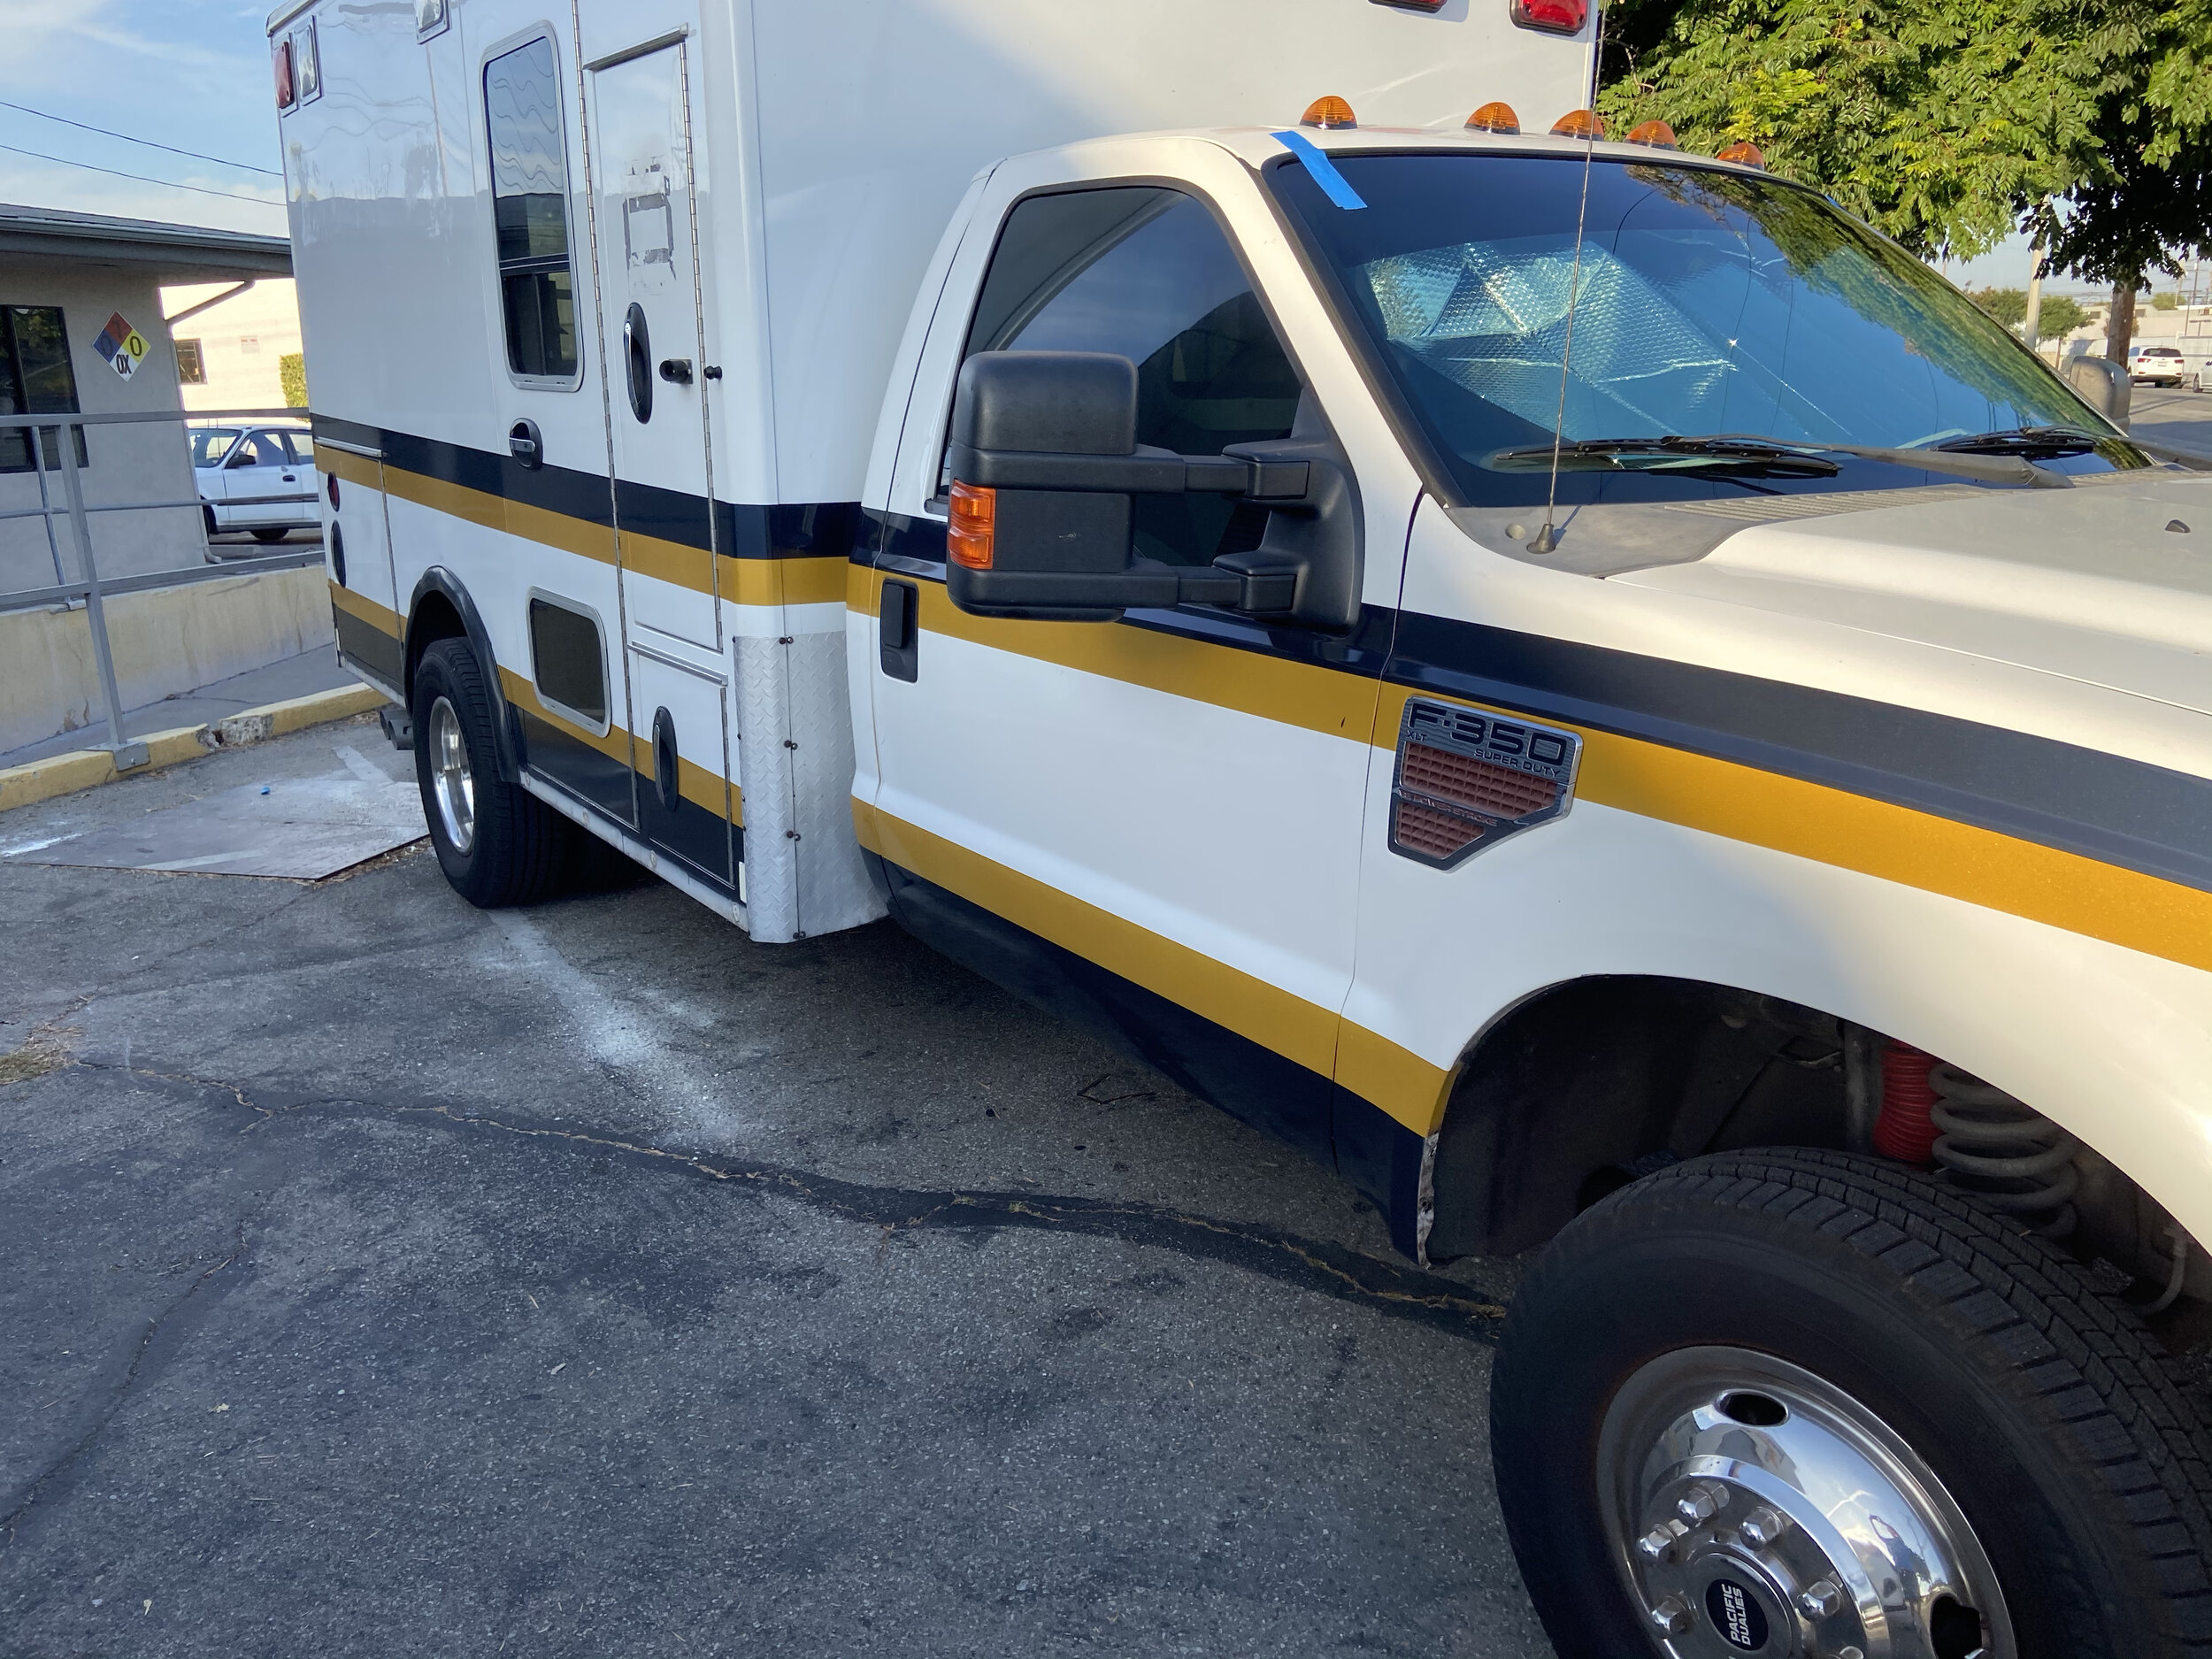
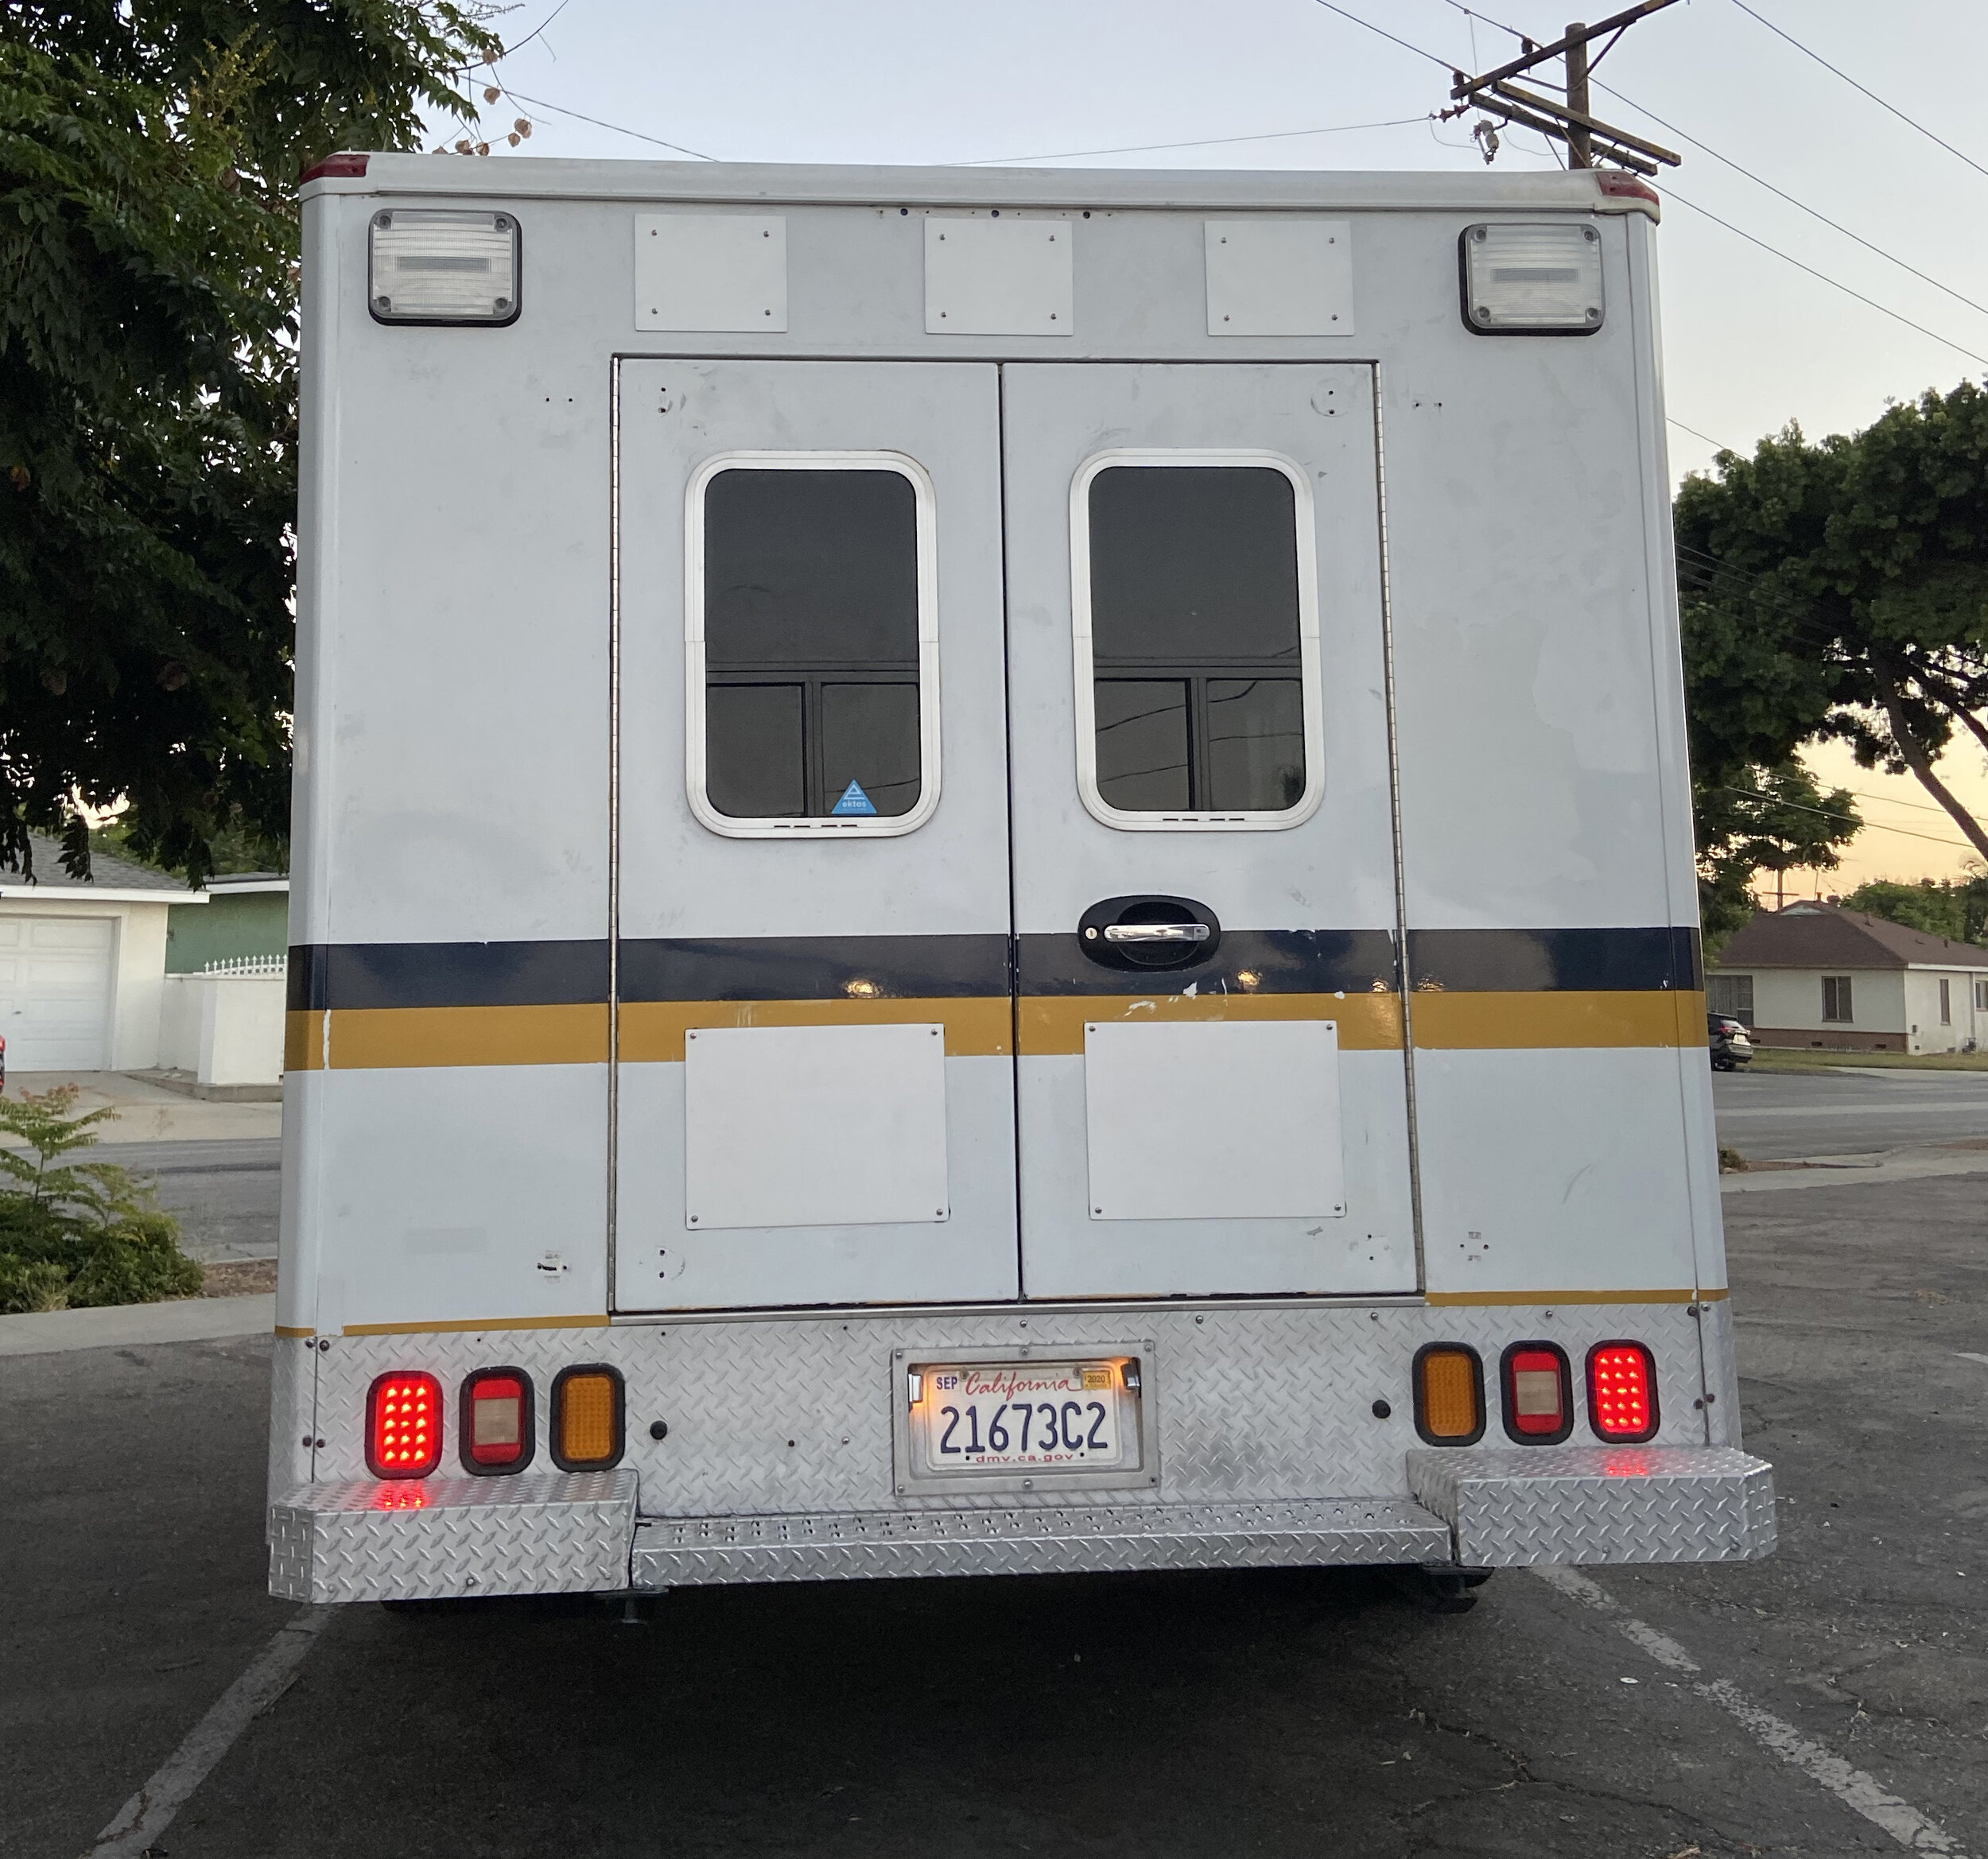
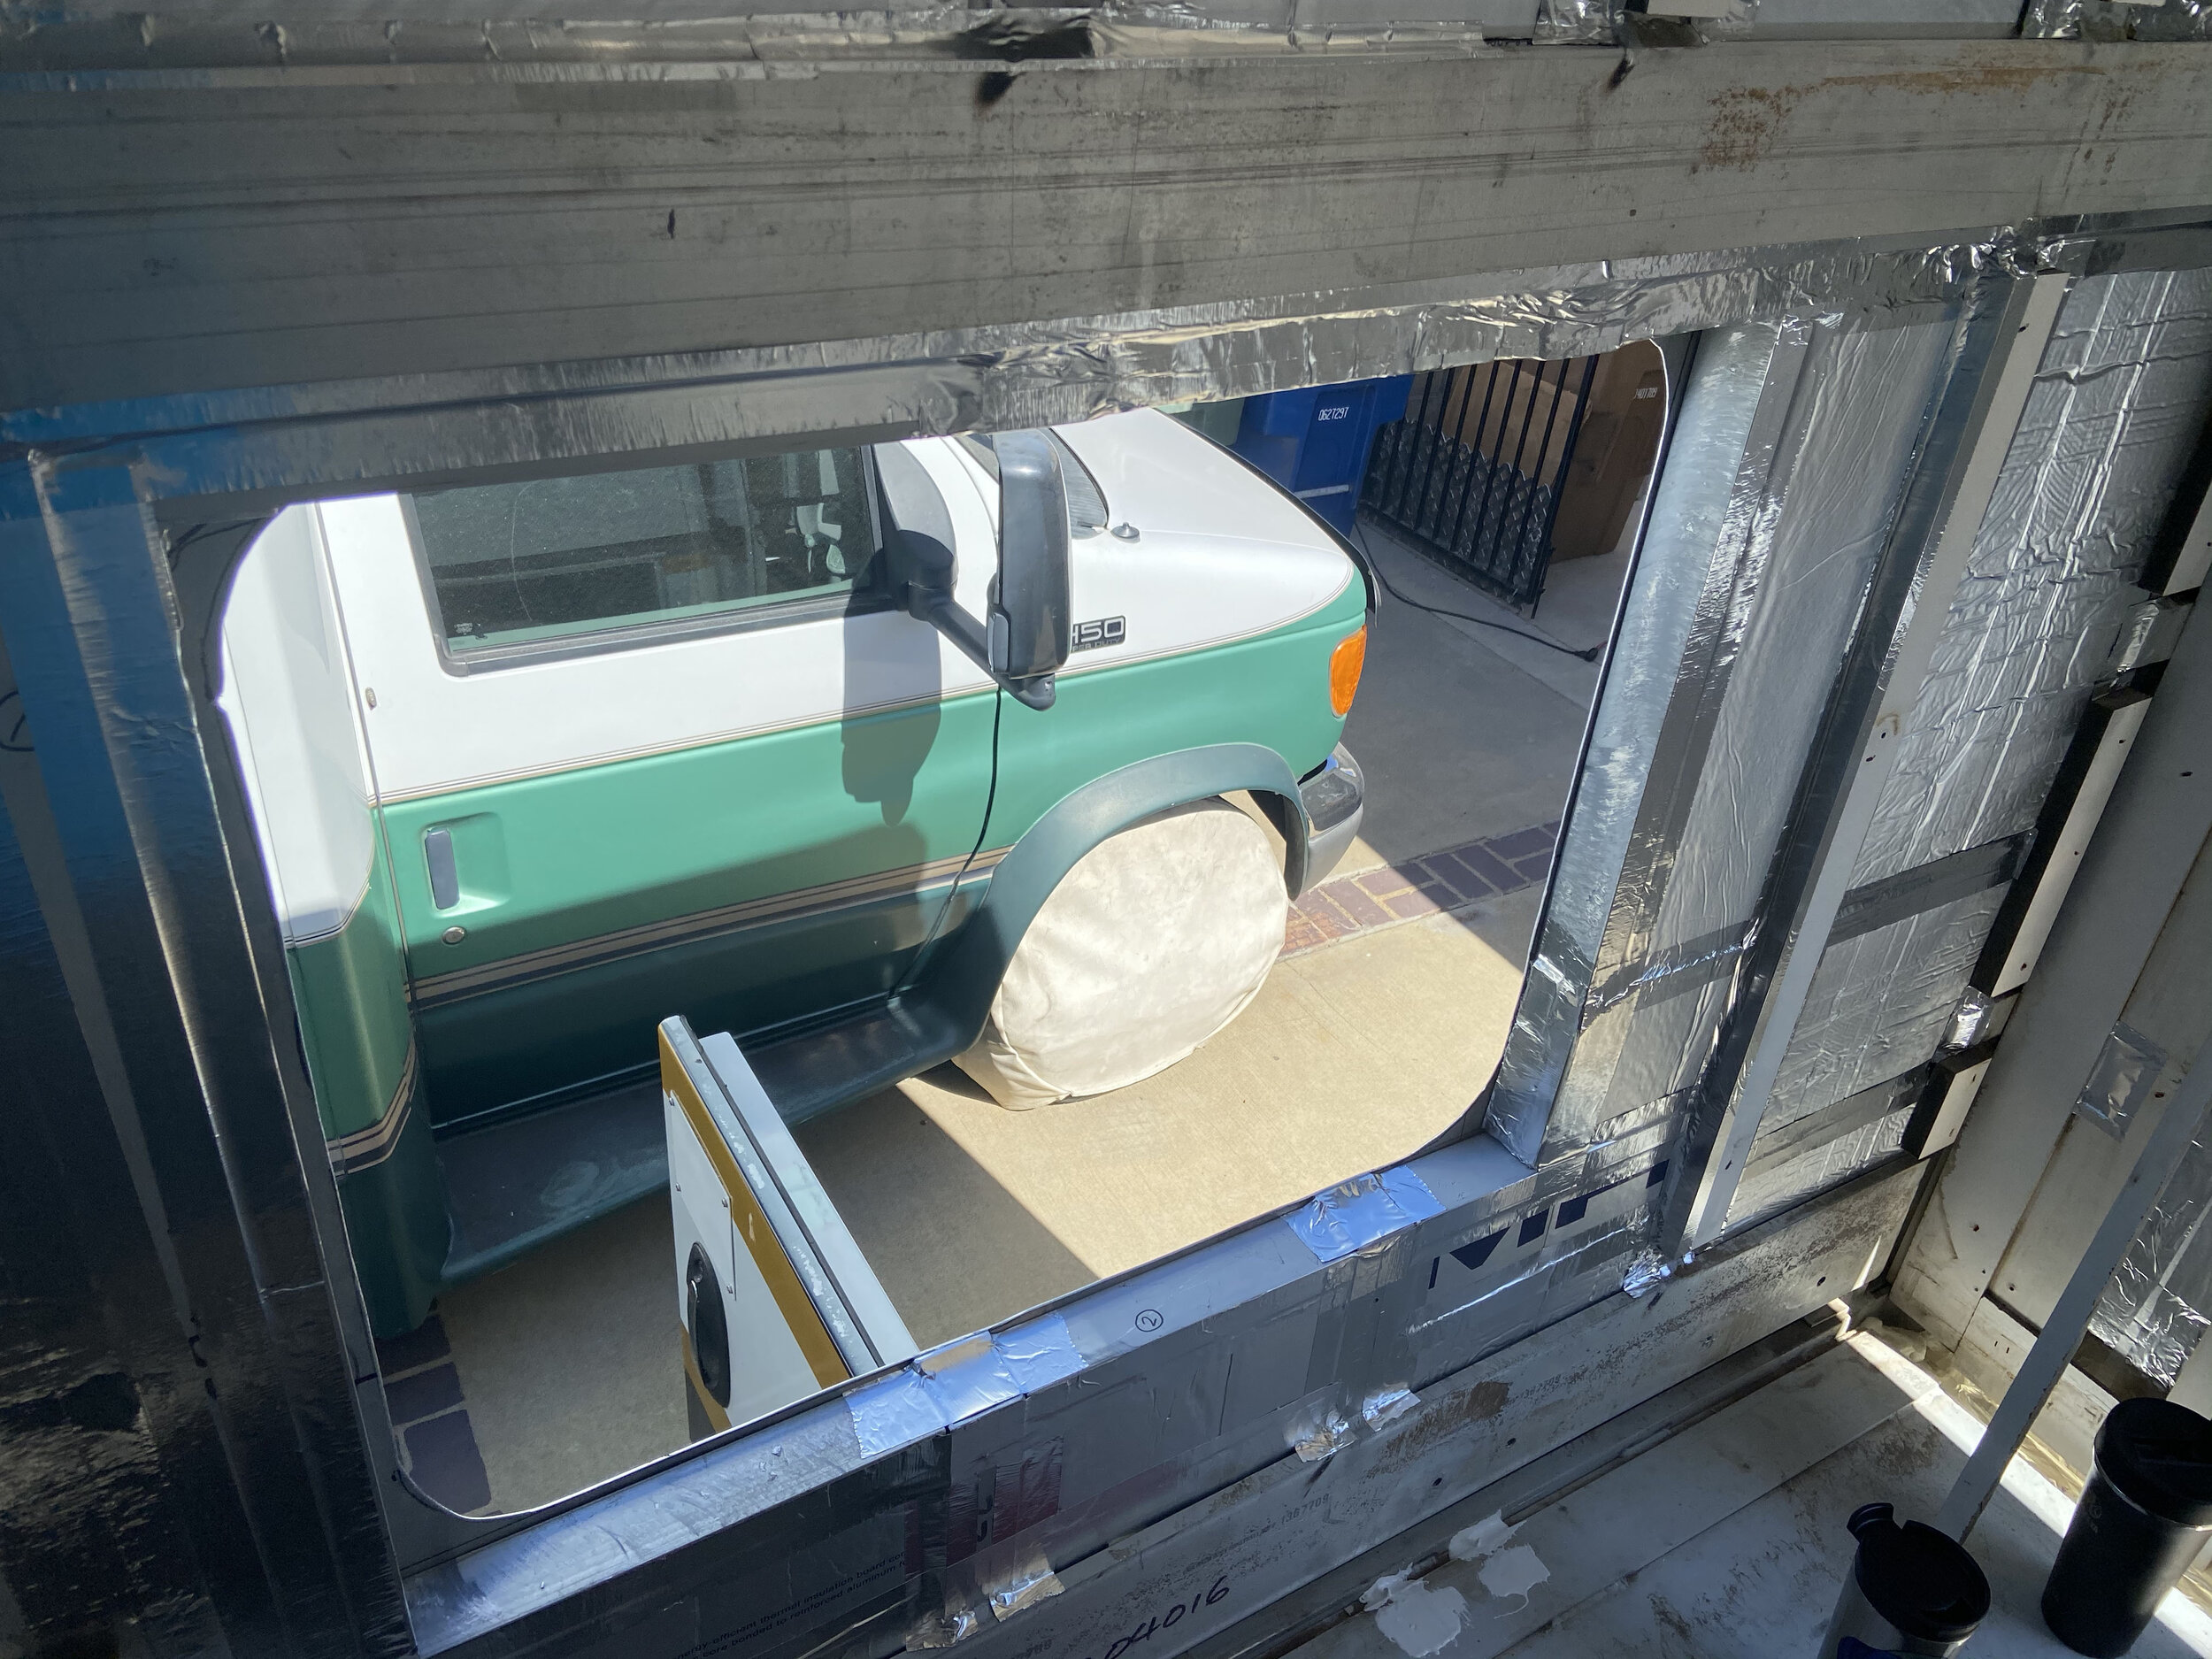
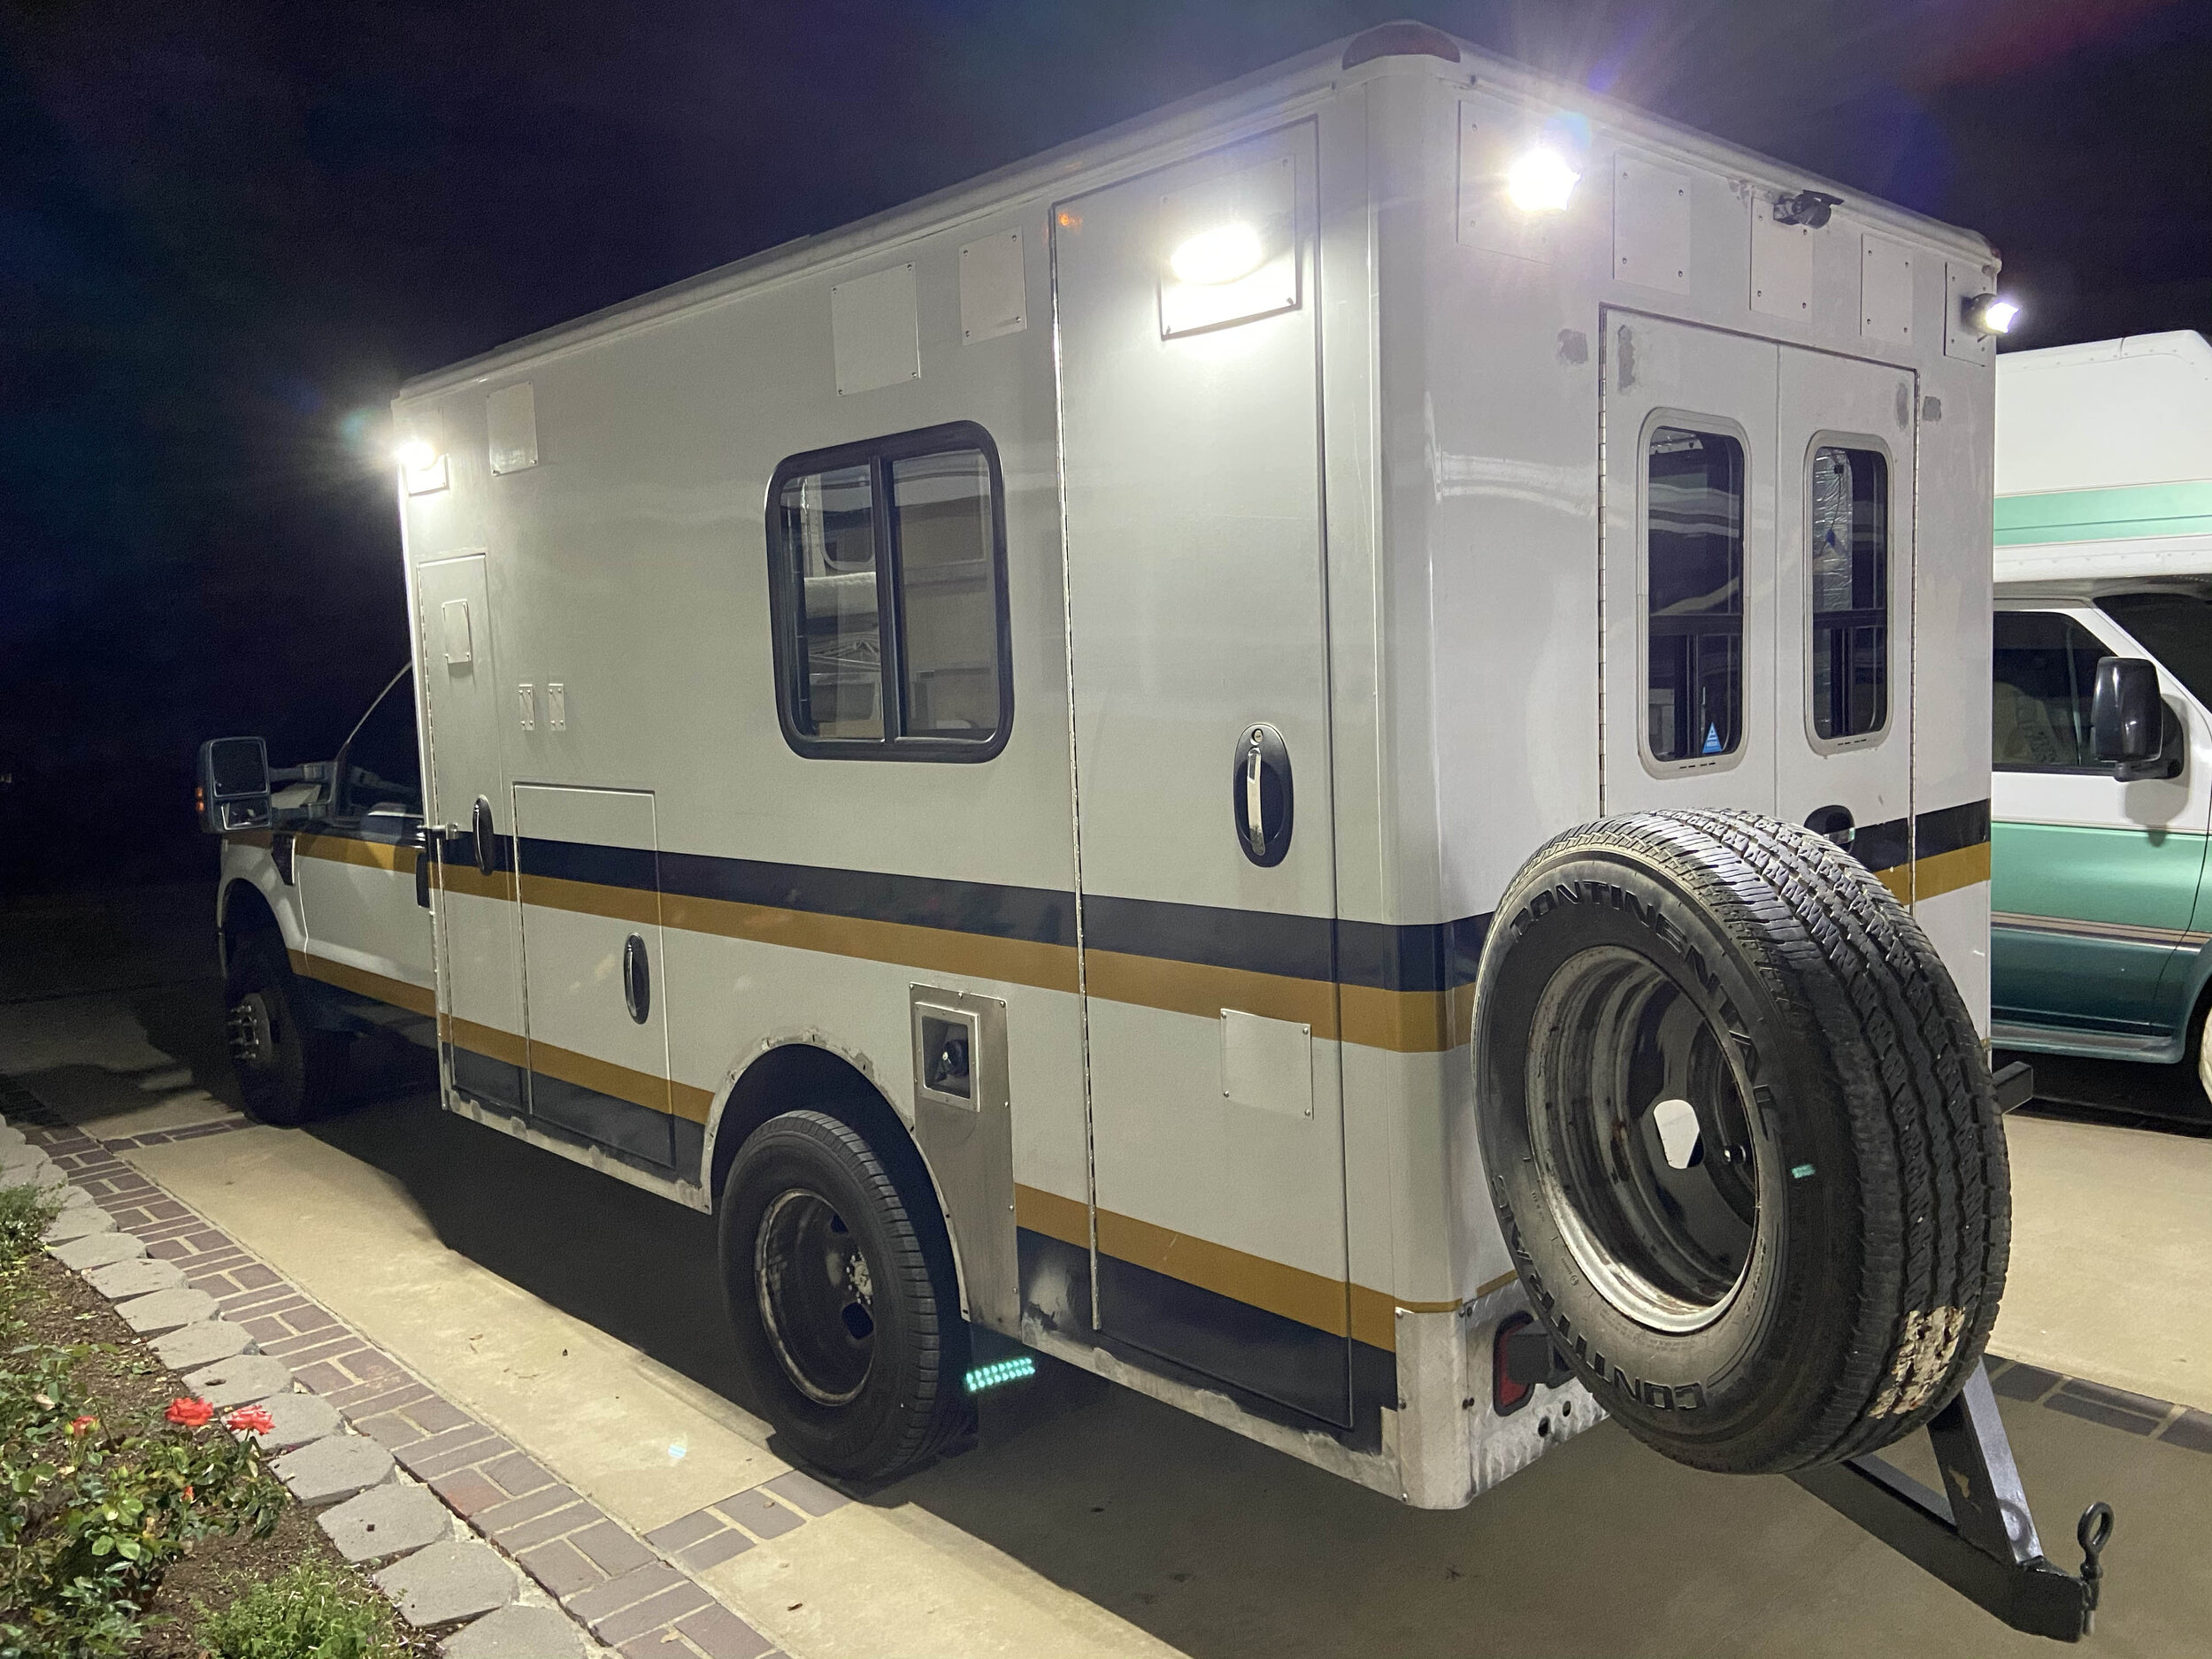
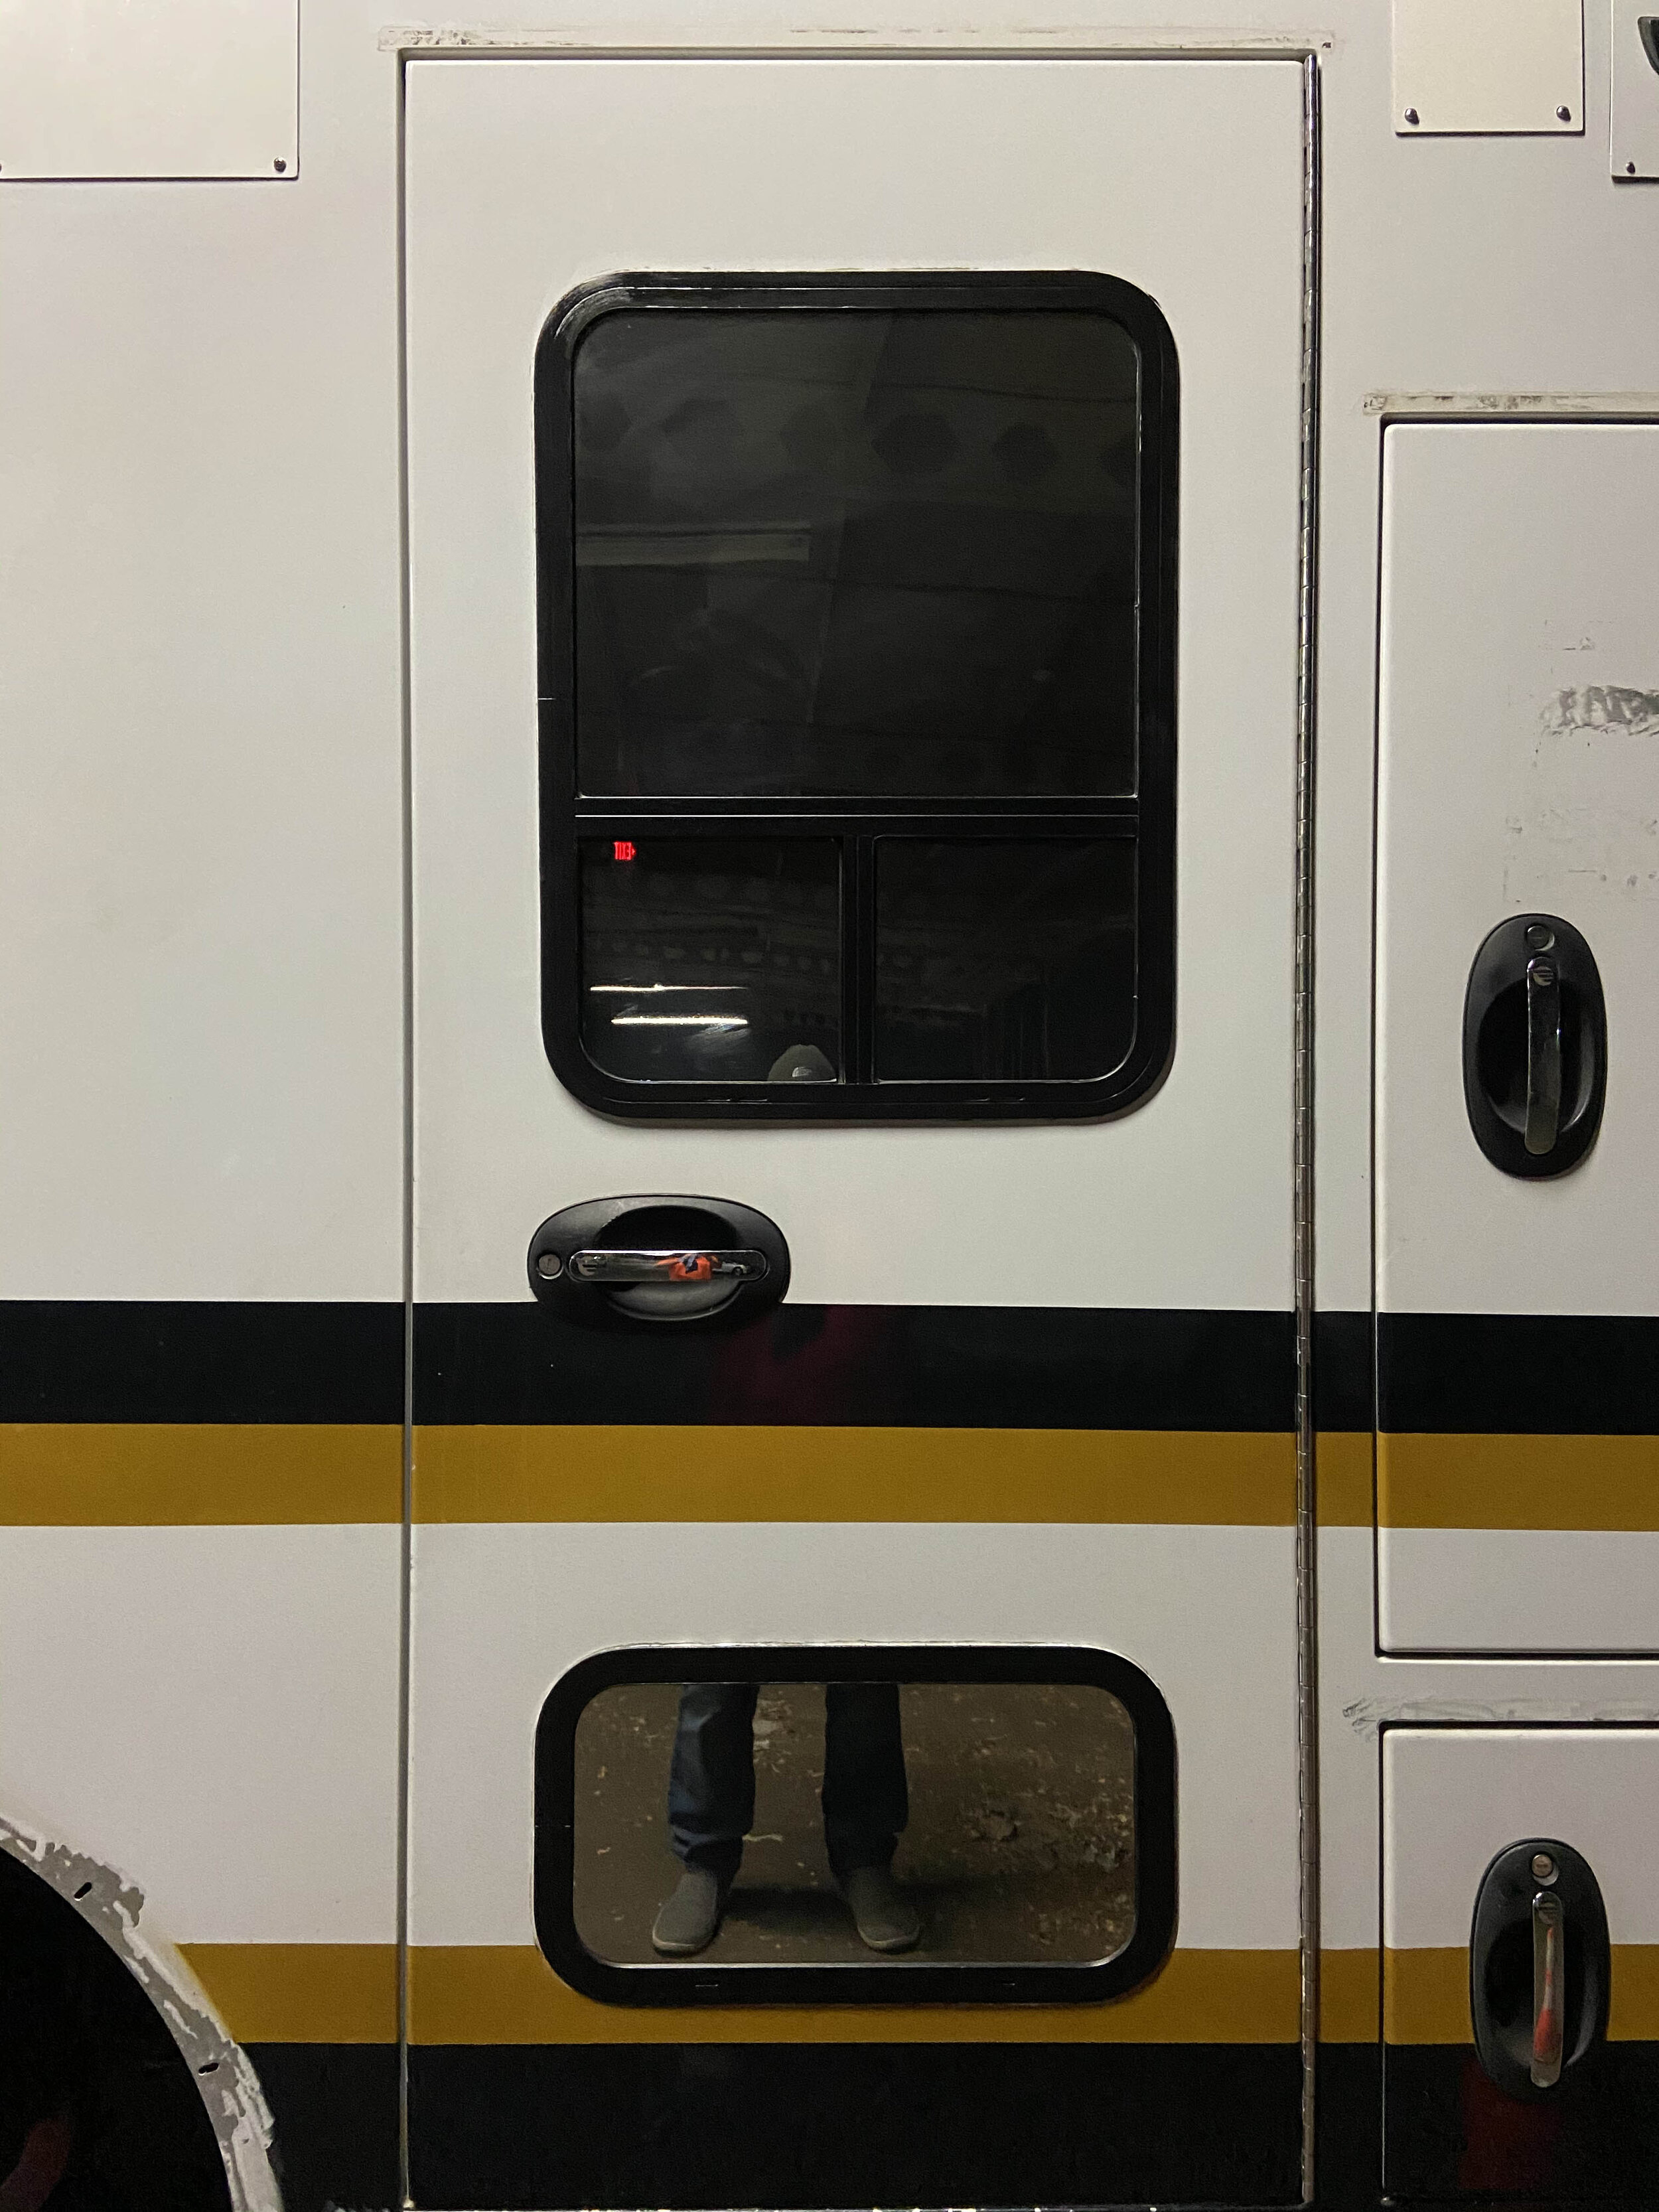
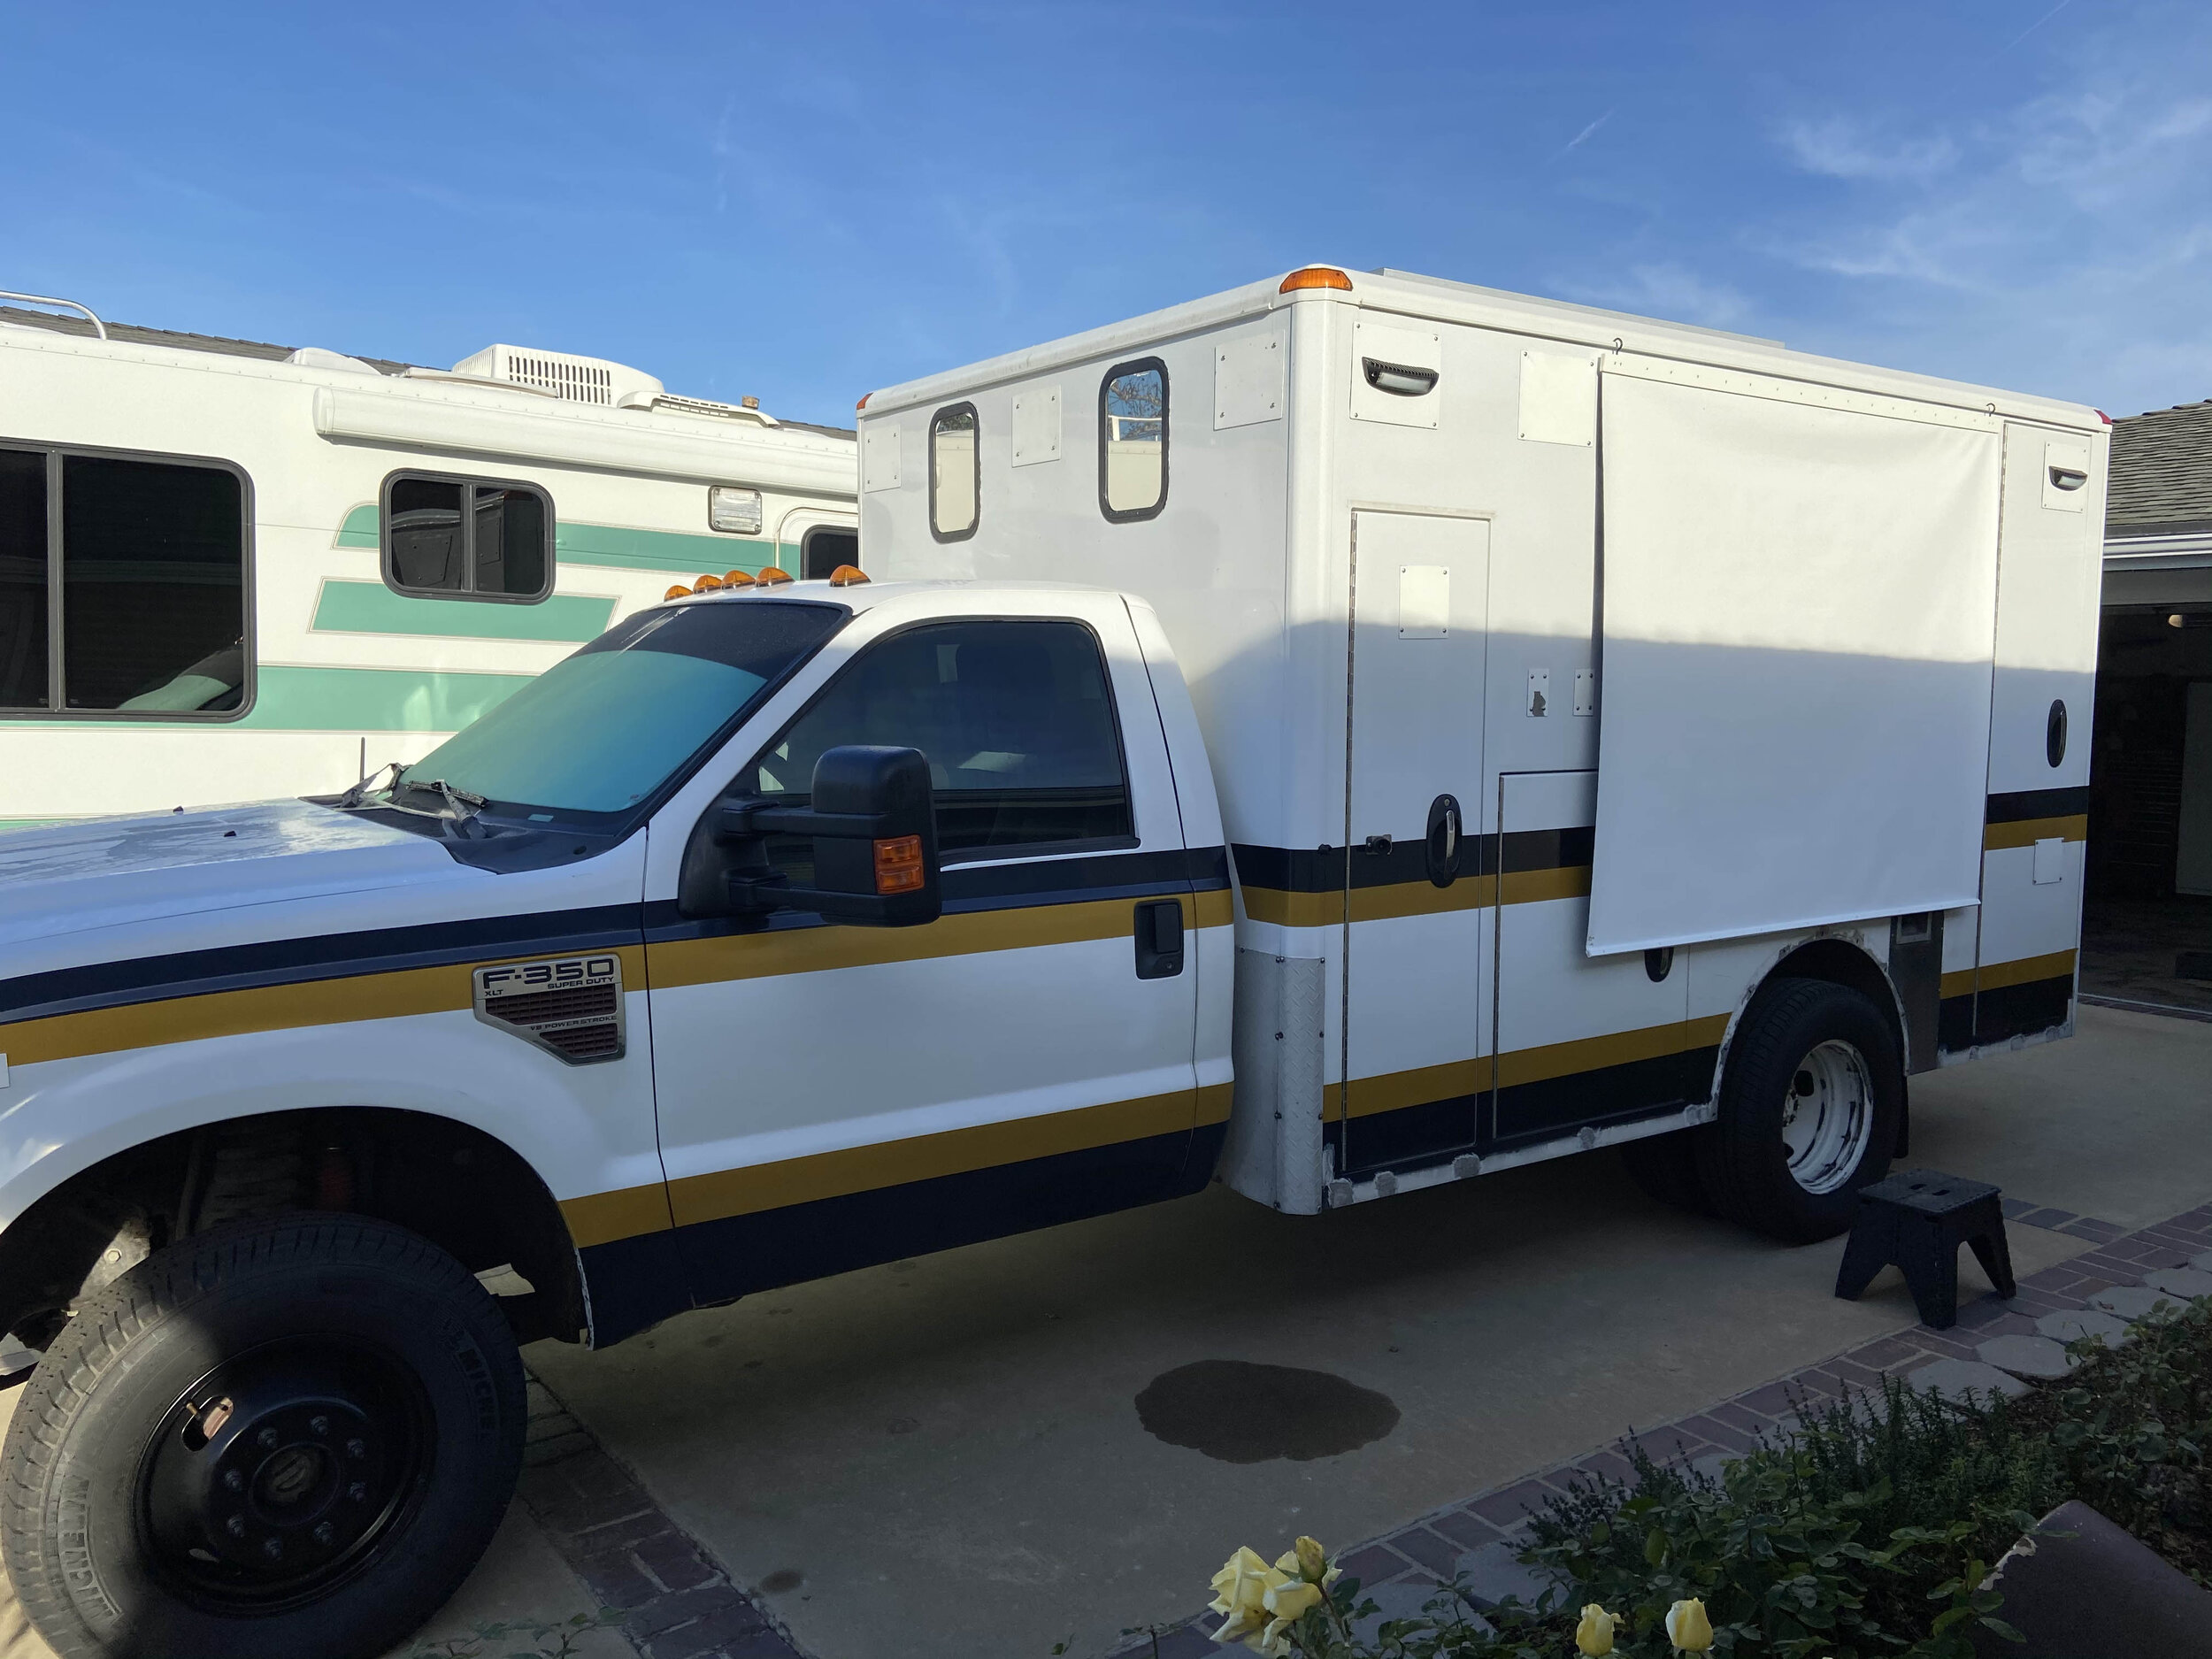
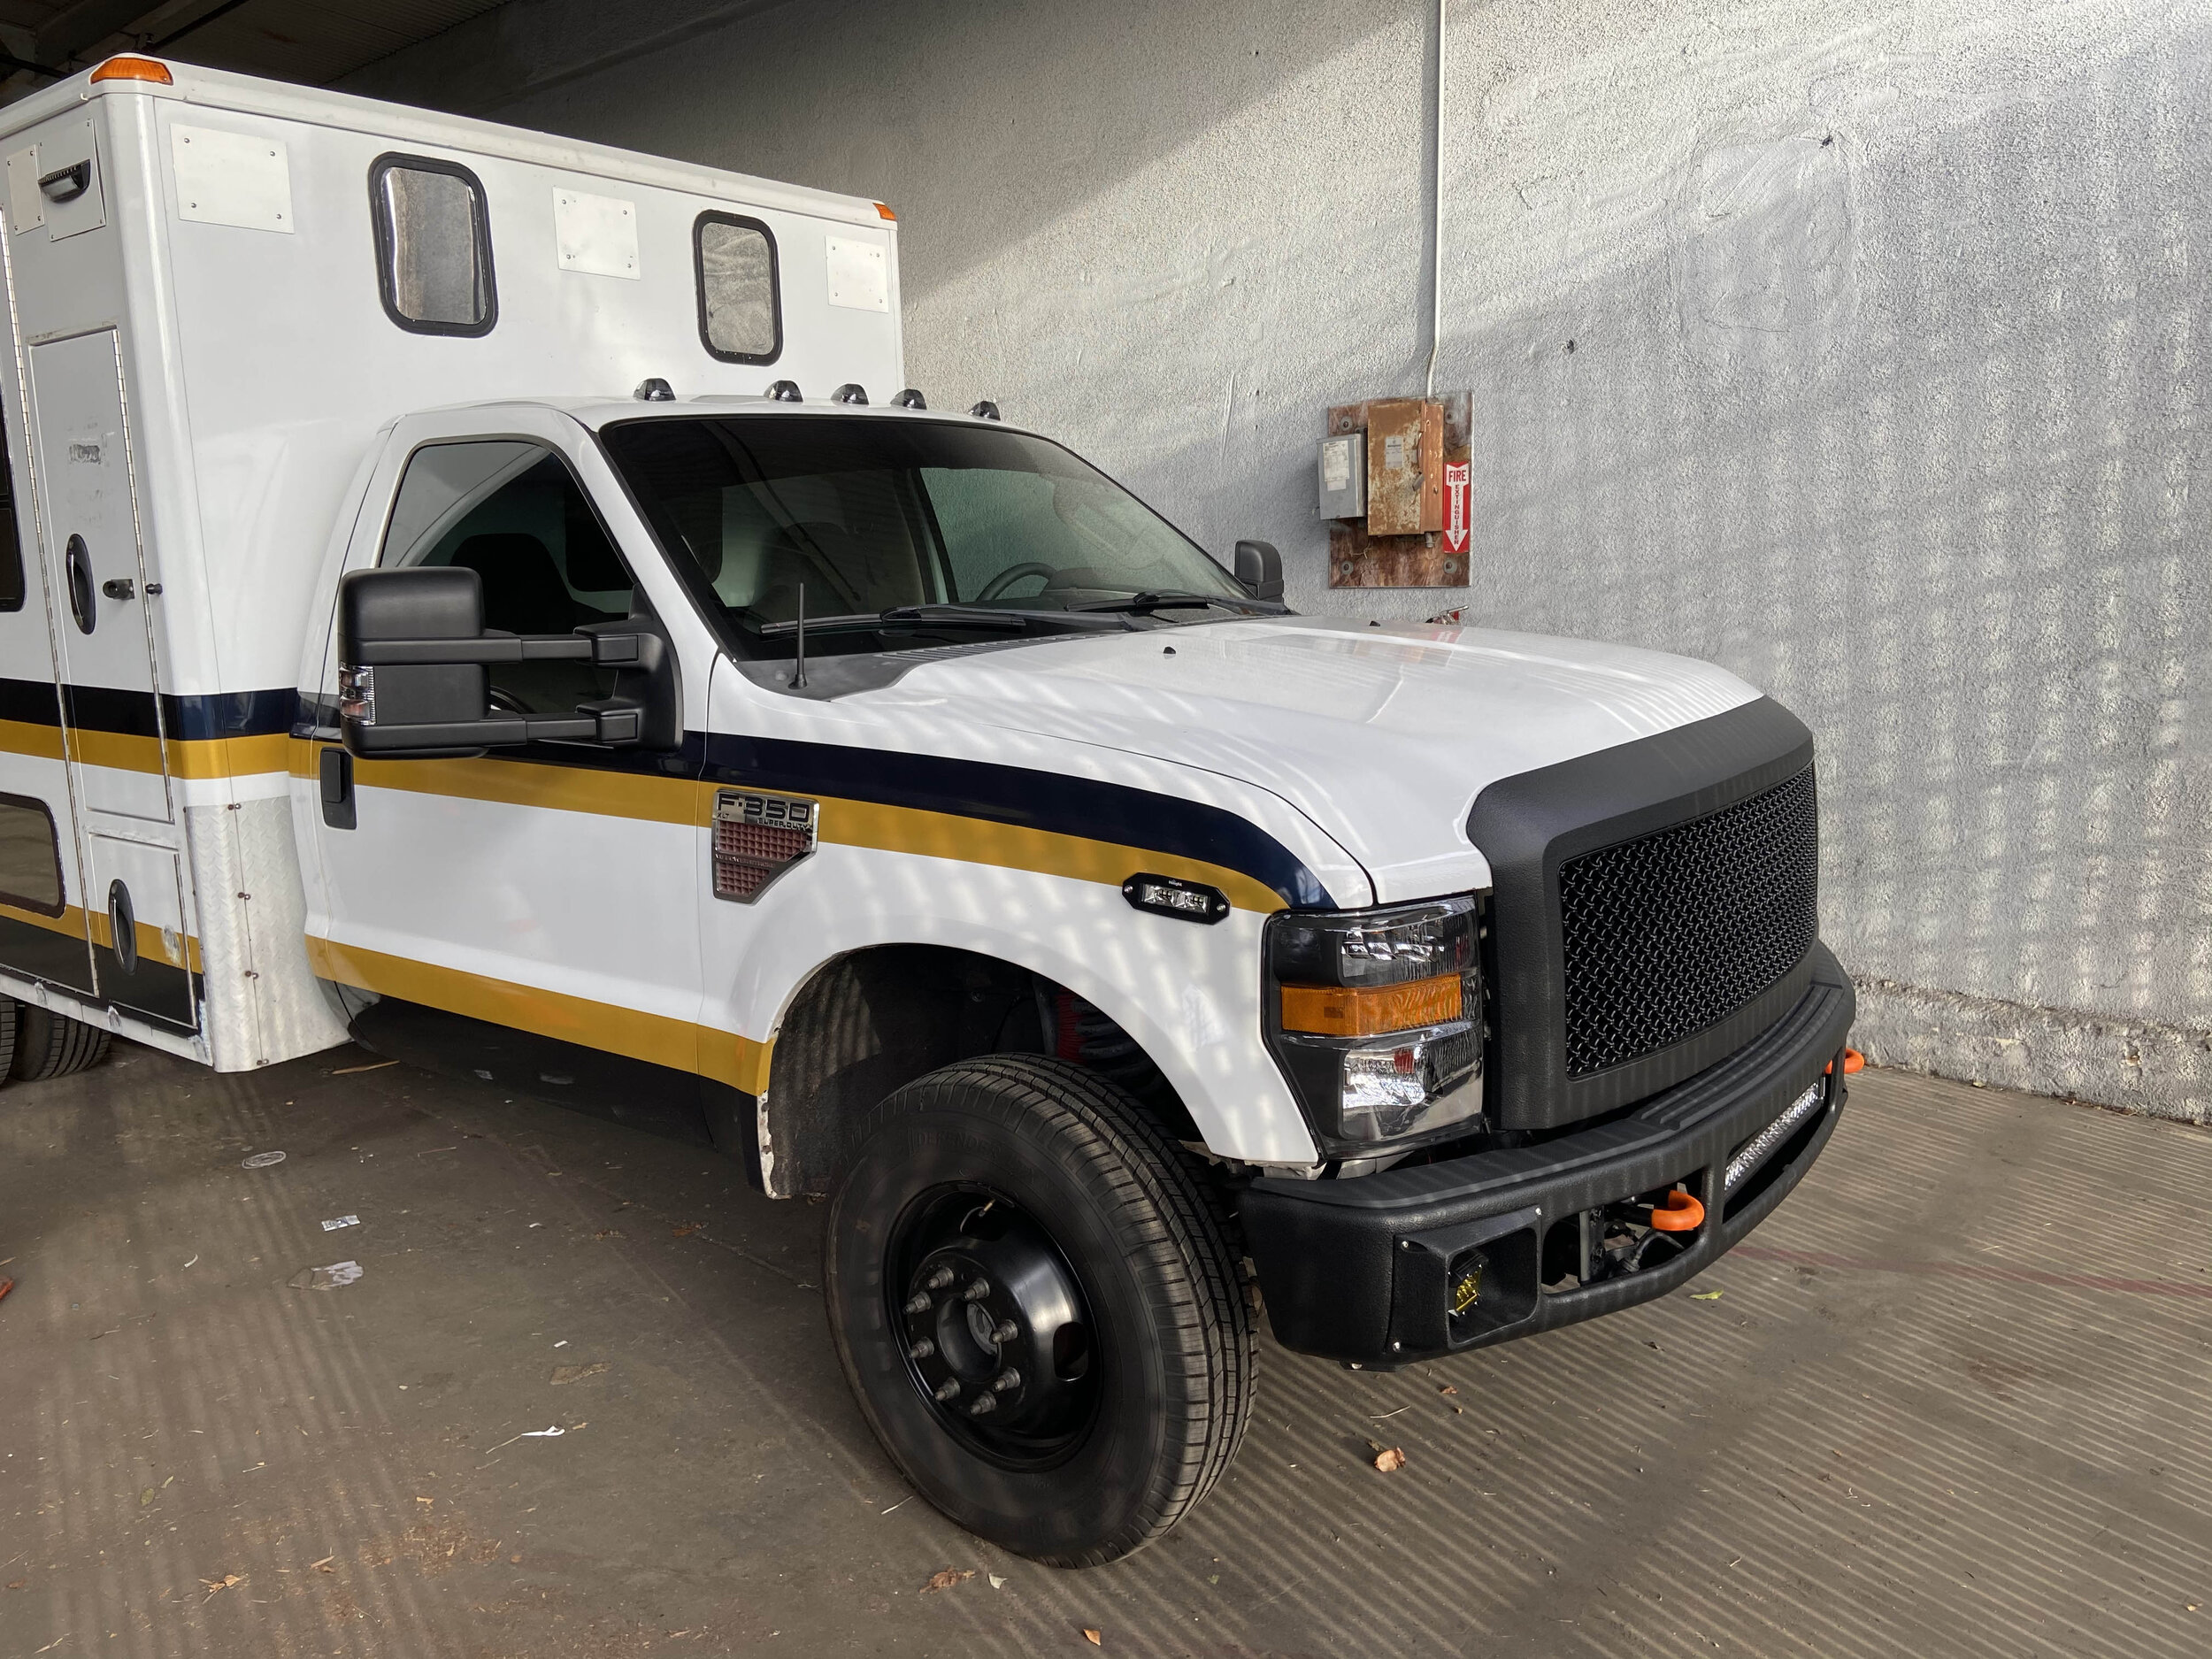
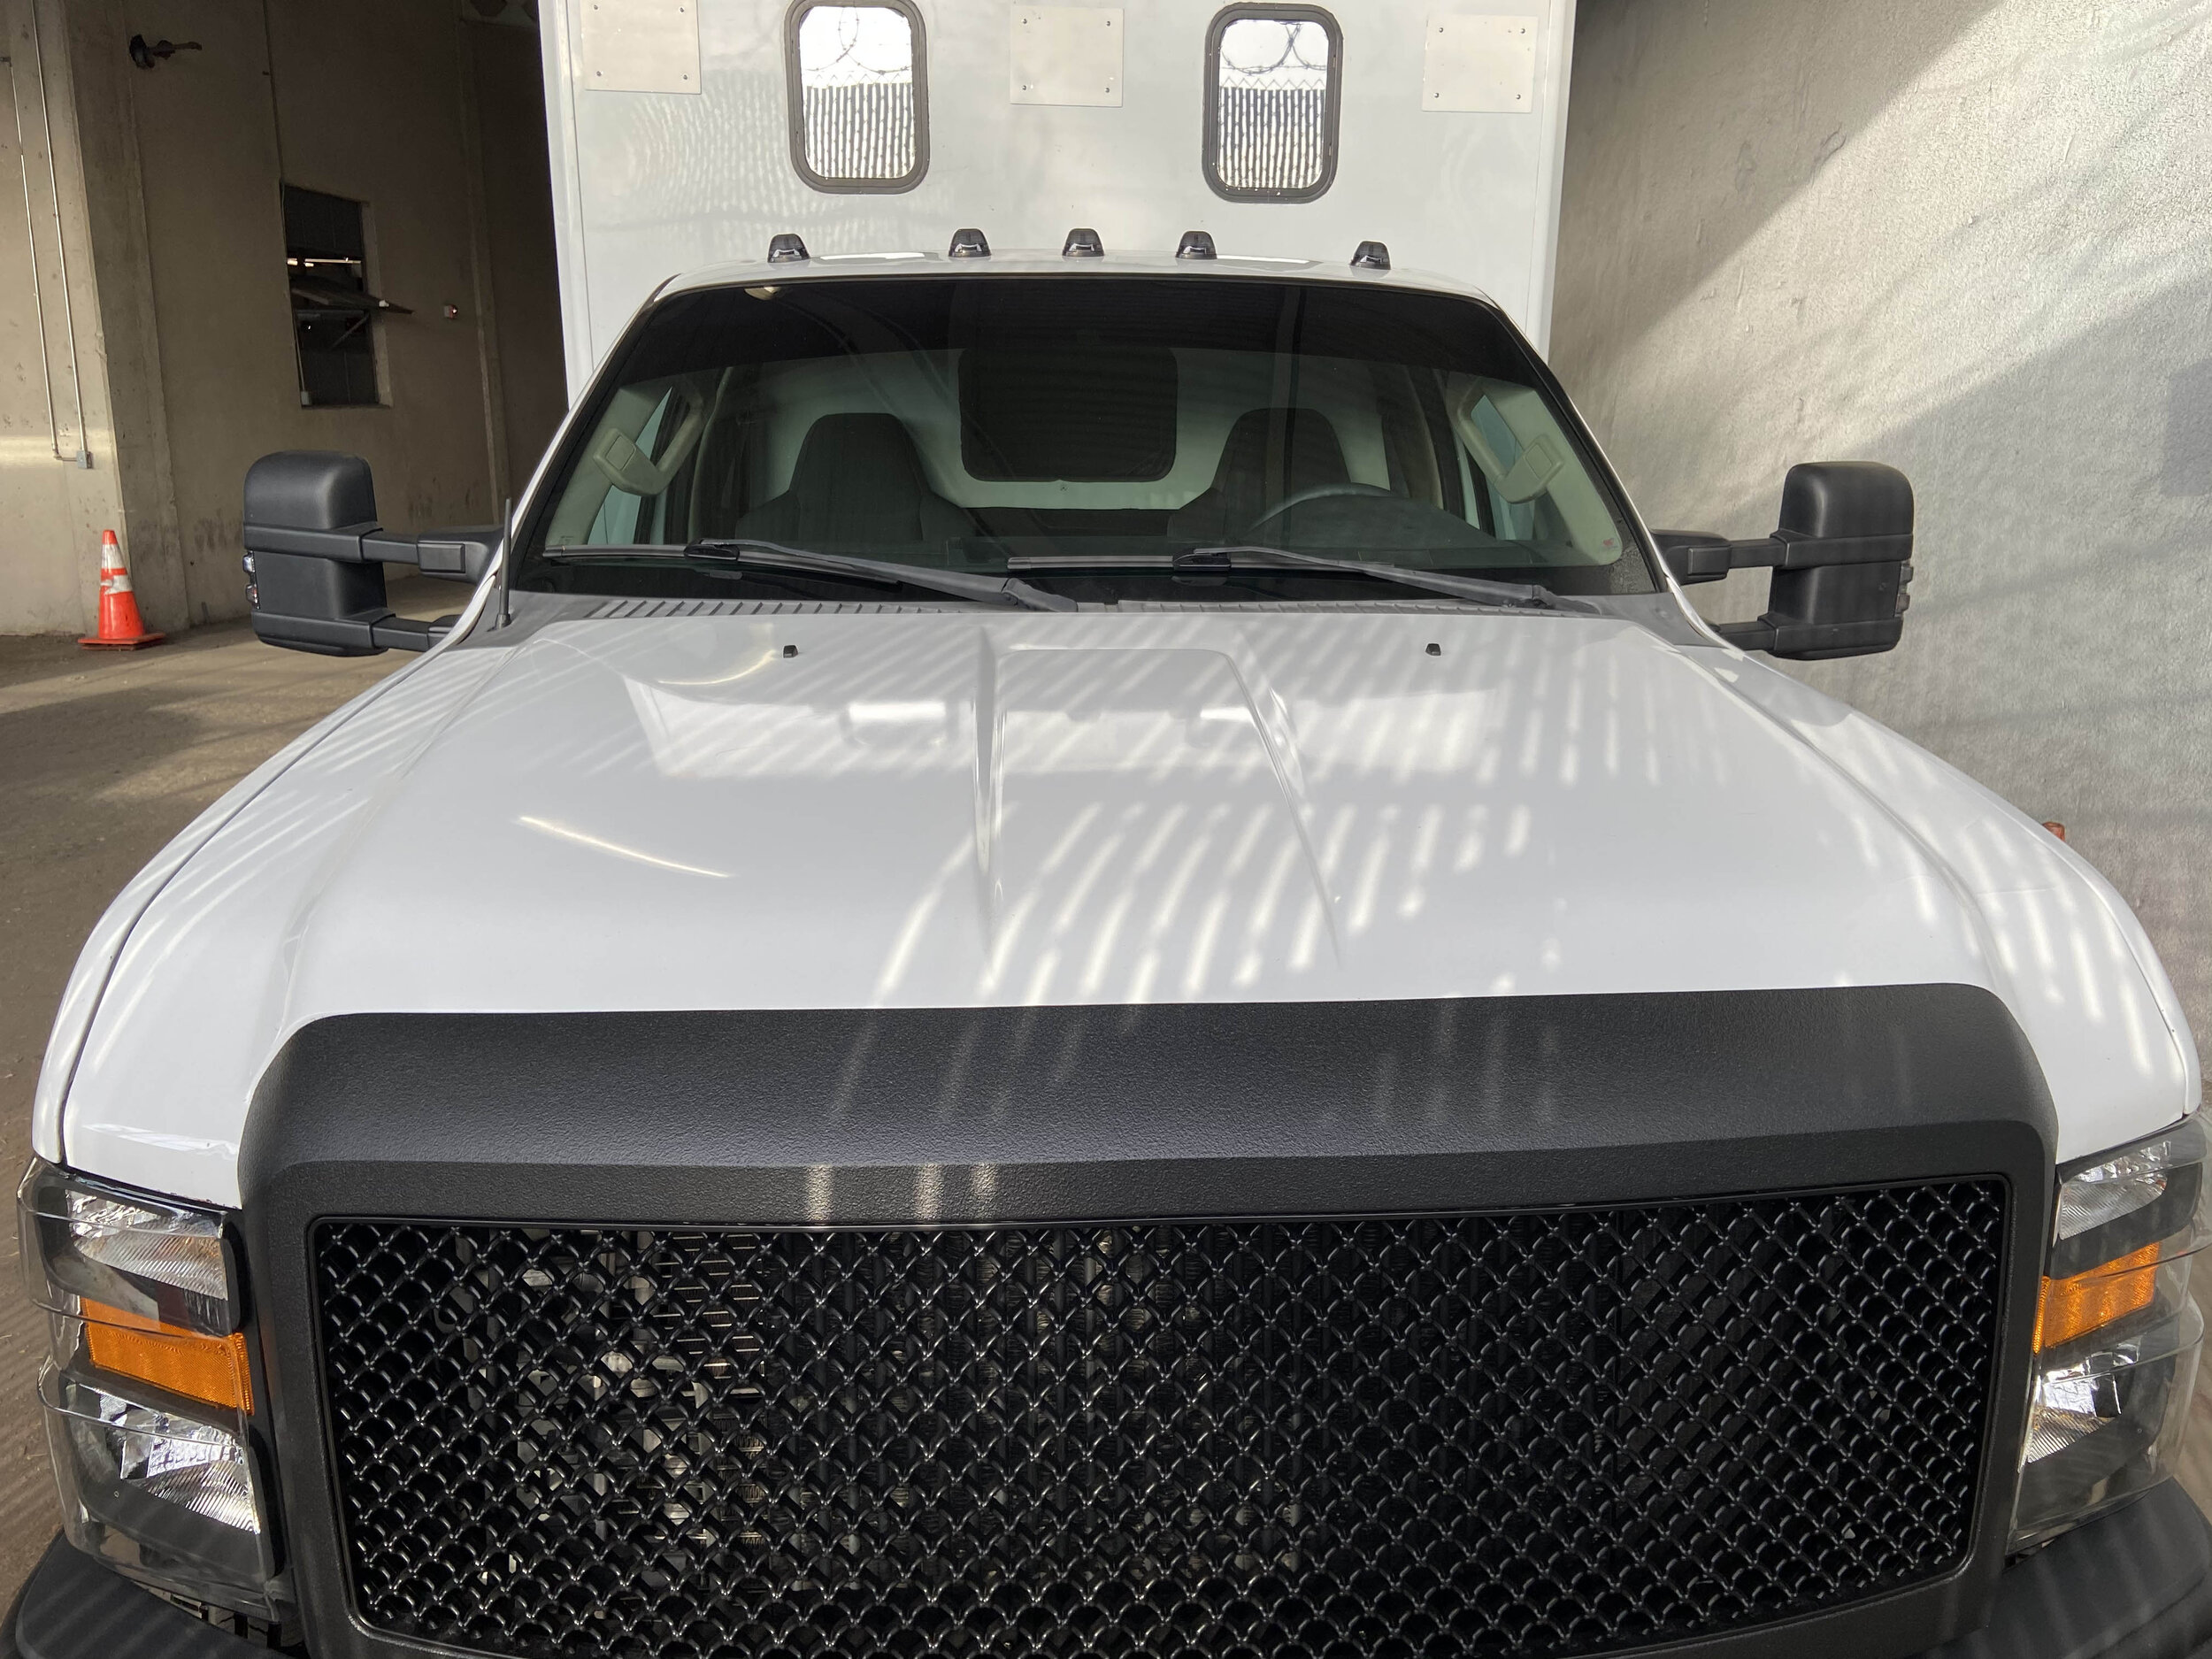
6/18/2020 - Heres where I started. 2010 F350 V8 4x4. 380,000 miles and all the documentation from the mechanics. This included all the engine components that had been replaced, all periodic maintenance etc. These particular units had been inspected by Orange County EMS, Los Angles County EMS and the California Highway Patrol annually. All worn components were like new annually. This is due mostly because it is required. Most people hear the 380,000 miles and cringe. Thats until I explain the maintenance procedures that are required to keep it in service. In 2018 the ambulance company spent $17,000 repairing and replacing engine and parts. For all intensive purposes I began with a new turbo and ALL under hood components. Prior to taking ownership the ambulance company removed all their insignia. The remaining stripes made the camper look like a sheriffs department unit. Cant wait till it gets painted!!


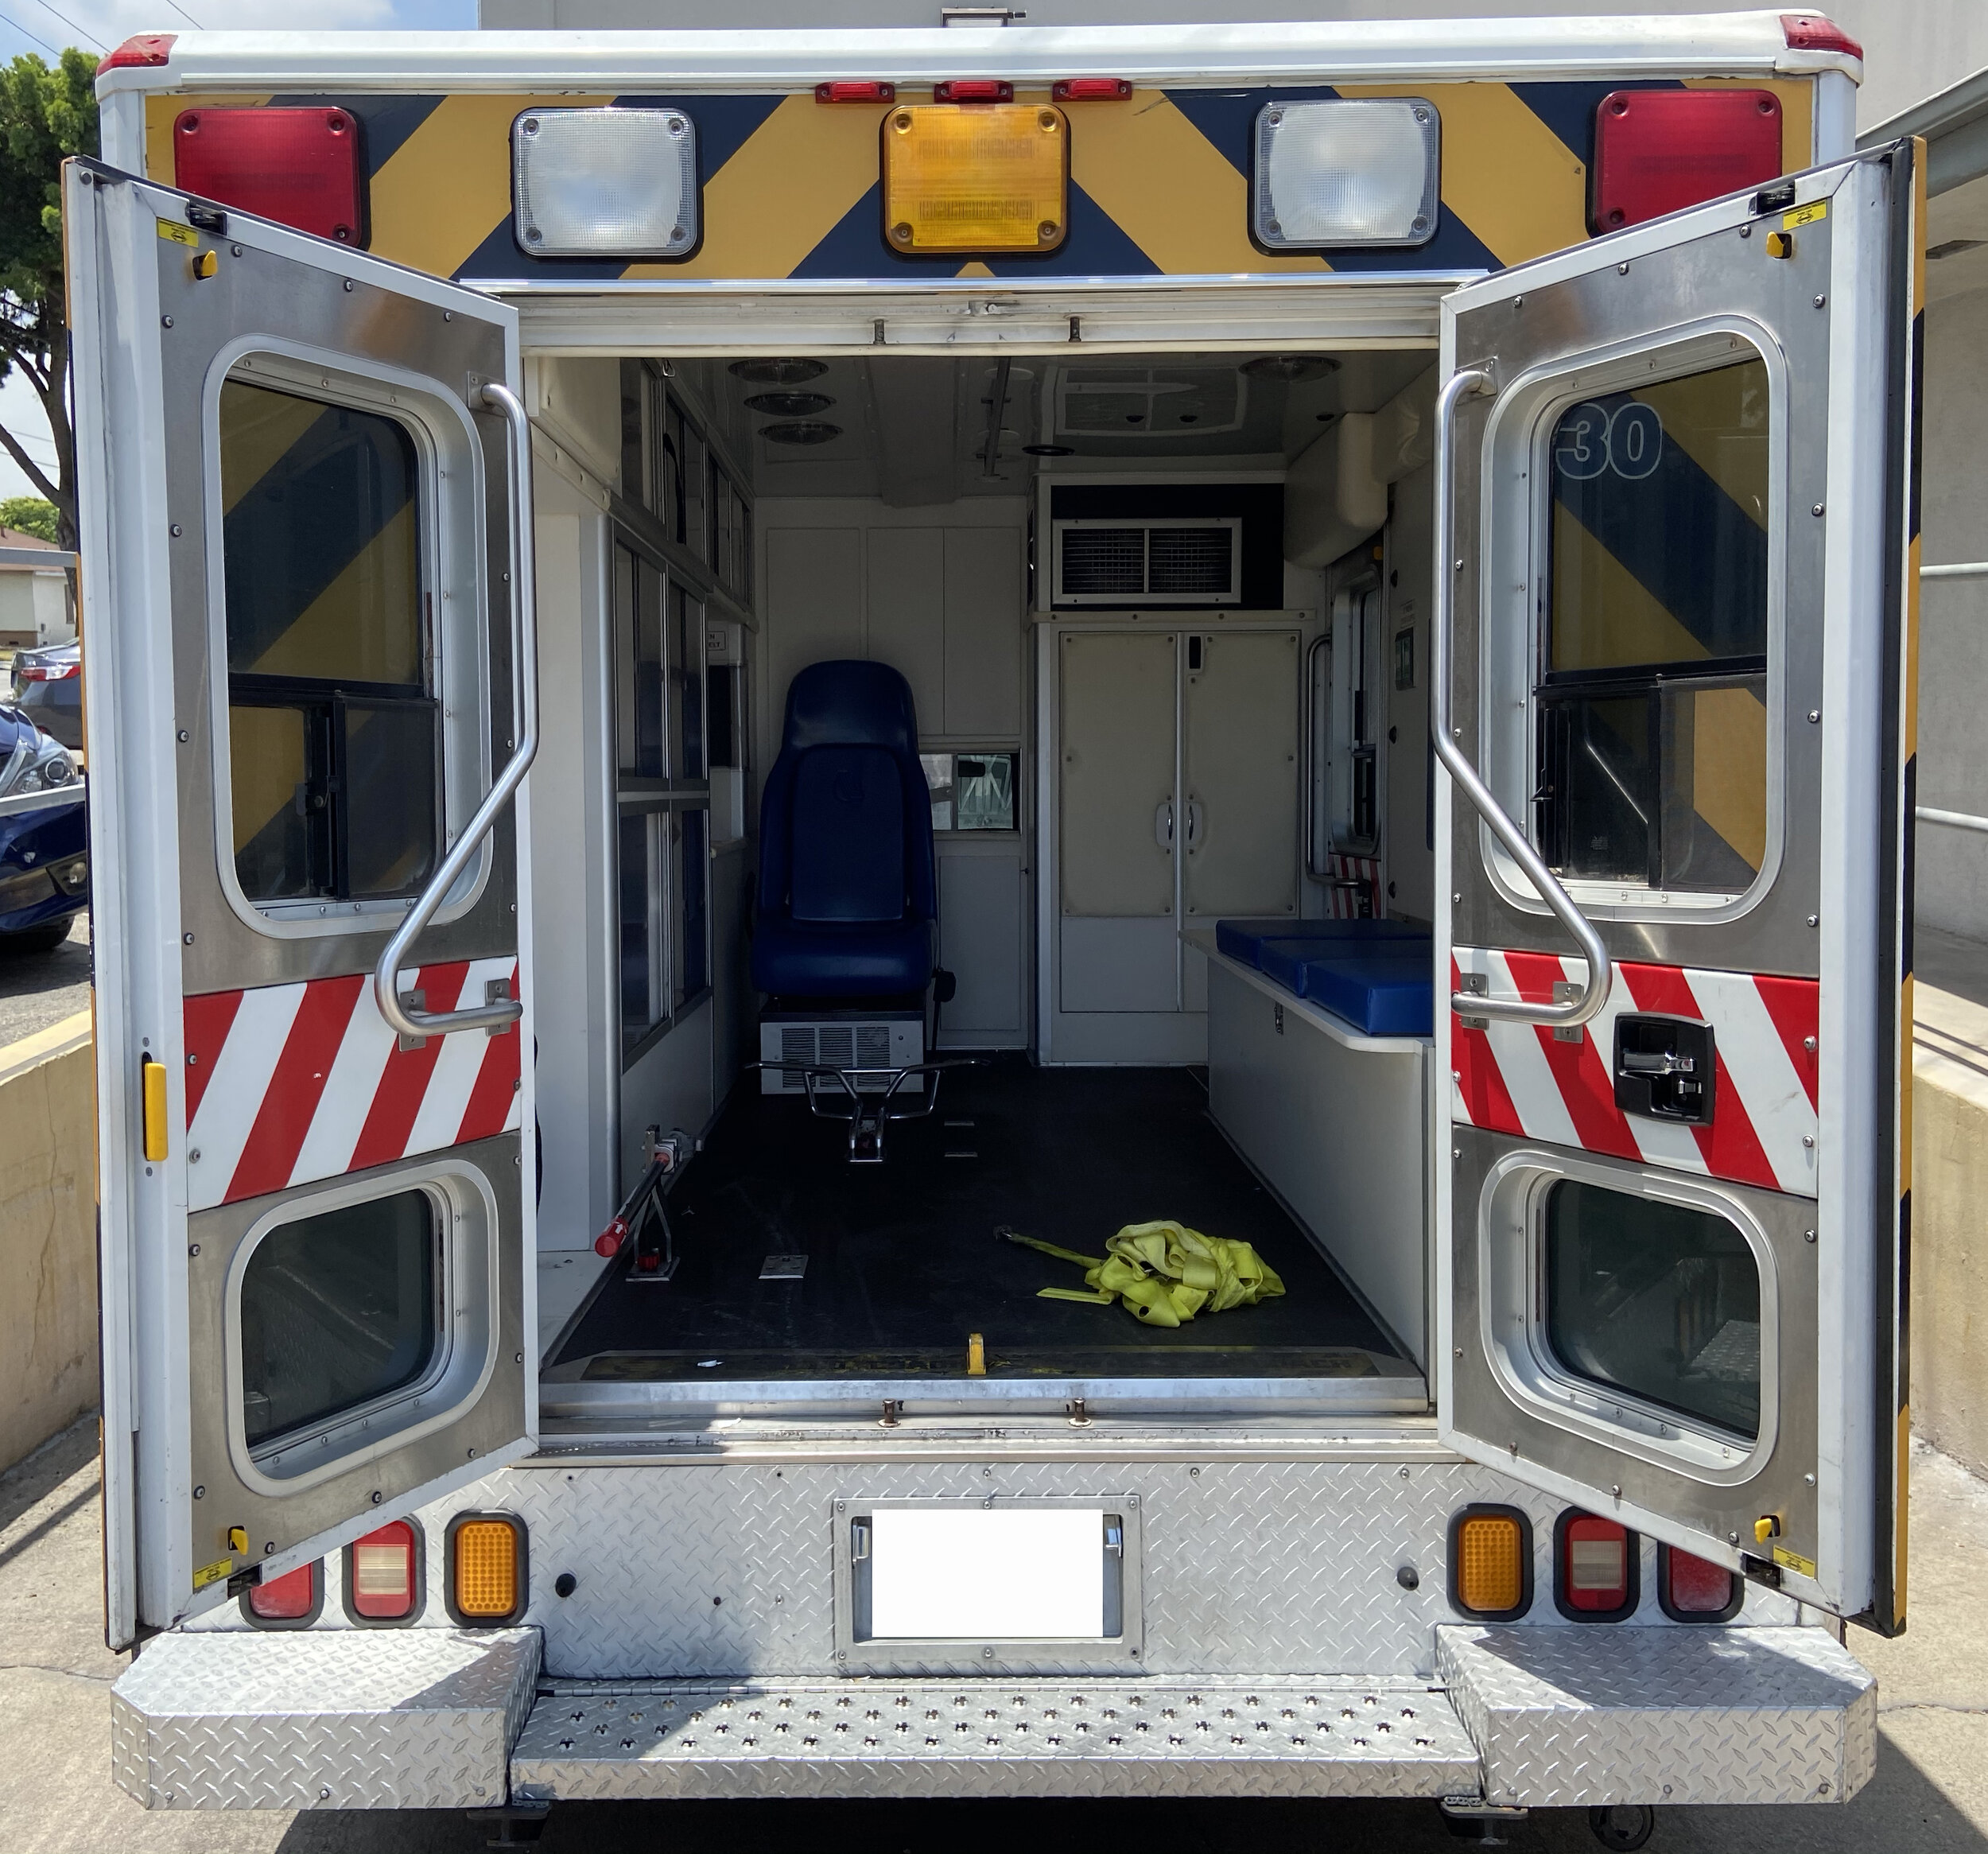
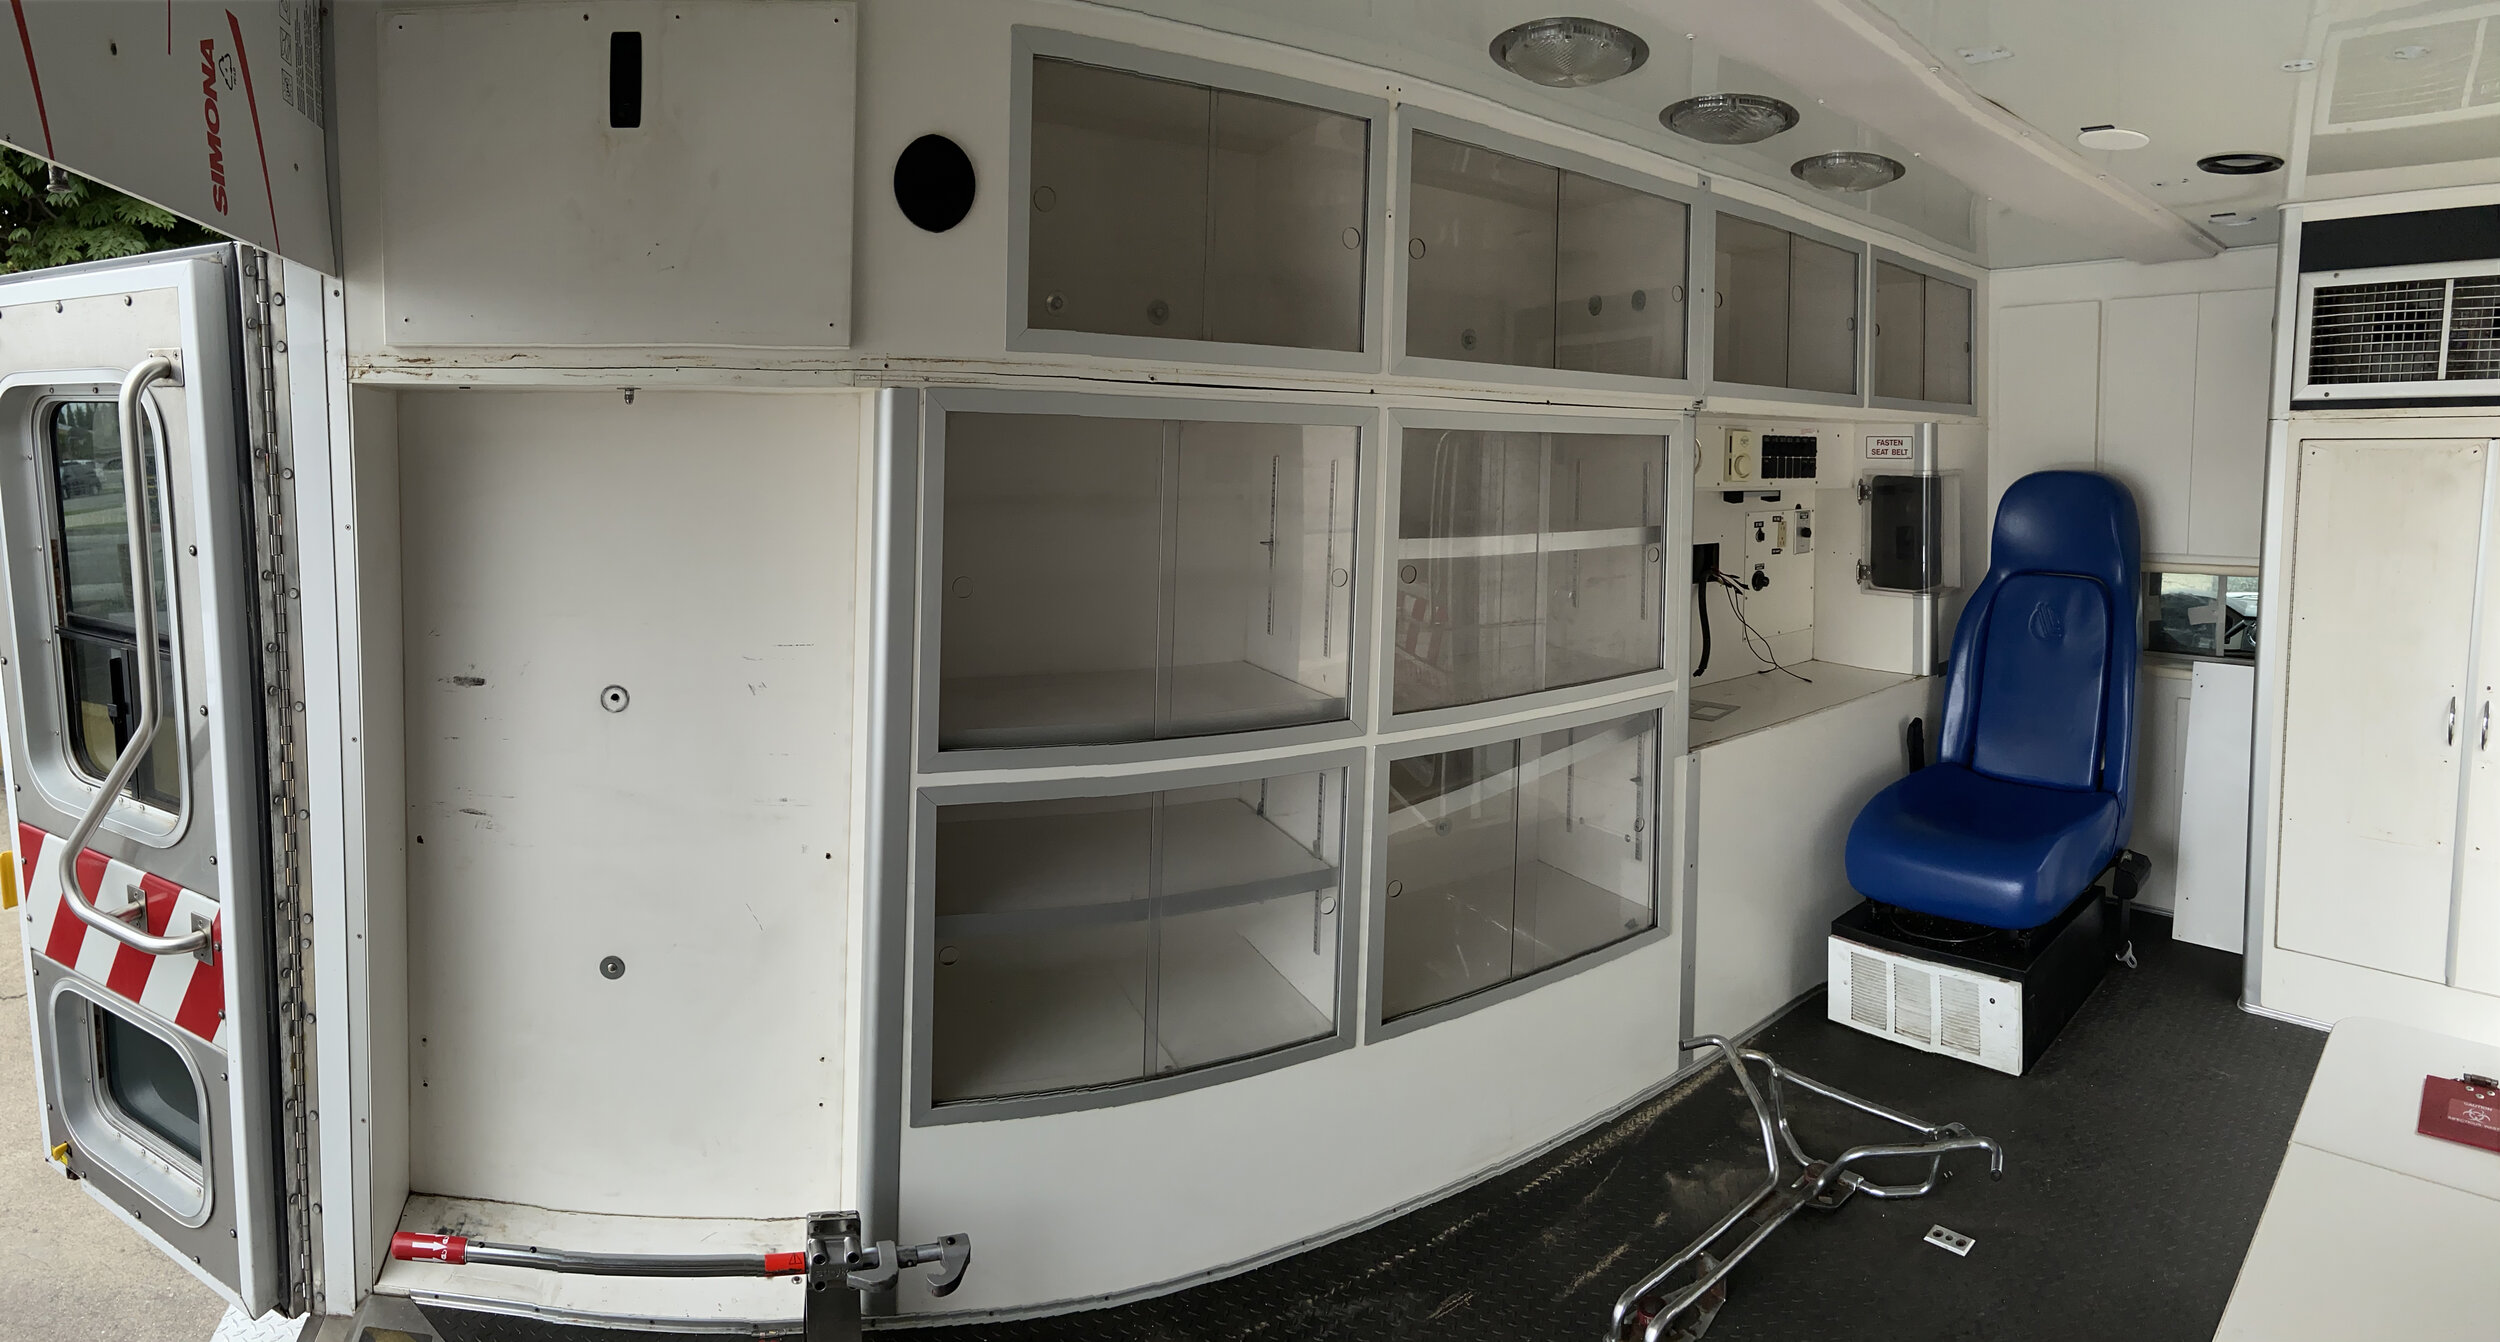
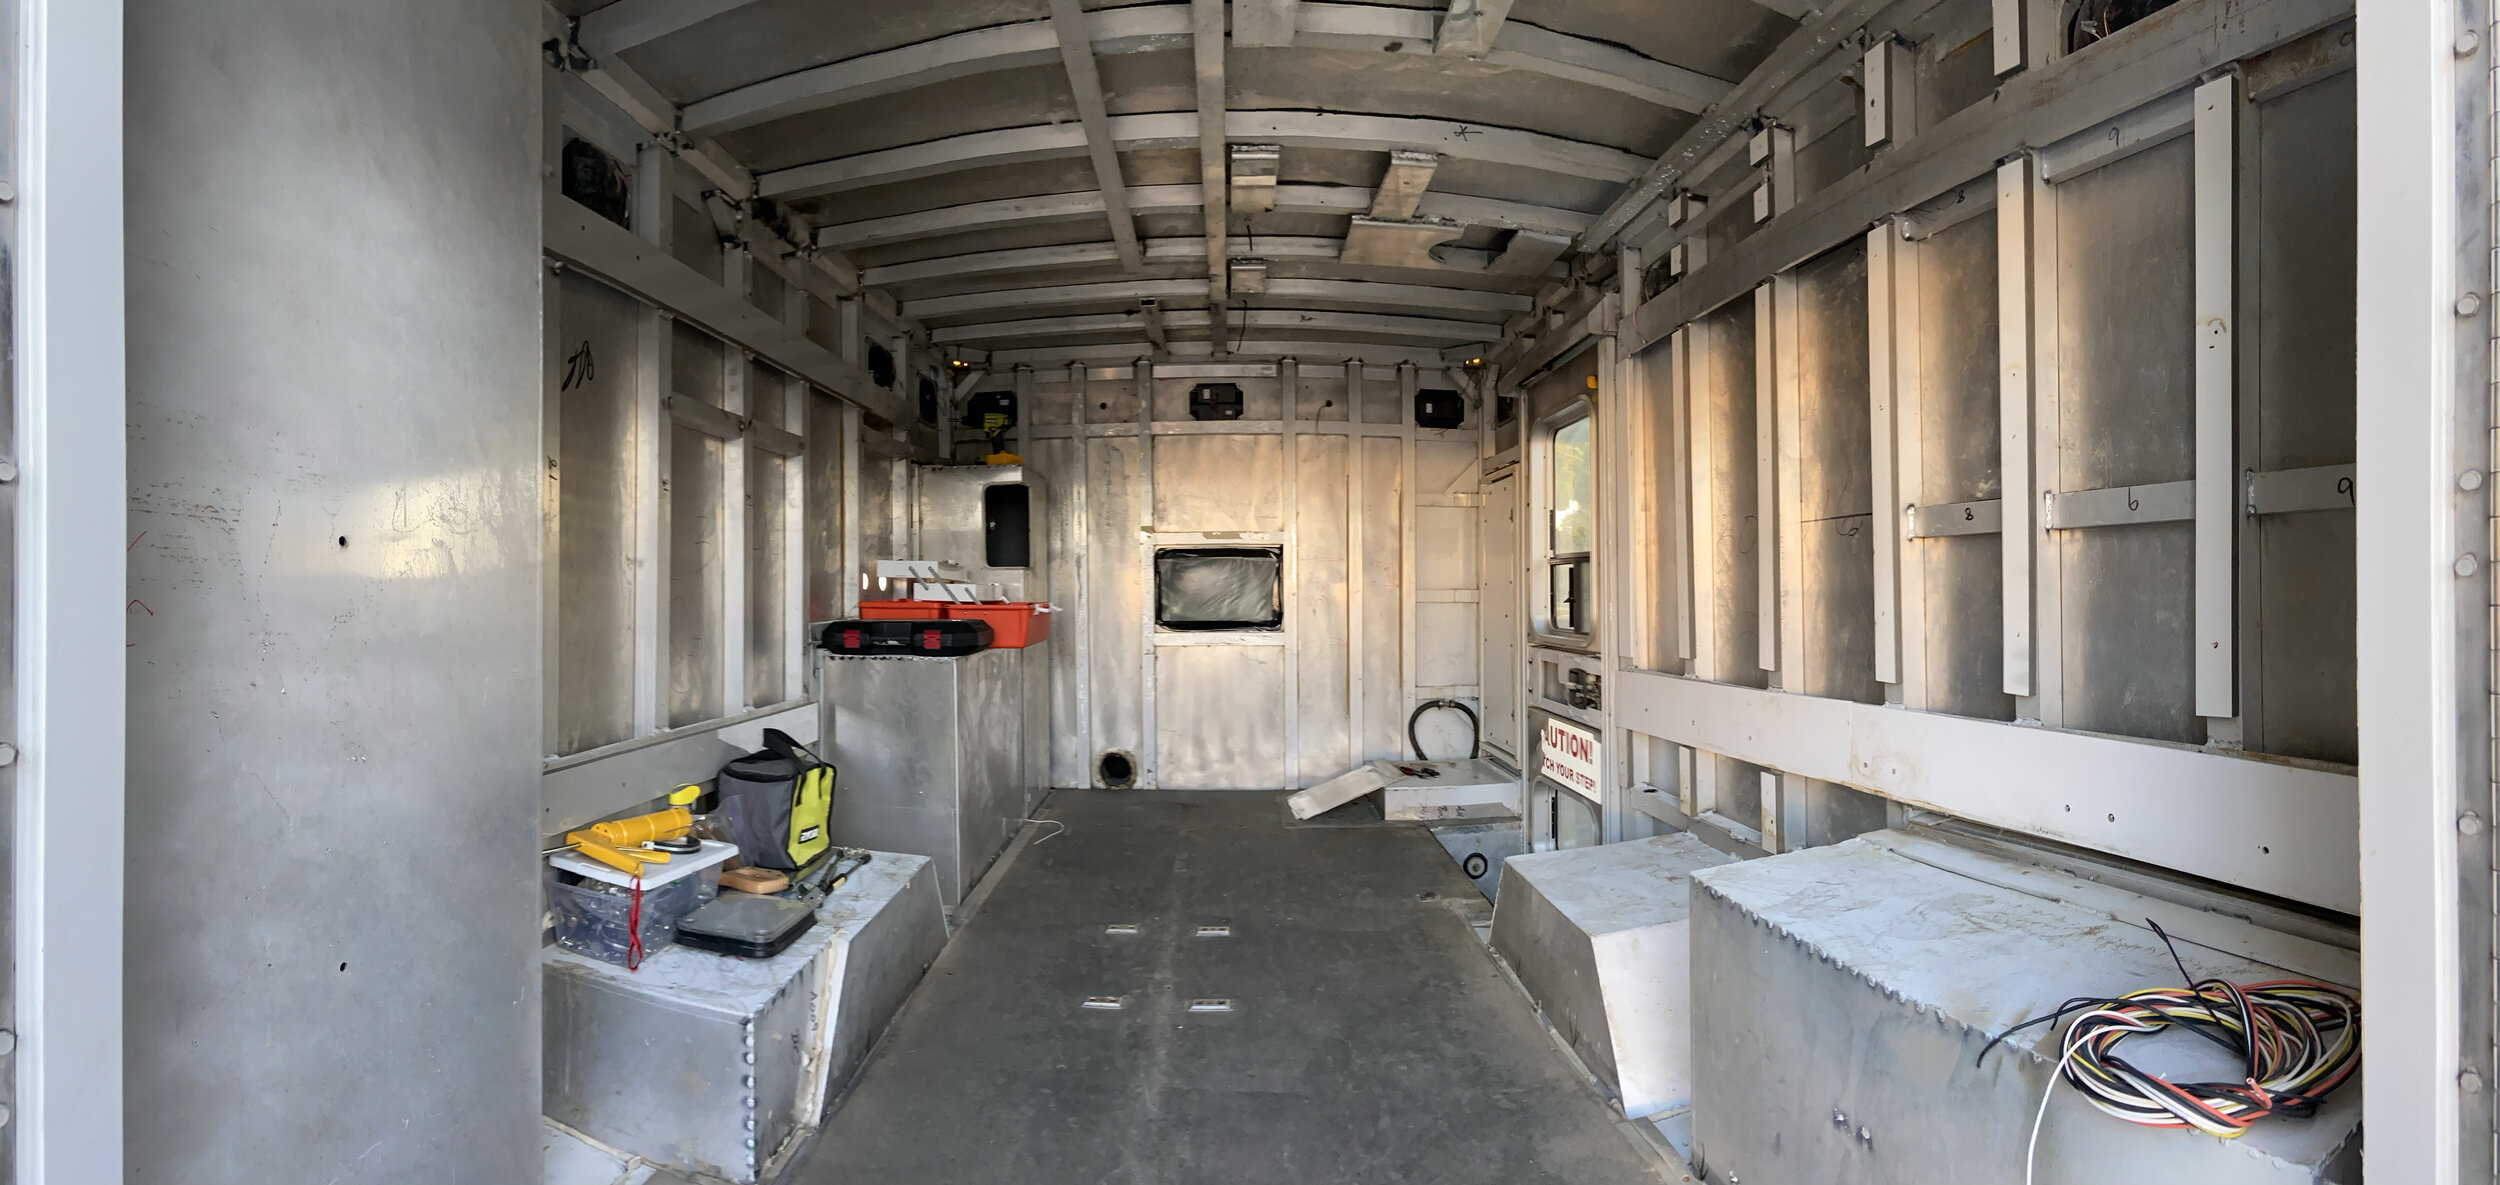
6/21/2020 - I began to remove all the interior “ambulance” components. The removal process was just laborious. It was interesting to “see behind the curtain” so to speak. I’ve spent most of my life in the back of these and never really gave it much thought as far as how it all worked. Removing the cabinets was first. Not really a difficult task. Only took some basic tools. I gave the ambulance company I work for all the equipment that I was not going to reuse as thank you for letting me demo the rig in their parking lot. At this point I just put my head down and started tearing everything out. I paid attention to where the road dust had accumulated behind the walls as those were the spots I was going to have to seal up very well. Every single screw was stainless. I kept them all! I did not reuse any of the cabinets, foam, insulation or any other component. All of the cabinetry was held together with screws and bolted to the wall.

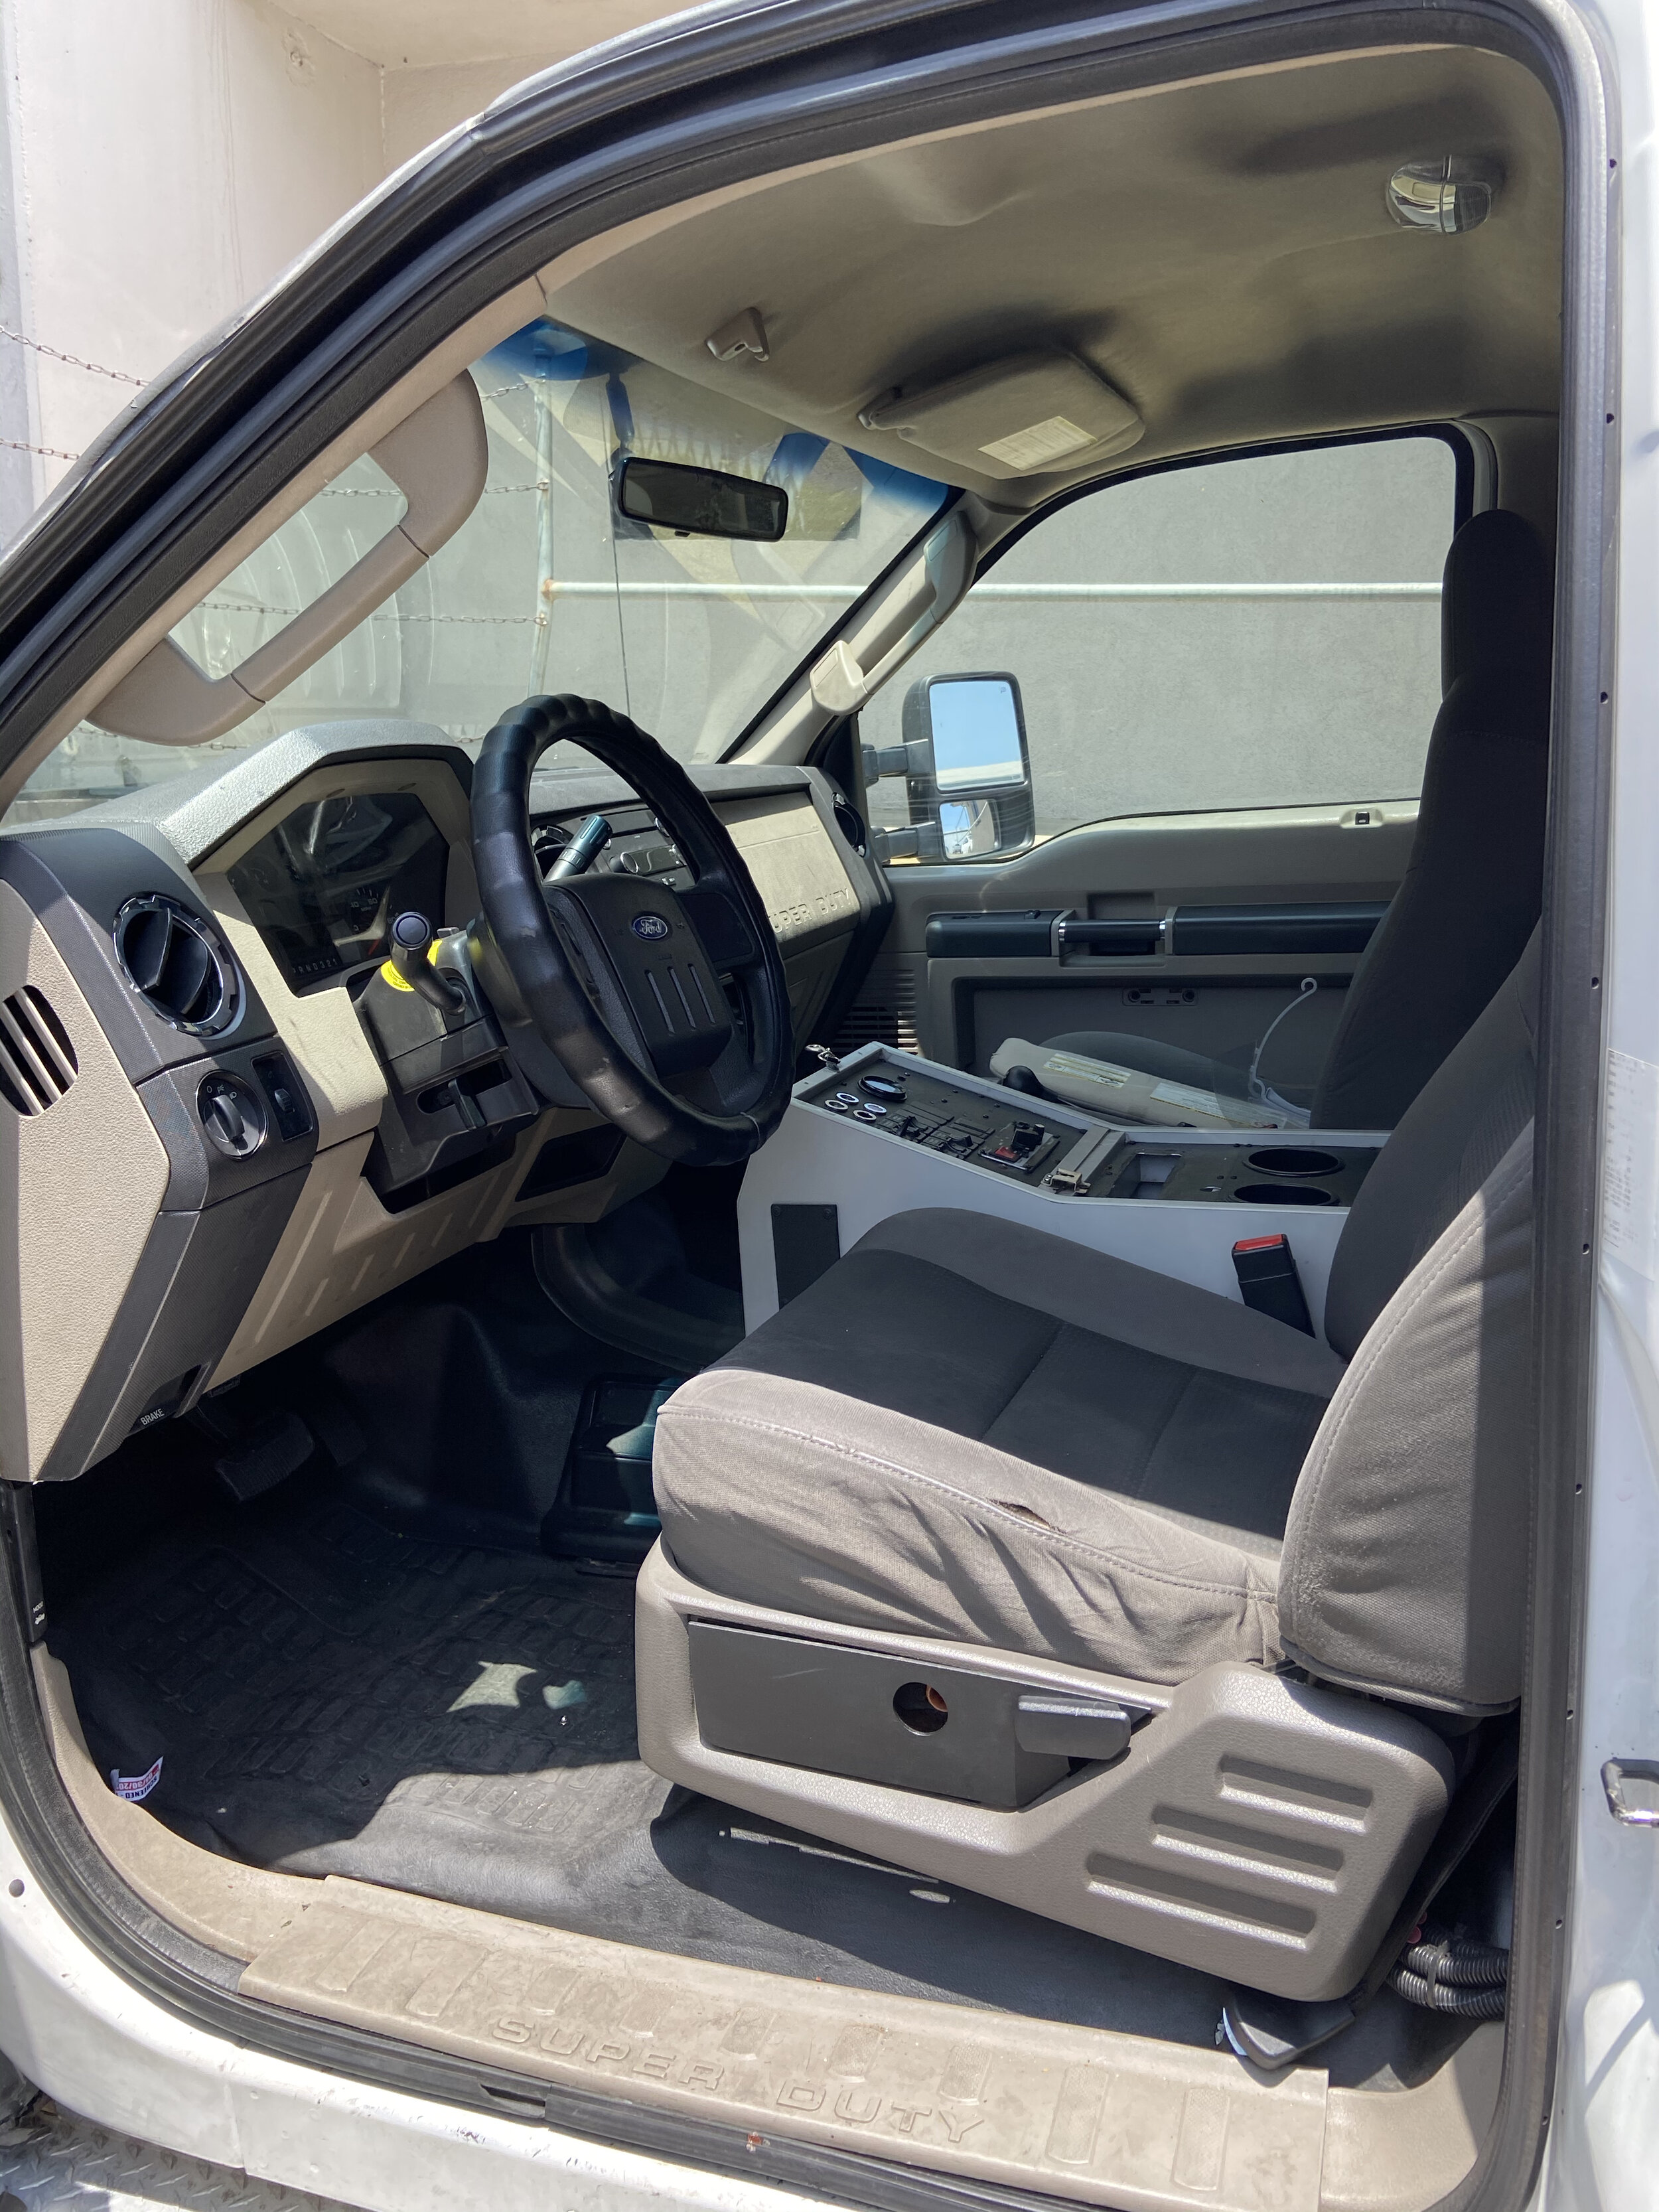
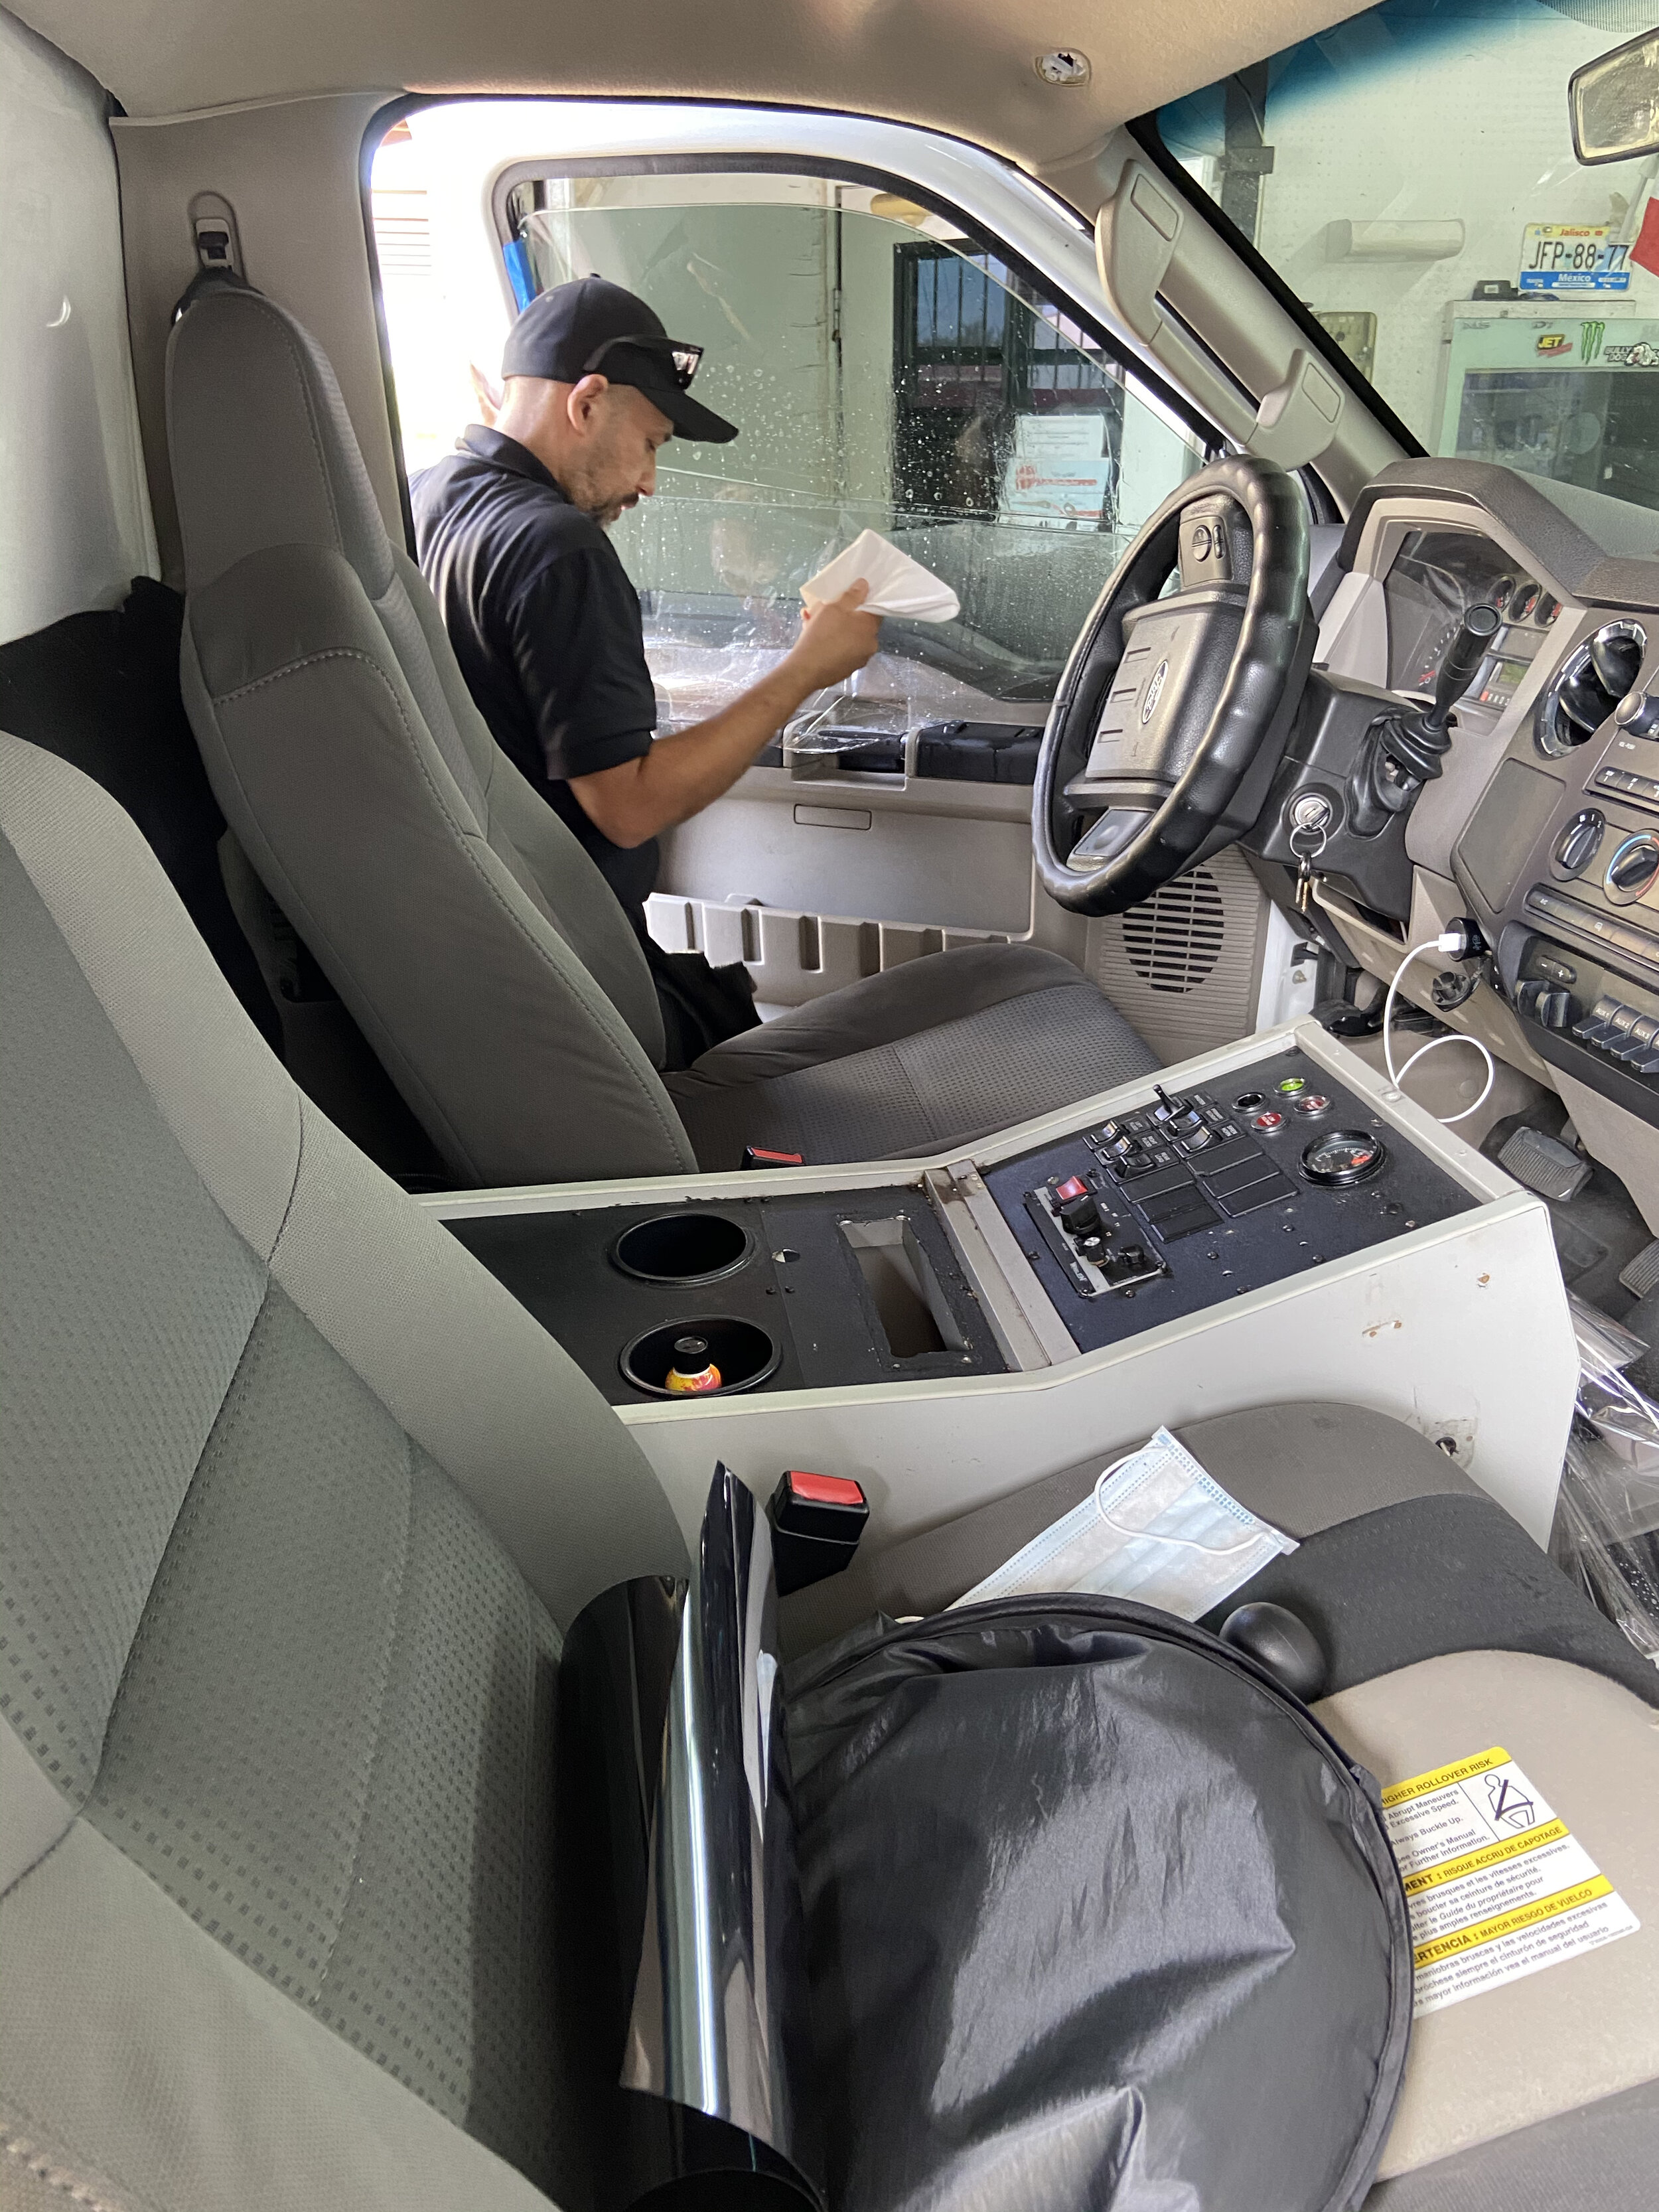
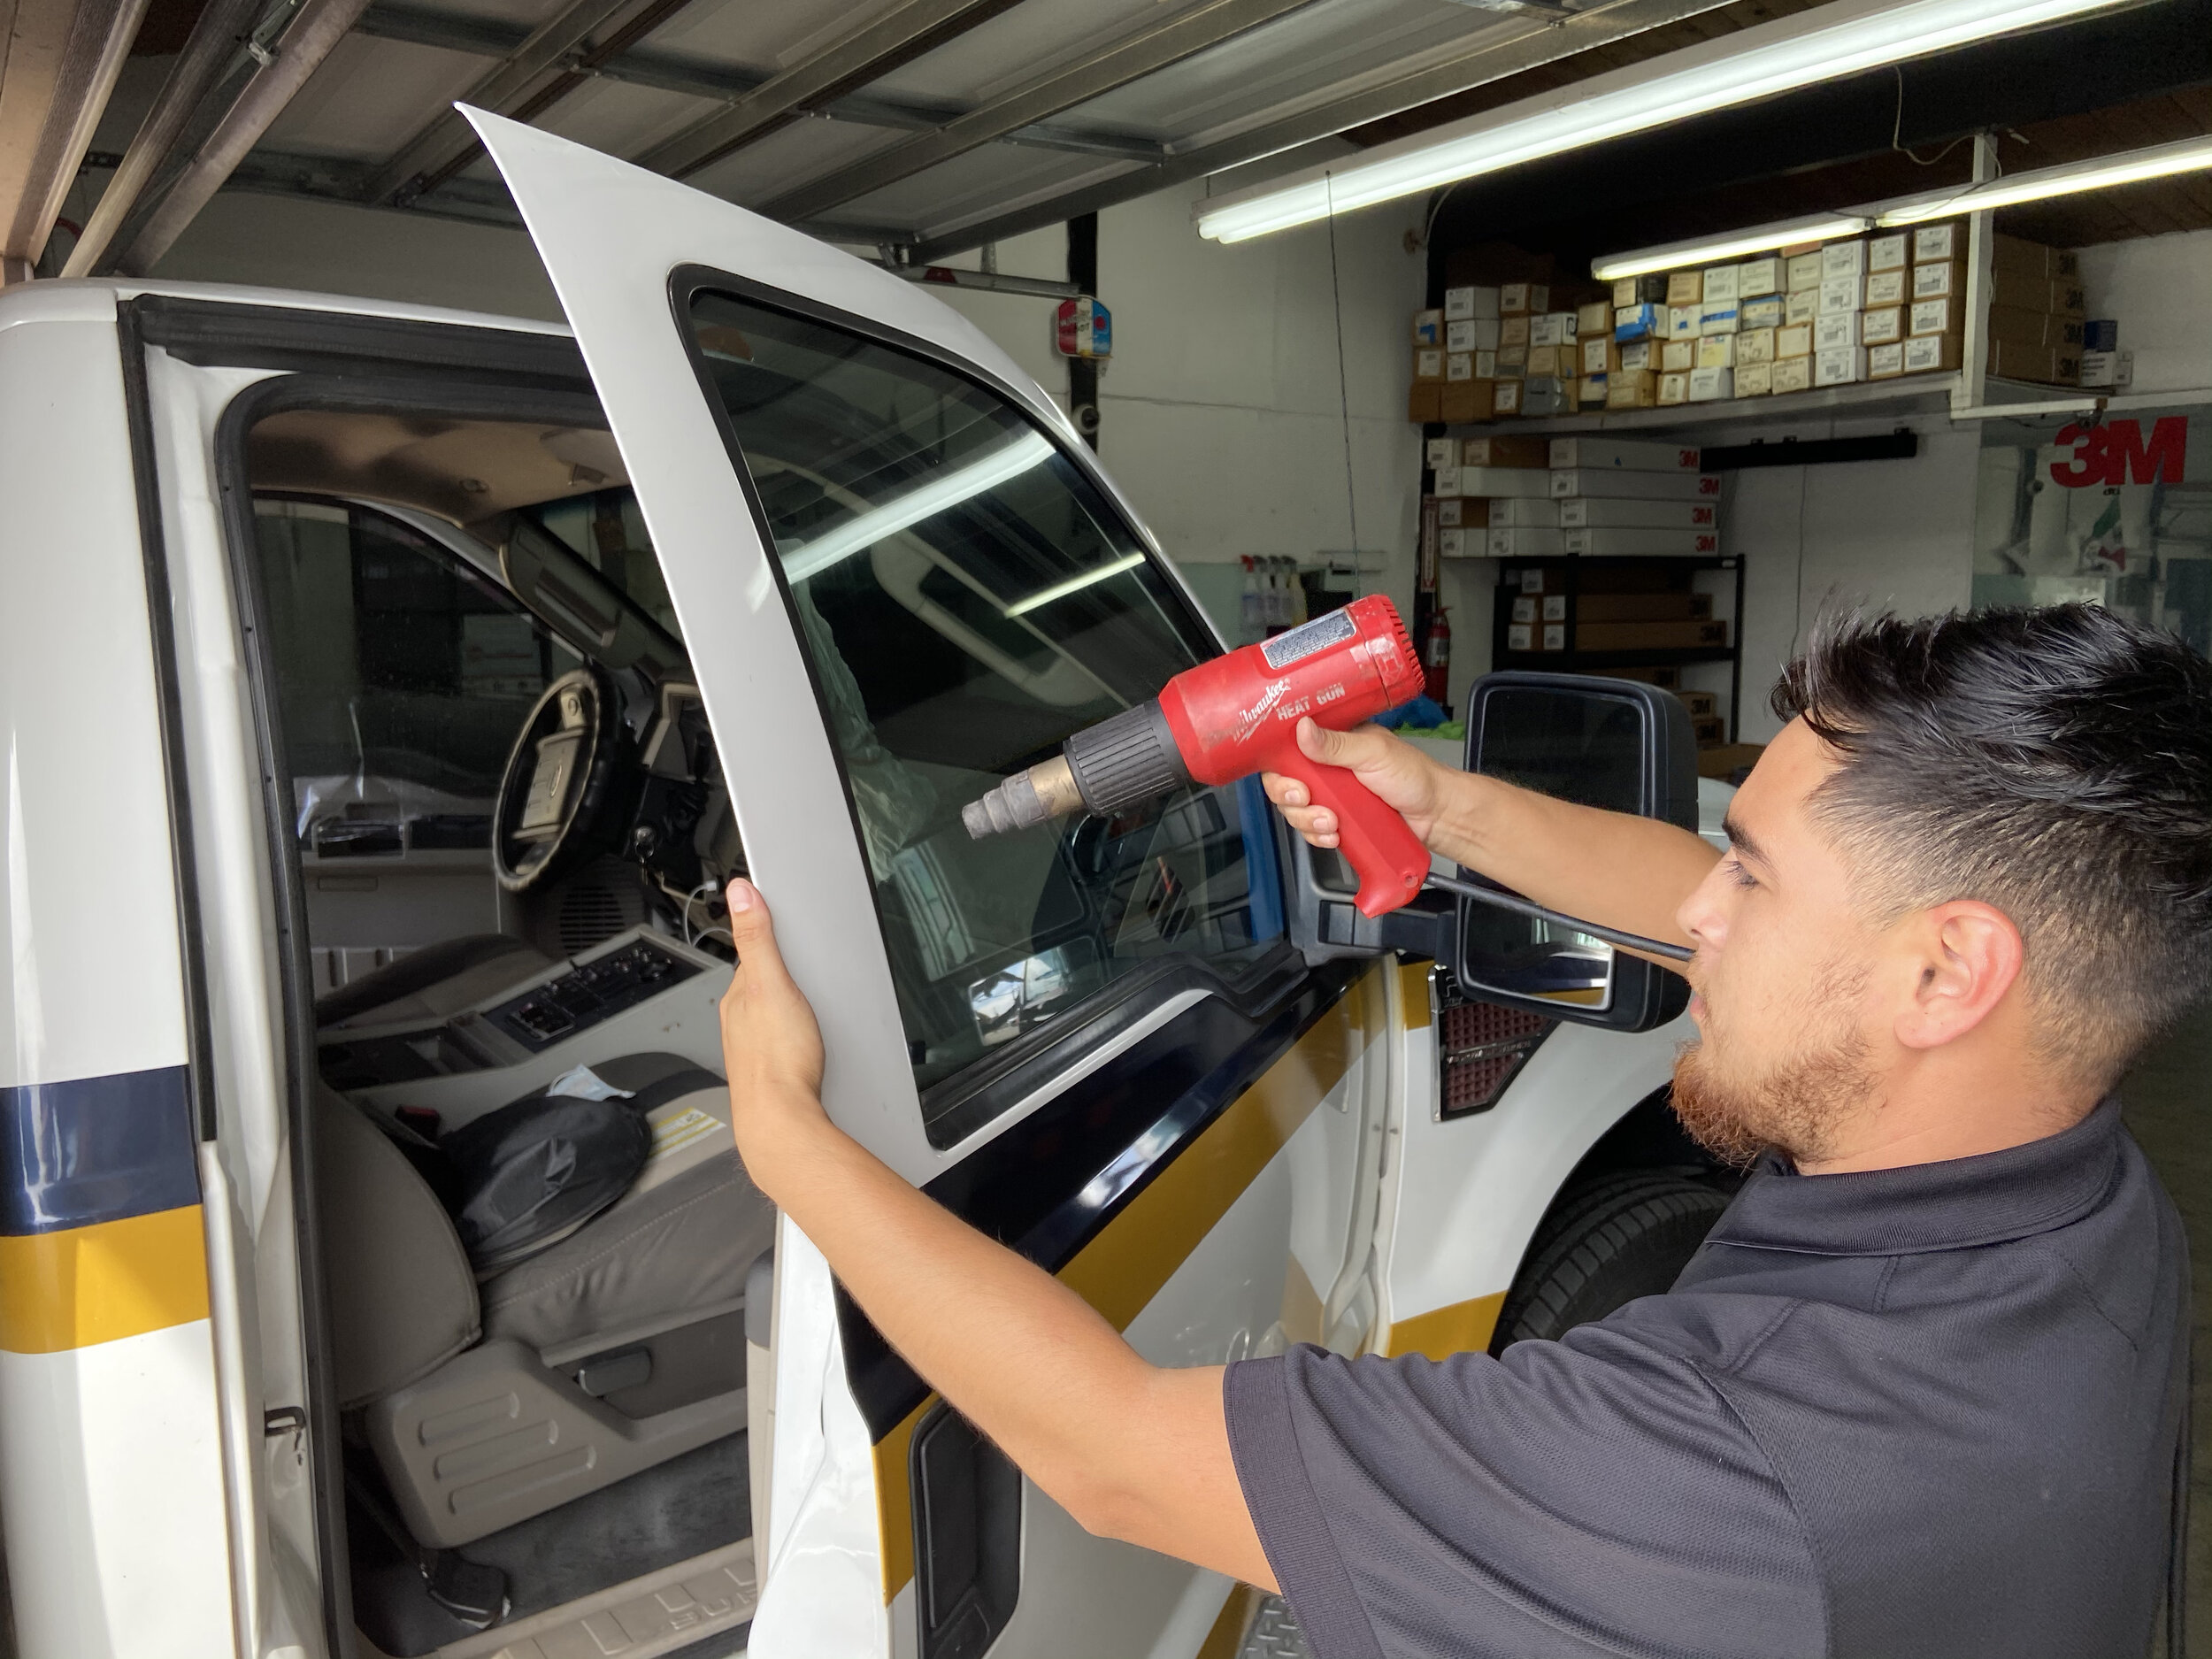
6/24/2020 - Window tint was applied (Limo tint in the front with a limo tint strip on the windshield) The window tint guys were great. Same application for any other vehicle. Not much to say here except these guys were great. In the future I’ll probably add the UV window tint. It makes a large difference with there is direct sunlight but the cost was a bit much at this point in the build.
6/26/2020 - More “Ambulance” interior removal. At first I tried to save as much wiring as possible and only kept the pieces that were 5-10’ long or more. After a while I gave up on that and started cutting. Remember to pull the fuses before starting to remove the wiring. Easy enough. Just disconnect the batteries from the rear. The insulation was glass fiber with Reflectix. It made for a very itchy removal. Id recommend a respirator and long sleeve shirt. I’d recommend an air compressor and blowing out all the dust at the end of each day. I dreaded takin out the mounts for the gurney. I left them alone and continuously sprayed them with WD40 each day to ensure there was a lot of penetration before I attempted to unbolt them from the floor. They are bolted into 1/2” AL plates that were welded to the subfloor. This actually made me feel like the patients that I’ve transported in other units before were extremely secure.
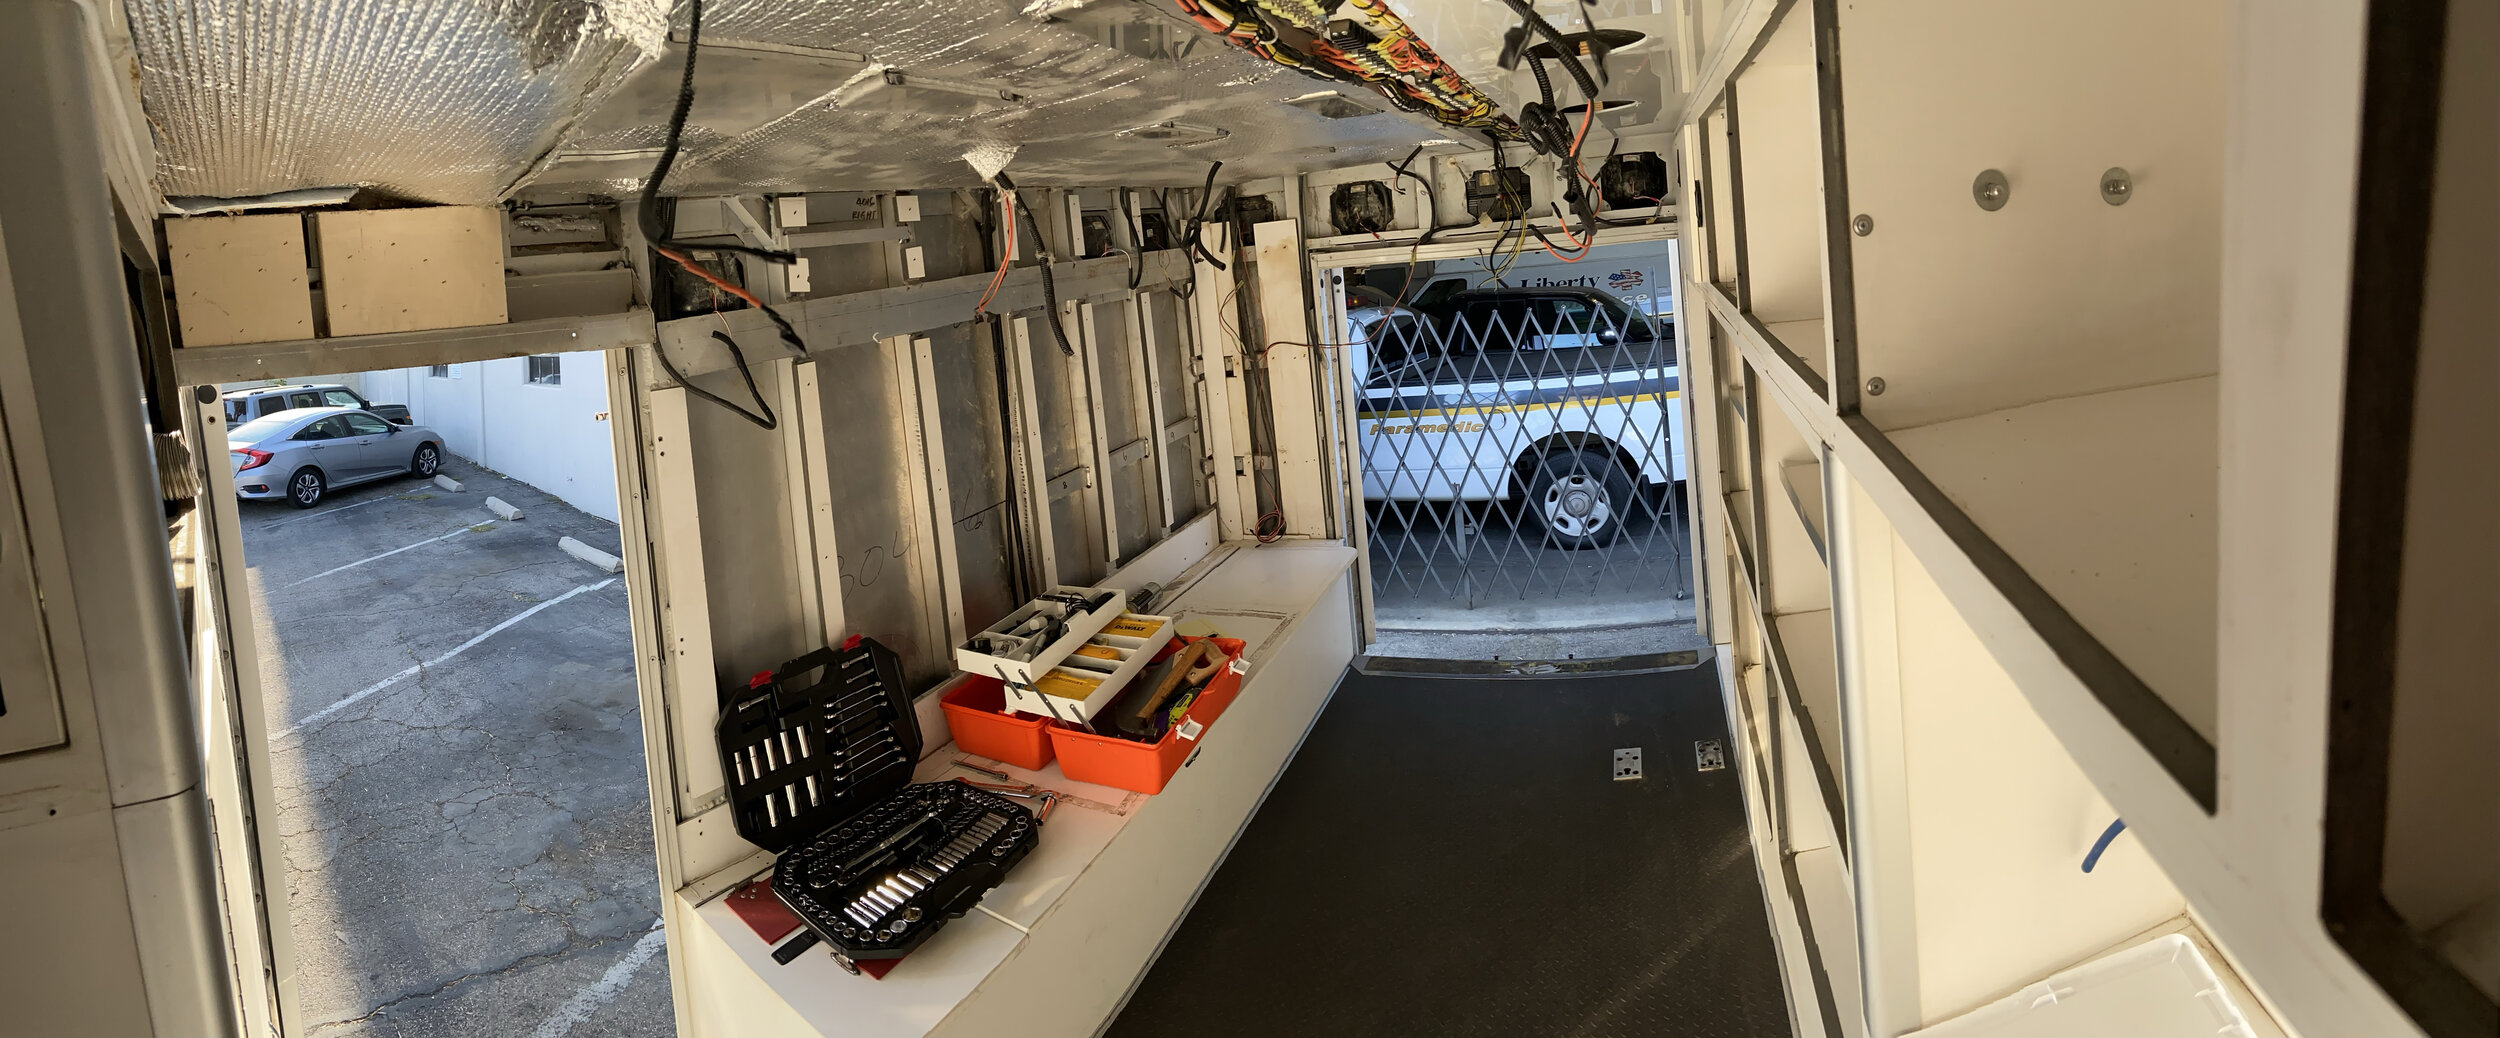


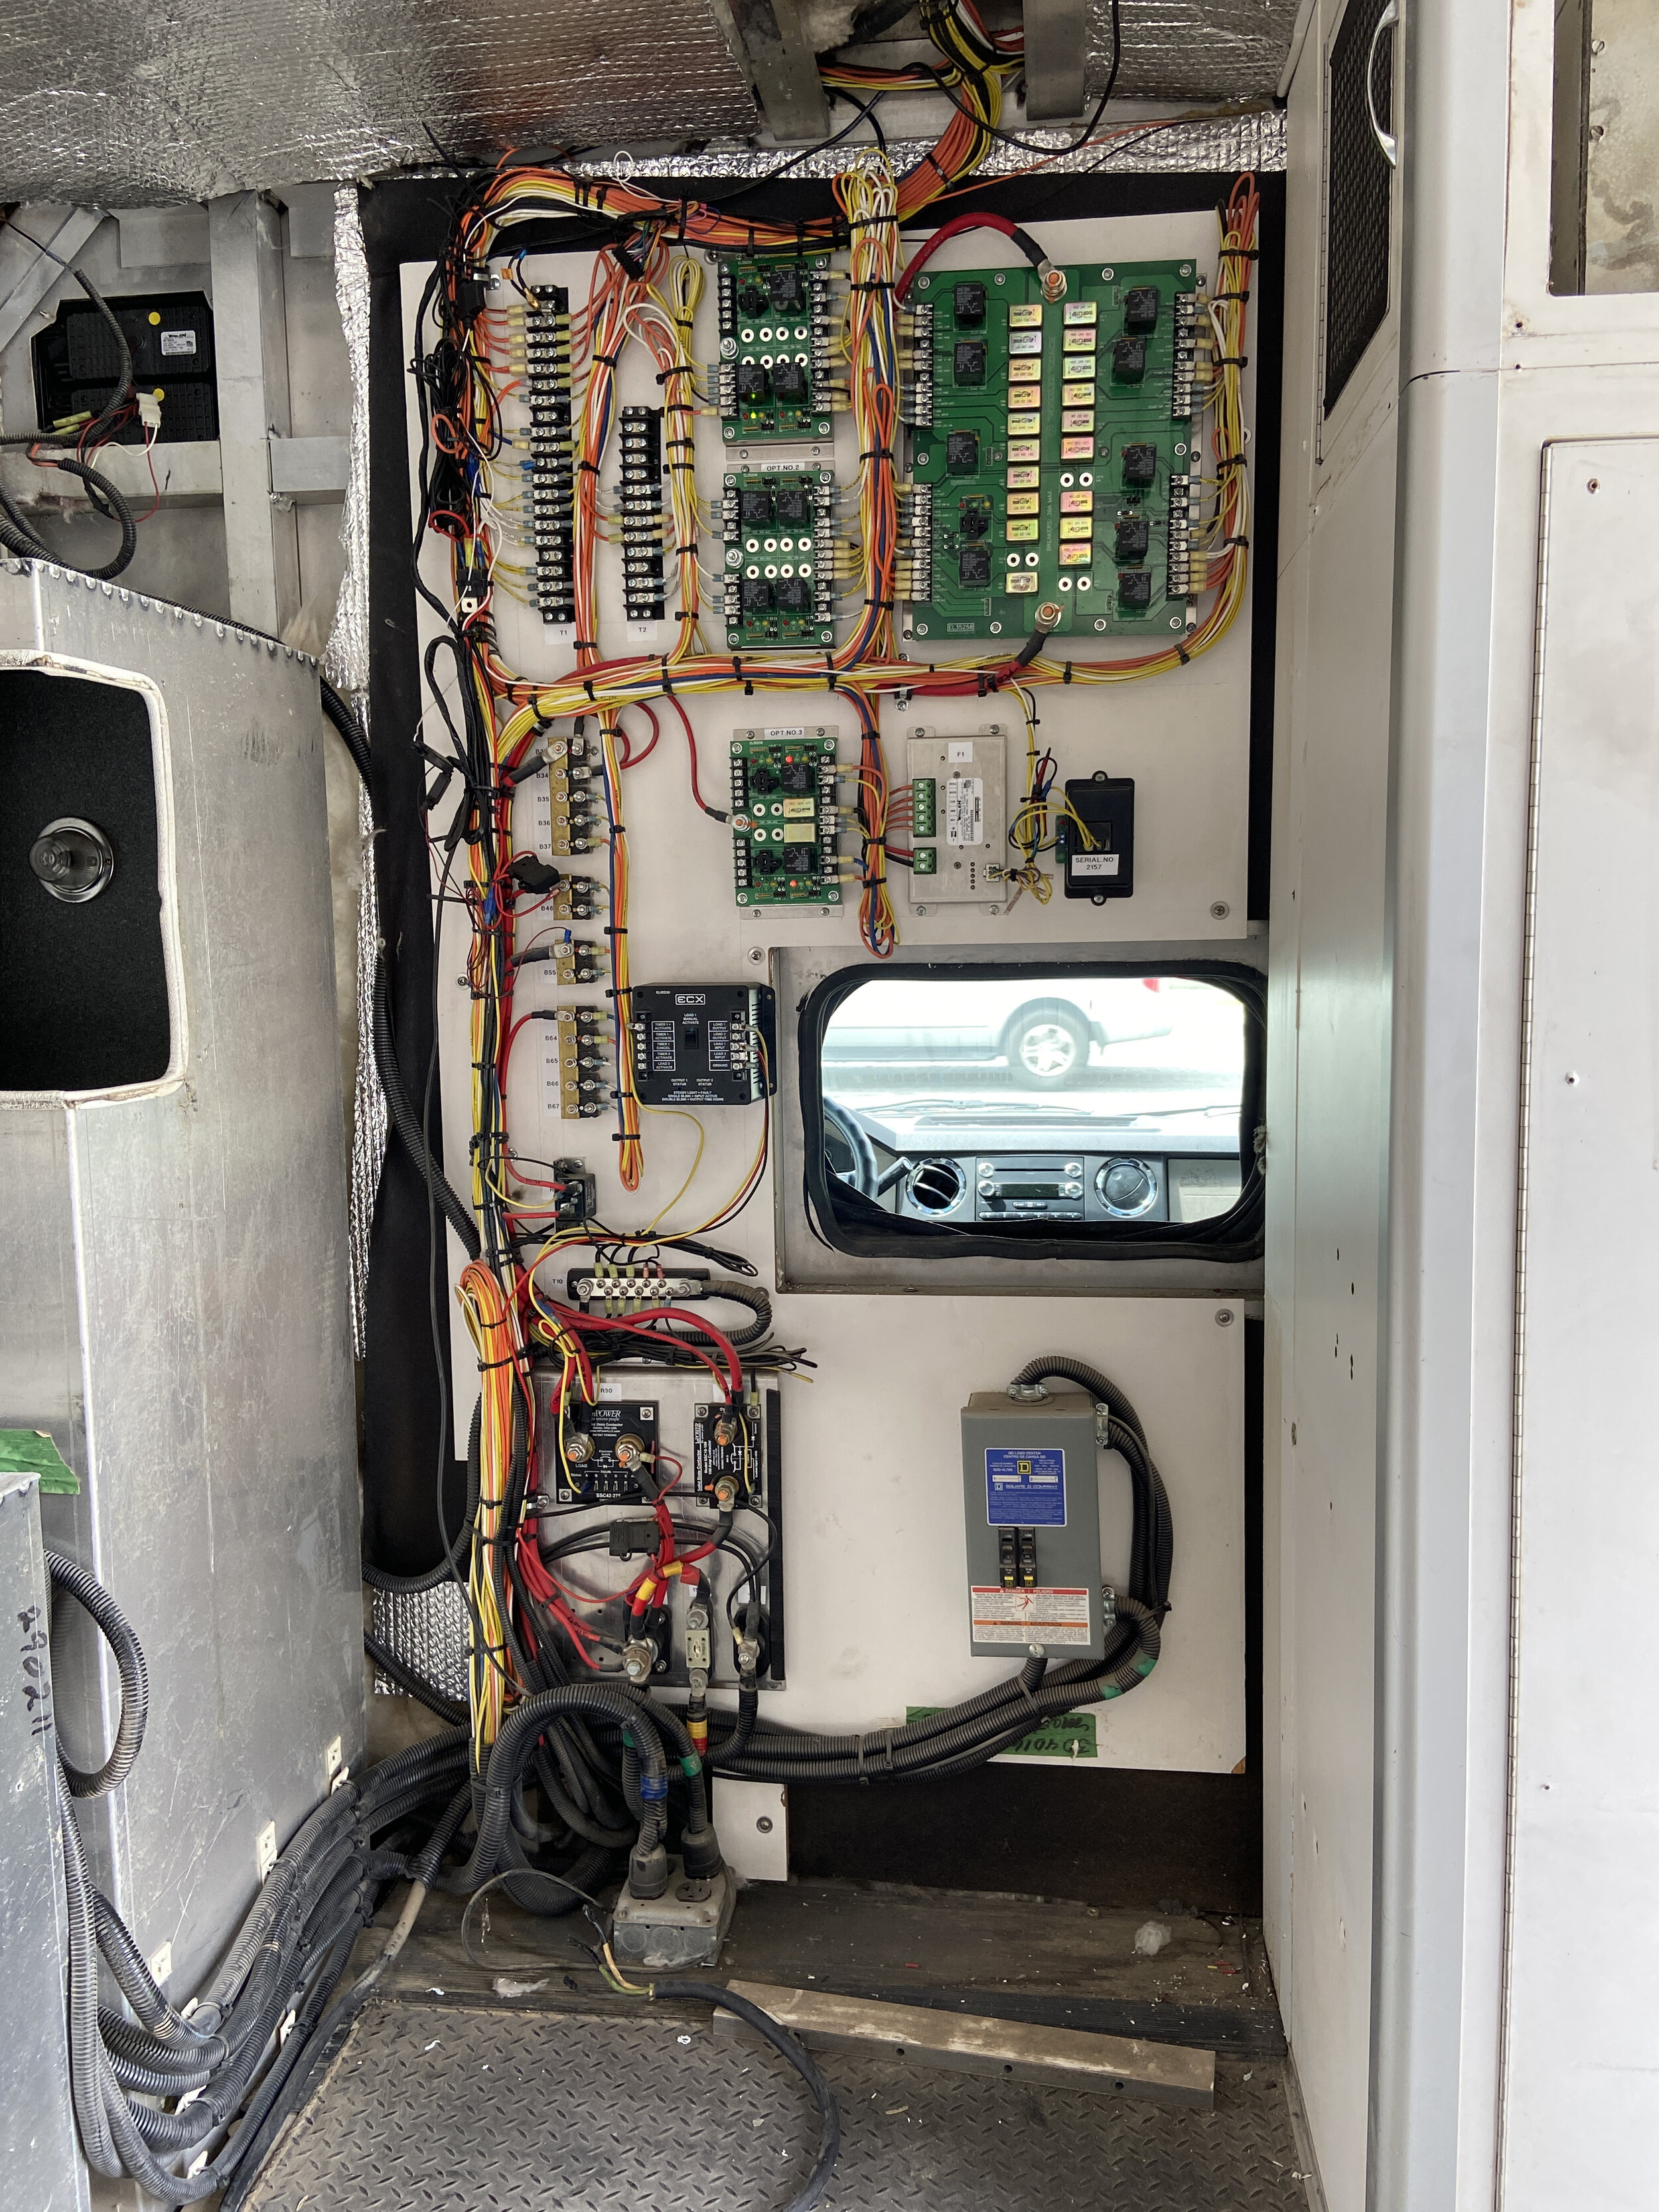
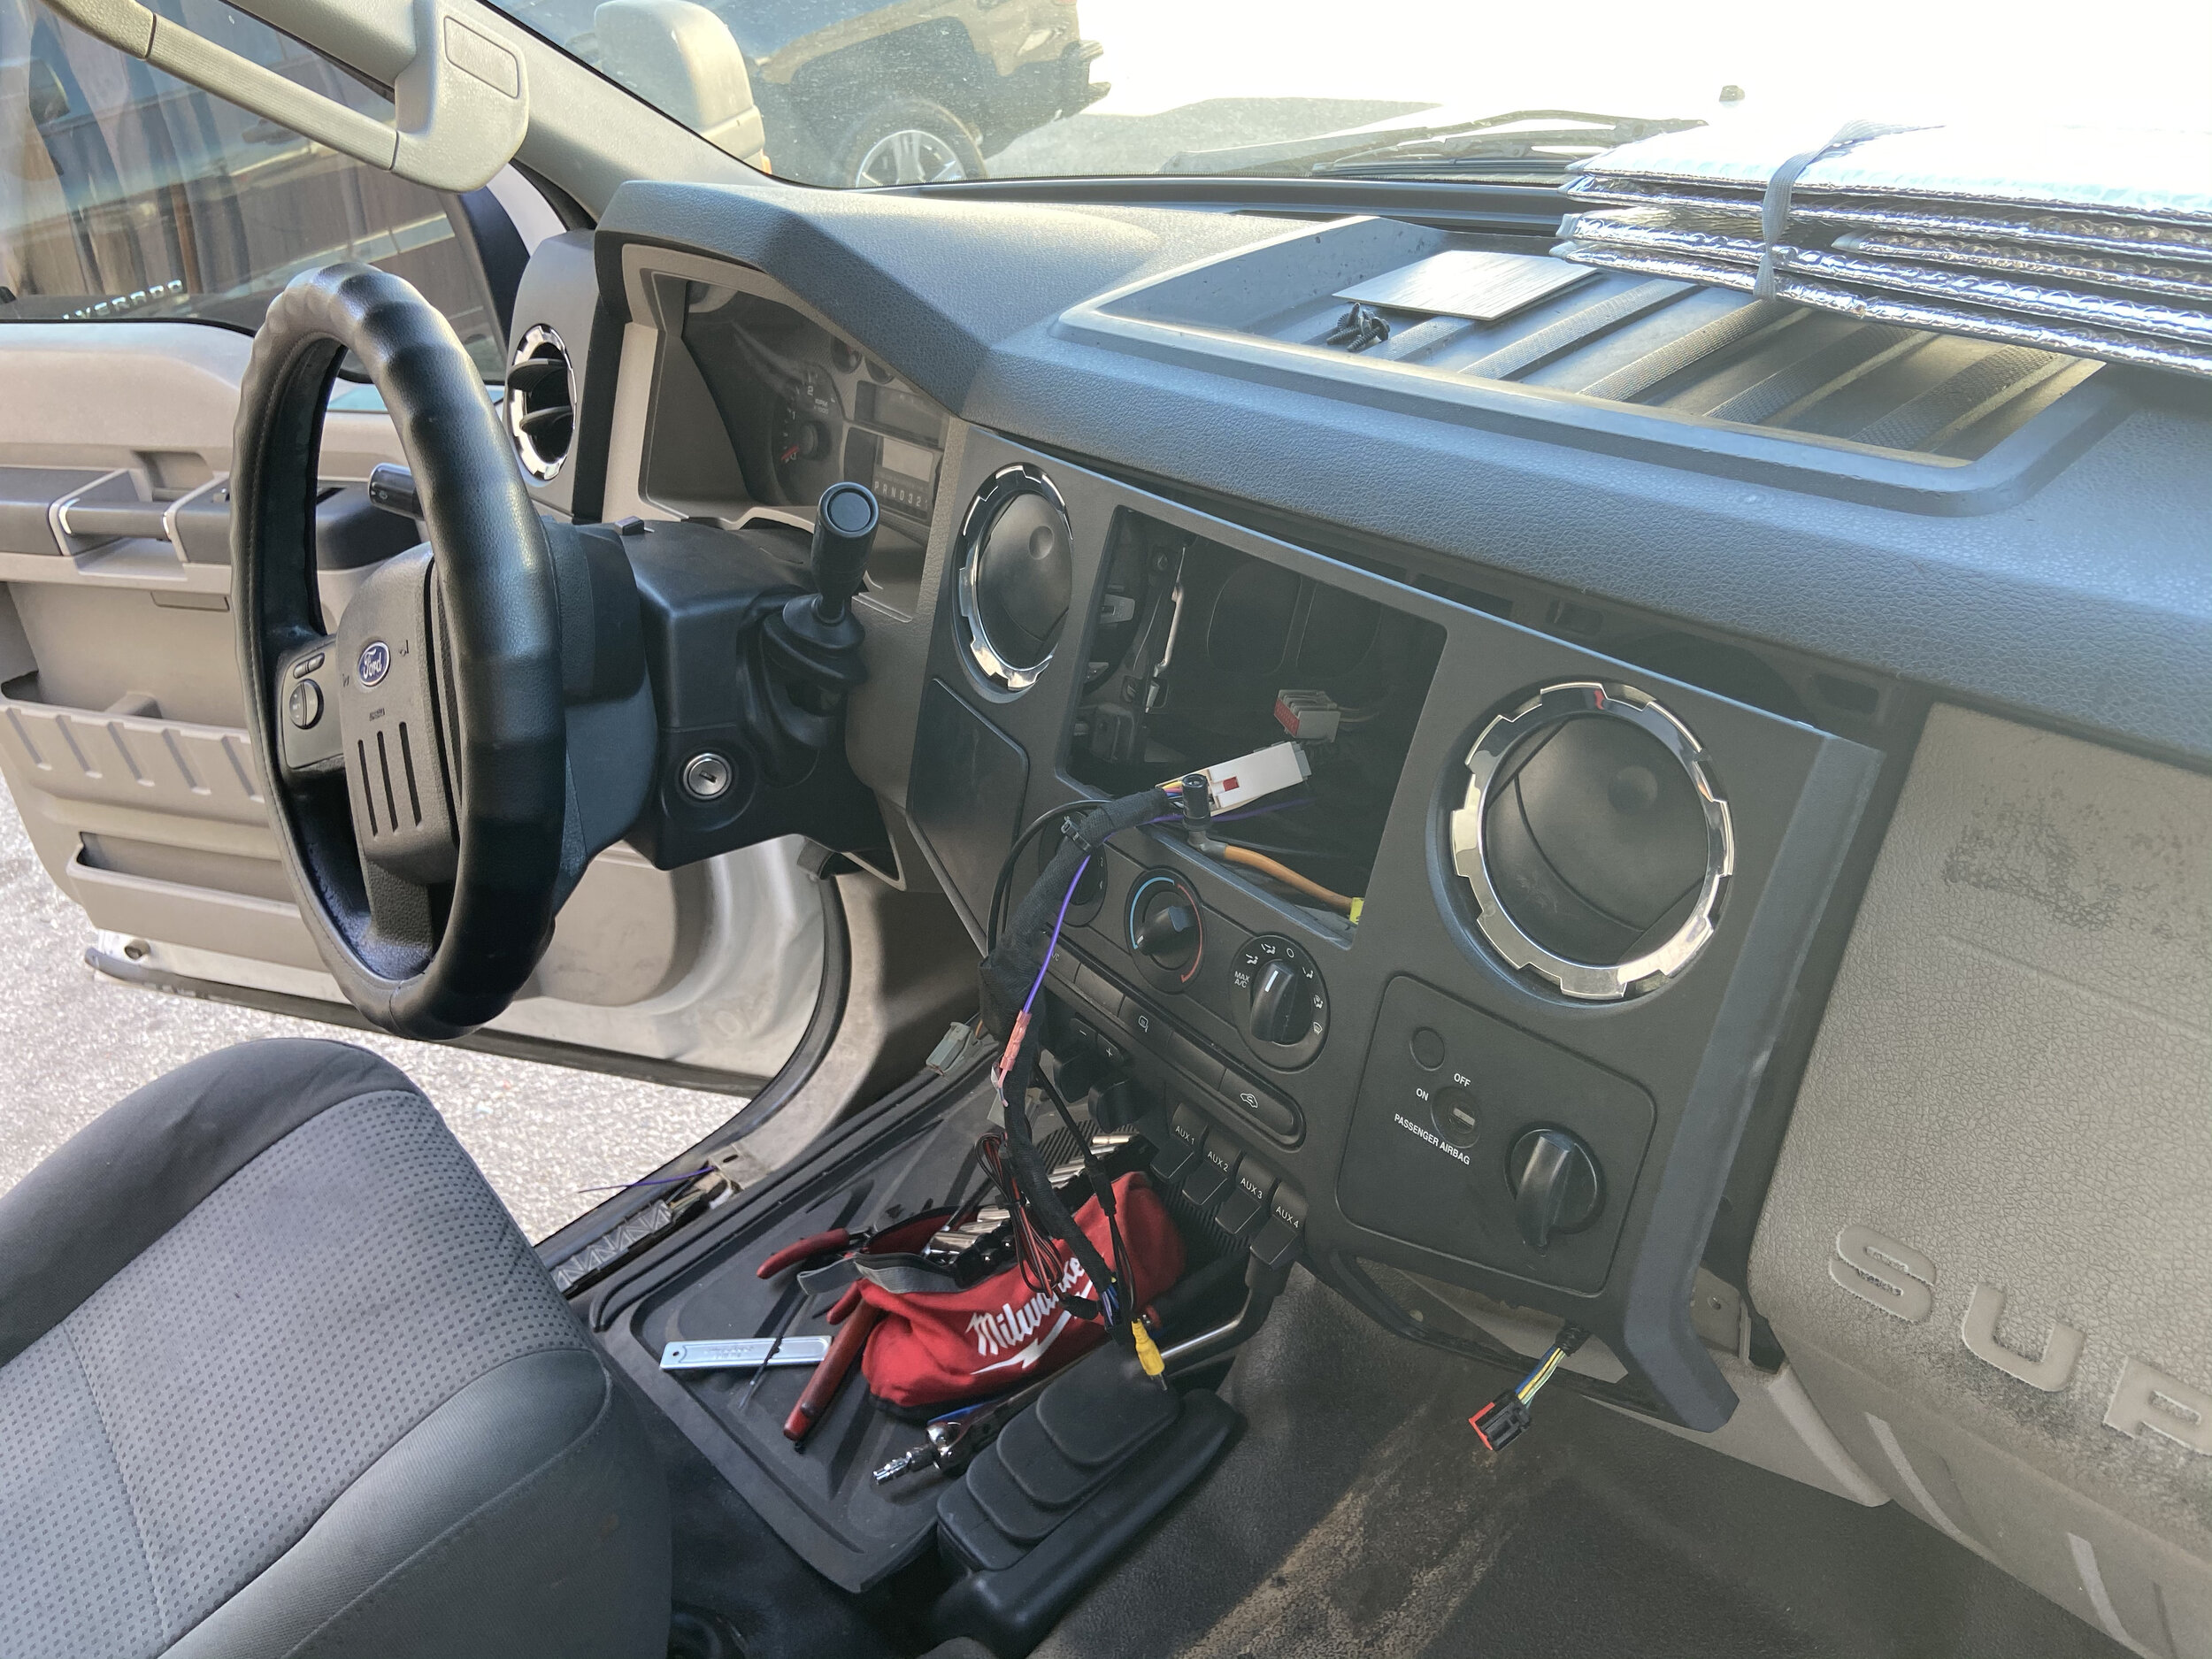
6/28/2020 - Starting to remove the wiring. There is a RIDICULOUS amount of wiring in here. I saved as much as I possibly could. I’d estimate the weight removed just in wiring to be a few hundred pounds. I thought that saving all the wiring would make it cheaper in the long run (planed on reusing it). In reality I didn’t really reuse any of it! Gave it to my brother. I did keep every stainless steel screw, and there were a lot!! I reused almost every screw. The main circuit board seen below was impressive. I asked a friend that constructed solar systems if I should leave it. His response was, “for what? You’ll never use that!” So out it went. At this point I thought about making the pass trough larger but thought nah. I don’t need a large pass through. In the long run I’m glad I left the pass through small. Makes it much easier to heat/cool the cab and reduces the amount of road noise. My brother went all in and cut his out. The factory wiring went through holes in the floor so I made notes on the locations of every exterior hole. I ended up sealing every square inch of it. The wiring alone took several days of work. Wheeled Coach has got to be sponsored by a cable tie company. There were zip ties every 4-6”.

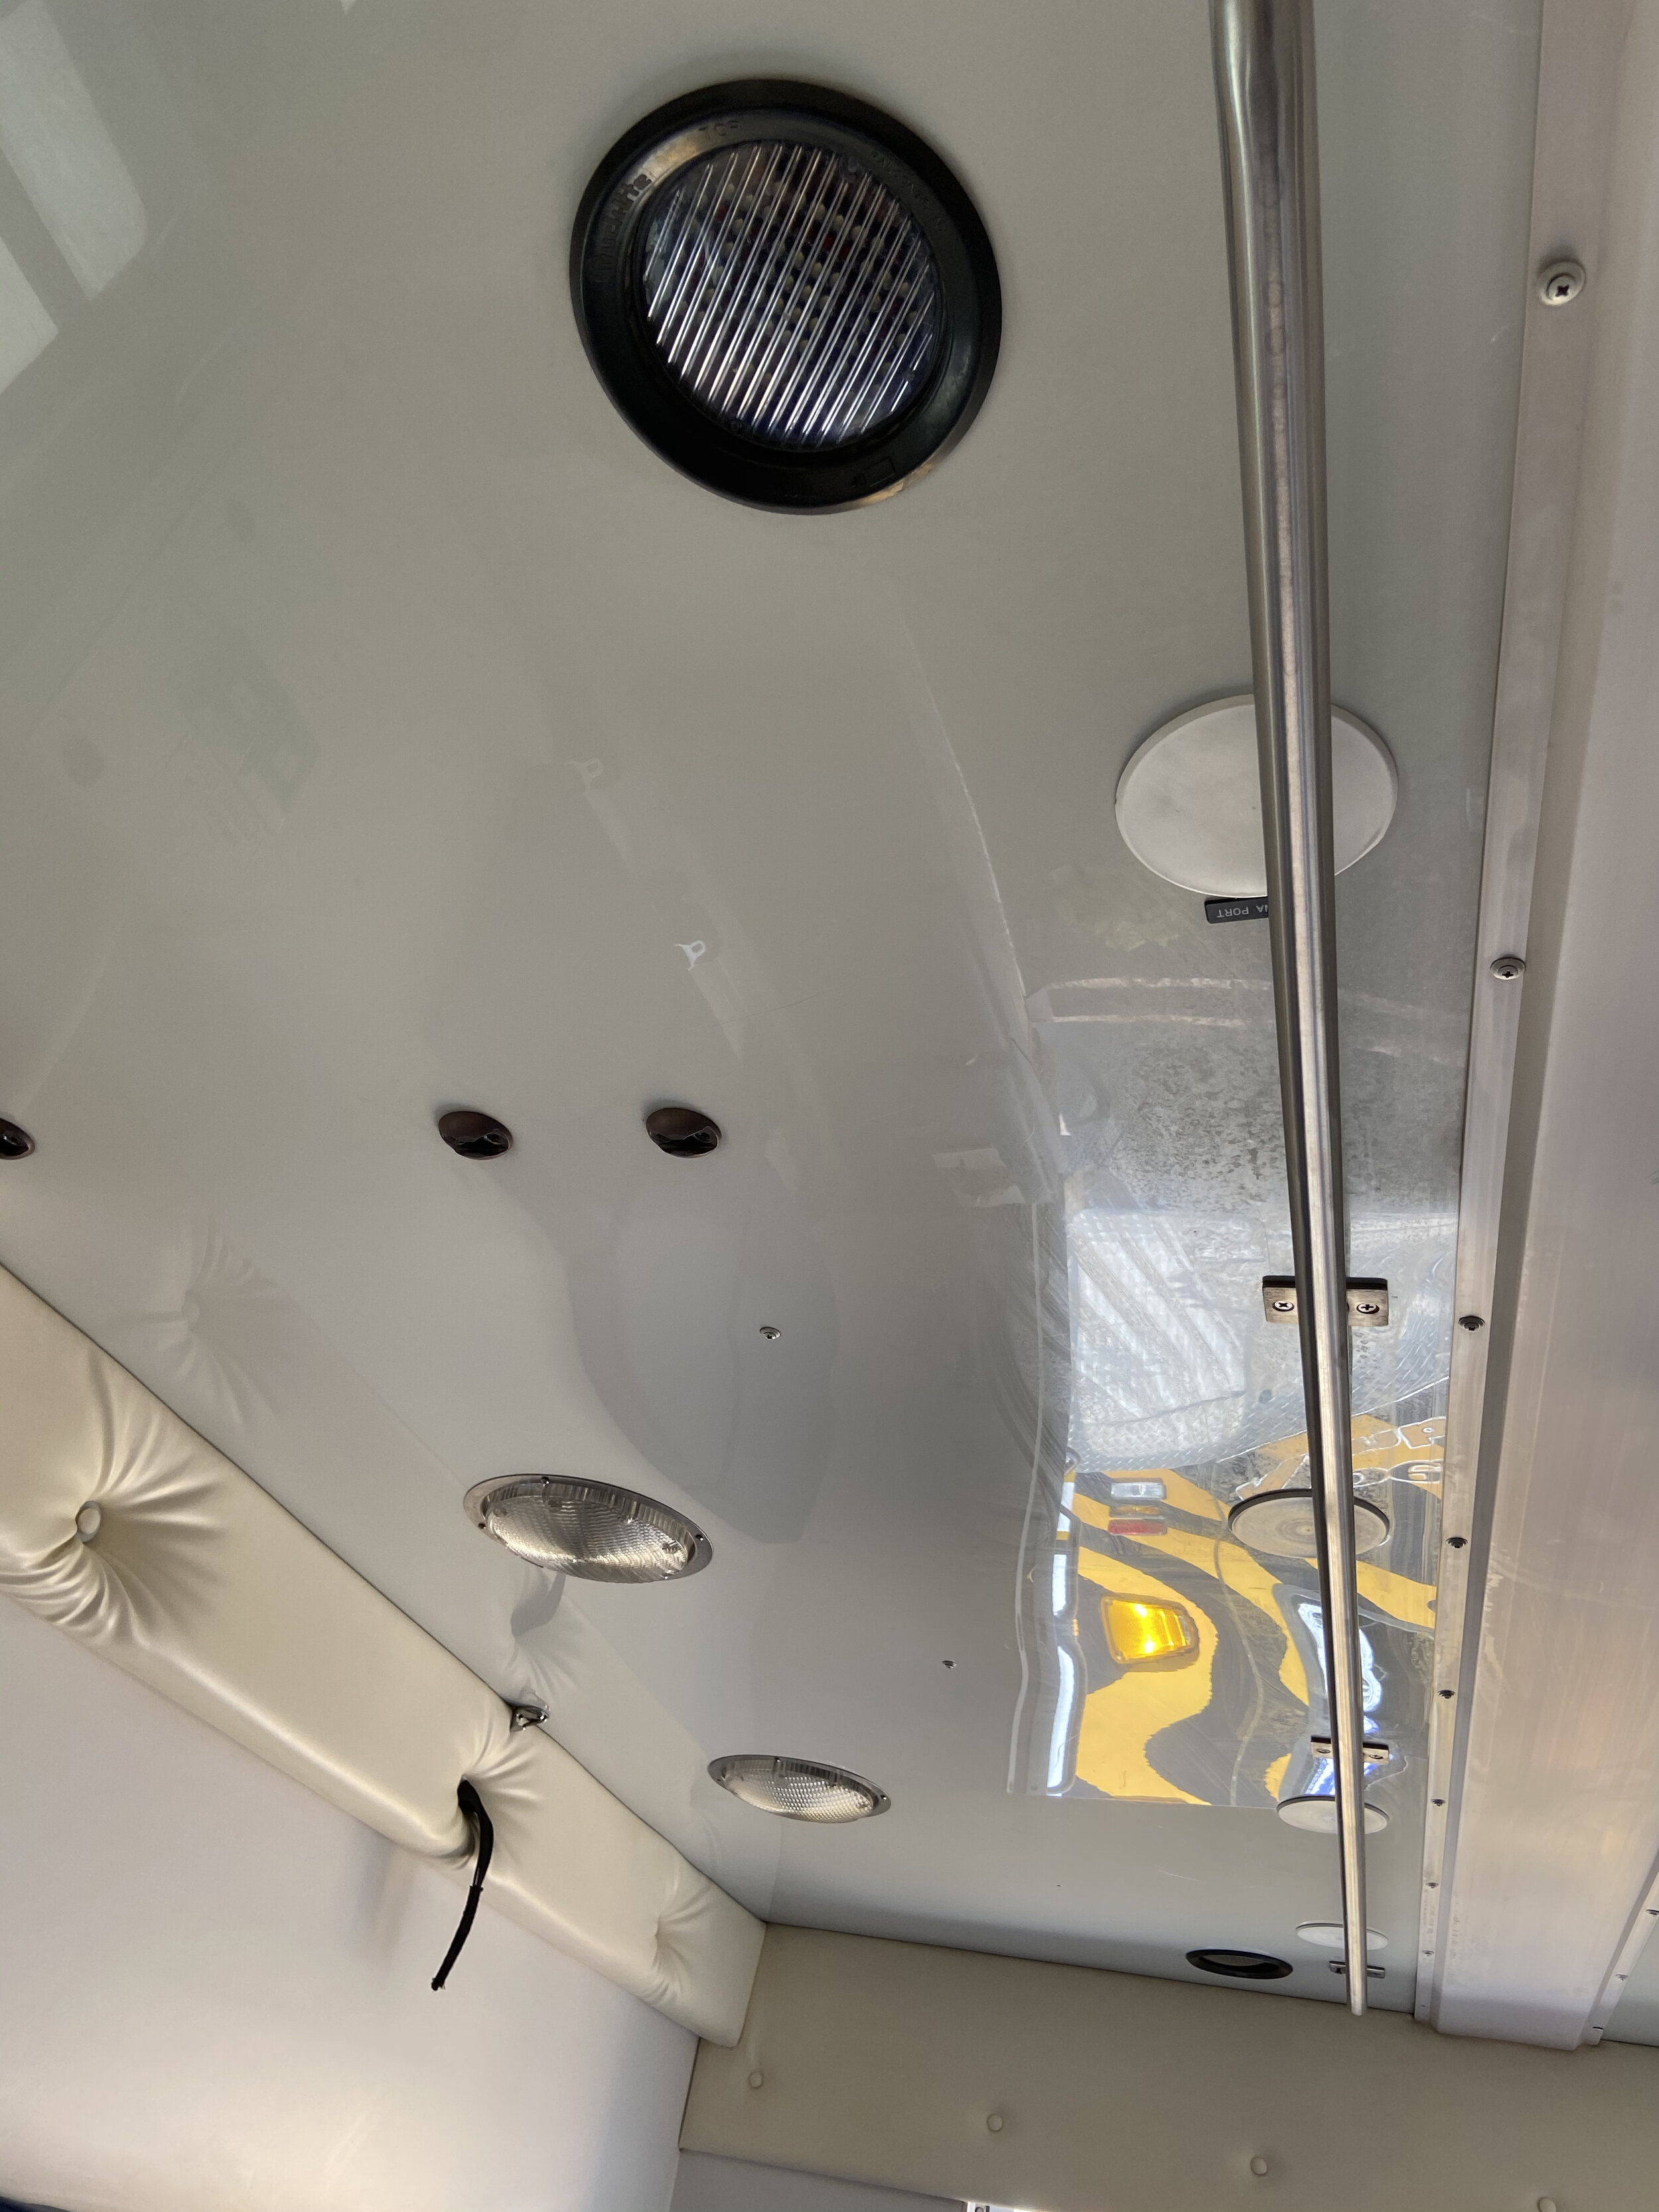
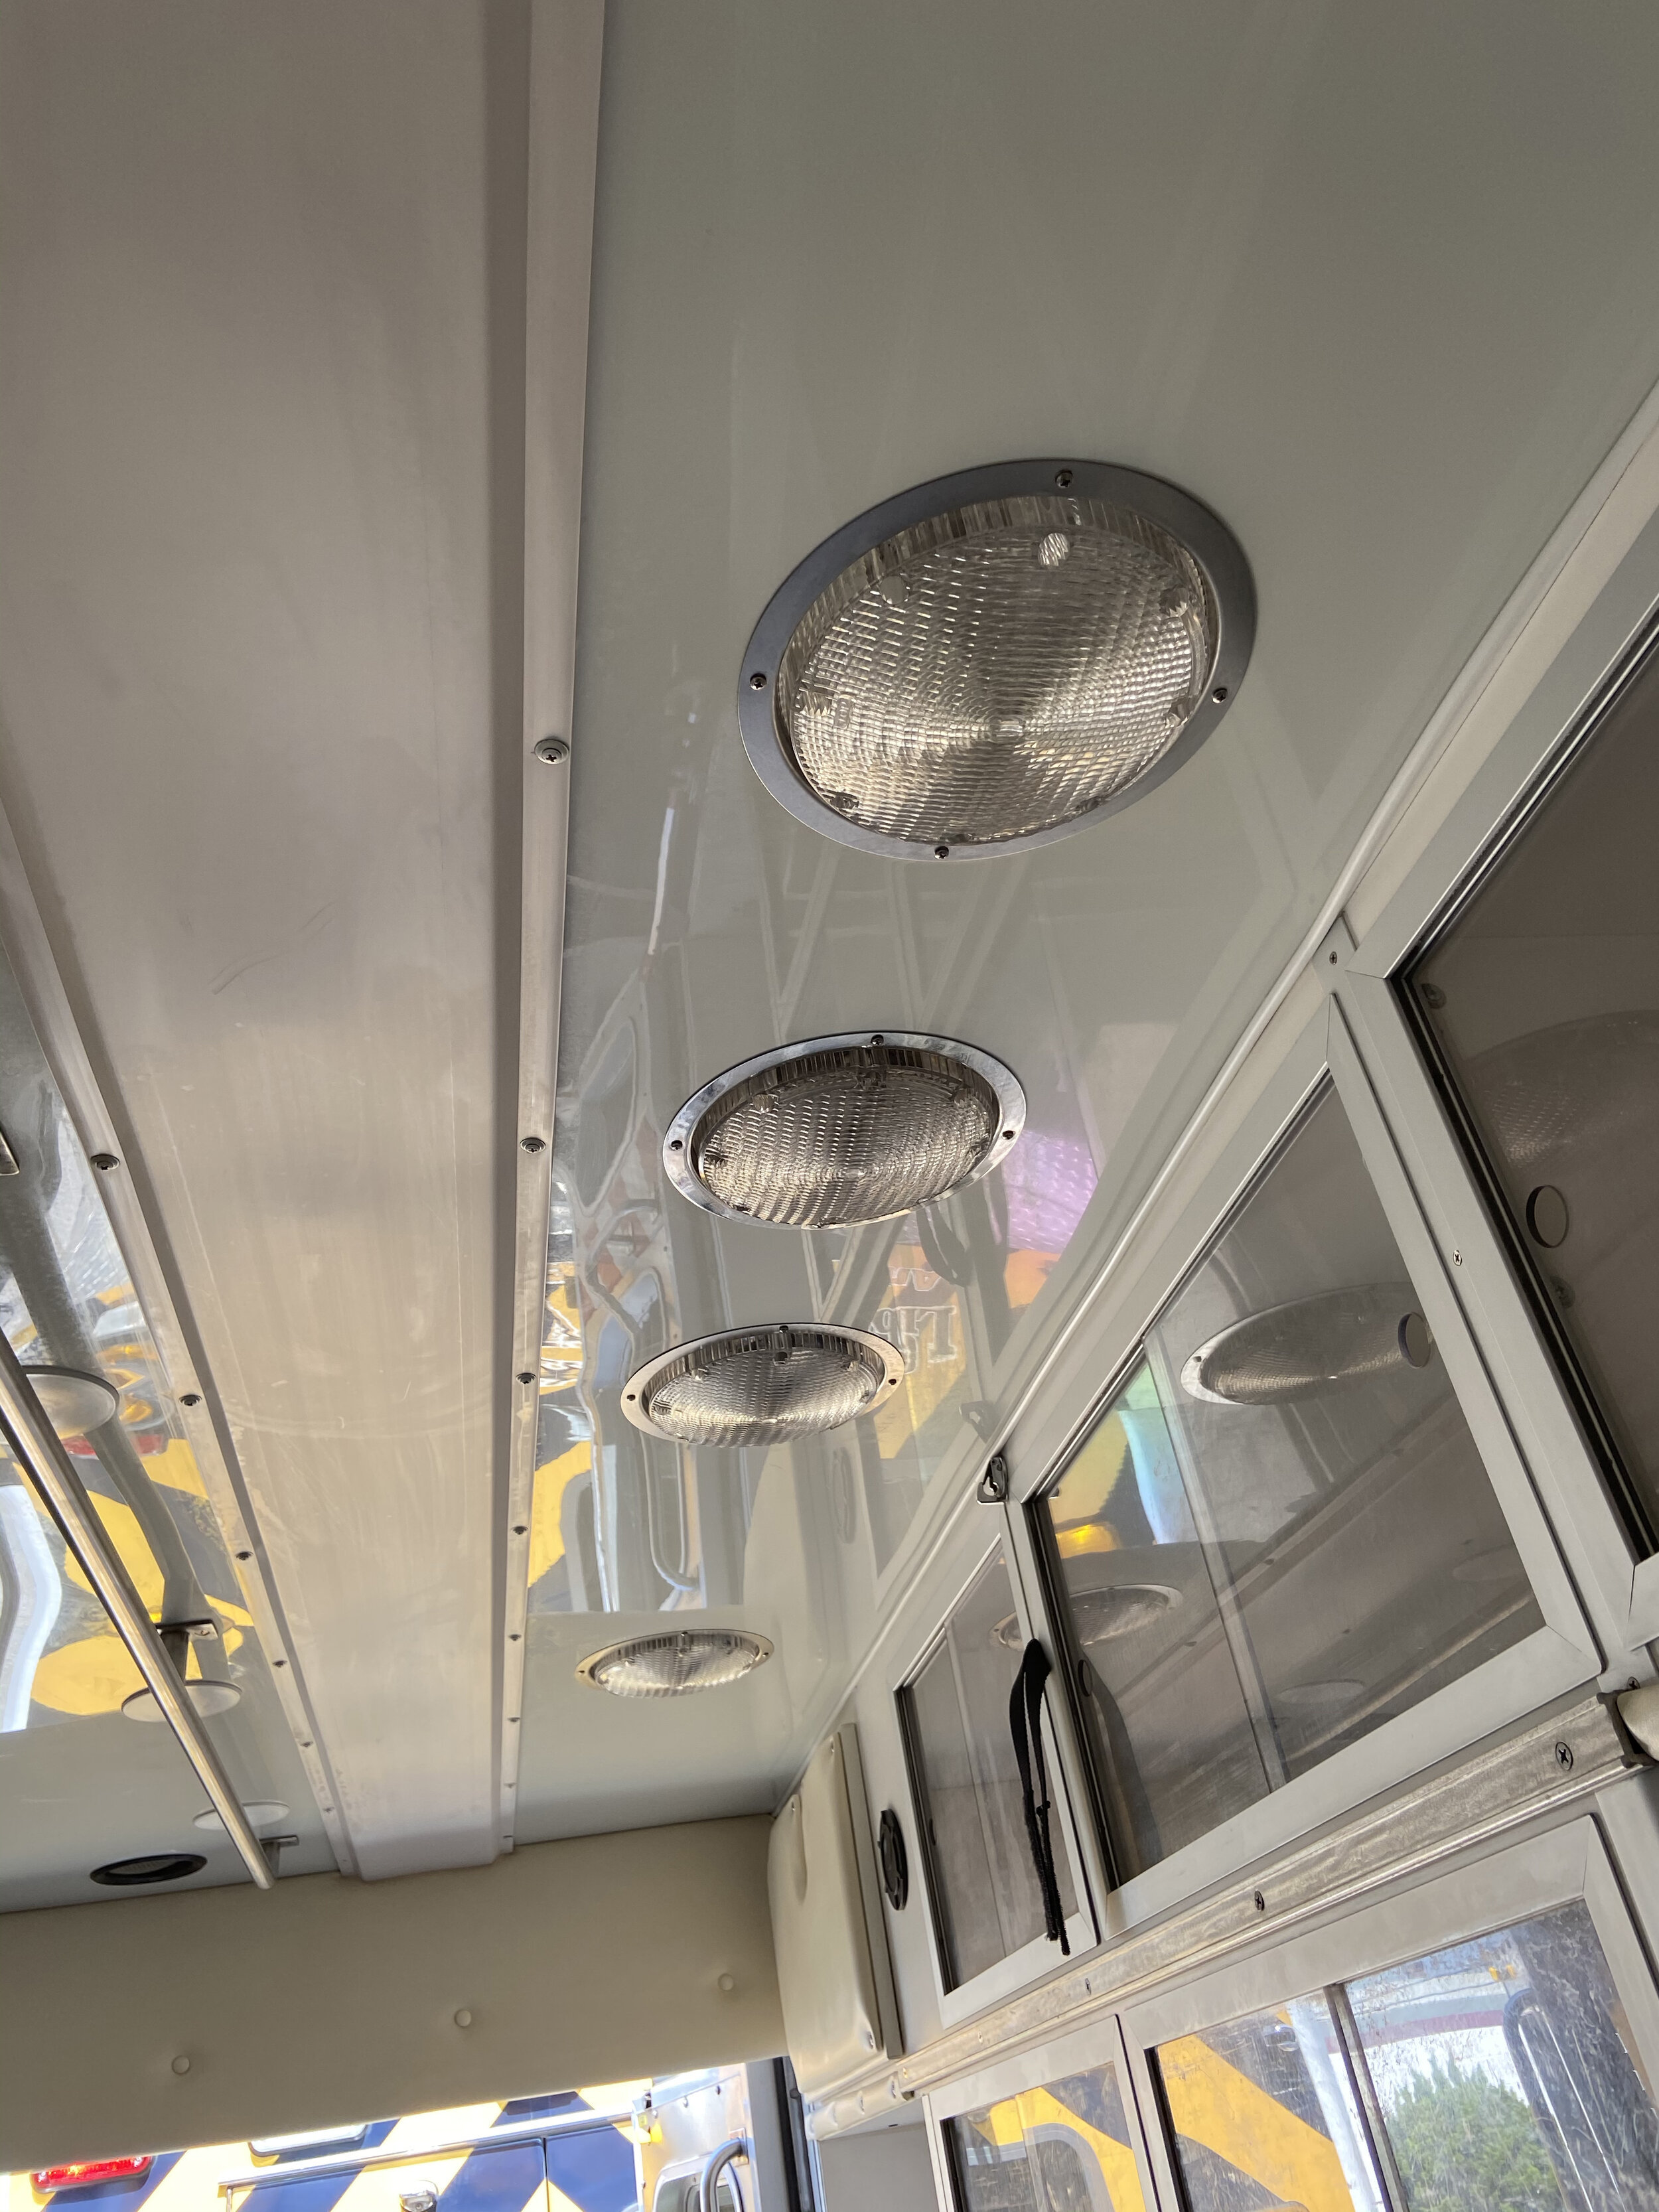
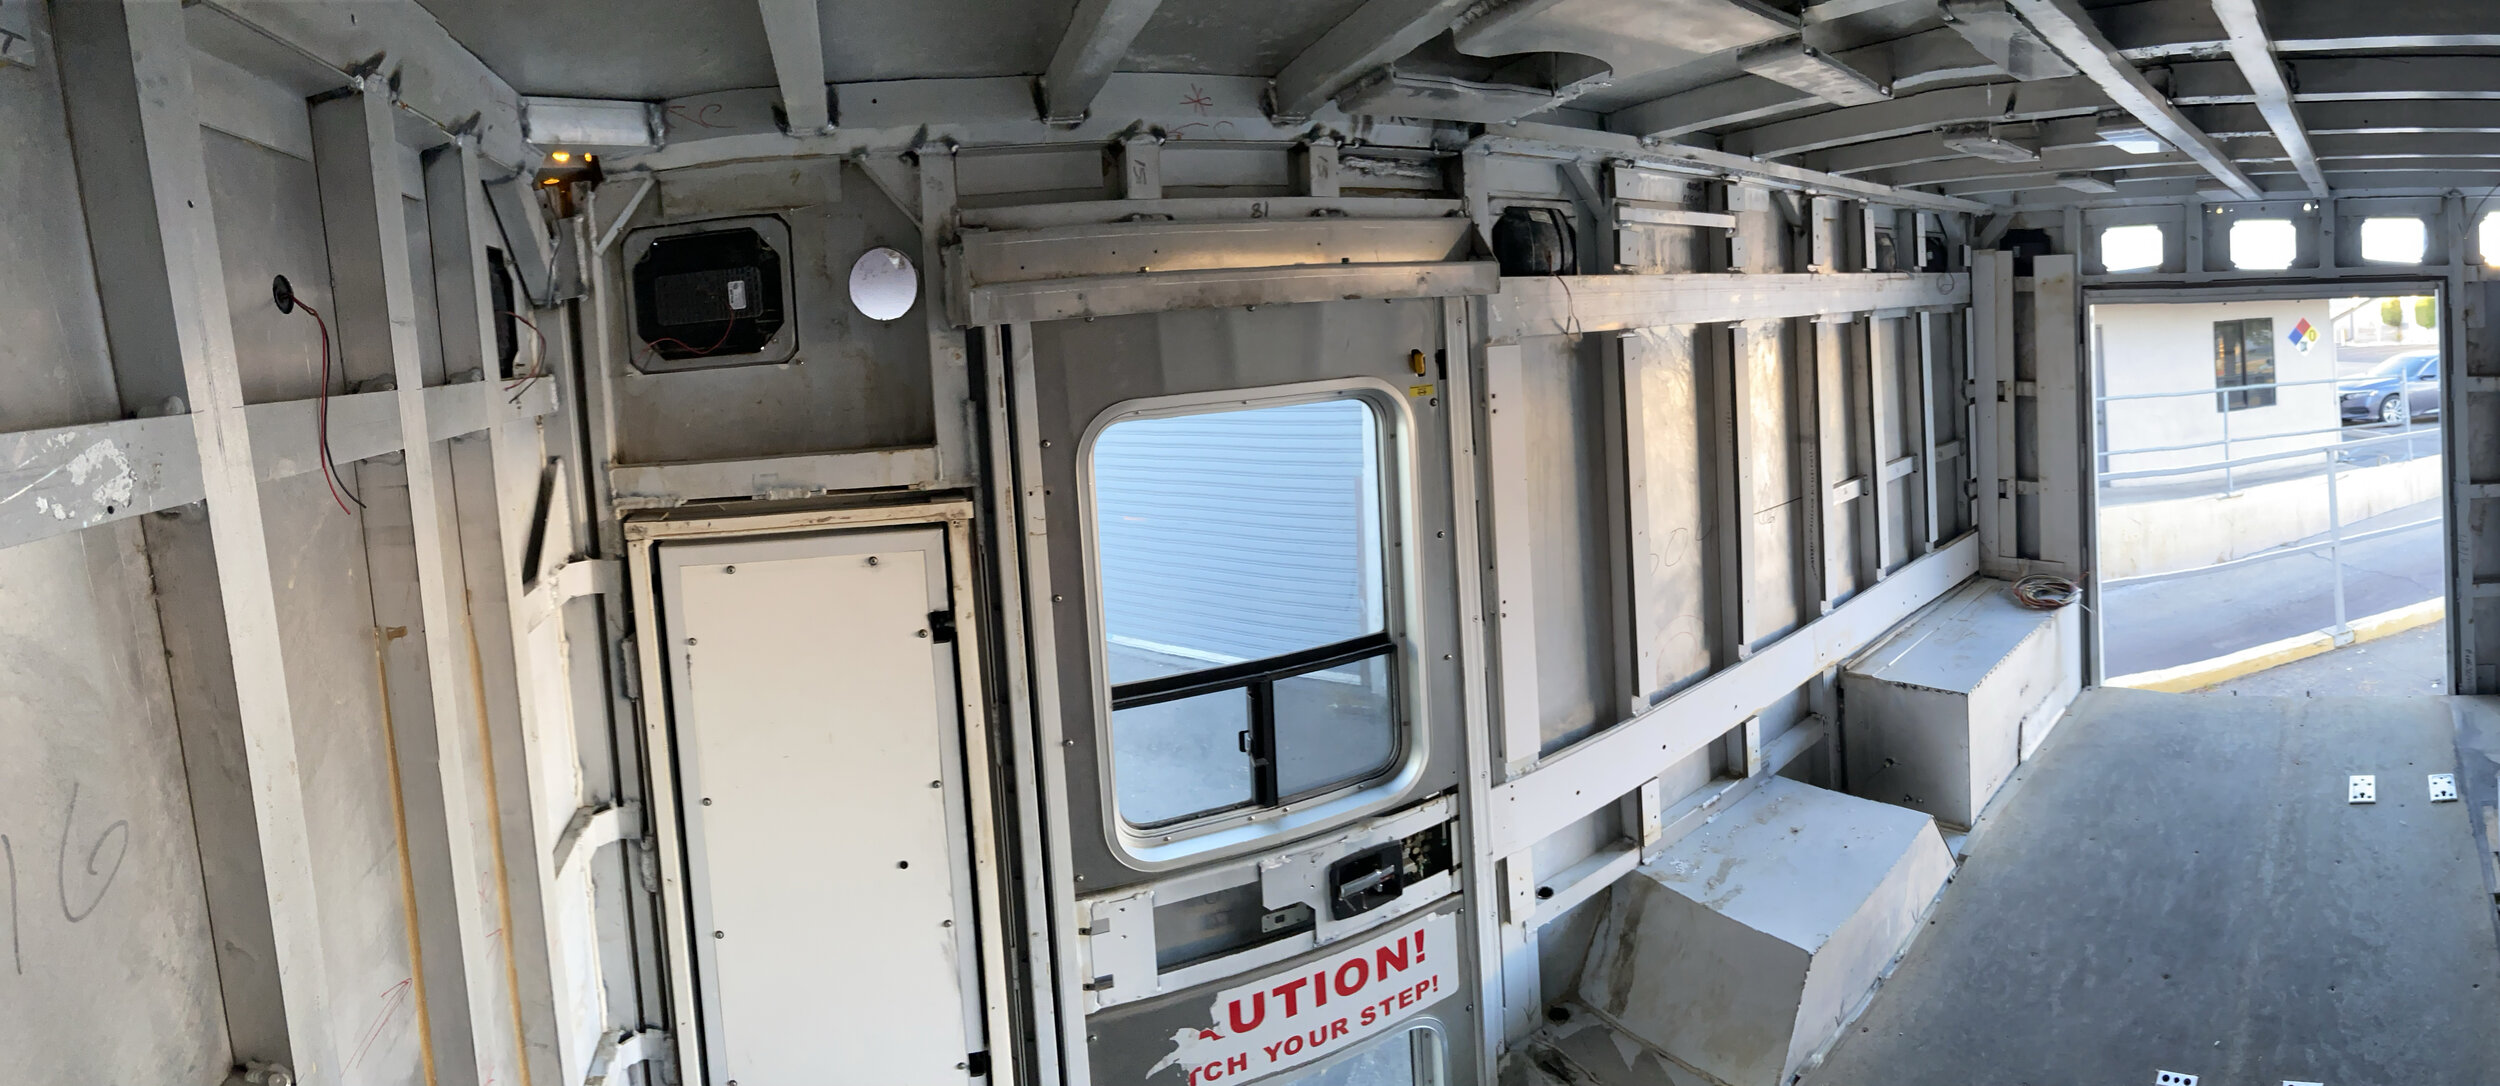
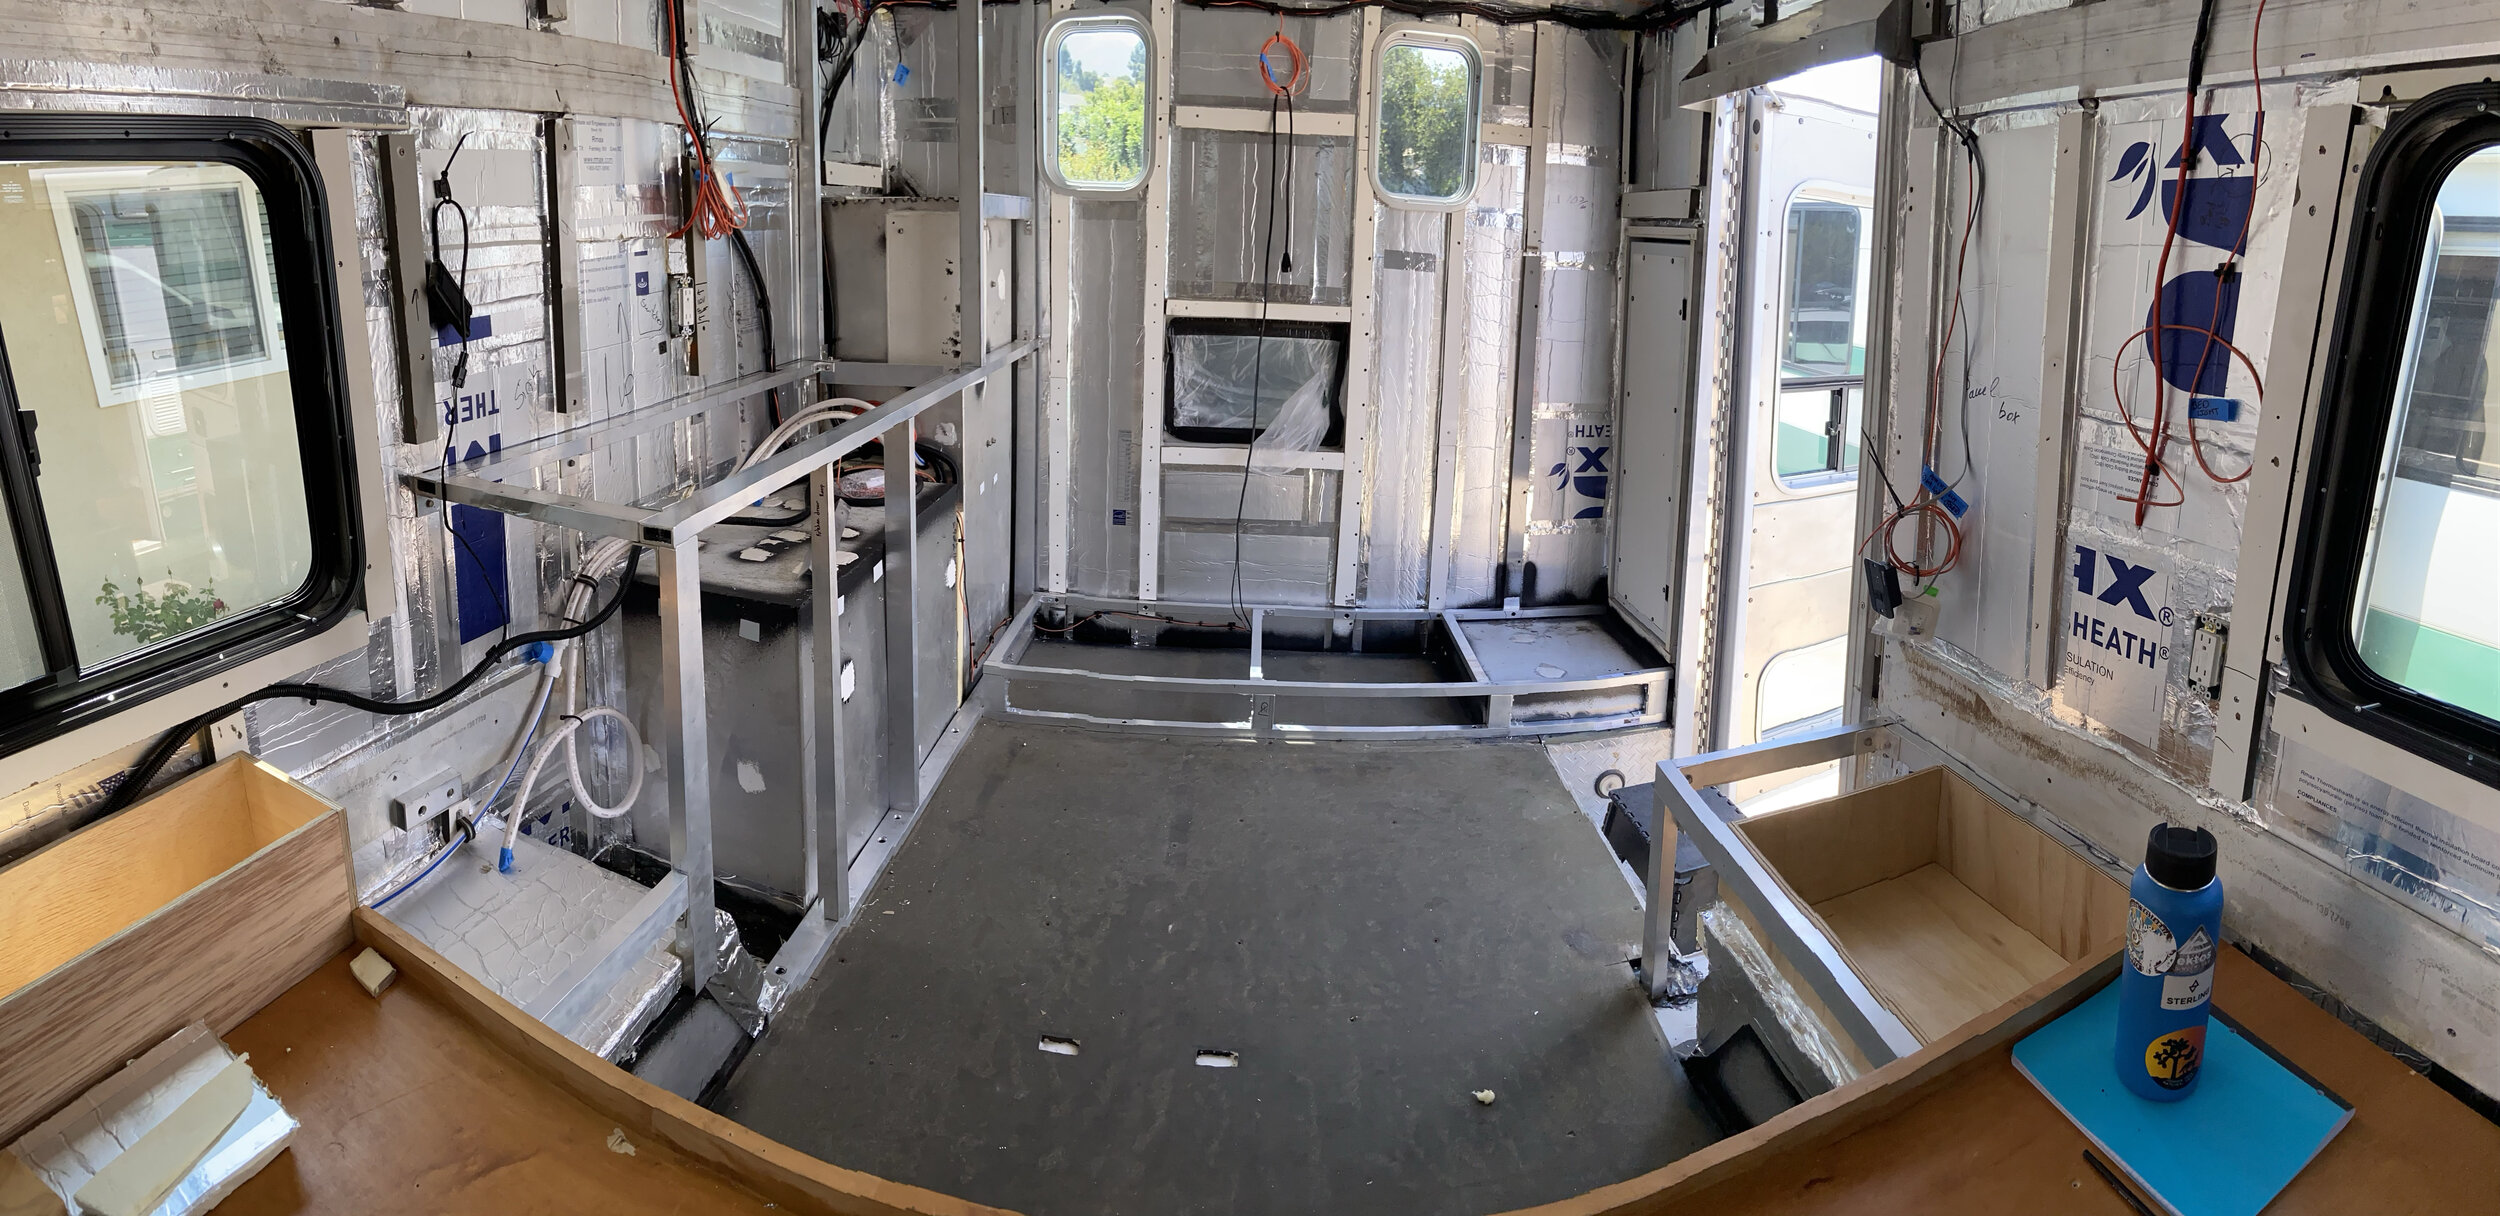
7/11/2020 - Finishing up with the “gutting” process. Removing the chevrons from the back proved to be a huge pain in the ass! Once all the walls and wiring were removed I finally got to see what I was working with. The construction of the box was 6061 high grade AL. This was going to make the building process much easier. Another really nice feature was everything was square. Everything was also overbuilt. I’d highly recommend an air compressor and hose. There was a TON of dust and debris behind the walls. As I was blowing it all out folks walking by said, “It looked like the ambulance was on fire” due to all the dust coming out. Id HIGHLY recommend a HEPA mask or N95 for blowing out the dust. God only knows was in that stuff! Here I was also able to start planning the exterior lighting. Whelen lights are ridiculously expensive so I knew they were gonna go. Replacing a lens on them in the future was going to suck!

Starting to build
A huge part of this is having a workspace with quick access to an Auto Parts store and a Lowes/Home Depot. It makes a big difference when you are limited on time.
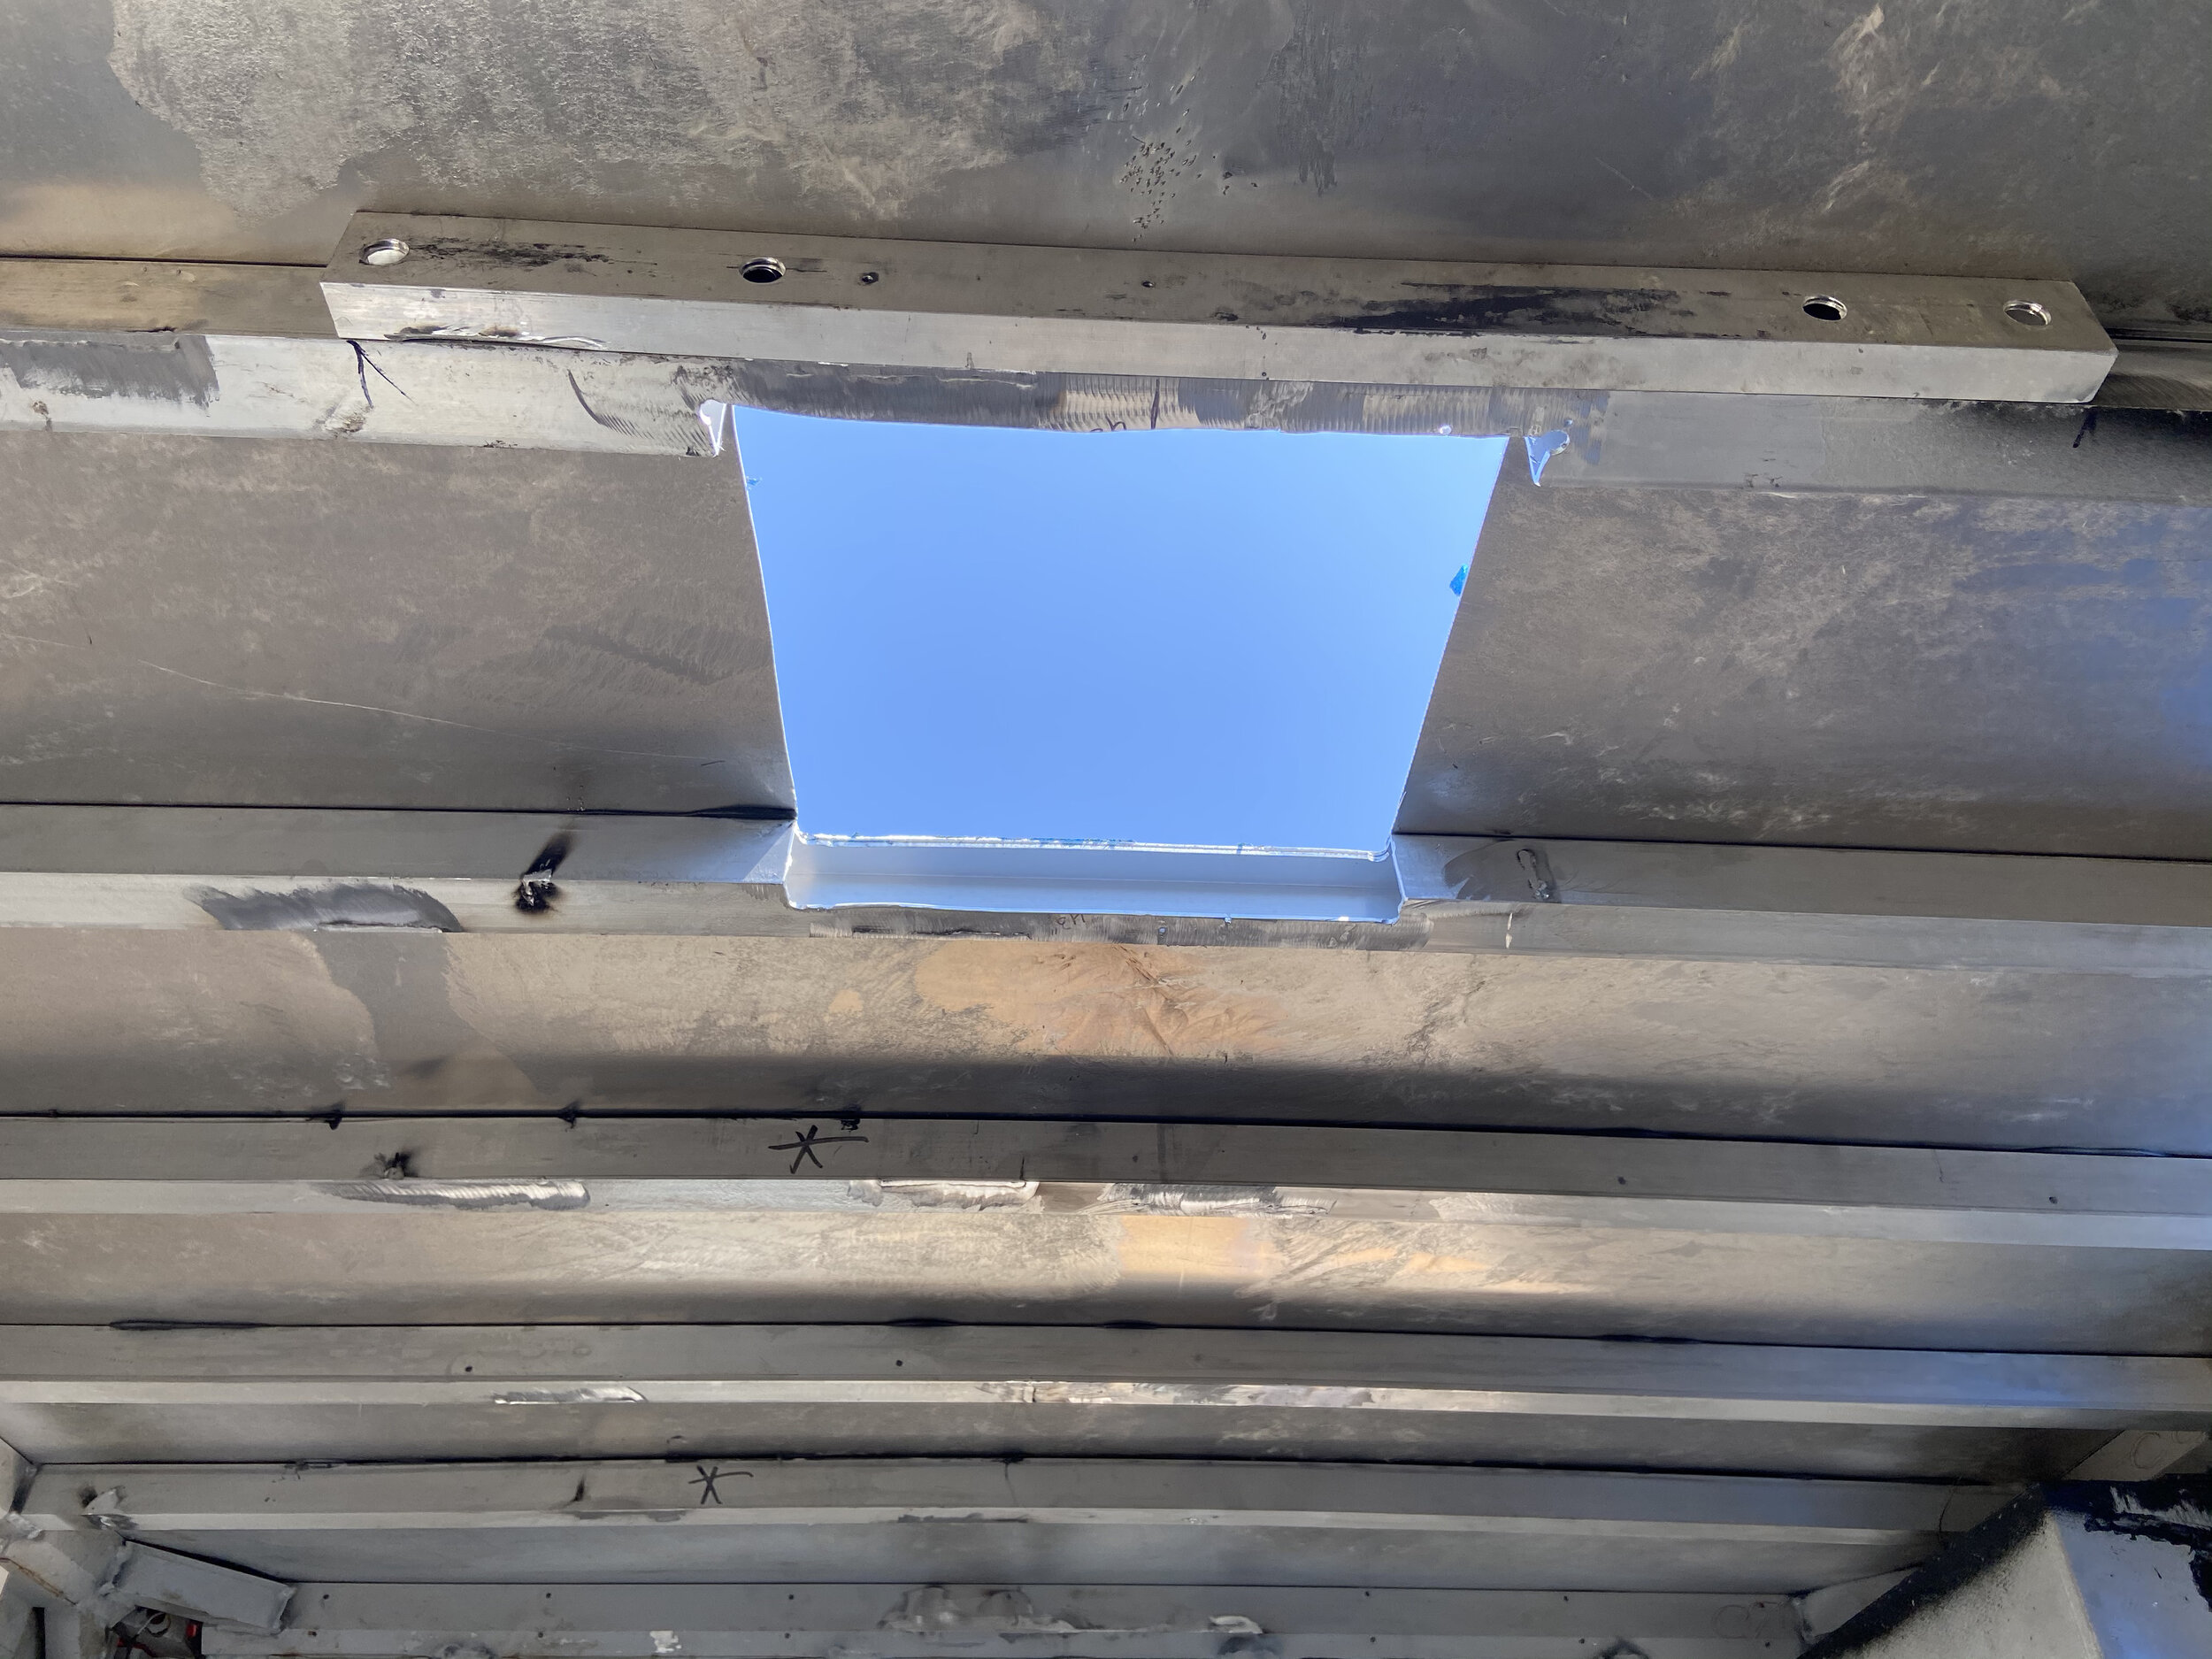
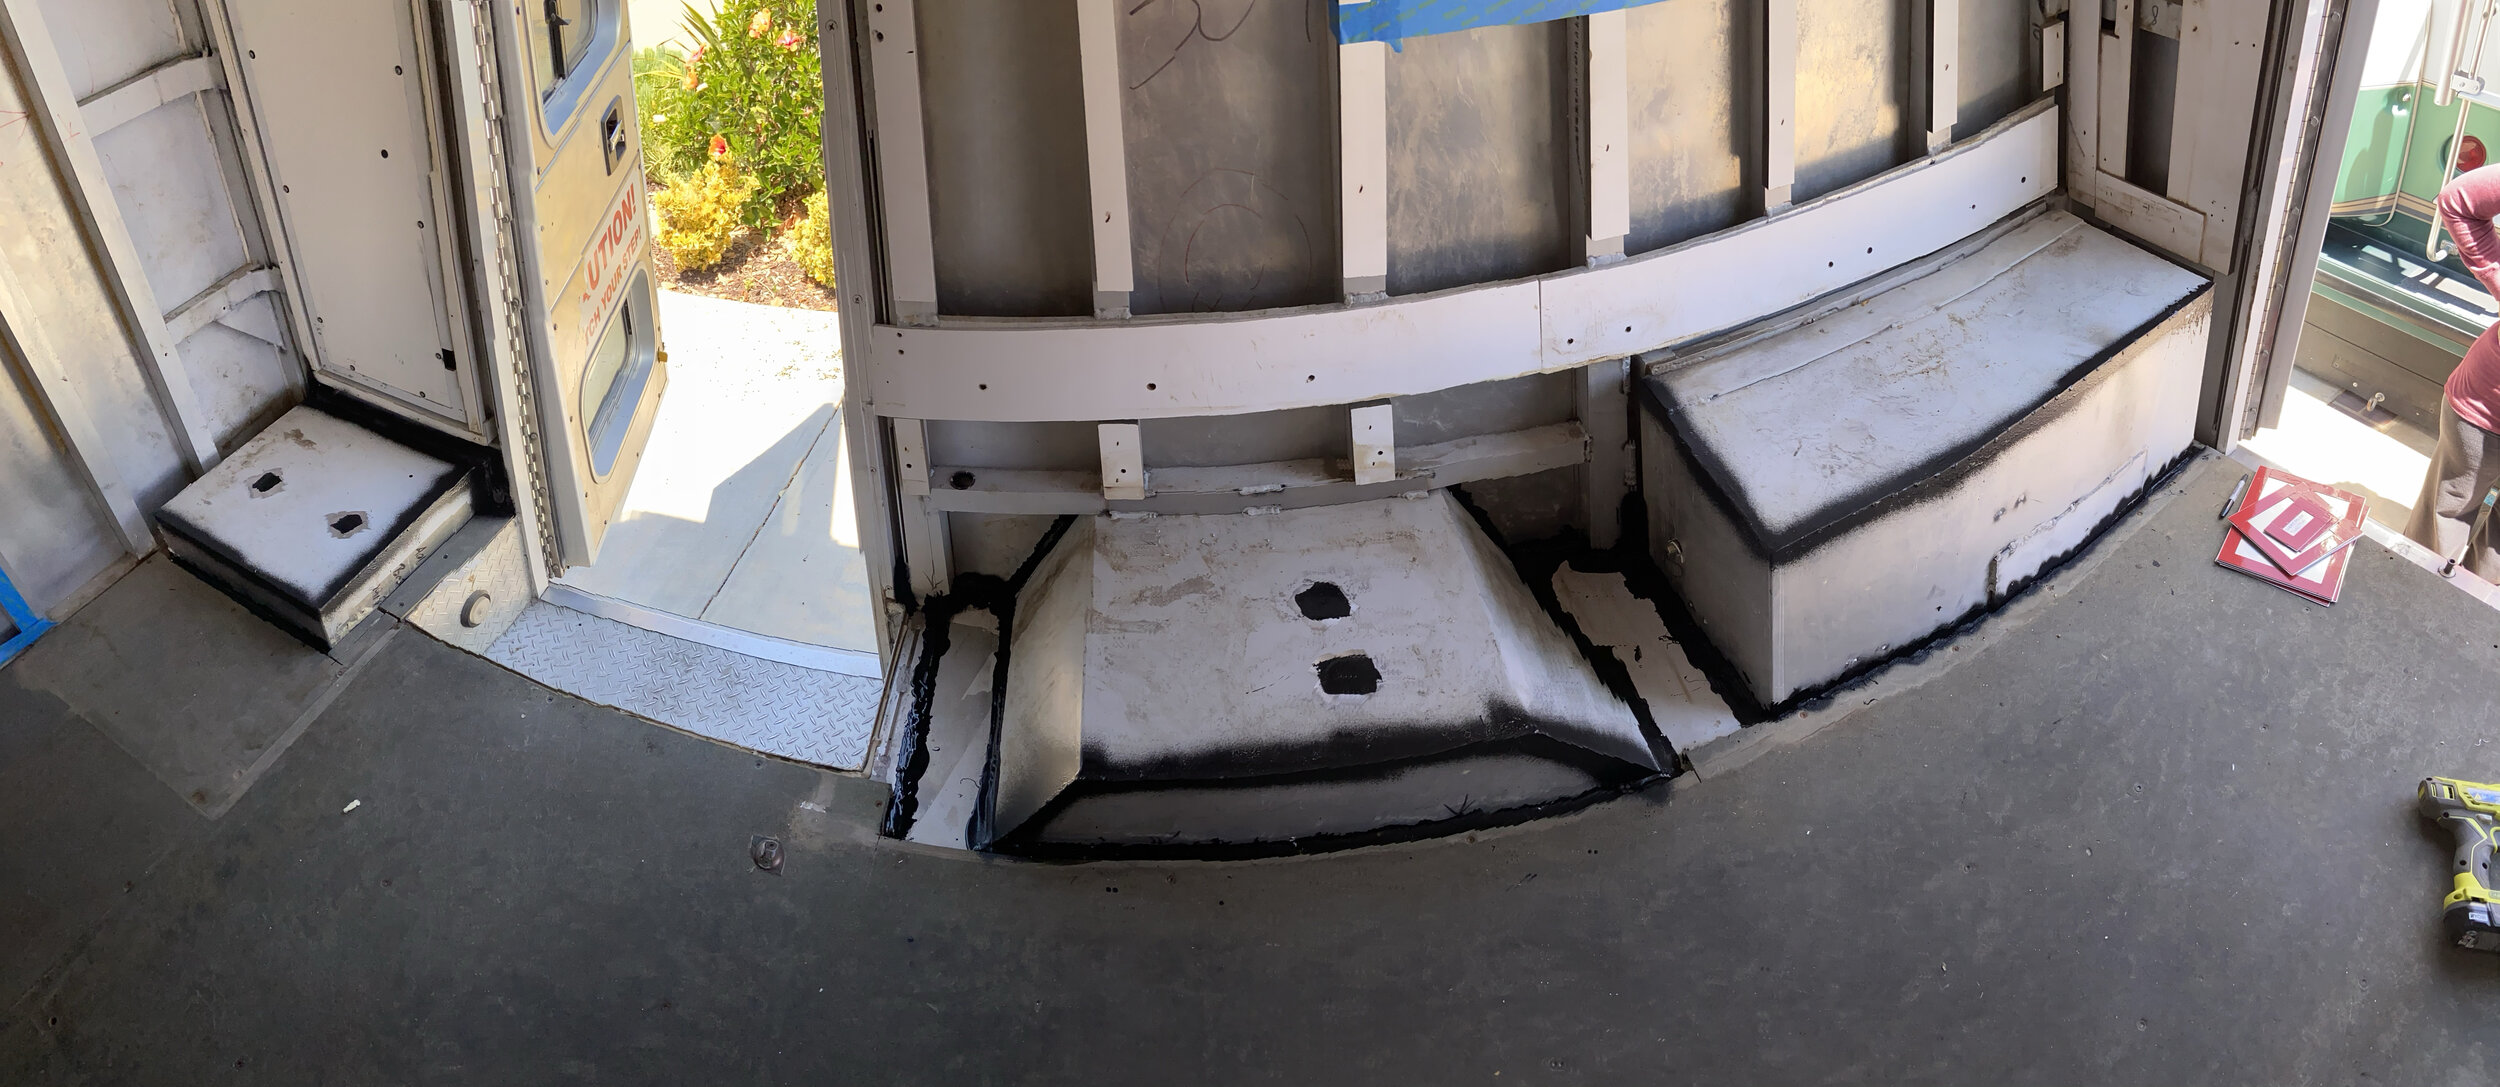
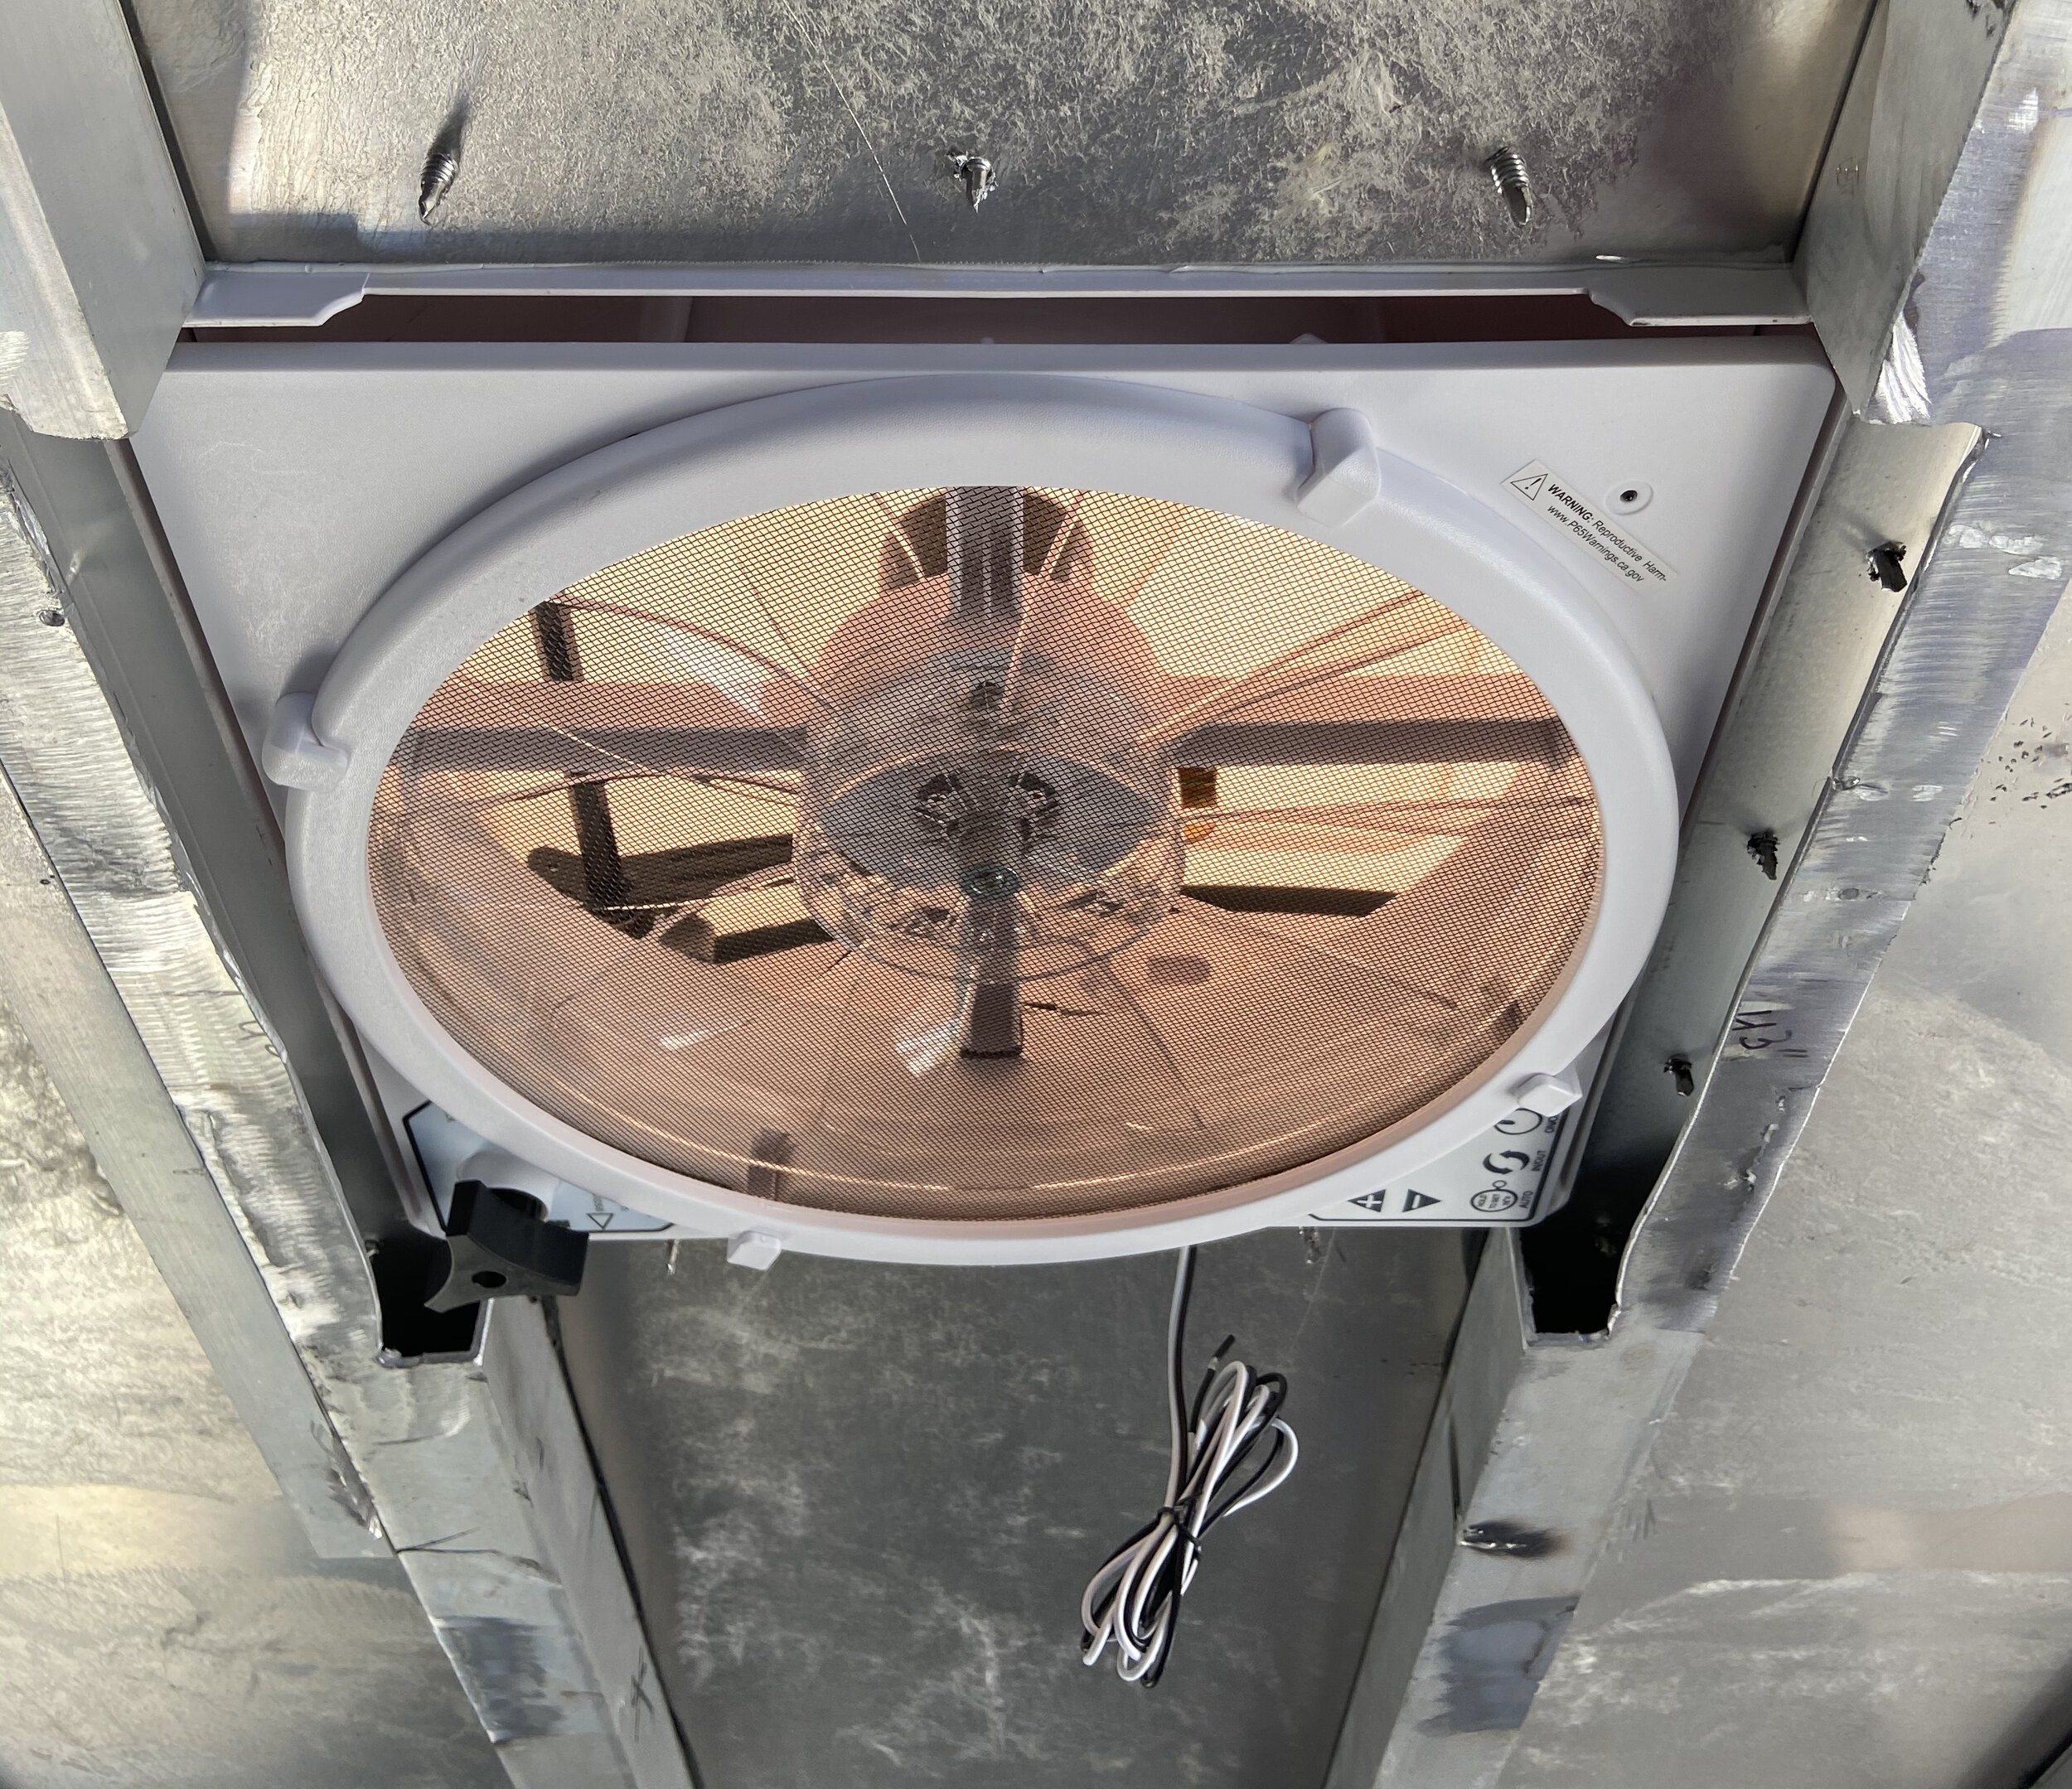
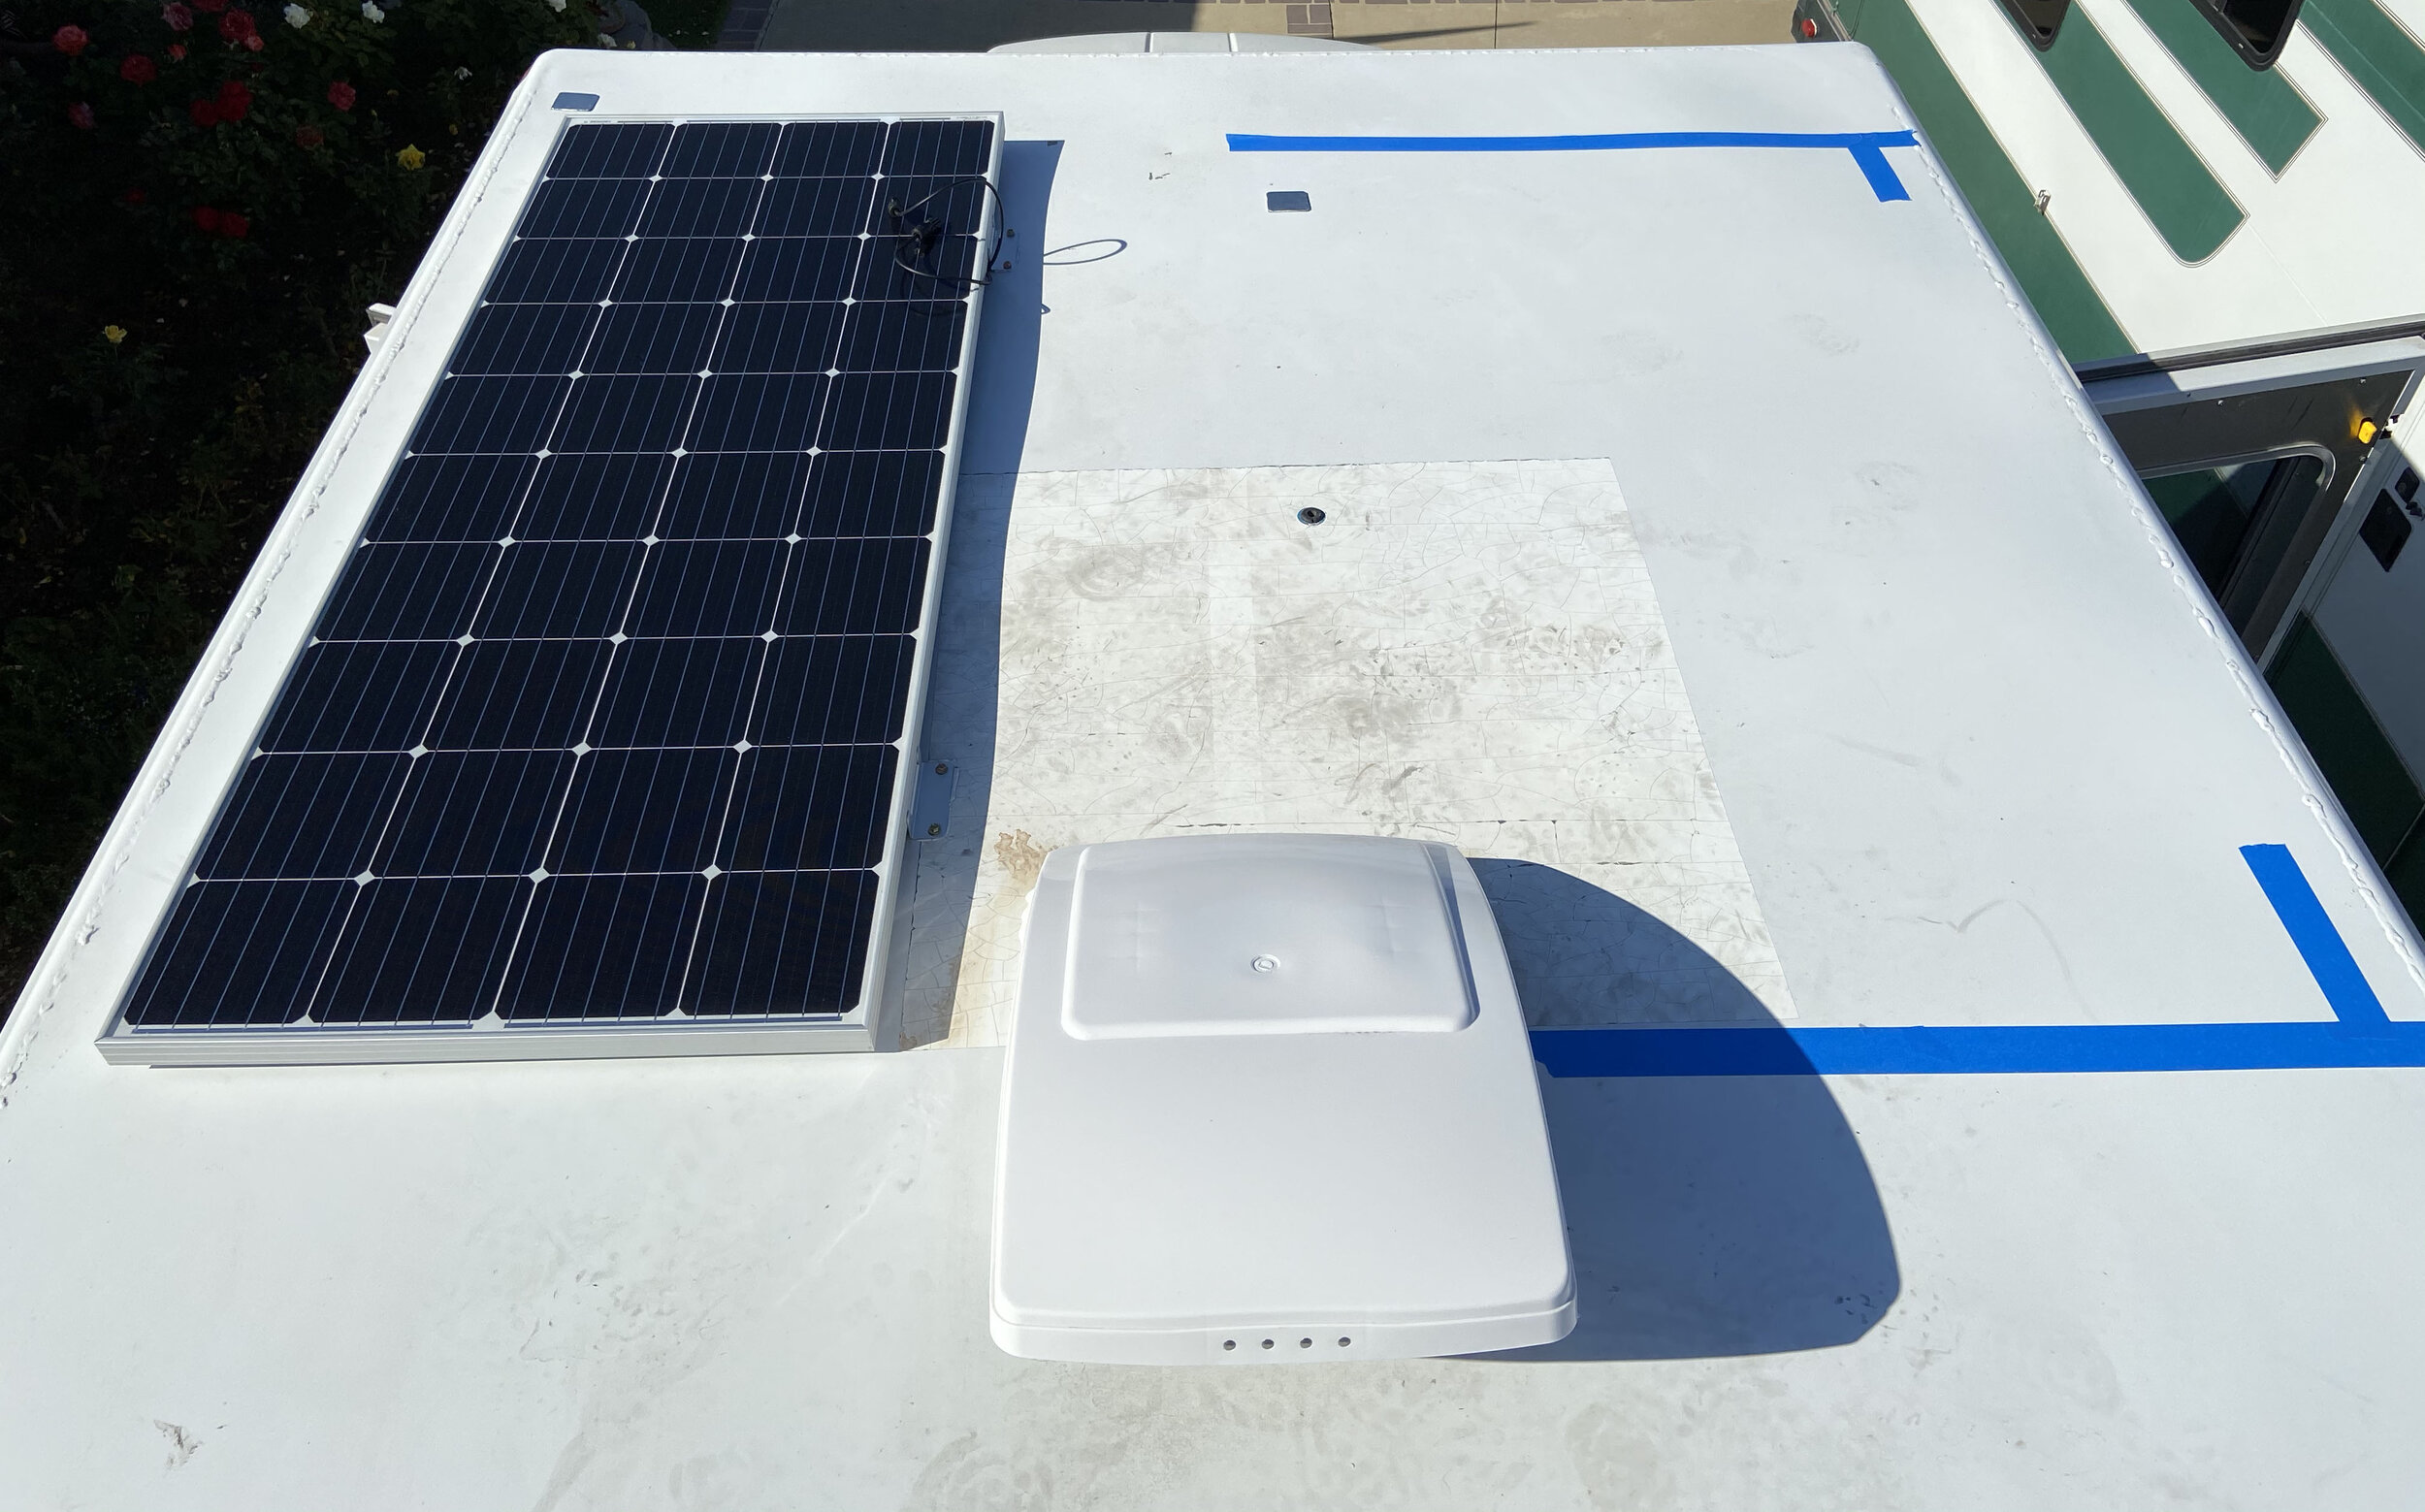
7/26/2020 - Installing the ceiling fan, removing the AC condenser fans underneath, Maxxair fan installation, sealing all the gaps/holes with liquid rubber, covering all the code 3 lights with .063 AL. I purchased a Maxxair fan. It was the first actual installation. Cutting a 14”x14” hole in the roof was scary. Don’t make a mistake here as it won’t be good. I chose to split the two cross members in half to retain the roofs integrity. Otherwise I would have had to cut one of the cross members in half. I added an additional cross members so that the roof was as strong as it was before. When I got the unit back from the Ford dealership (they removed the AC and Heater Core hoses) I removed the AC condenser fans and AL bracket. All unnecessary weight.


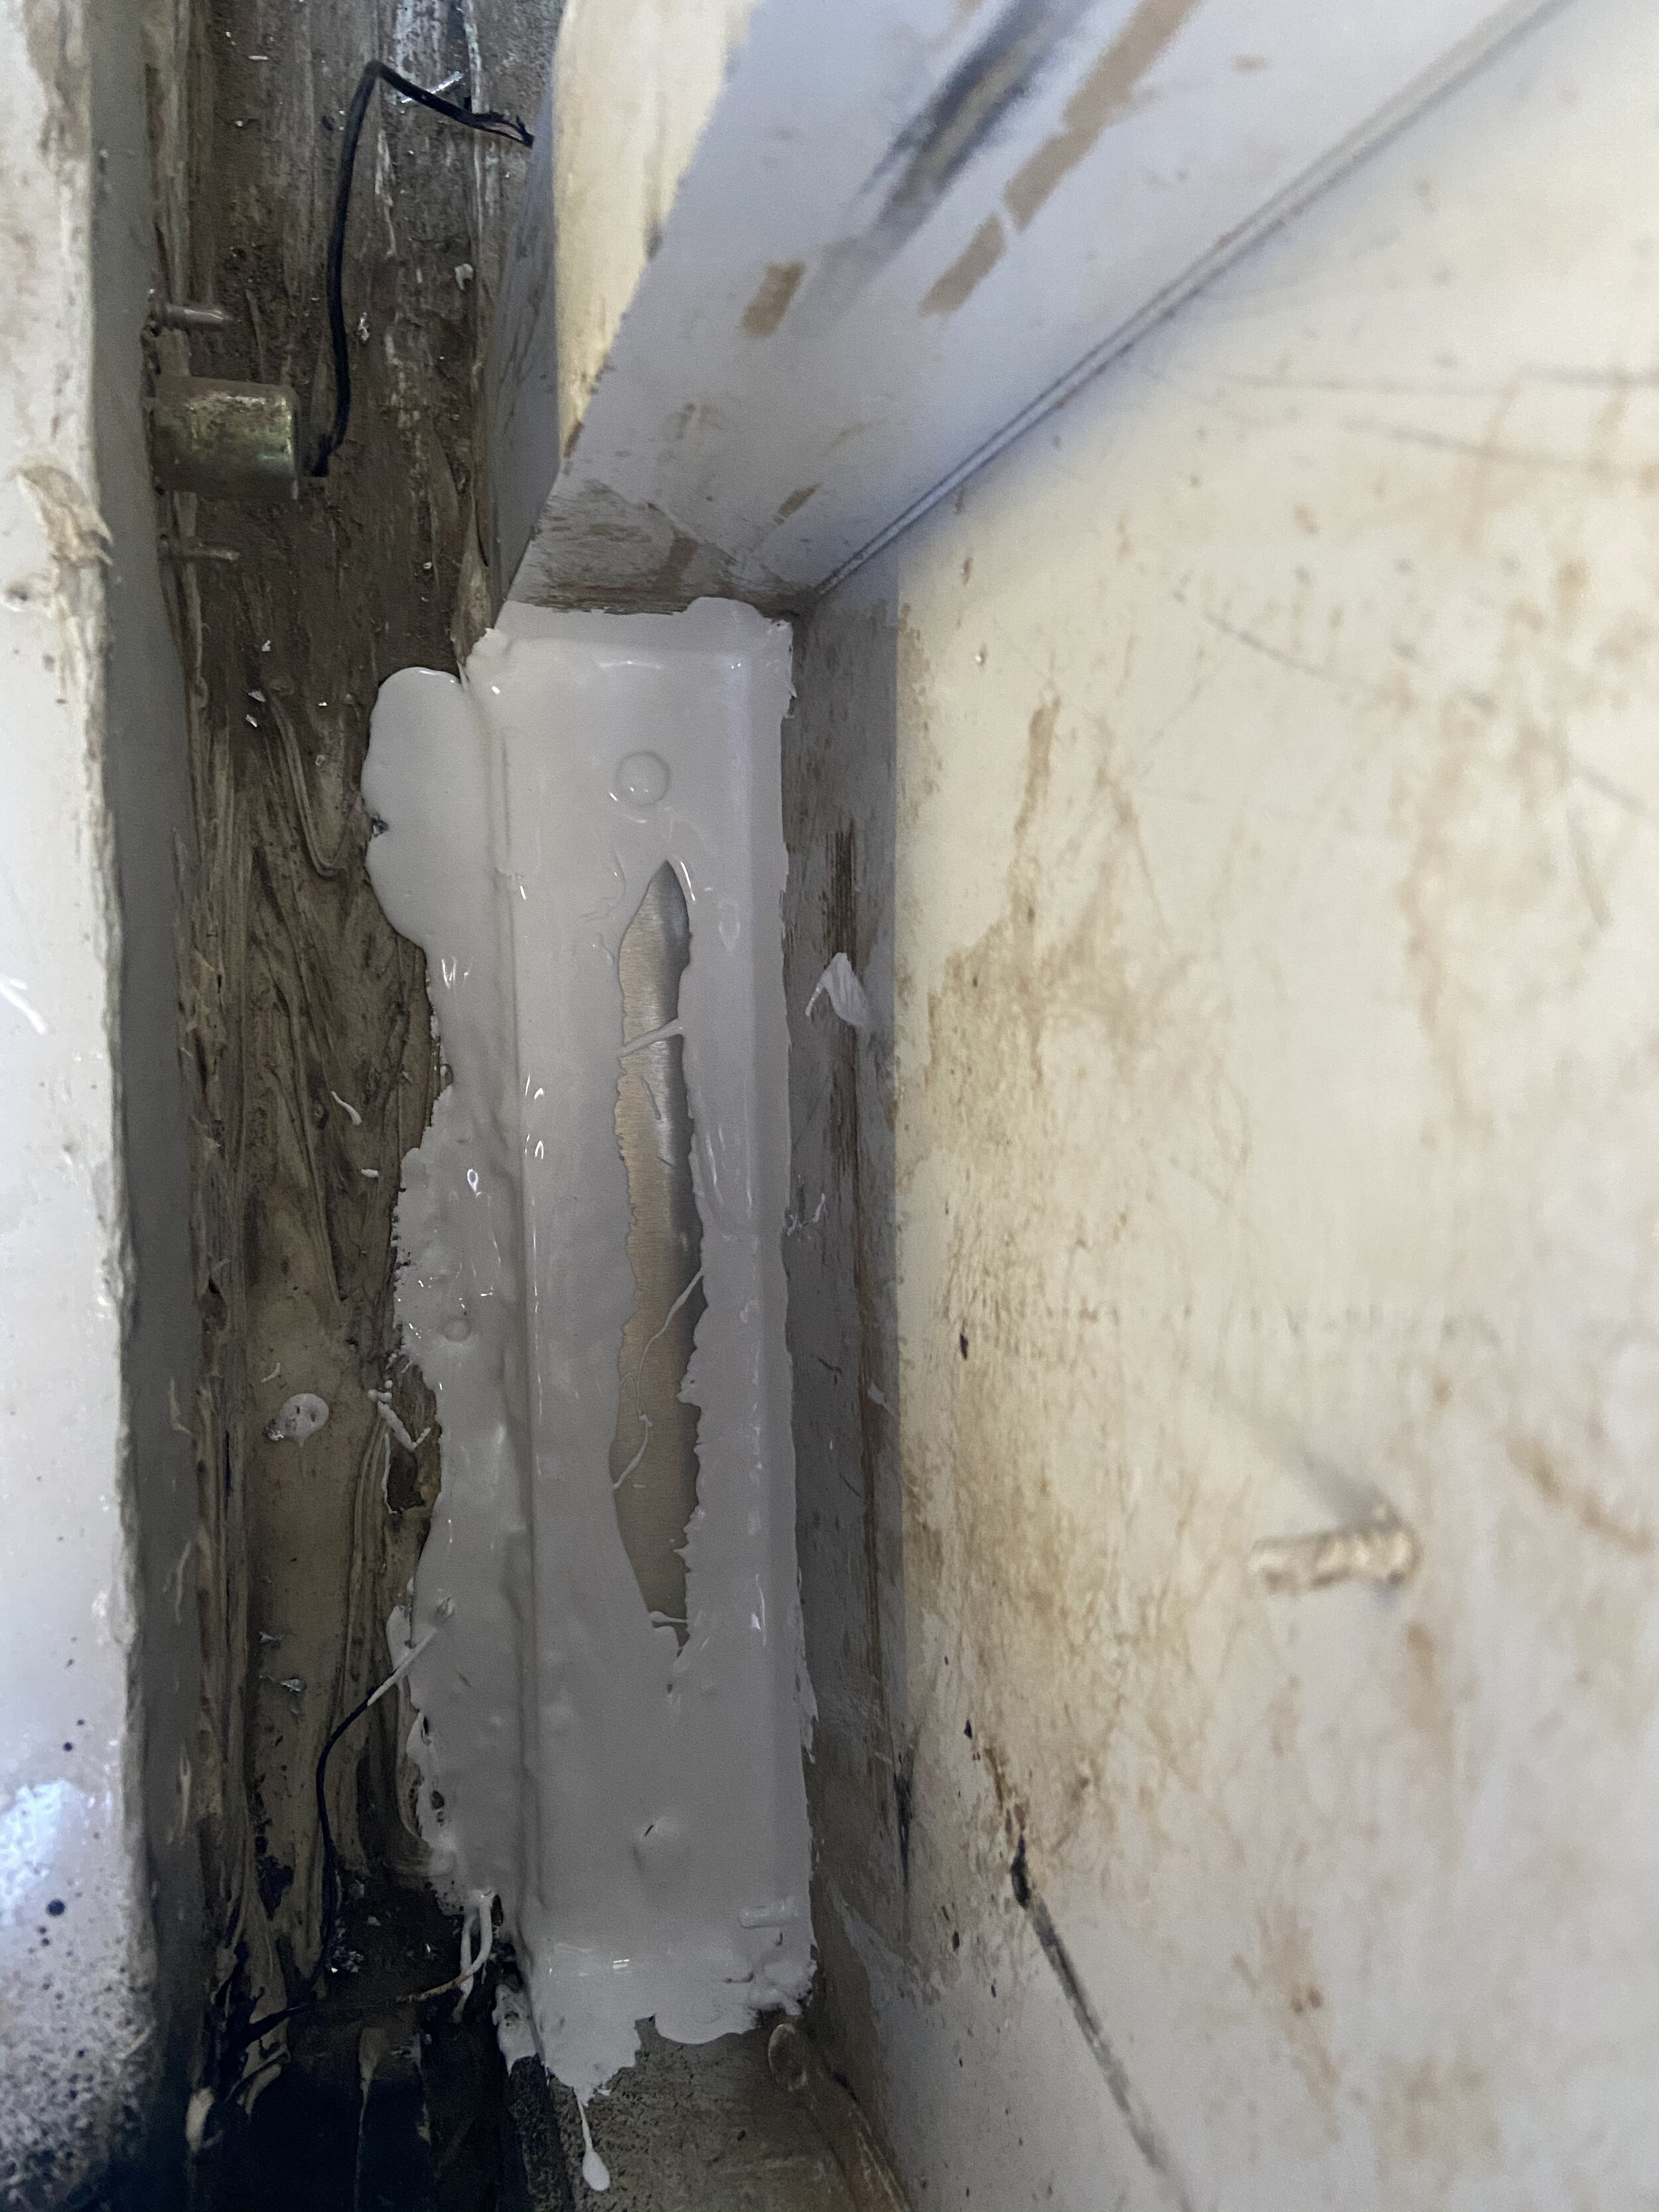
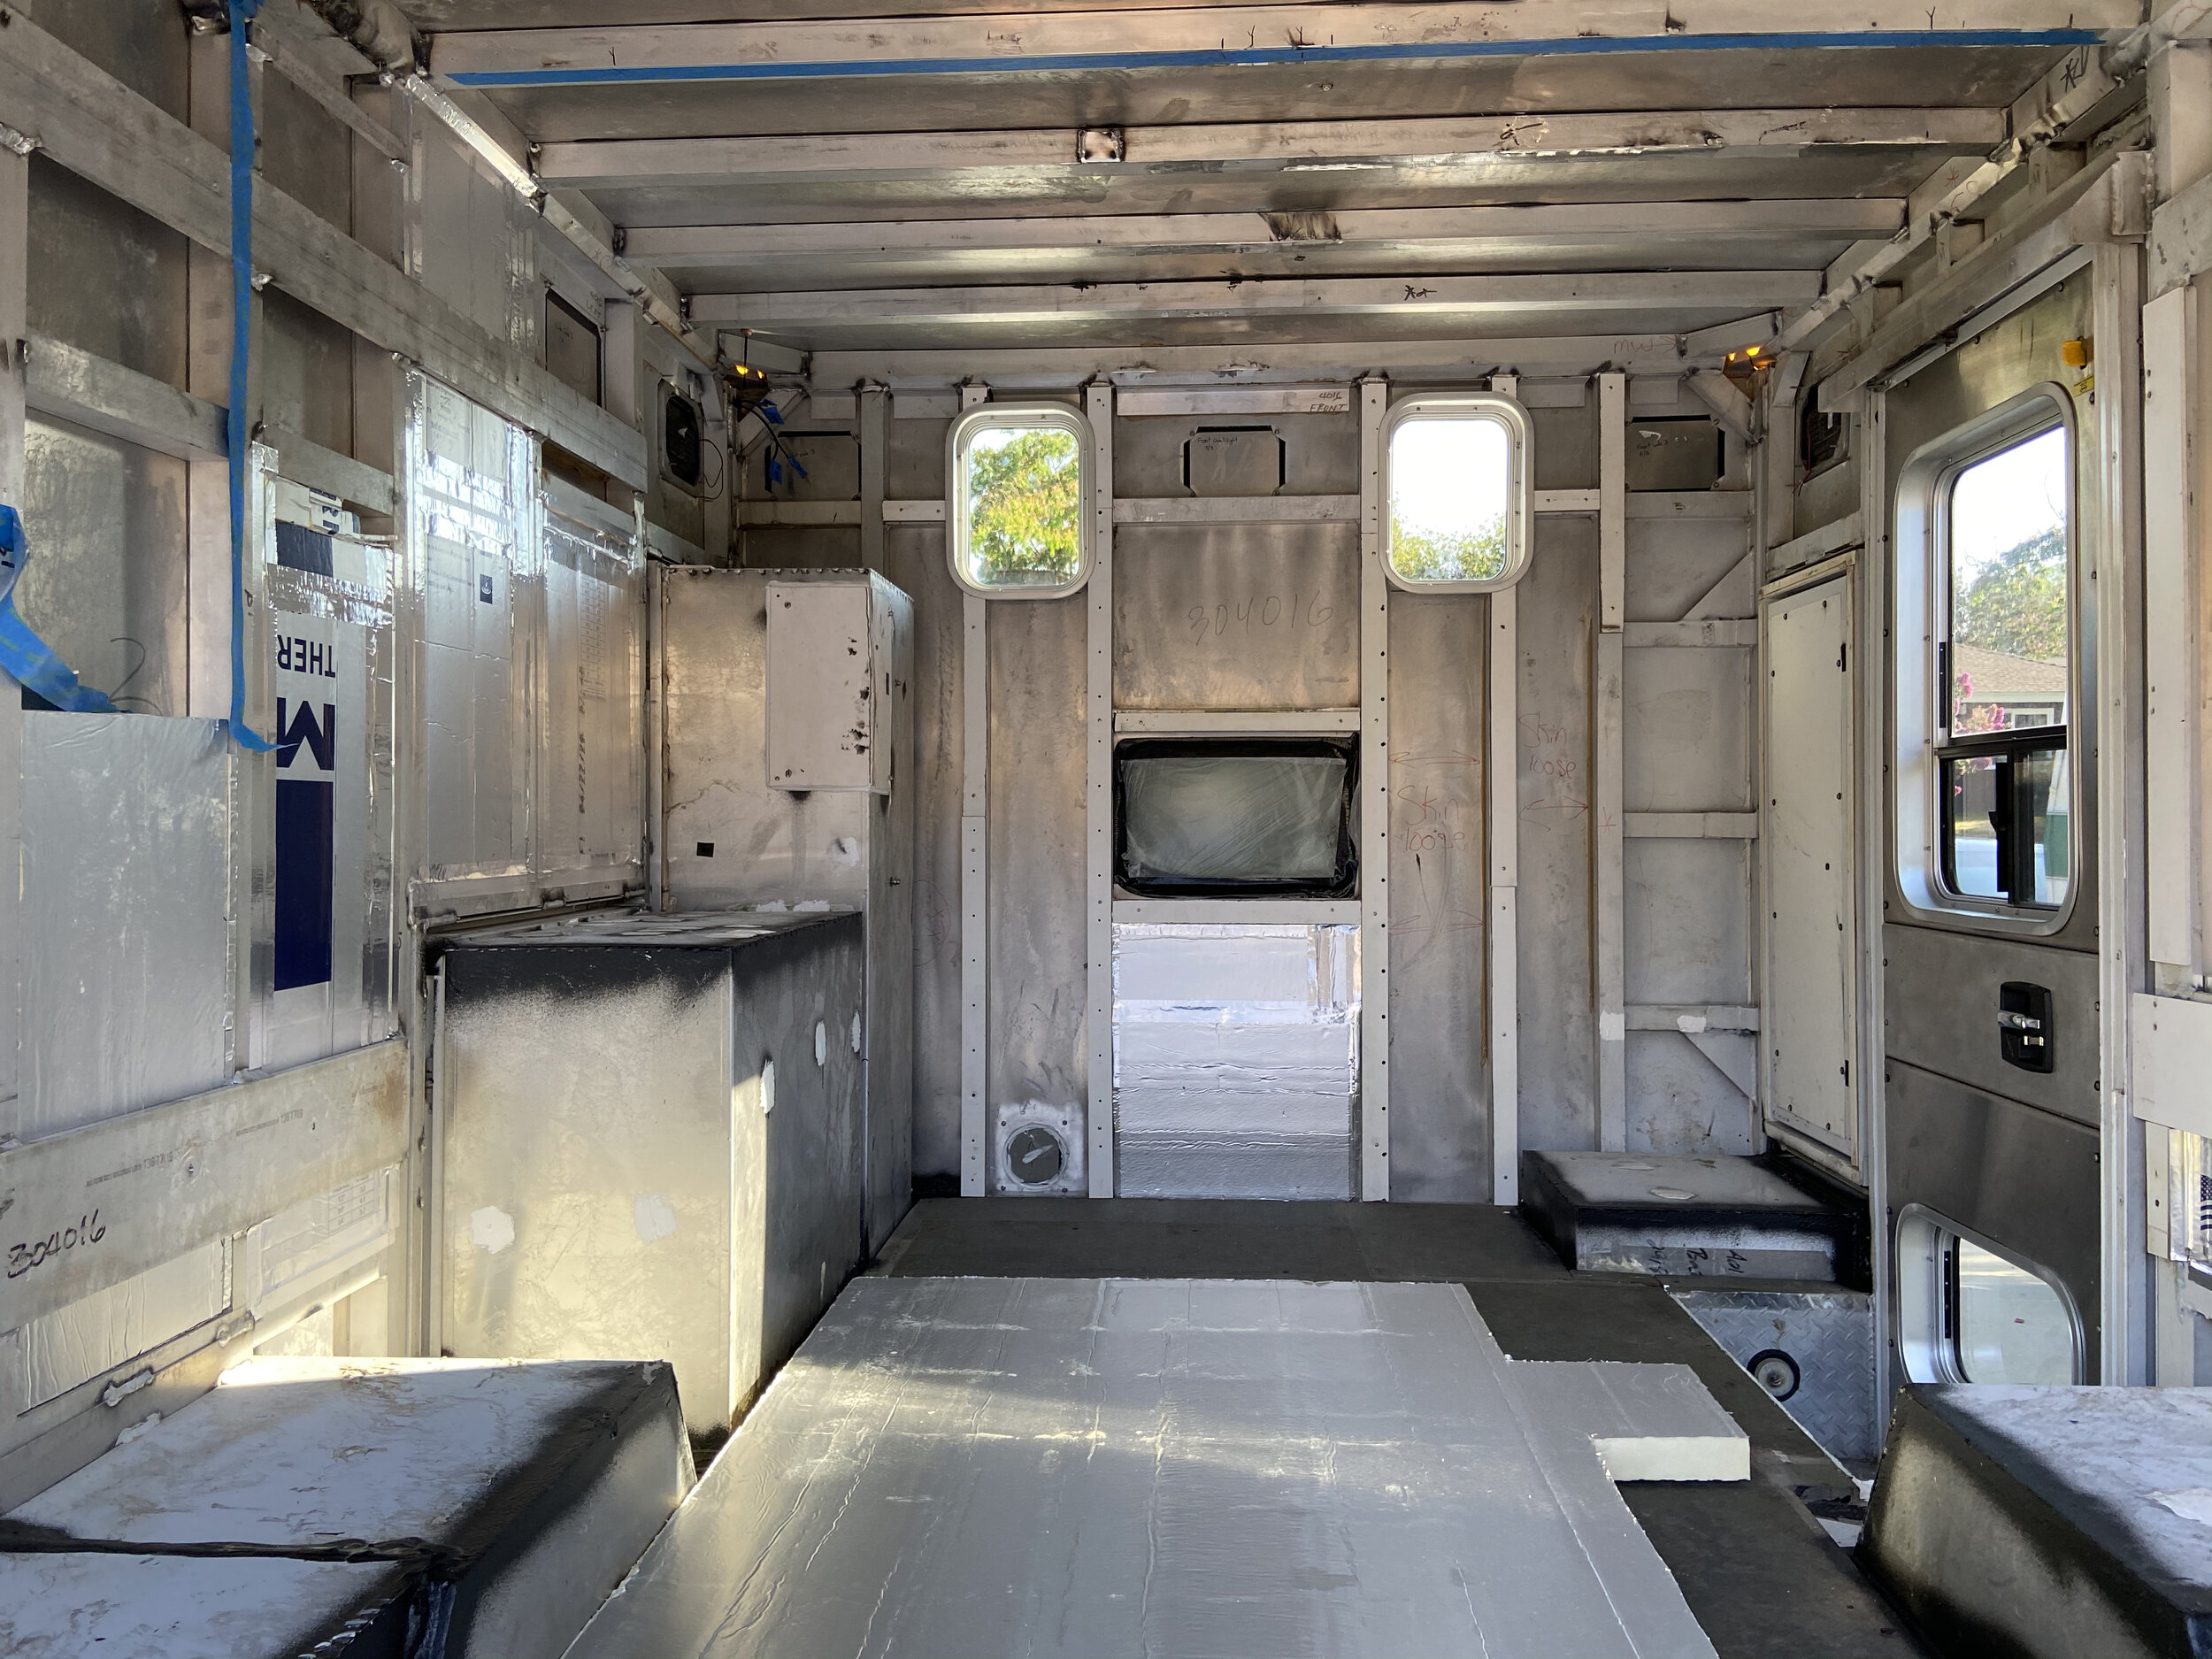
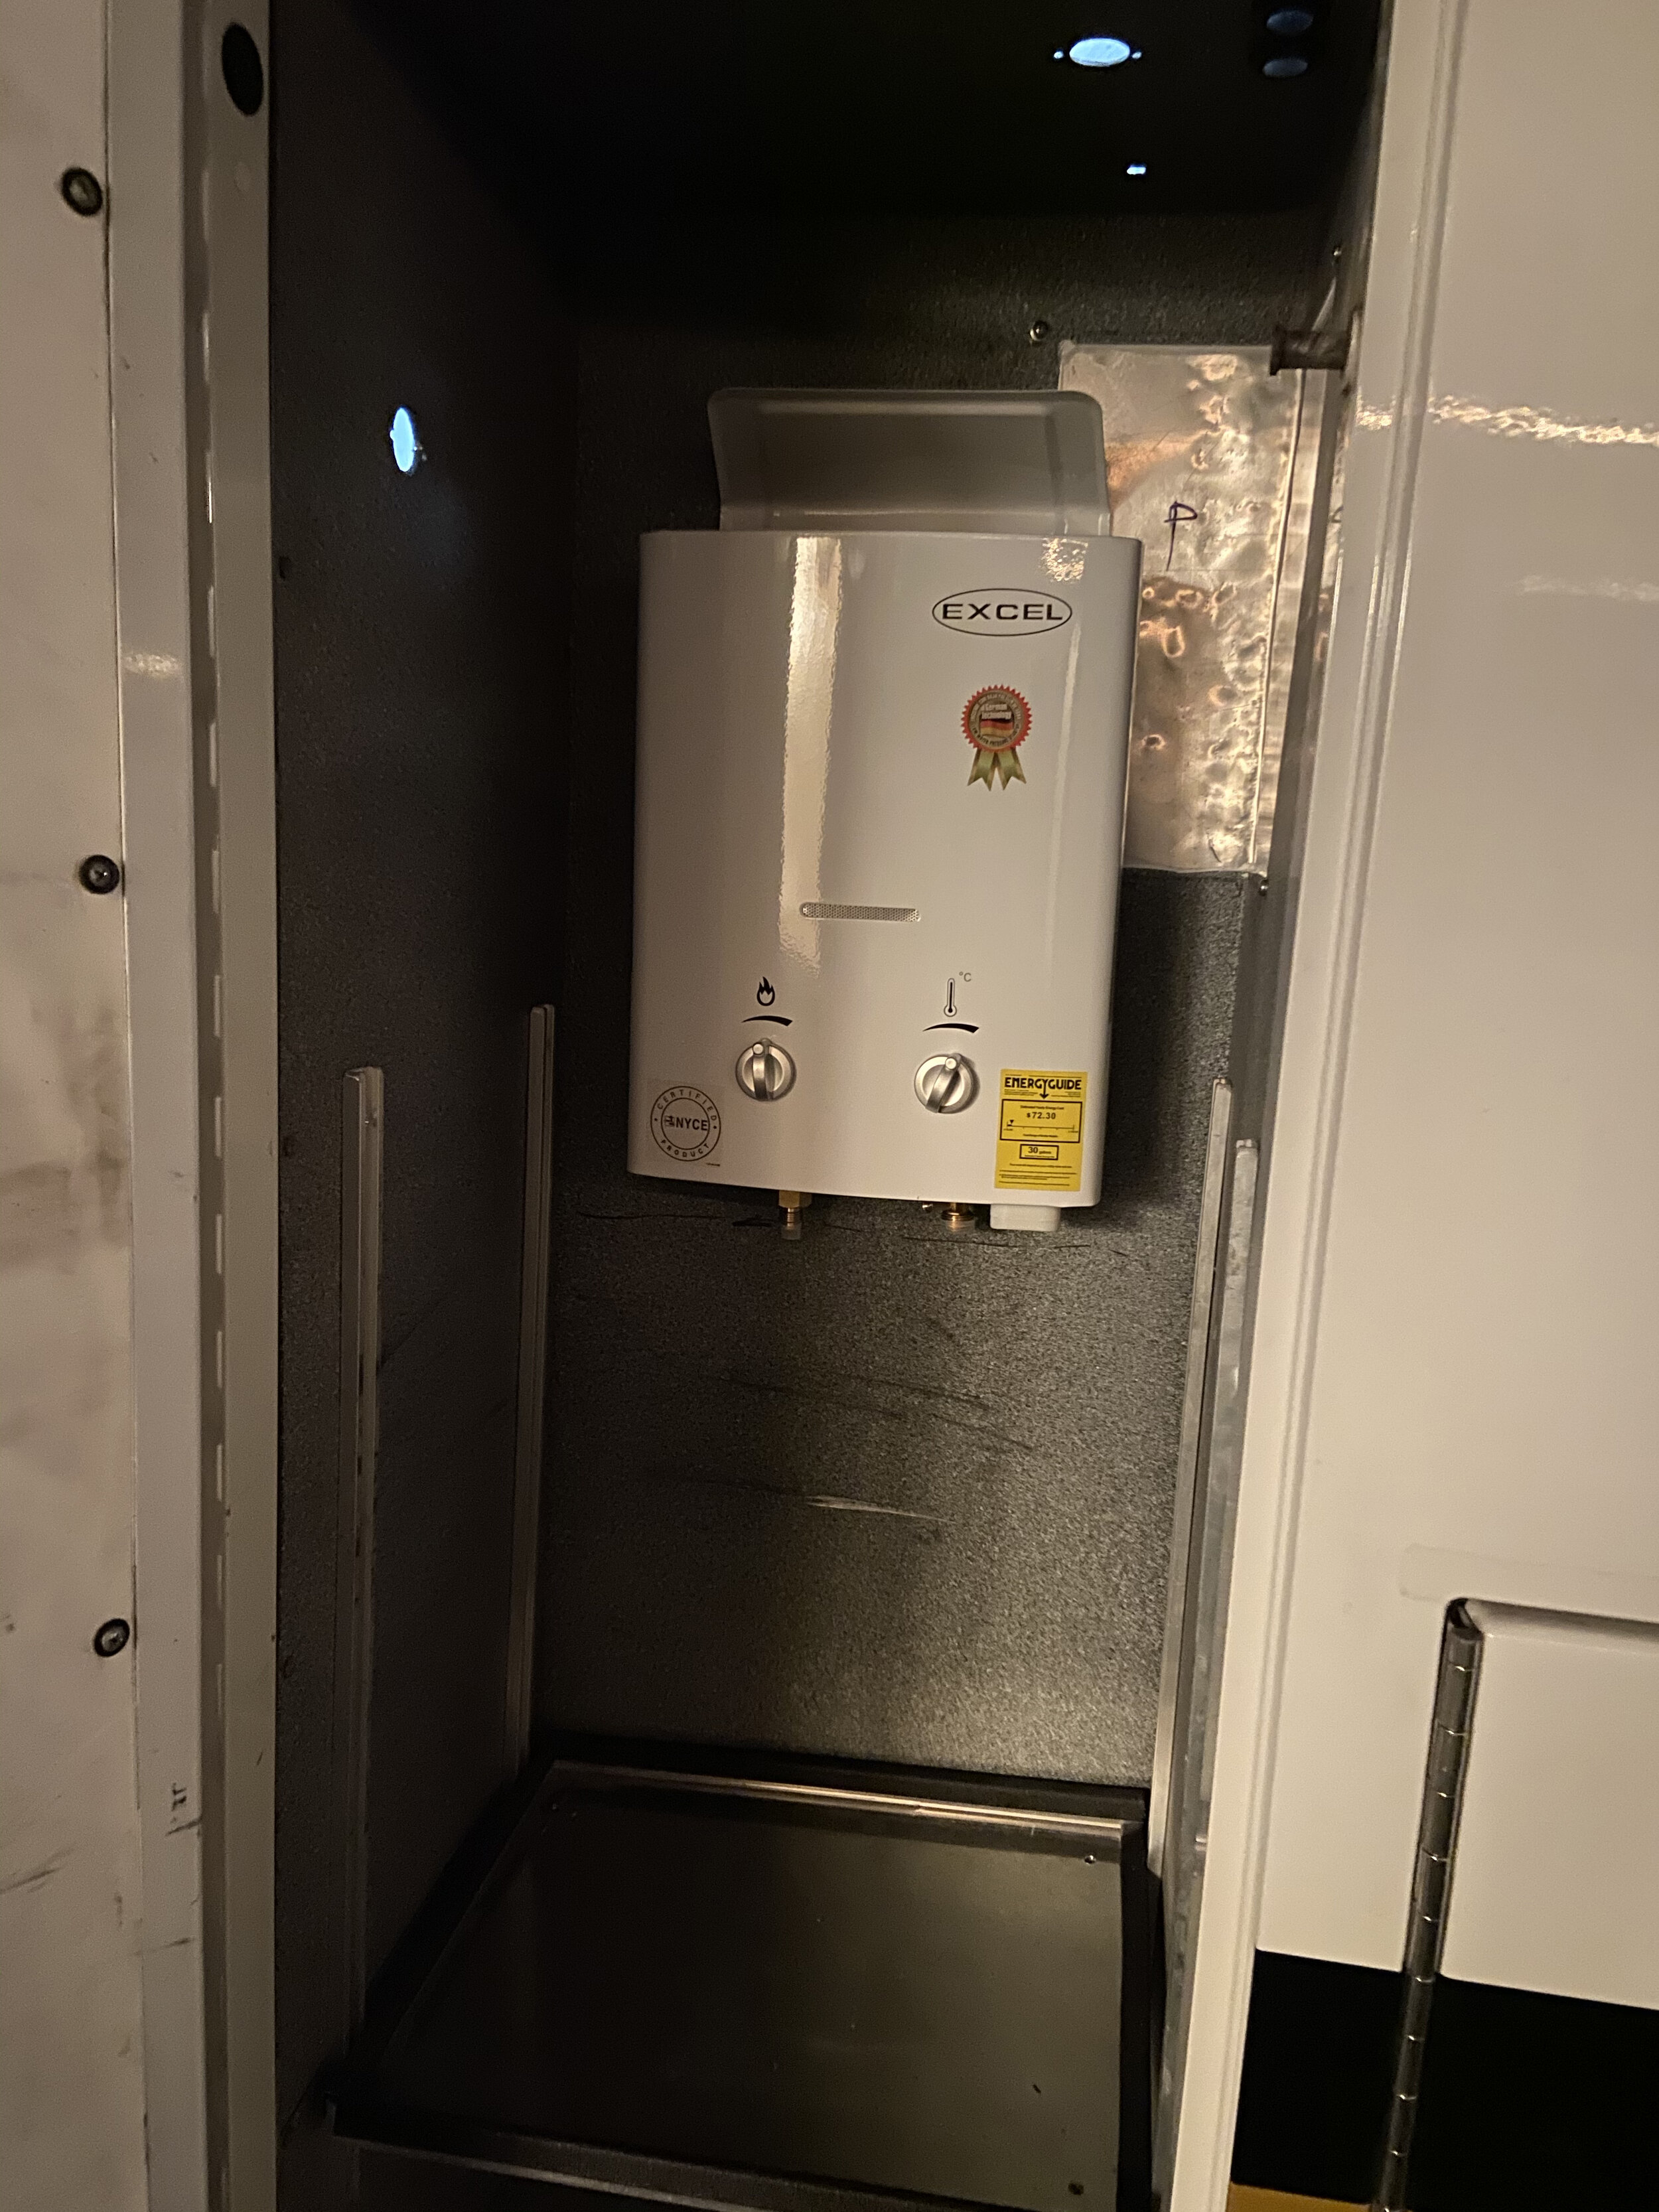
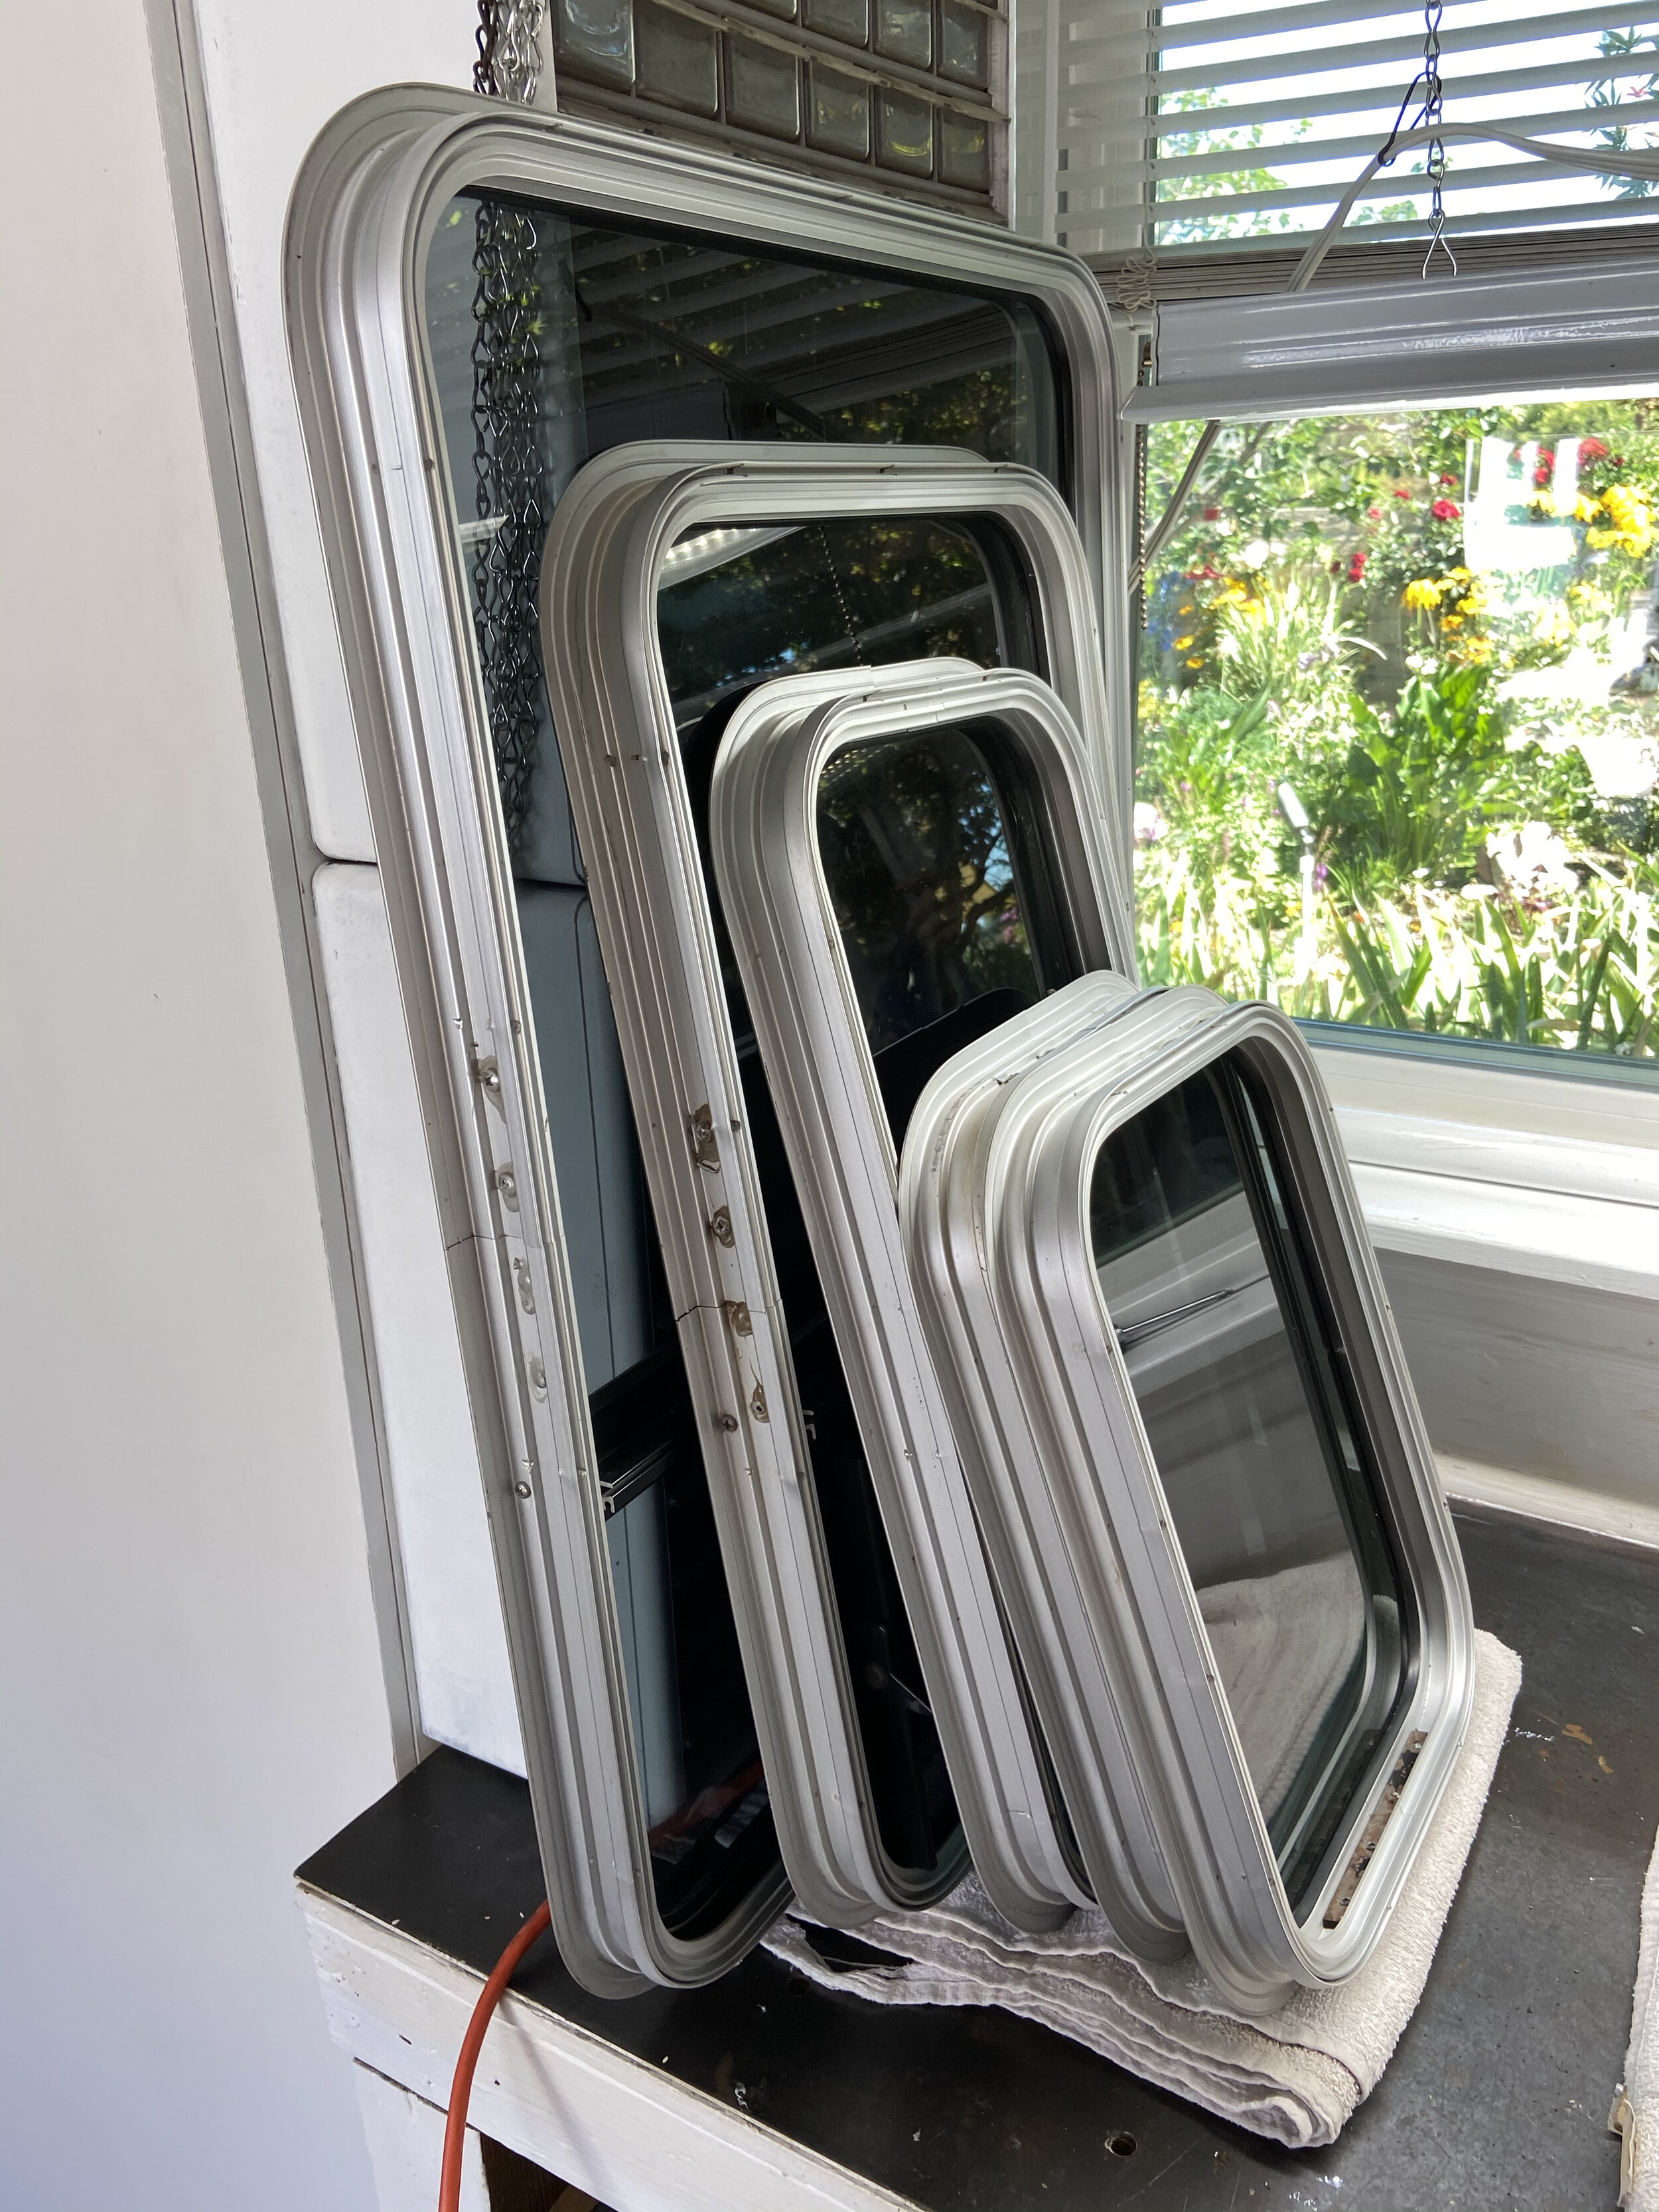
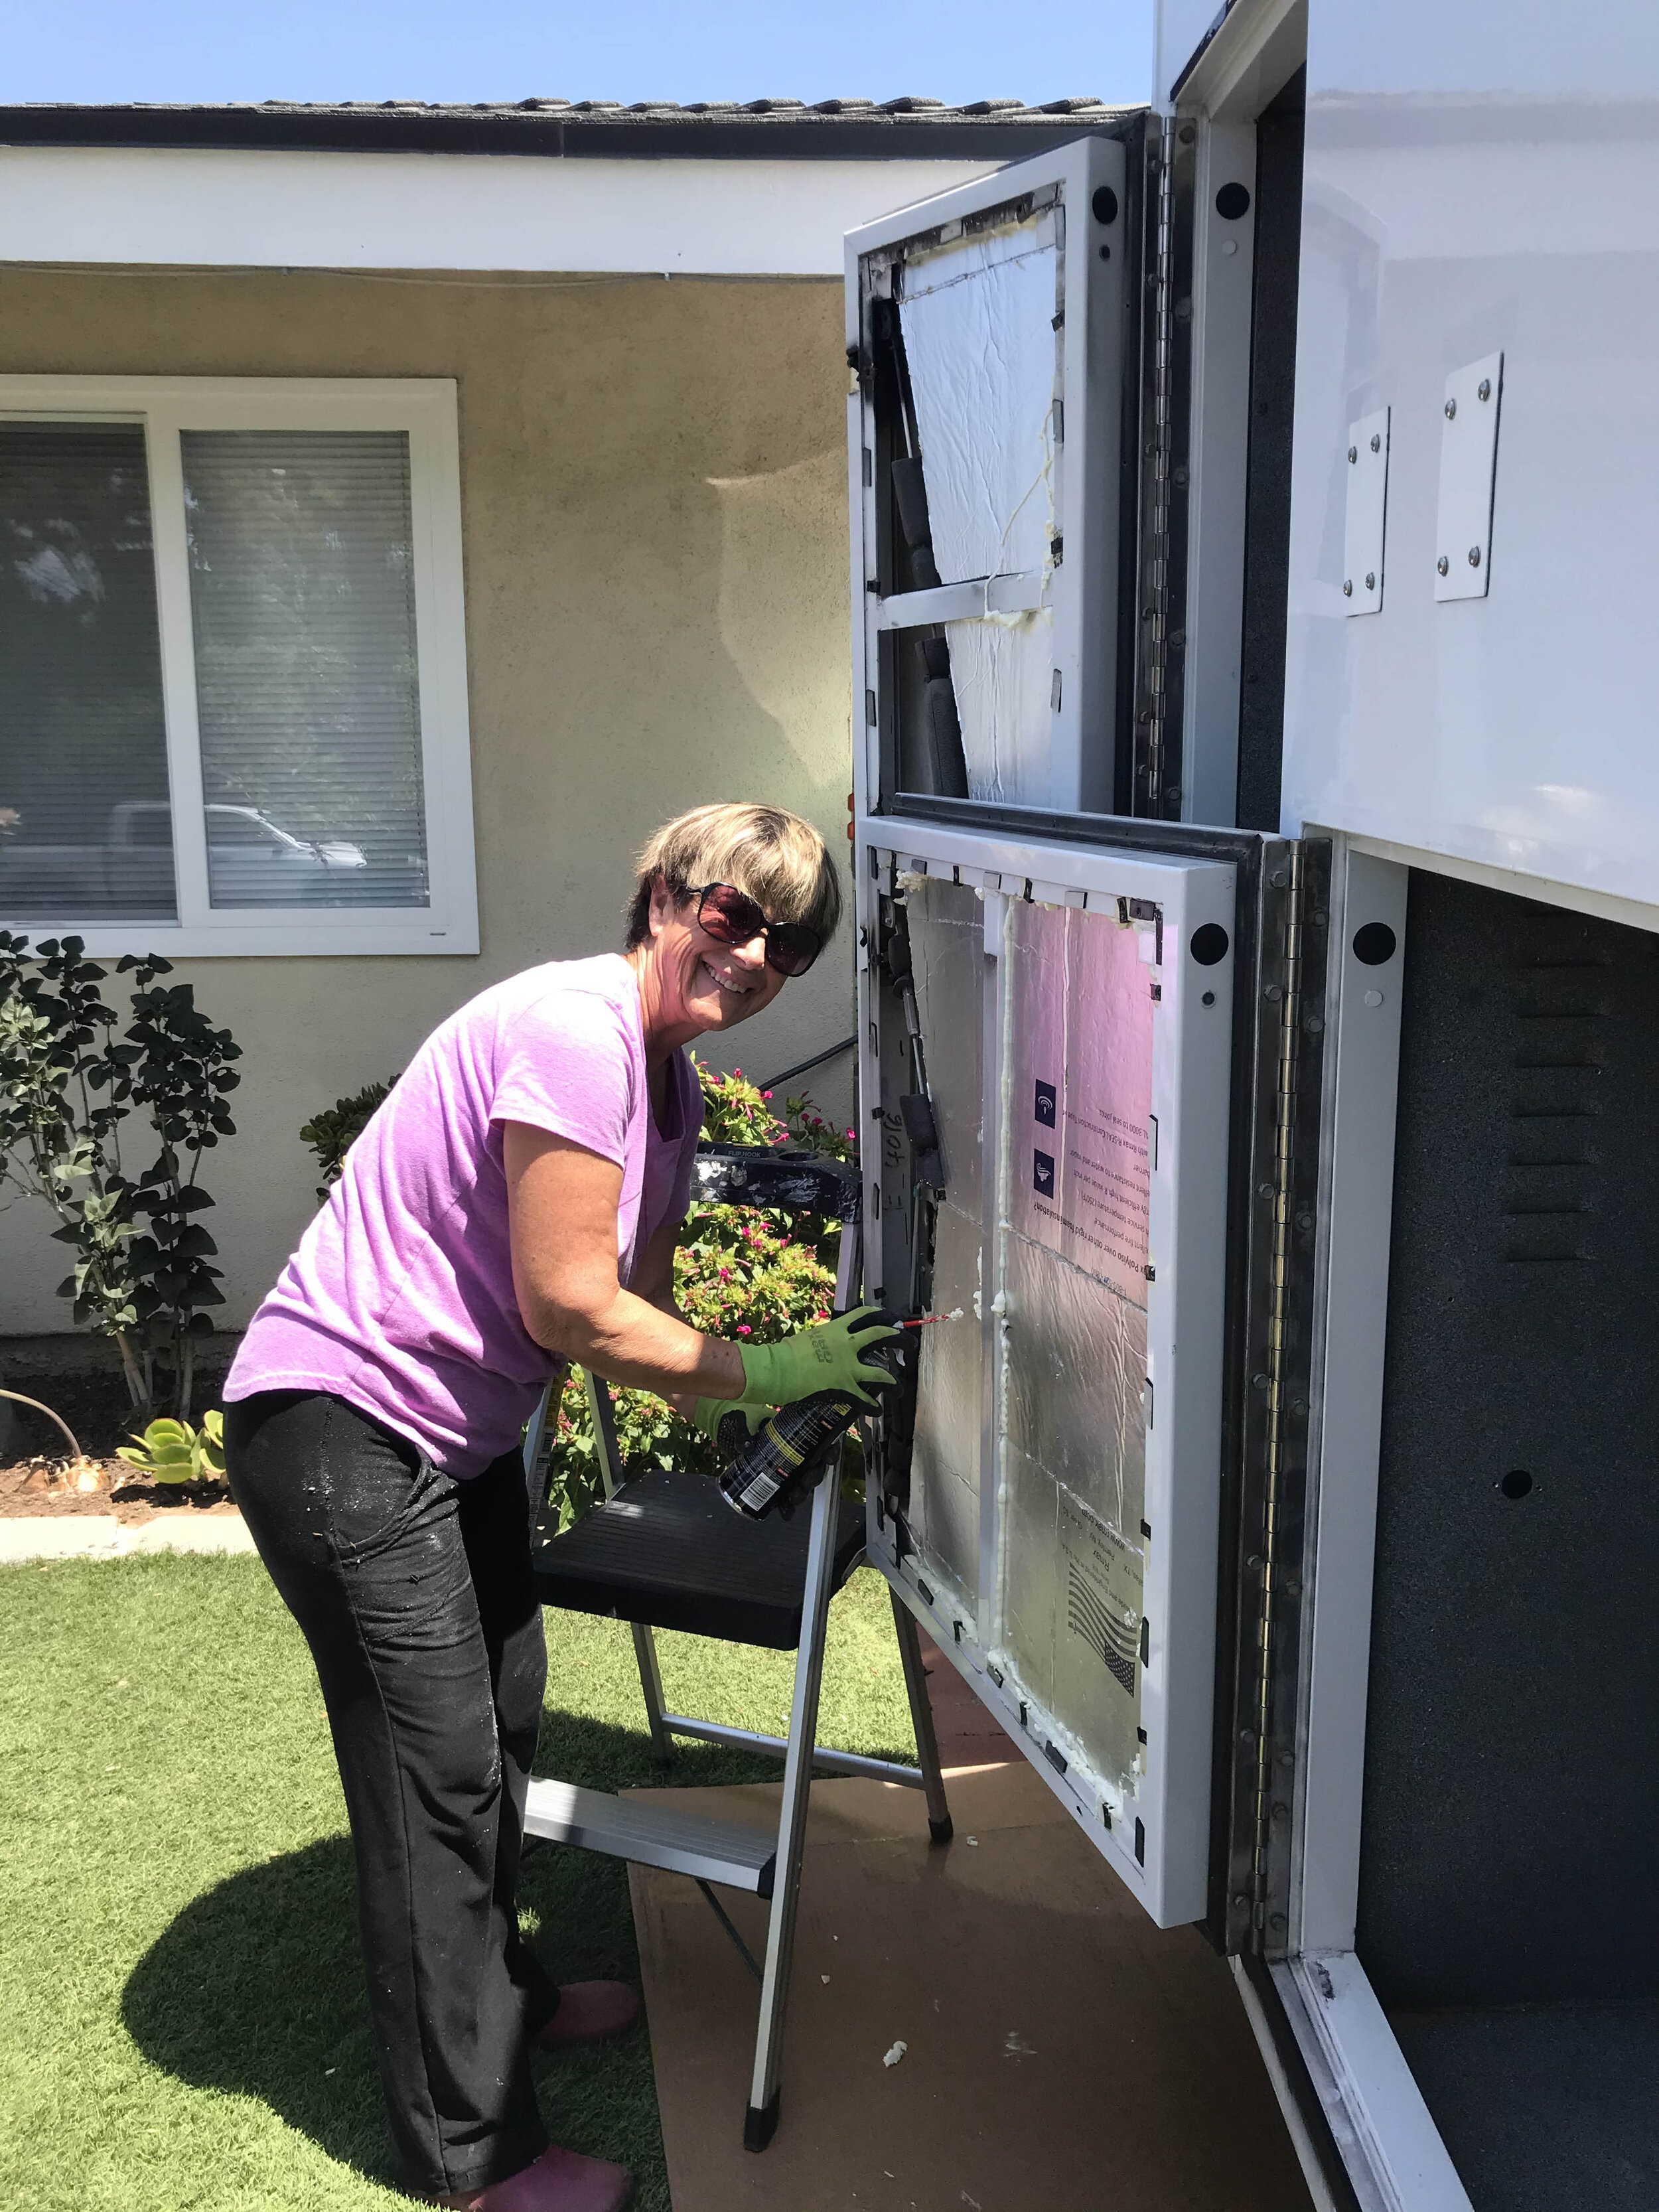
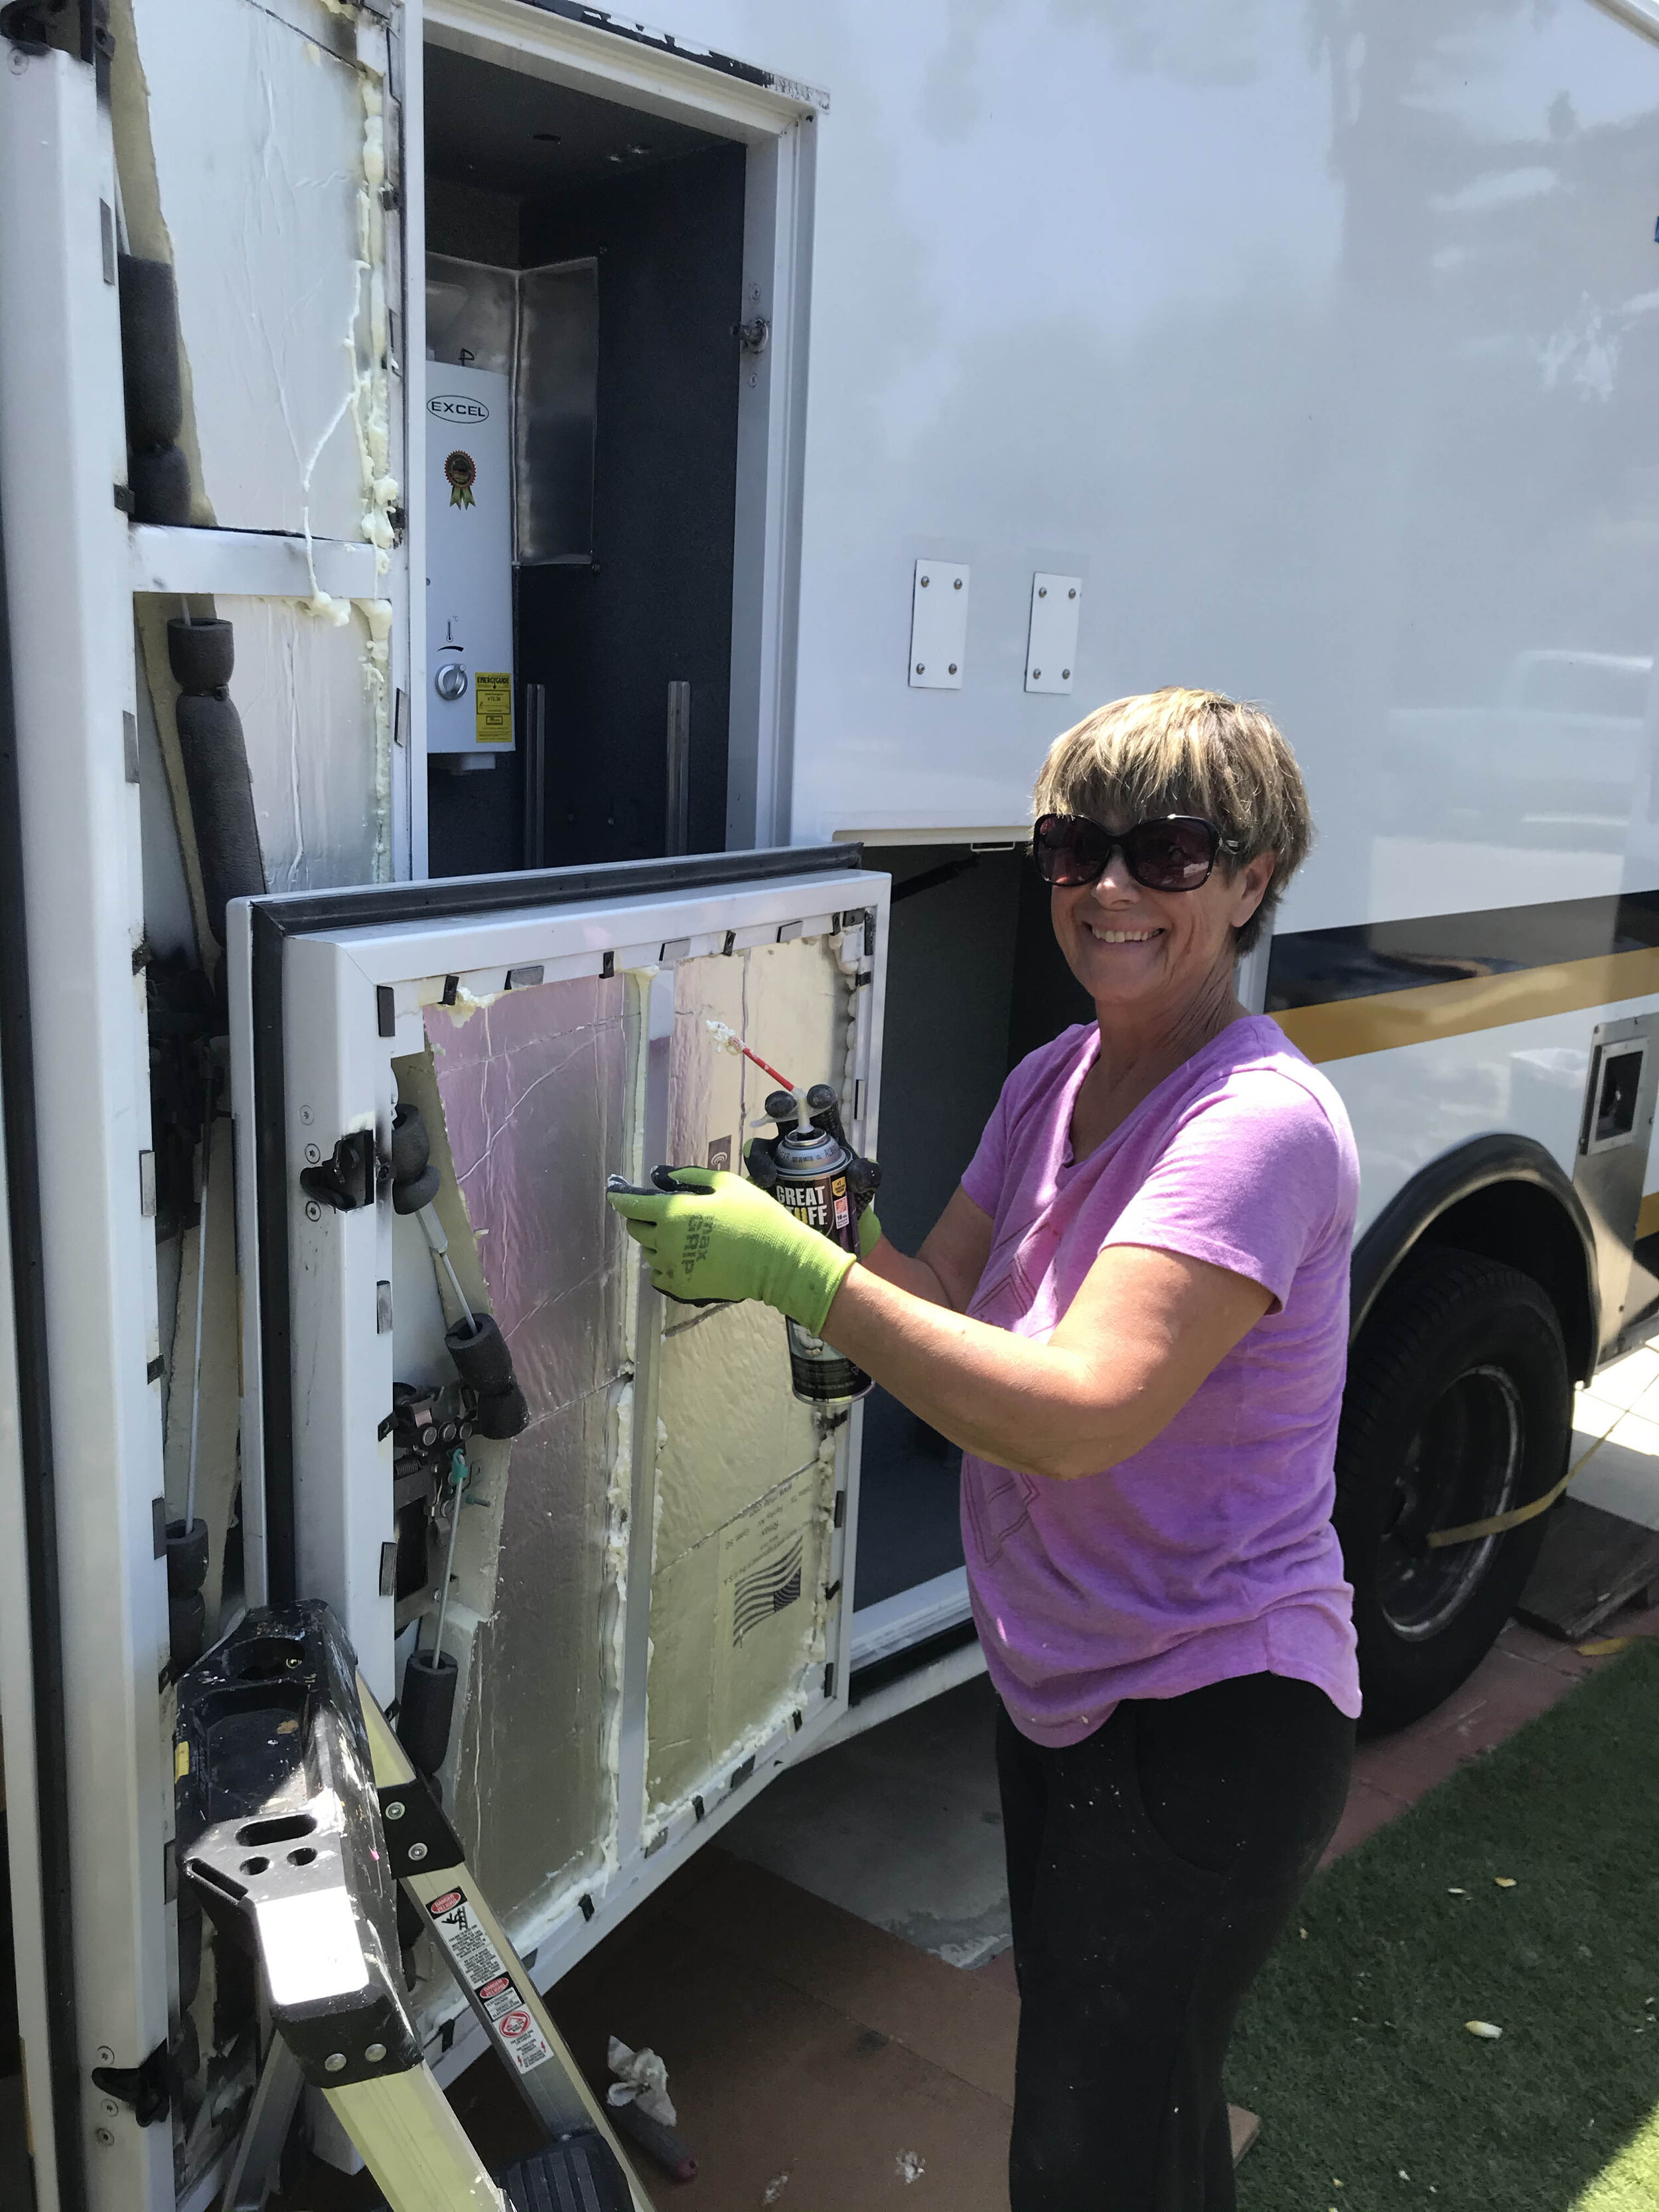
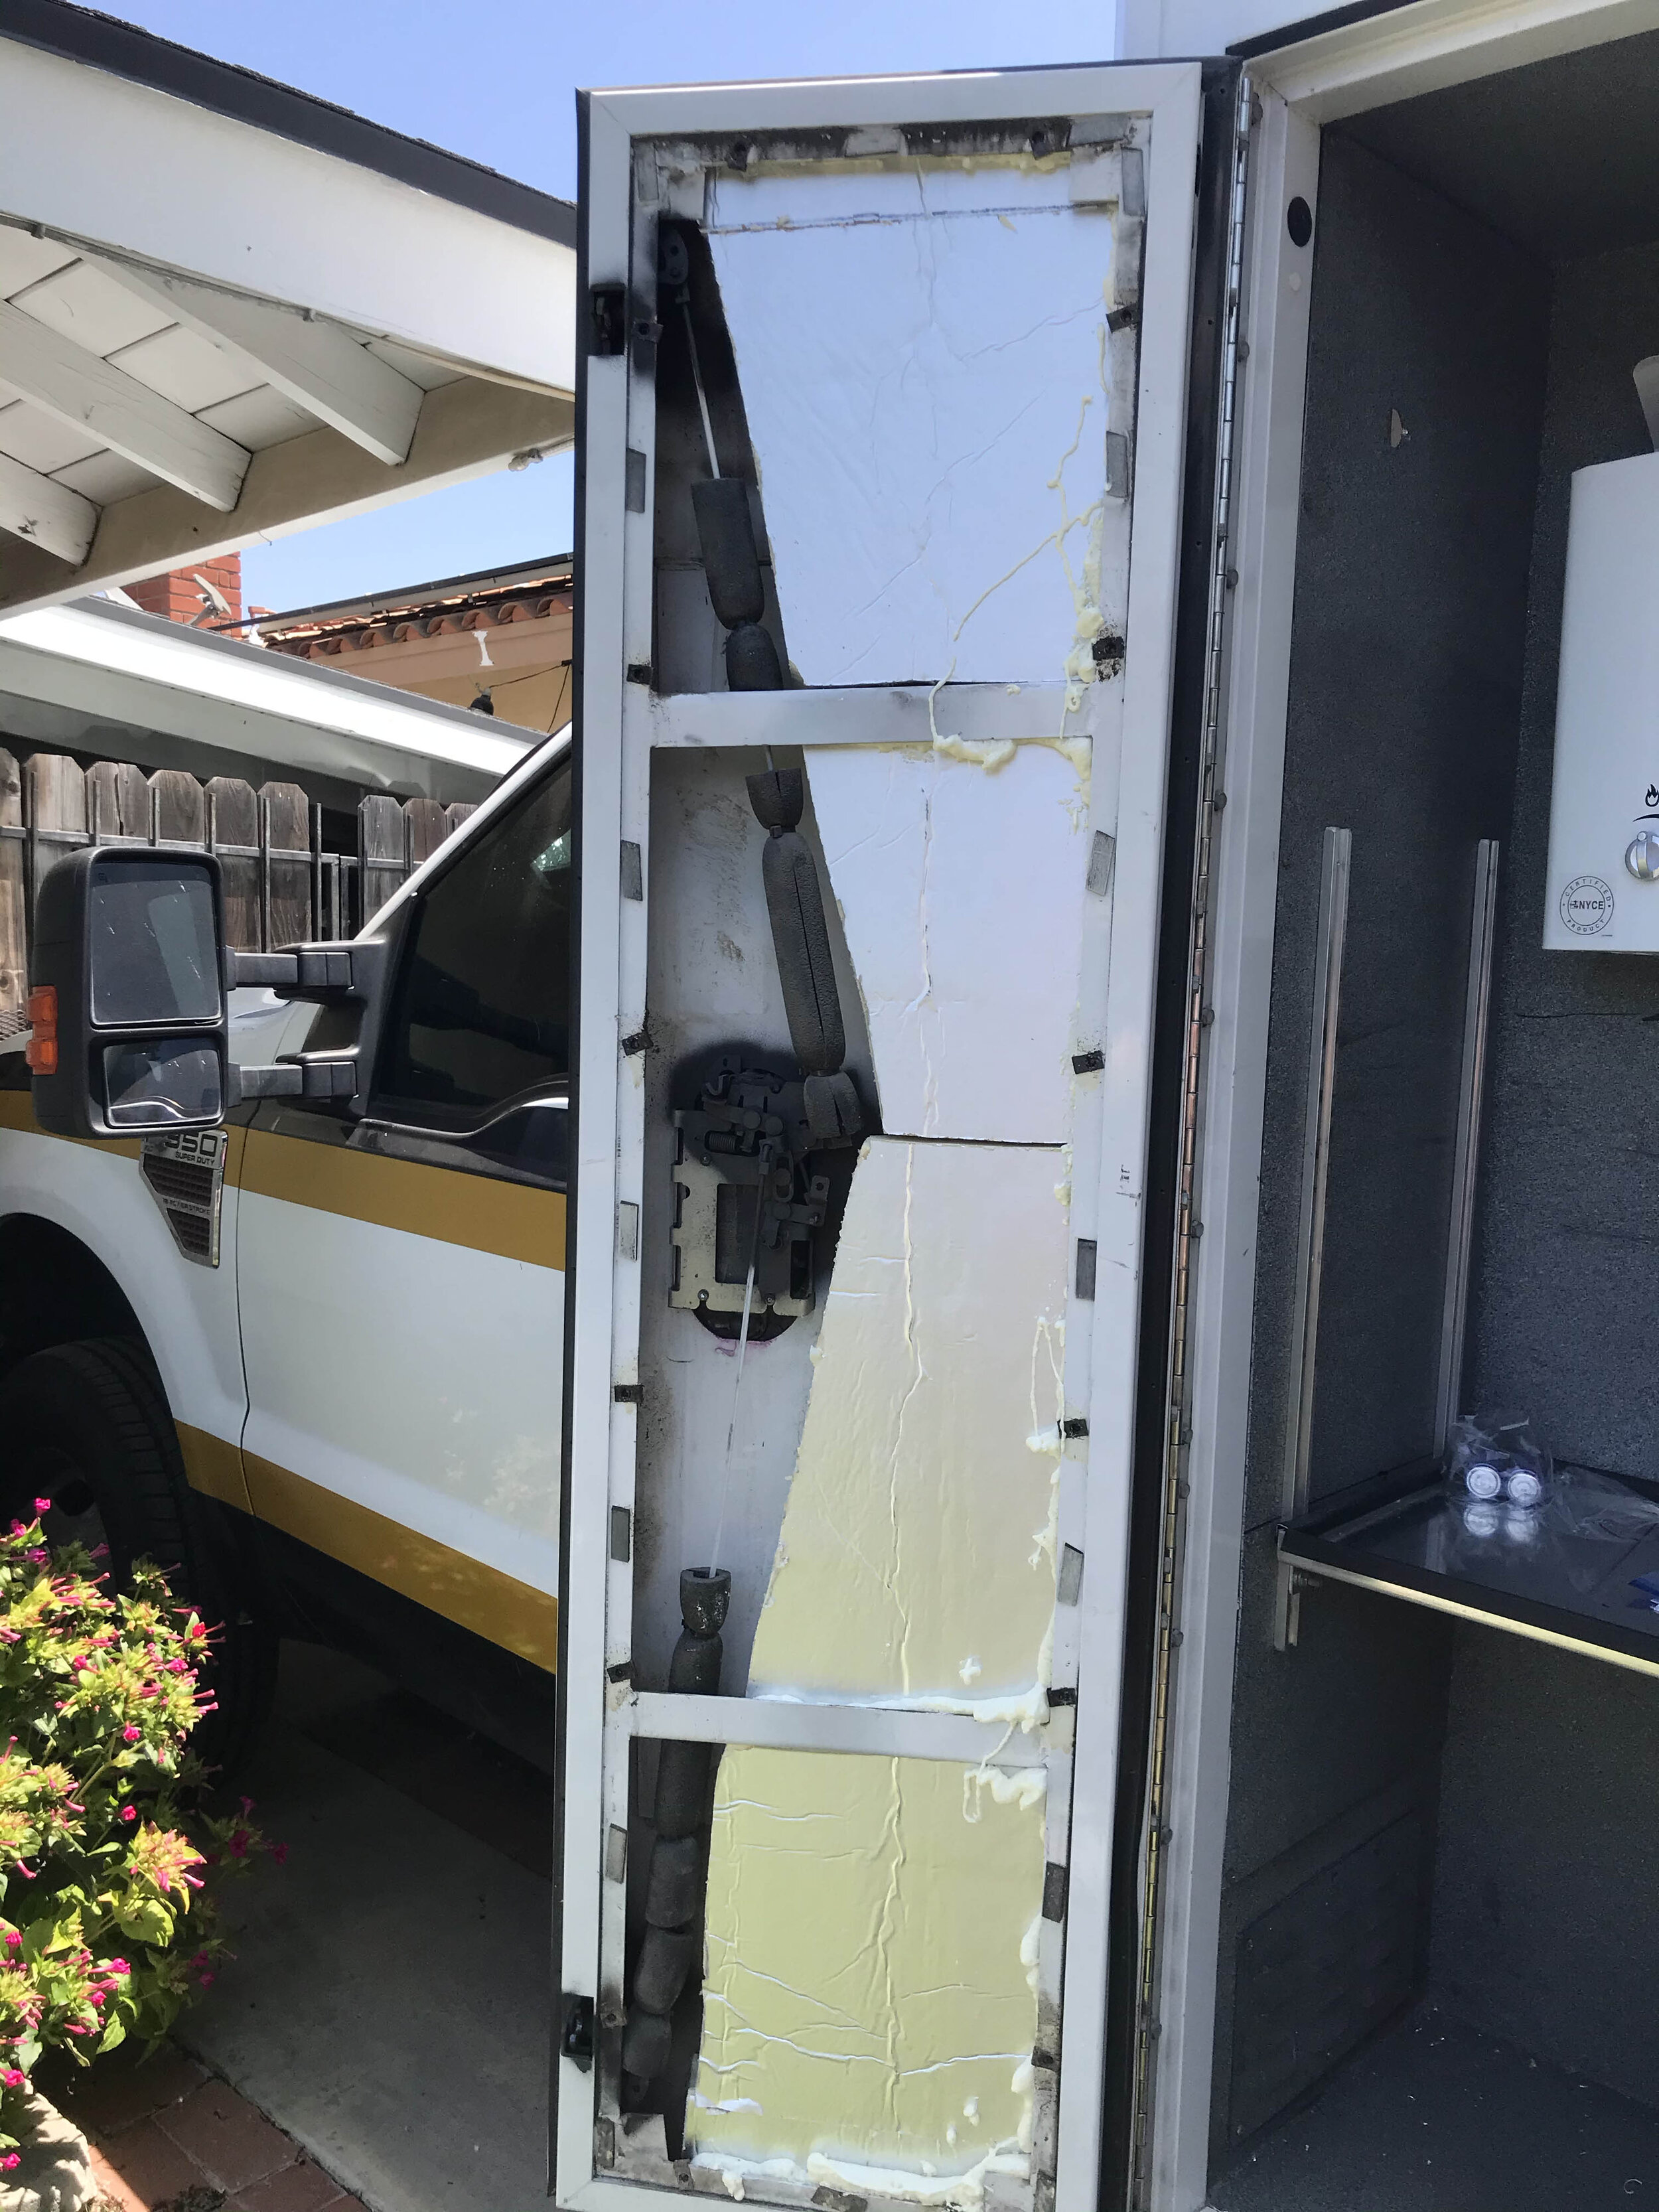
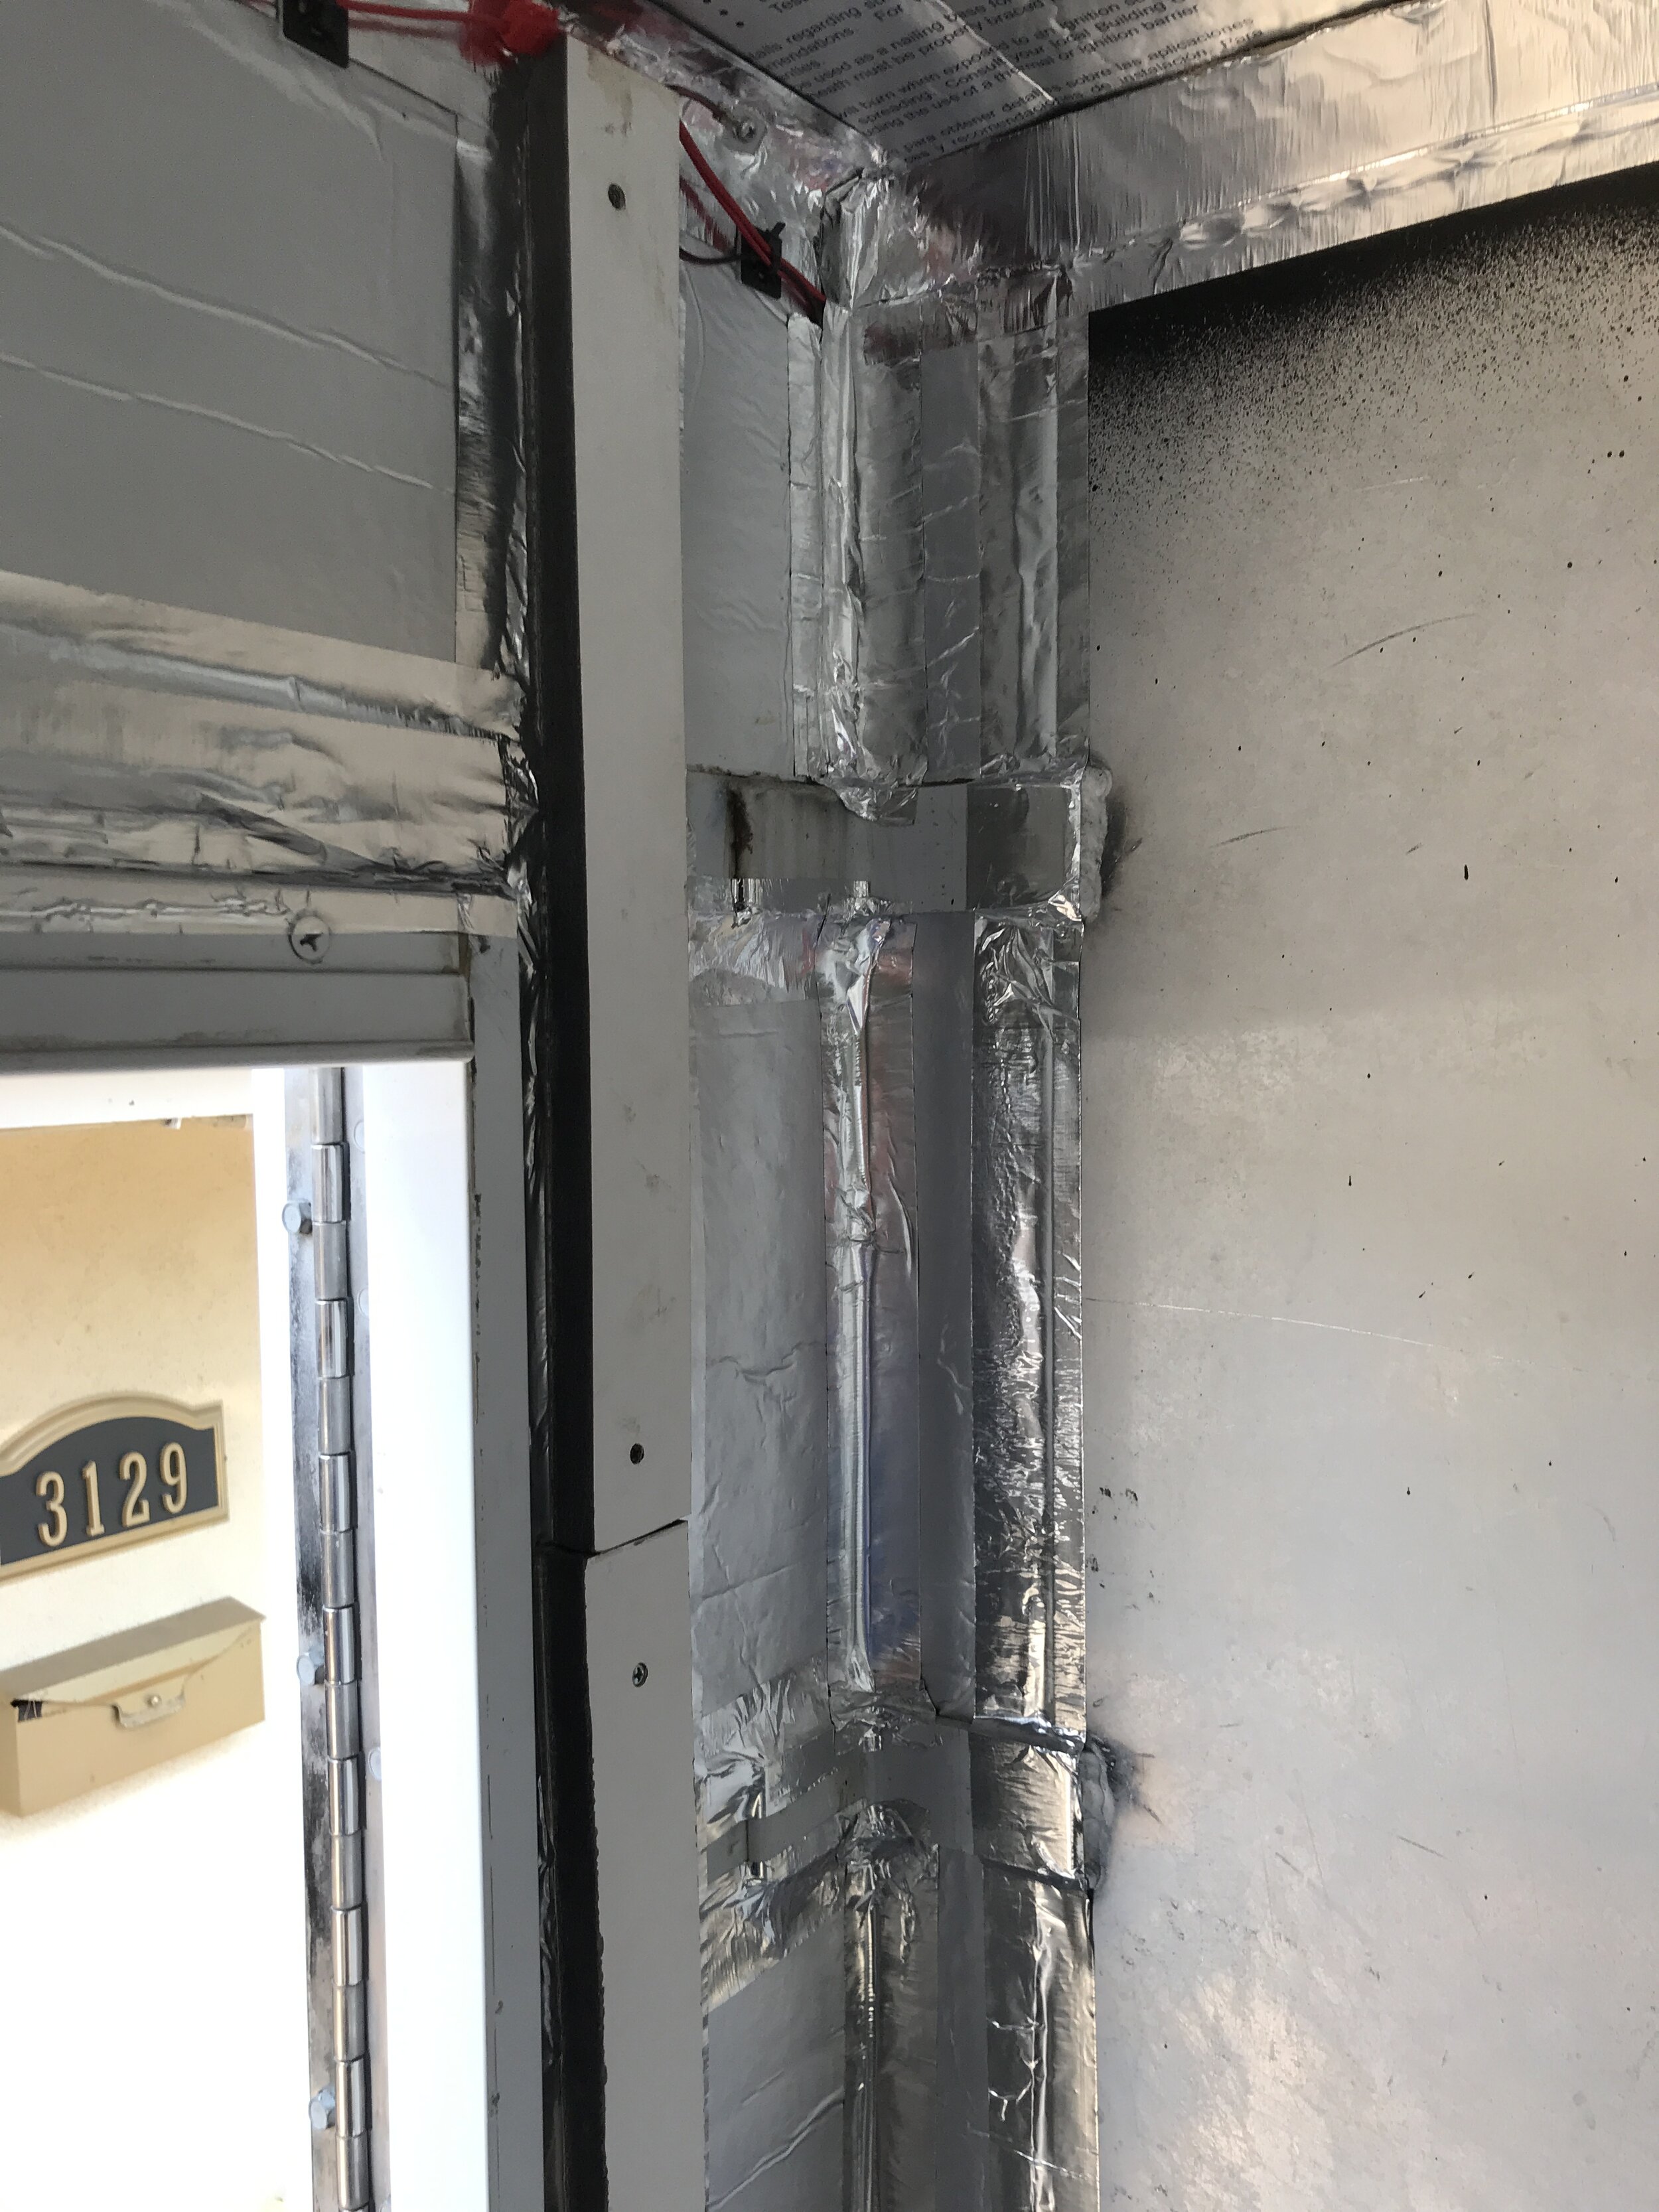
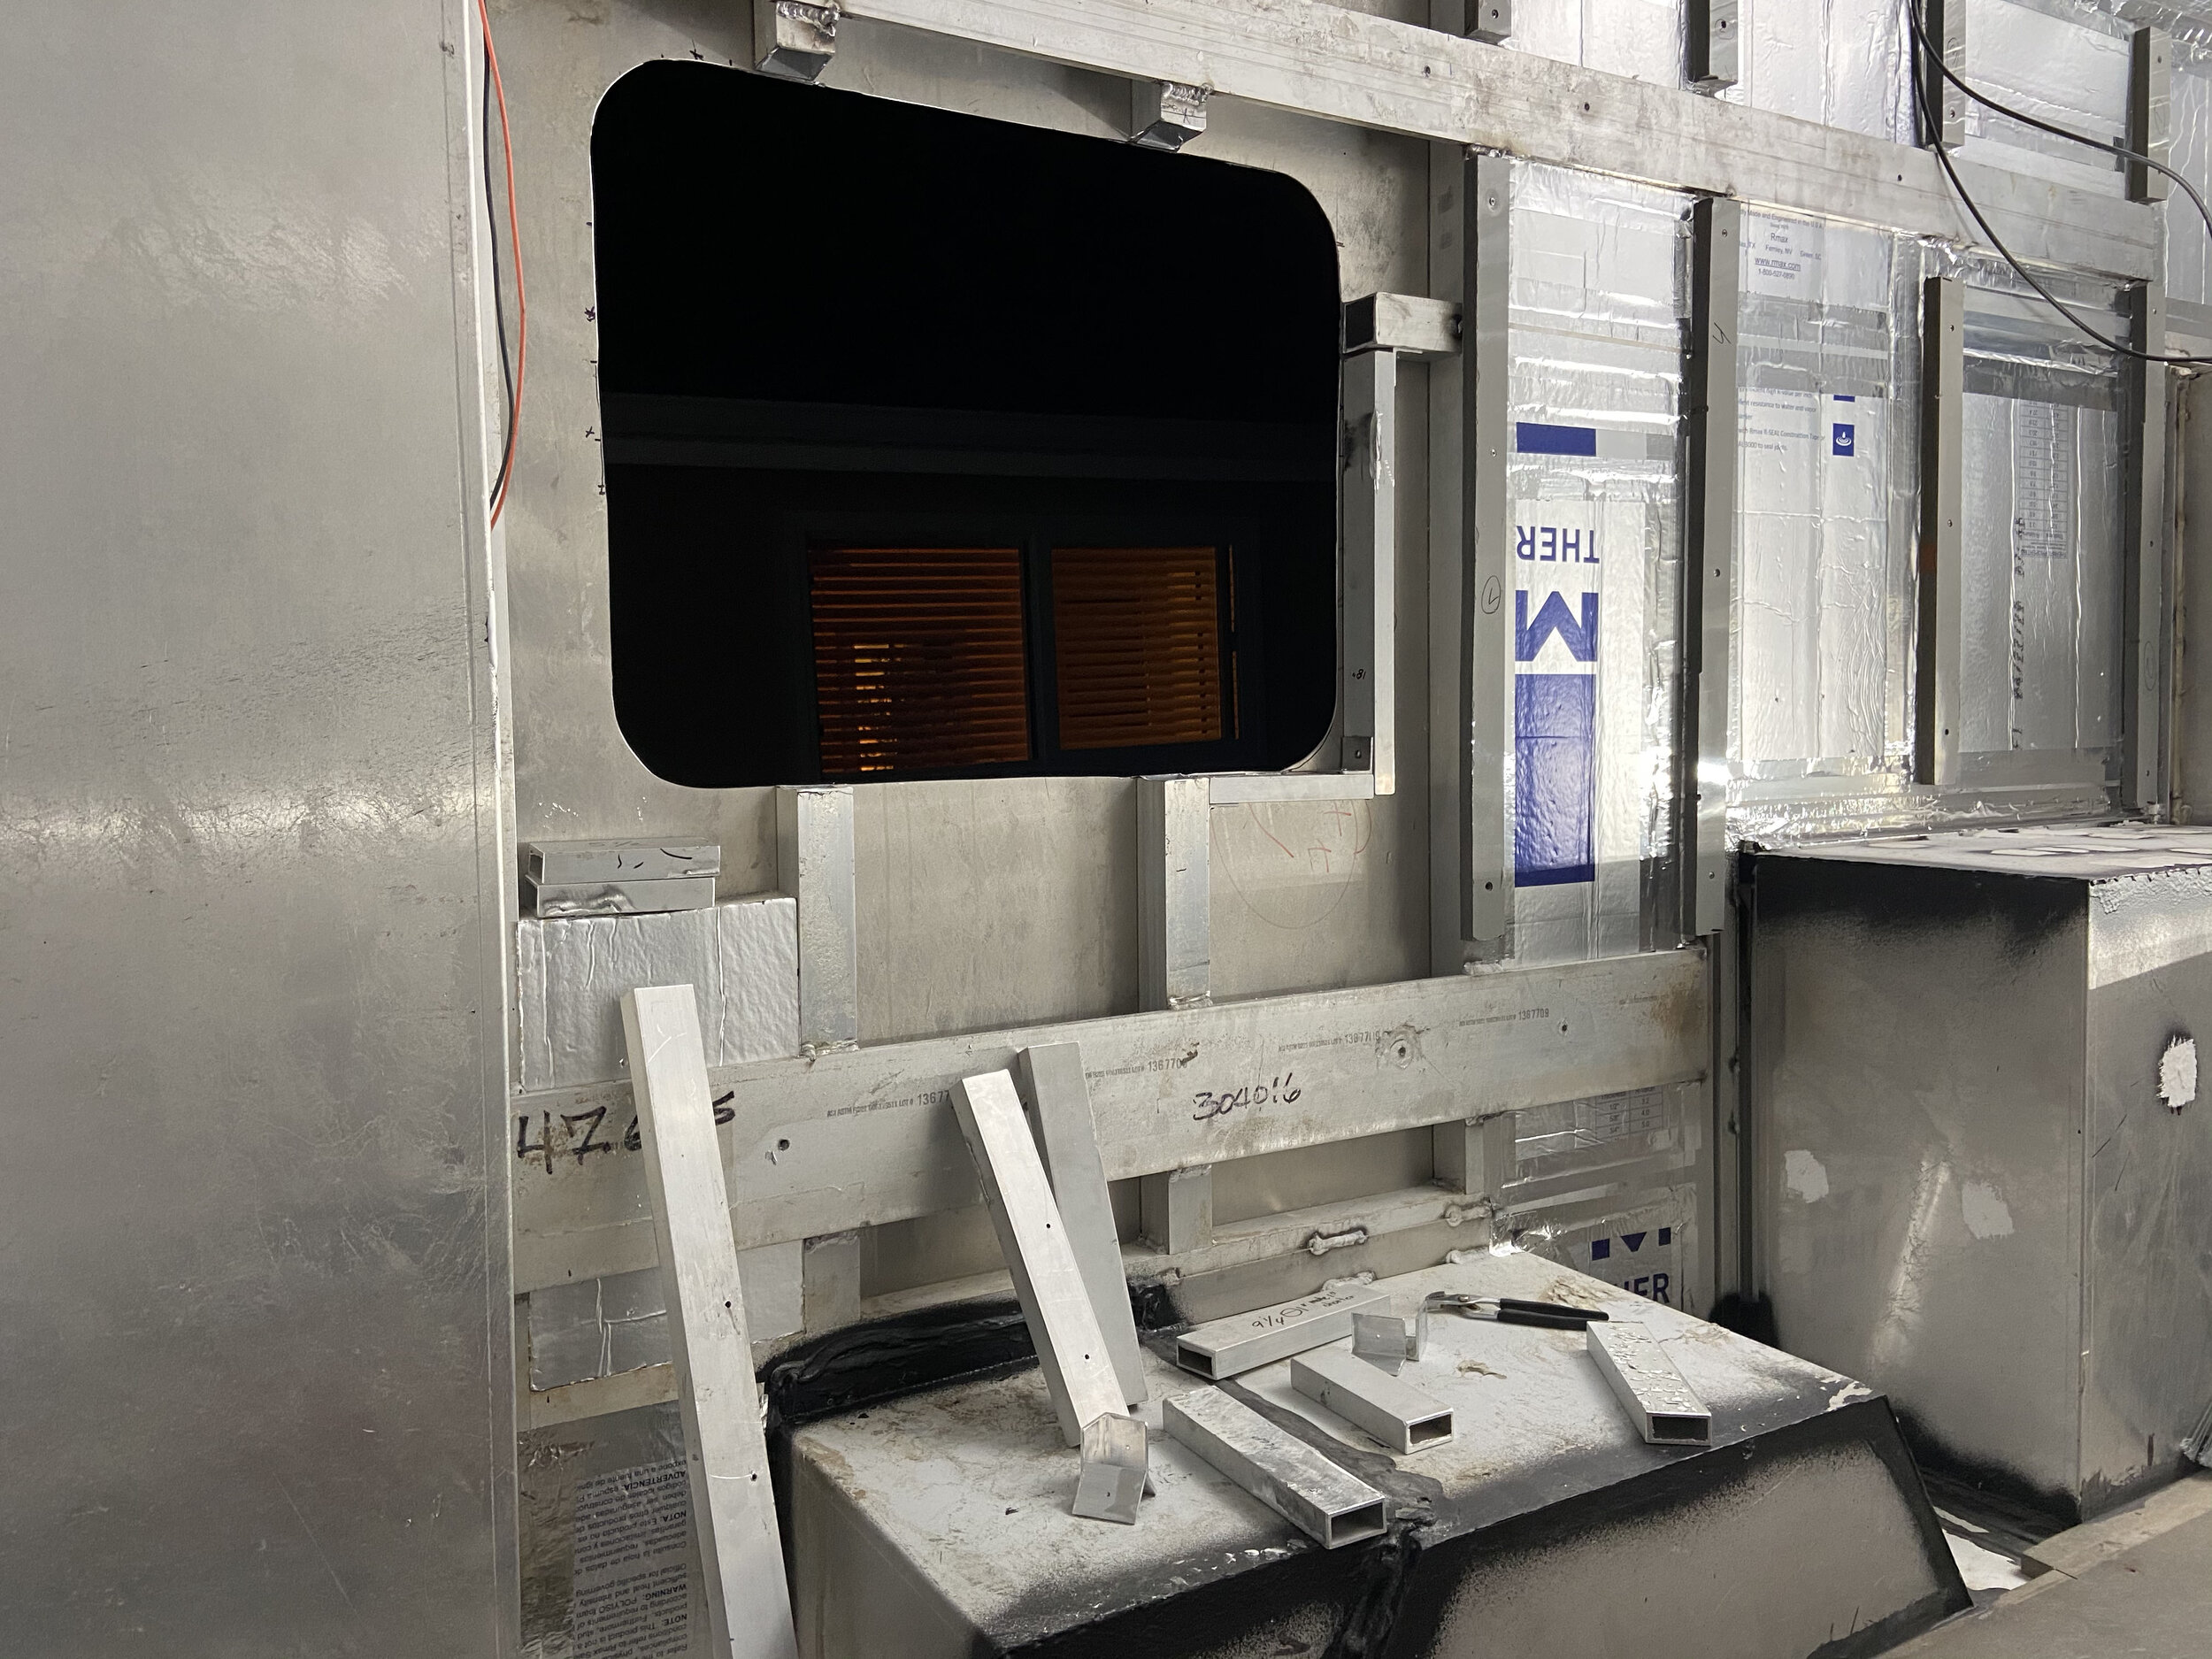
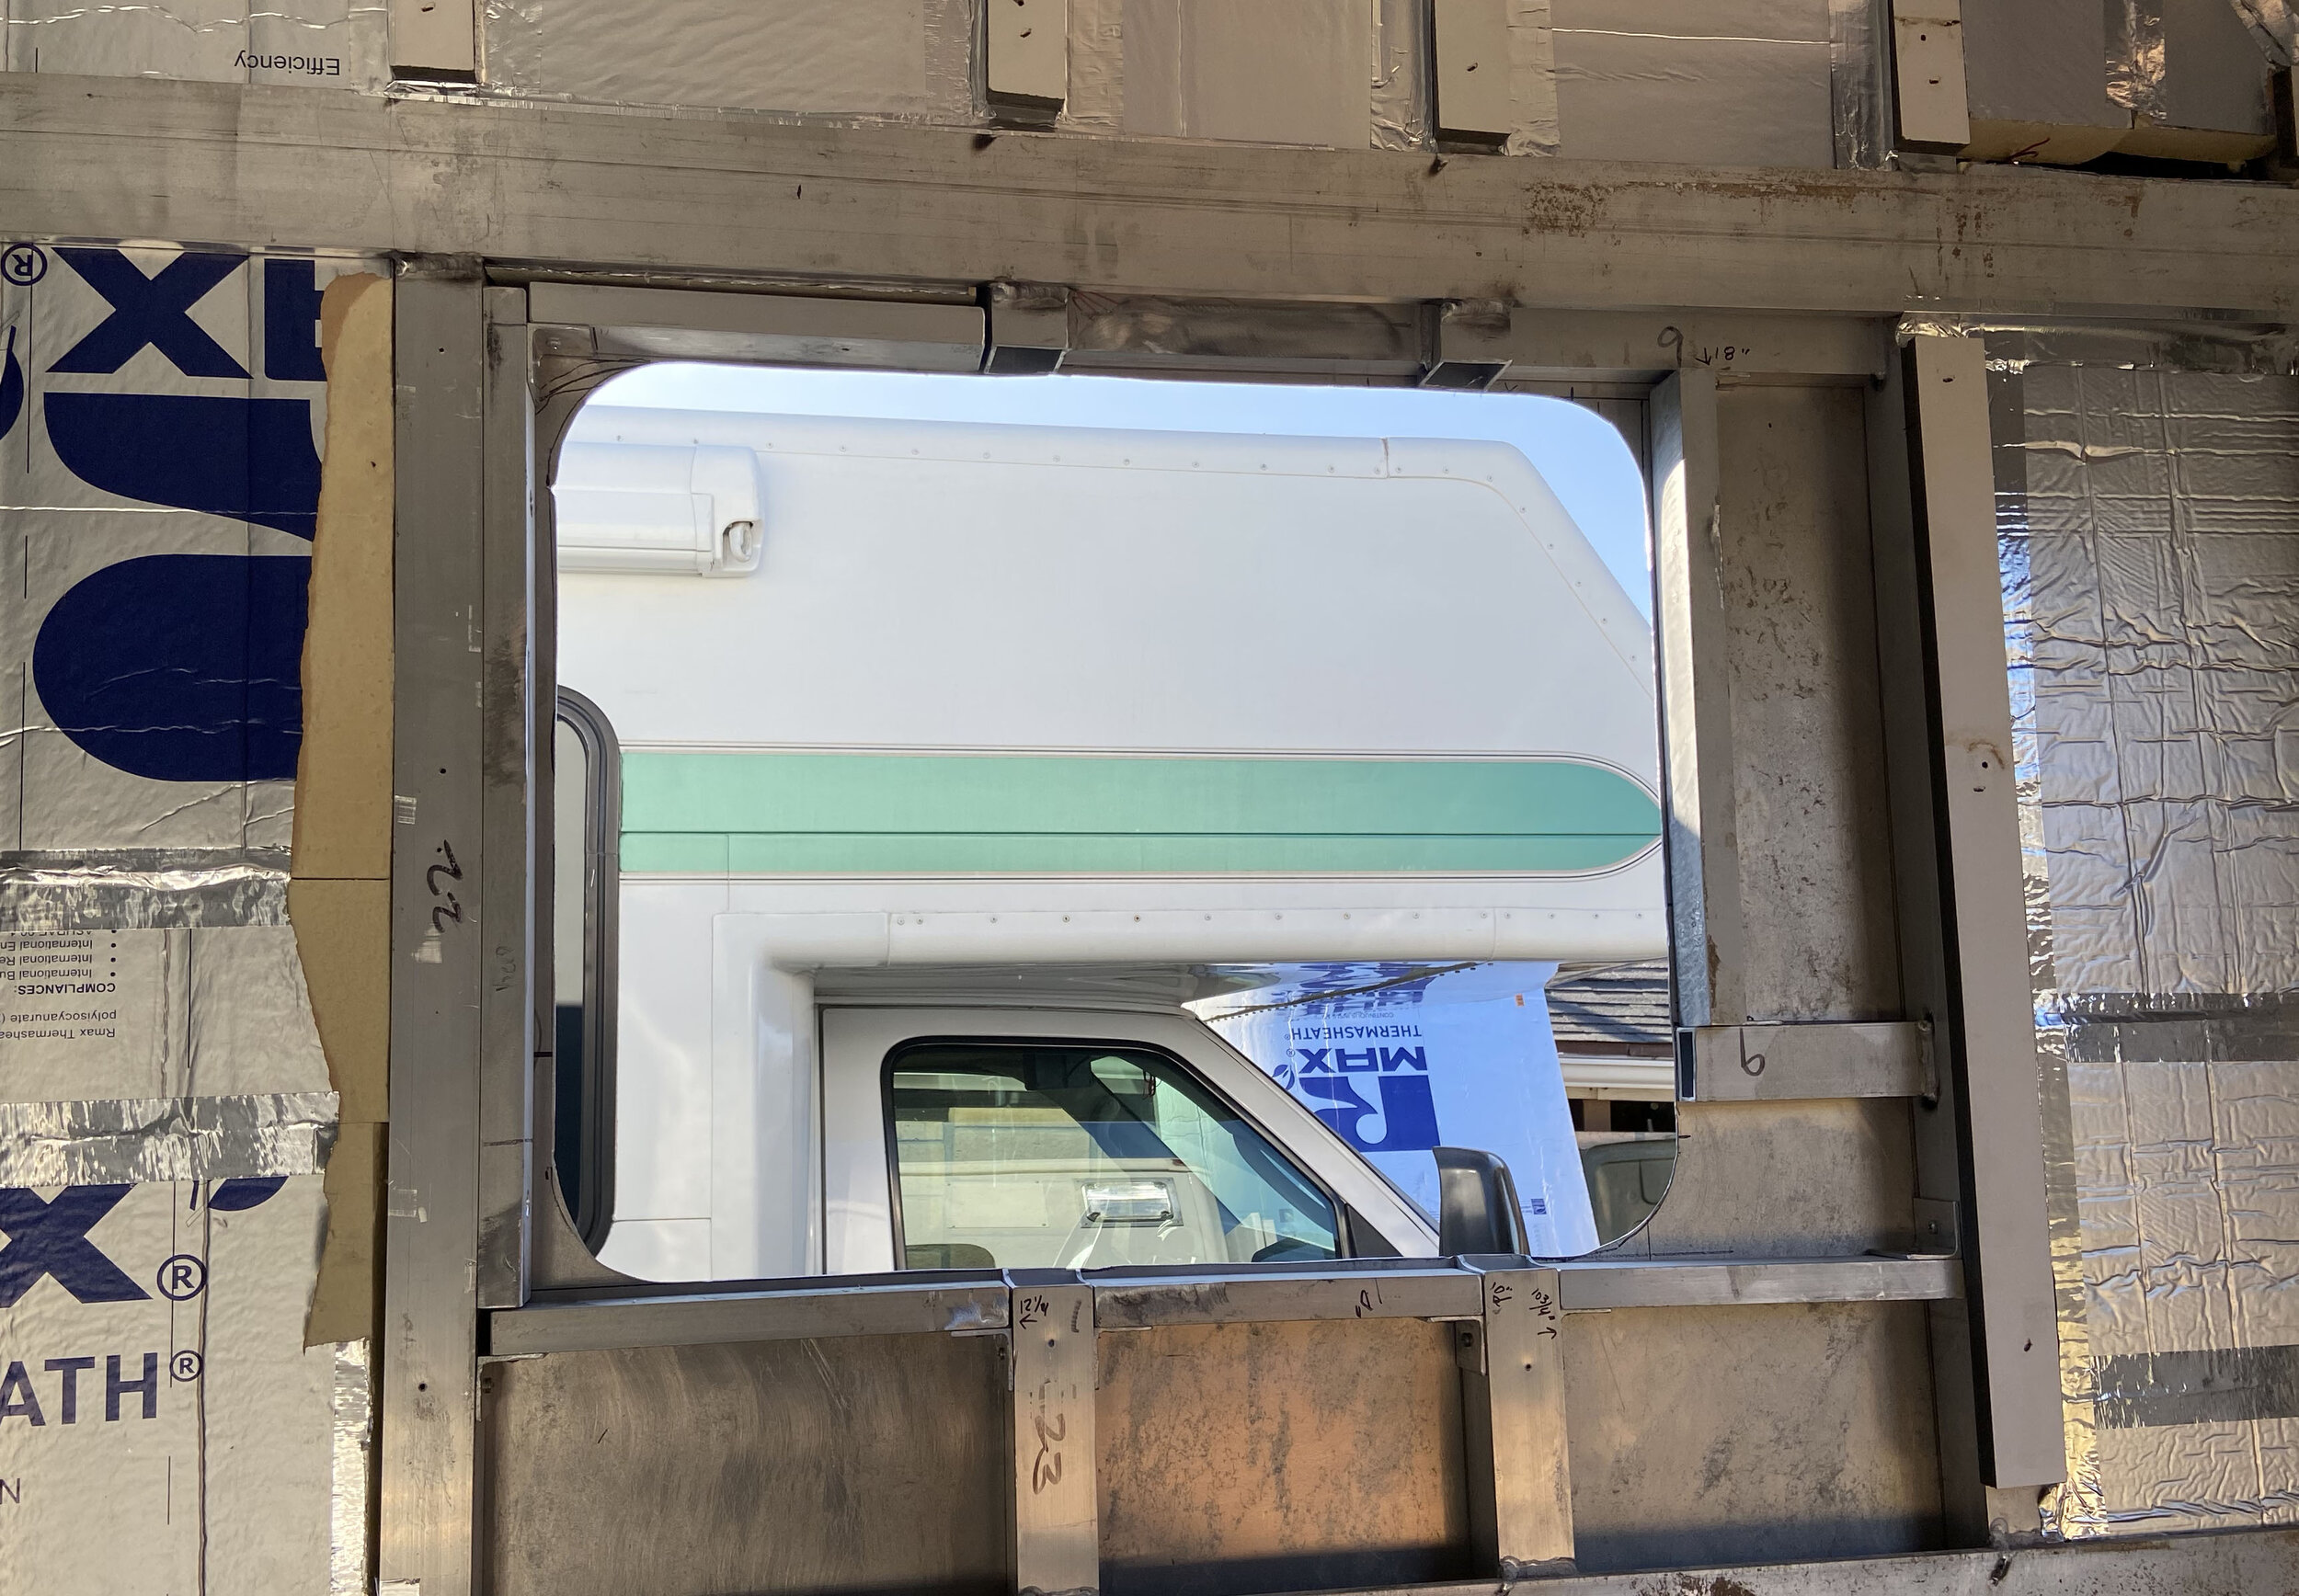
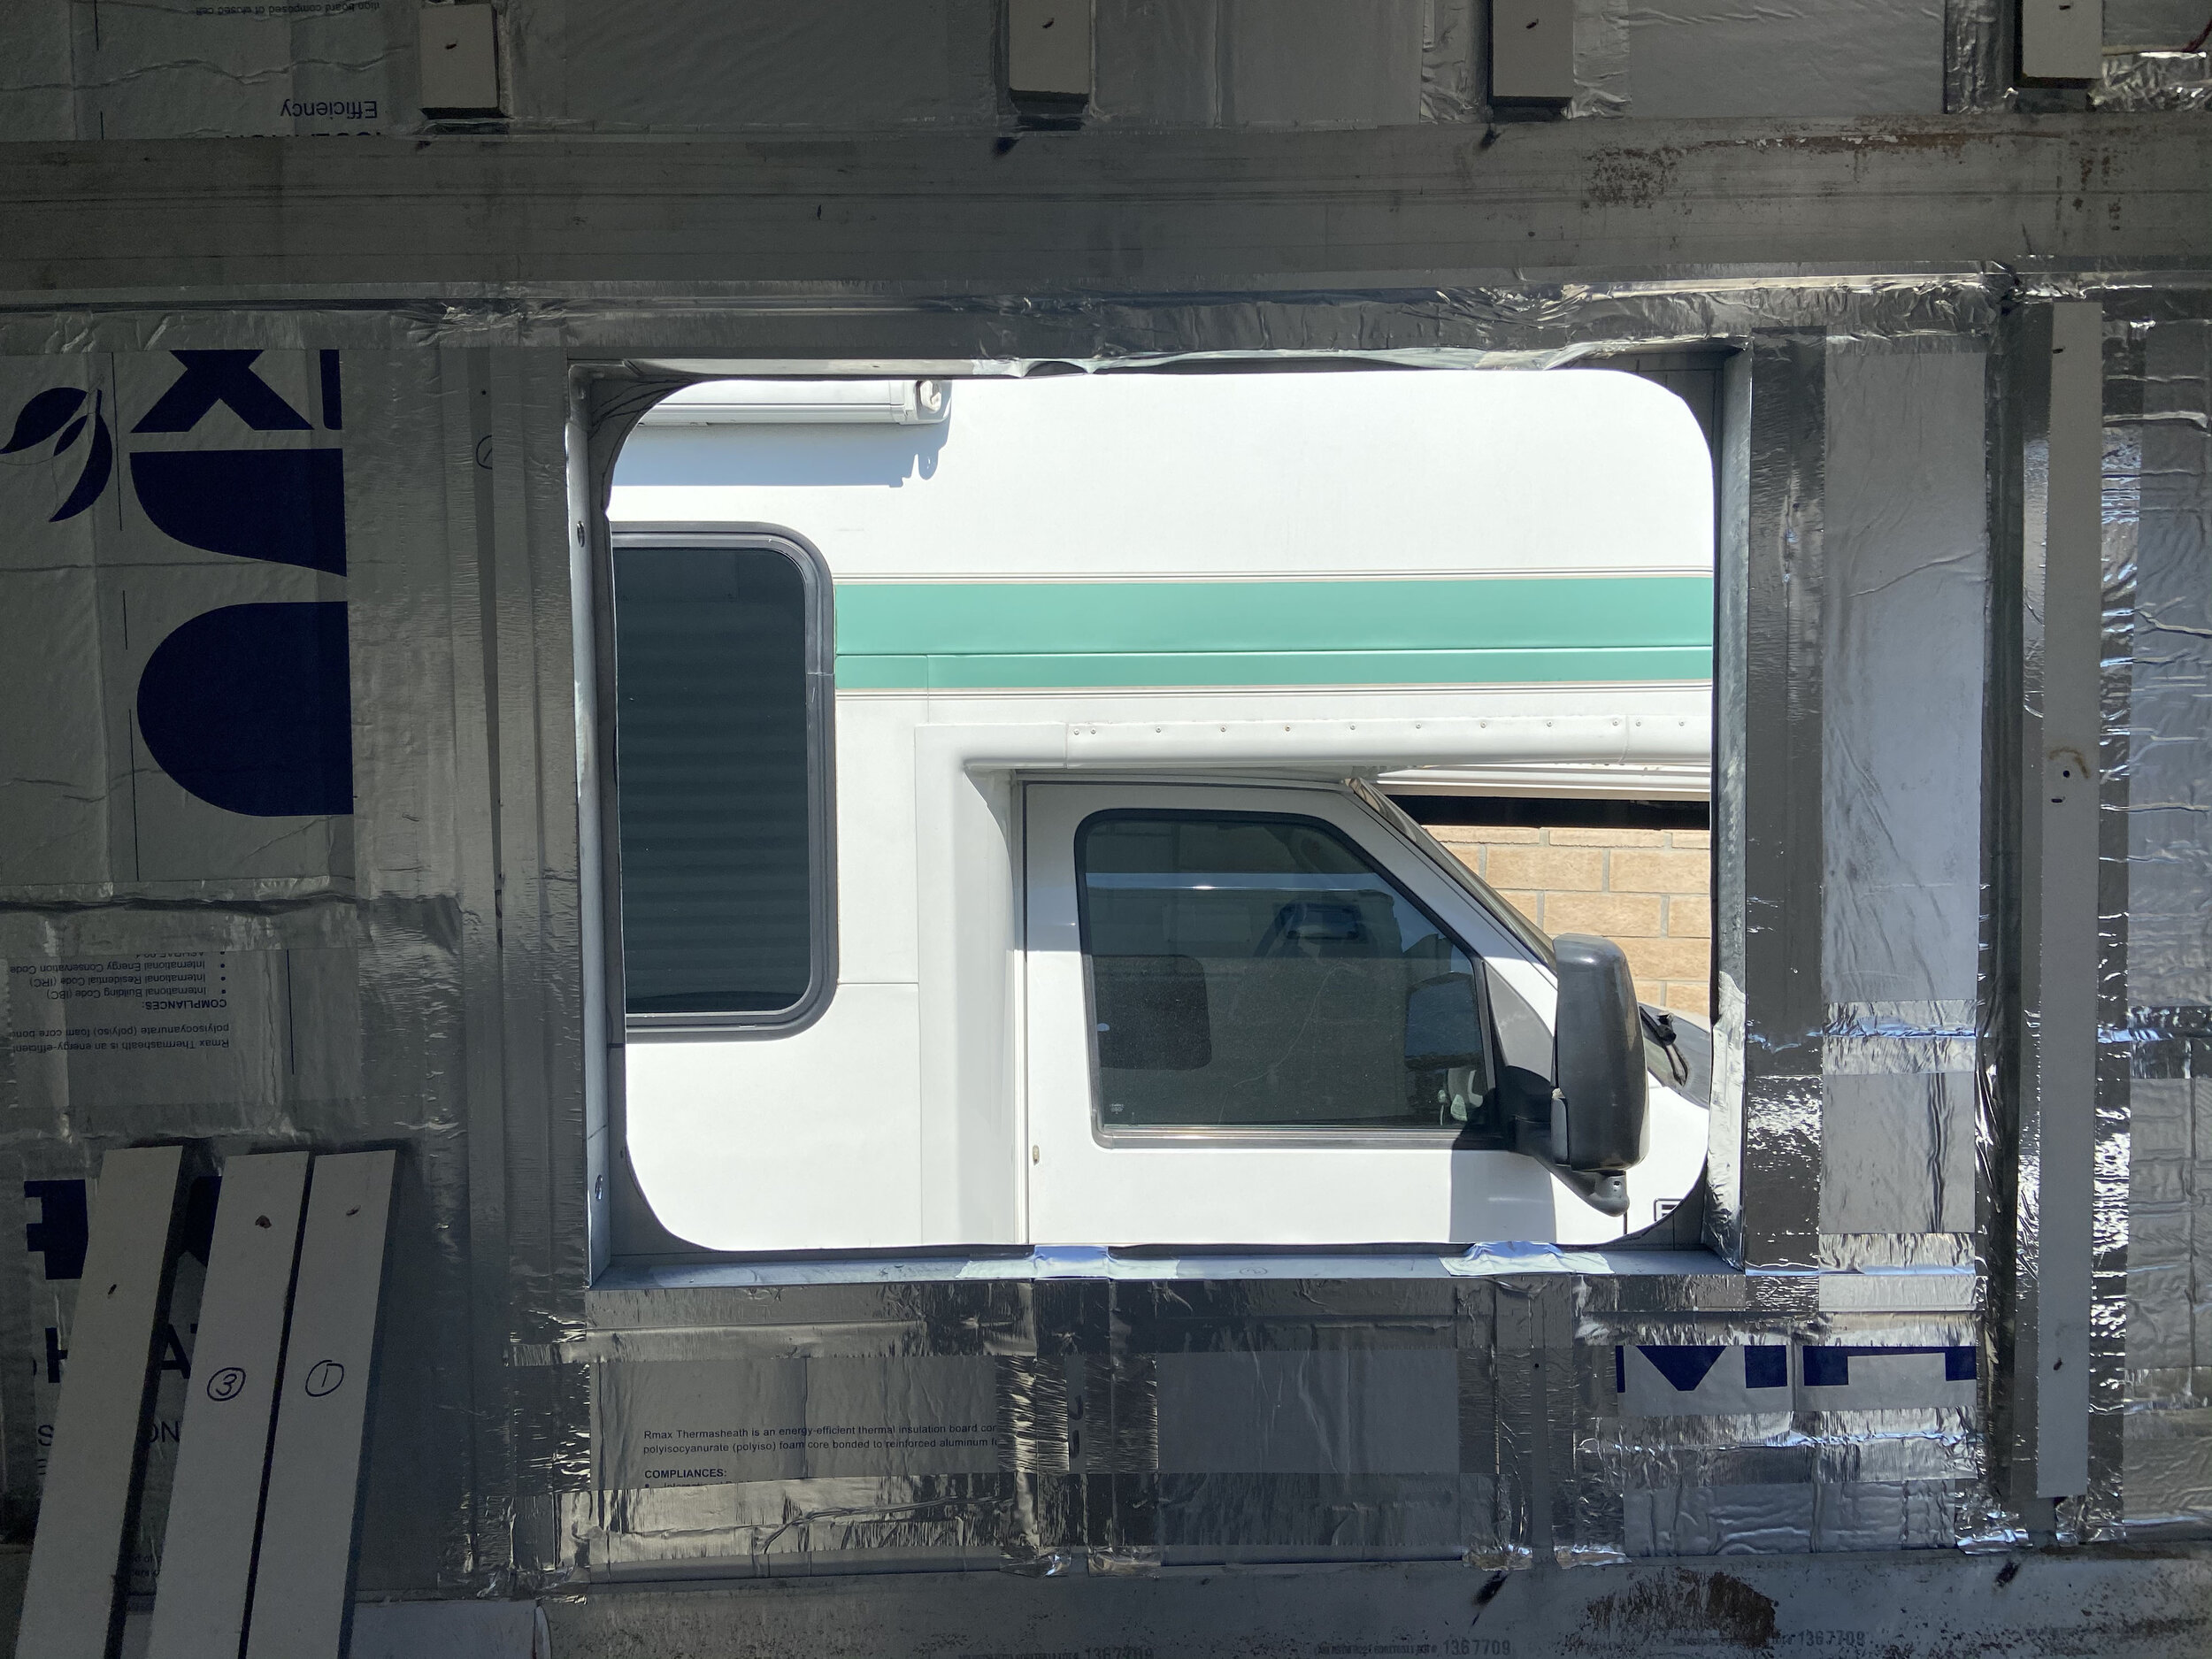
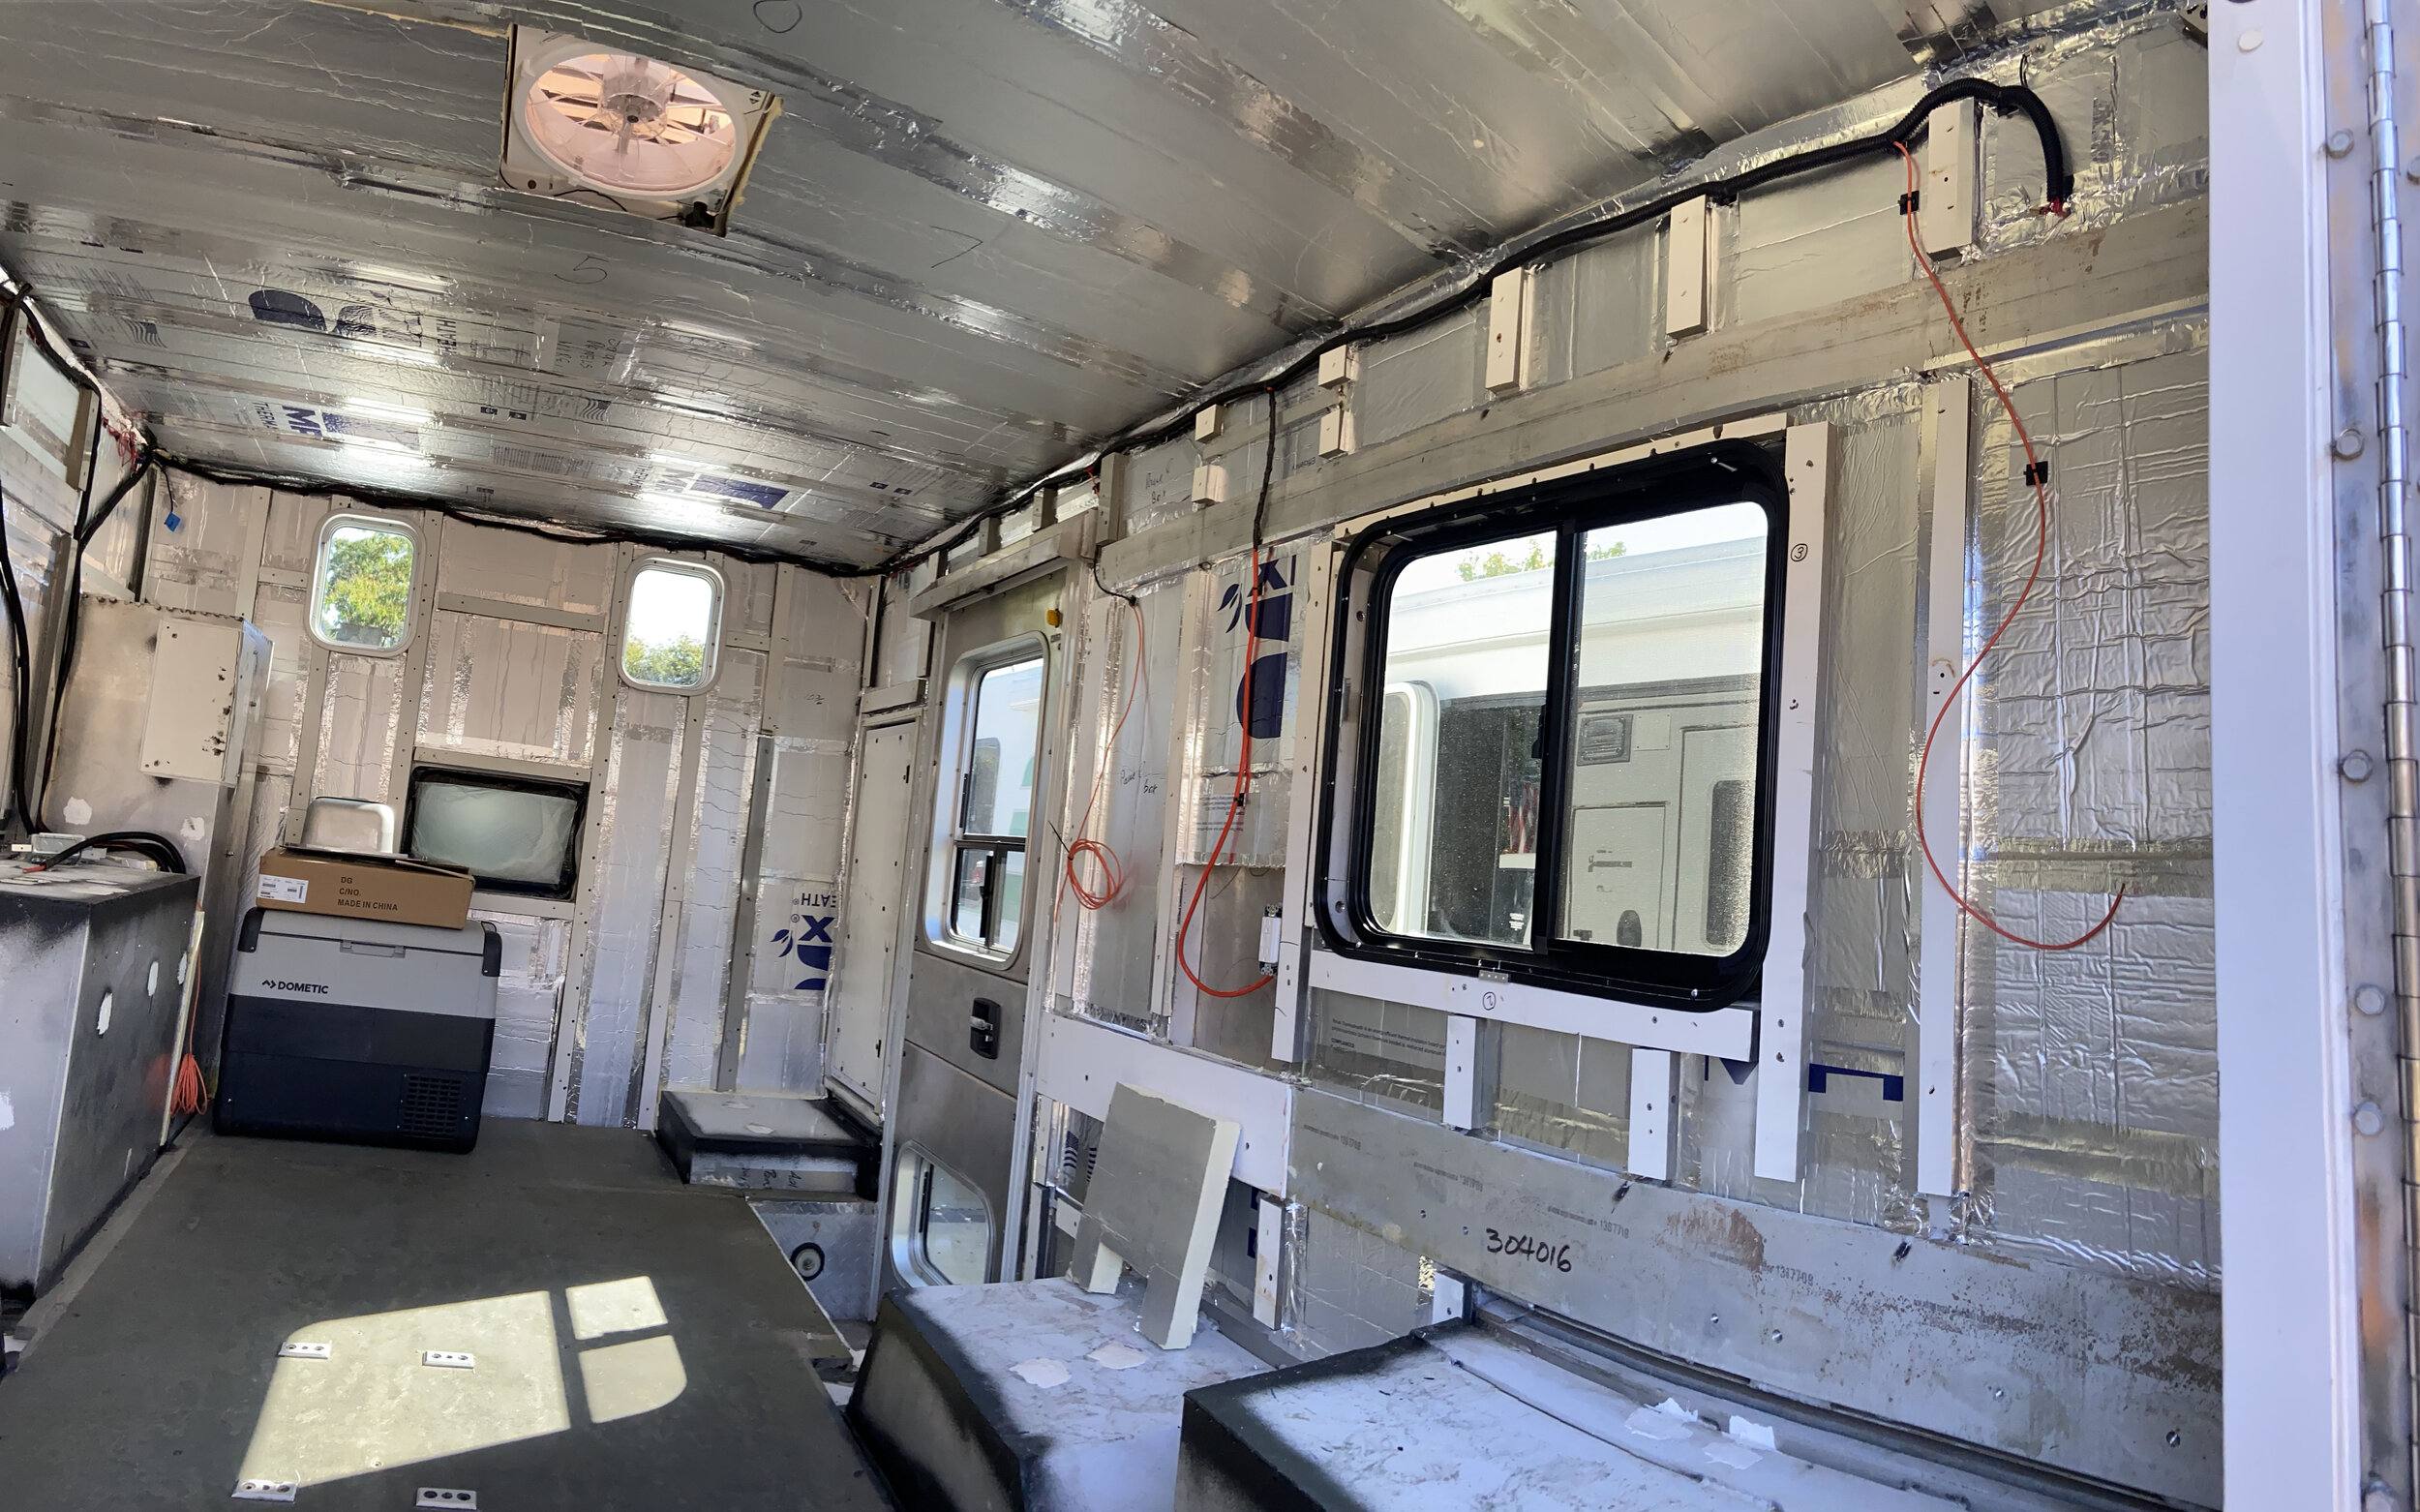
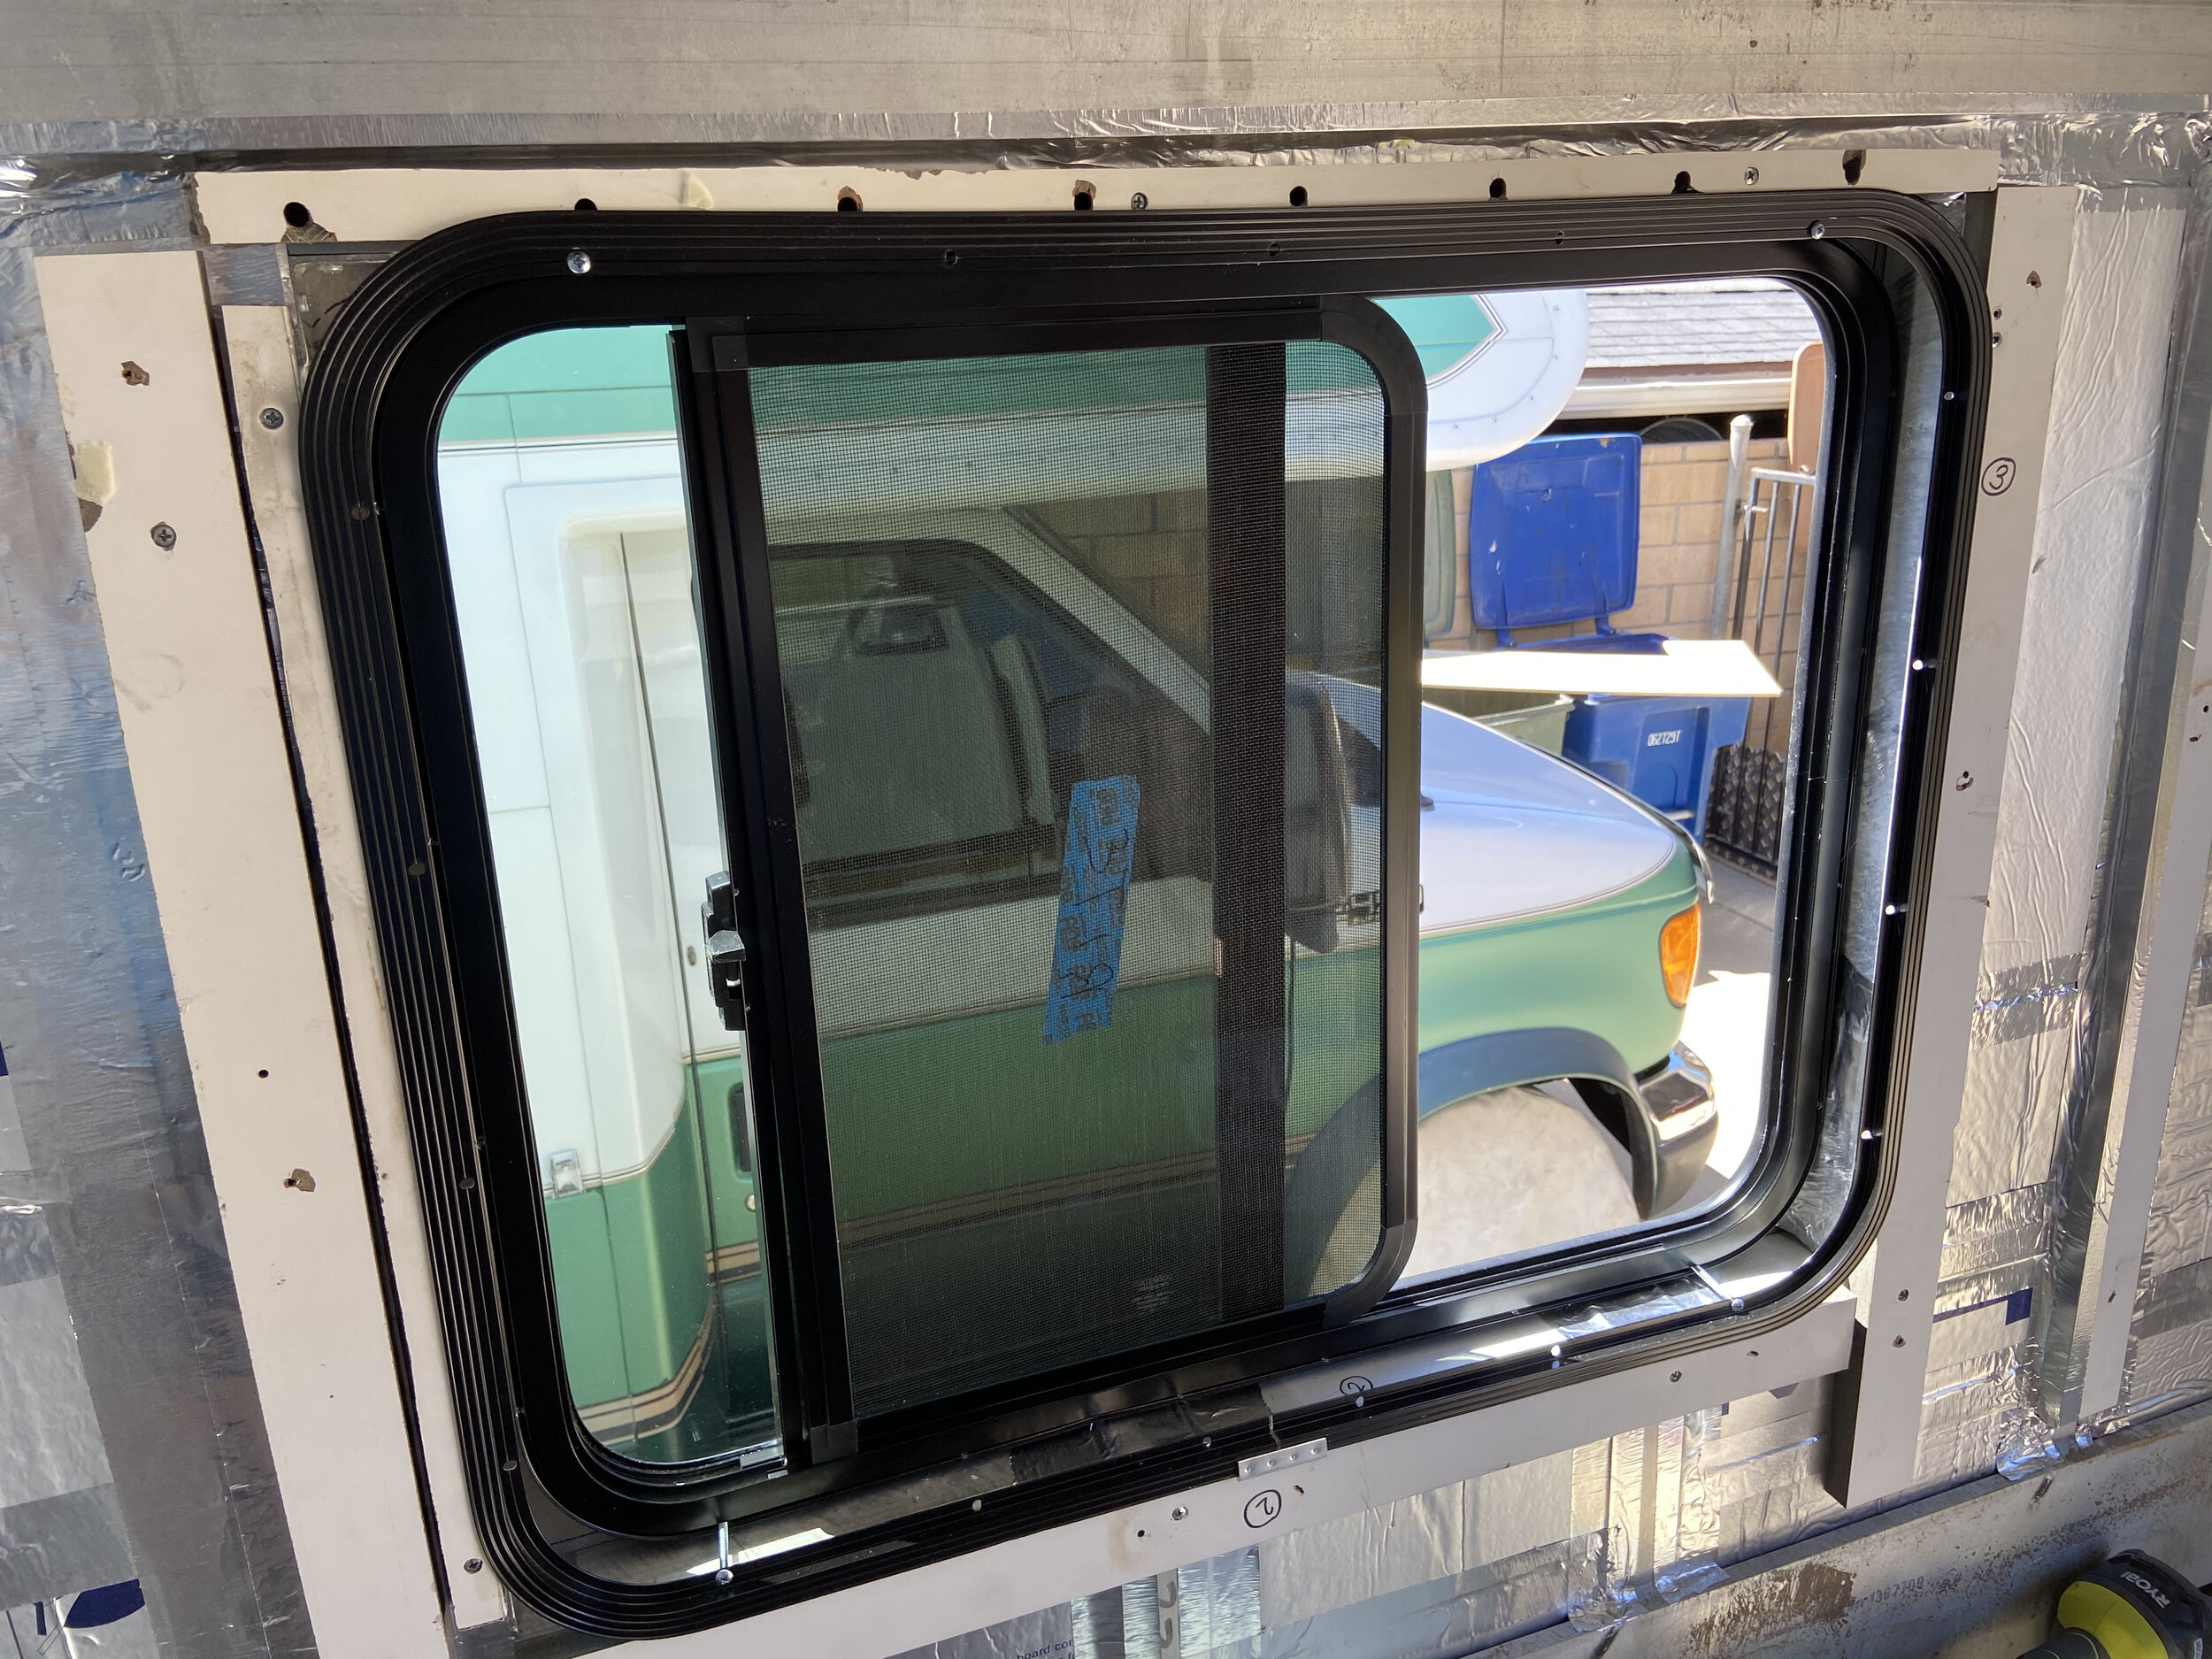
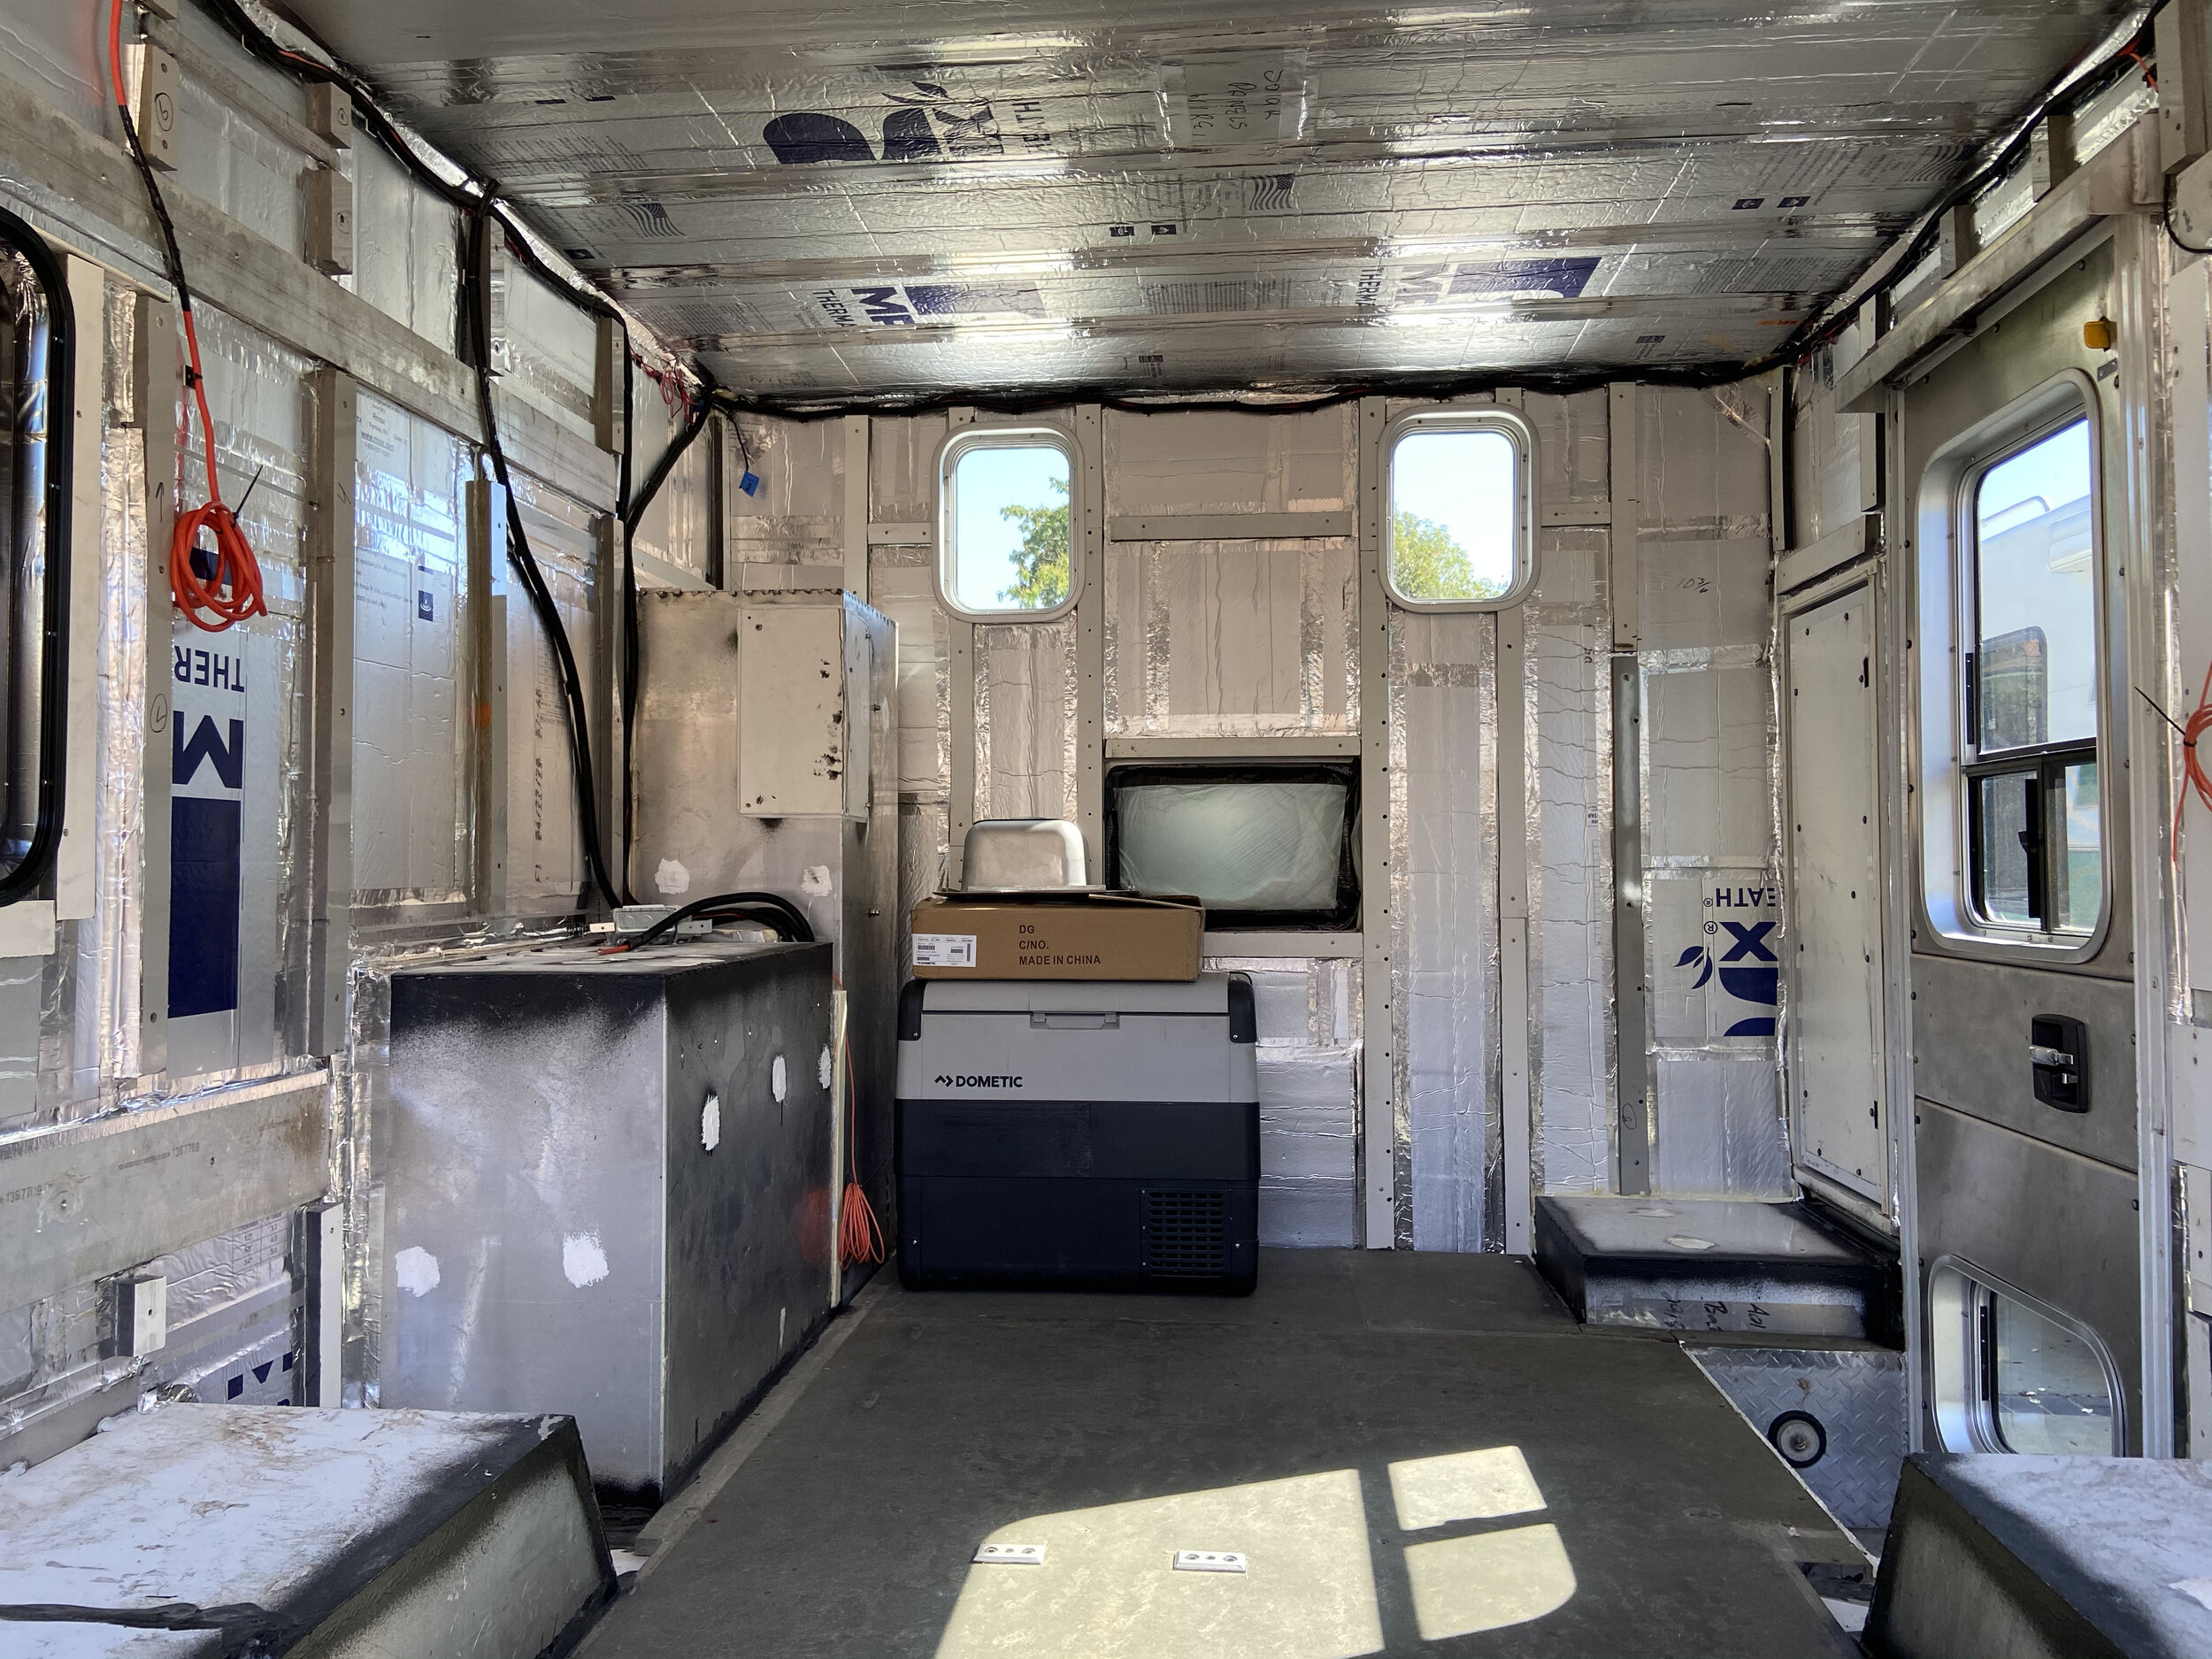
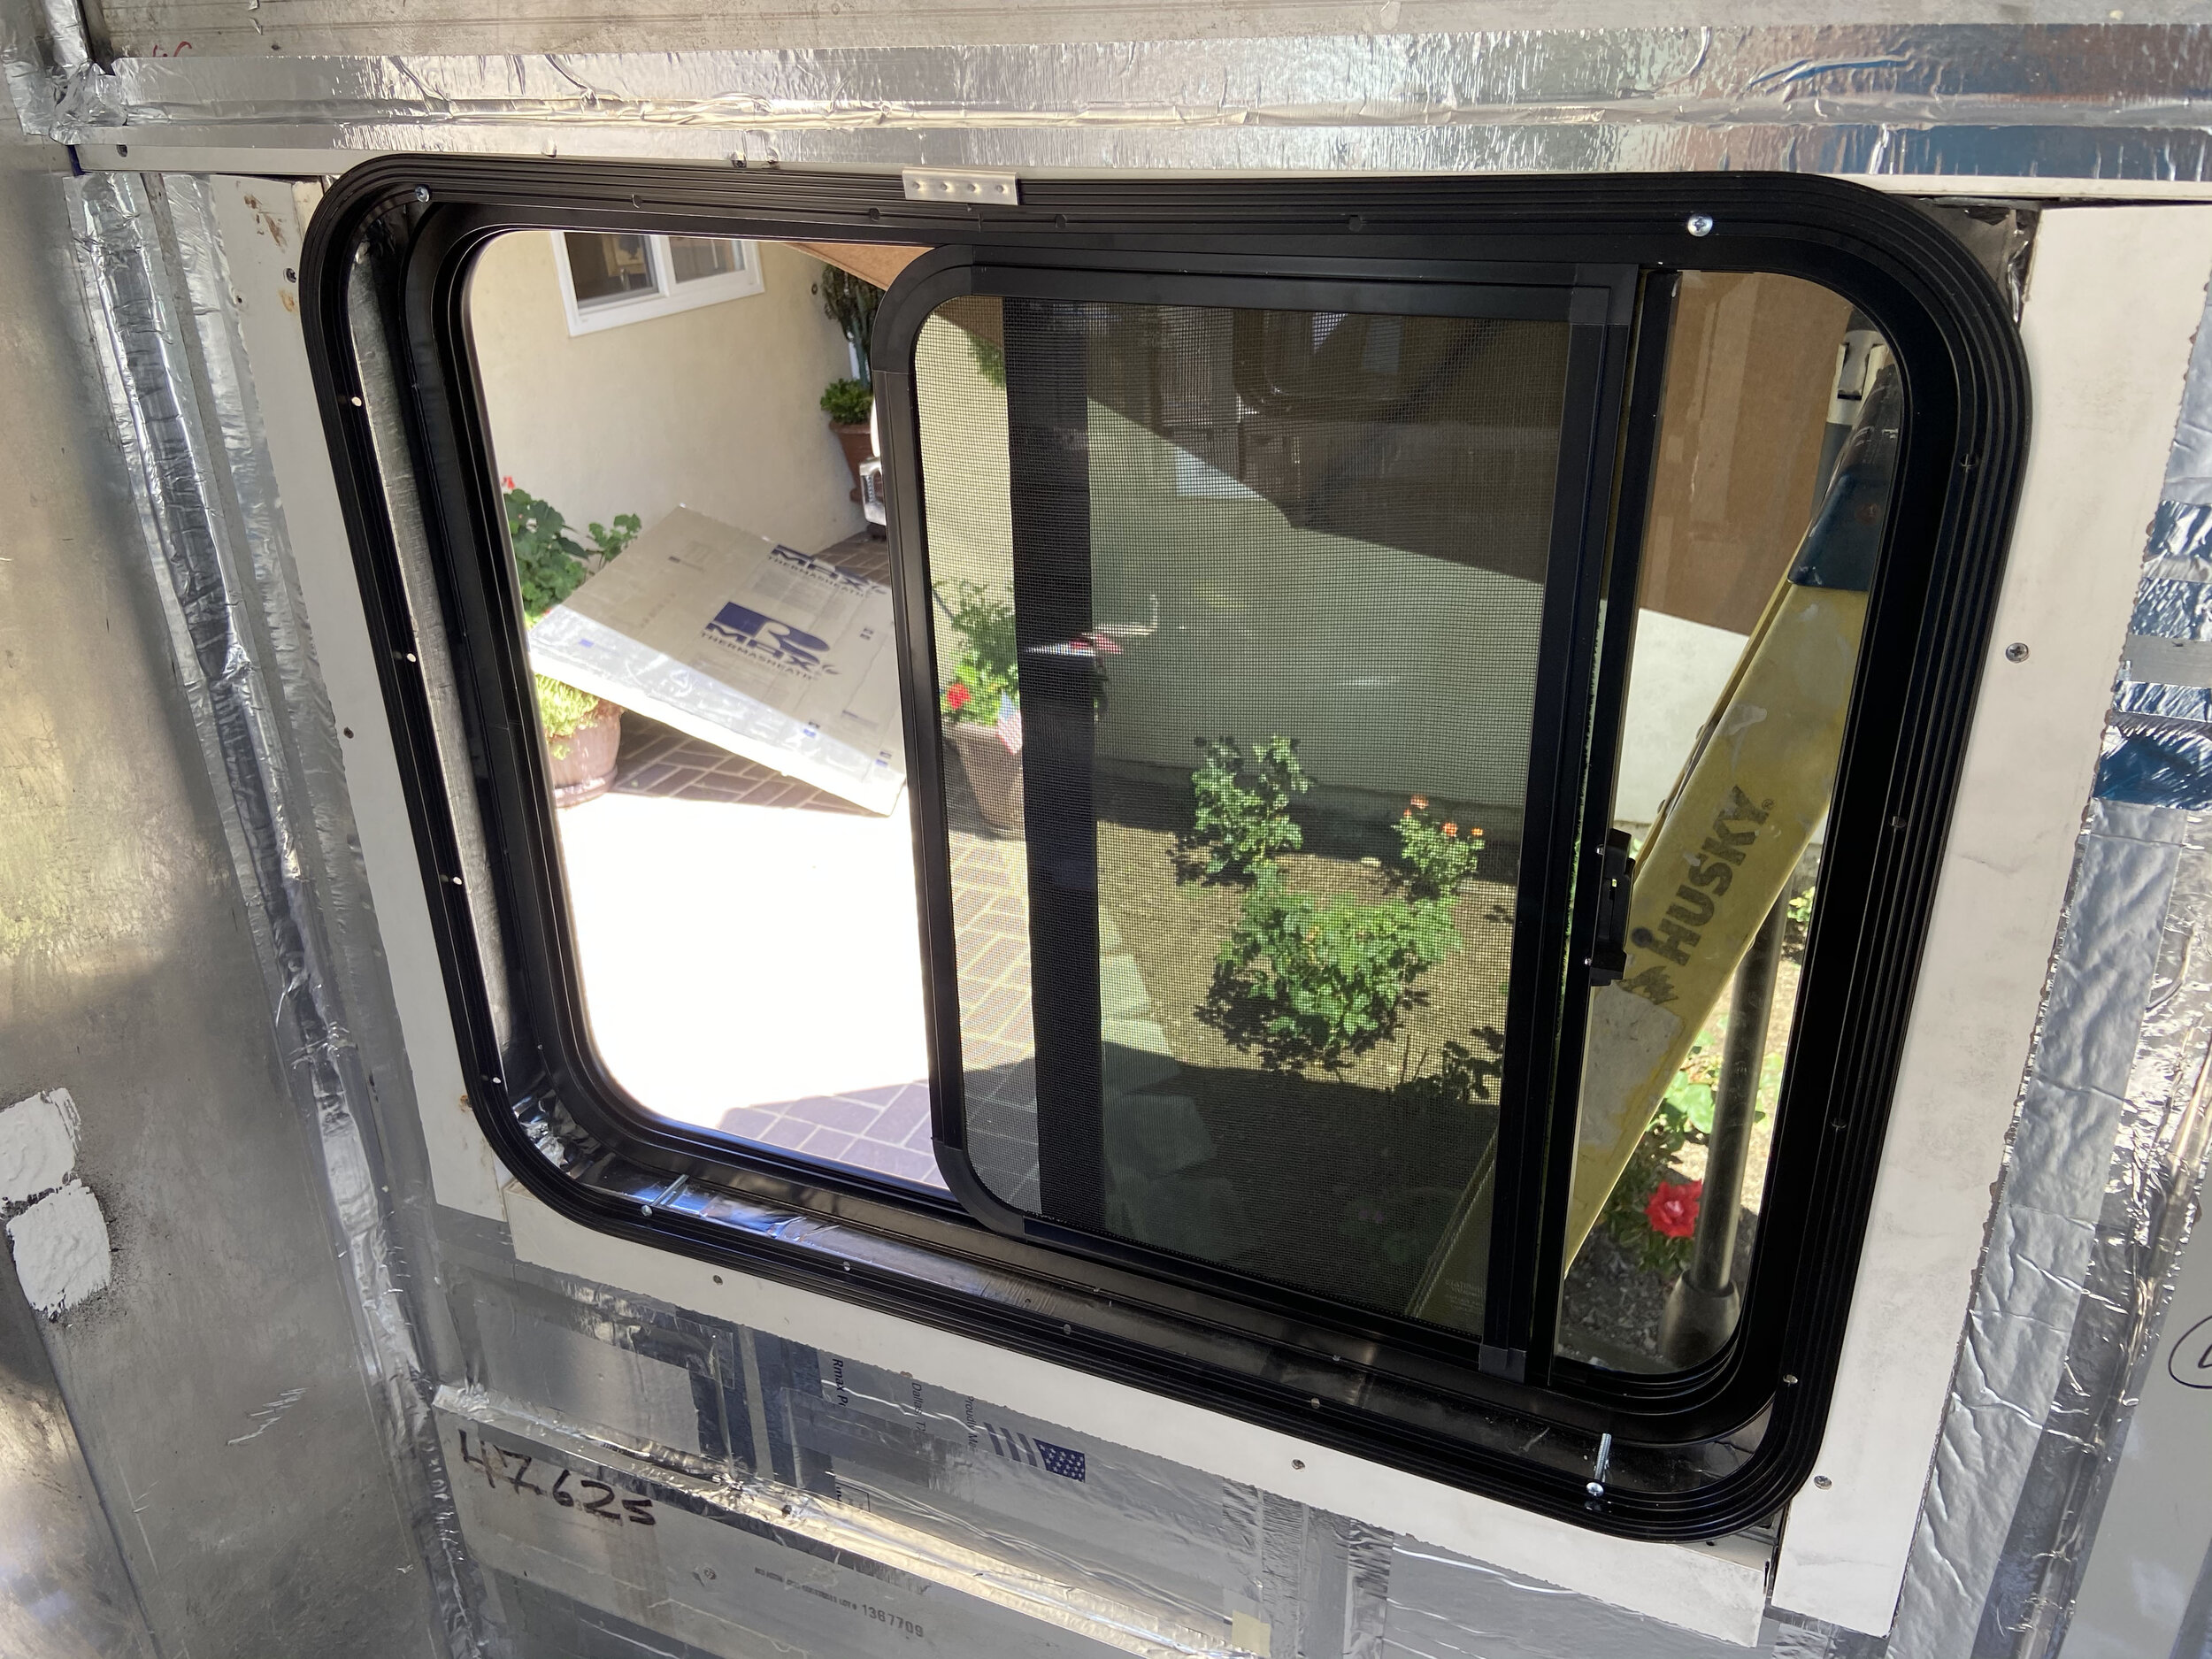
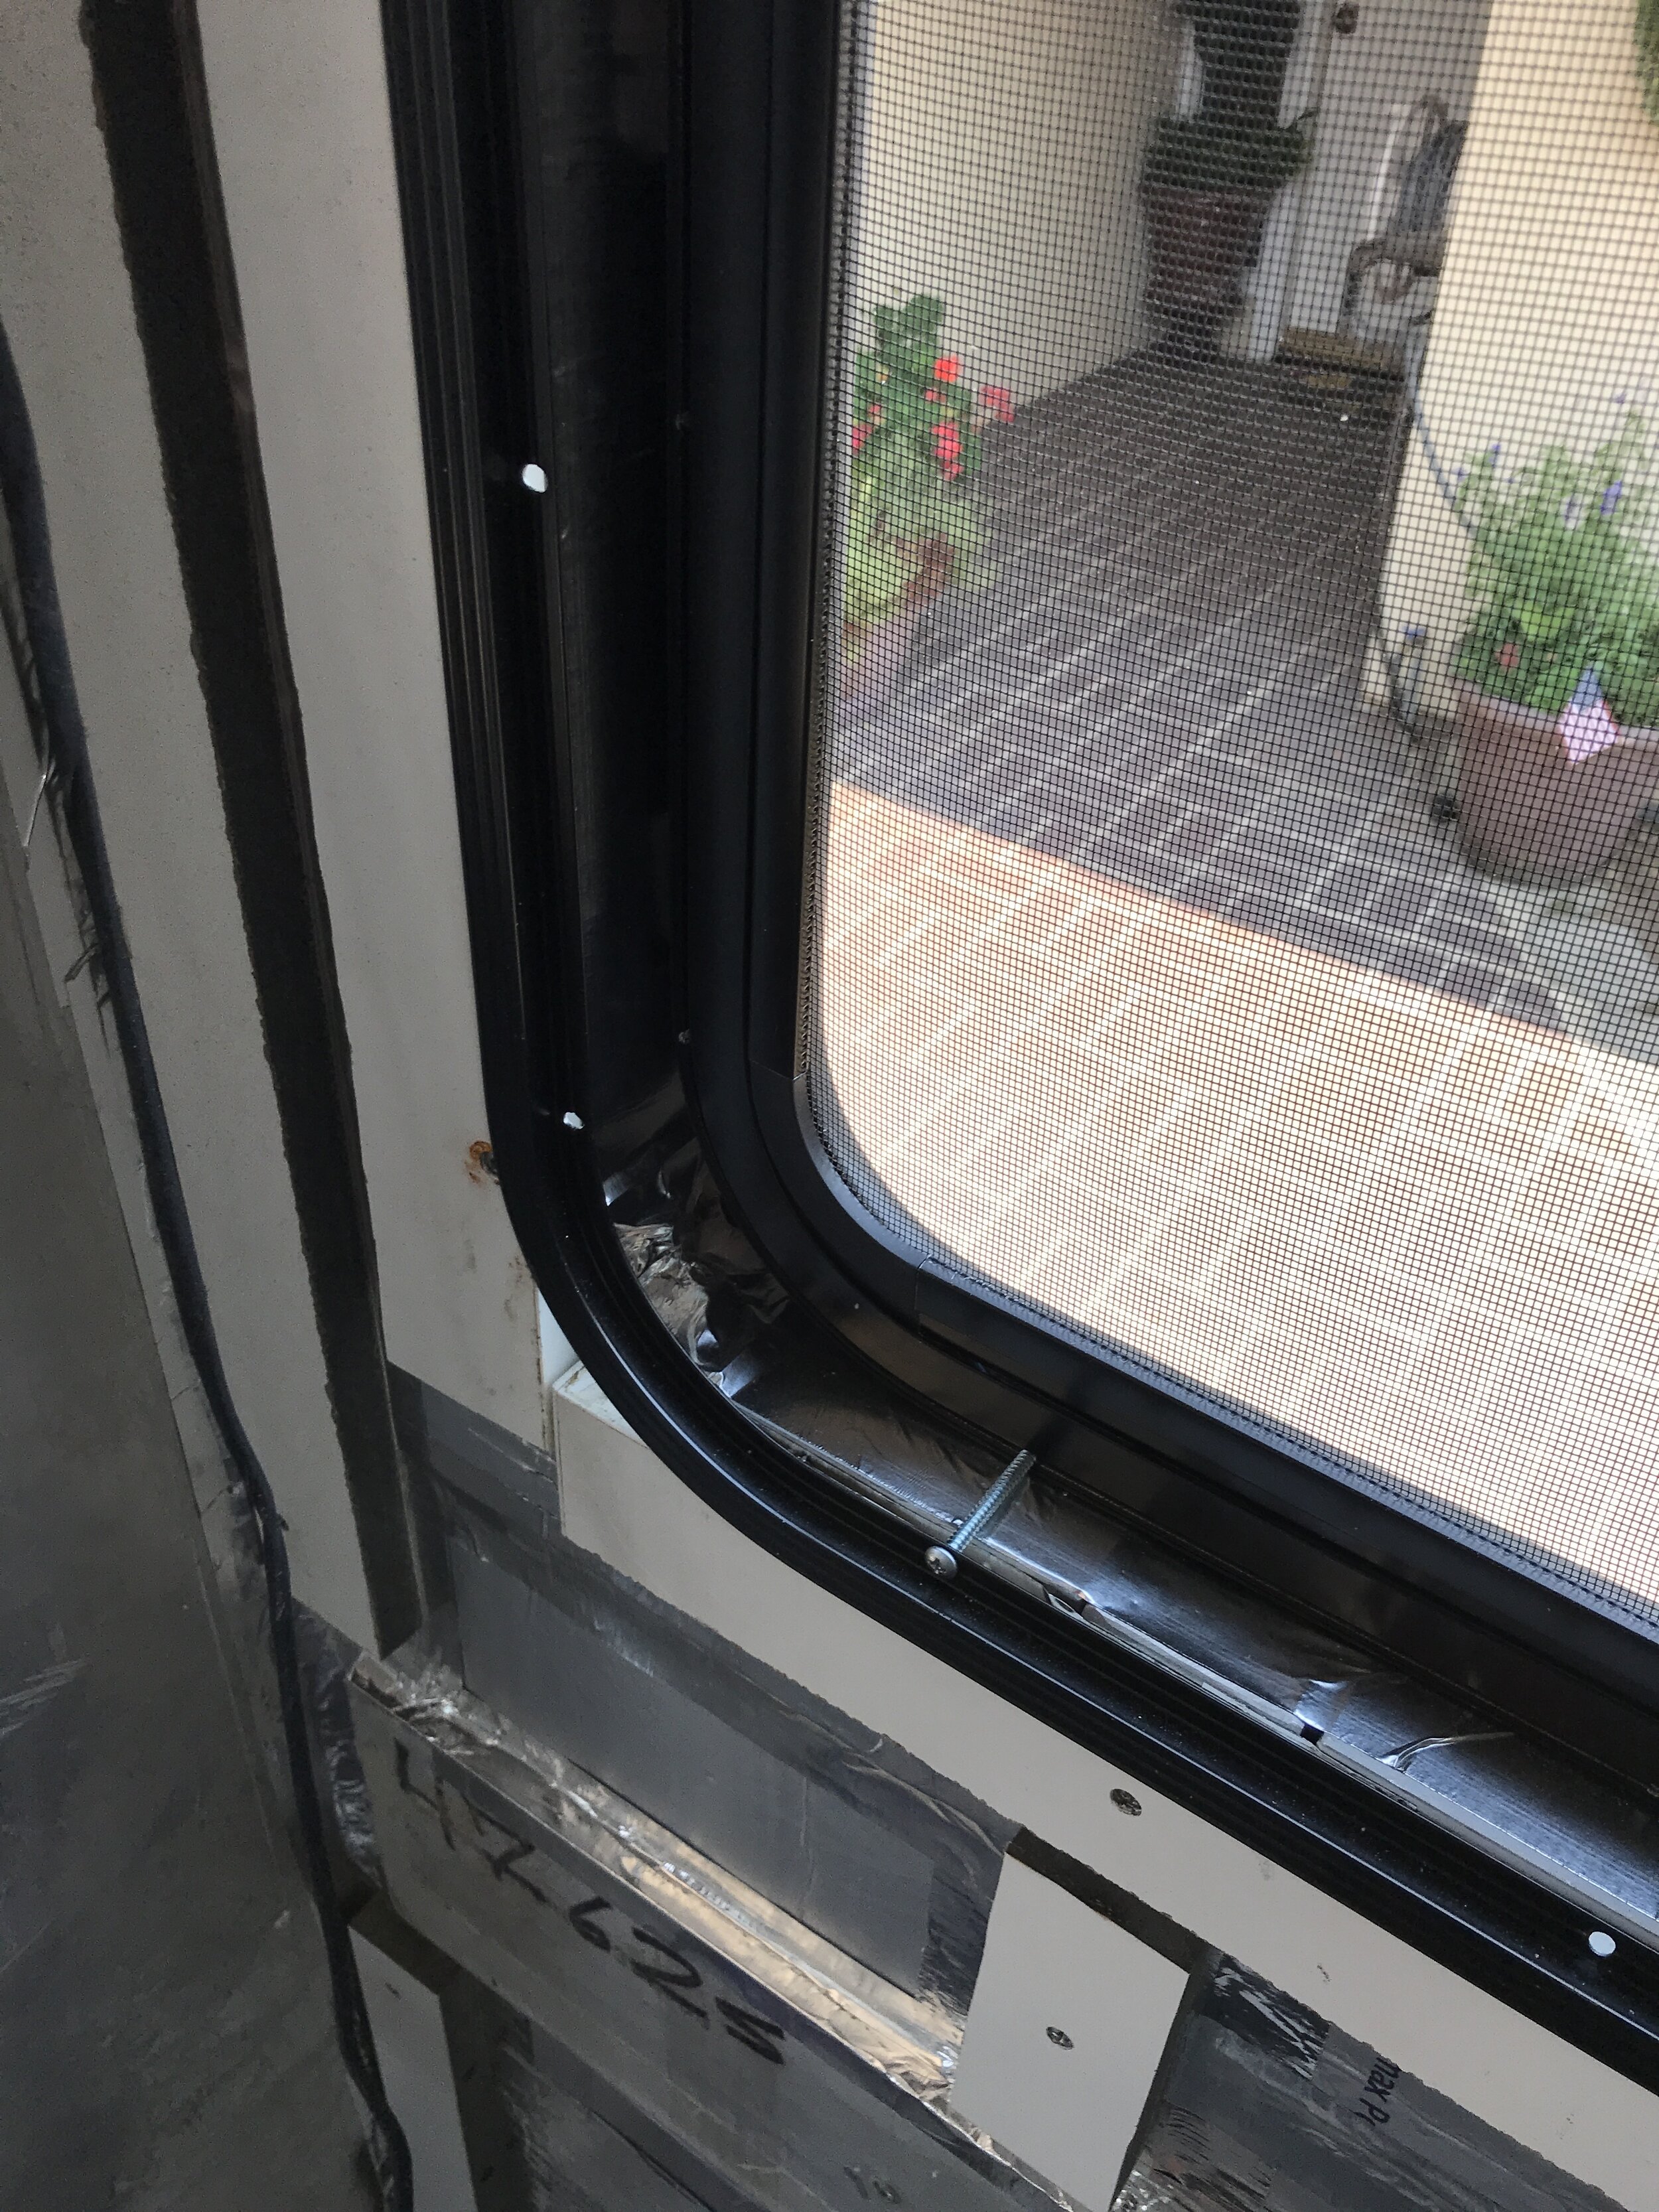
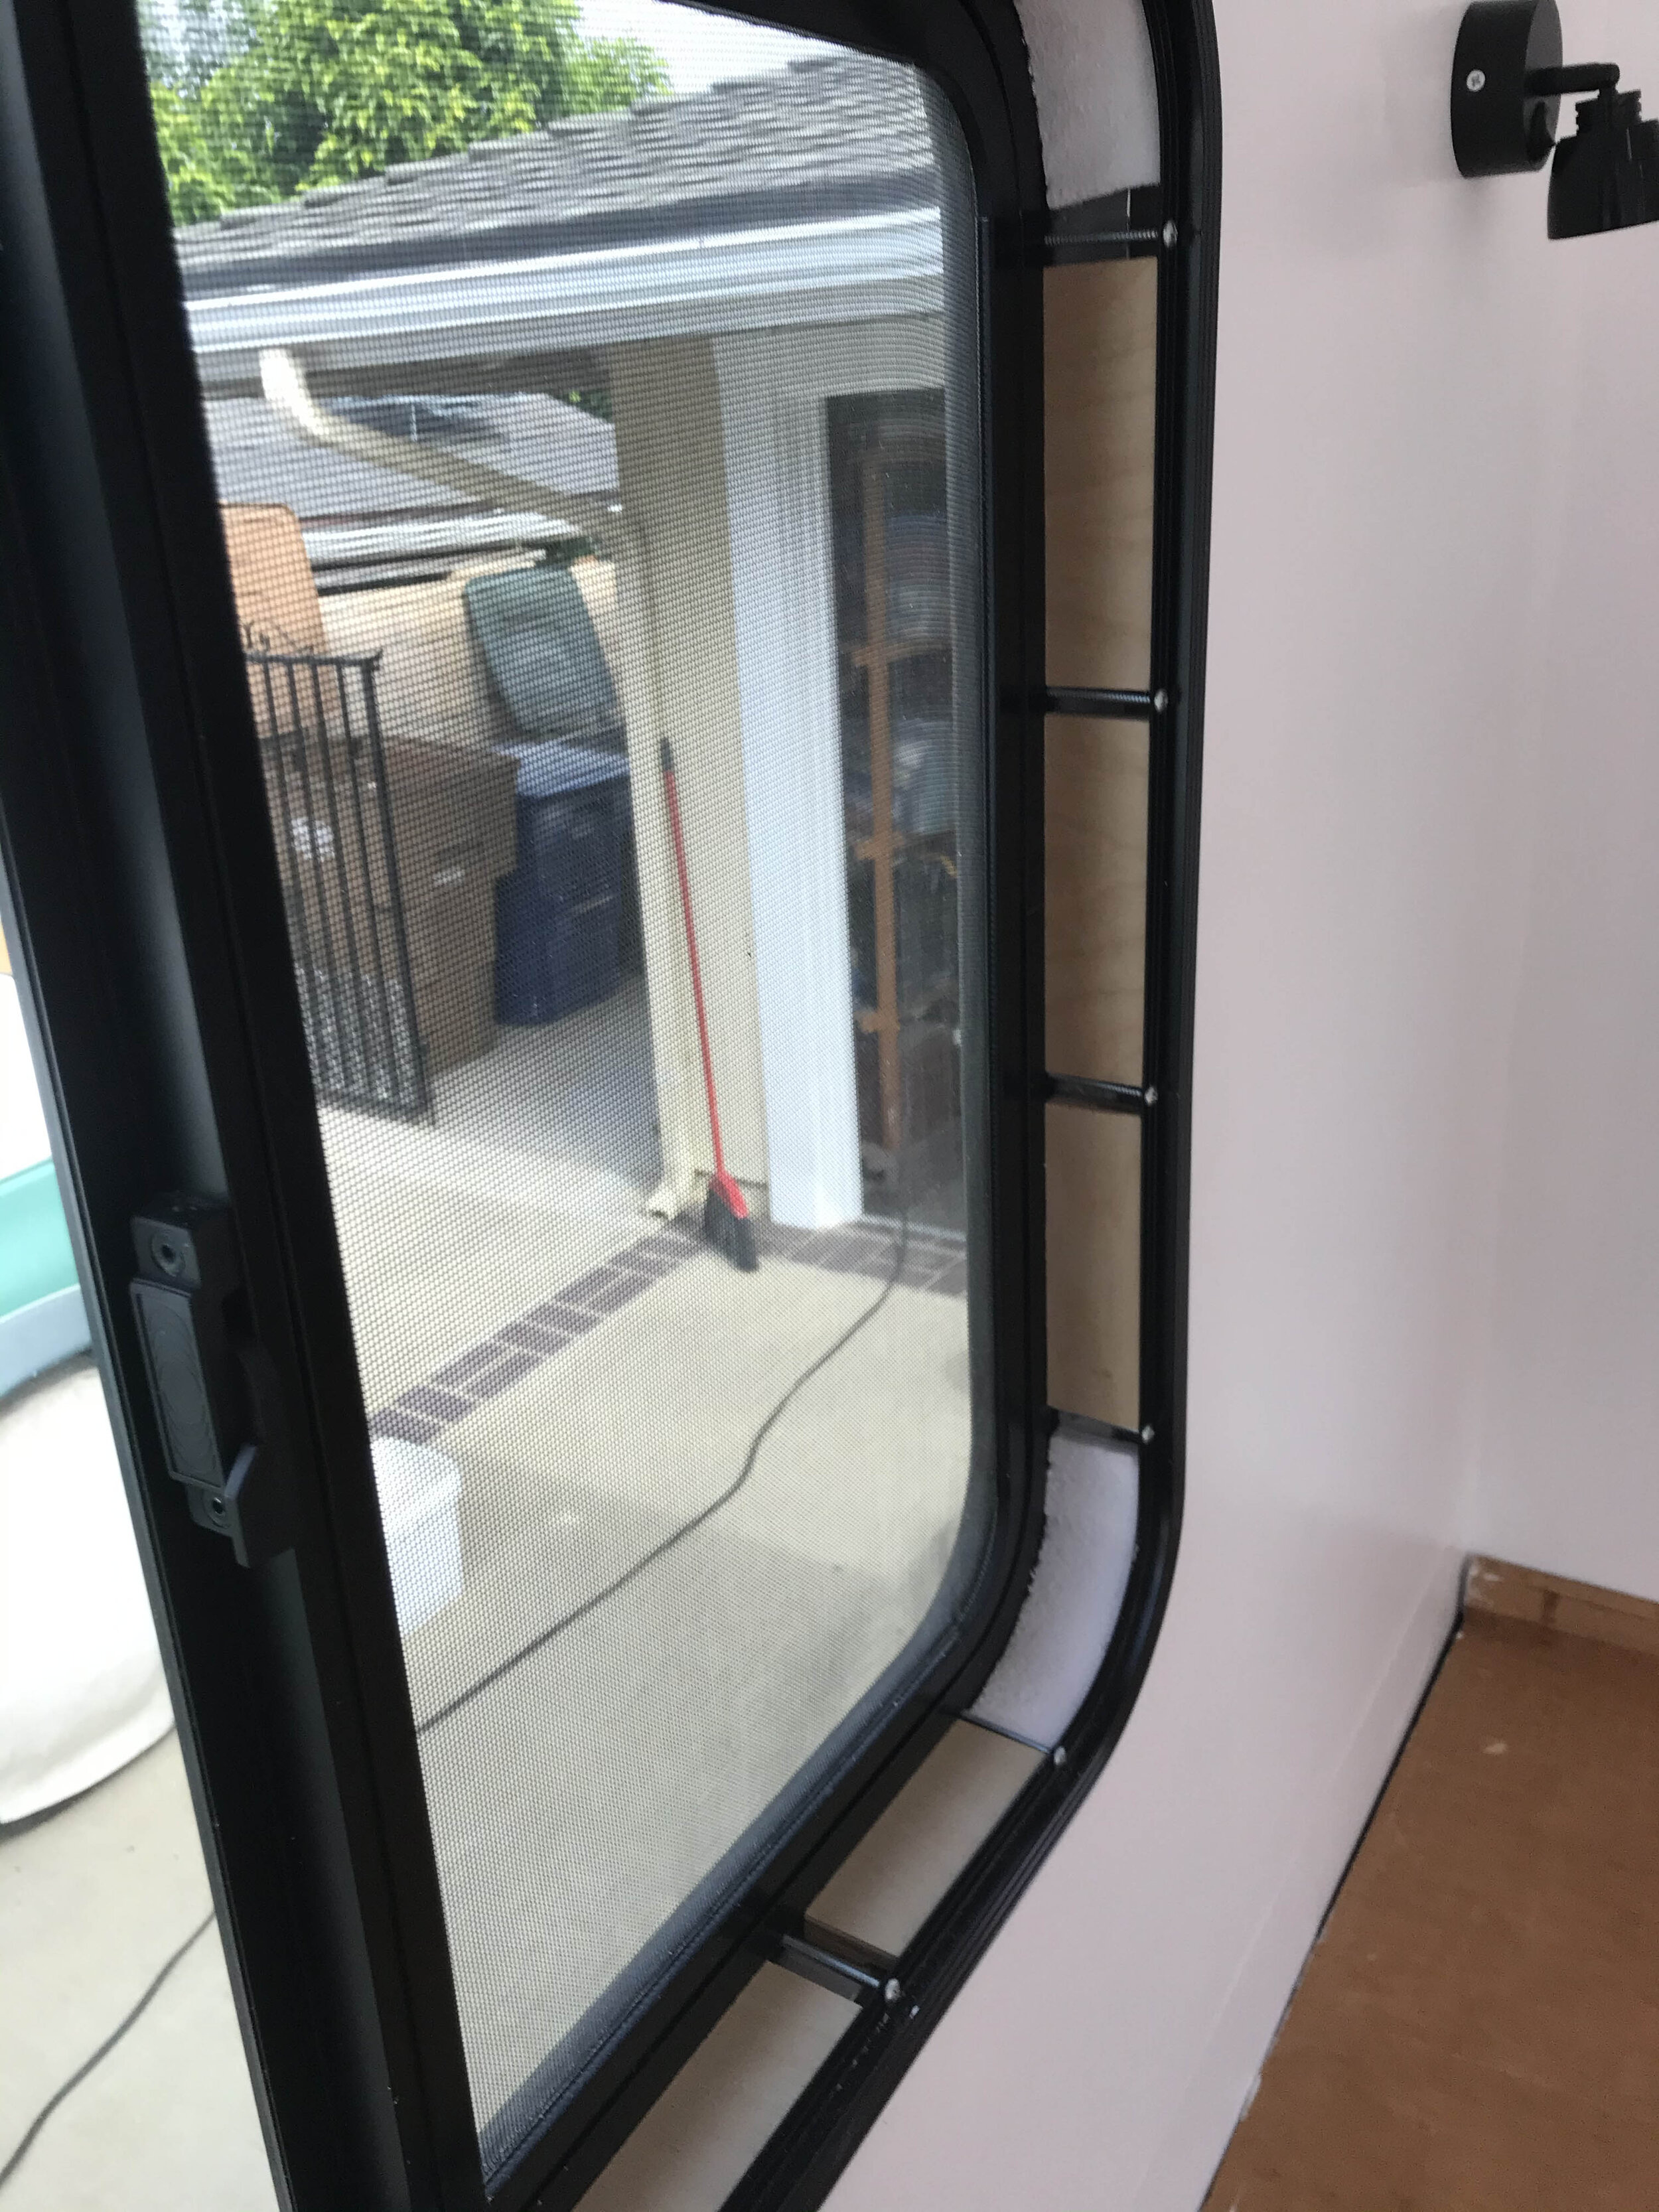
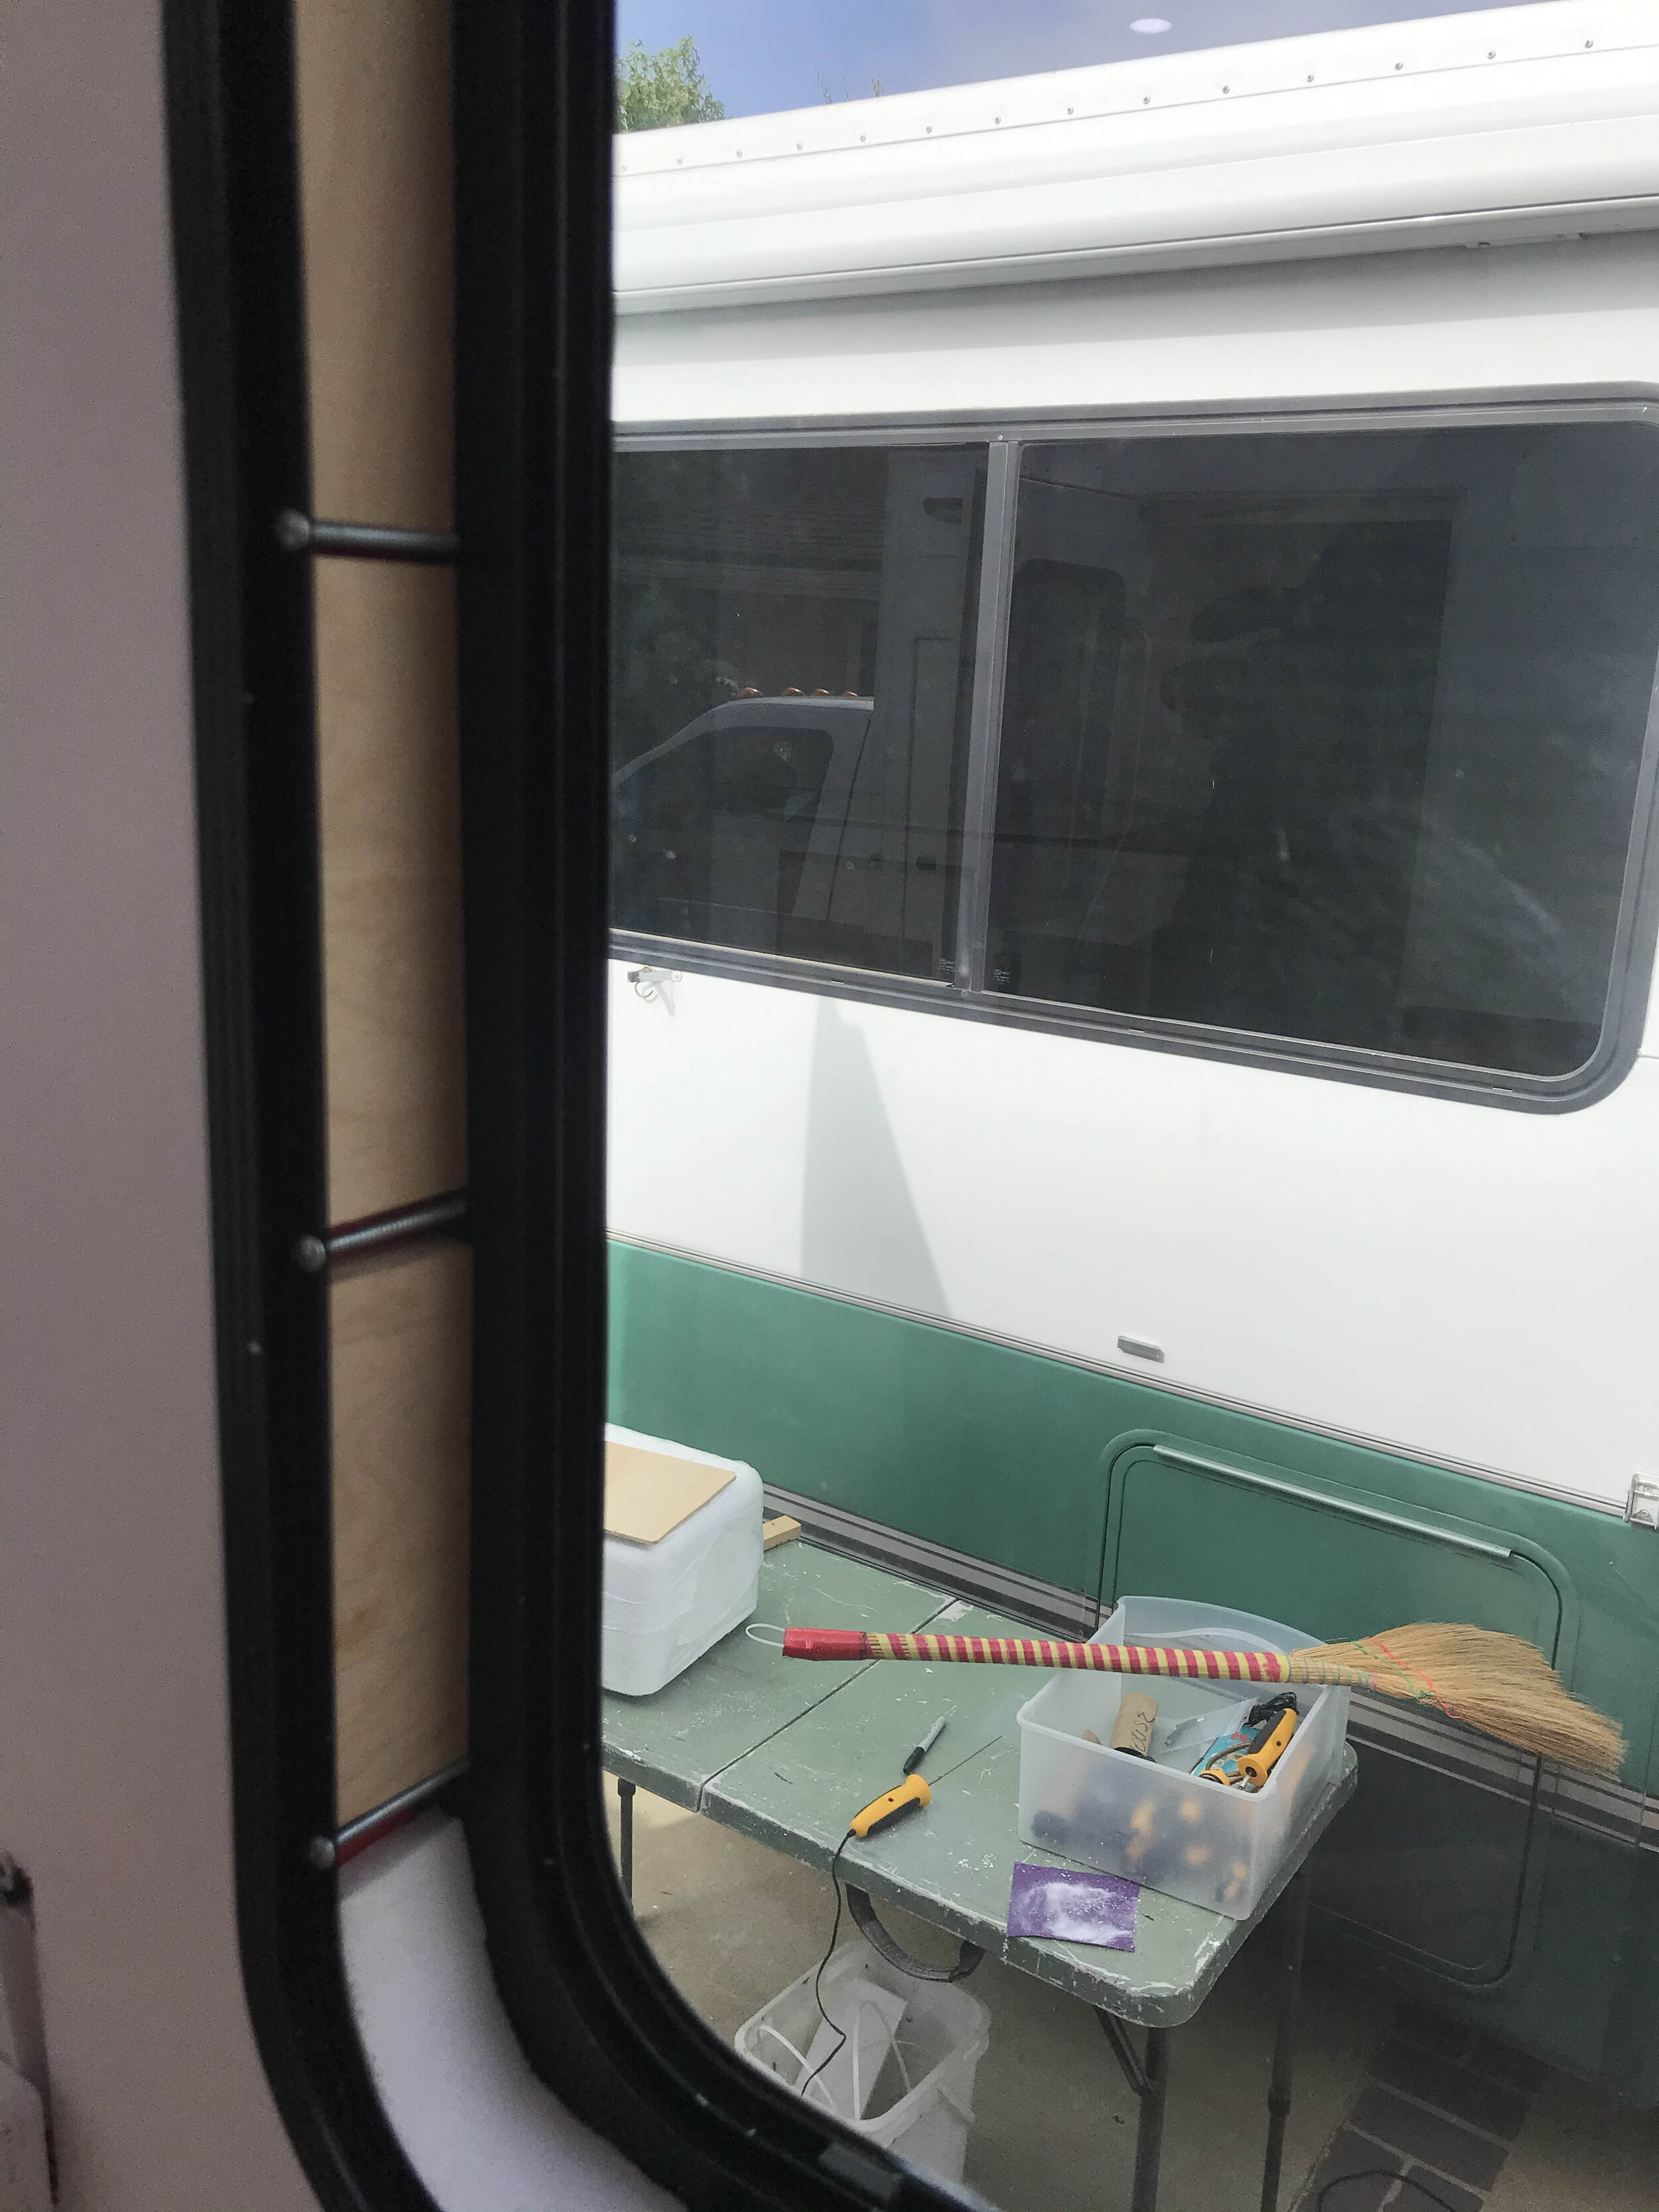
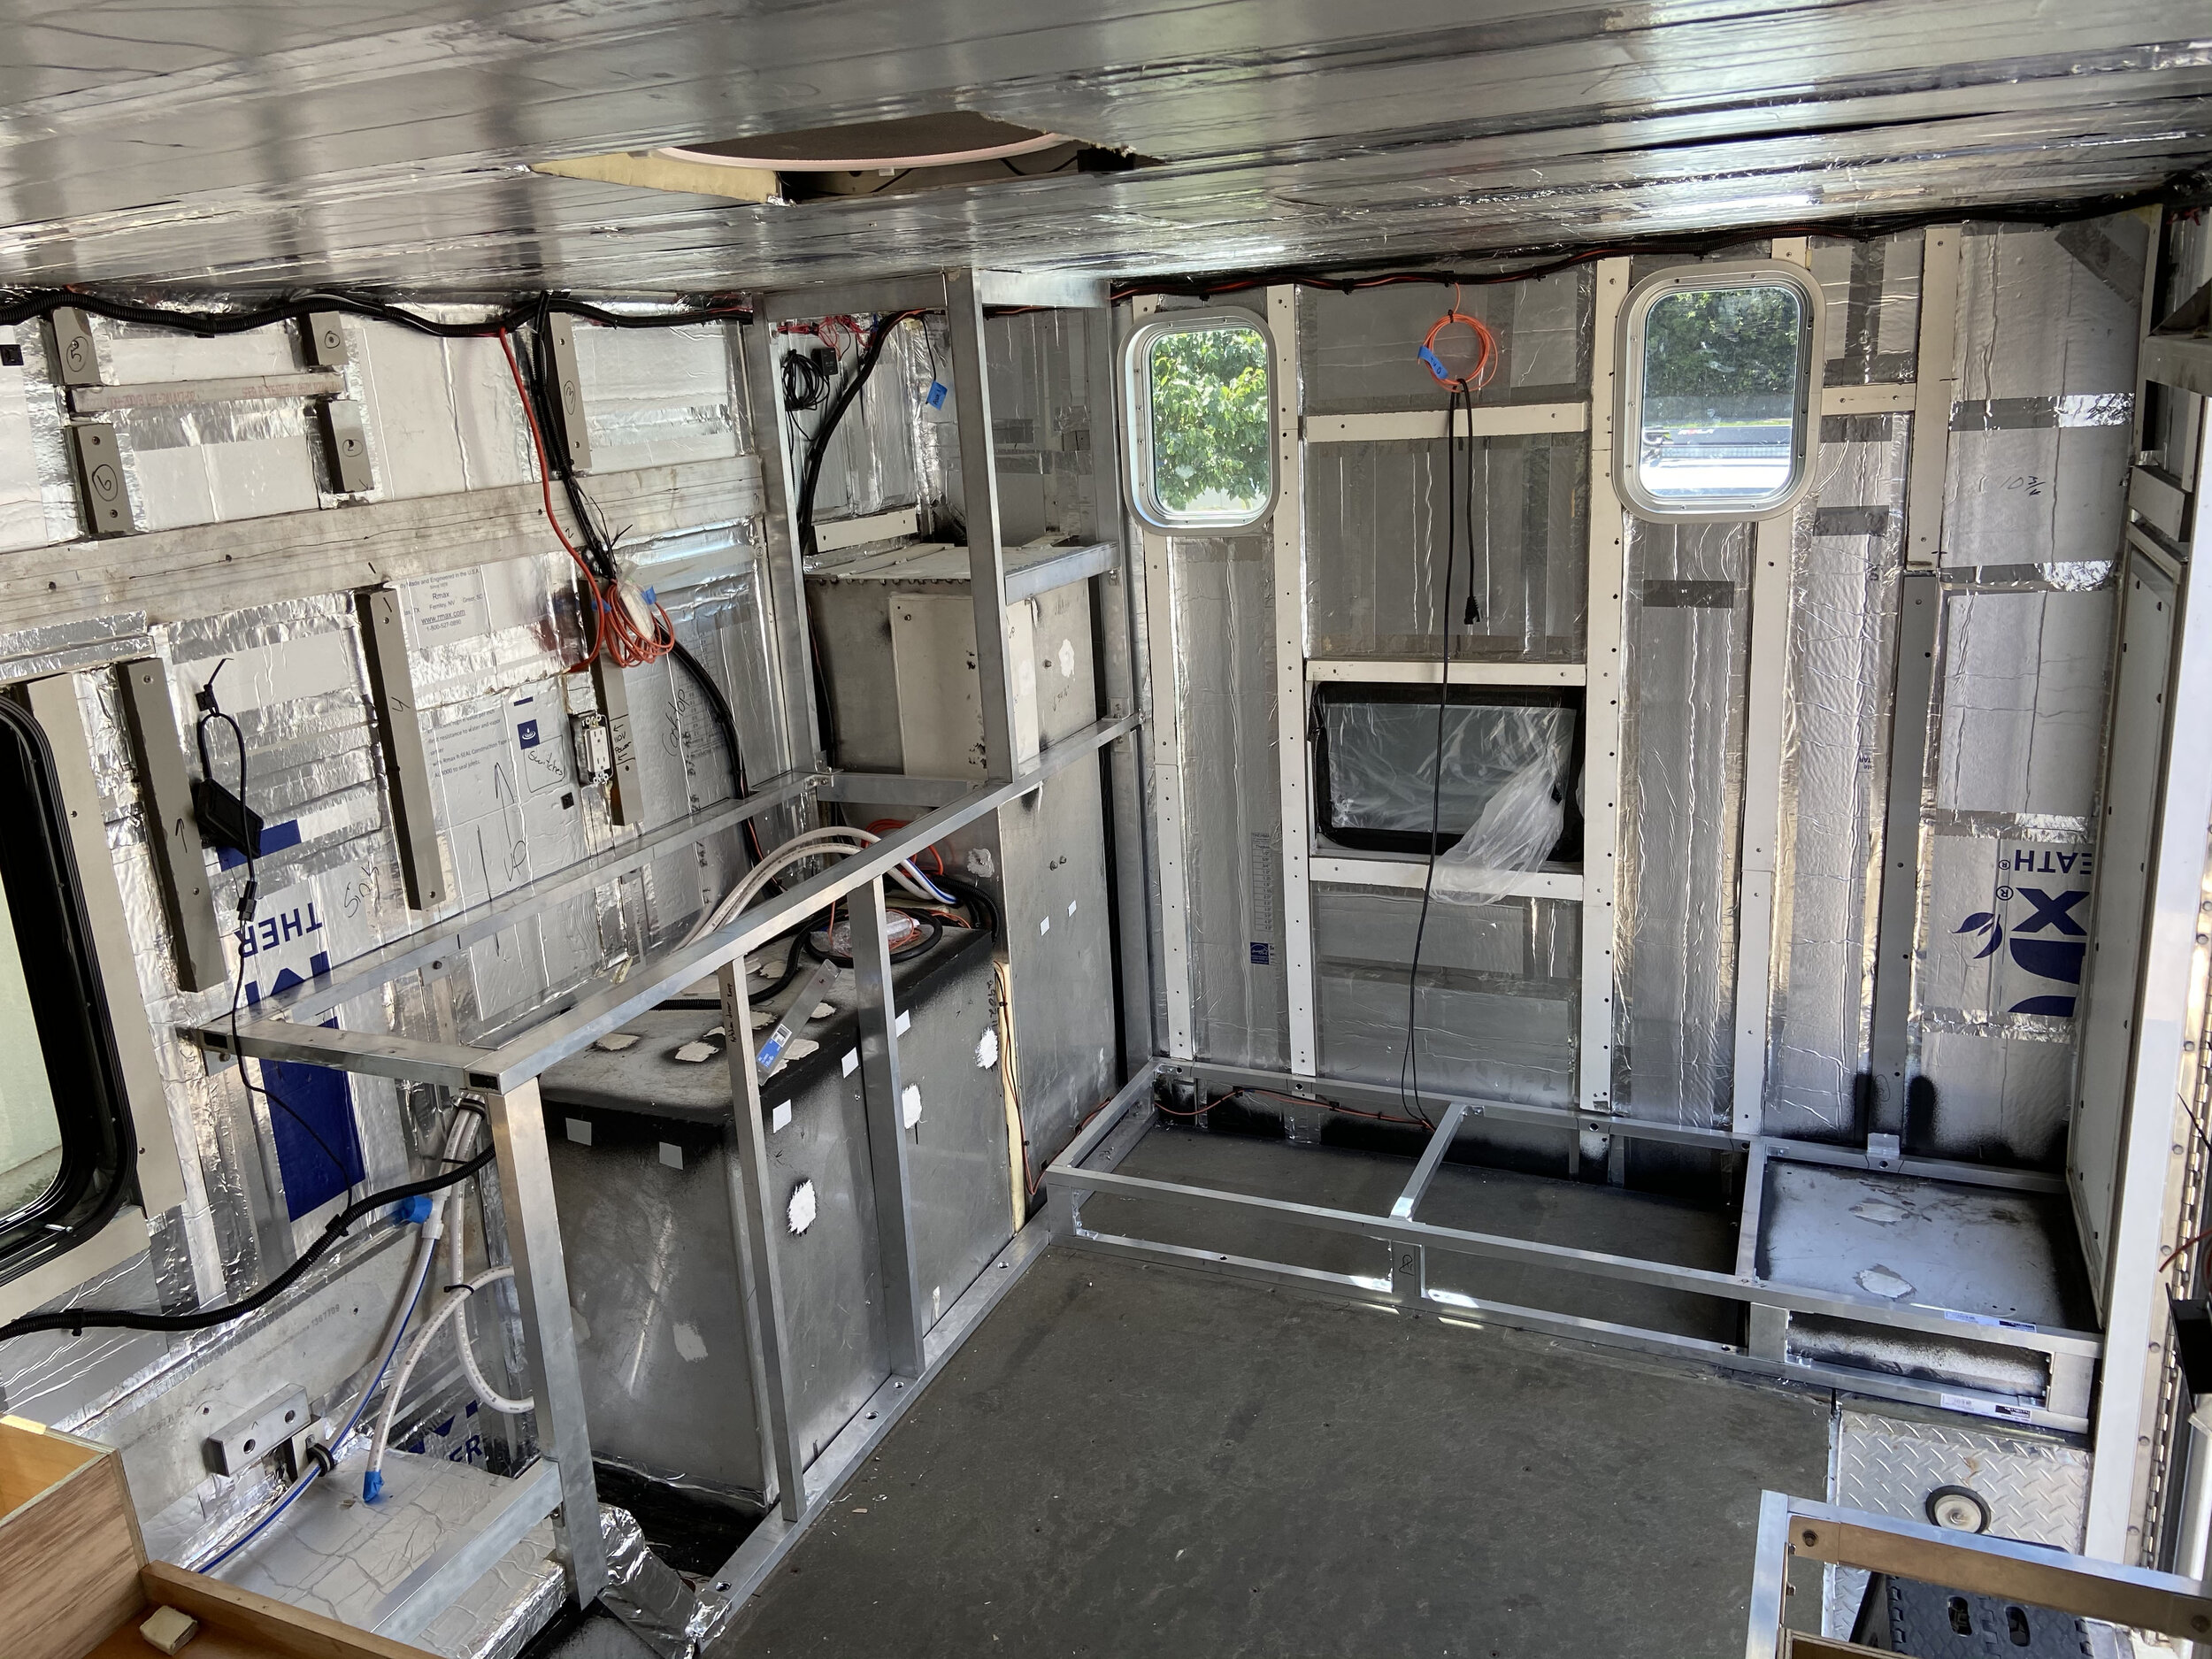
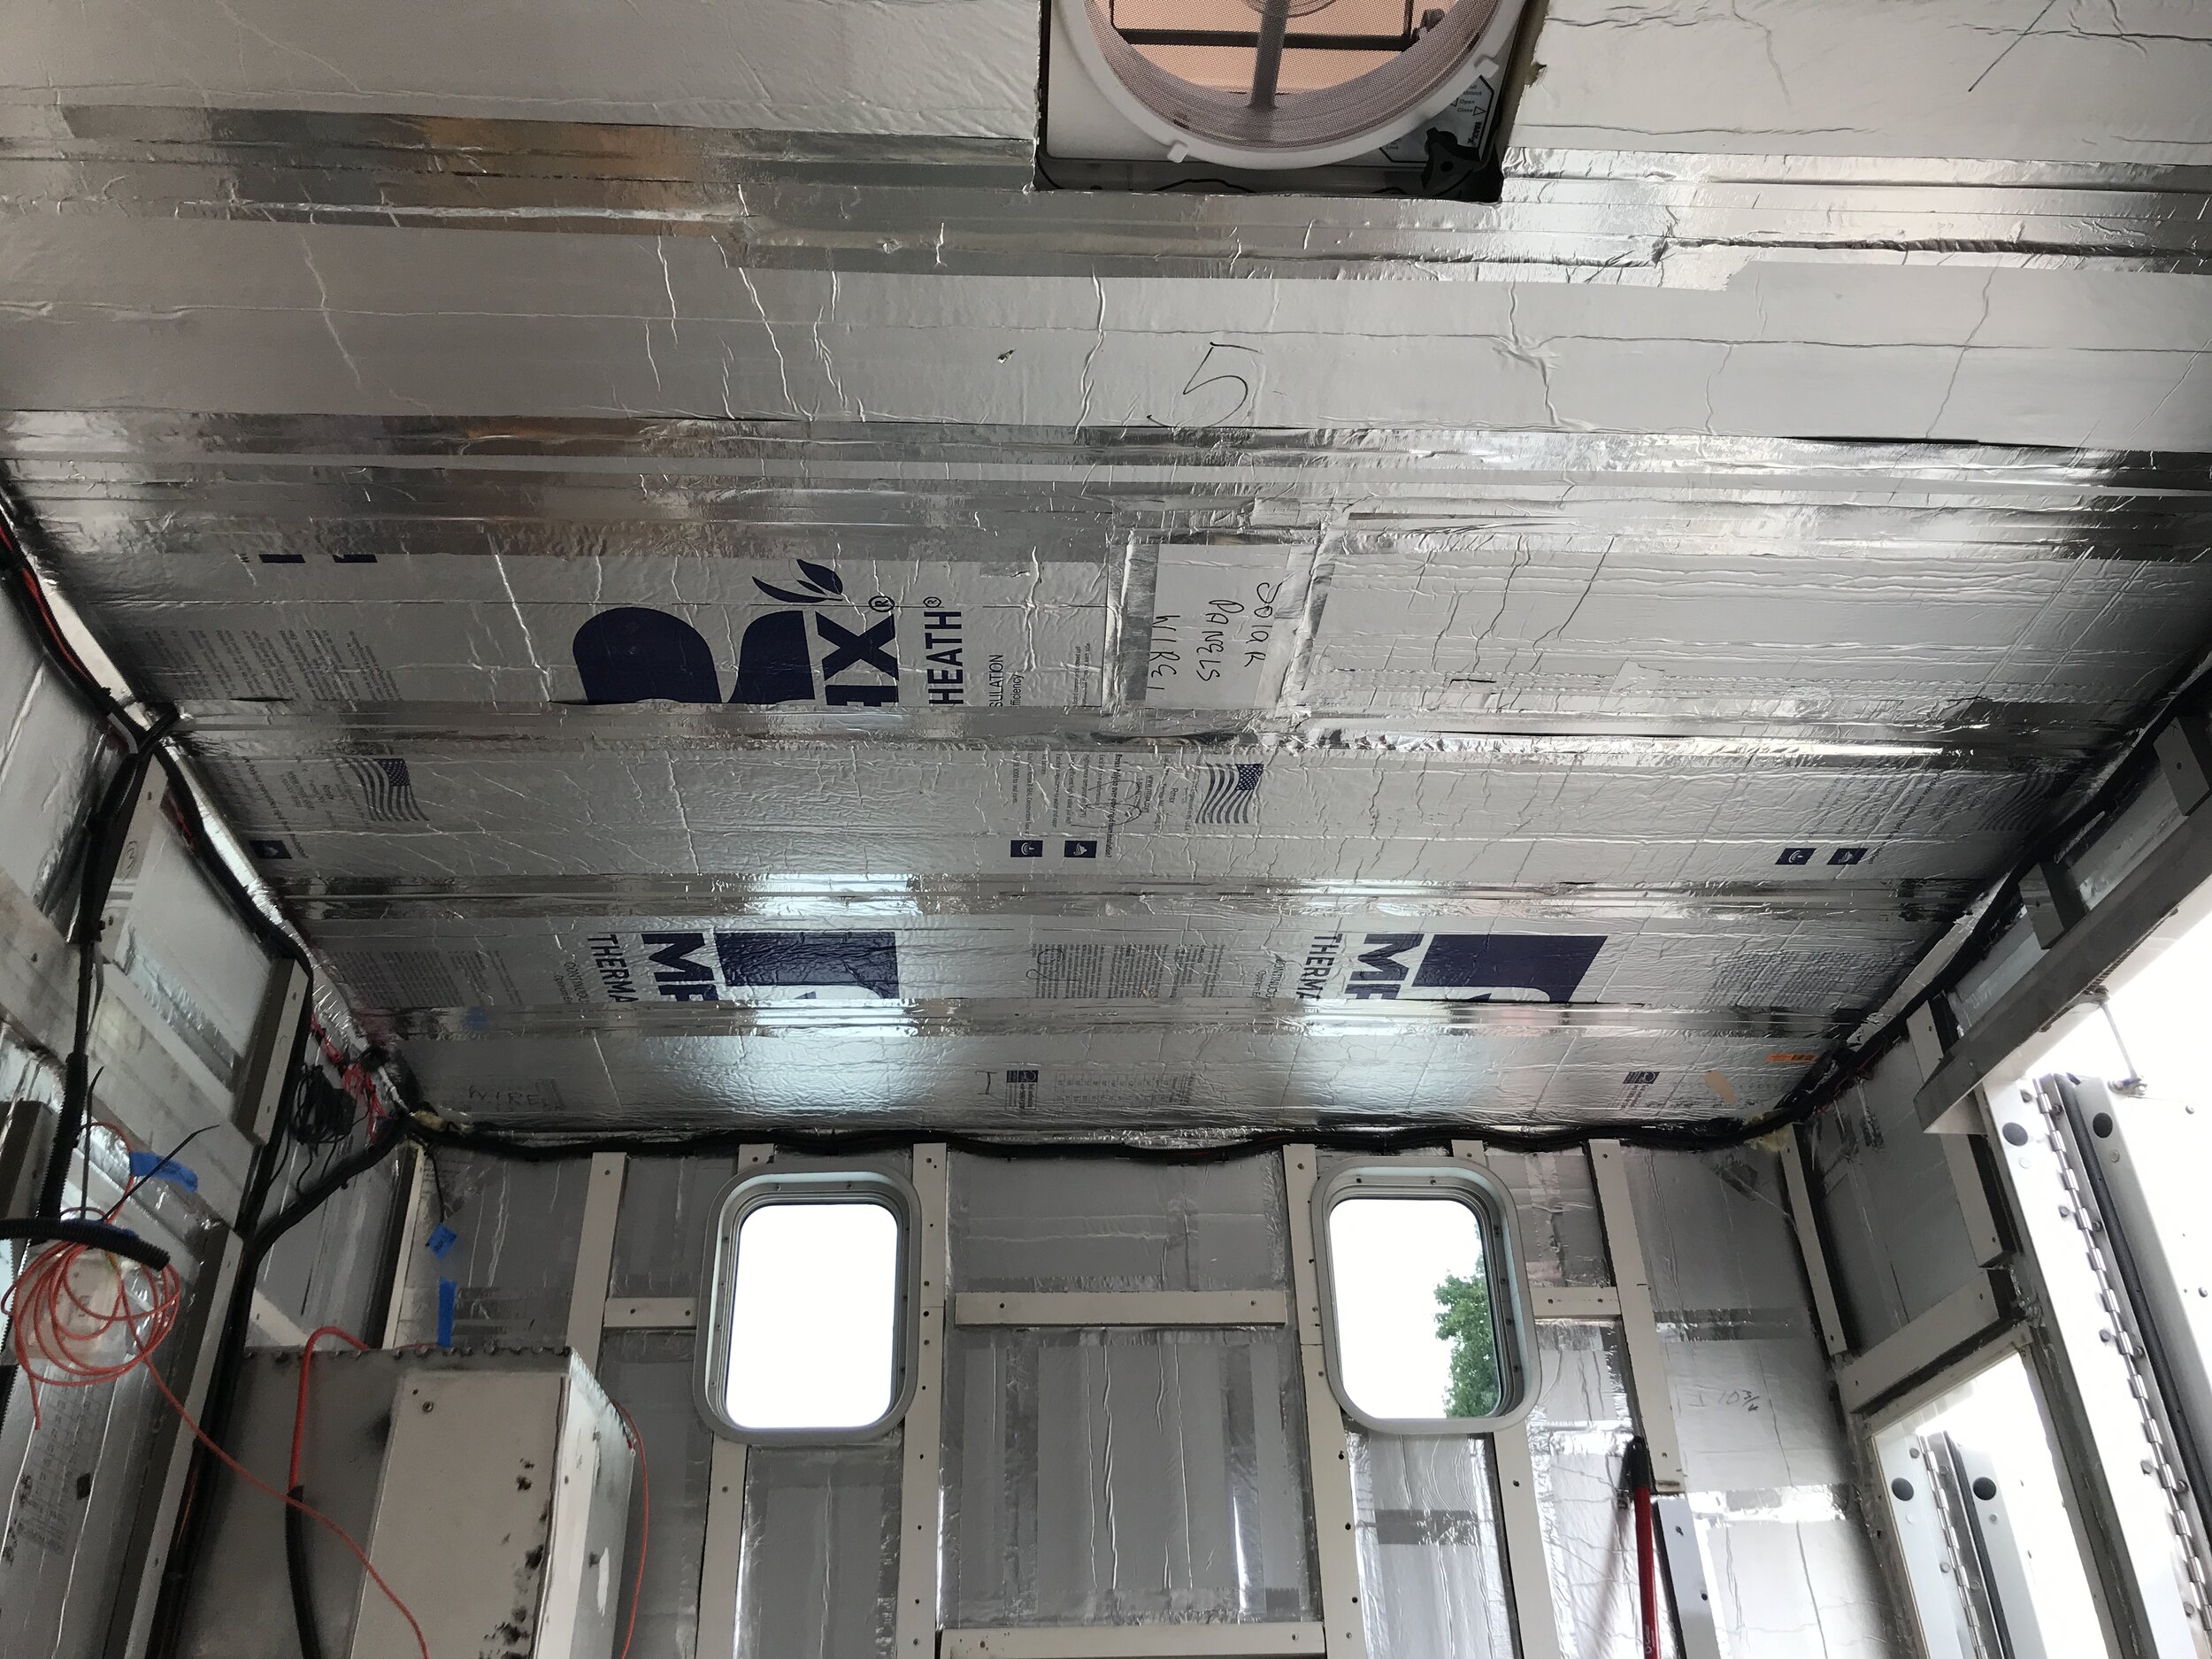
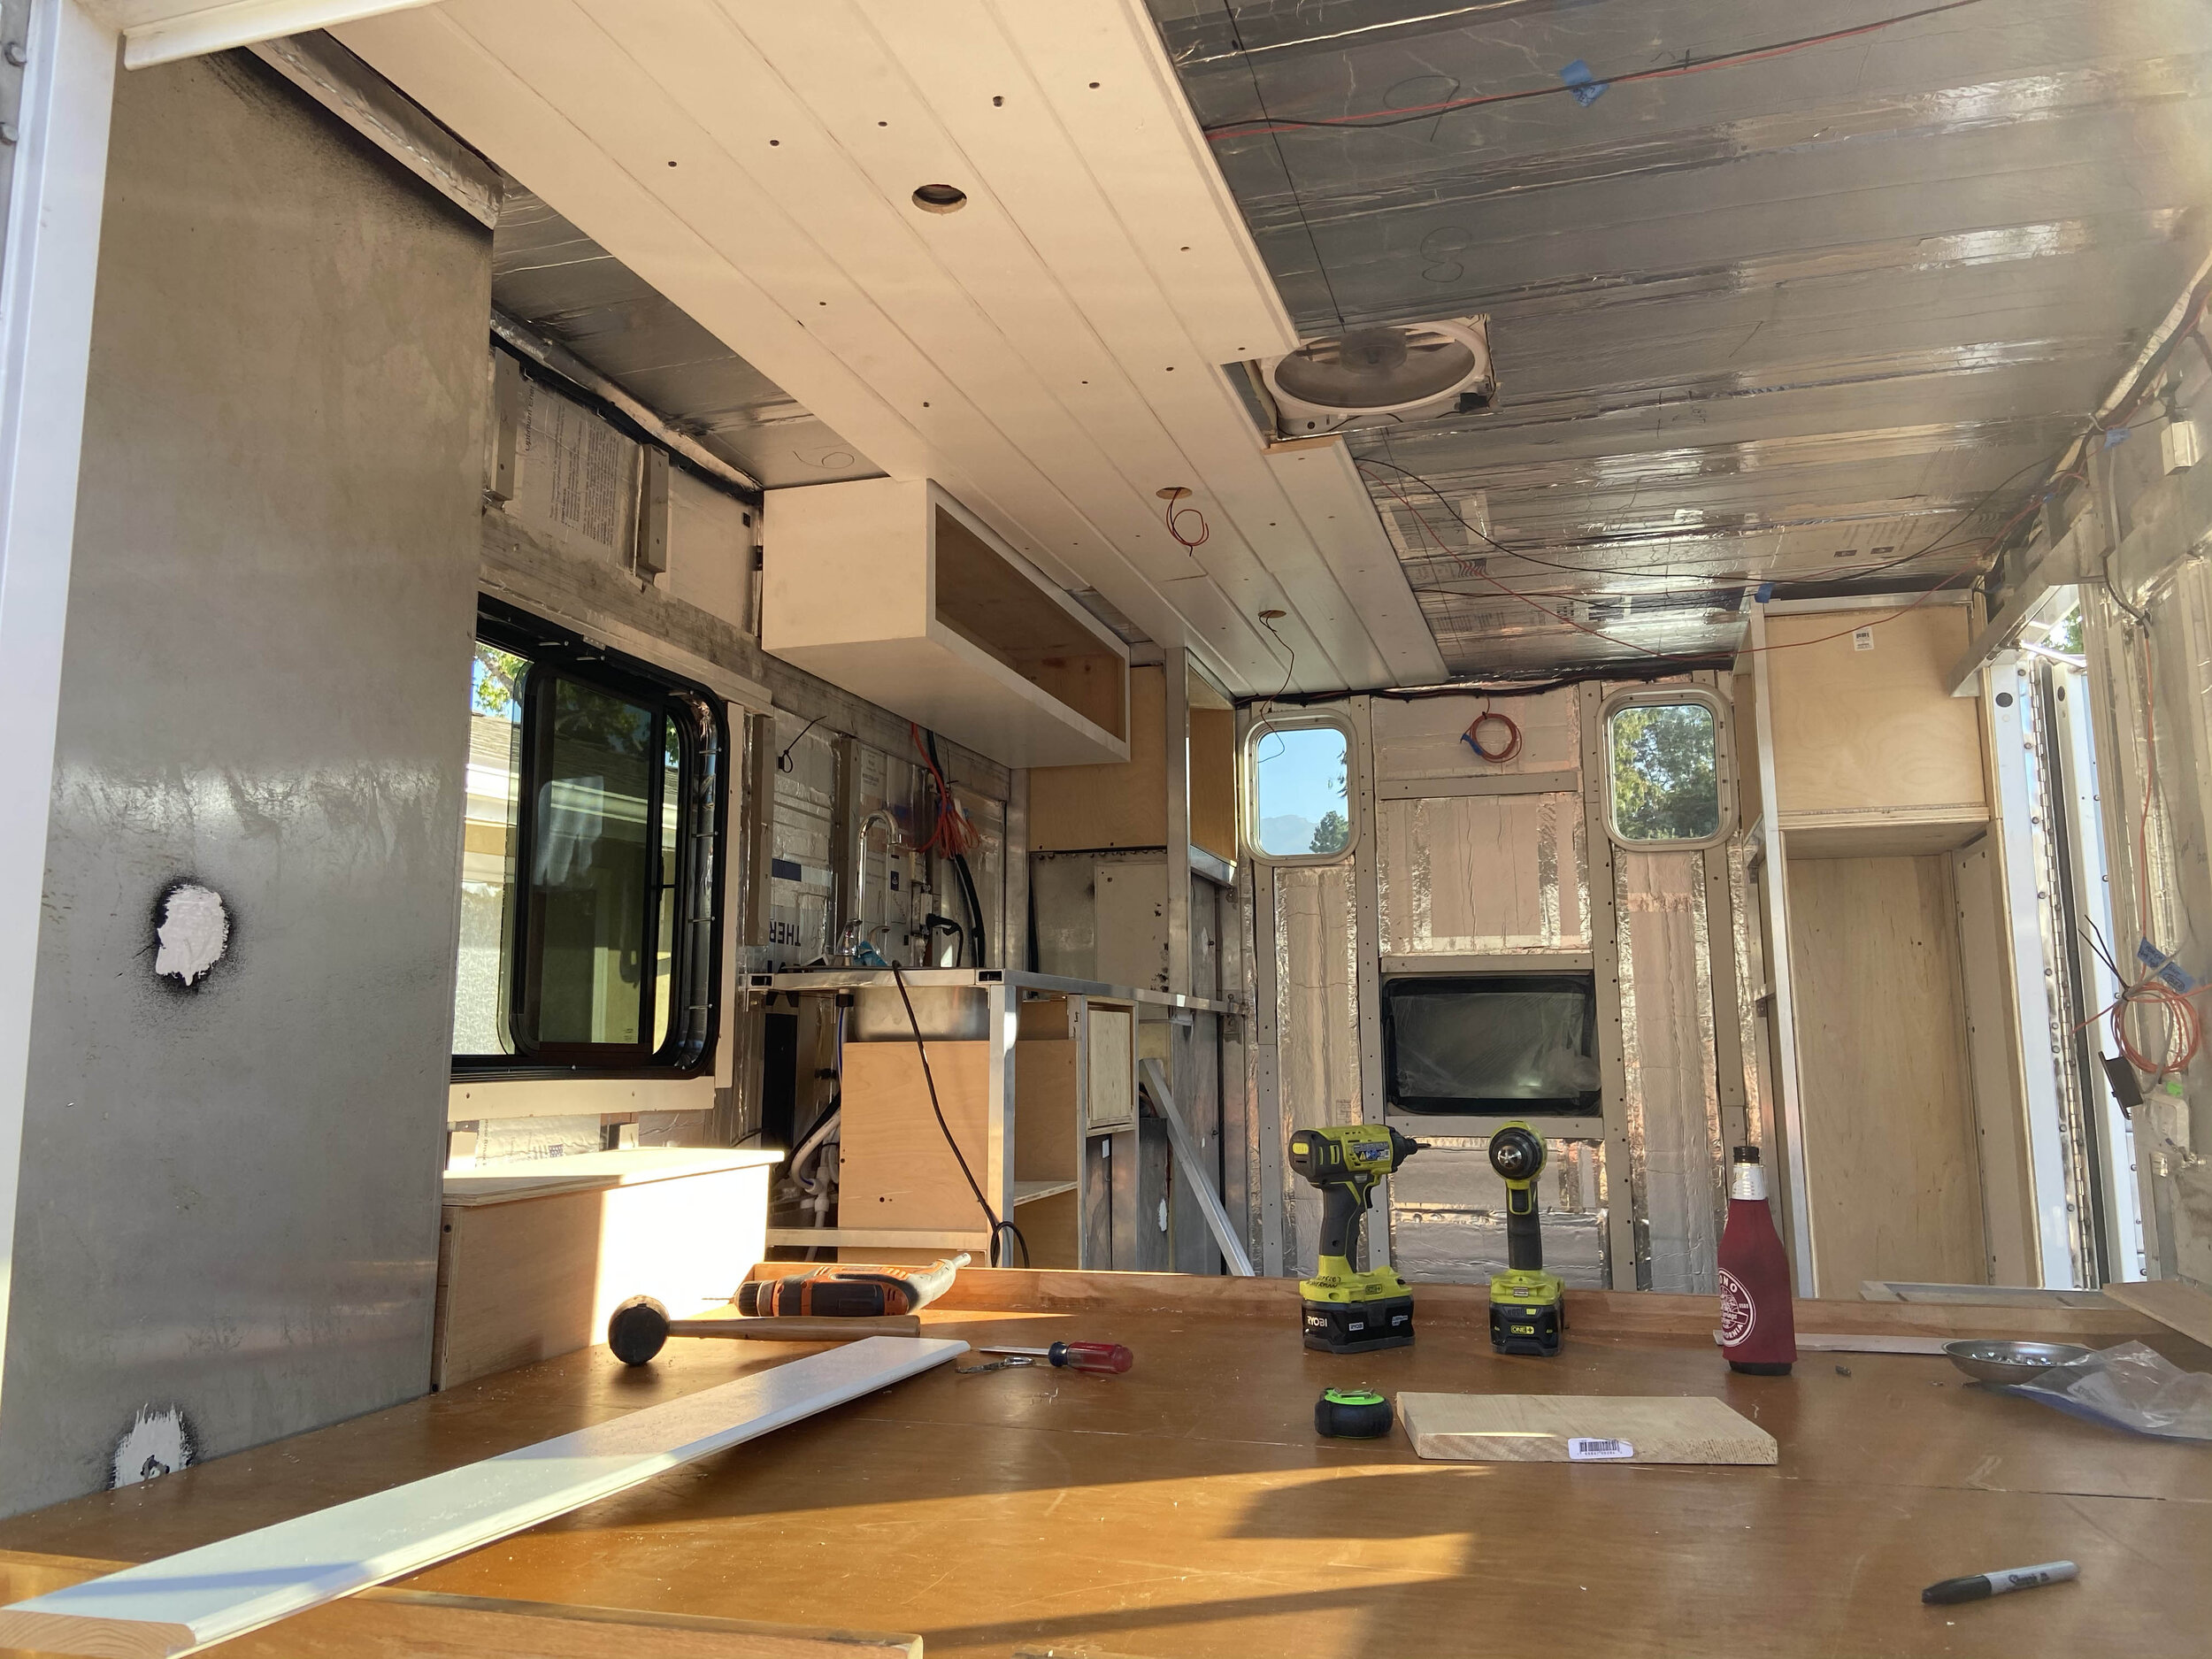
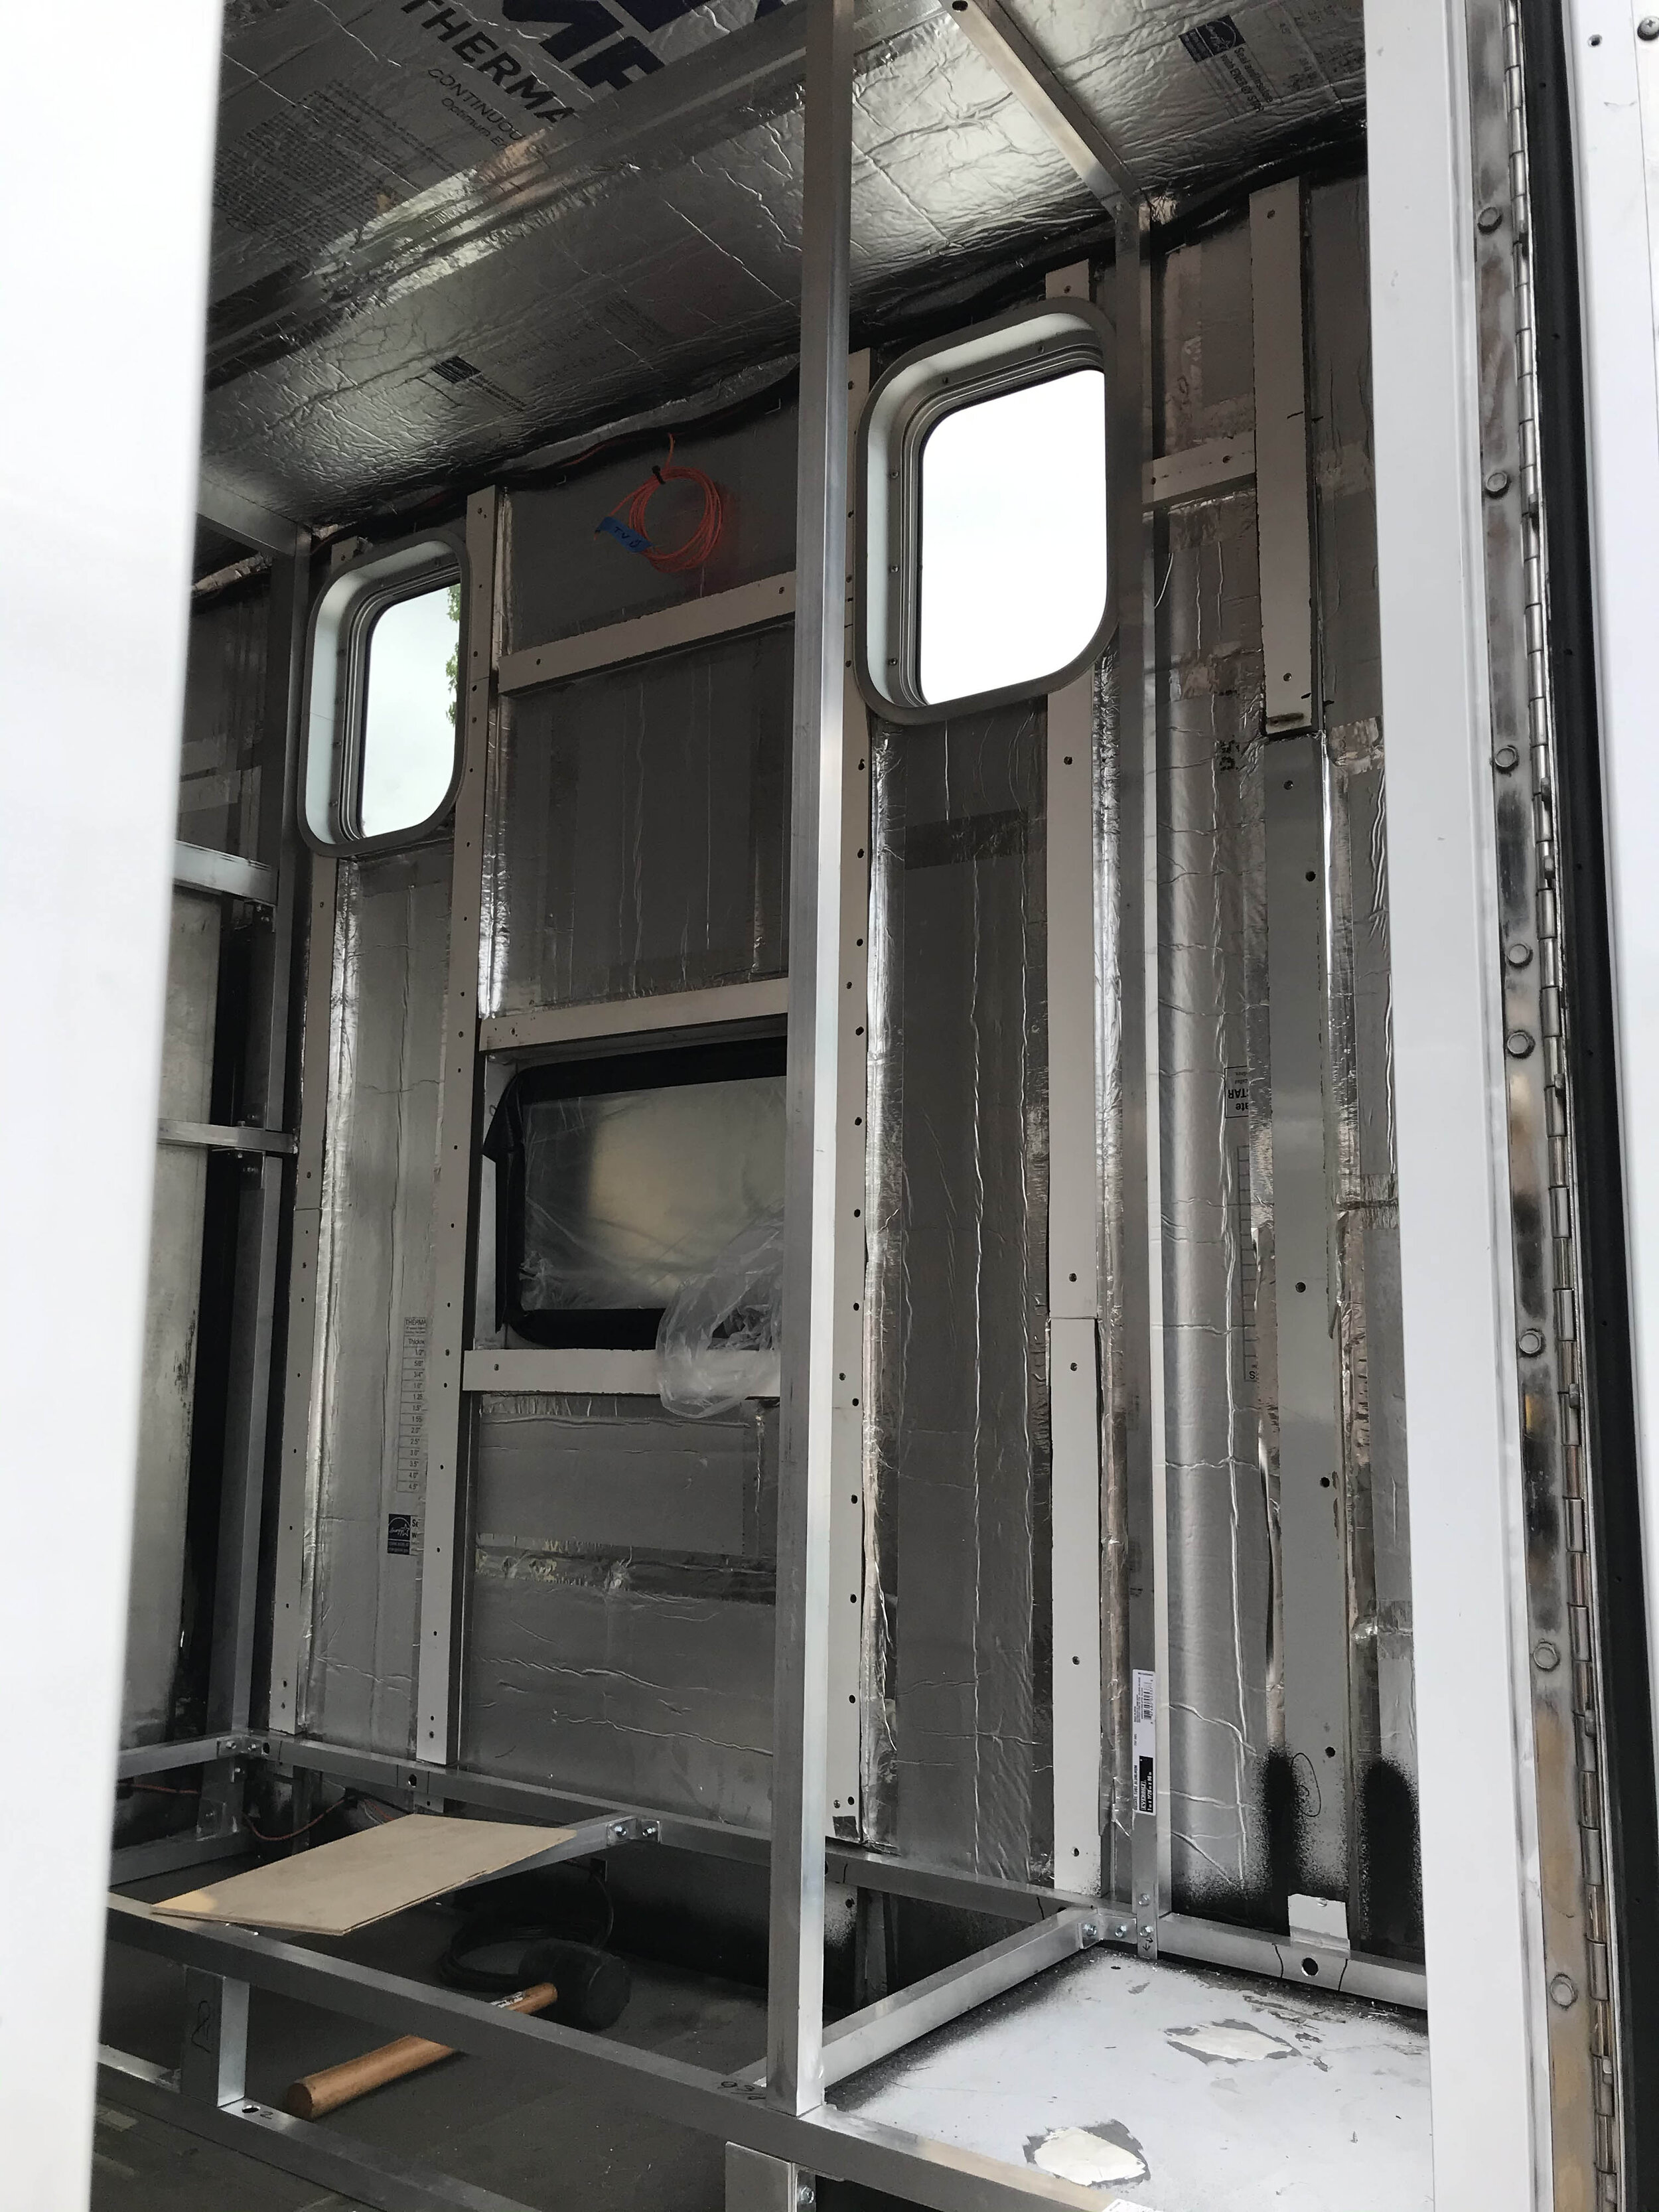
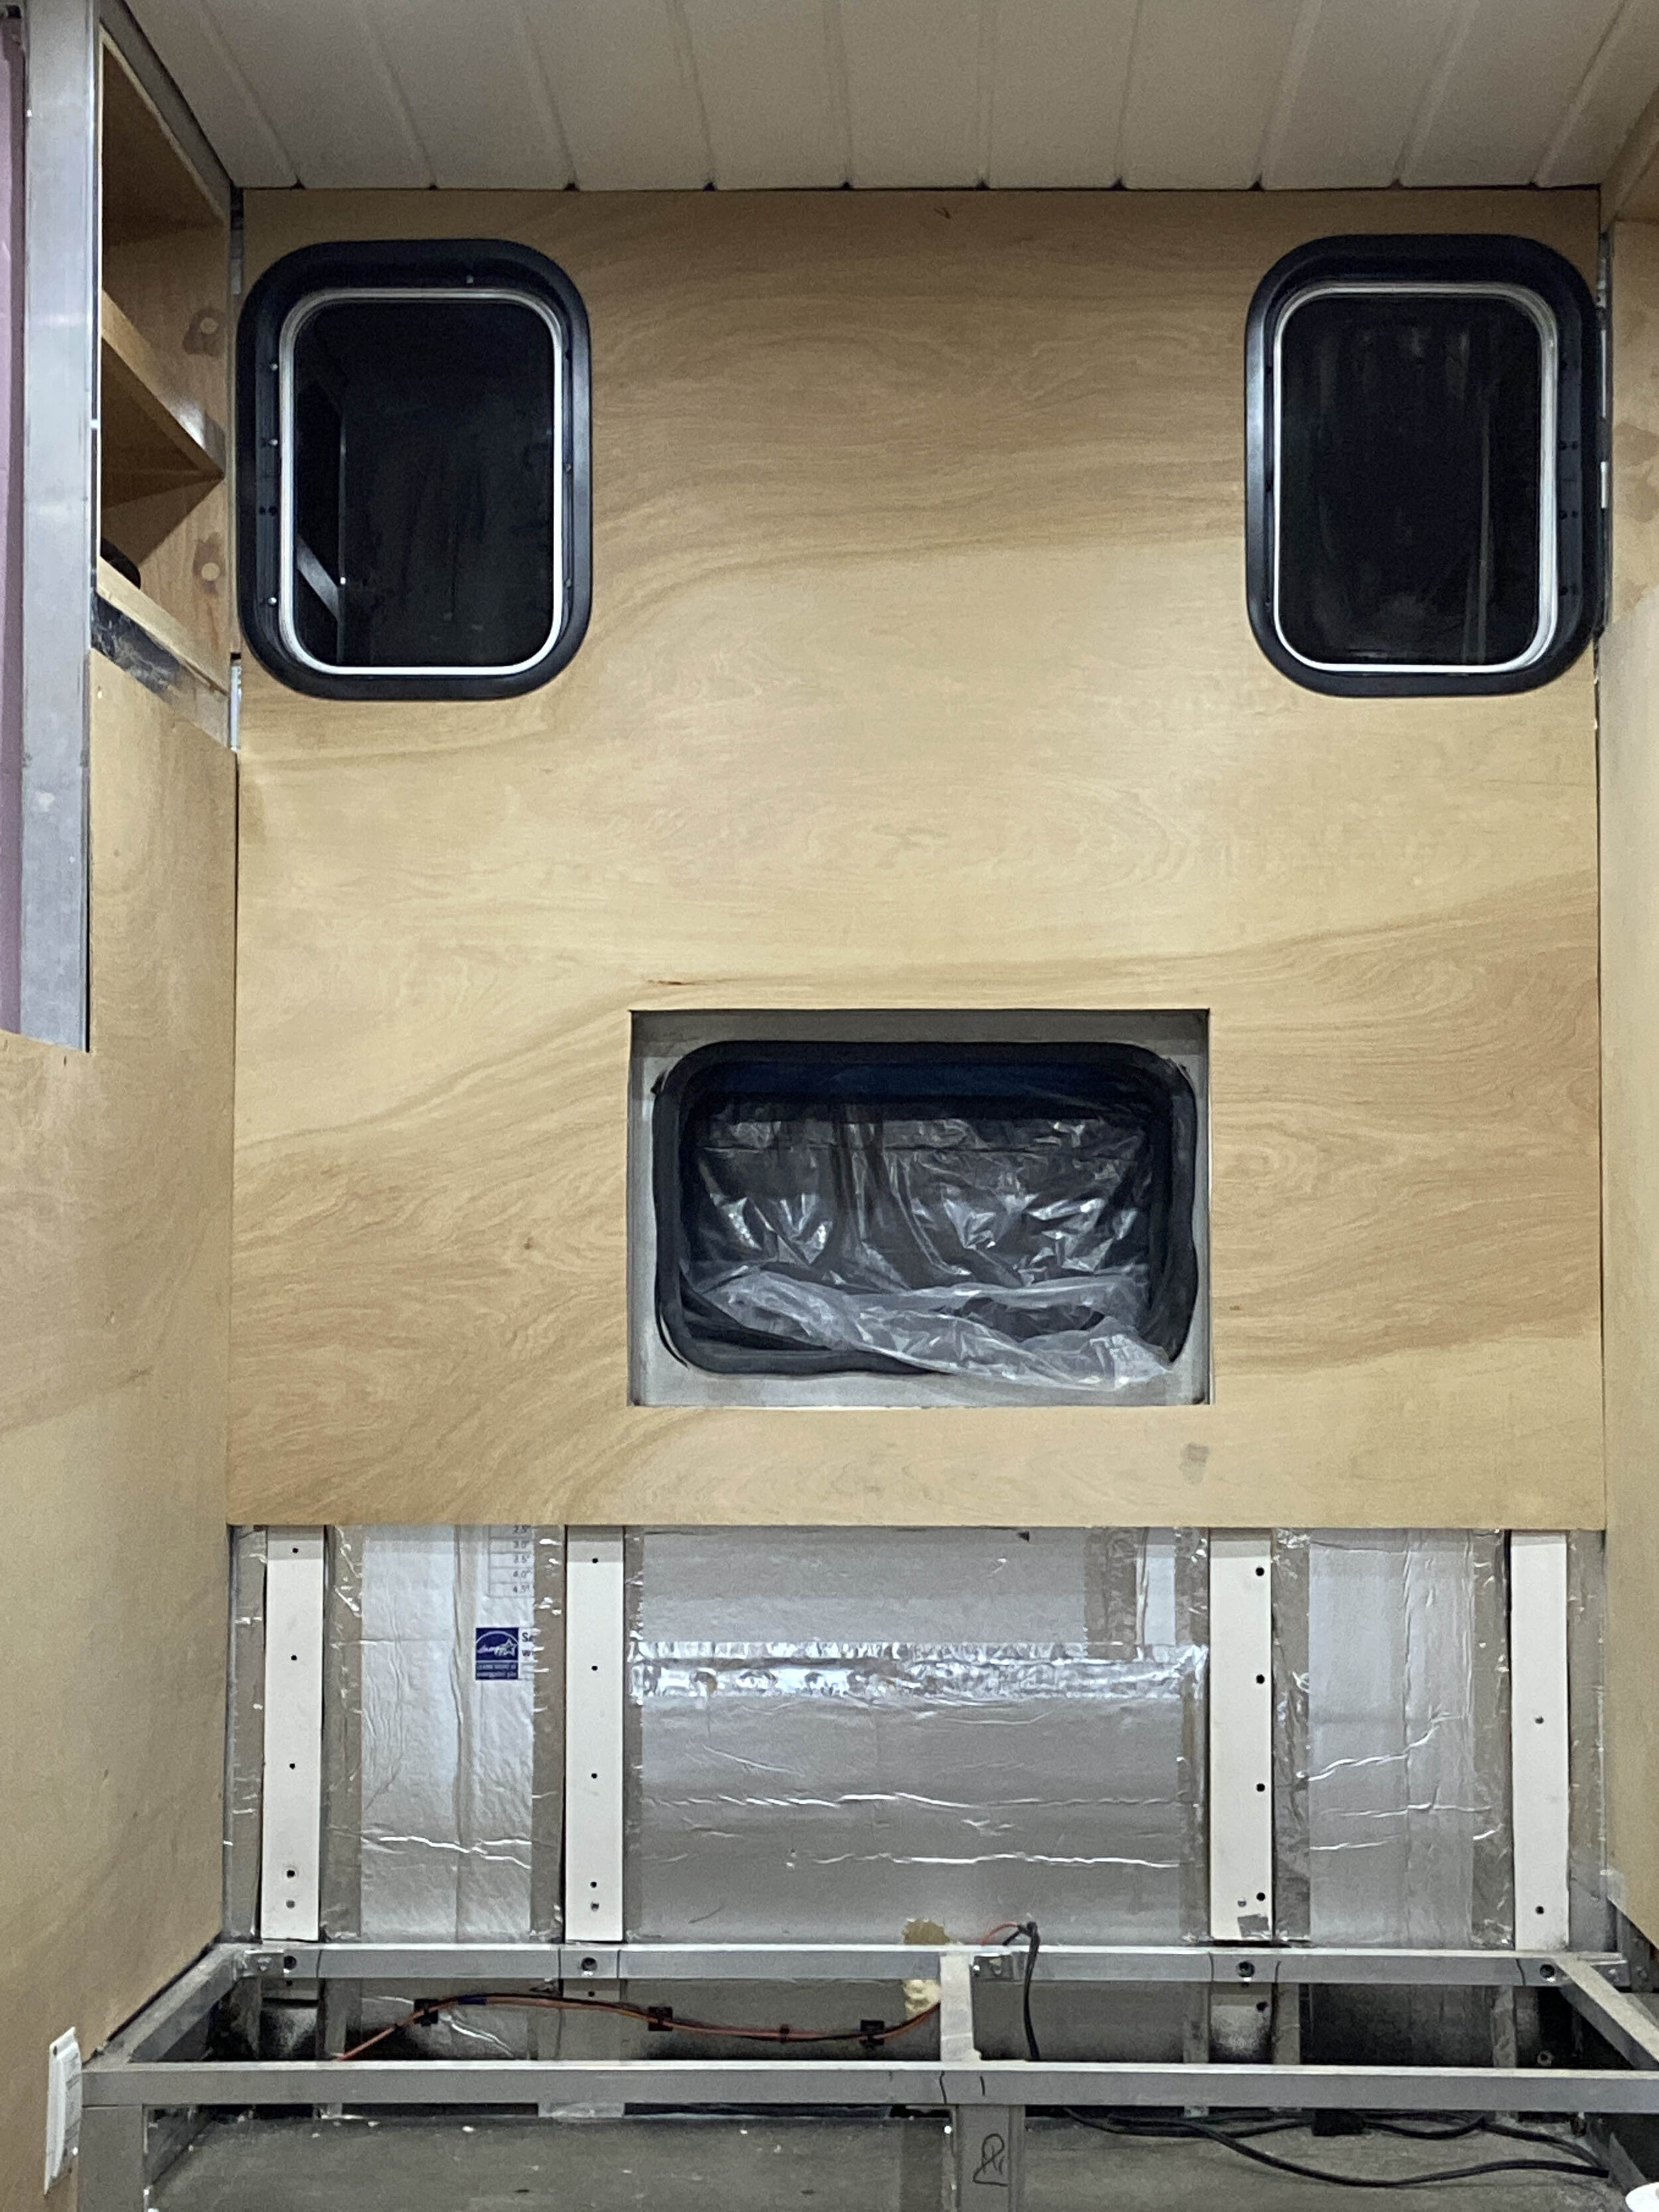
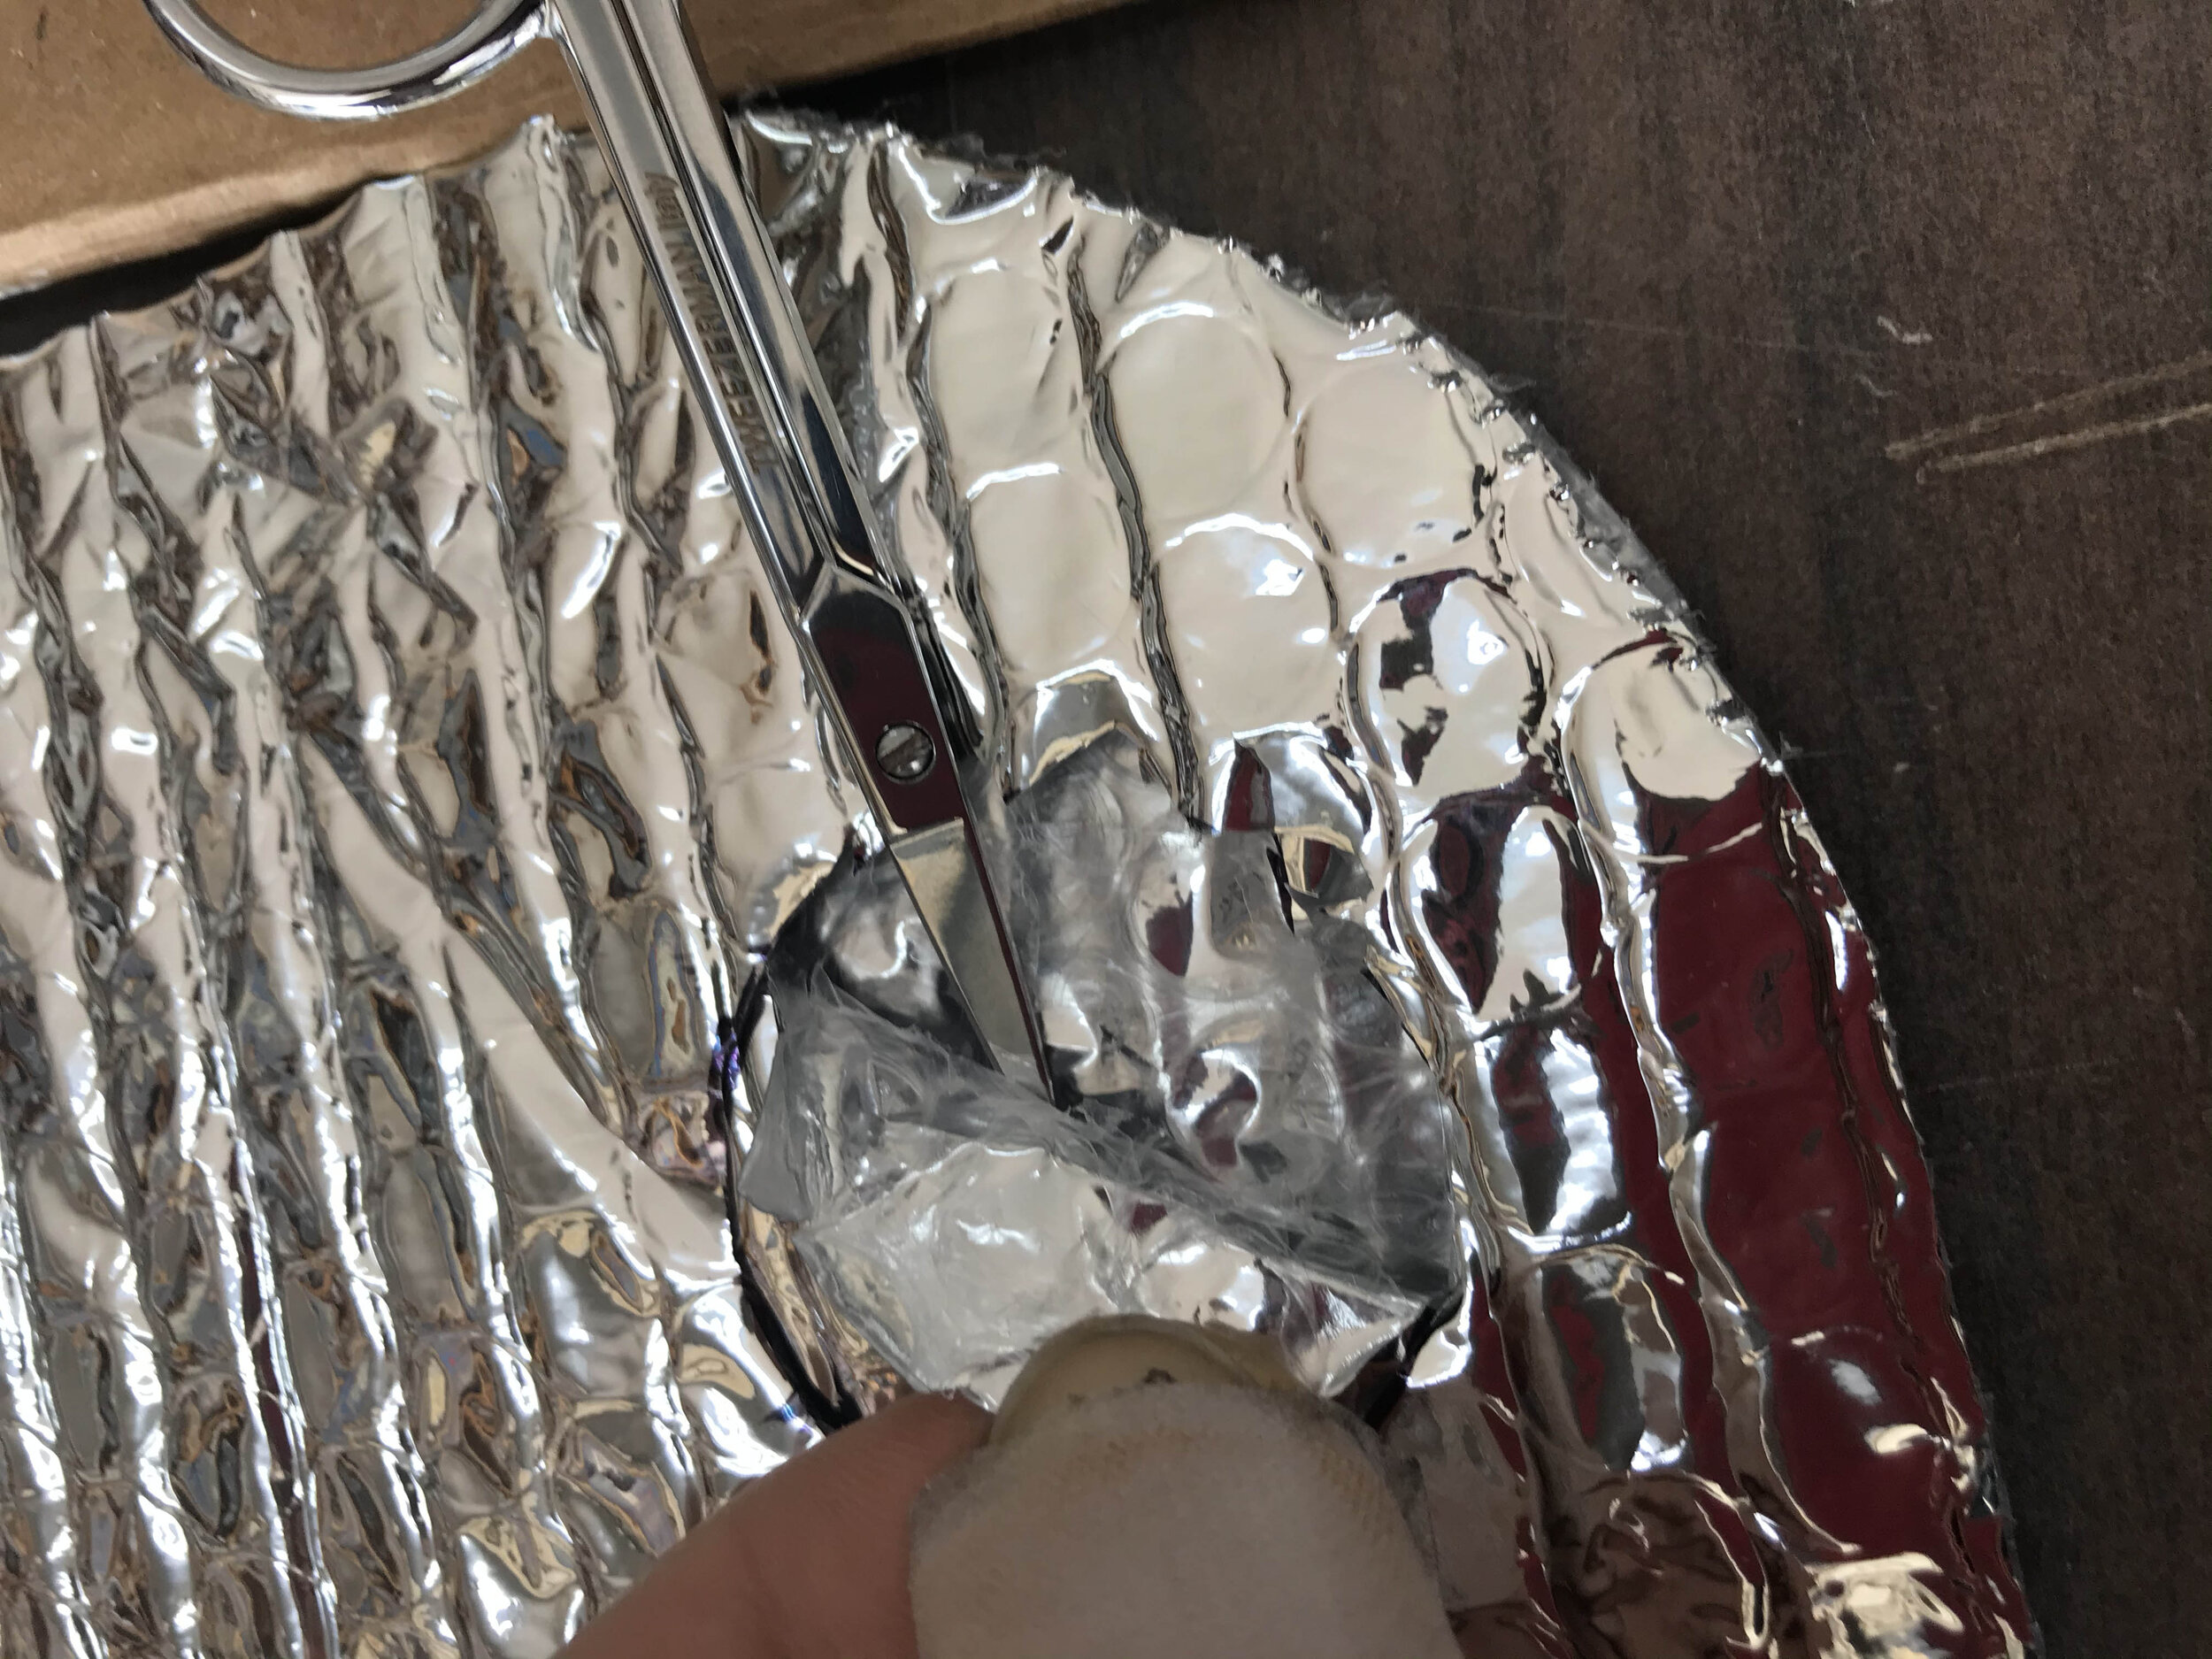
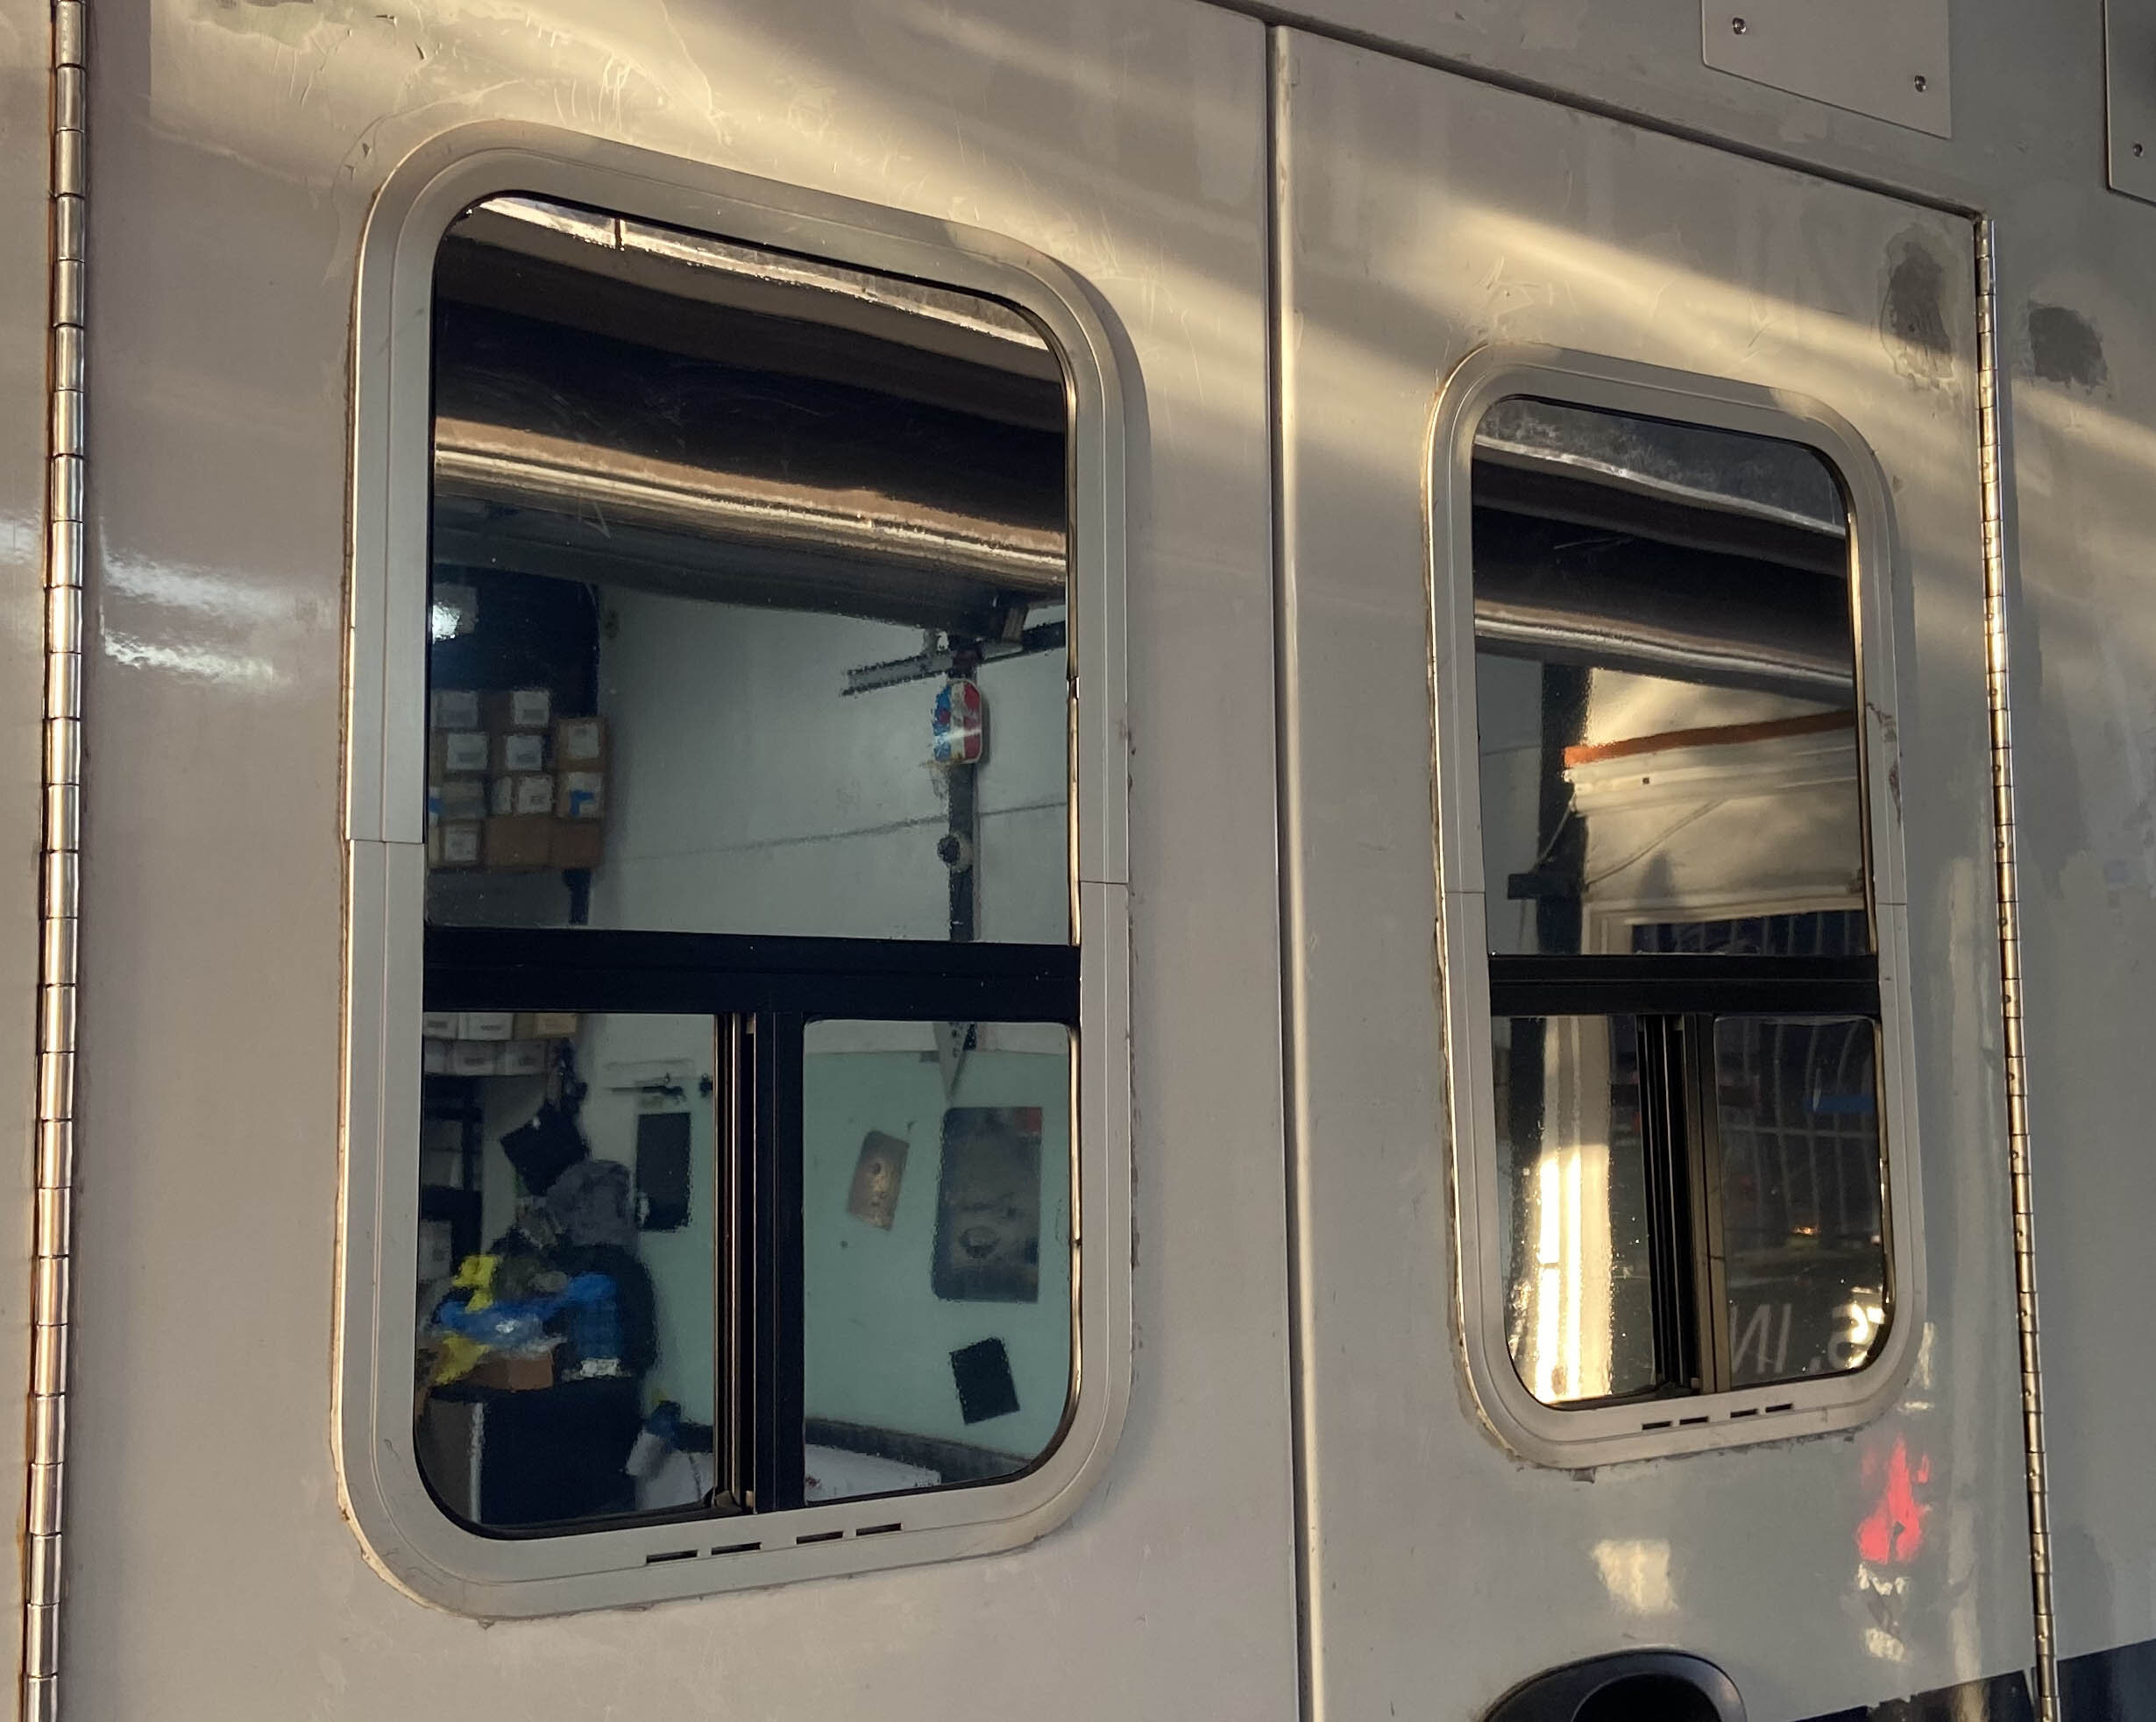
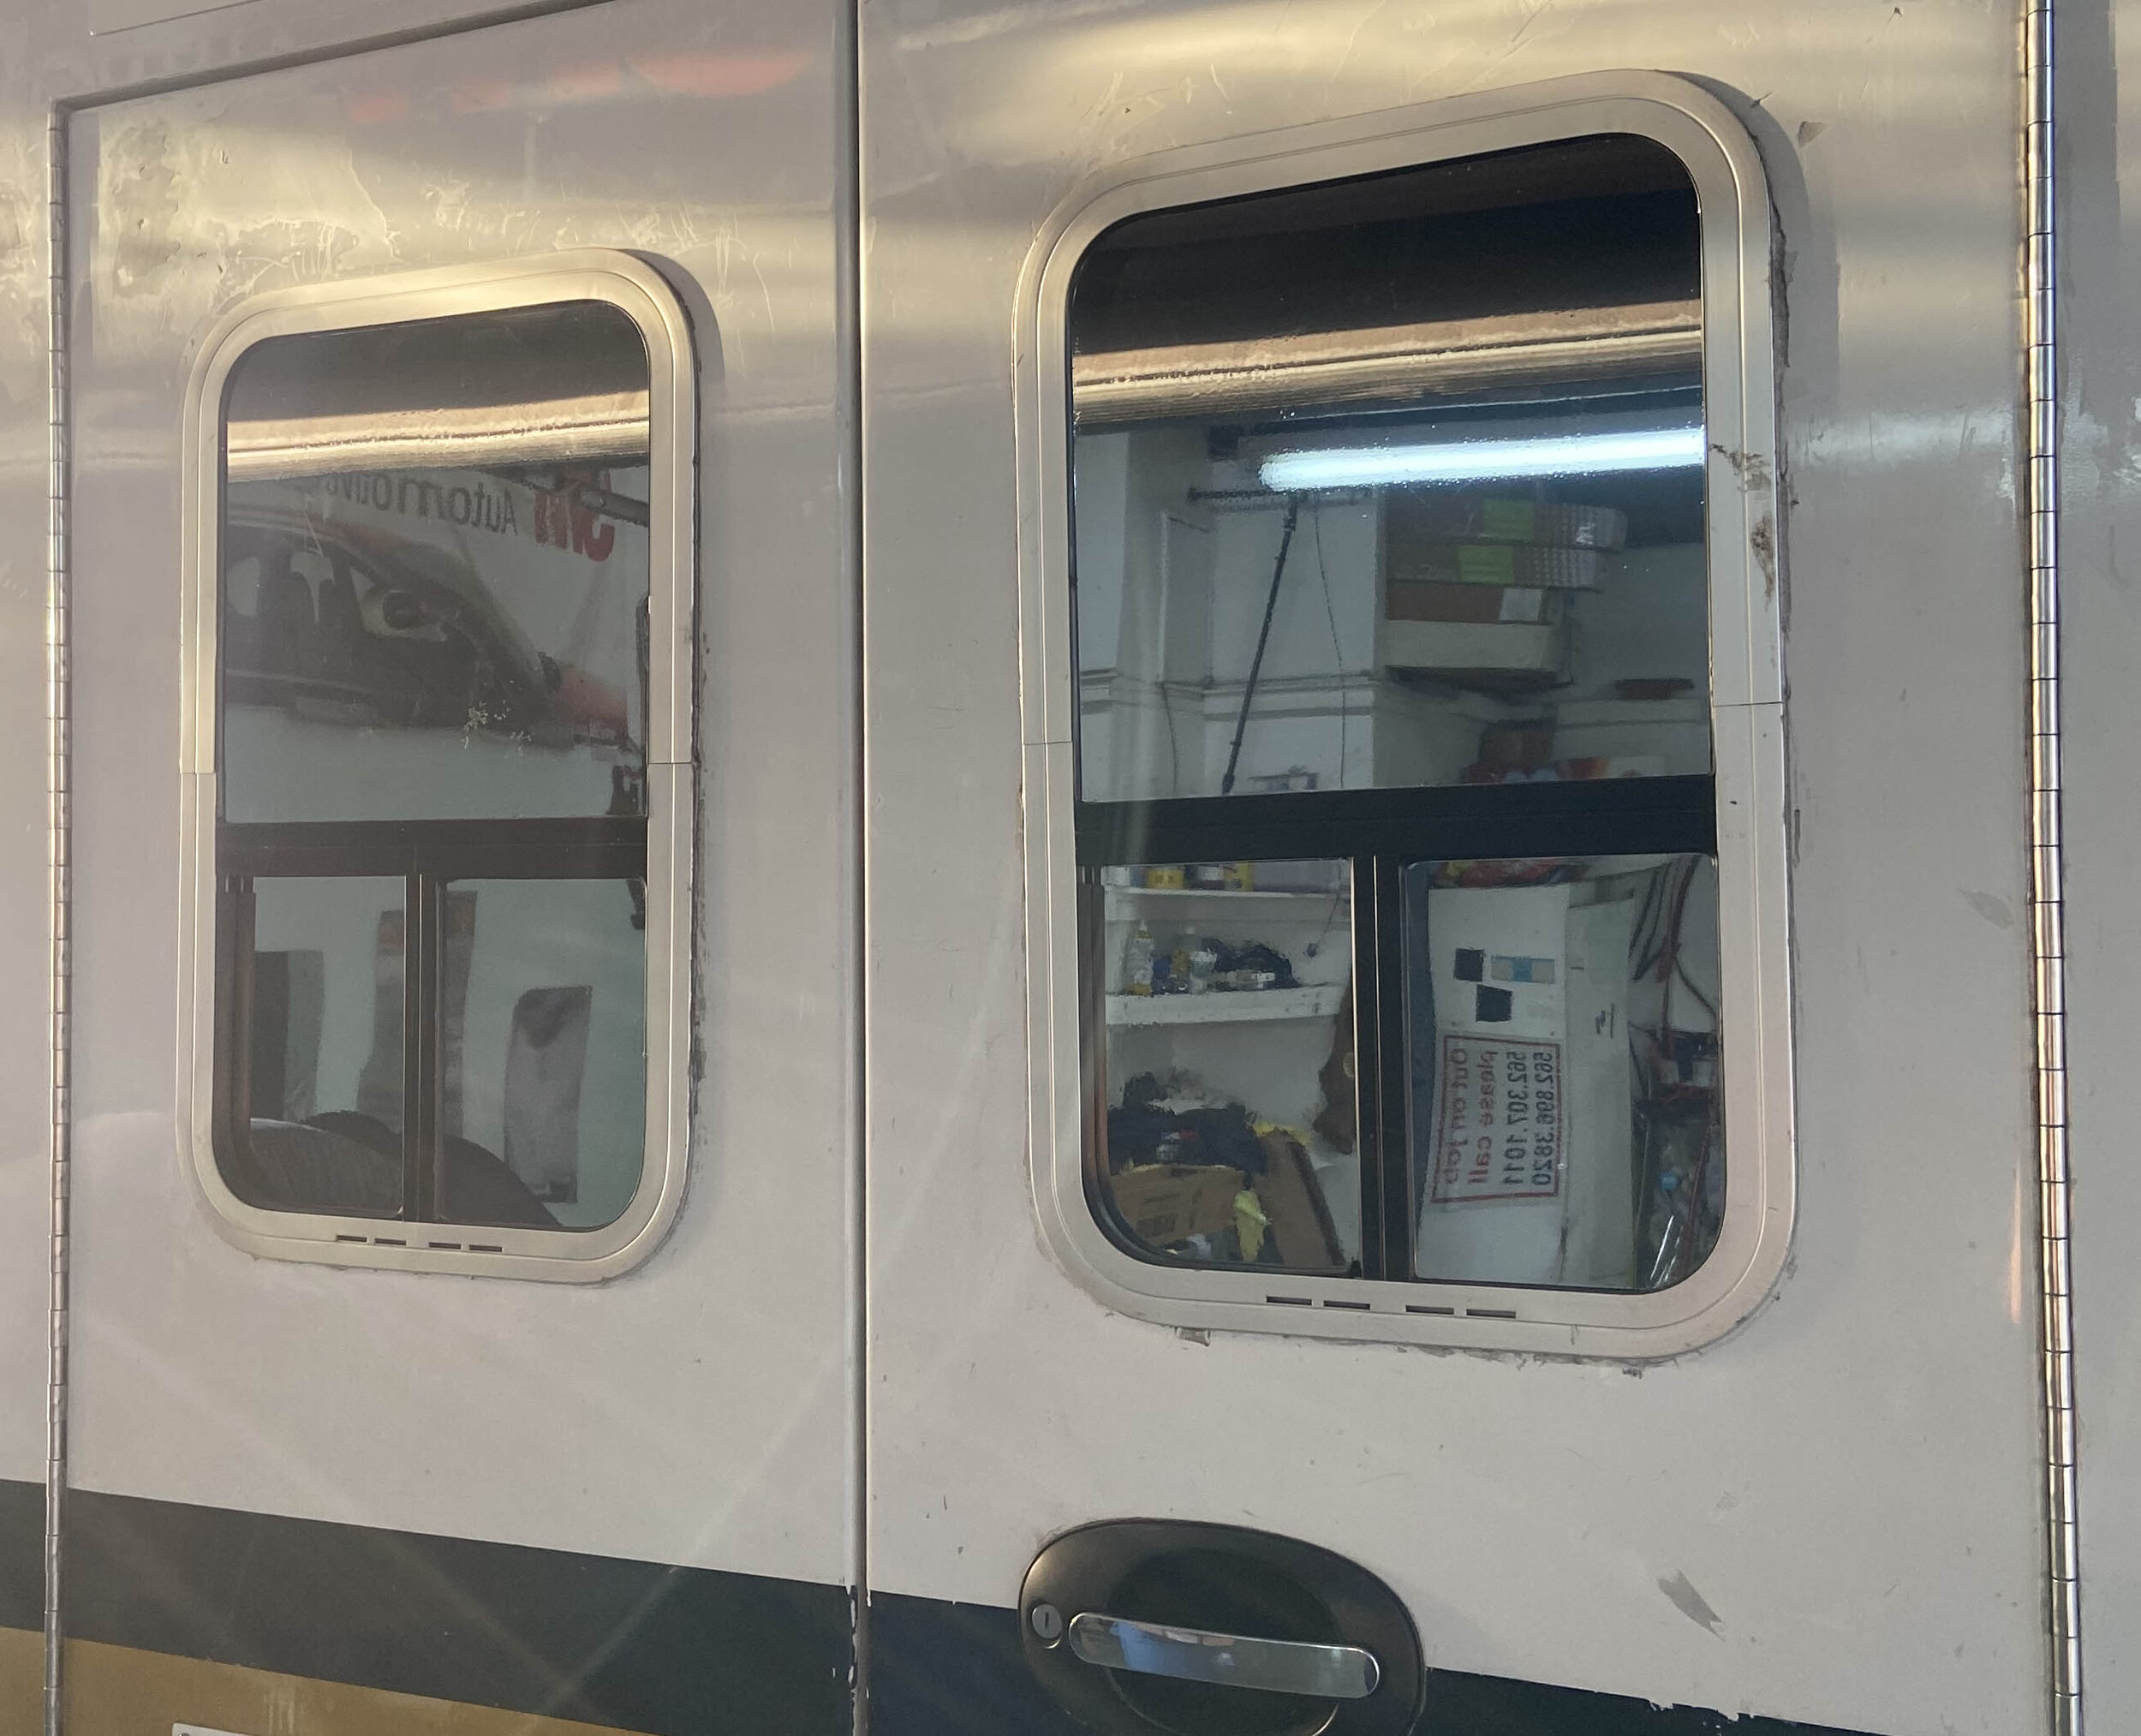
7/30/2020 - Continuing to fill all the gaps and holes with Locktite X8 and AL. Using Liquid Rubber to continue sealing around the edges. Beginning to install the R-22 Closed Cell foam insulation. Planning the location of the side windows. Installed the two forward looking windows (these were taken from the rear doors). Rear view camera relocated and Excel tankless water heater dry fitted into position. I took my time here. I wanted every inch of this box to be completely sealed from the outside. I used about 1.5 gallons of liquid rubber in all. The insulation was purchased from Home Depot. Its 2” thick closed cell foam. Almost immediately it was cooler in the back. I used 2” AL insulation tape to further insulate and attach the foam in the walls. We insulated the box as well as the compartment doors. Everywhere 2” closed cell foam would fit we added it. We used the blue painters tape to mock up where the windows would go. I took the 2 small windows out of the rear doors and repurposed them to the front of the box. Now I would have a 360 degree view of the outside. Removing the giant chevron sticker from the back doors was a massive undertaking. Im not sure why this one was so difficult but it was. Required a rubber wheel, heat gun and 4 days of work.

solar - windows
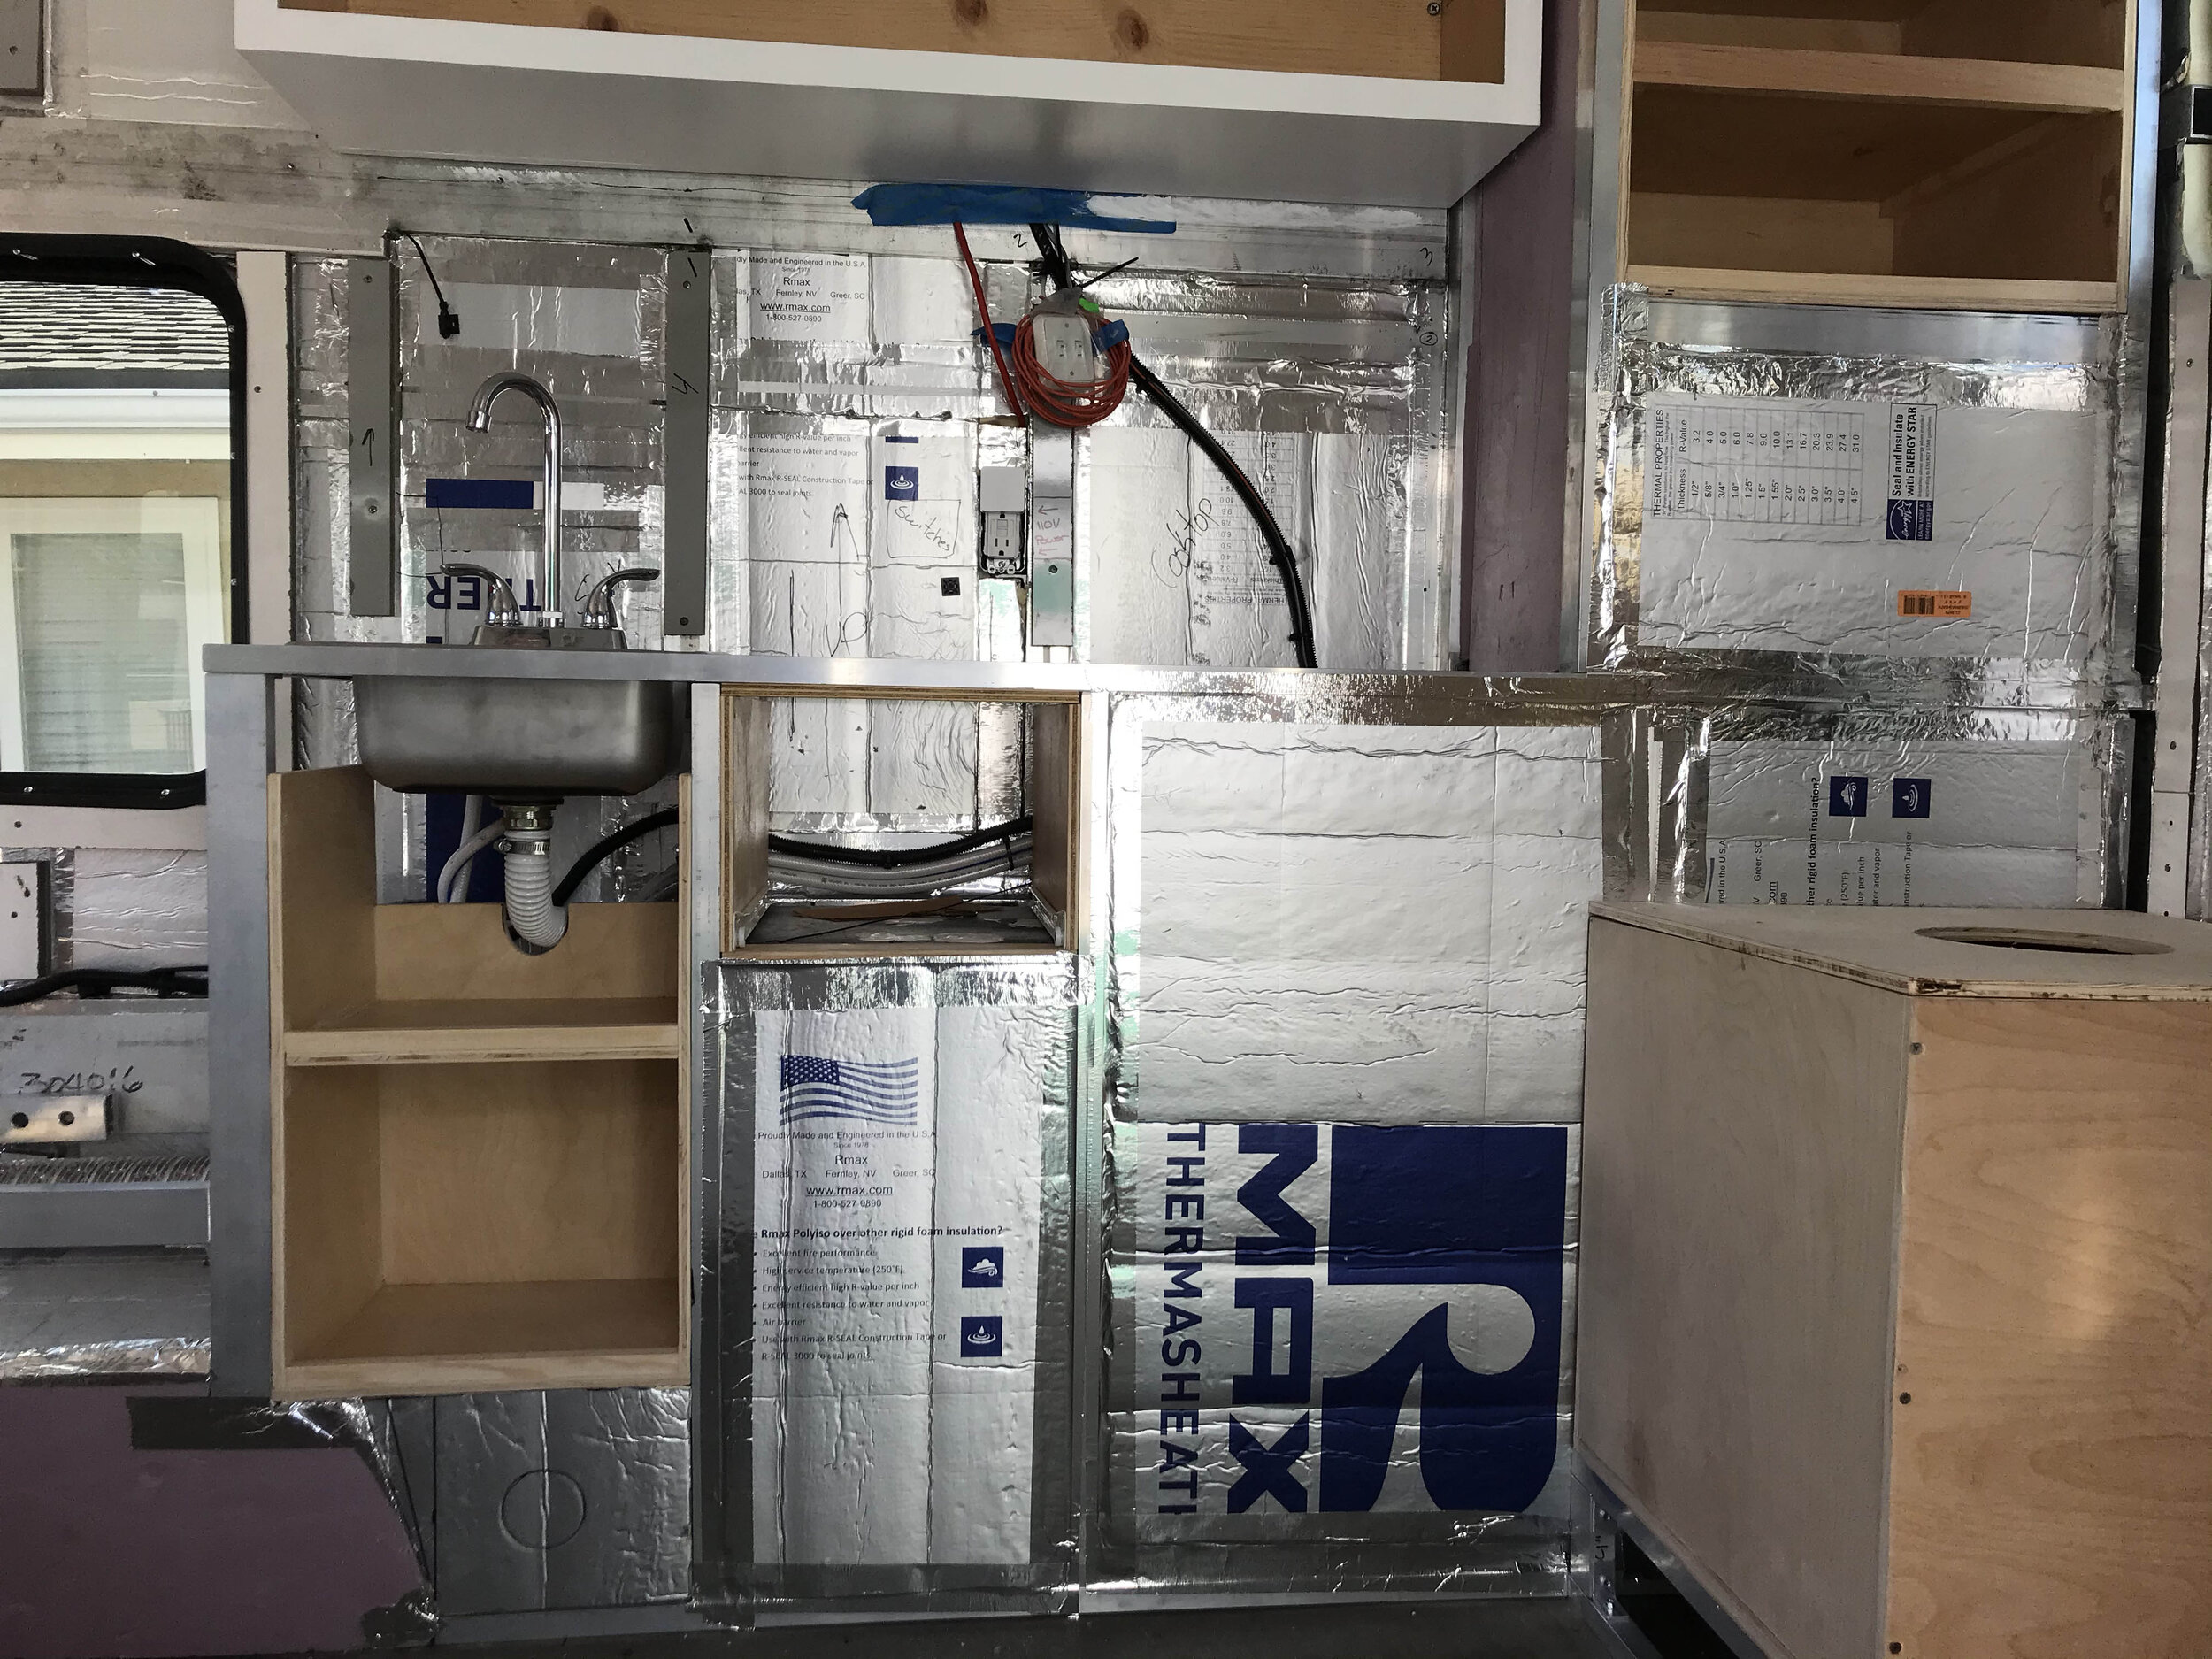
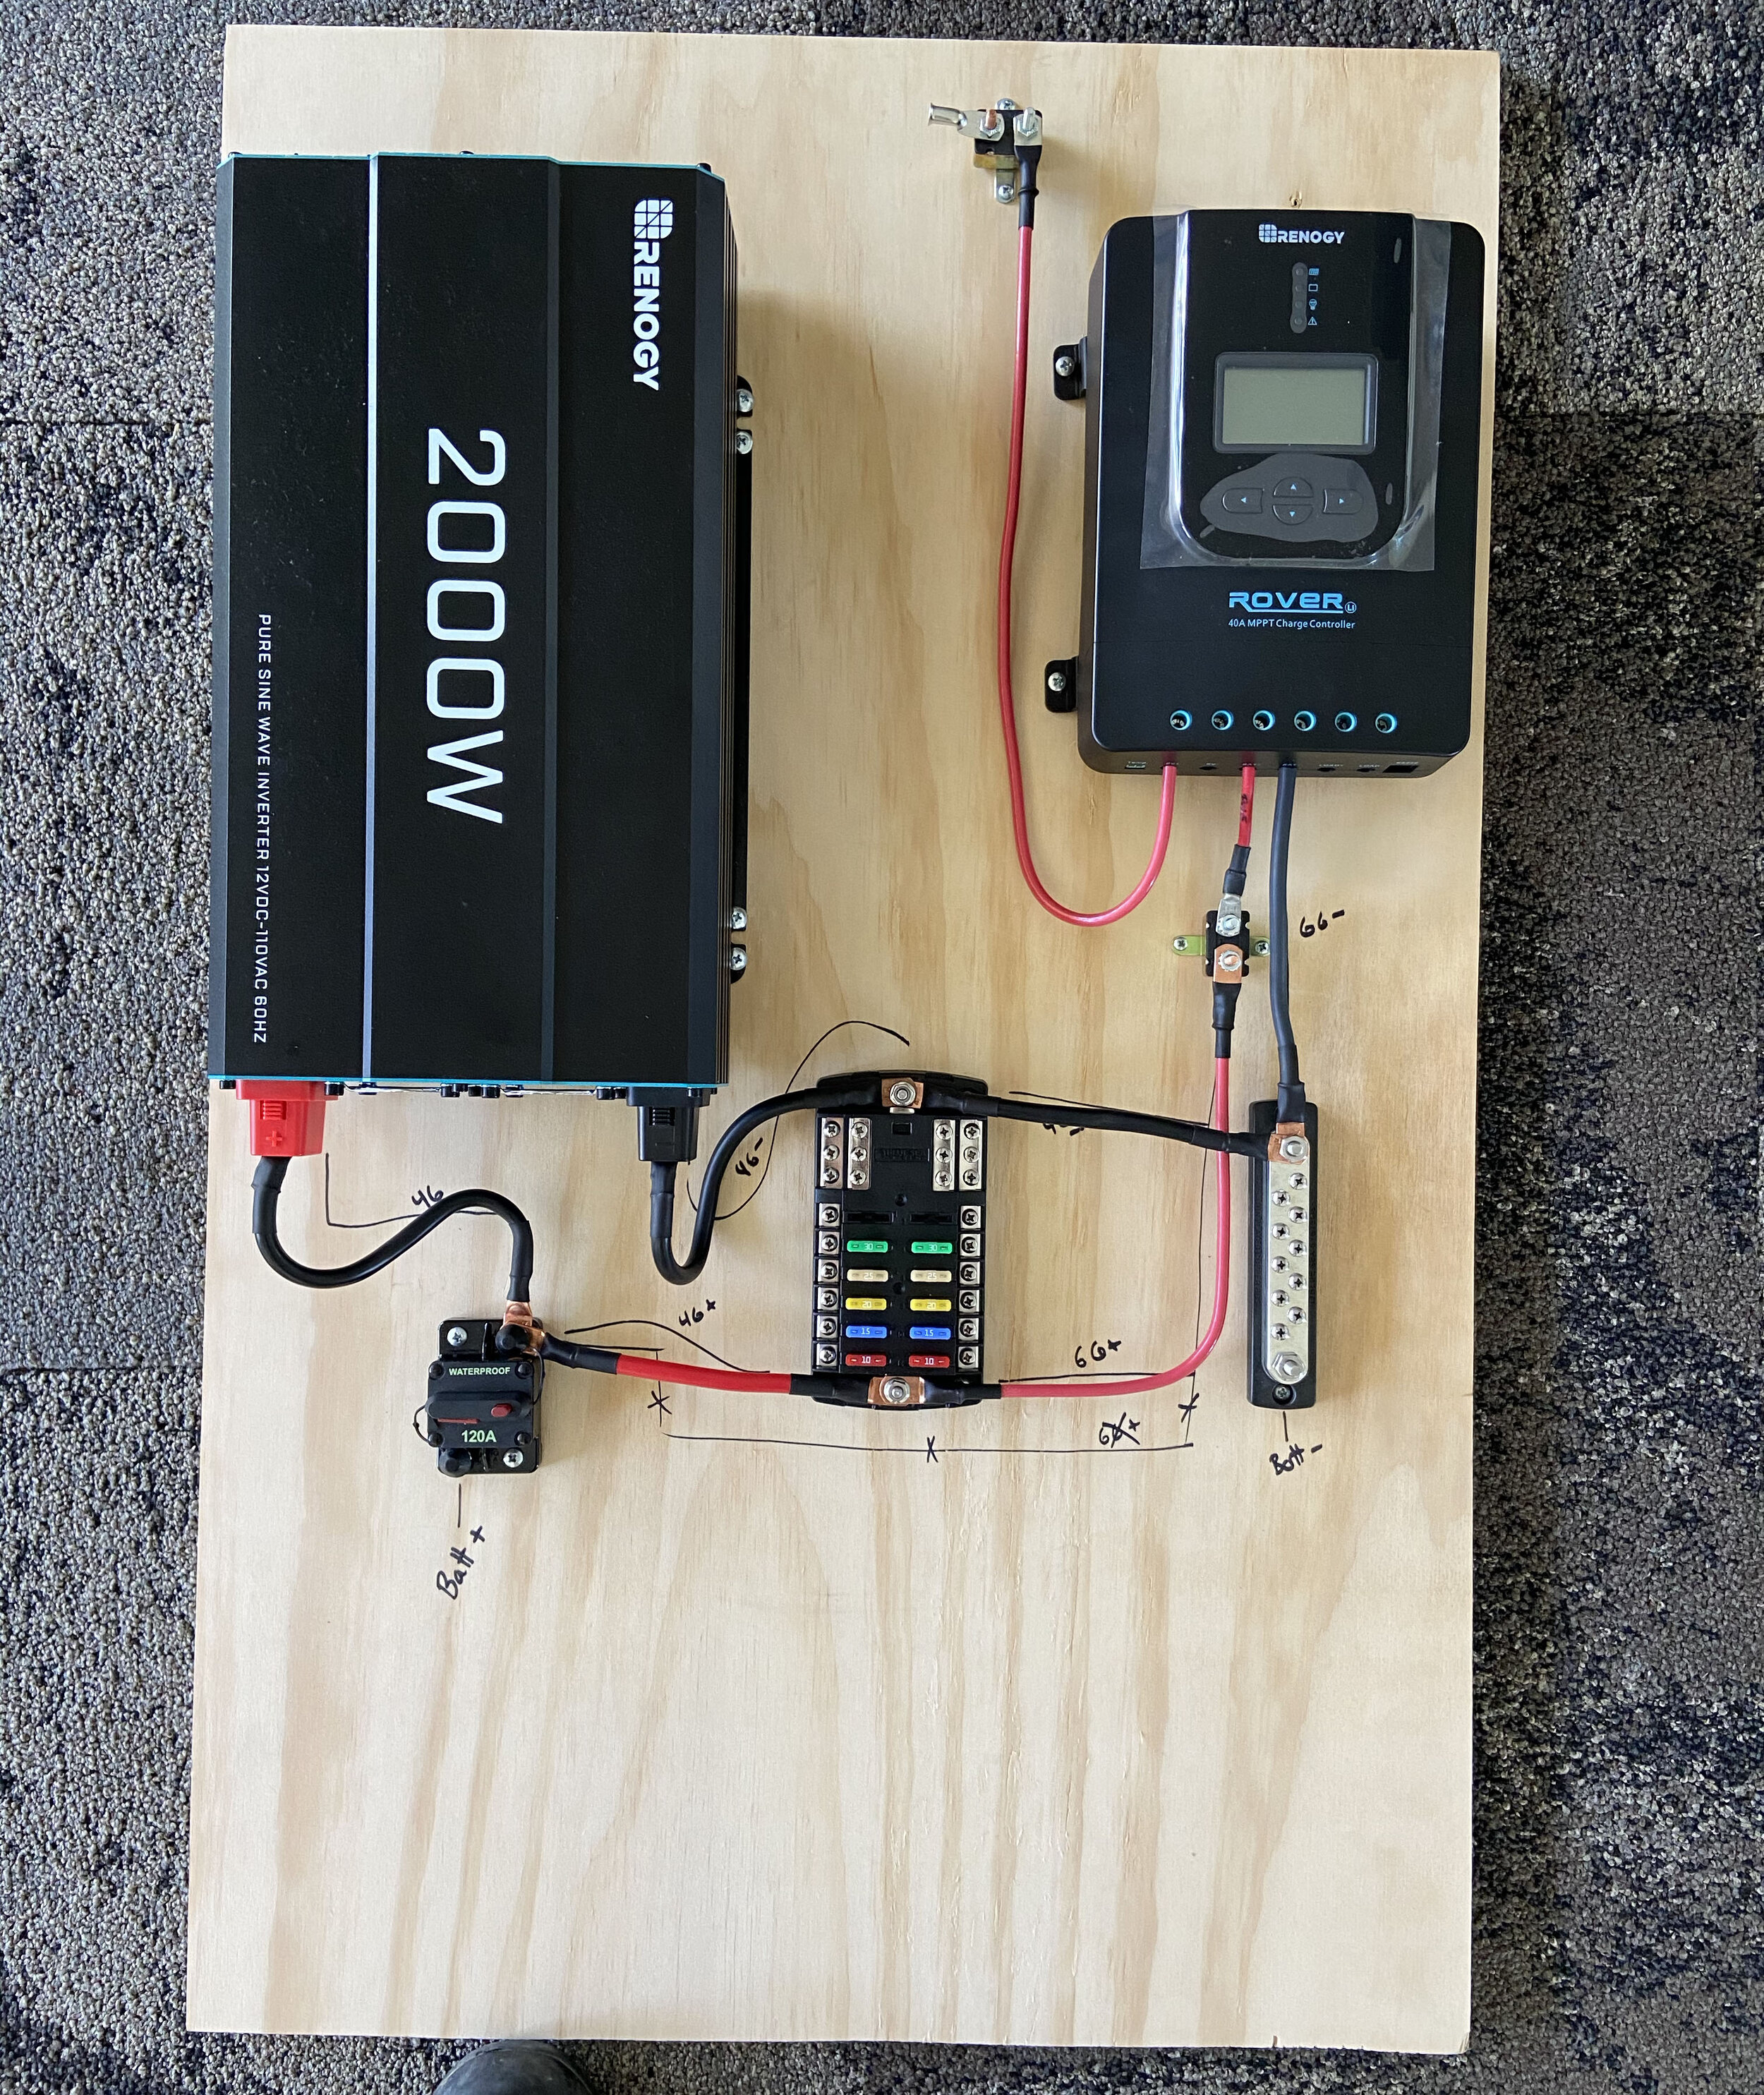
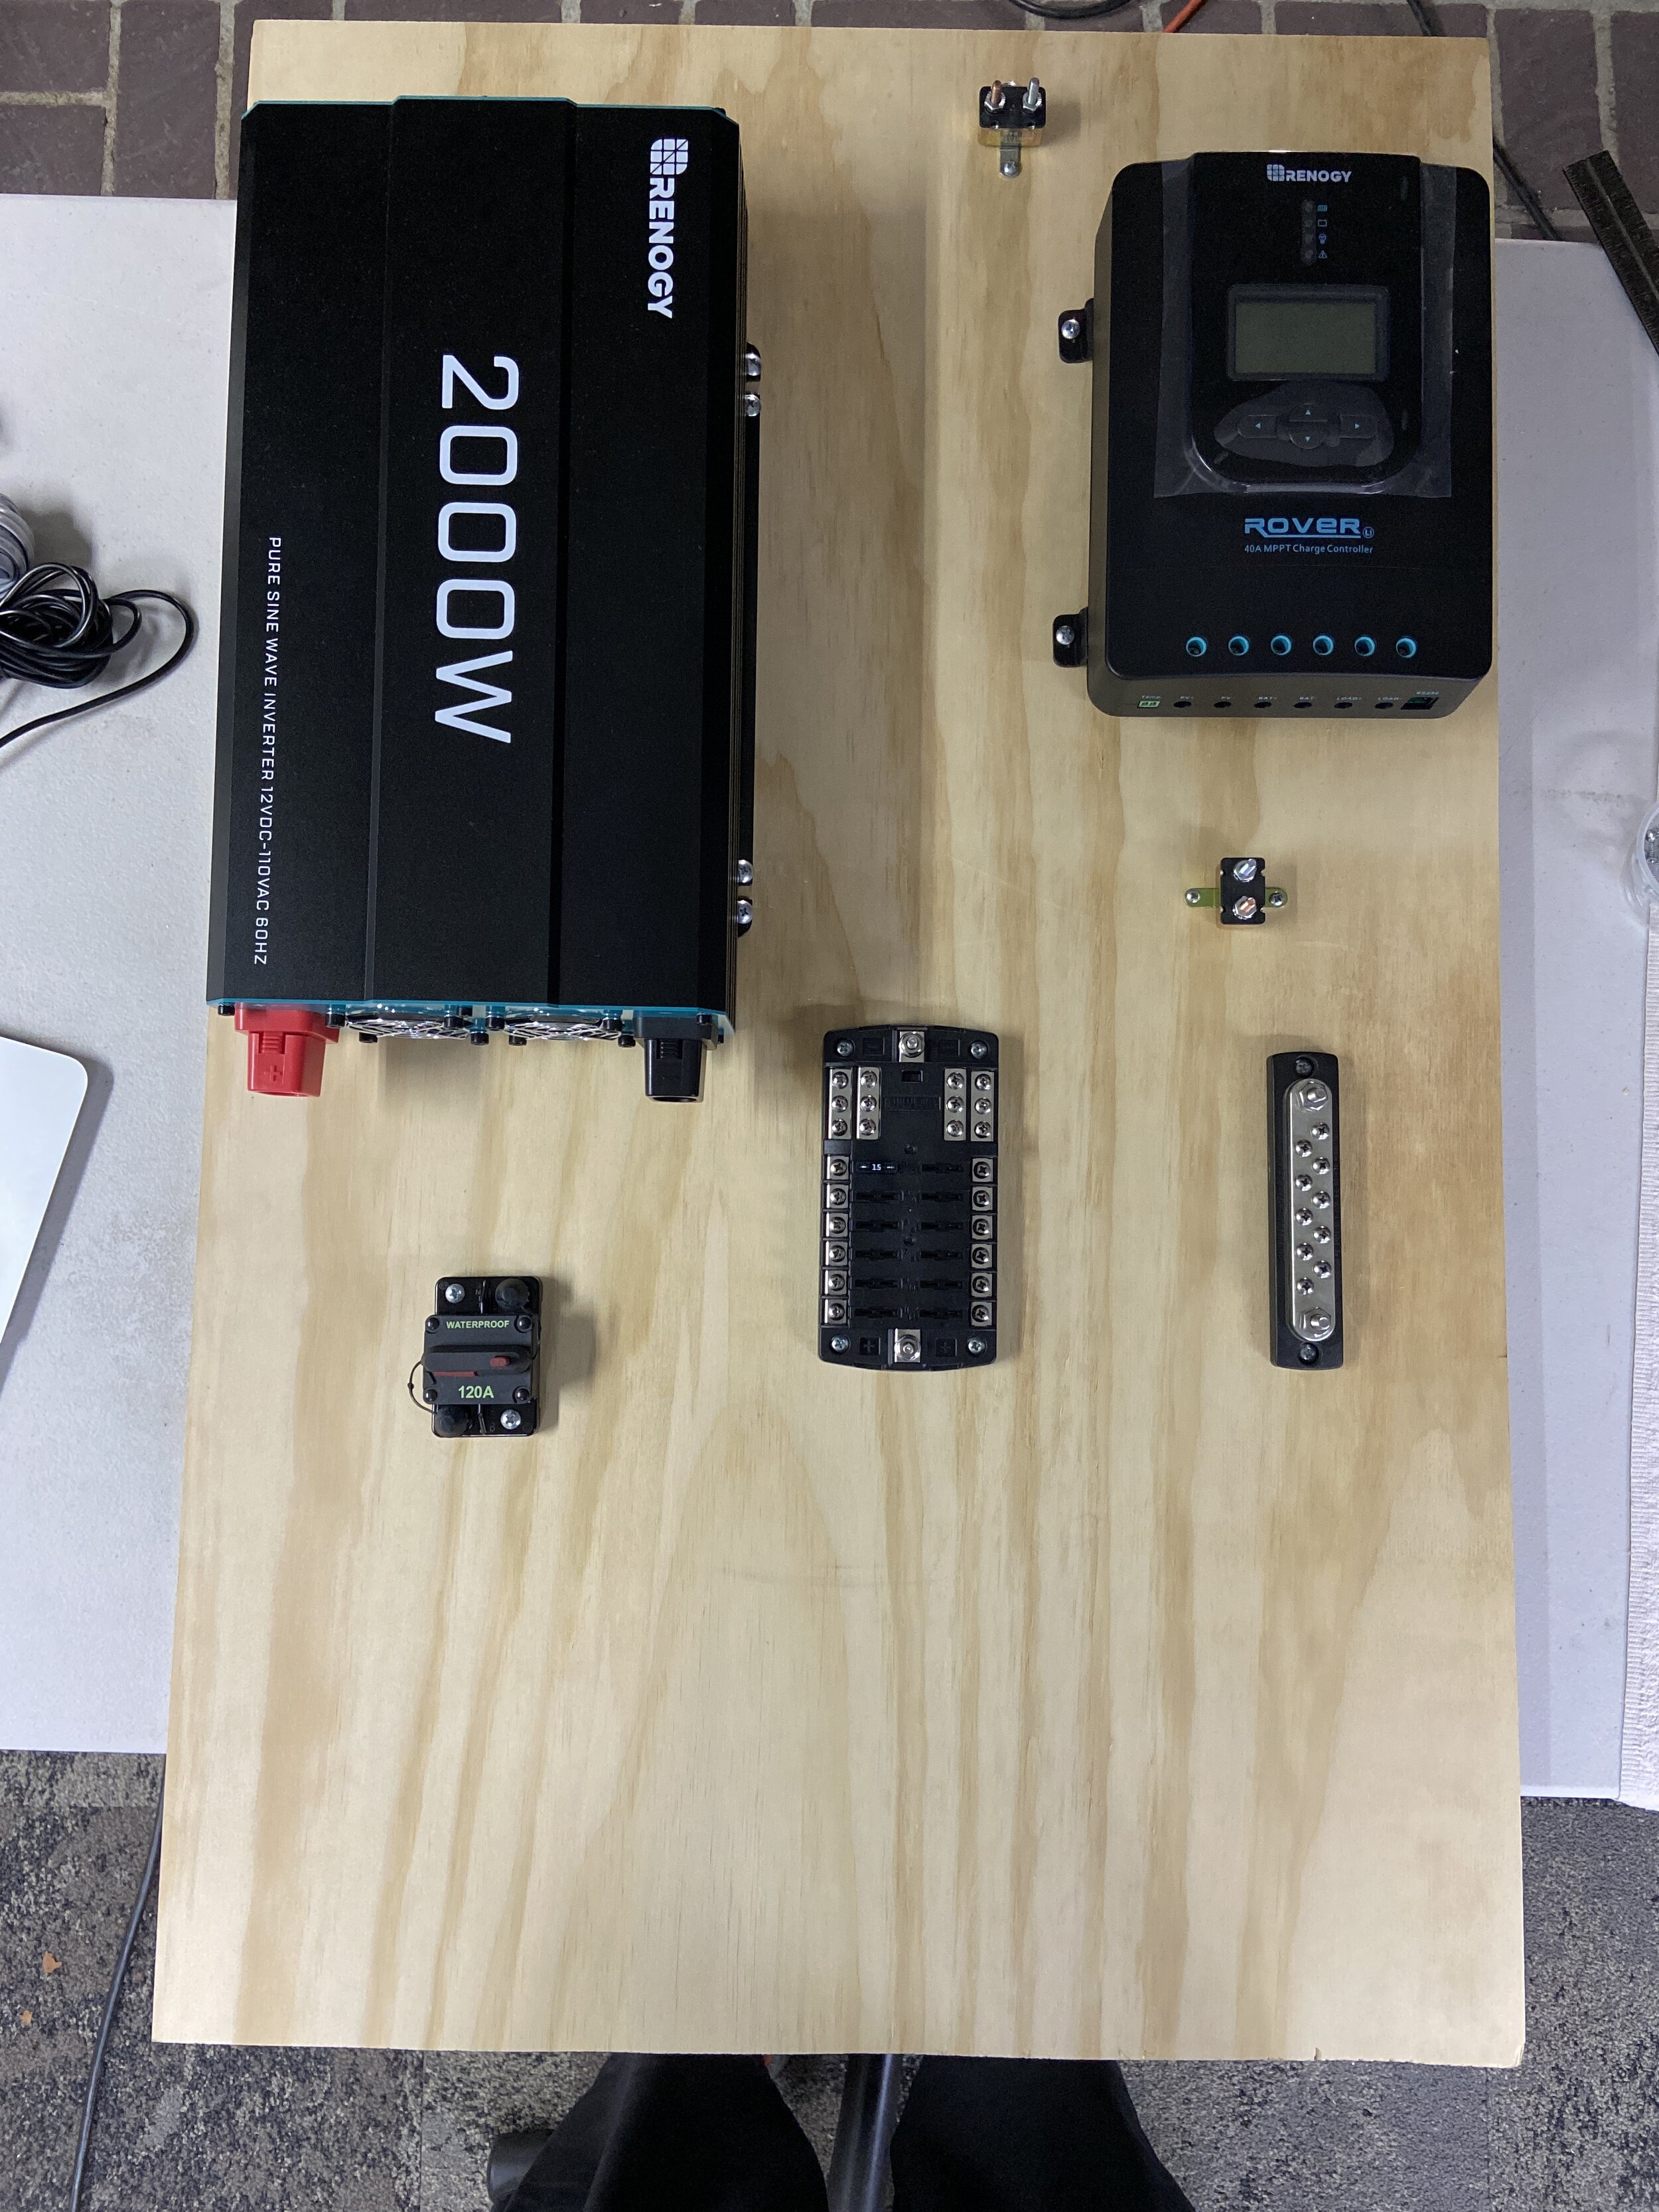
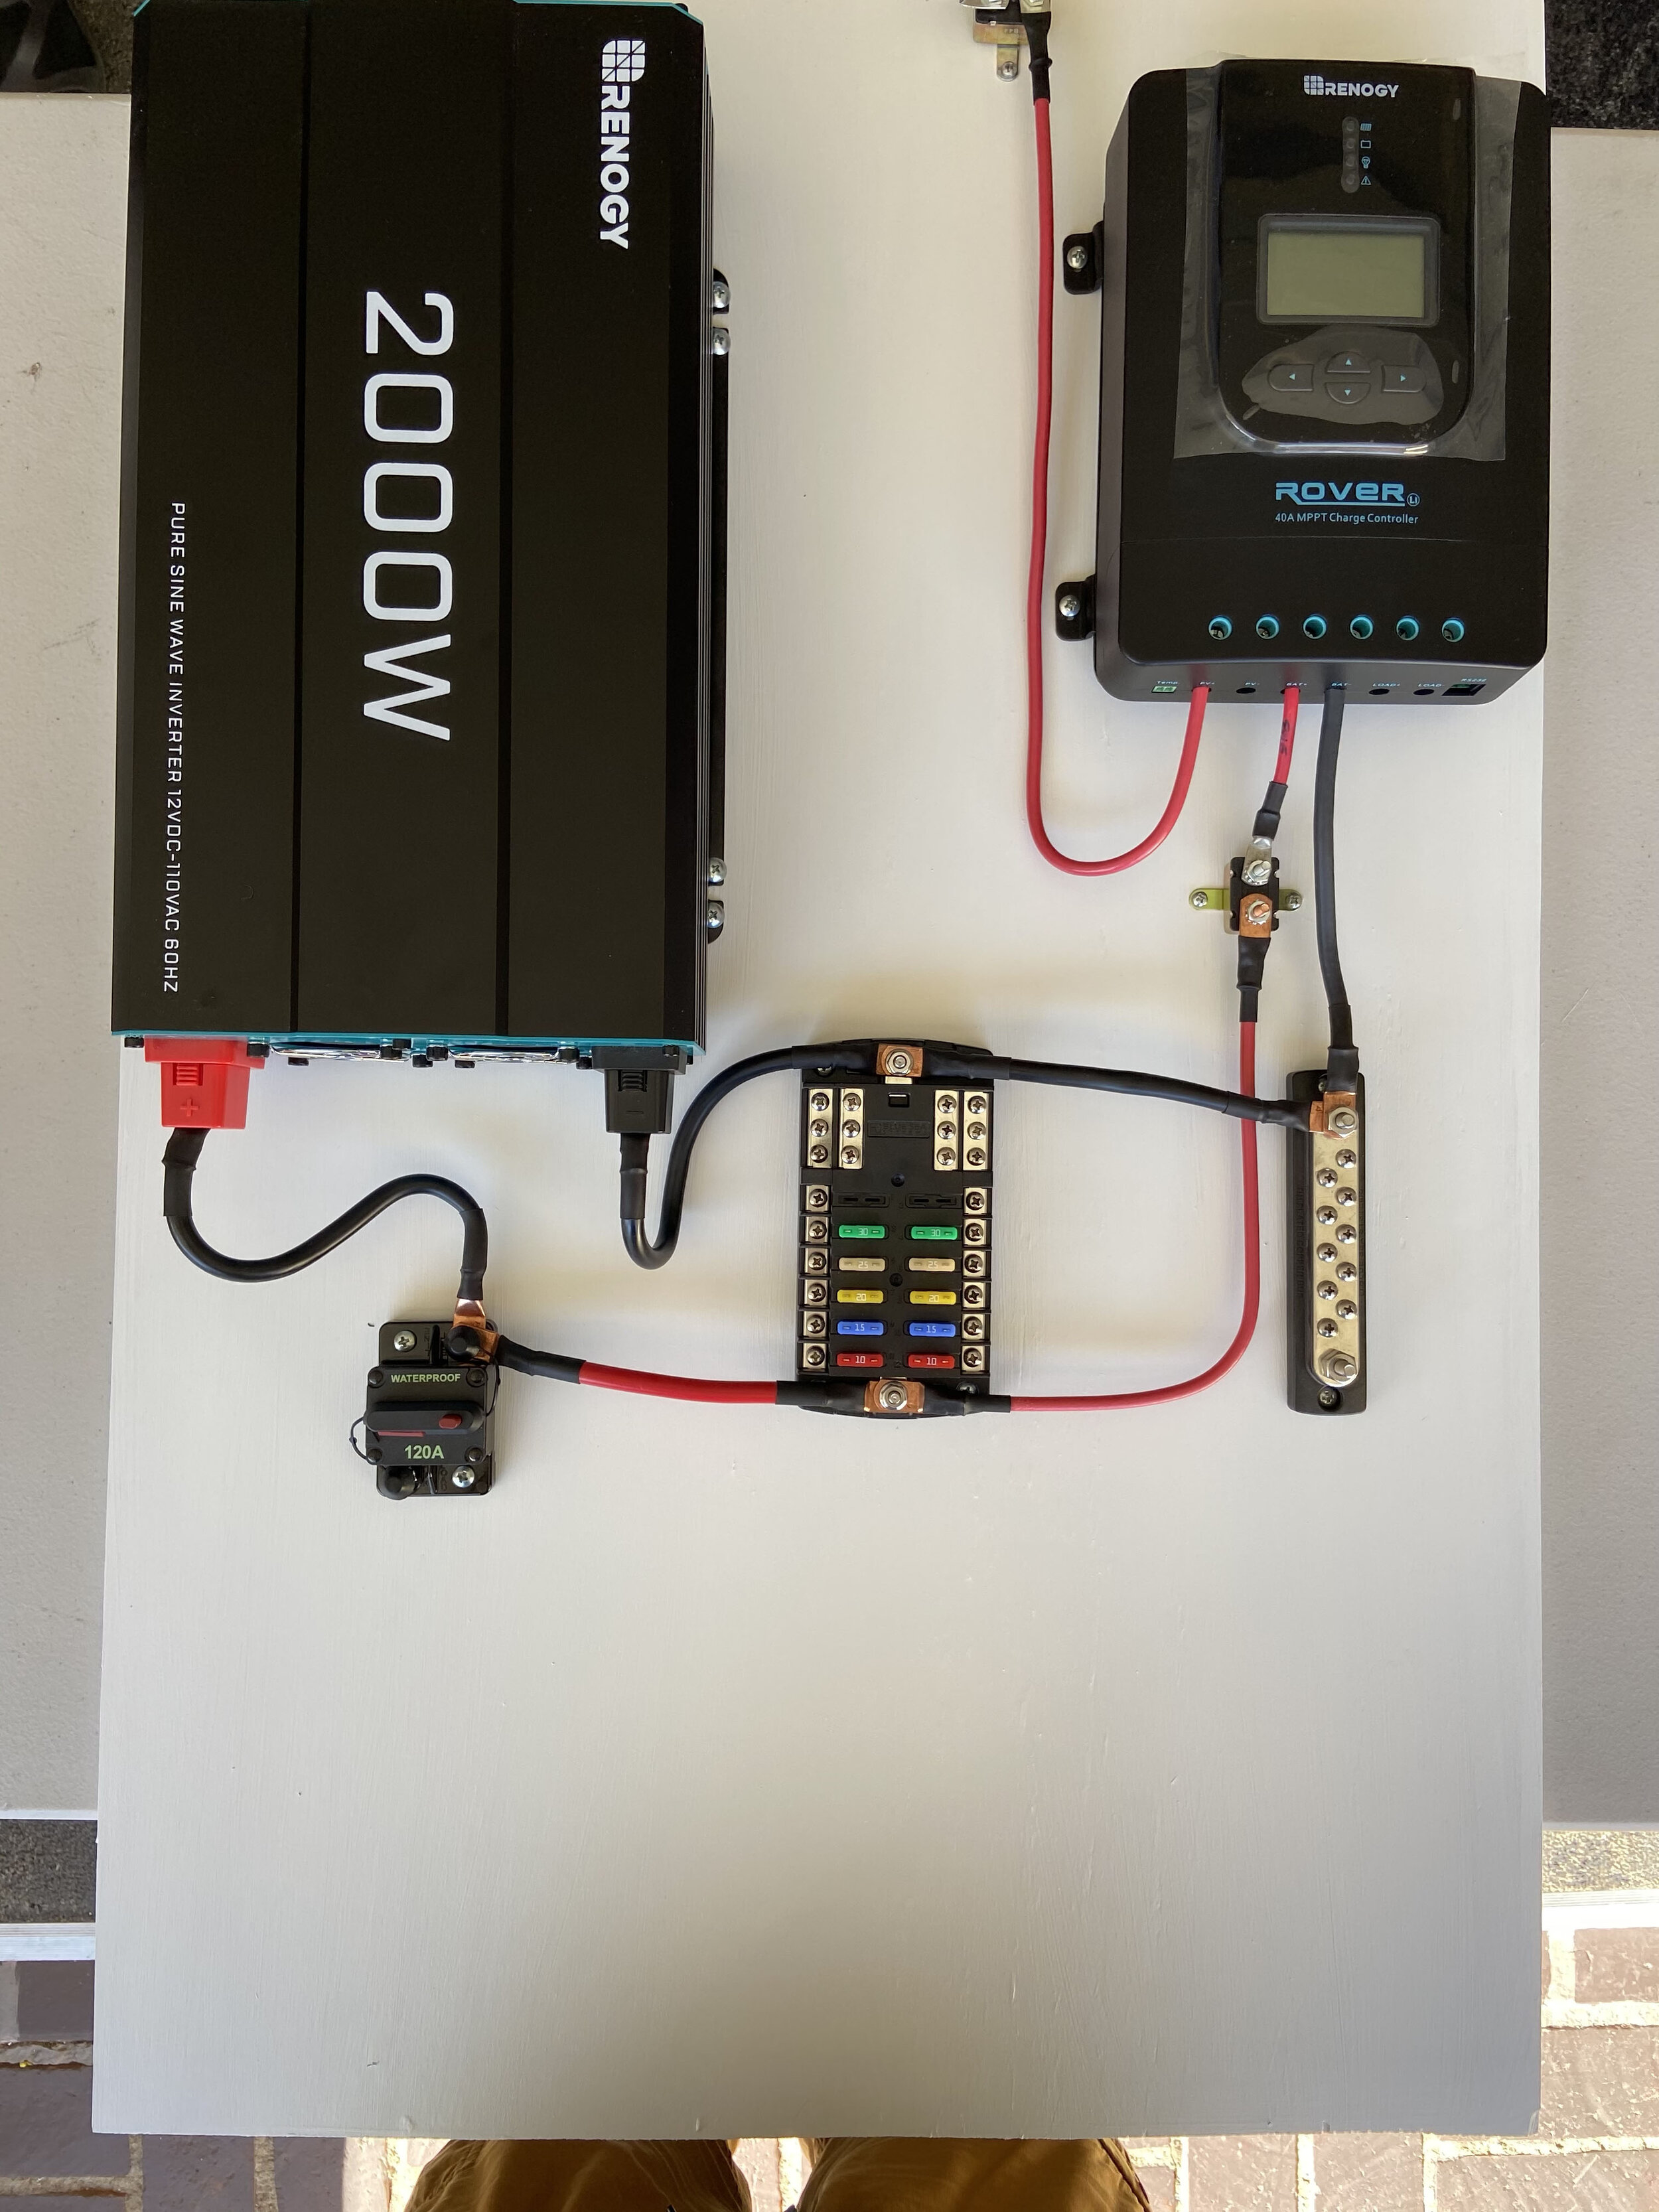
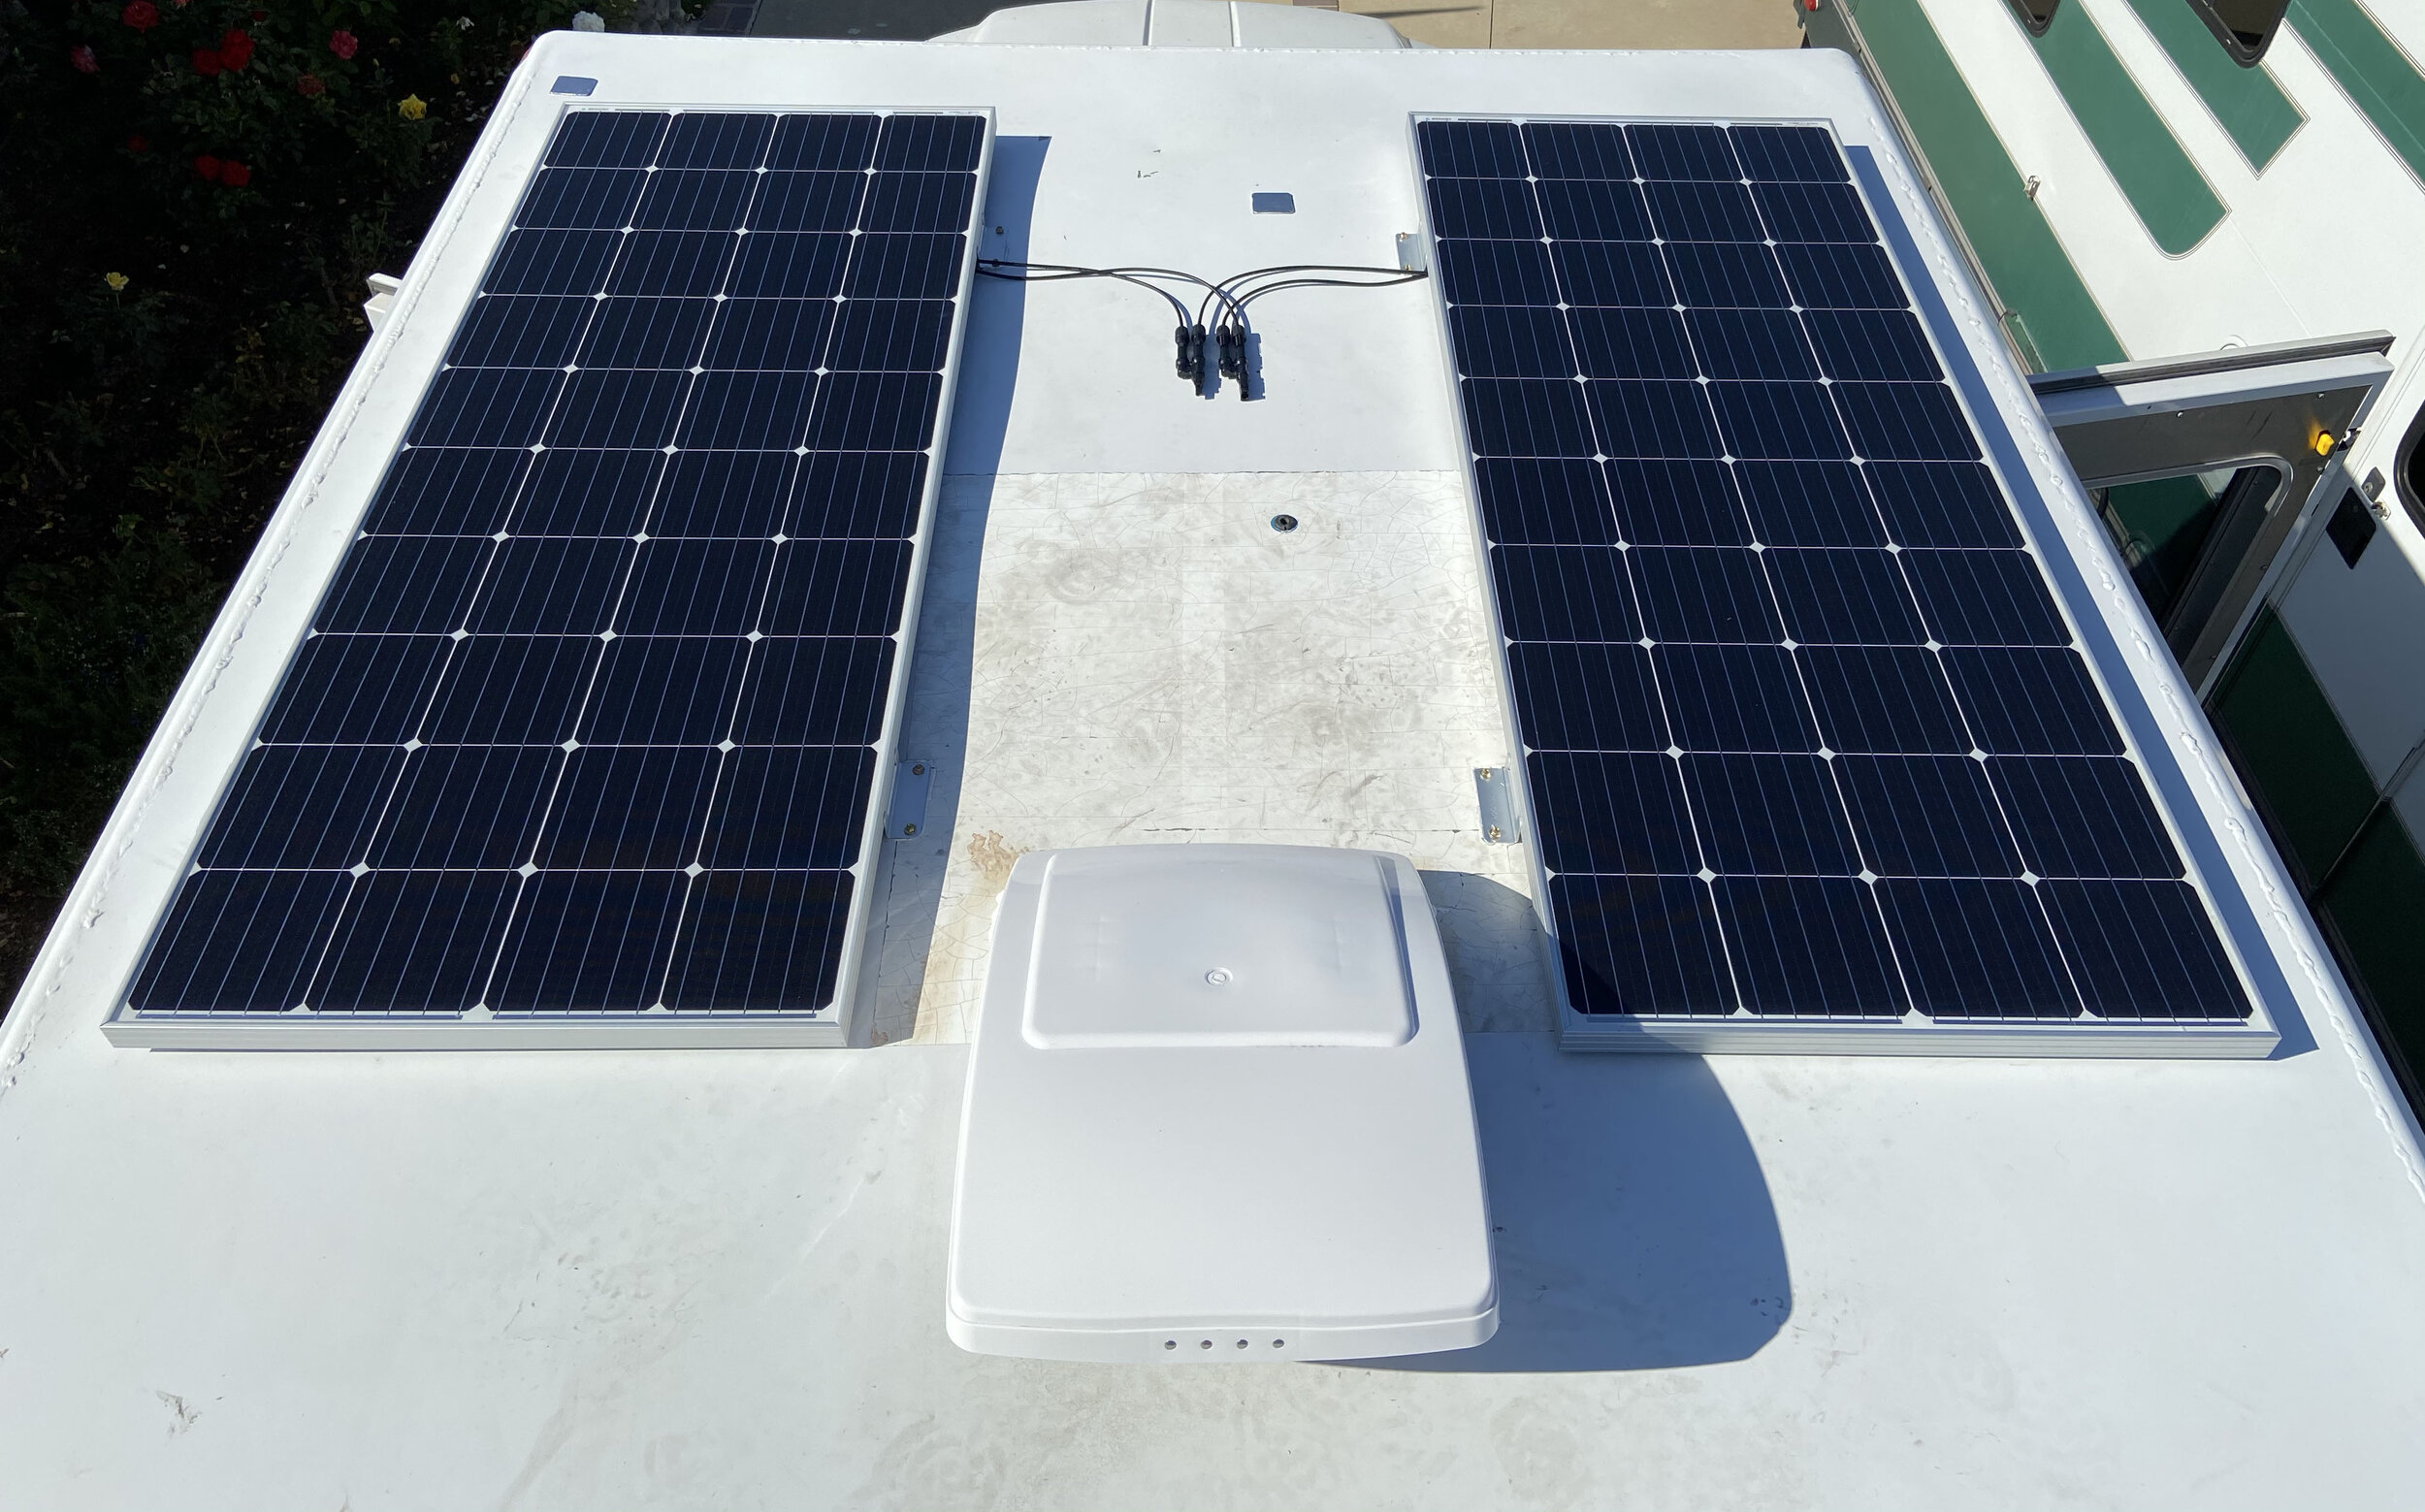
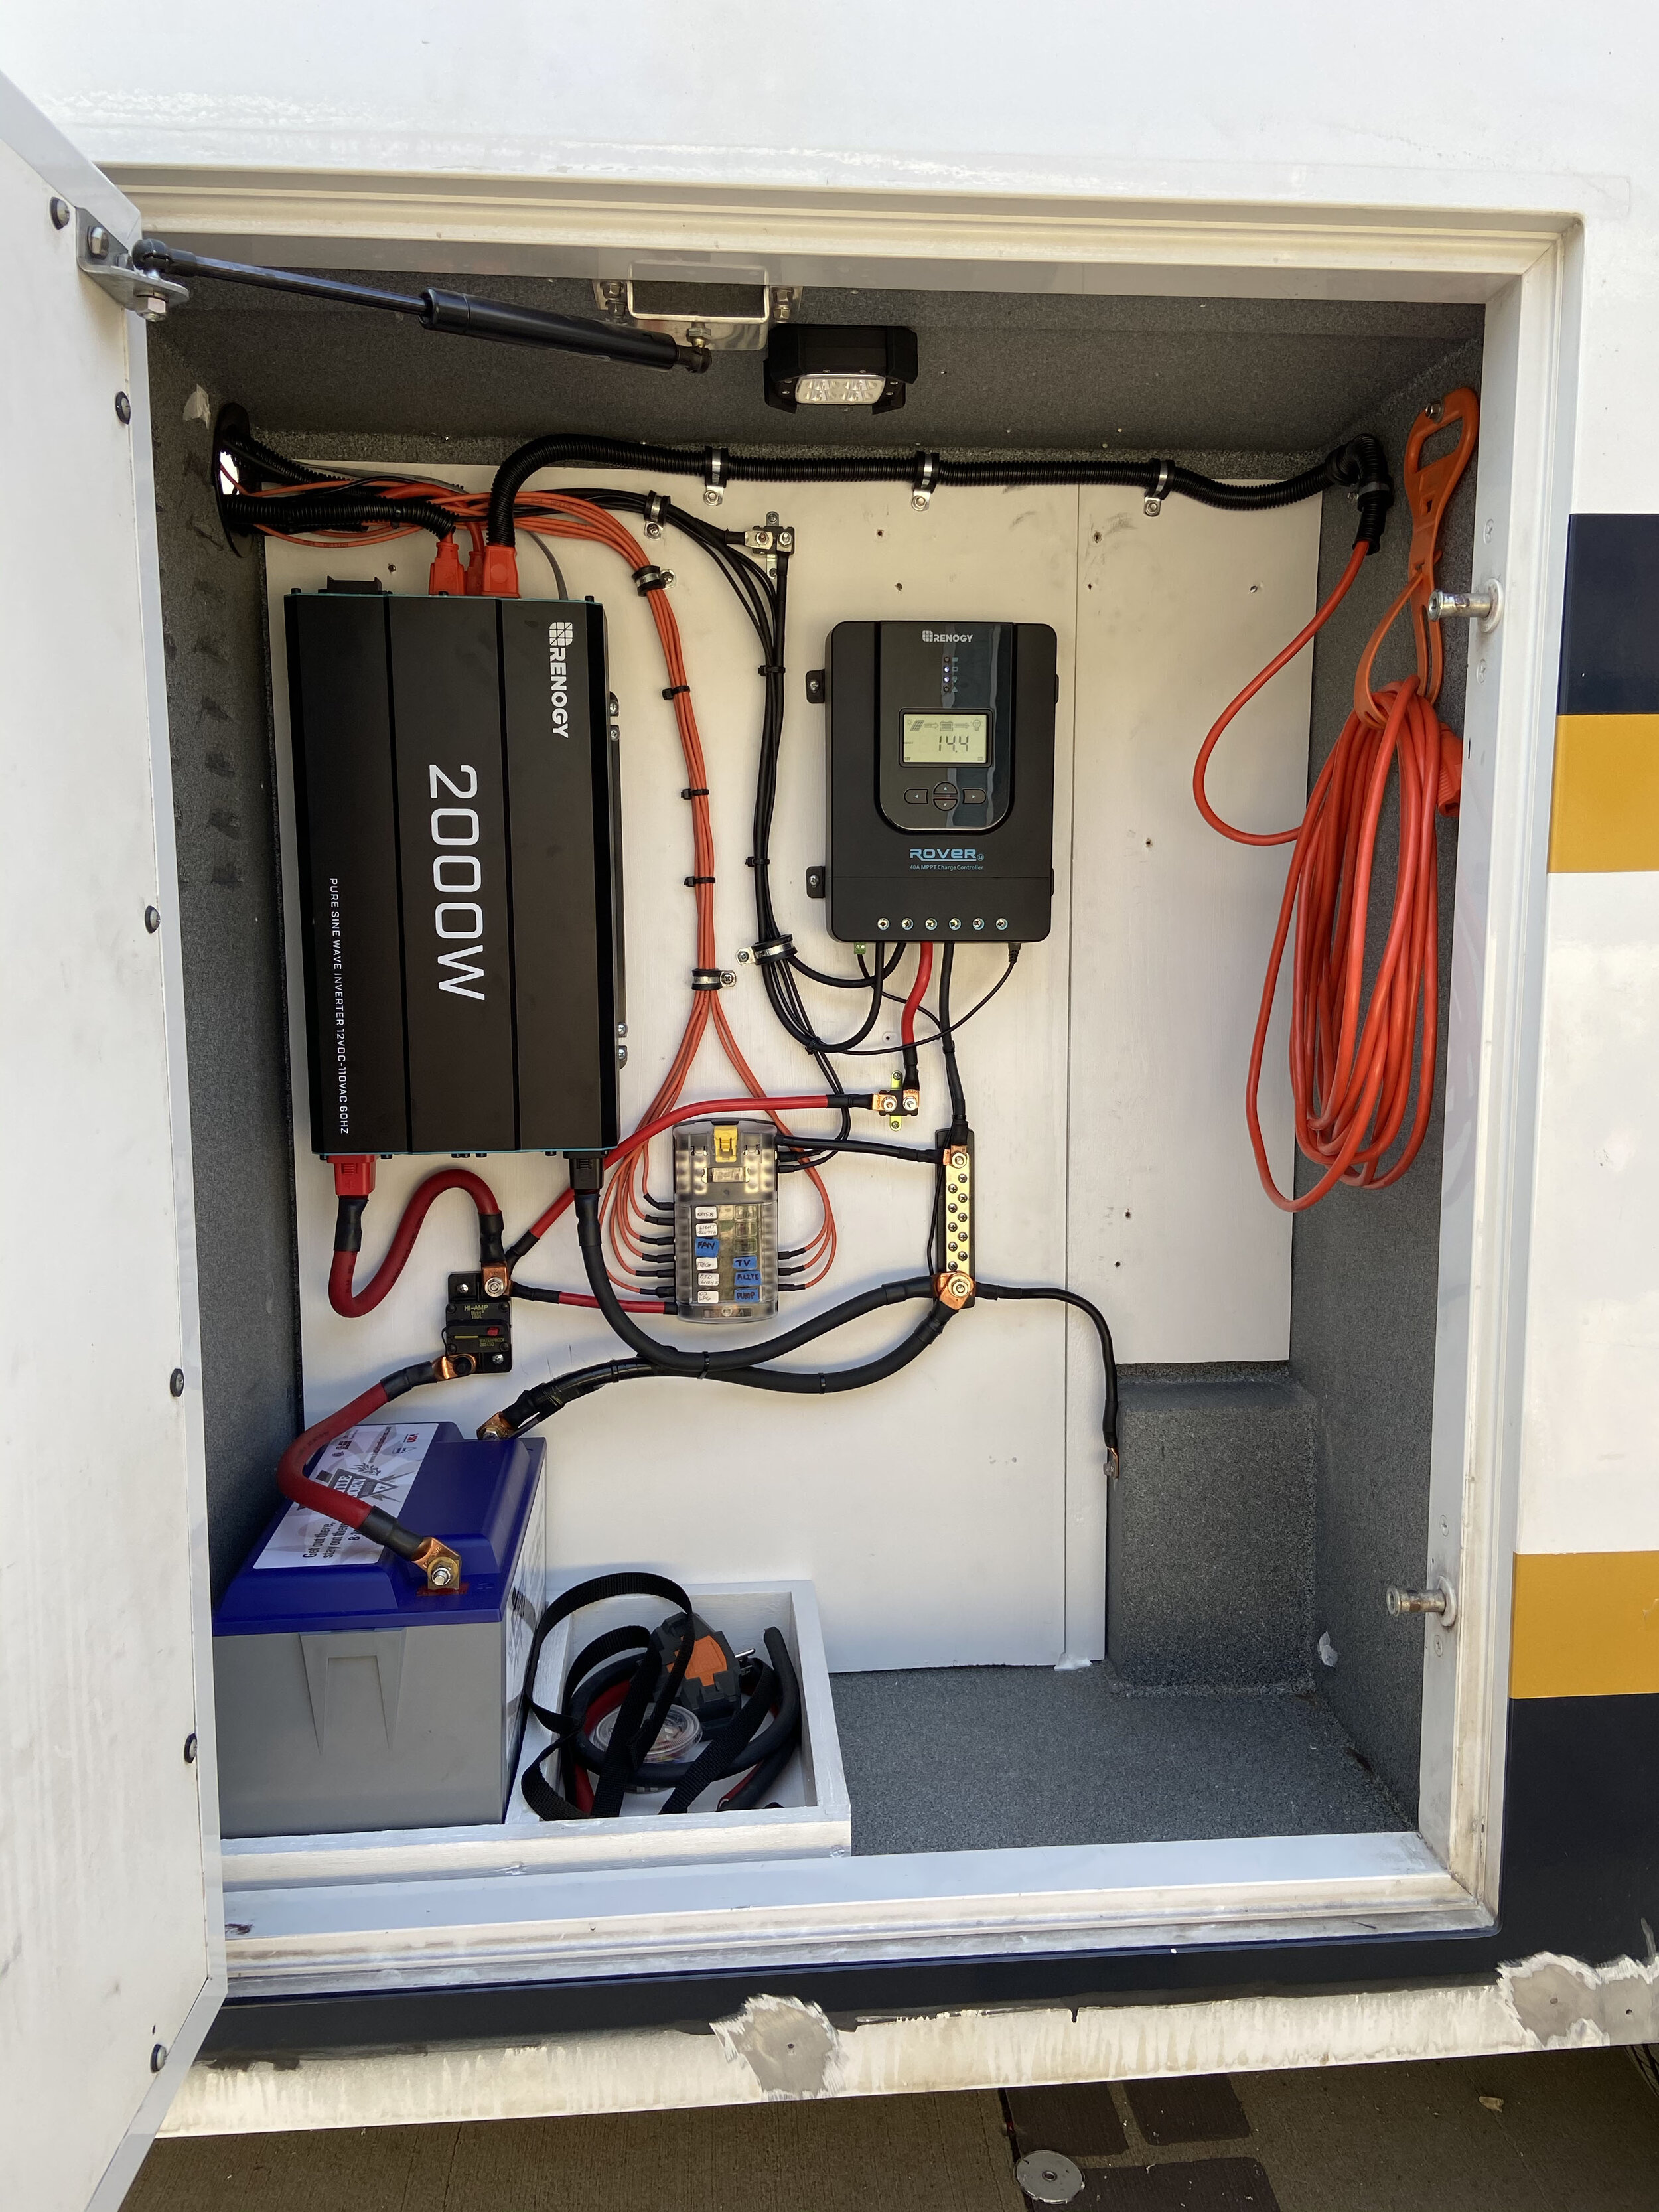
8/9/2020 - This was a big weekend. Insulation, windows, solar system. From day one I knew that the solar system was going to be challenging. I’ve never installed solar and electricity. It’s not my strong suit. From day one I watched countless hours of youtube videos, looked at diagrams and called the folks at Renogy asking tons of questions. In the end I decided on a 12V system, 2000W Inverter, 200AH of battery and 400W of solar panel array. All of which came from Renogy. They are based in Ontario CA and I wanted to support the home team. Their customer service was amazing as well. In all the solar system was $2700 including the Battle Born Battery. I still have to purchase the second battery. They cost $949 each so thats gonna wait a bit.' I chose to mount the system to a 3/4” plywood board so that I could easily remove any parts without damaging the interior walls. The board itself was bolted to the compartment wall. The only piece of electrical equipment I reused was the bus bar for the negative connections.
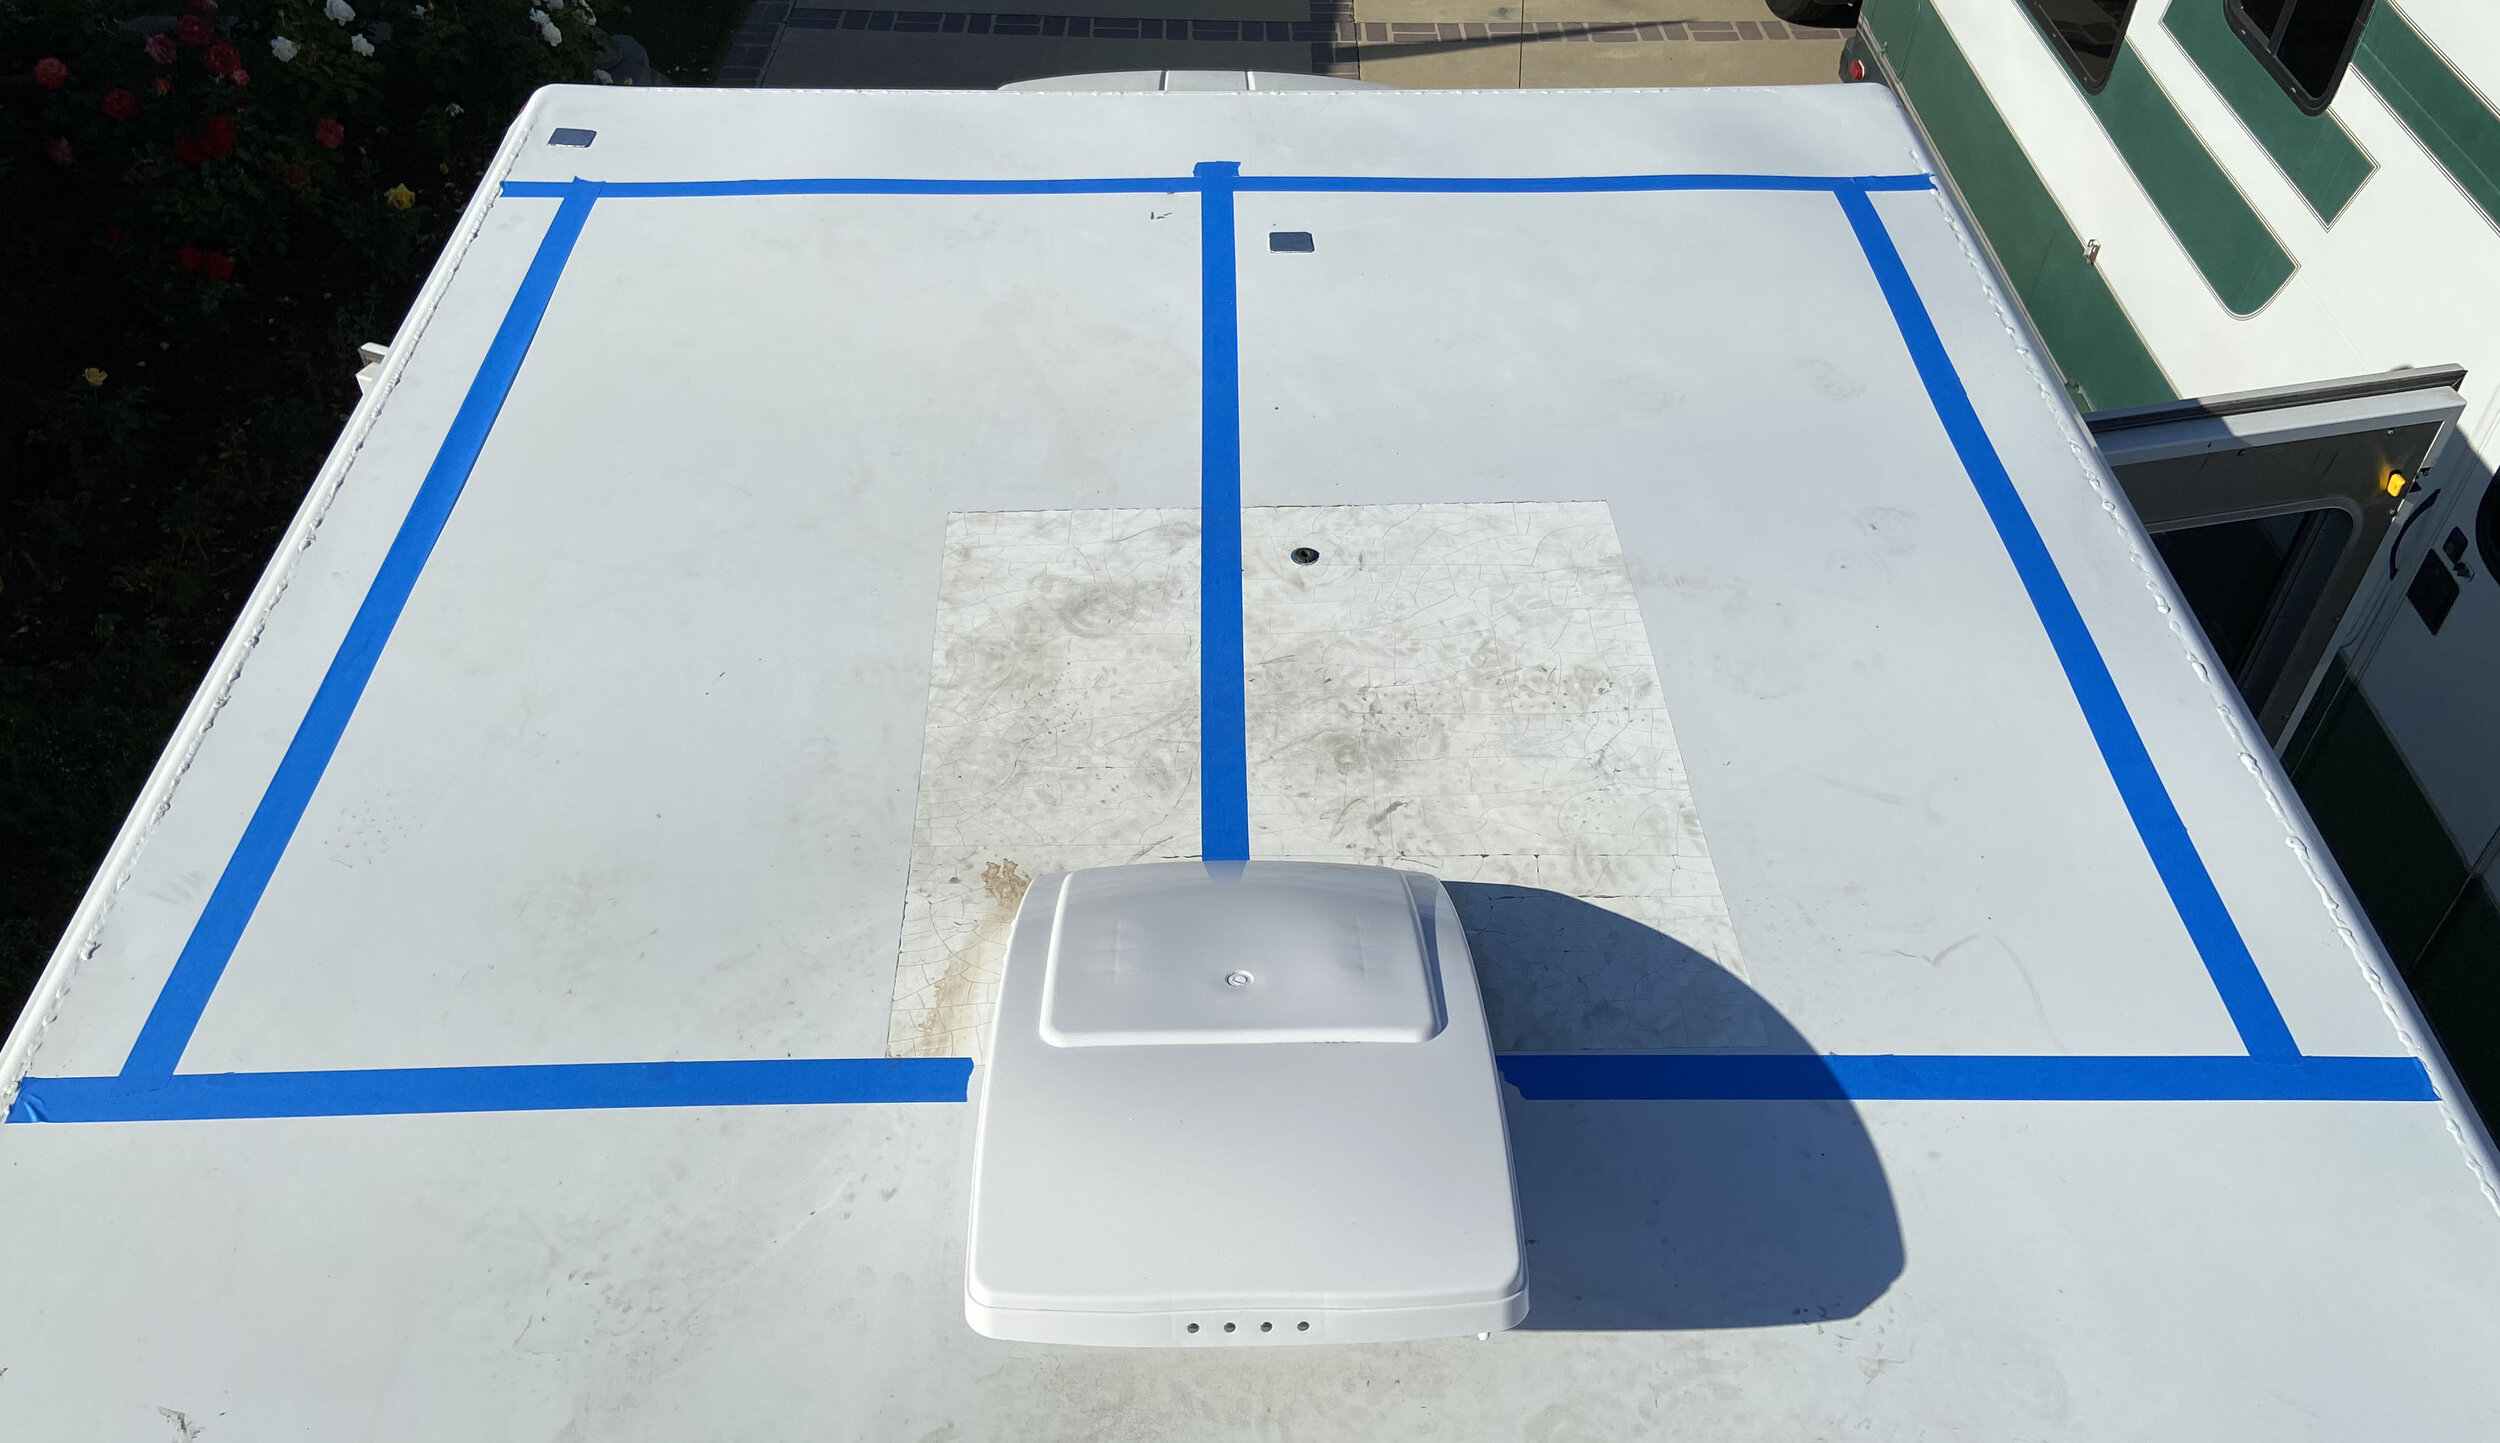
For the solar panels I used the blue painters tape to mark out and measure where they would be mounted. I moved them back from the front about 8” so that they wouldn’t be effected by the wind-stream. Again all the solar came form Renogy. Glad I got the 20’ solar wiring as it was the perfect length. Each panel produces 200W of power. In late October 2020 after the interior build was complete we took the camper to the Eastern Sierra. There were VERY heavy winds on the drive home through Mojave CA. The solar panels were bolted far enough back from the front to where the headwind did not effect the panels.


SOLAR SYSTEM PARTS
Below is a breakdown of the costs and part numbers for all the hardware for the Solar System. All Hardware came form Renogy. The DC Fuse Box came from Blue Sea. All large gauge wire is welding grade cable.
Solar Panels
(2) 200W Monocrystalline
(Part Number) RSP200D-G1
$299.99 Each
MC4 Connector
(Part Number) RNG-CNCT-MC4Y
$12.99
Cable Entry Housing
(Part Number) RNG-MTS-CE
$14.99
BattleBorn Battery
100Ah Lithium Ion
$949
Solar Cable (20’)
10AWG
(Part Number) RNG-AK-20FT-10
$29.99
Solar Charge Controller
Rover Li 40 Amp MPPT
(Part Number) RNG-CTRL-RVR40-BT
$199.99
2000W 12V Pure Sine Inverter
(Part Number) RNG-INVT-2000-12V-P2
$299.99
All Fuses are from Orileys Auto Parts
150A, 30A, 50A
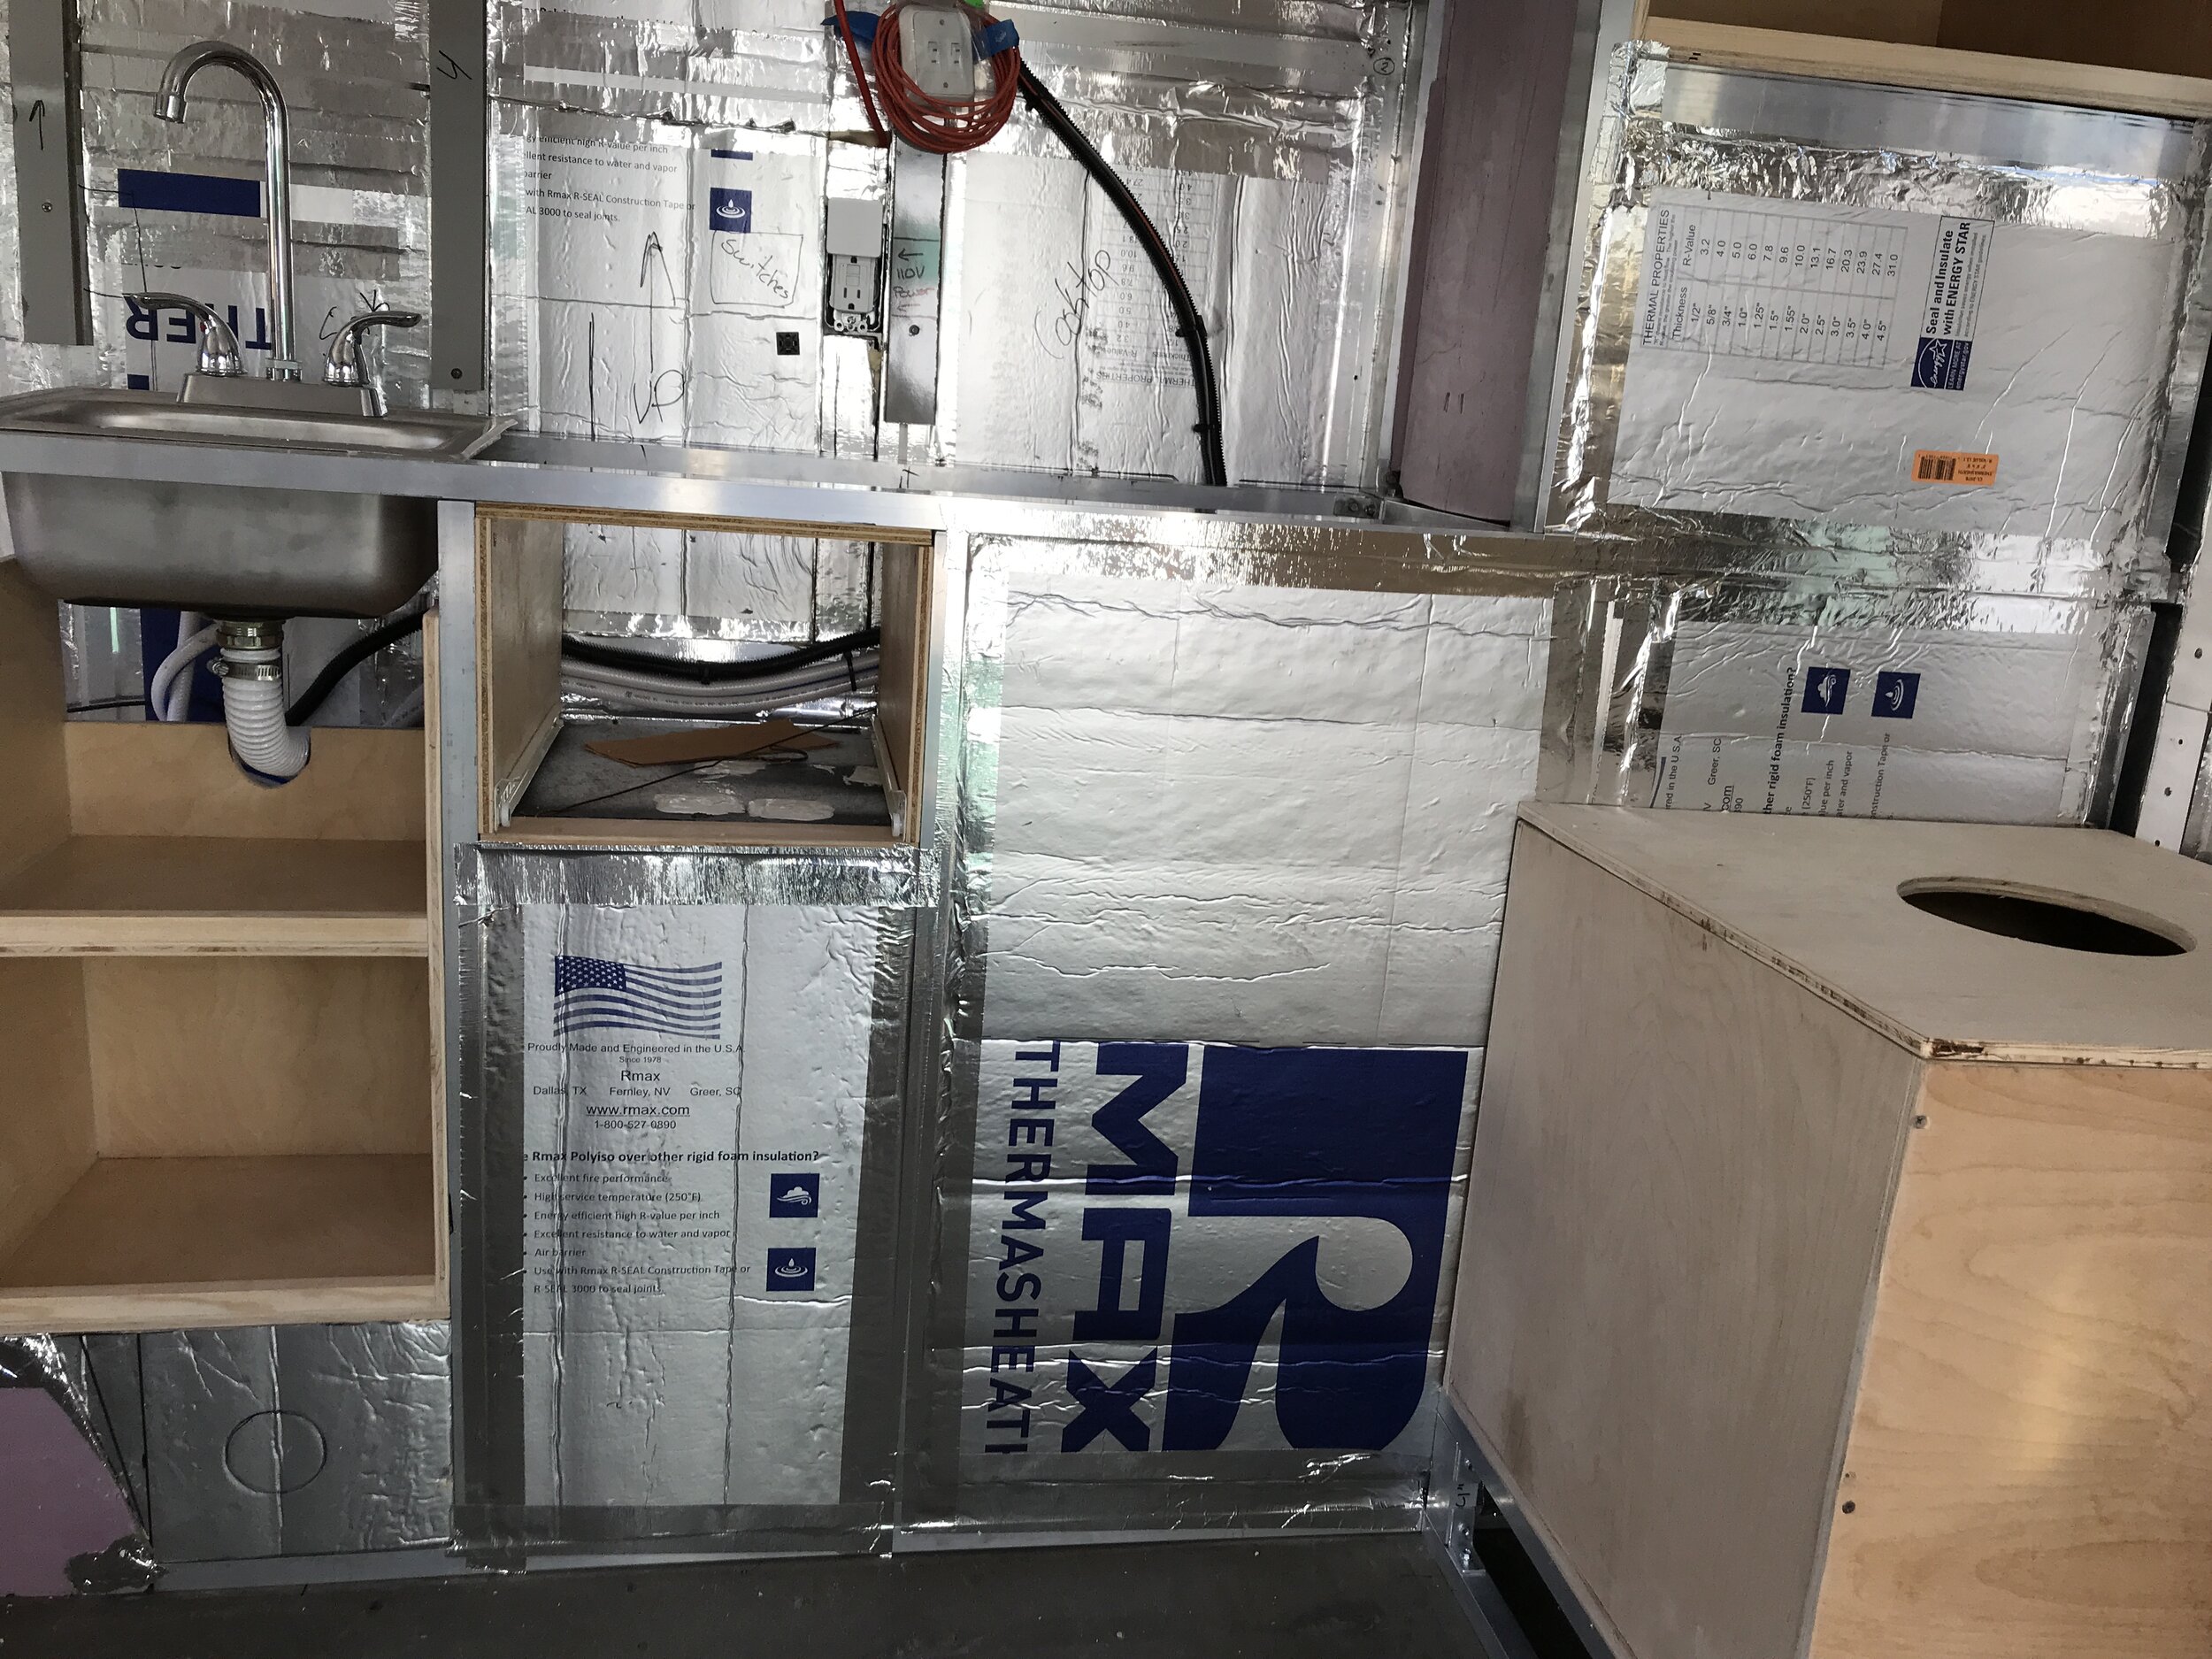
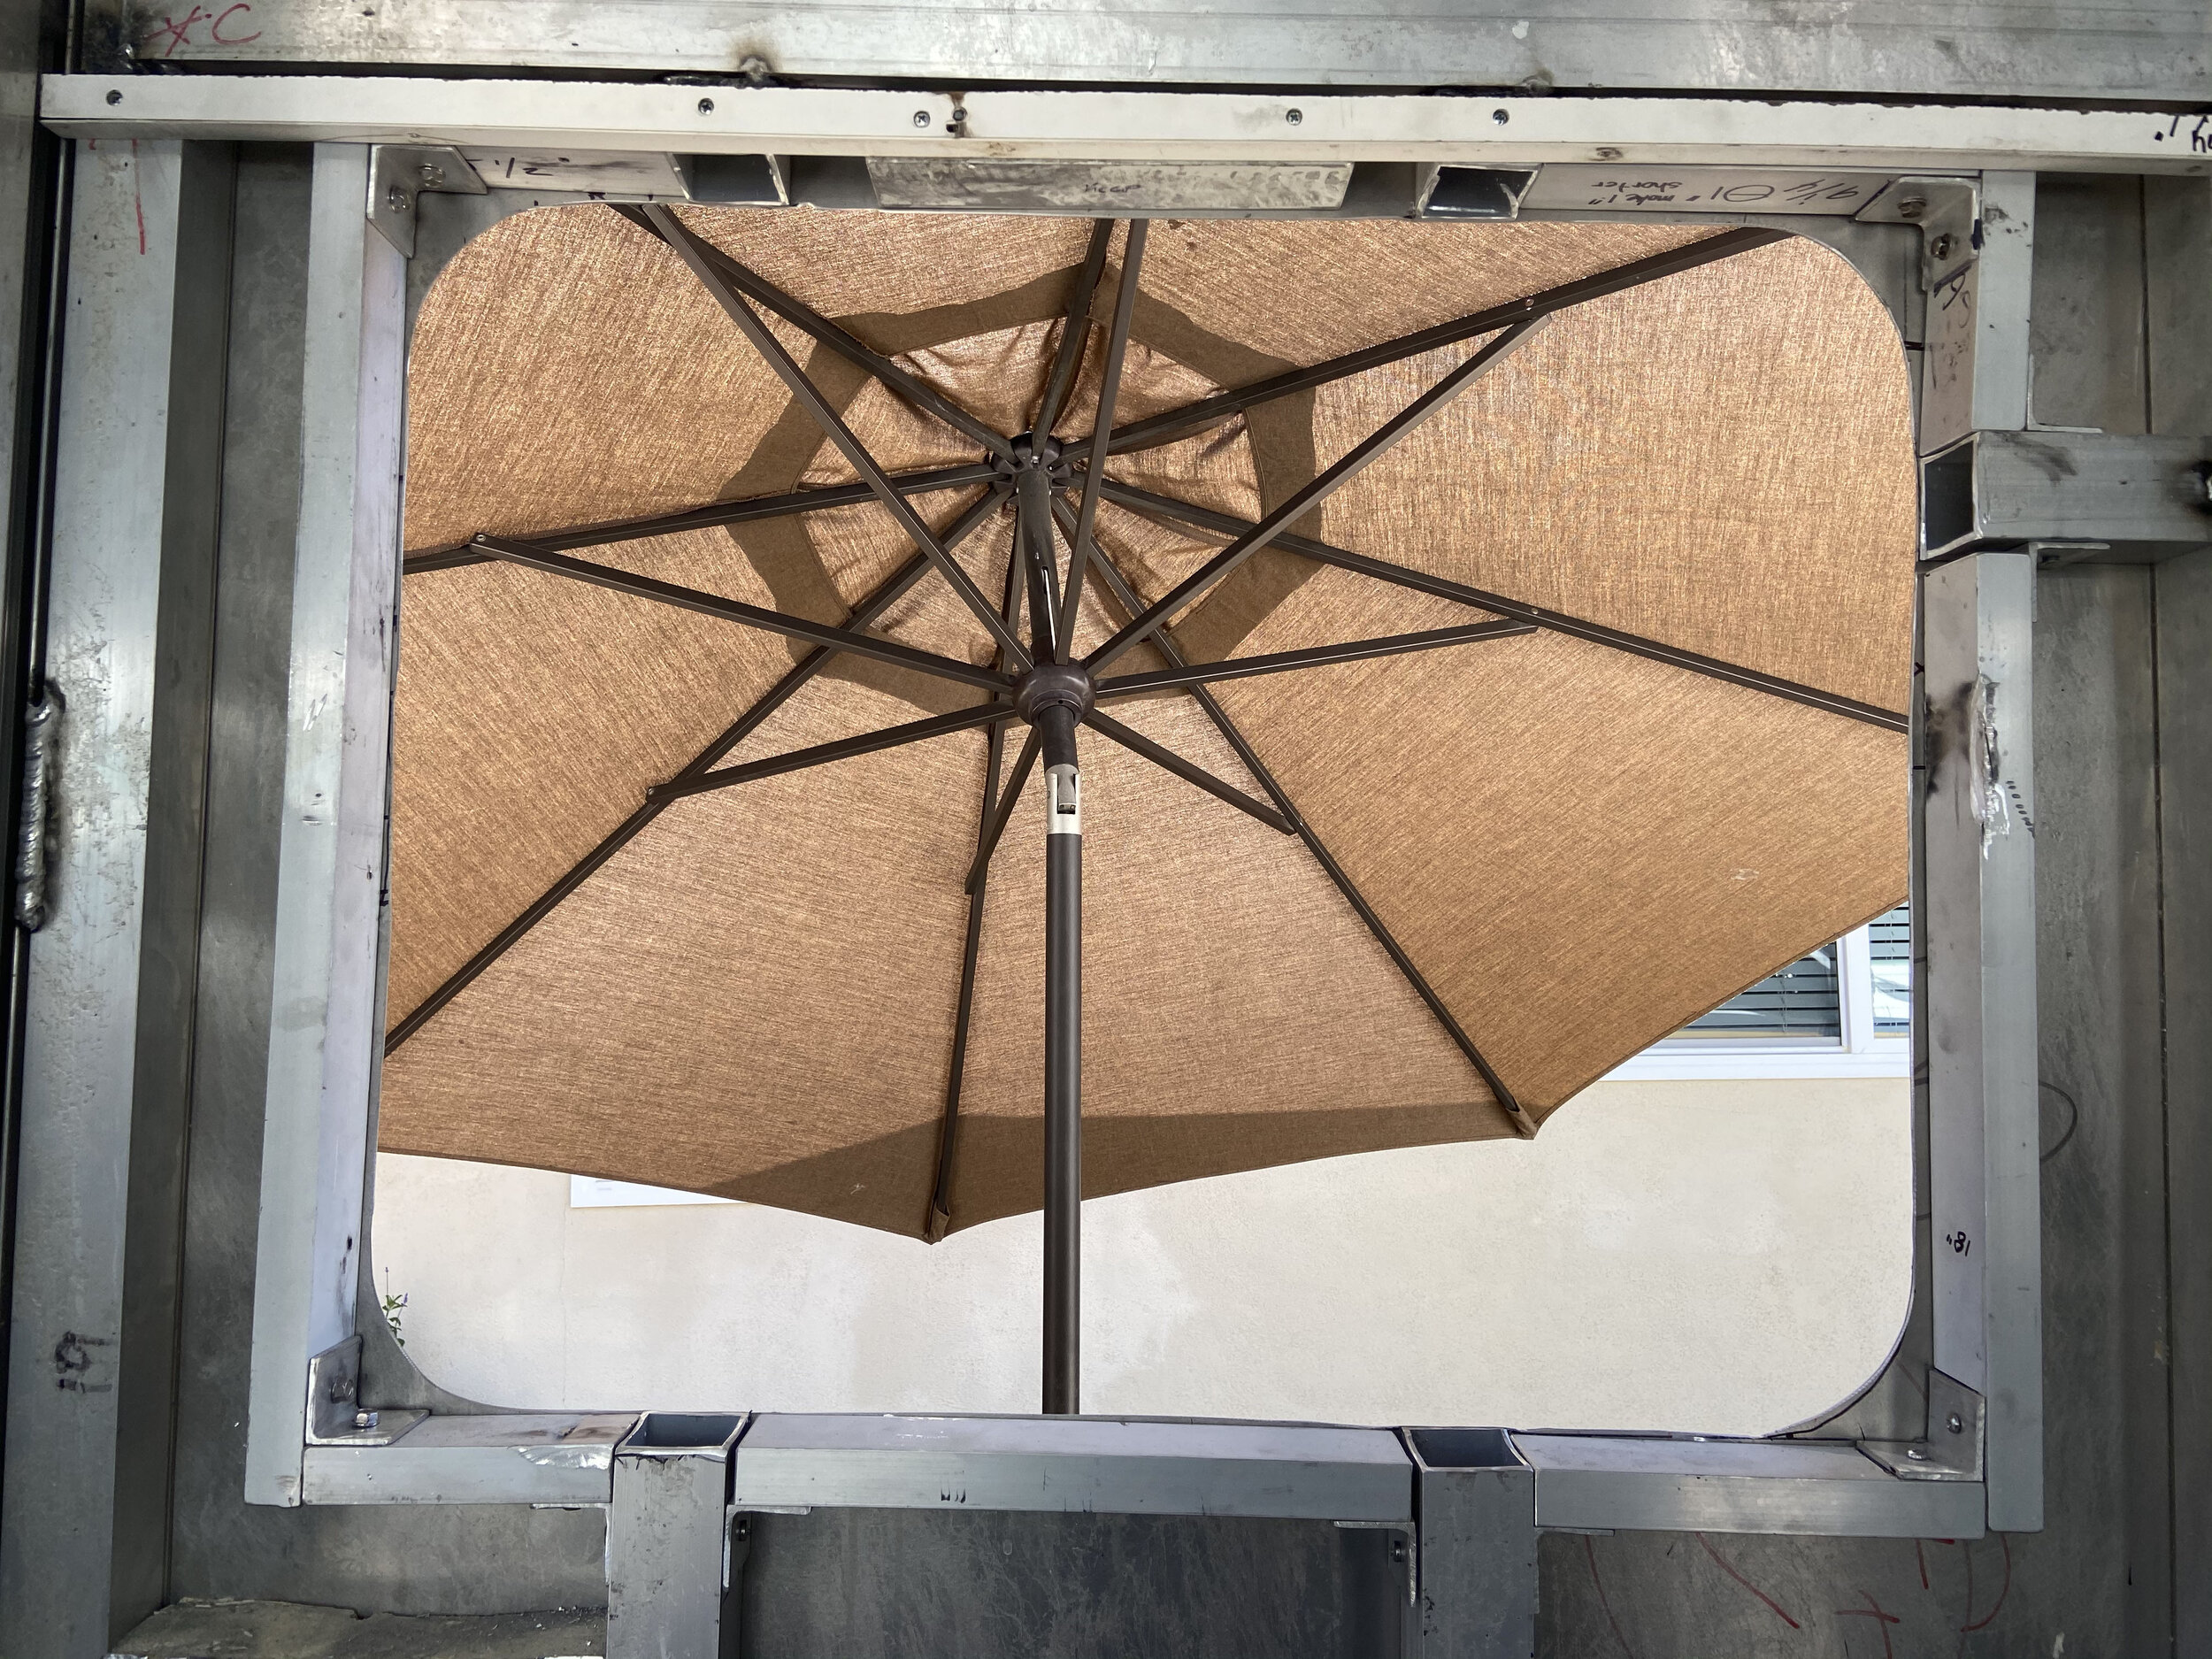
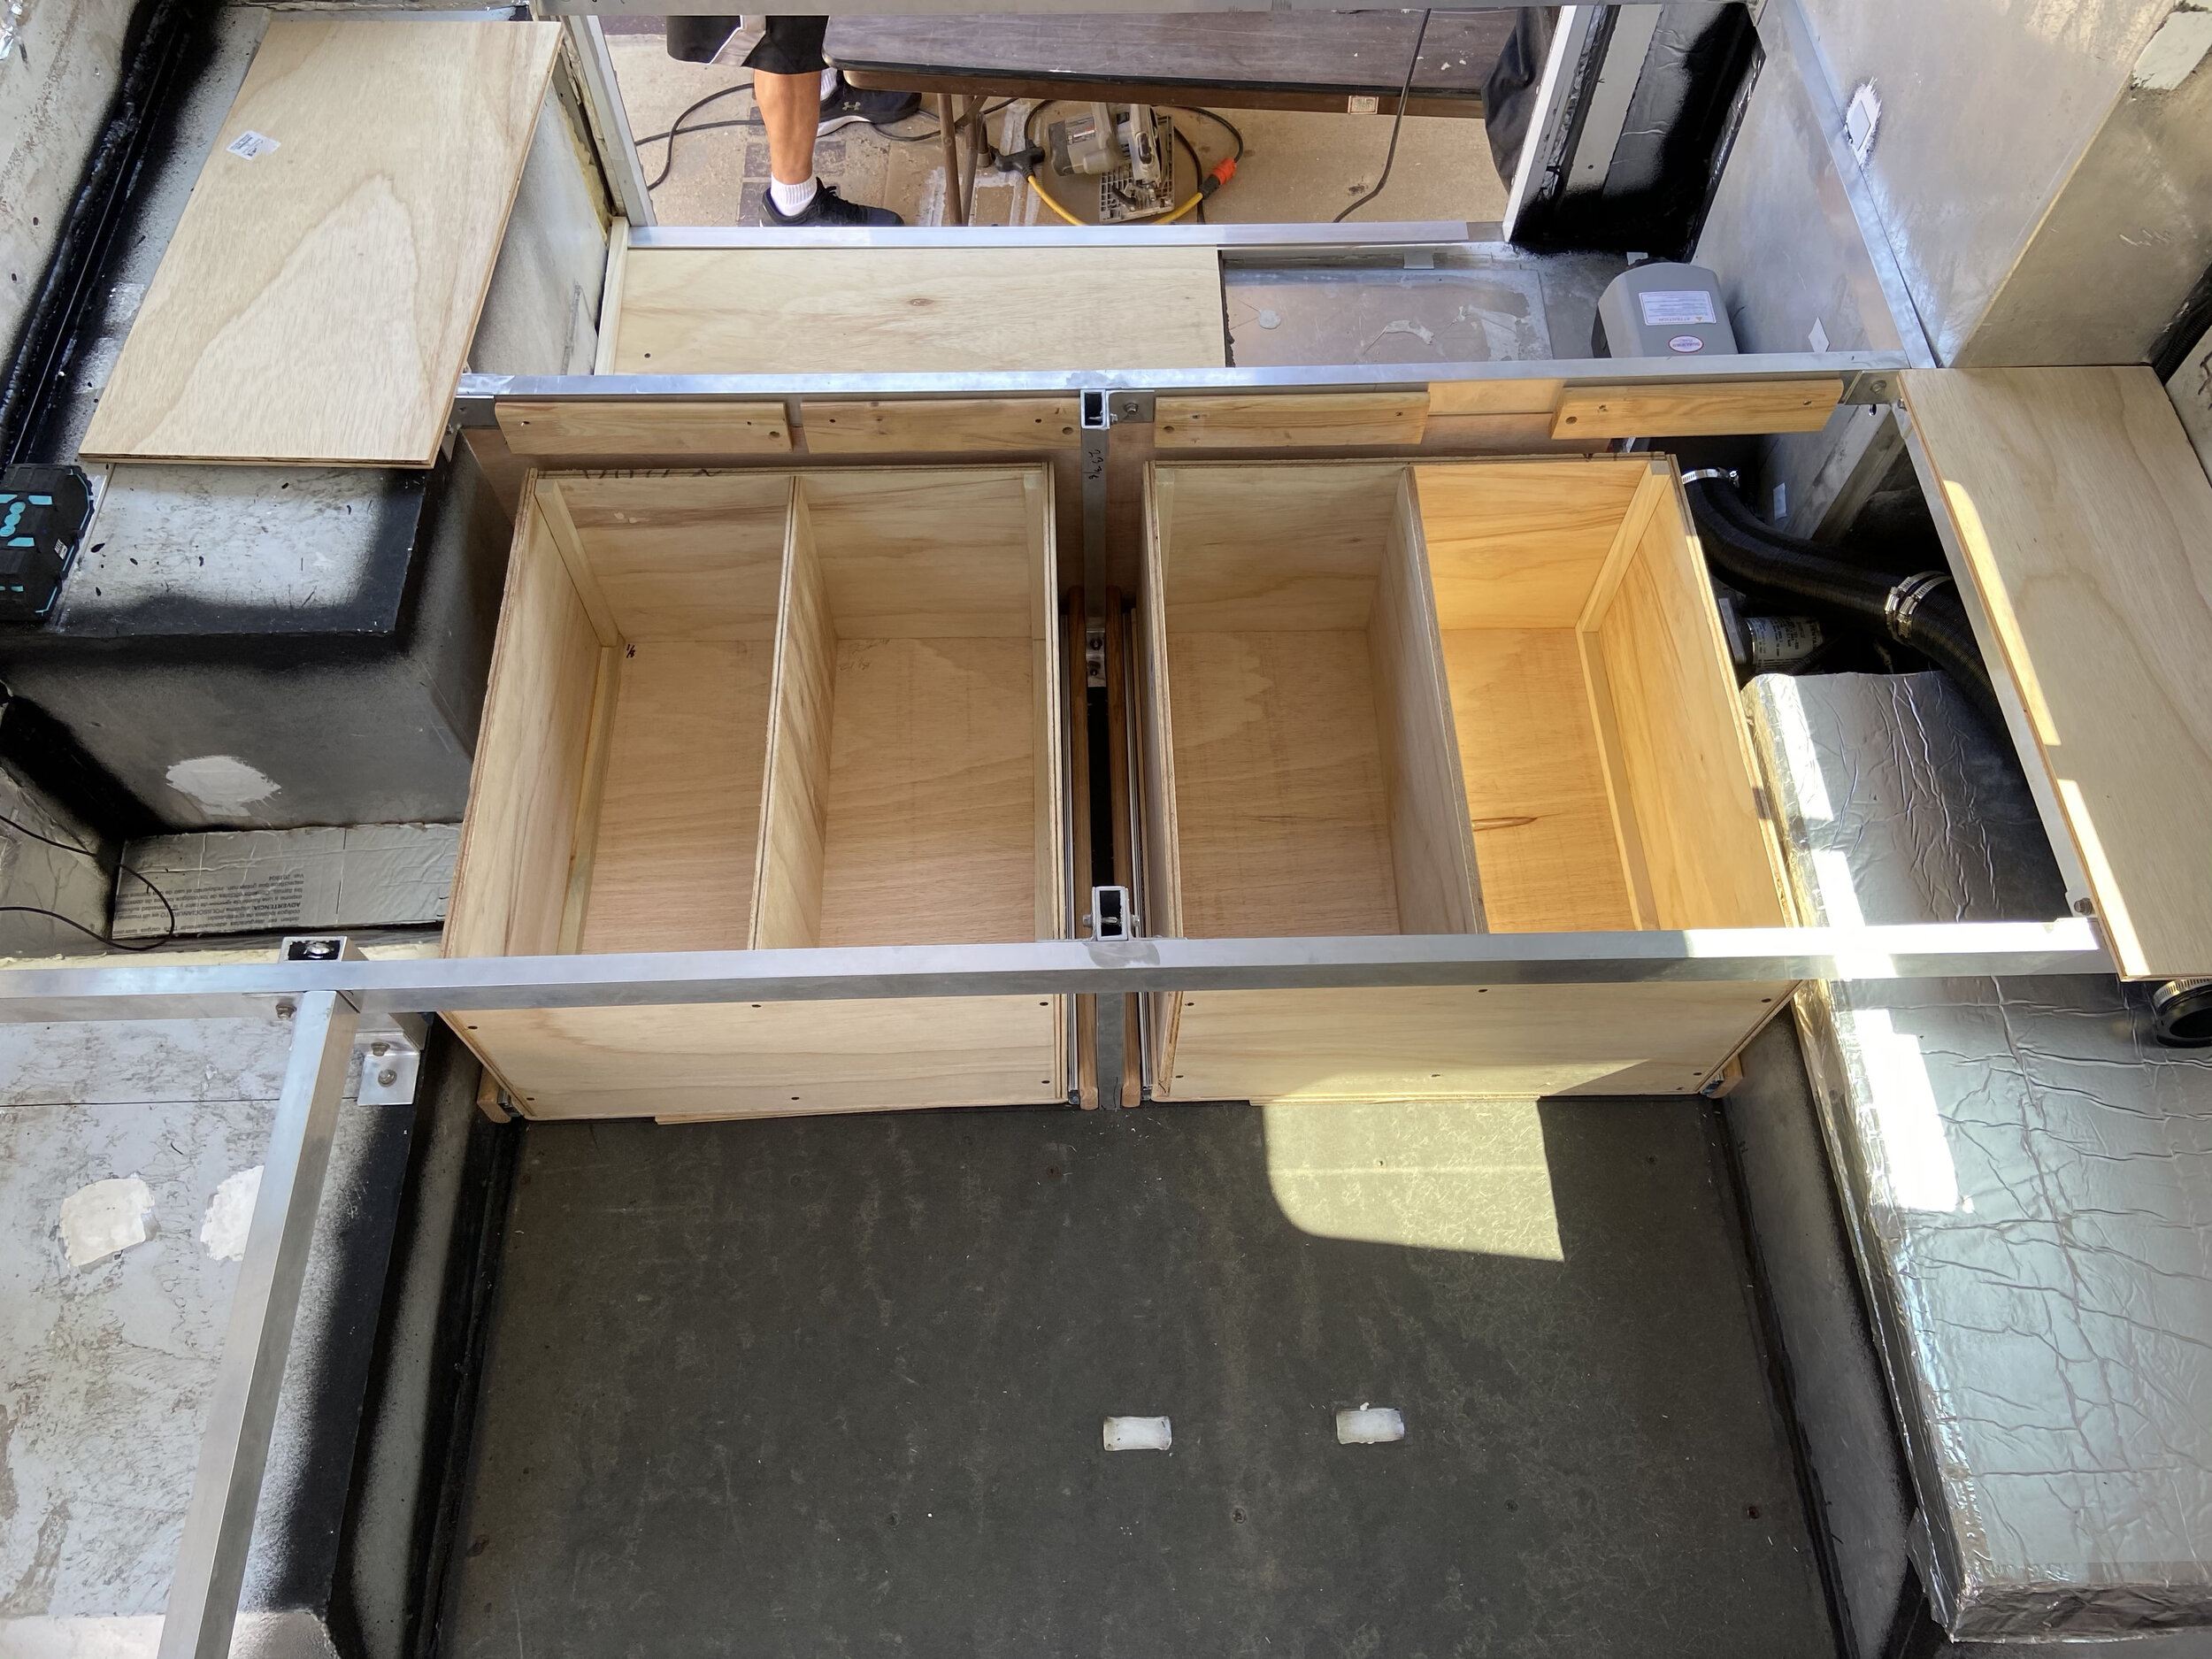
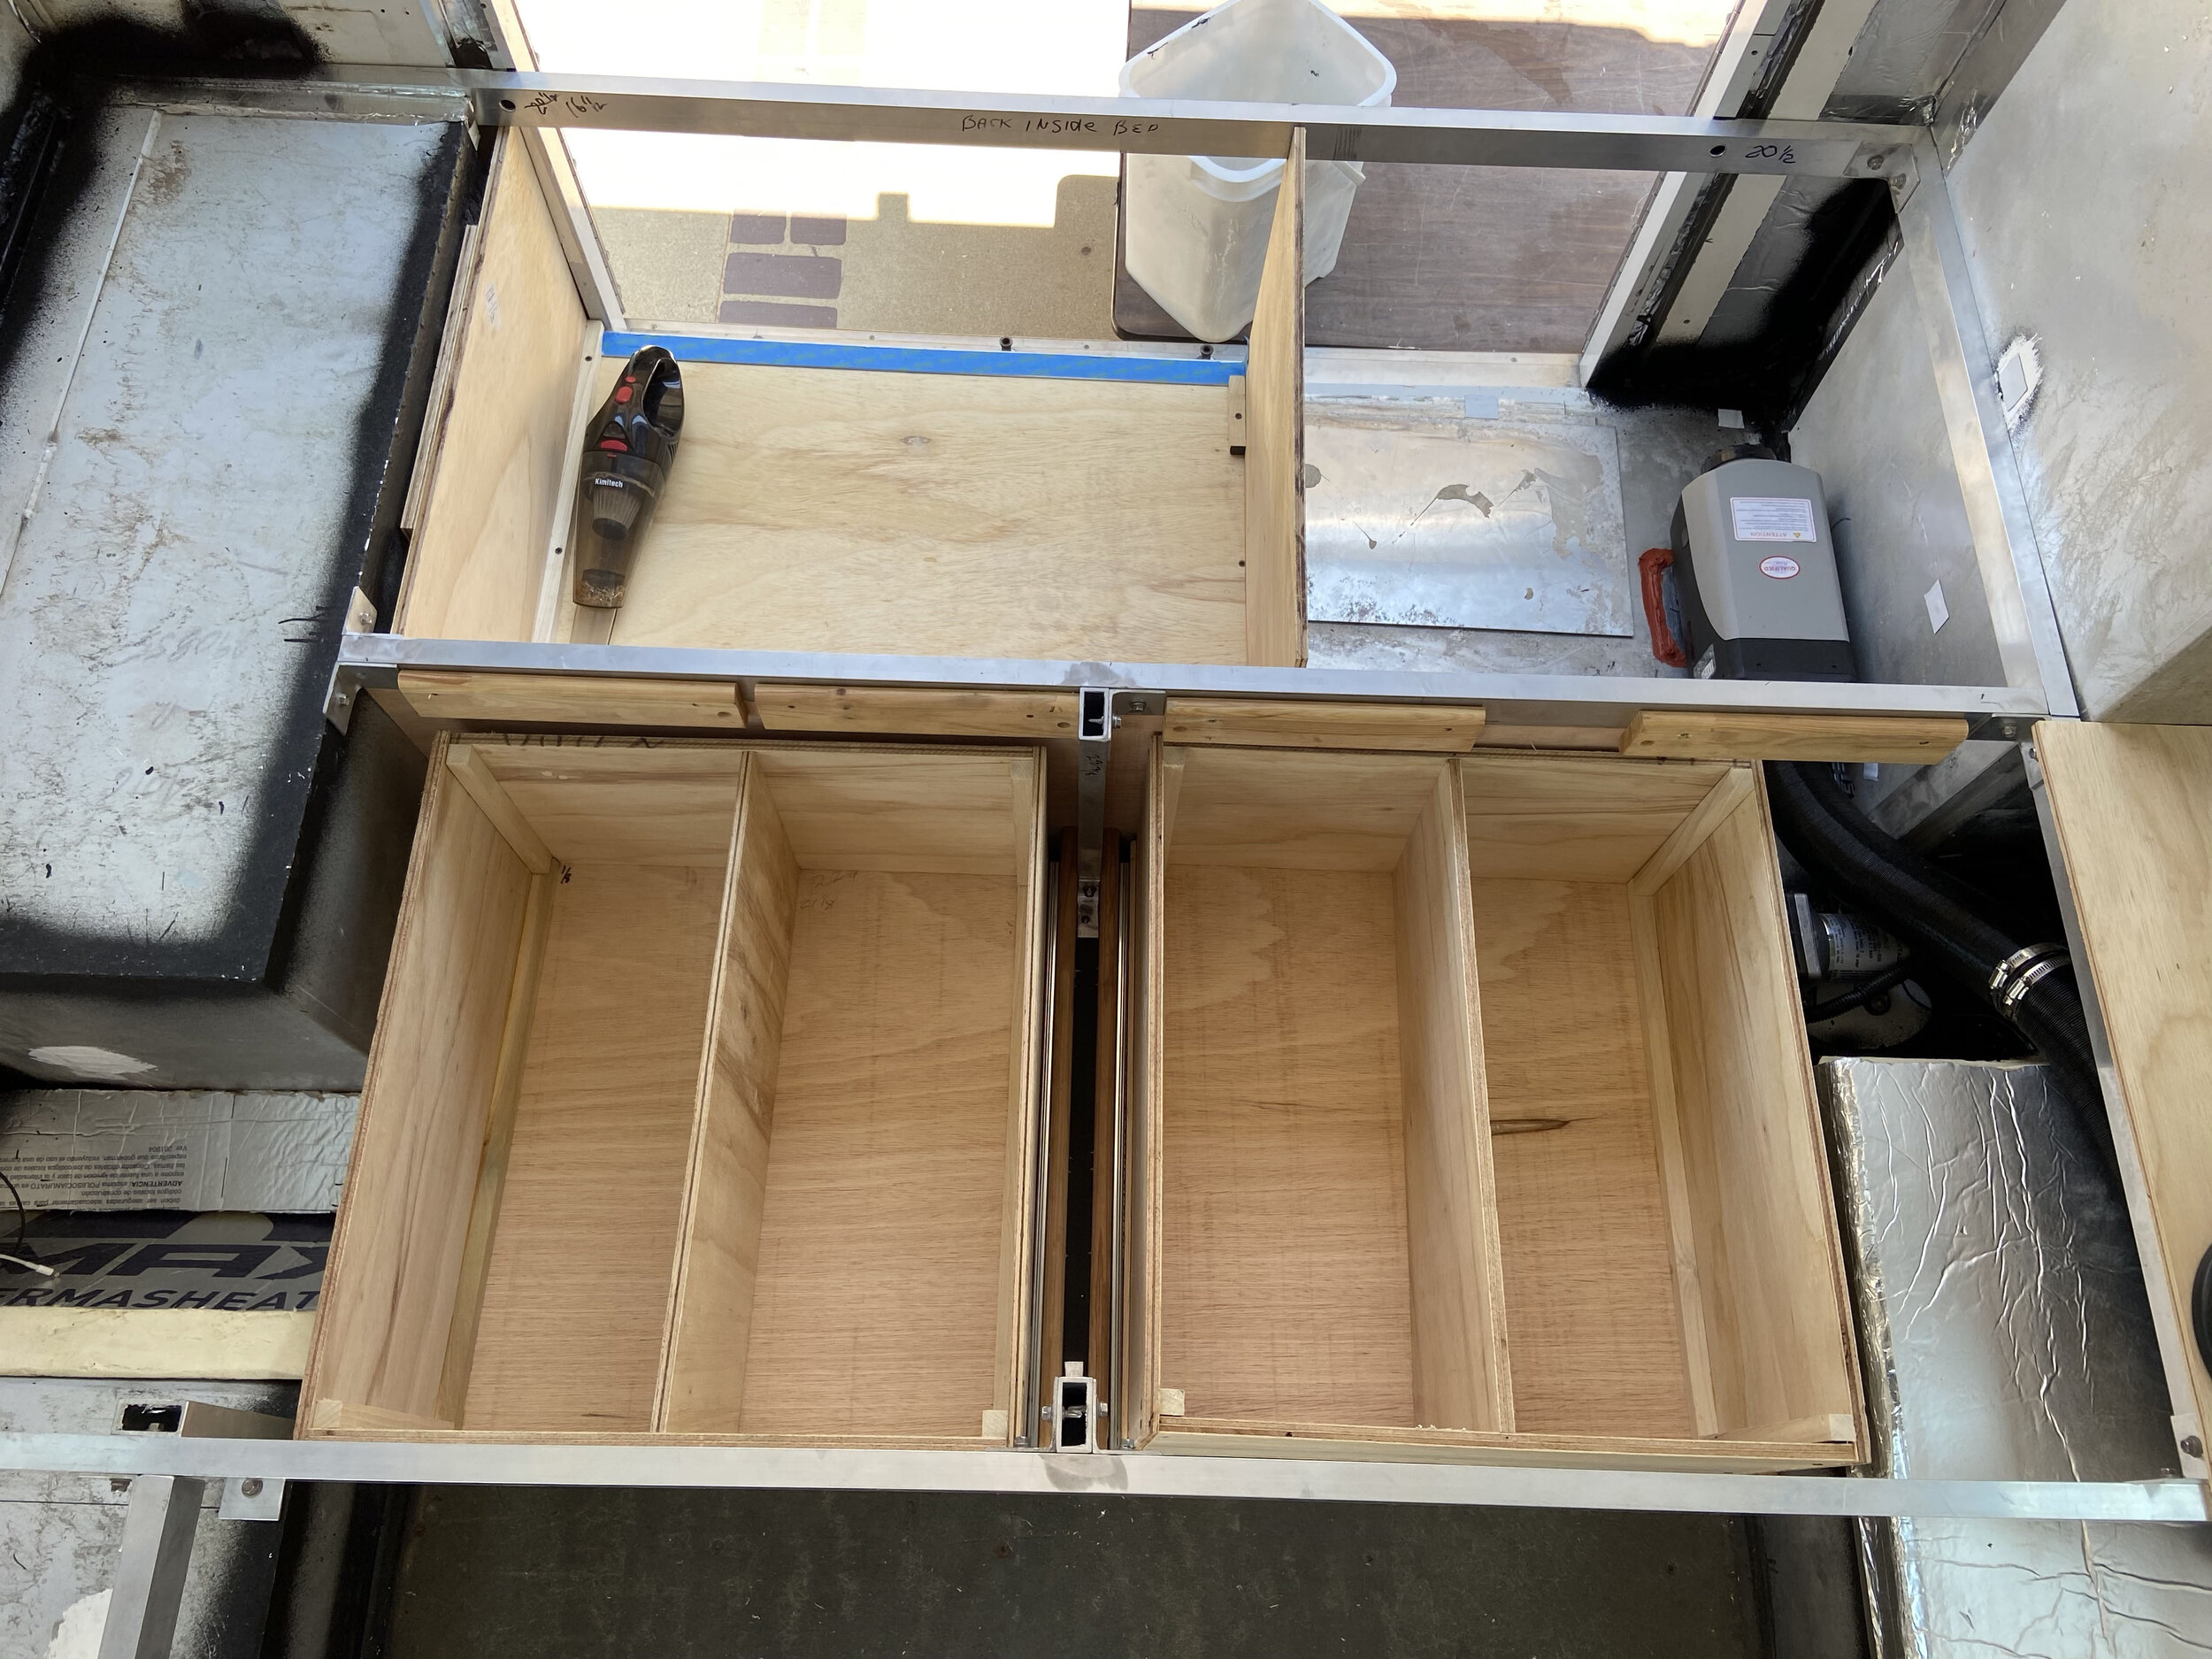
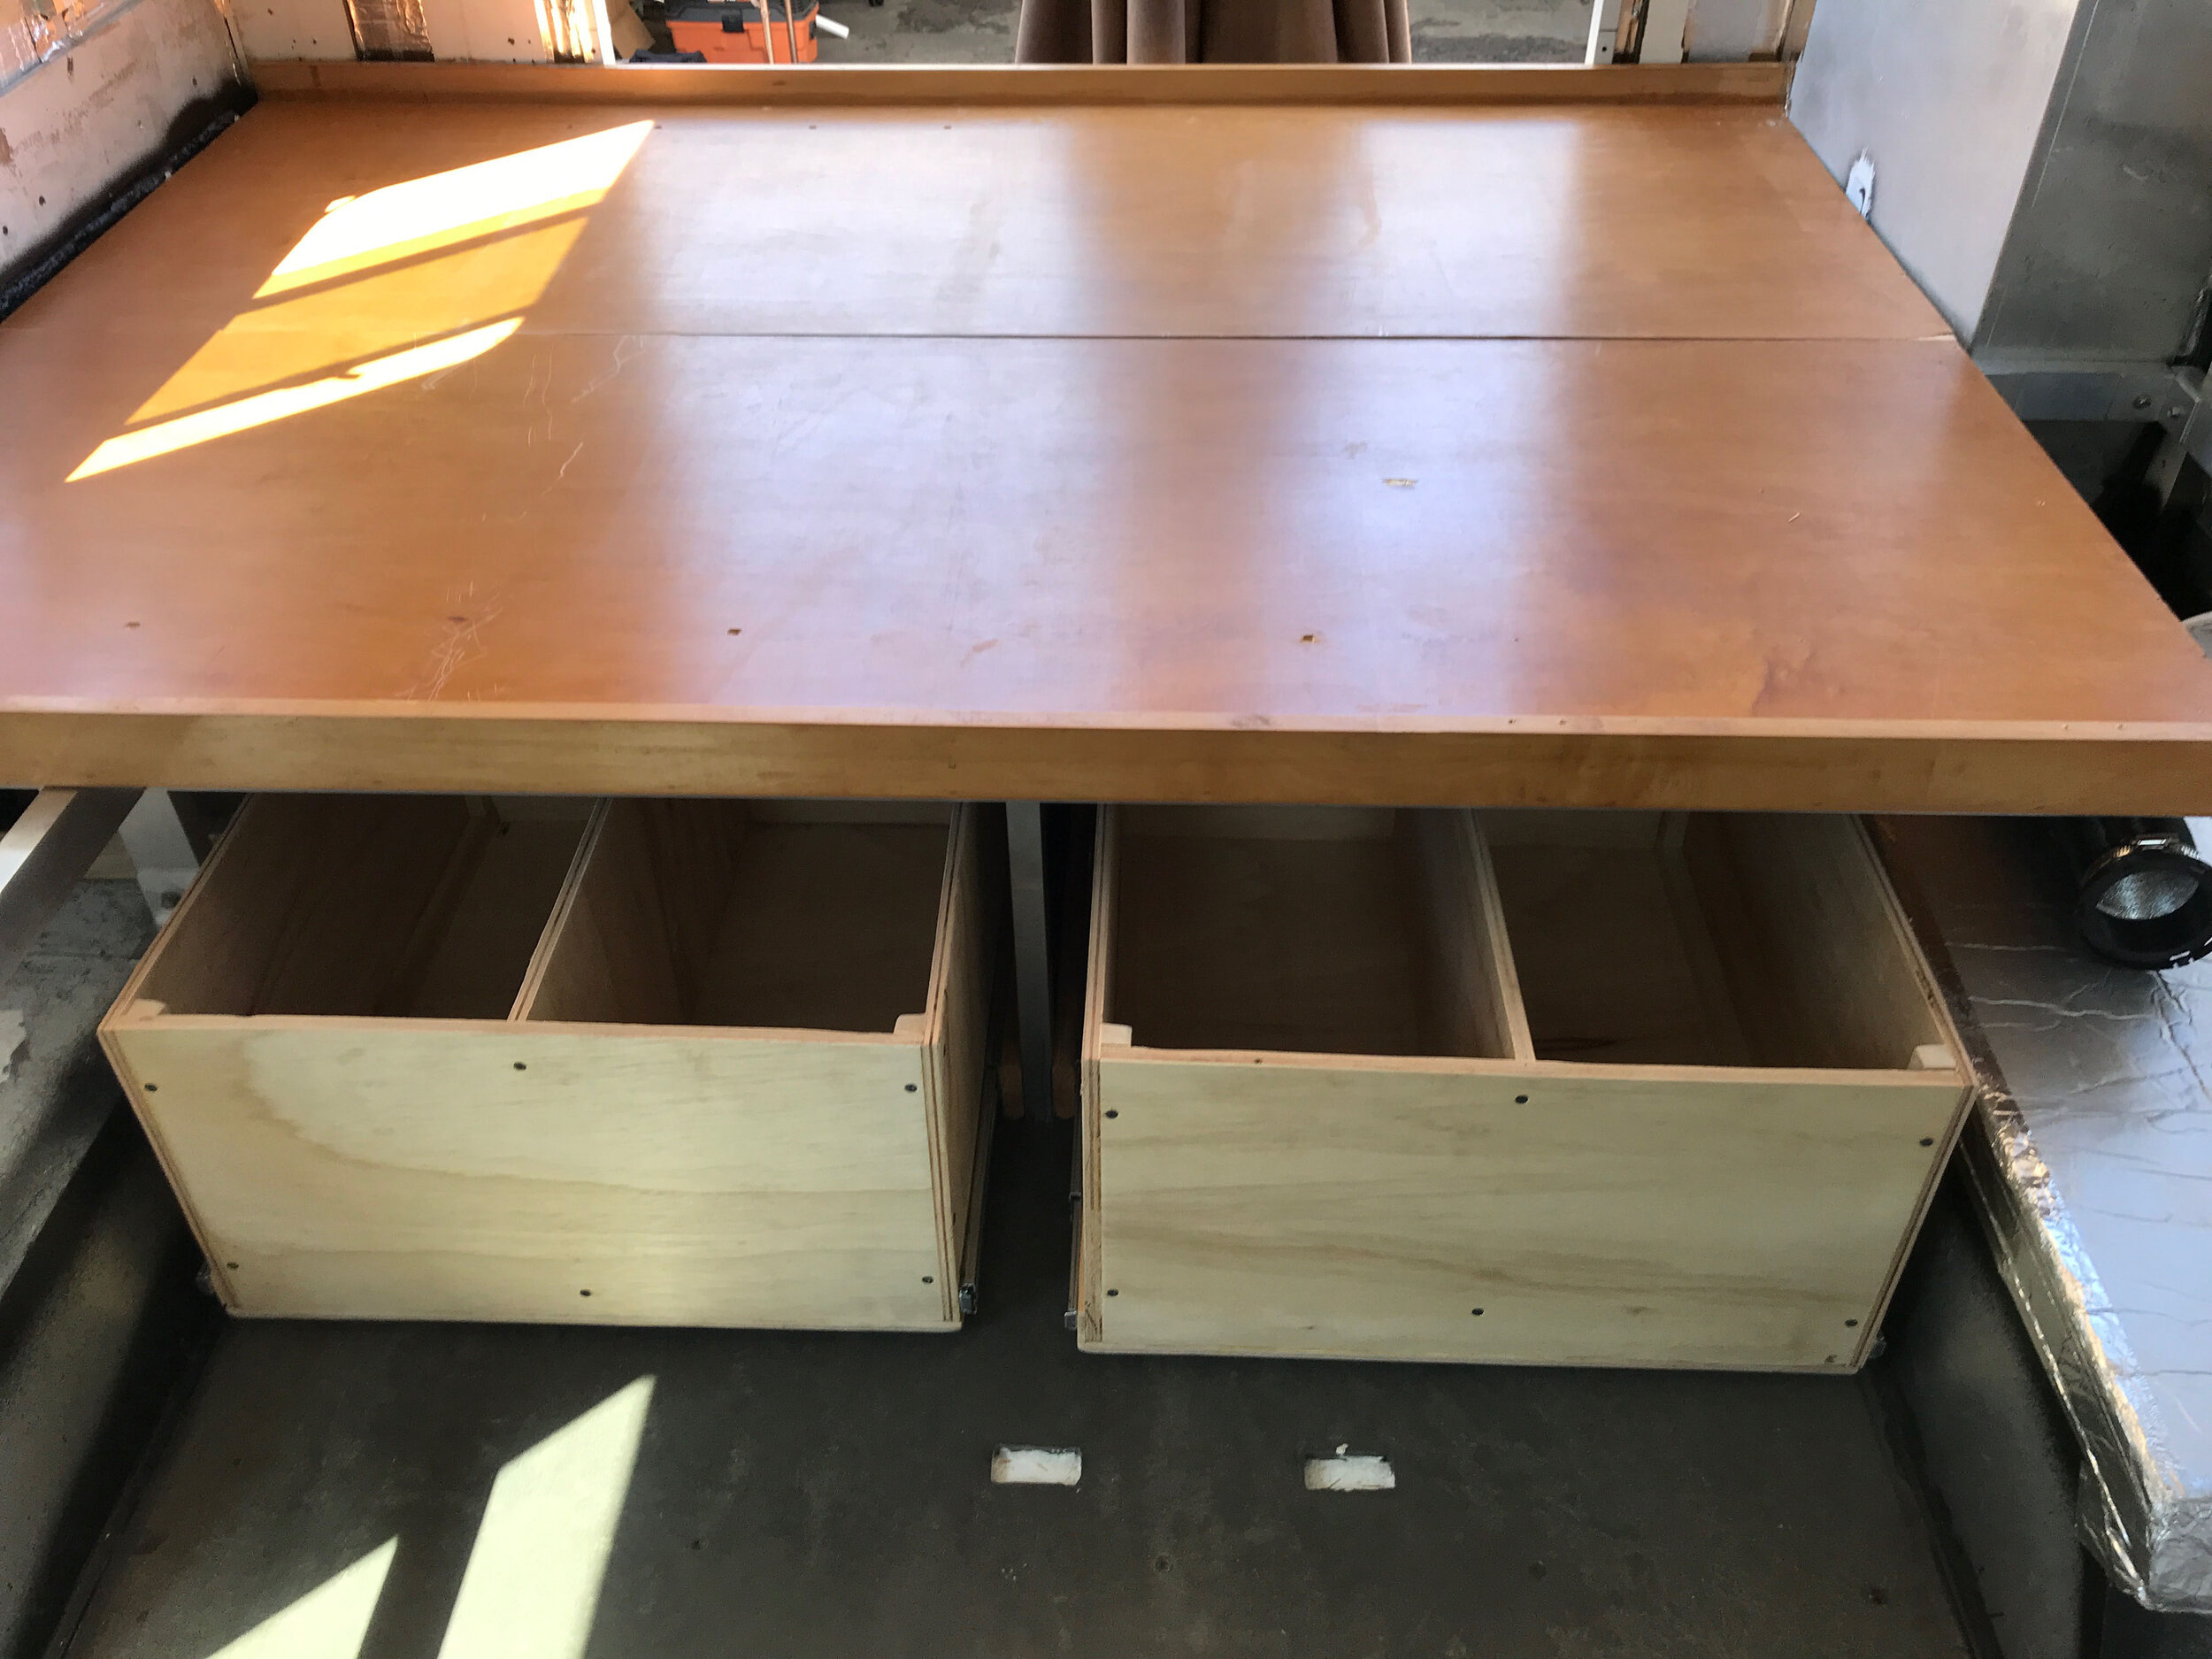
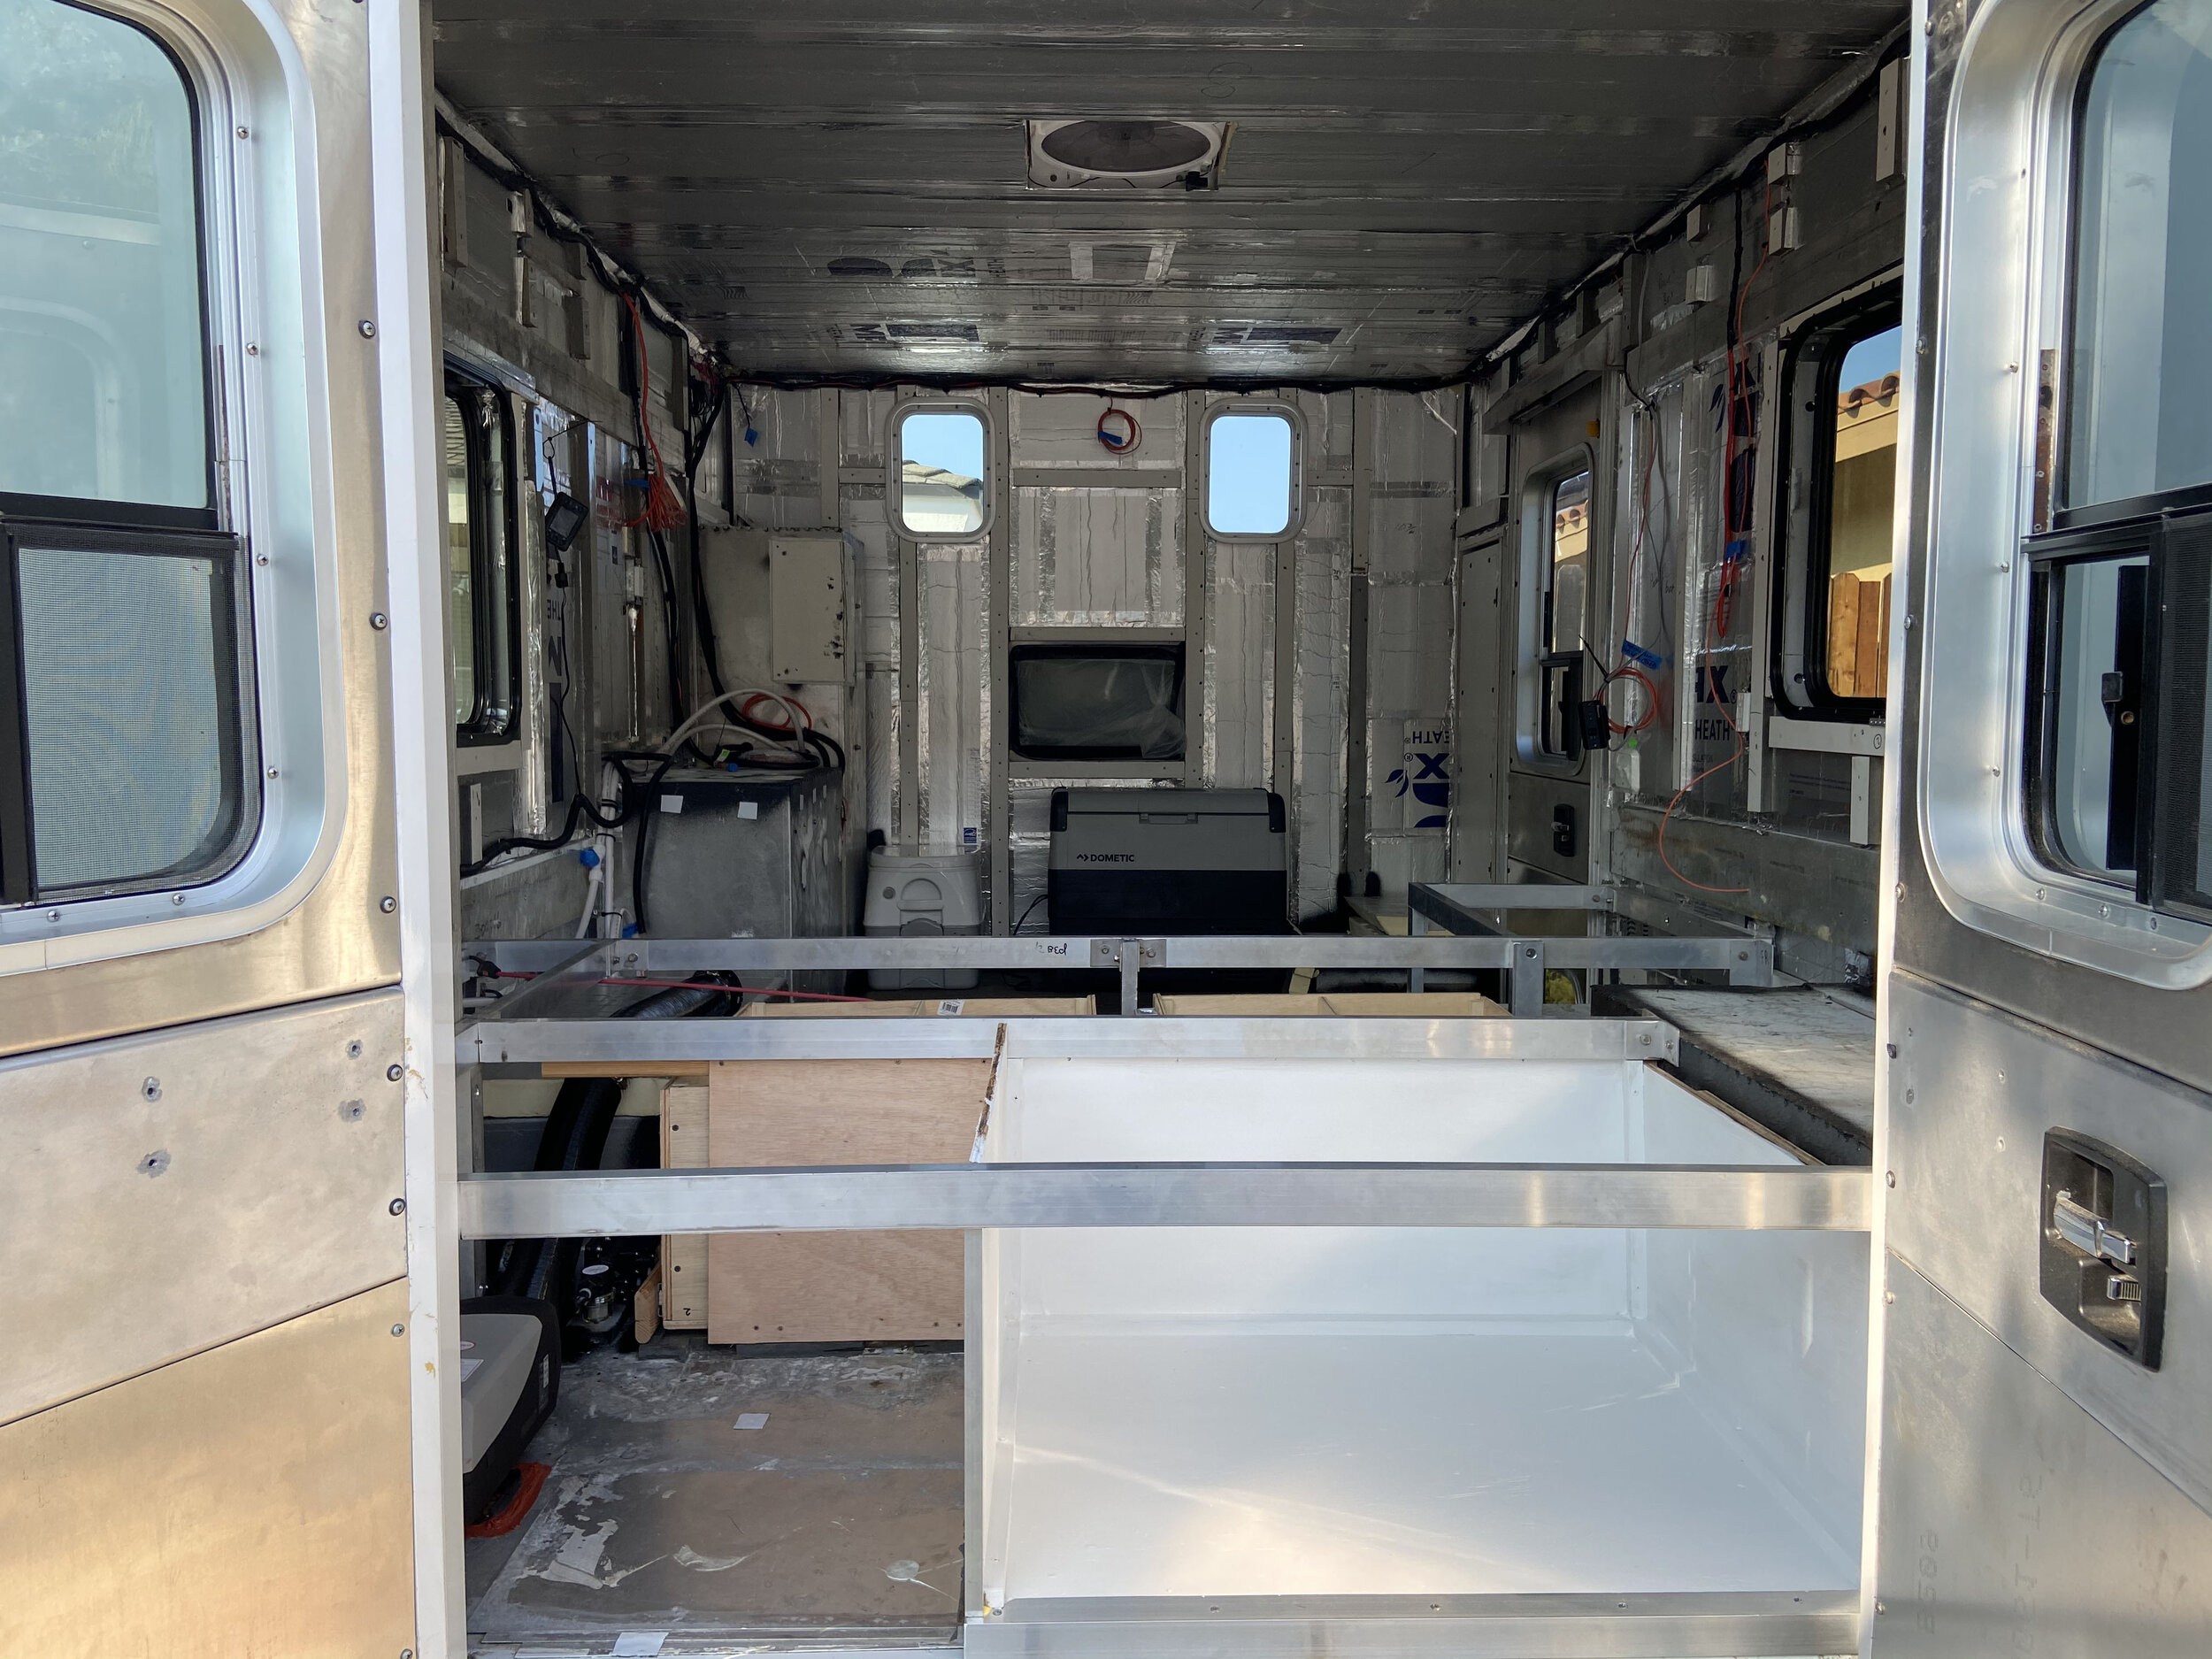
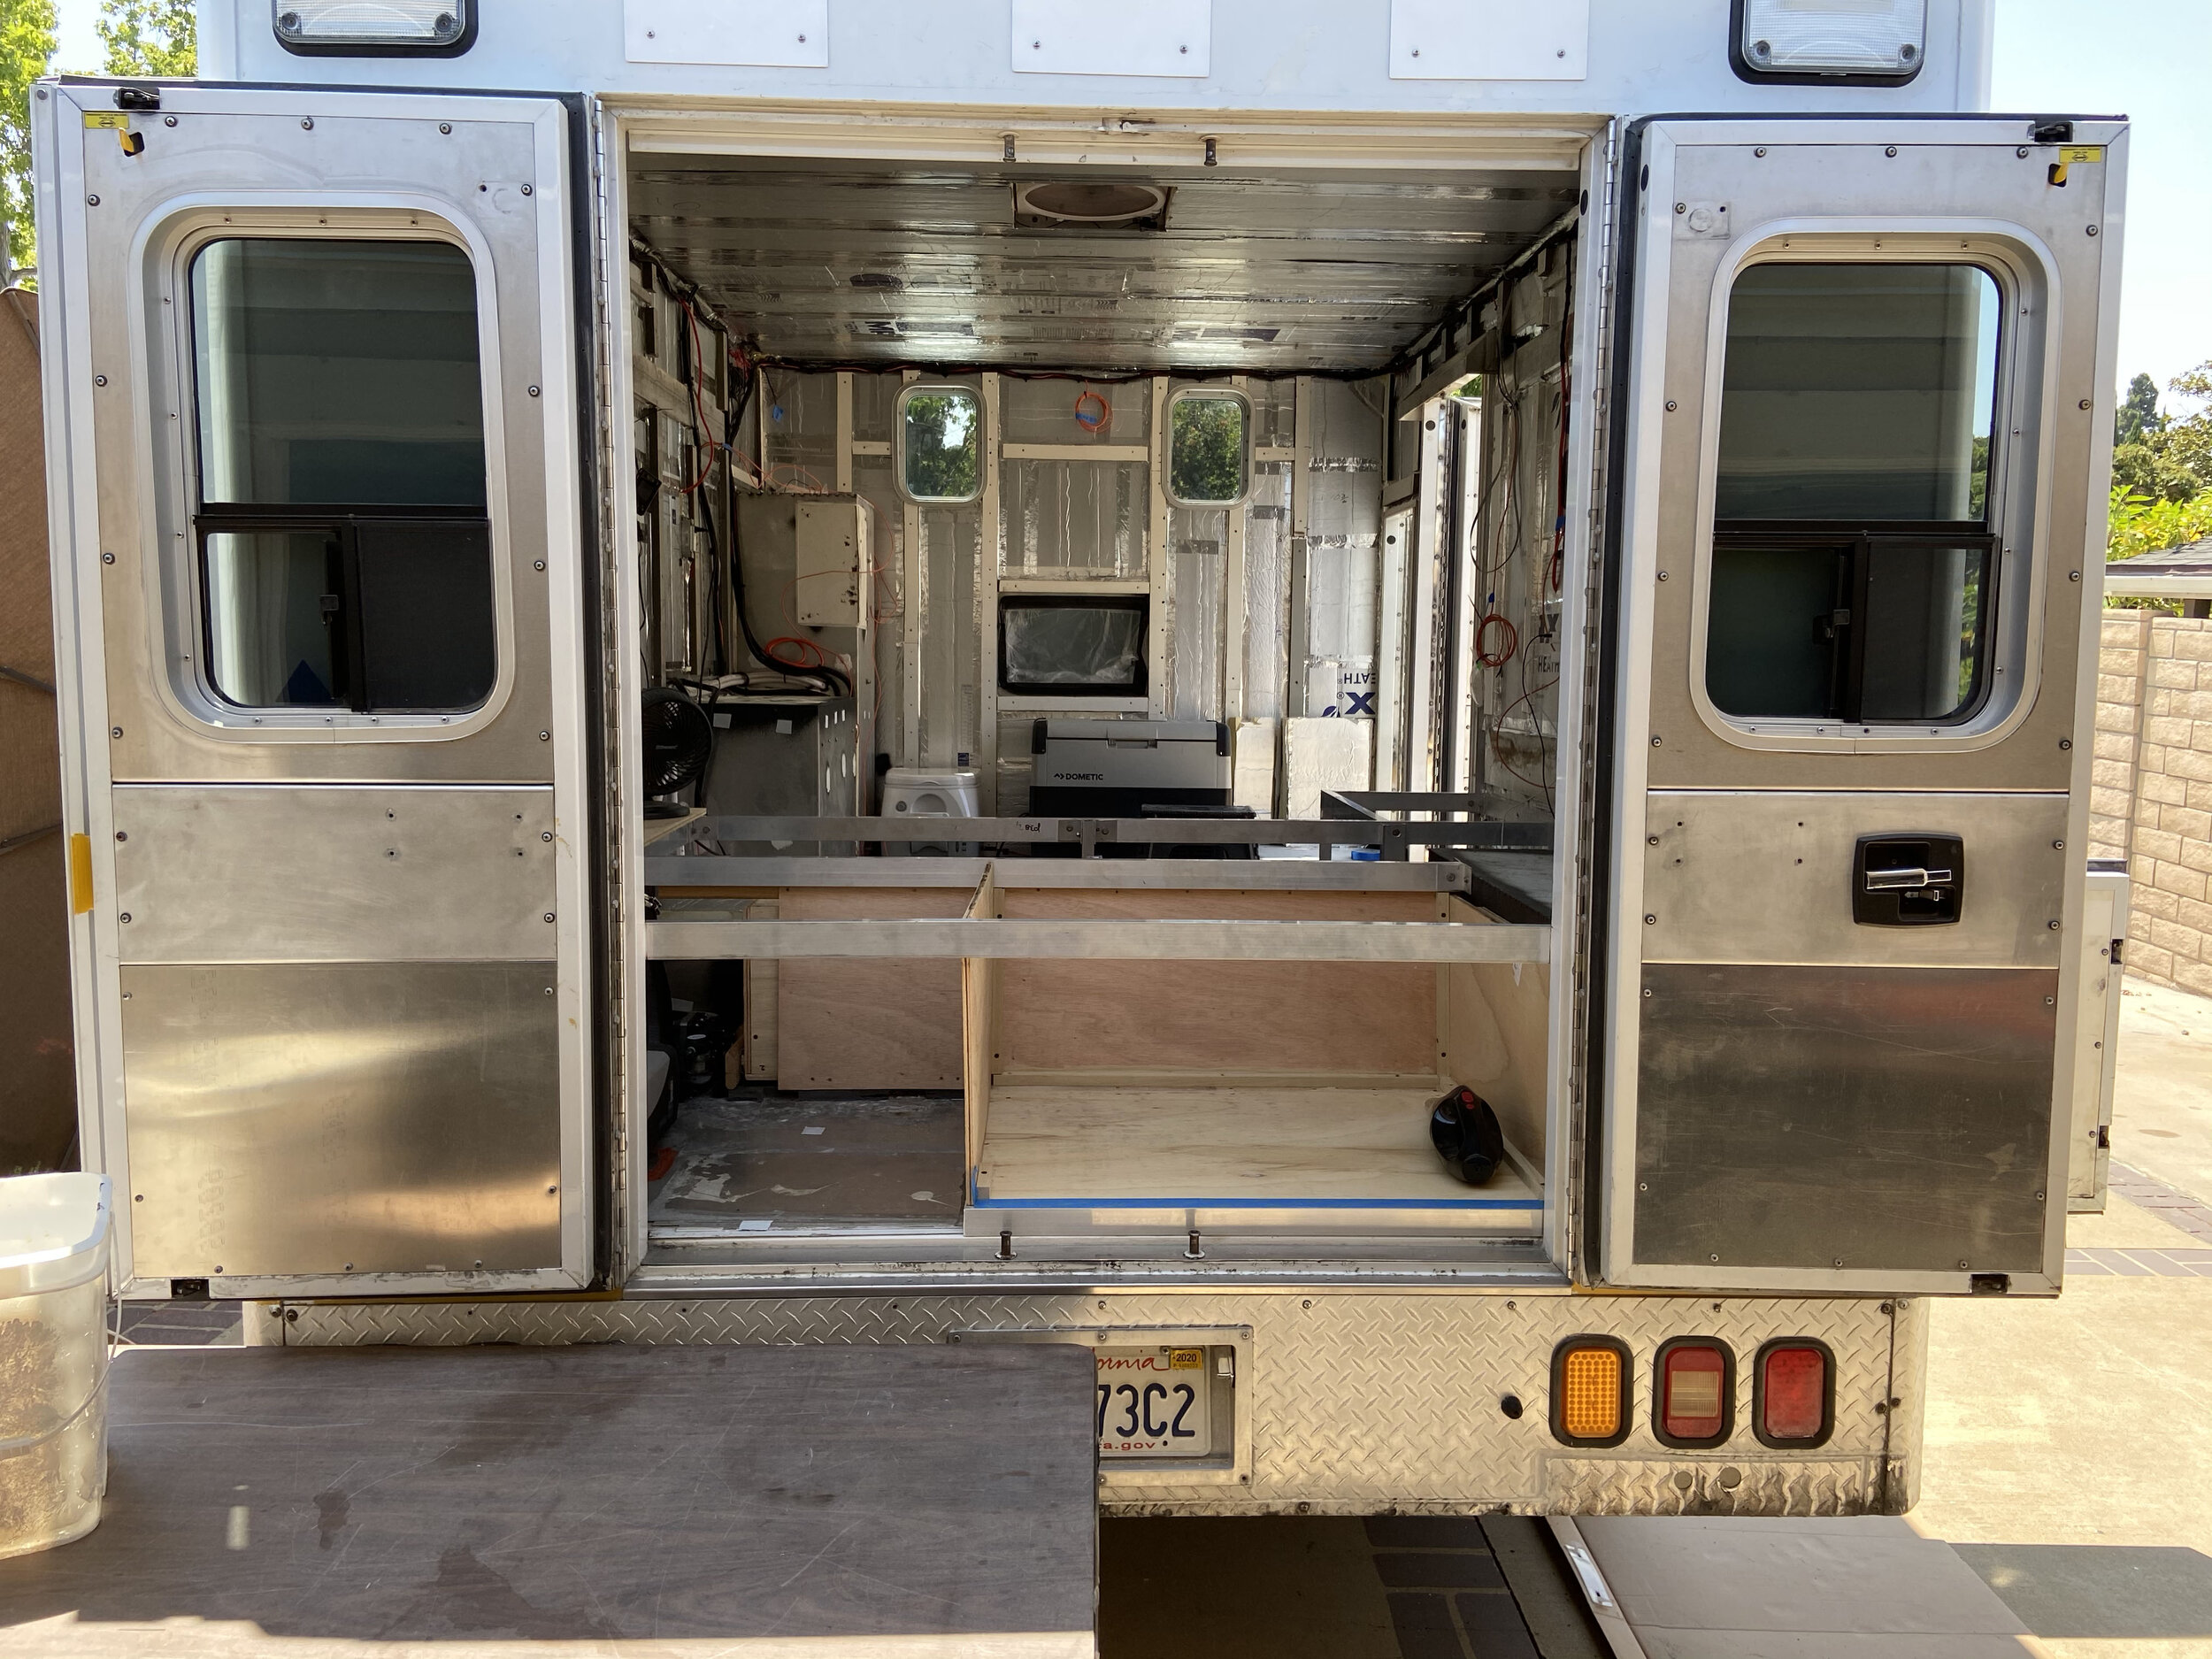
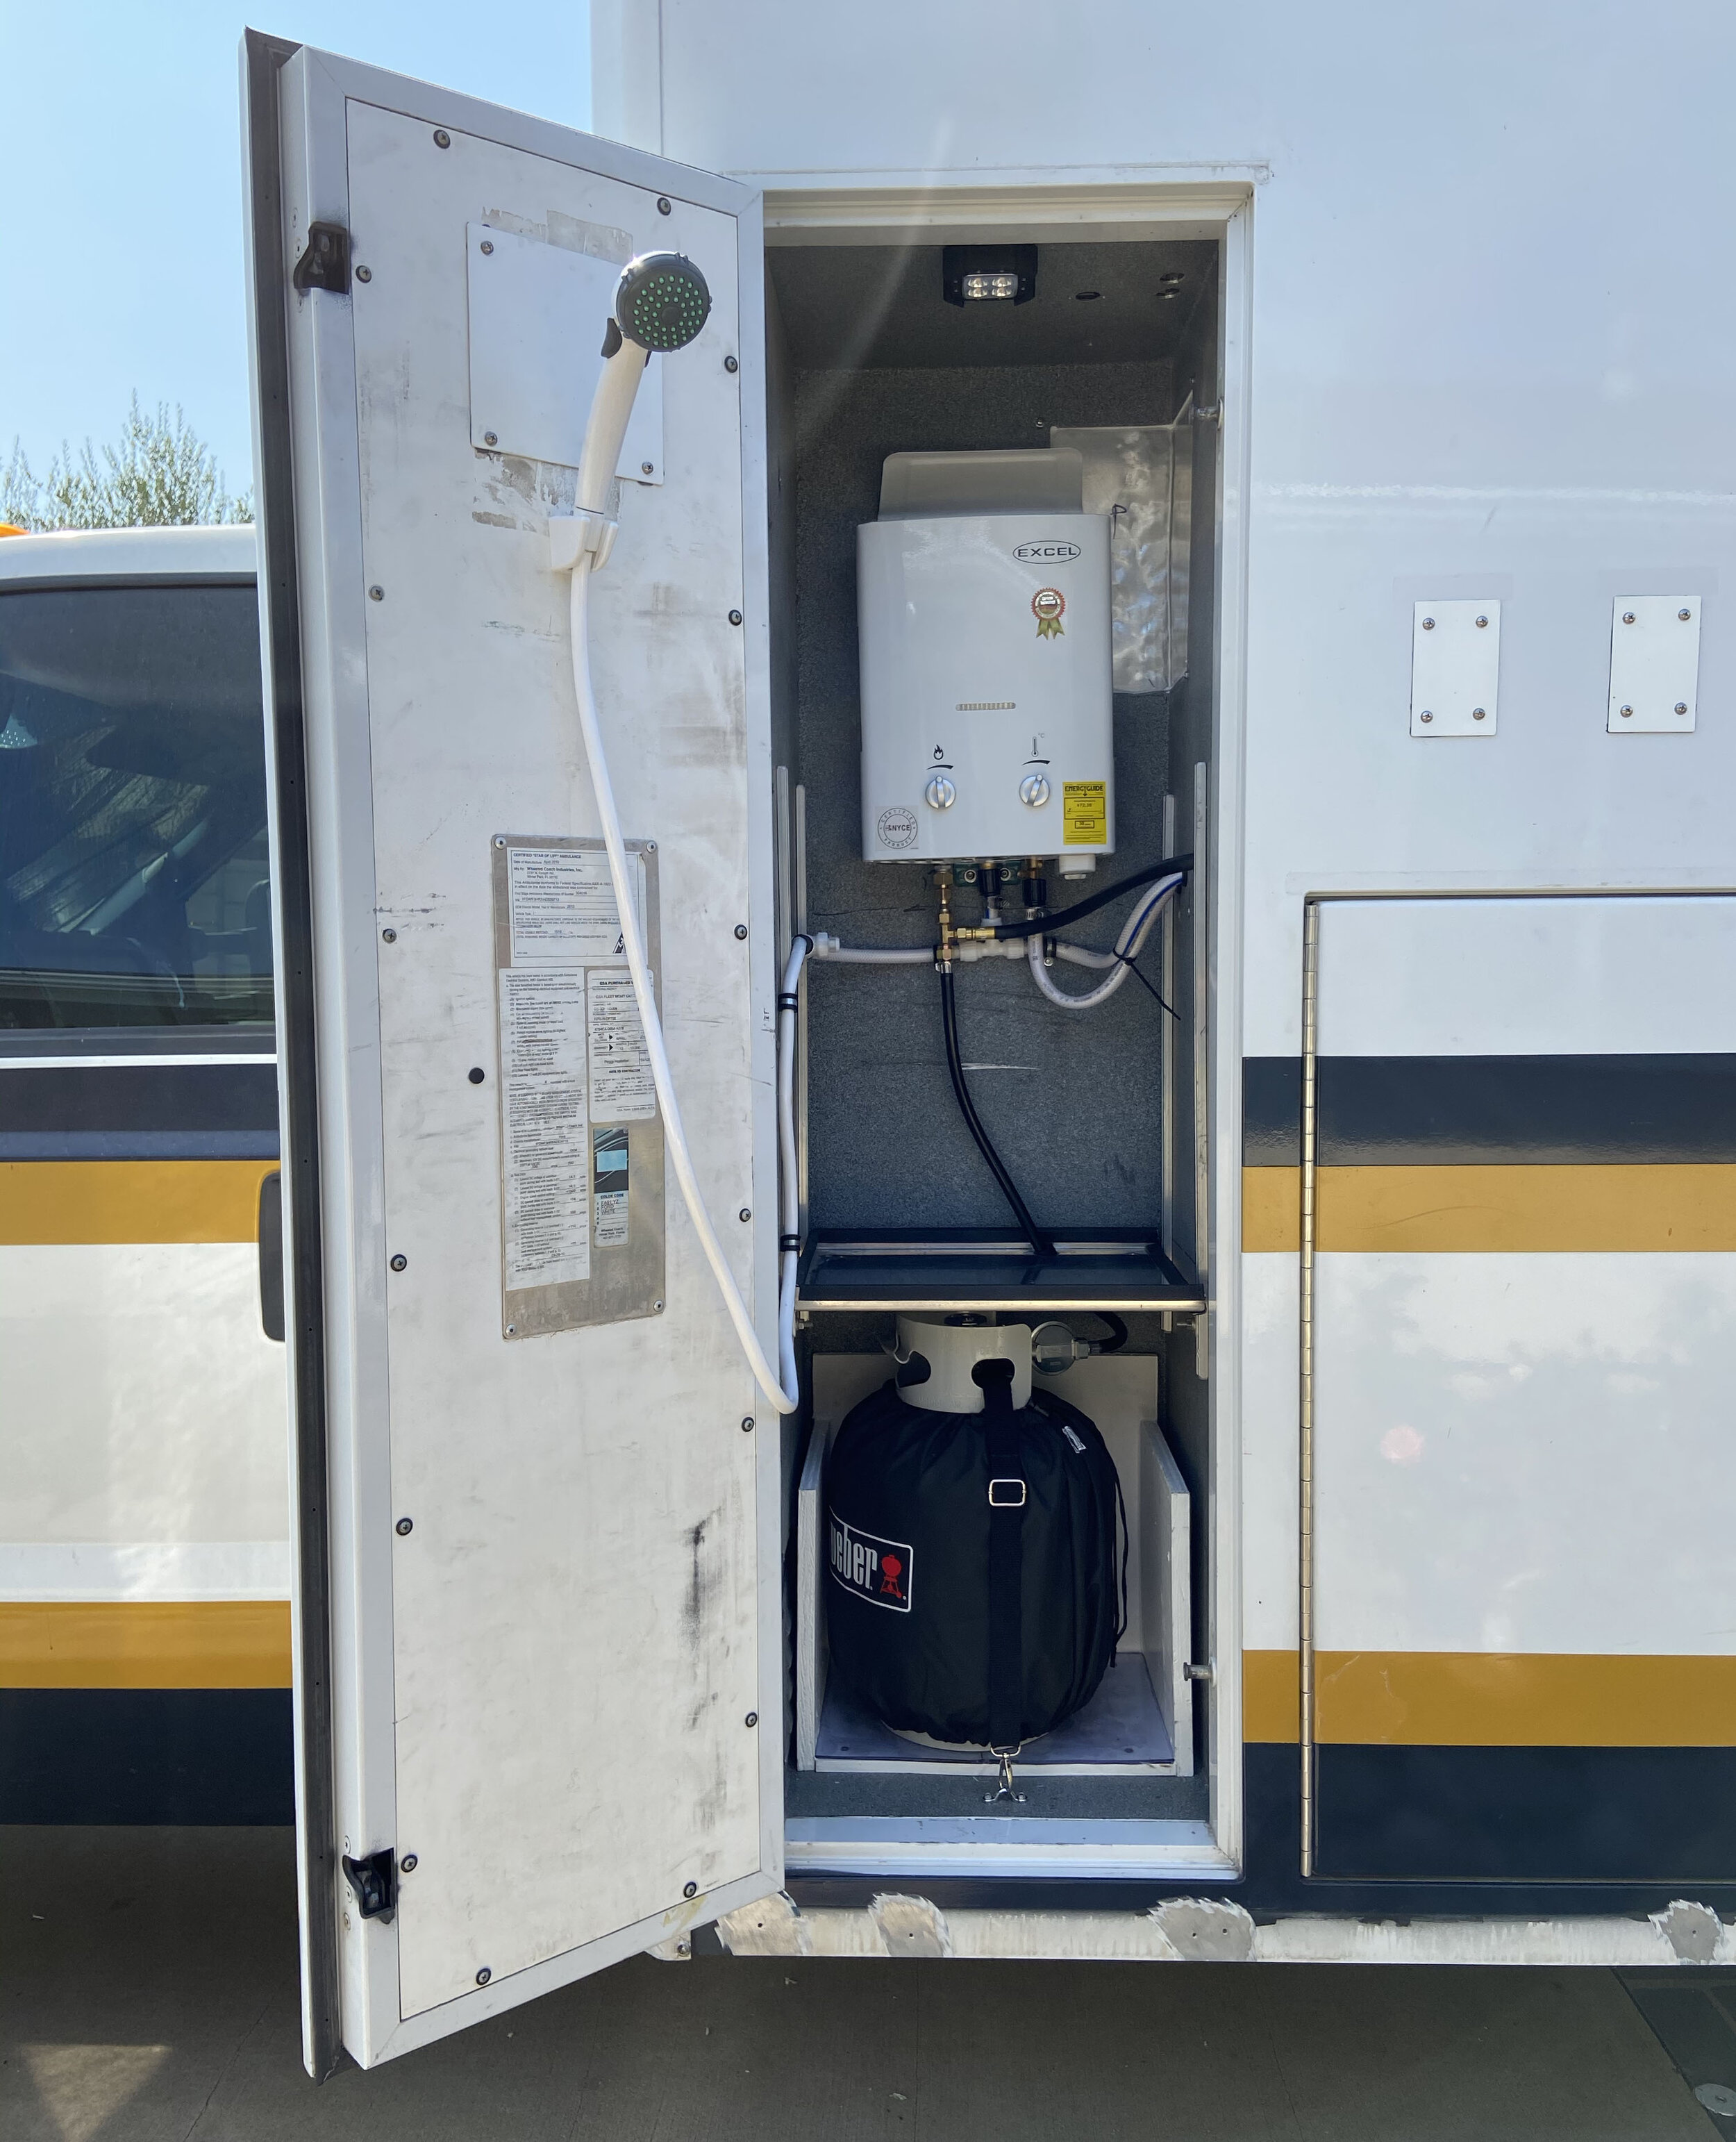
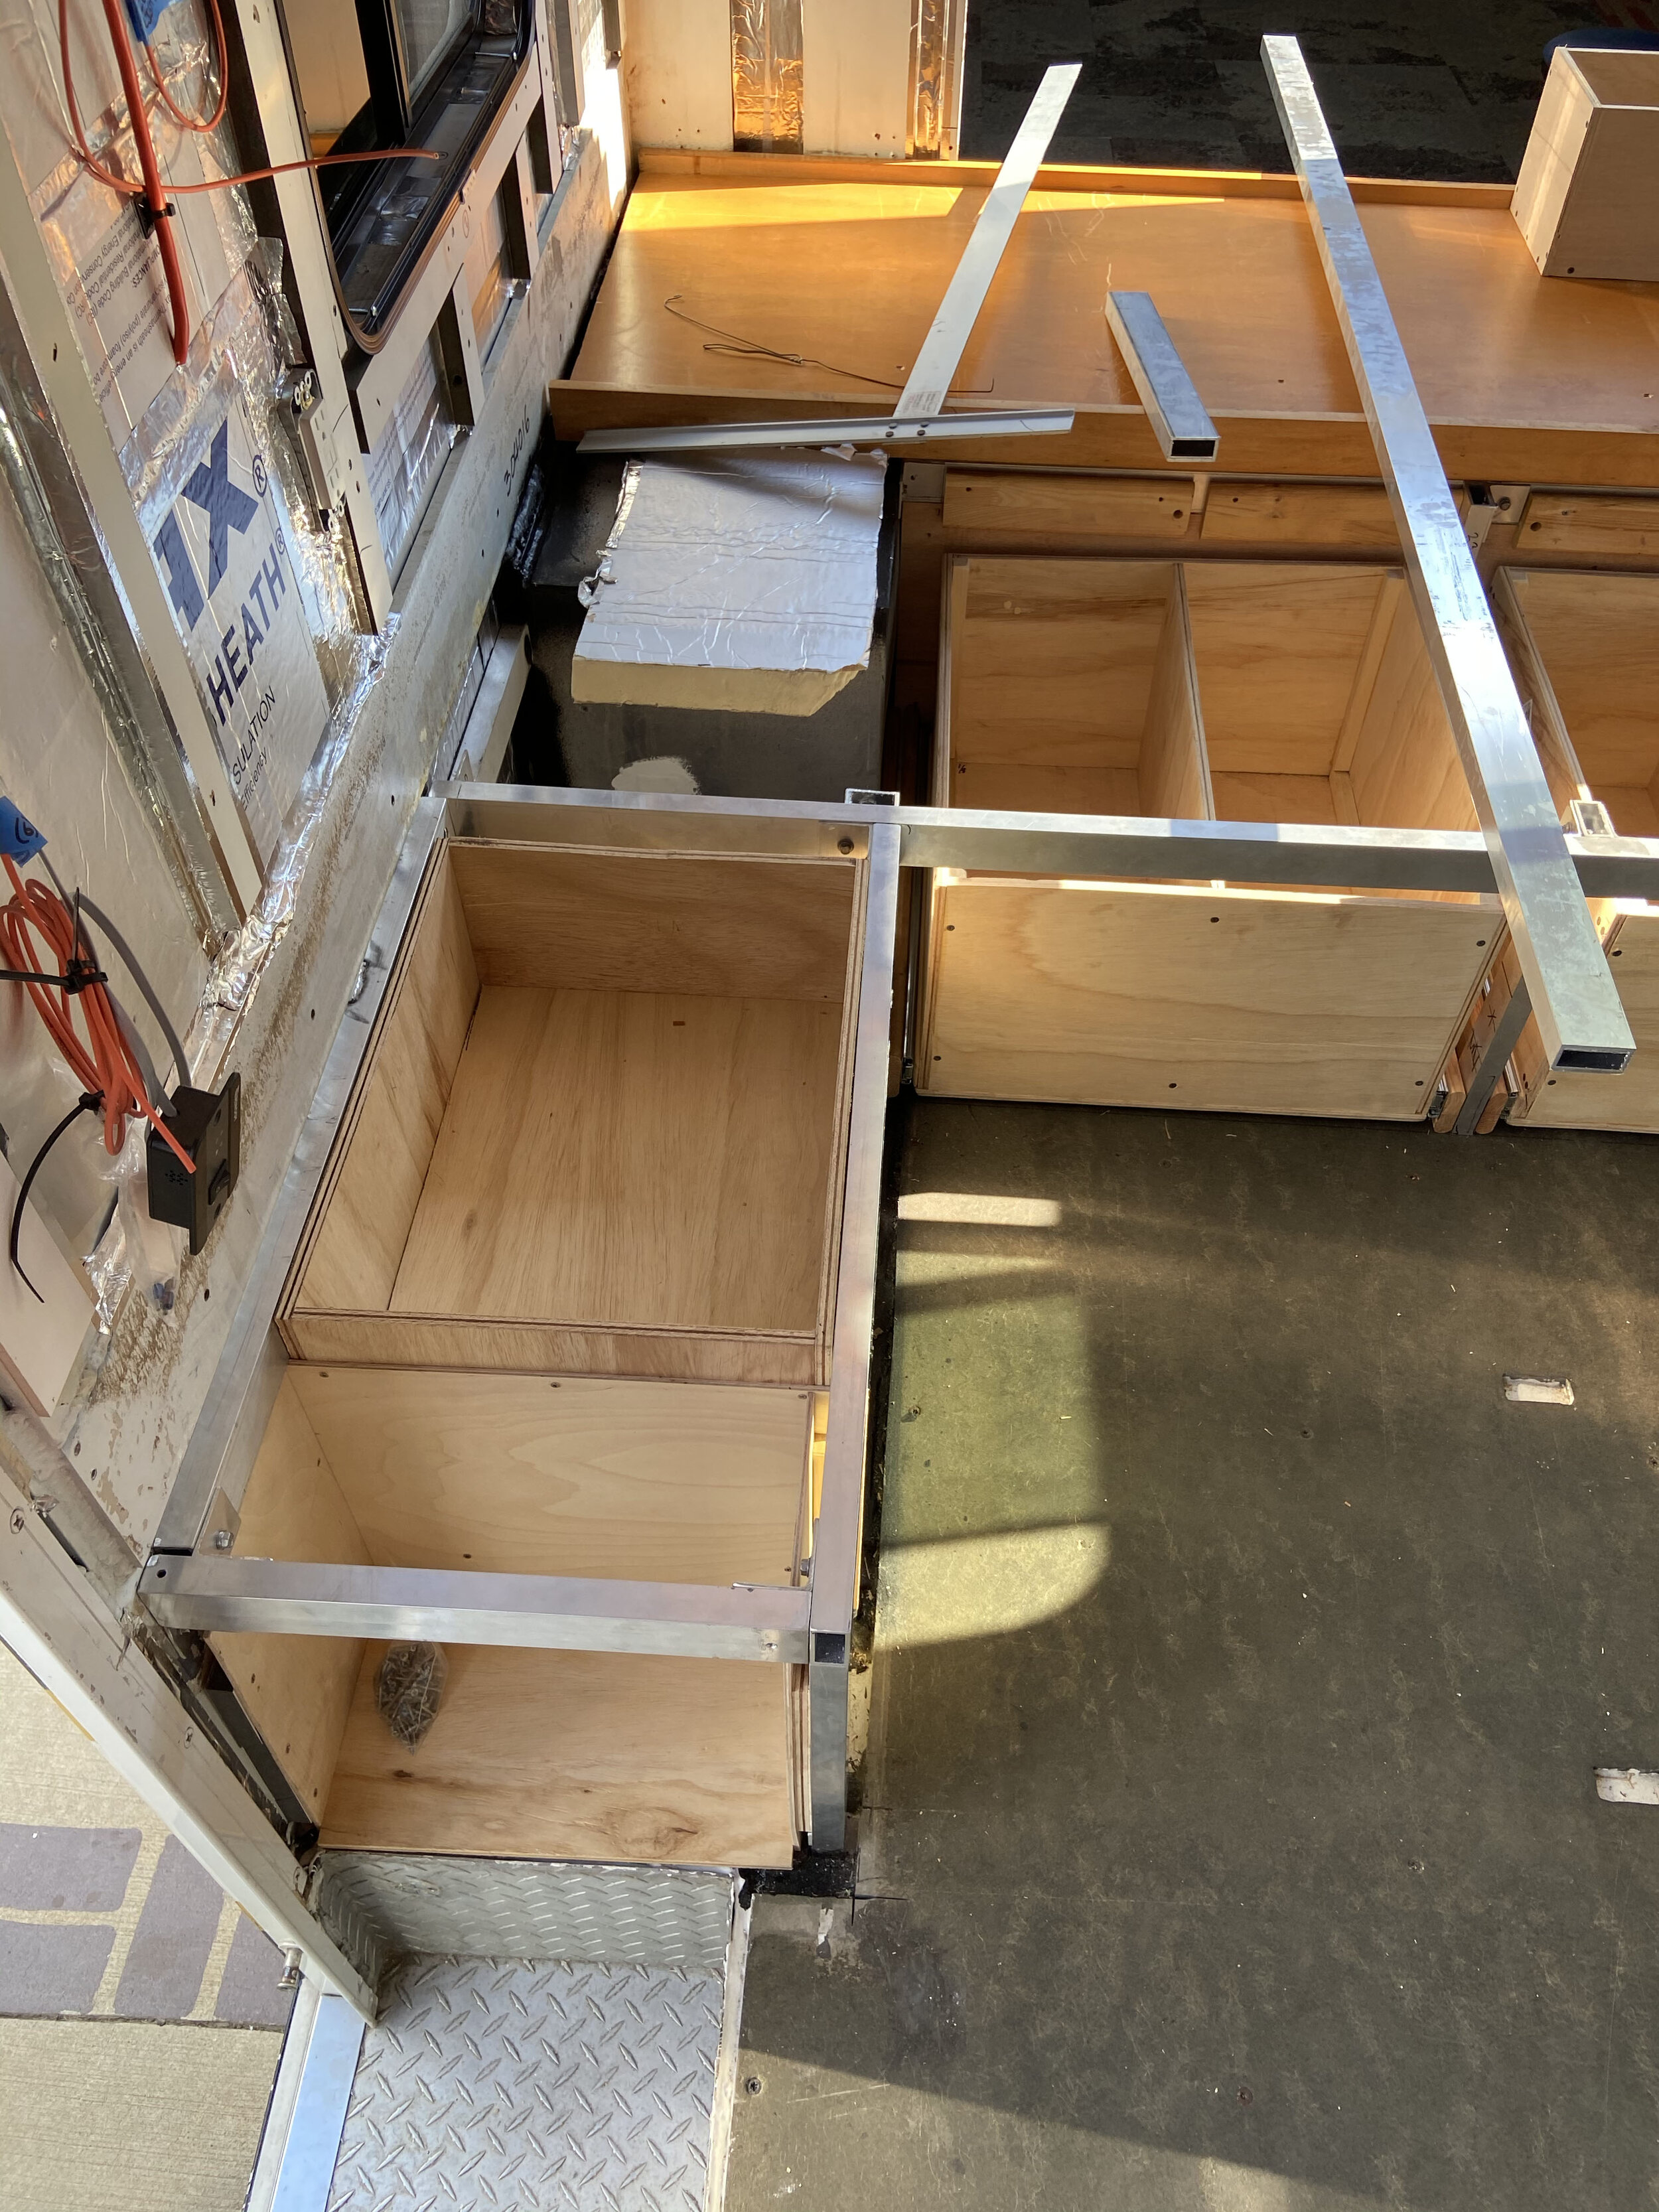
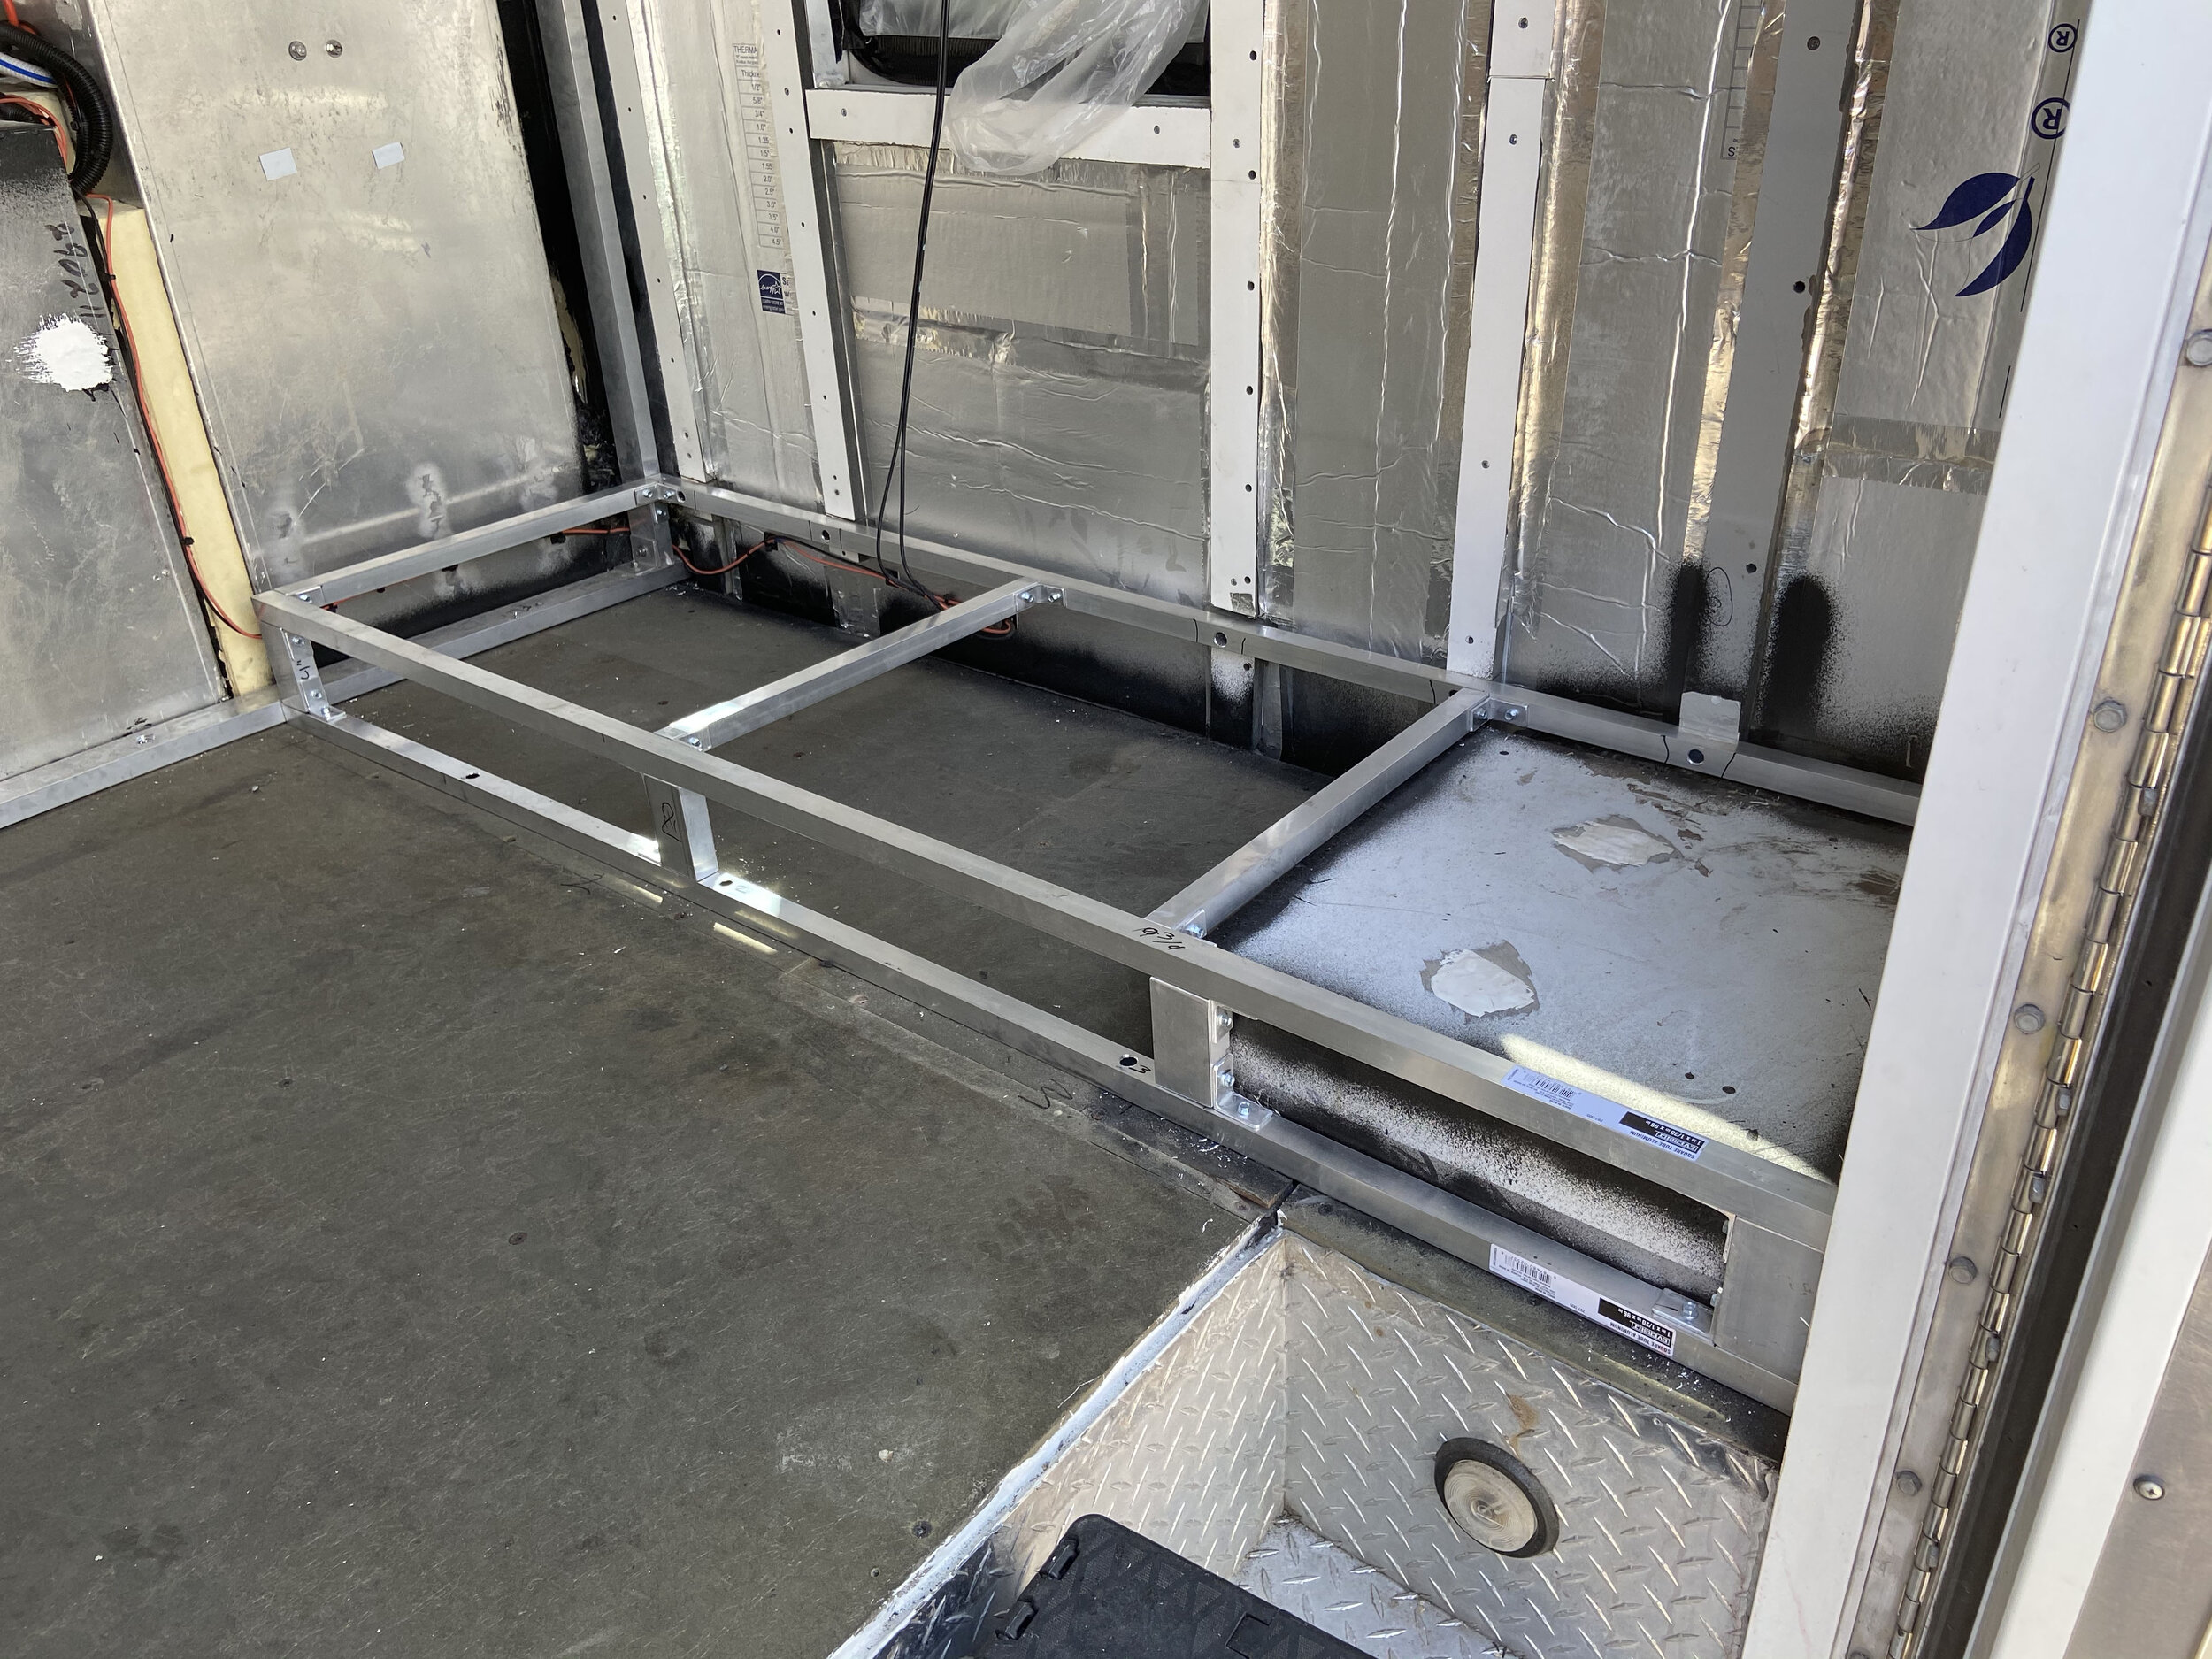
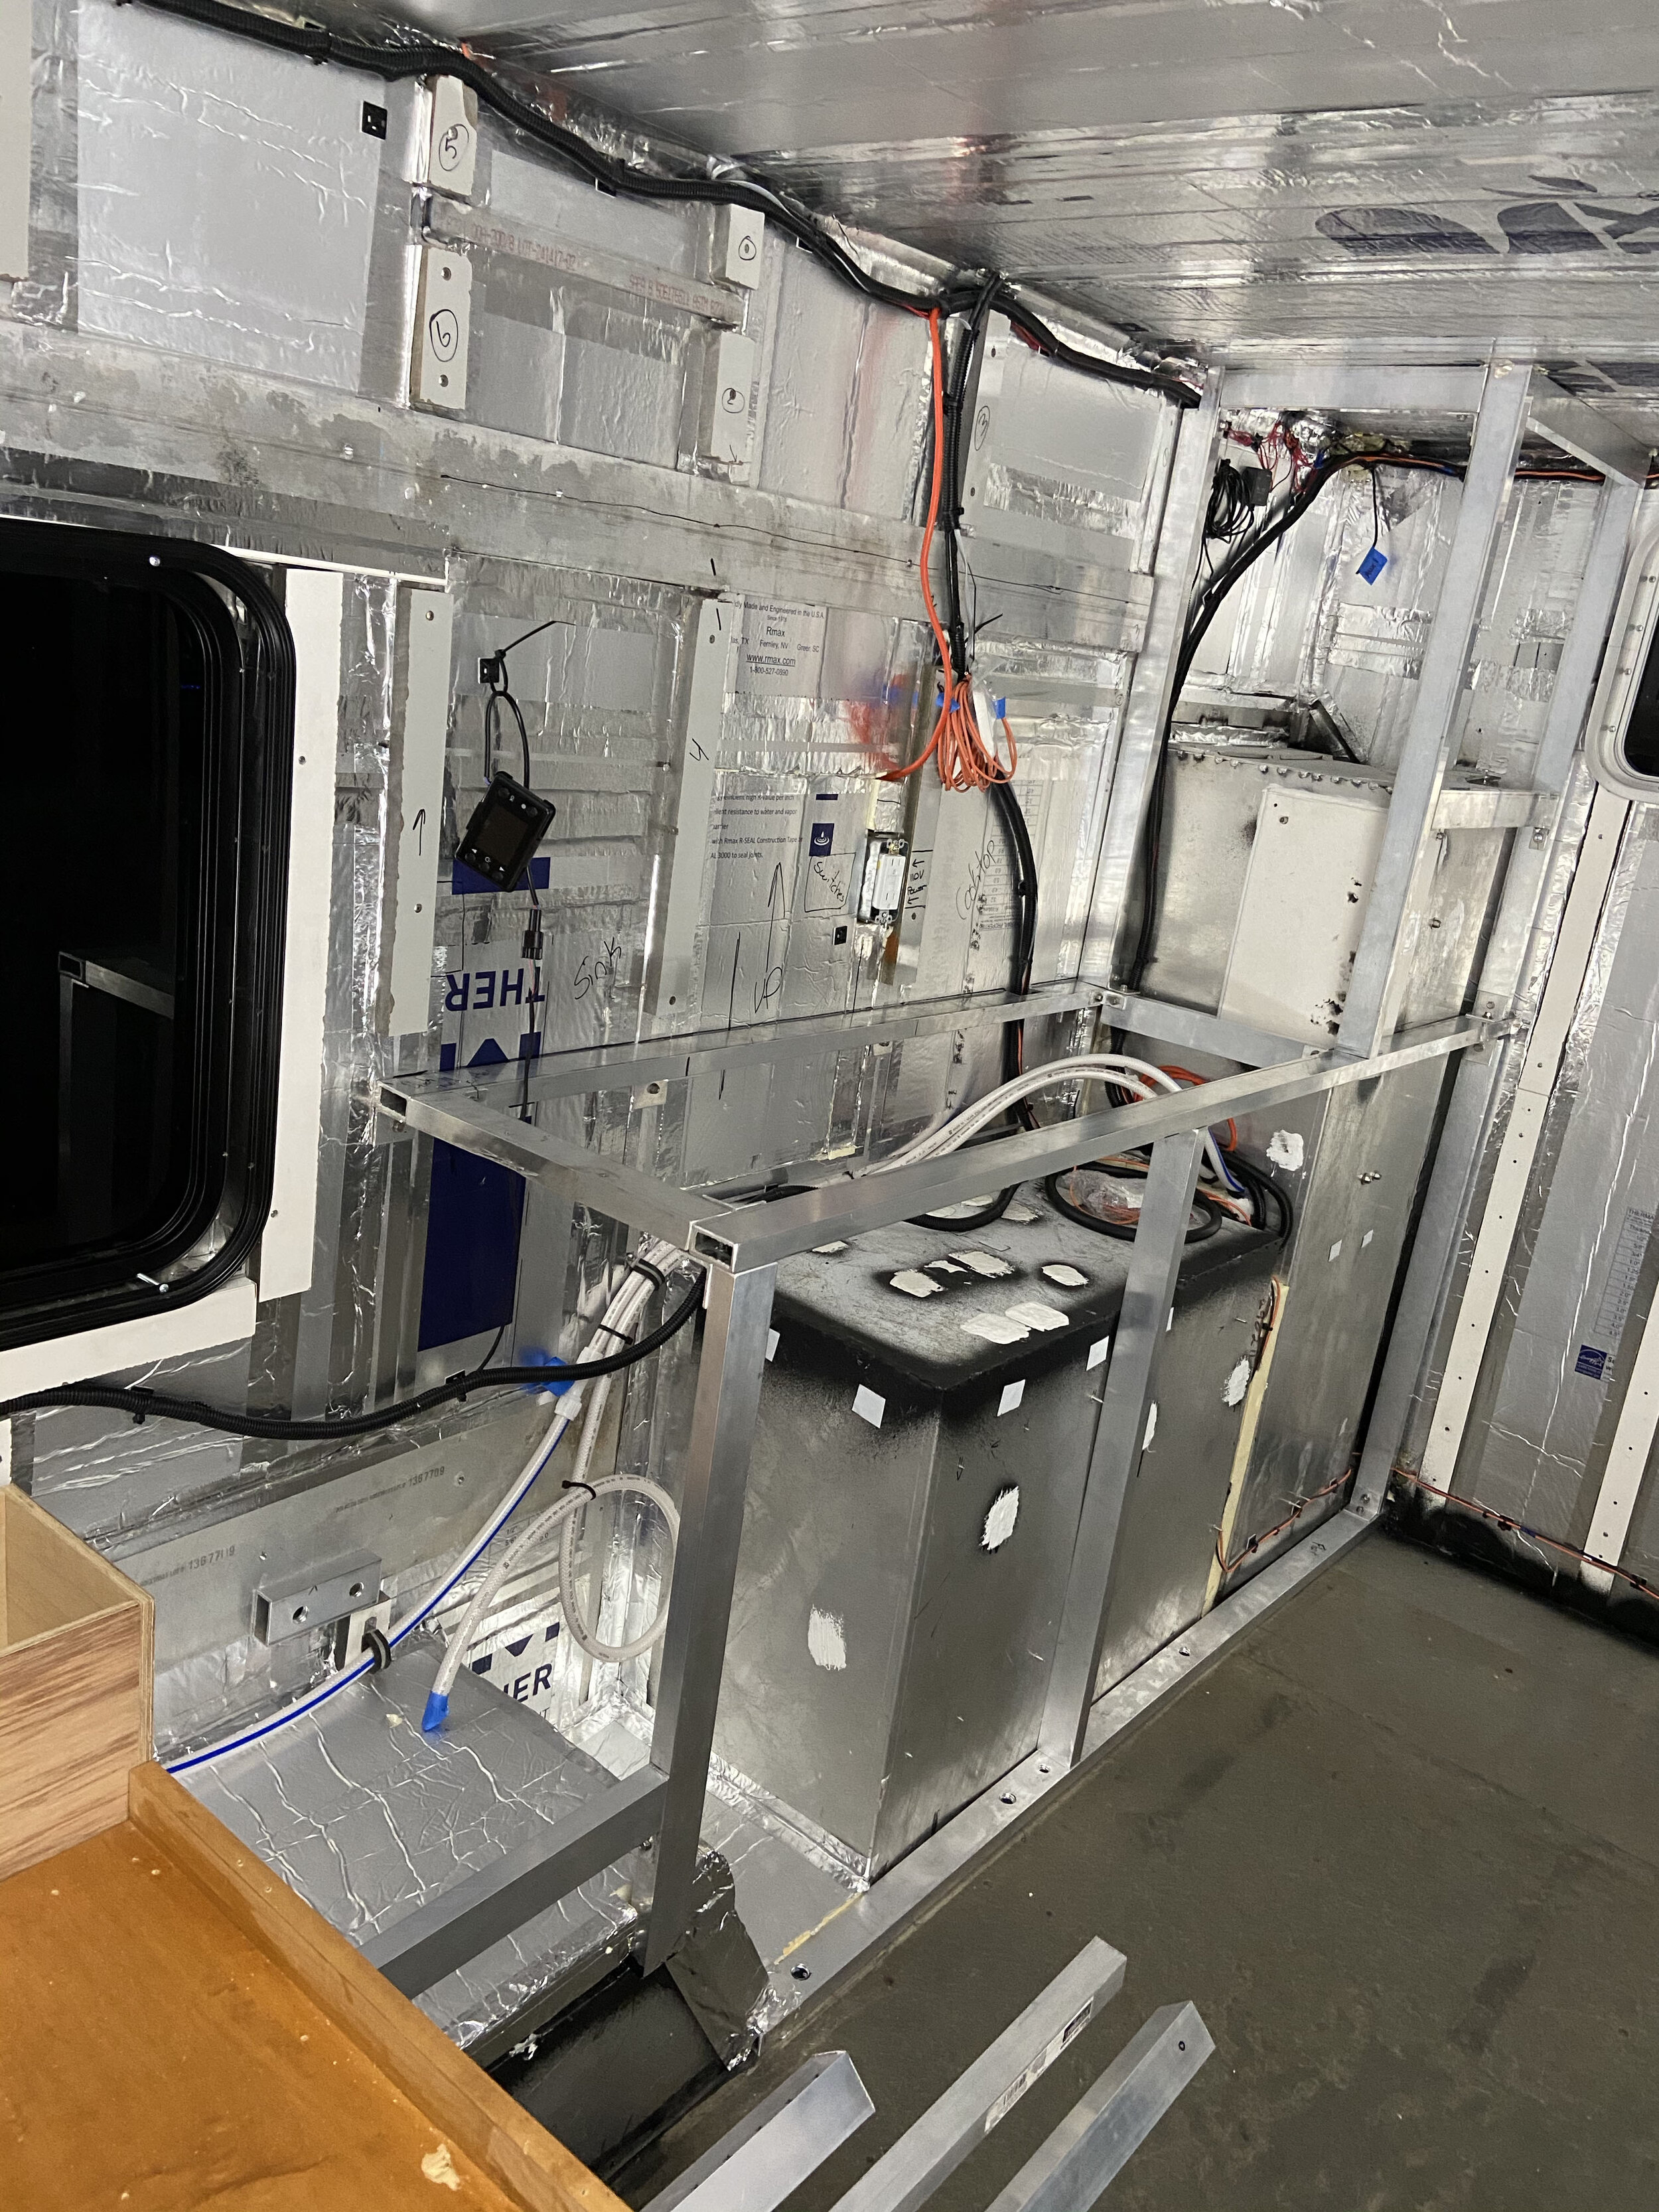
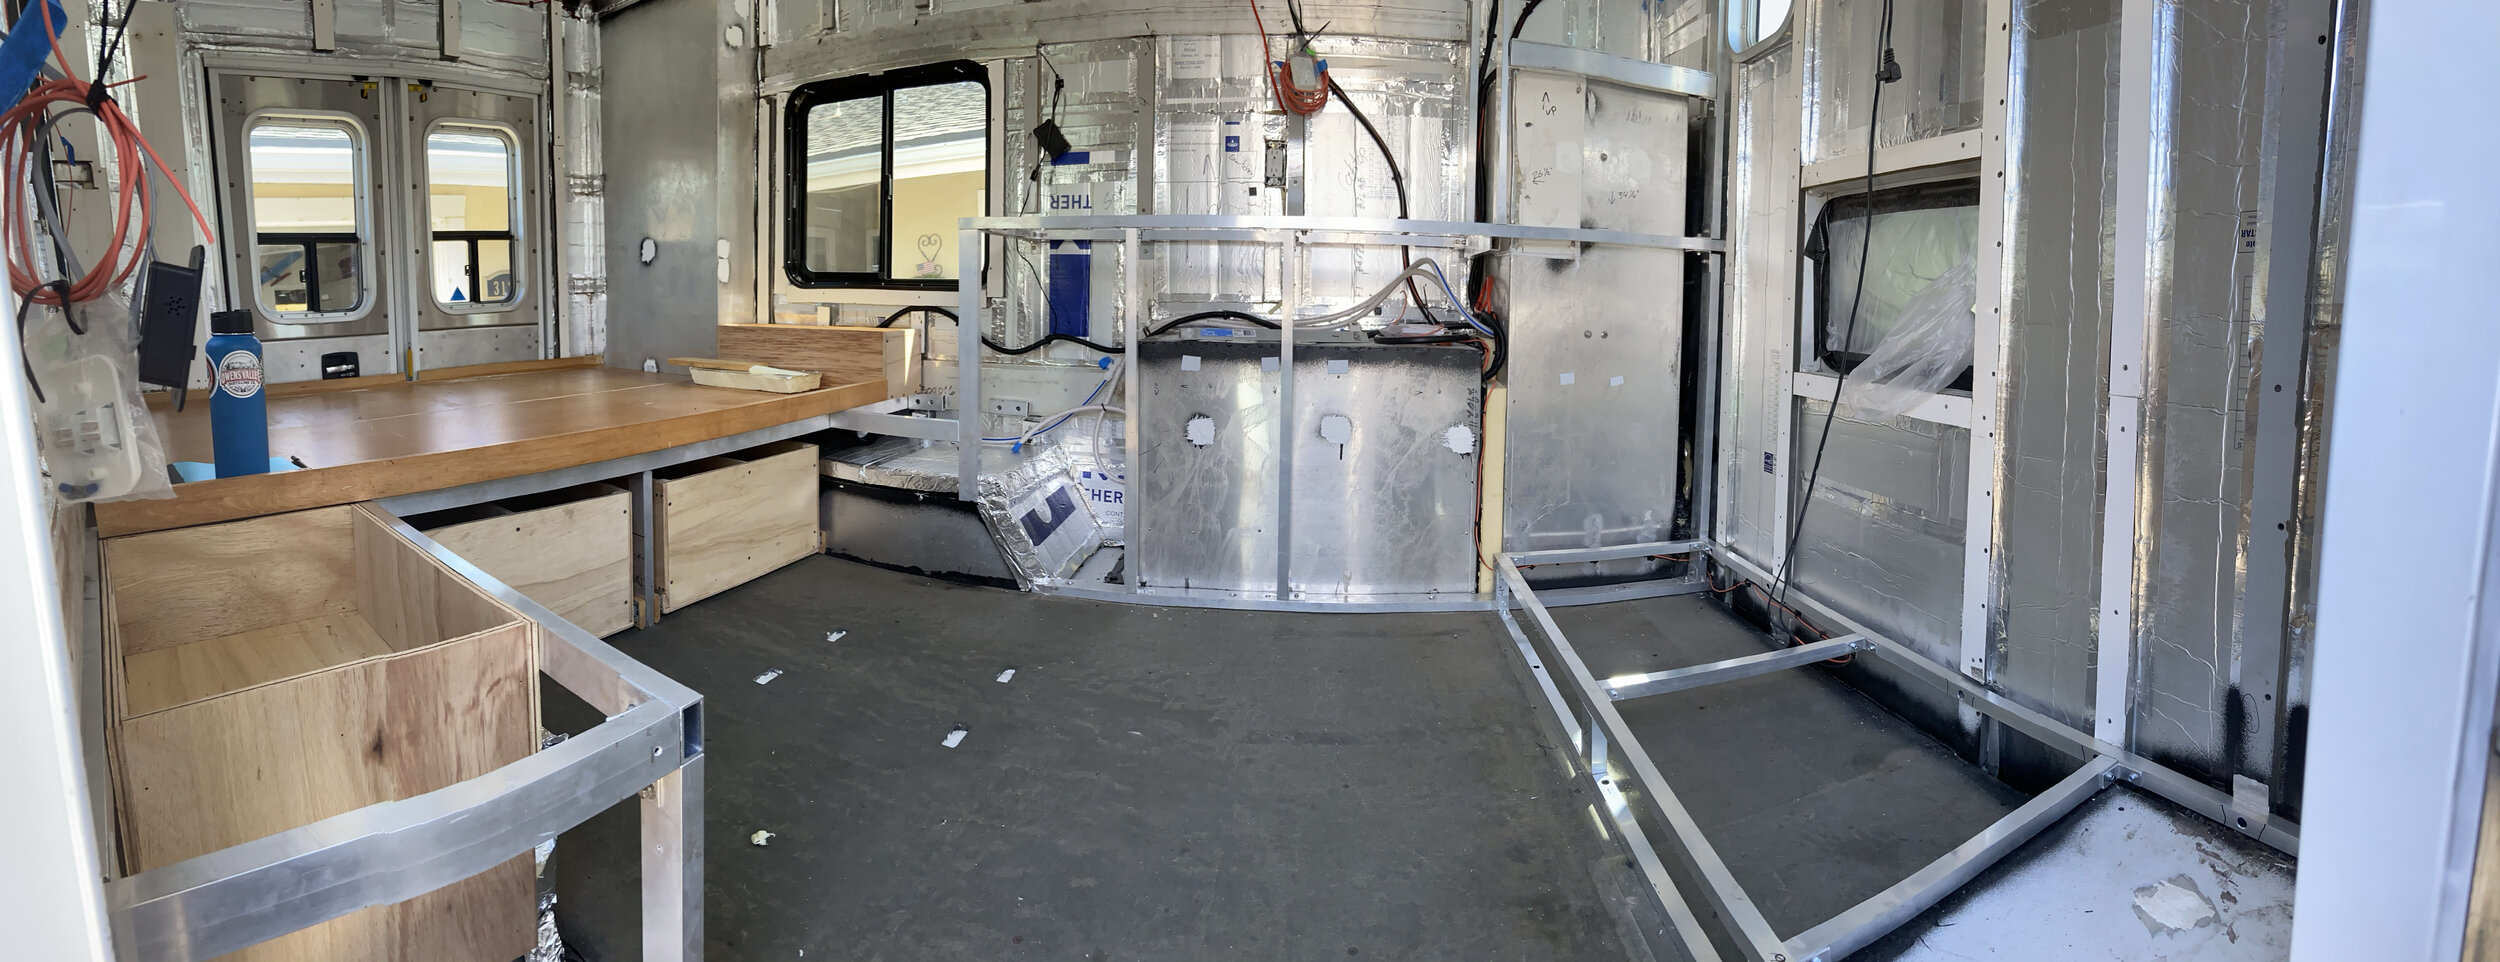
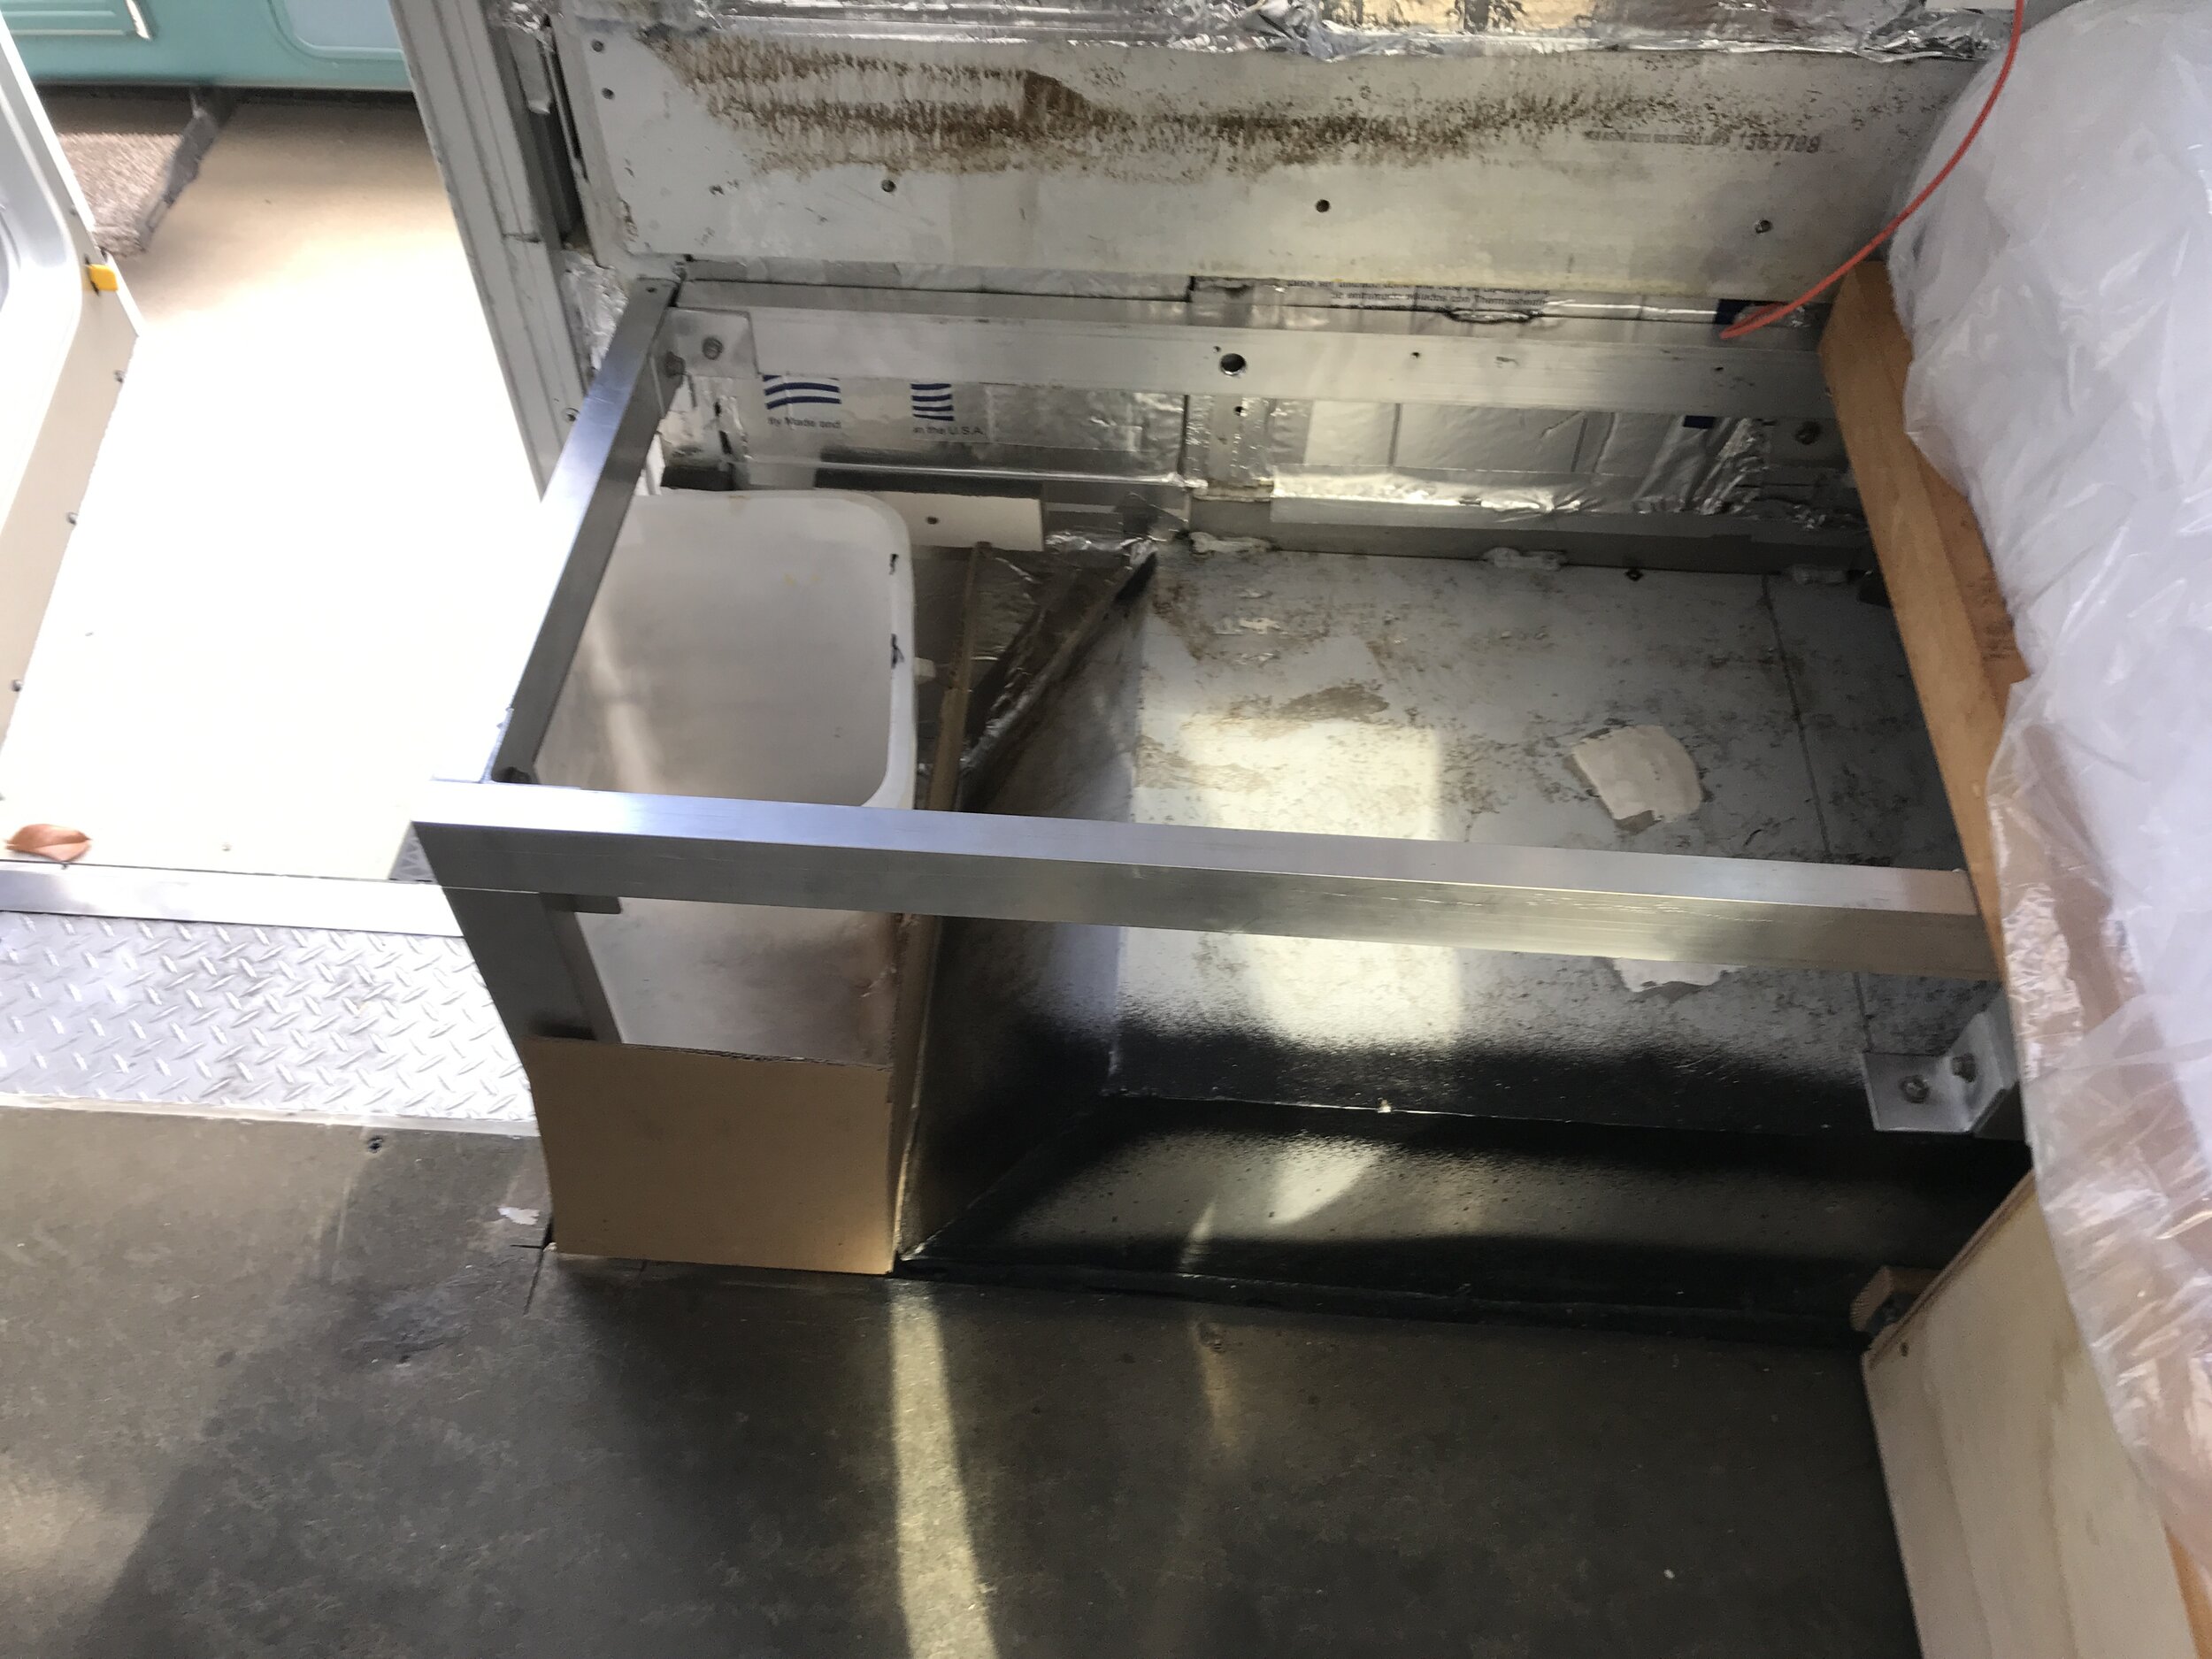
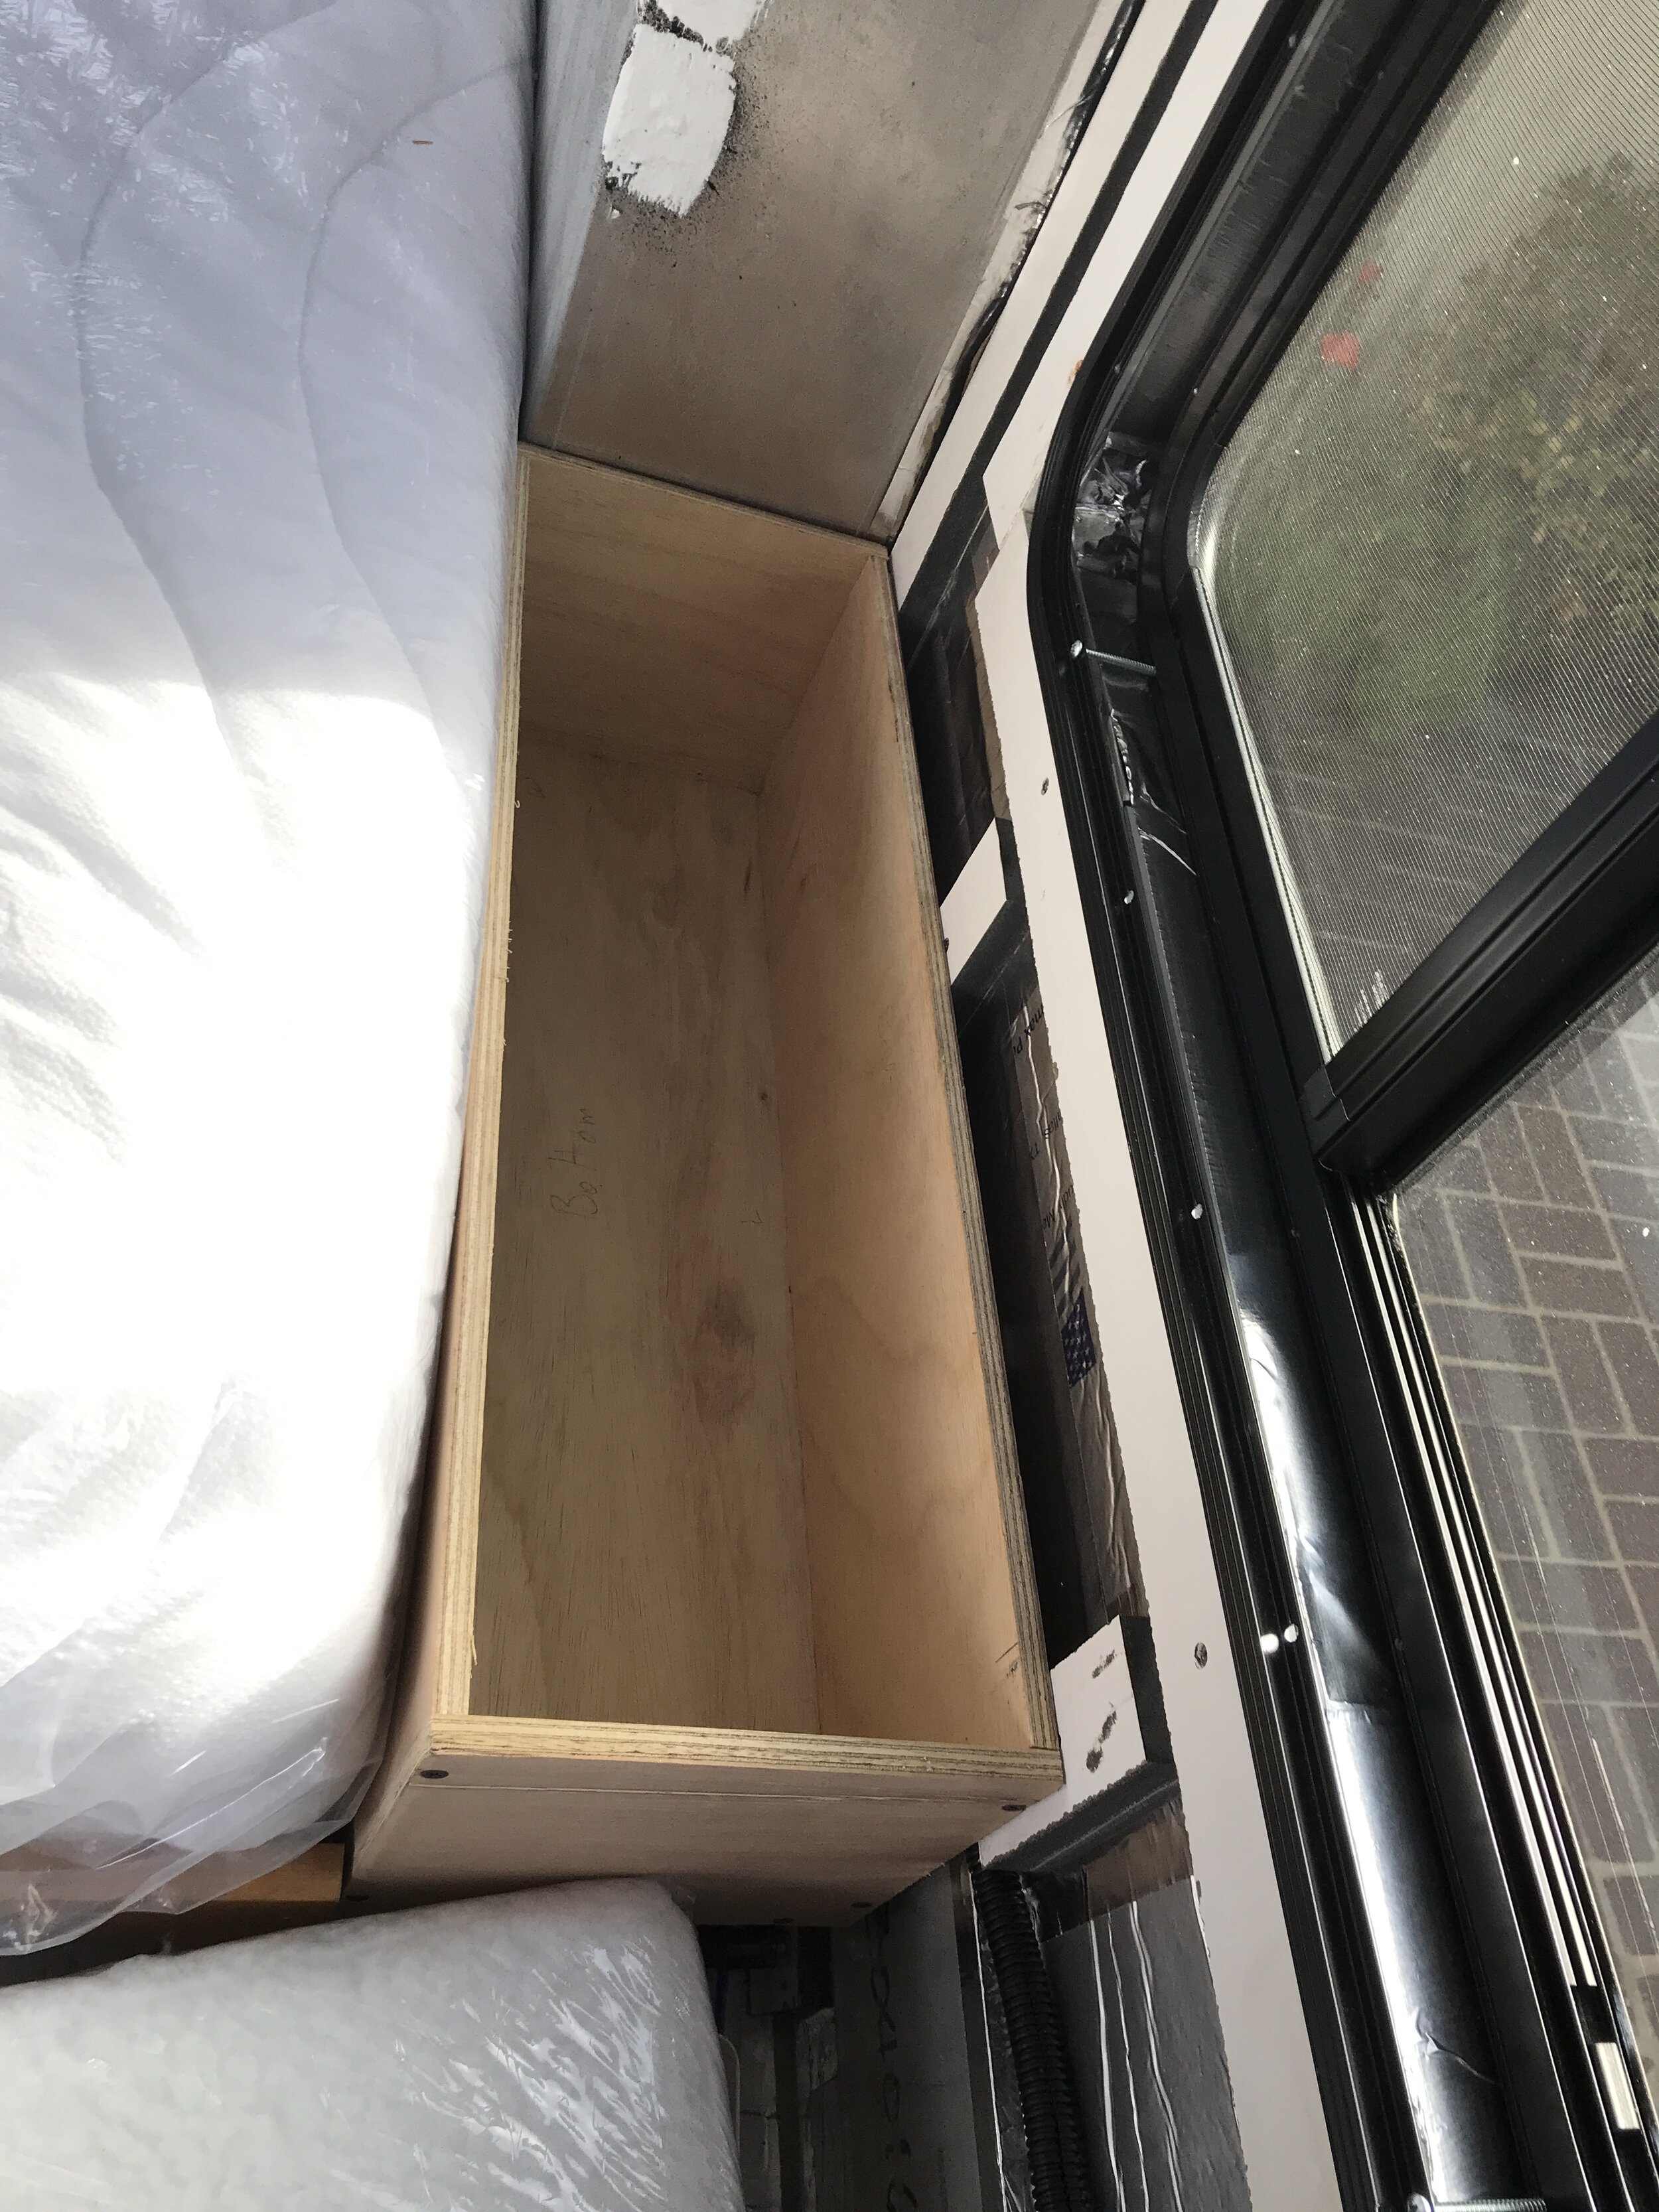
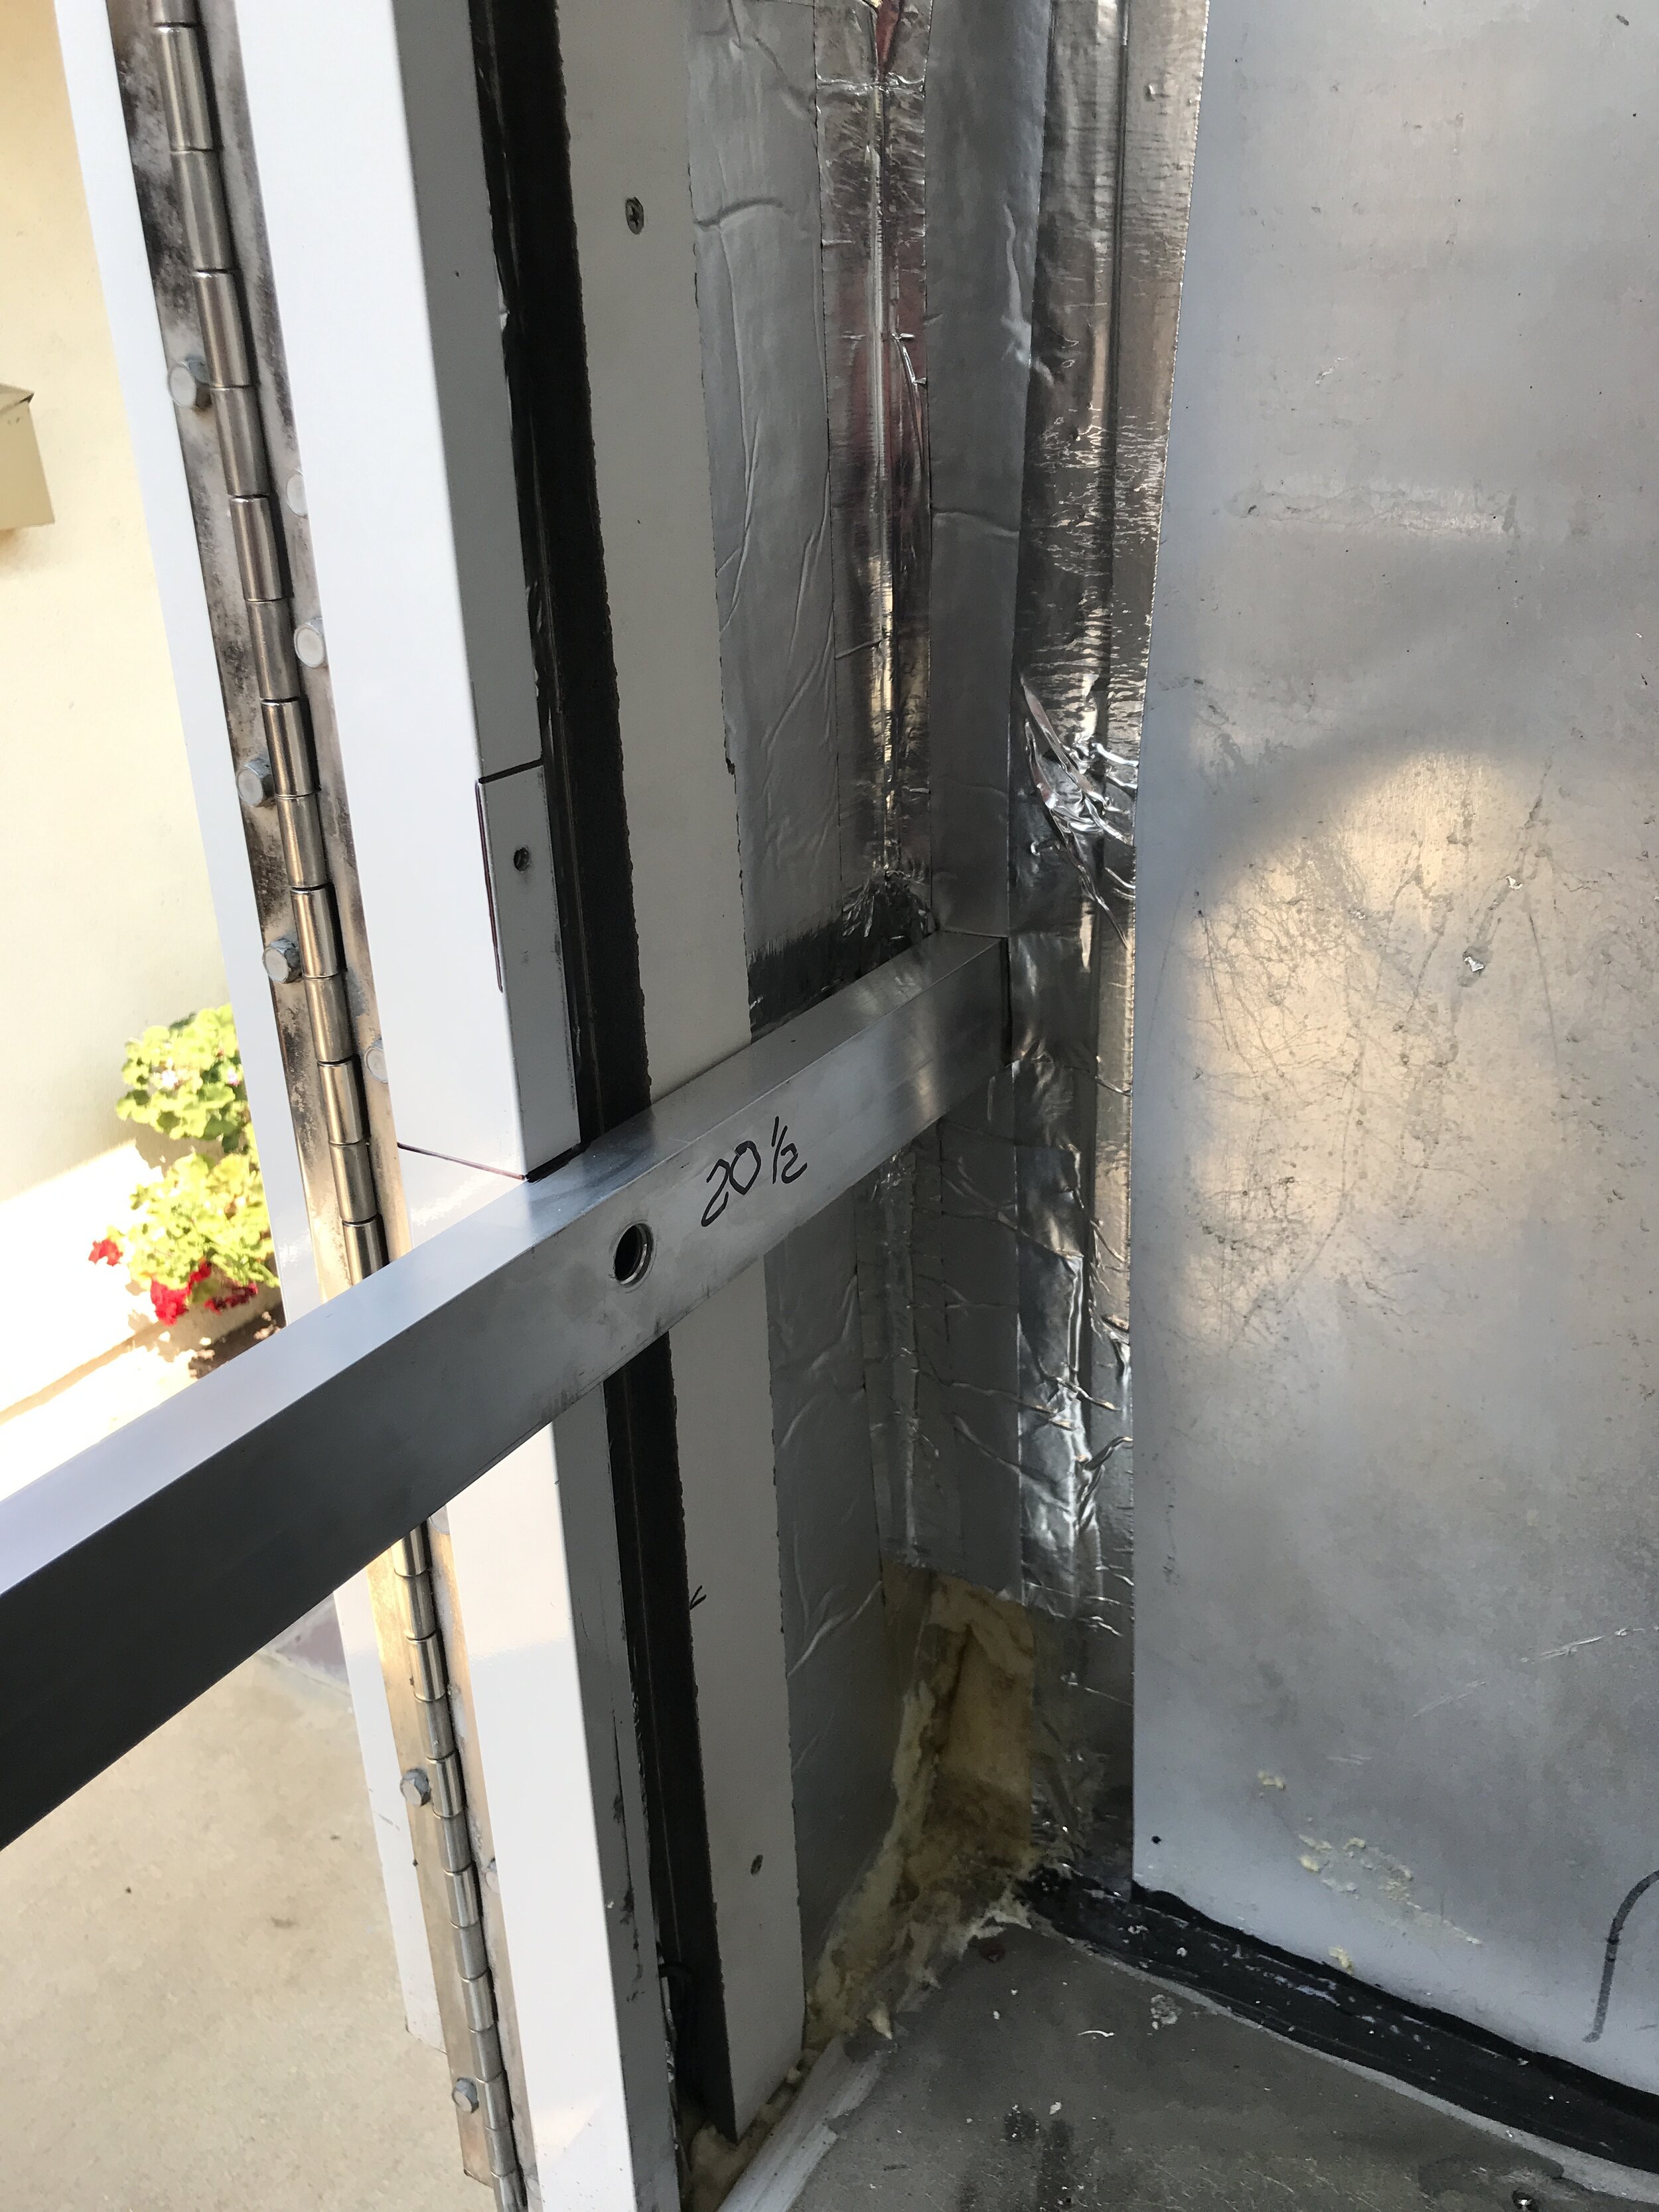
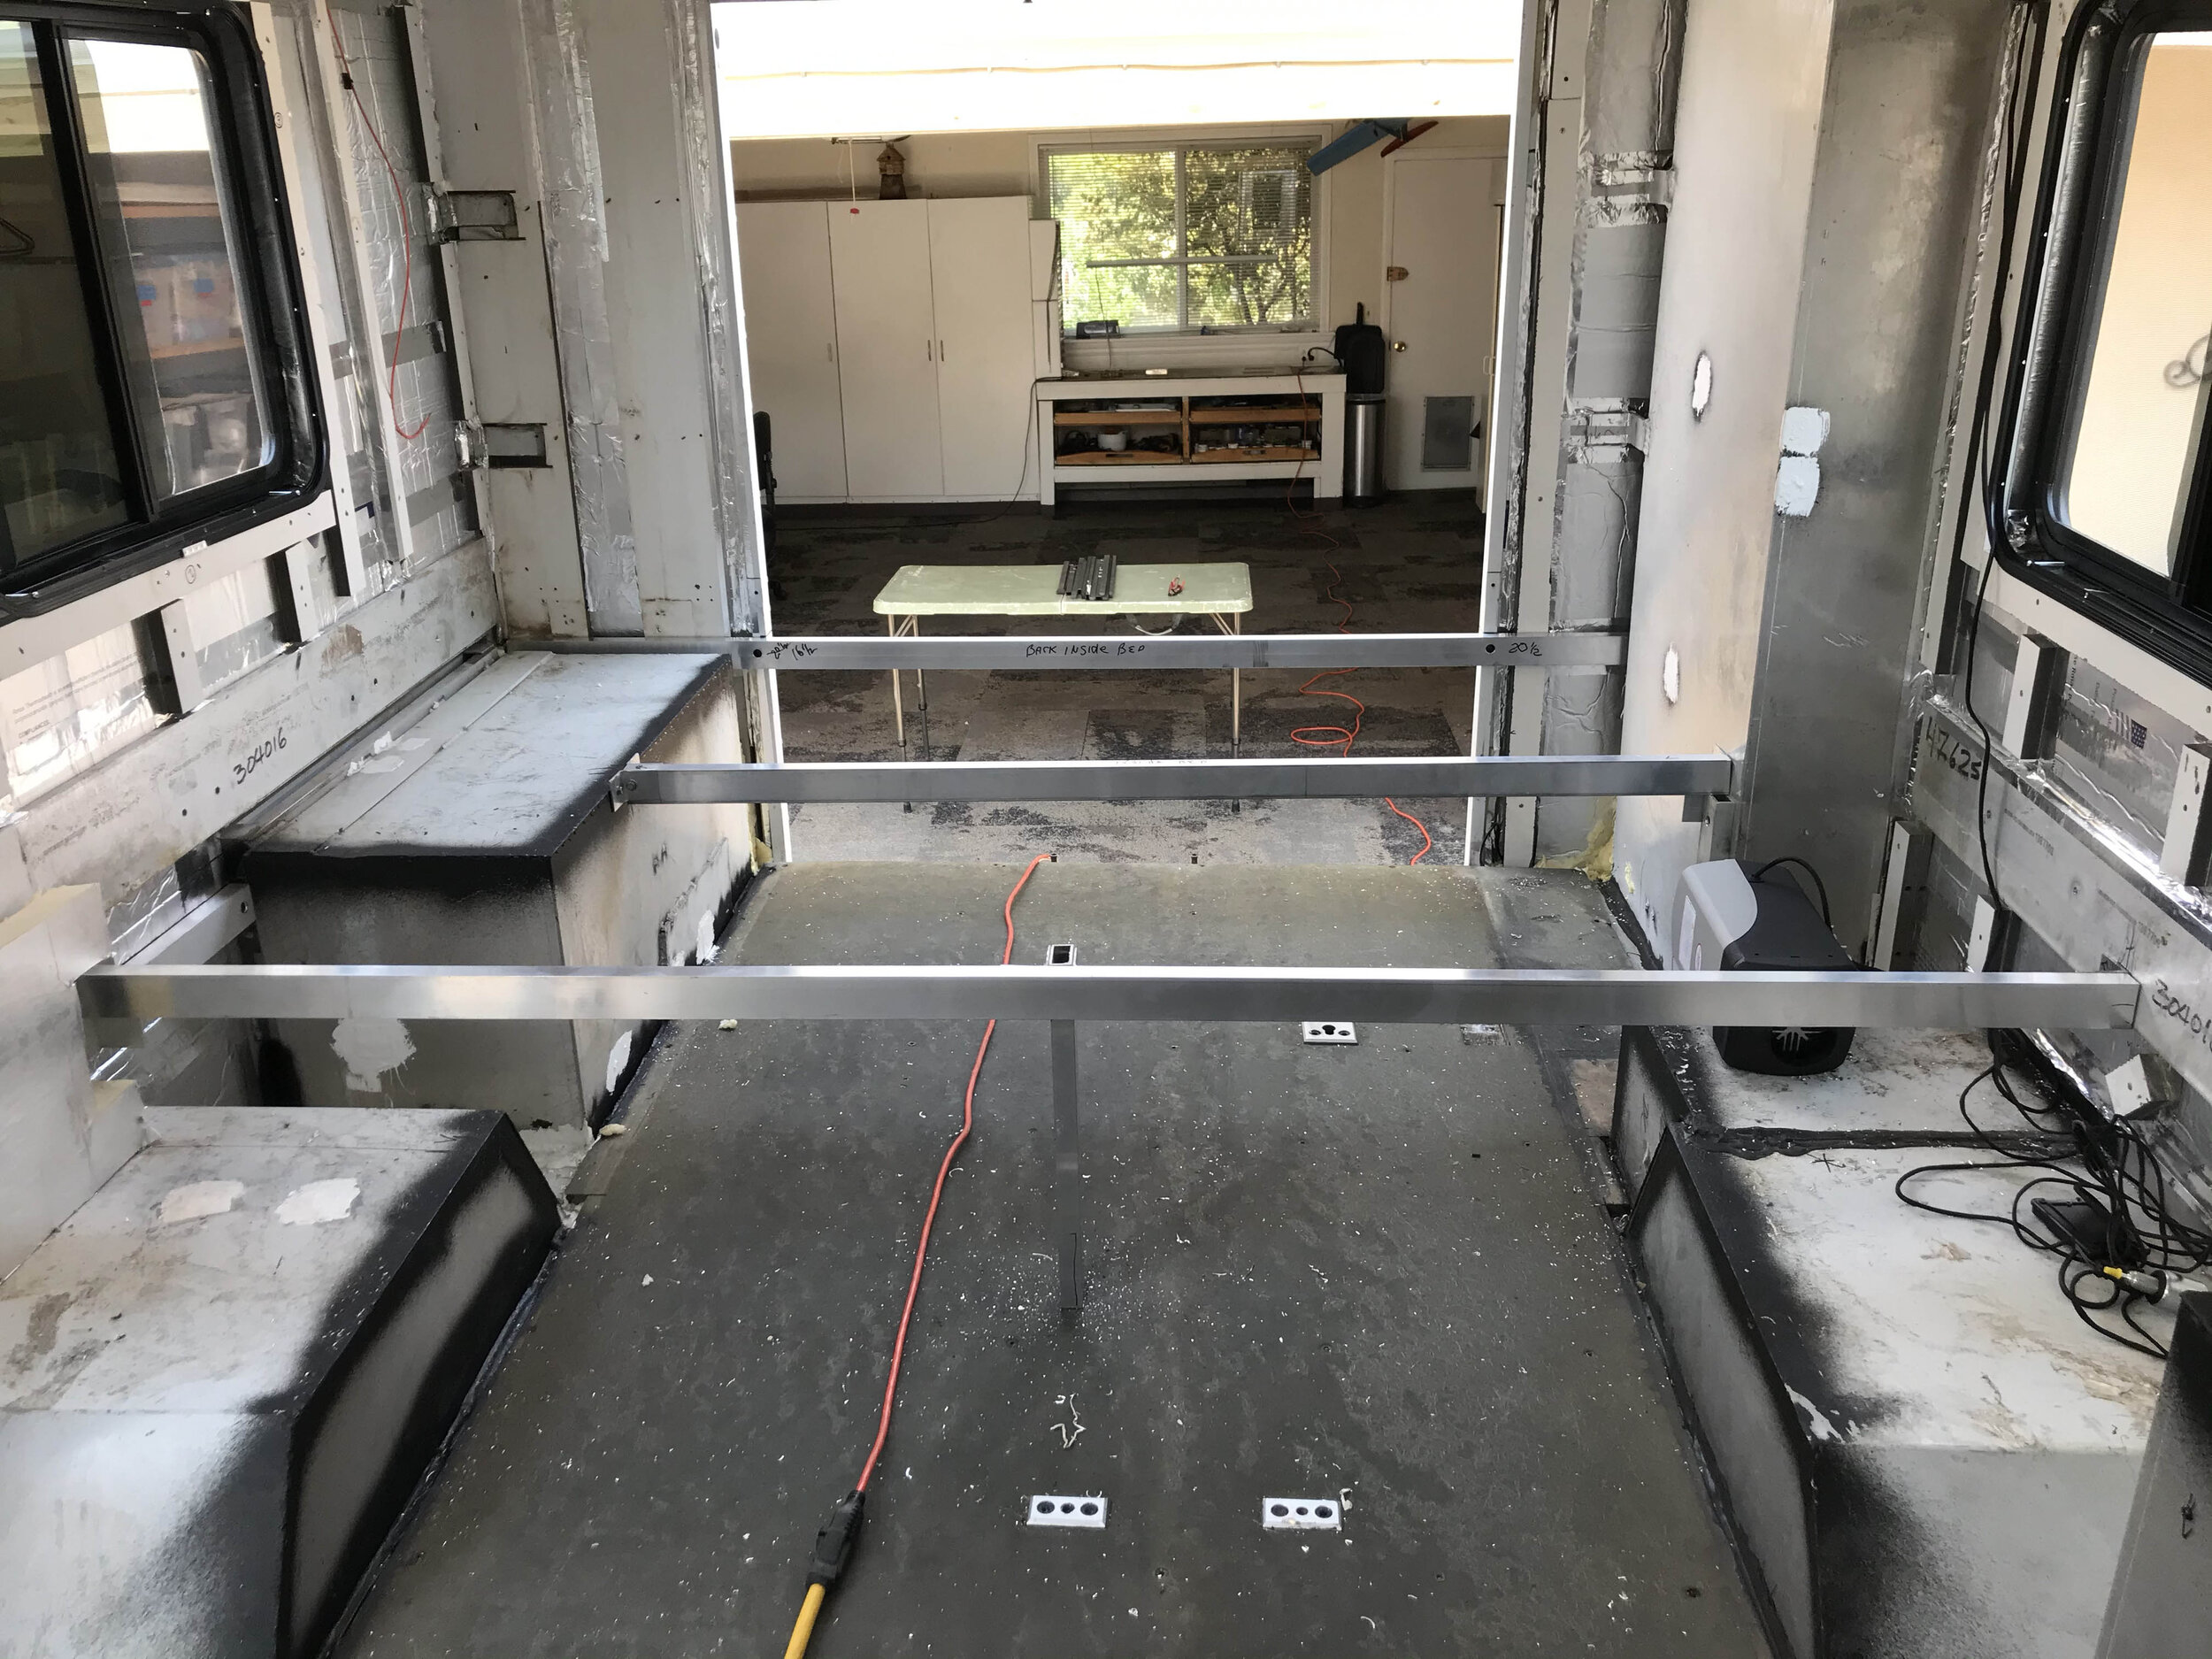
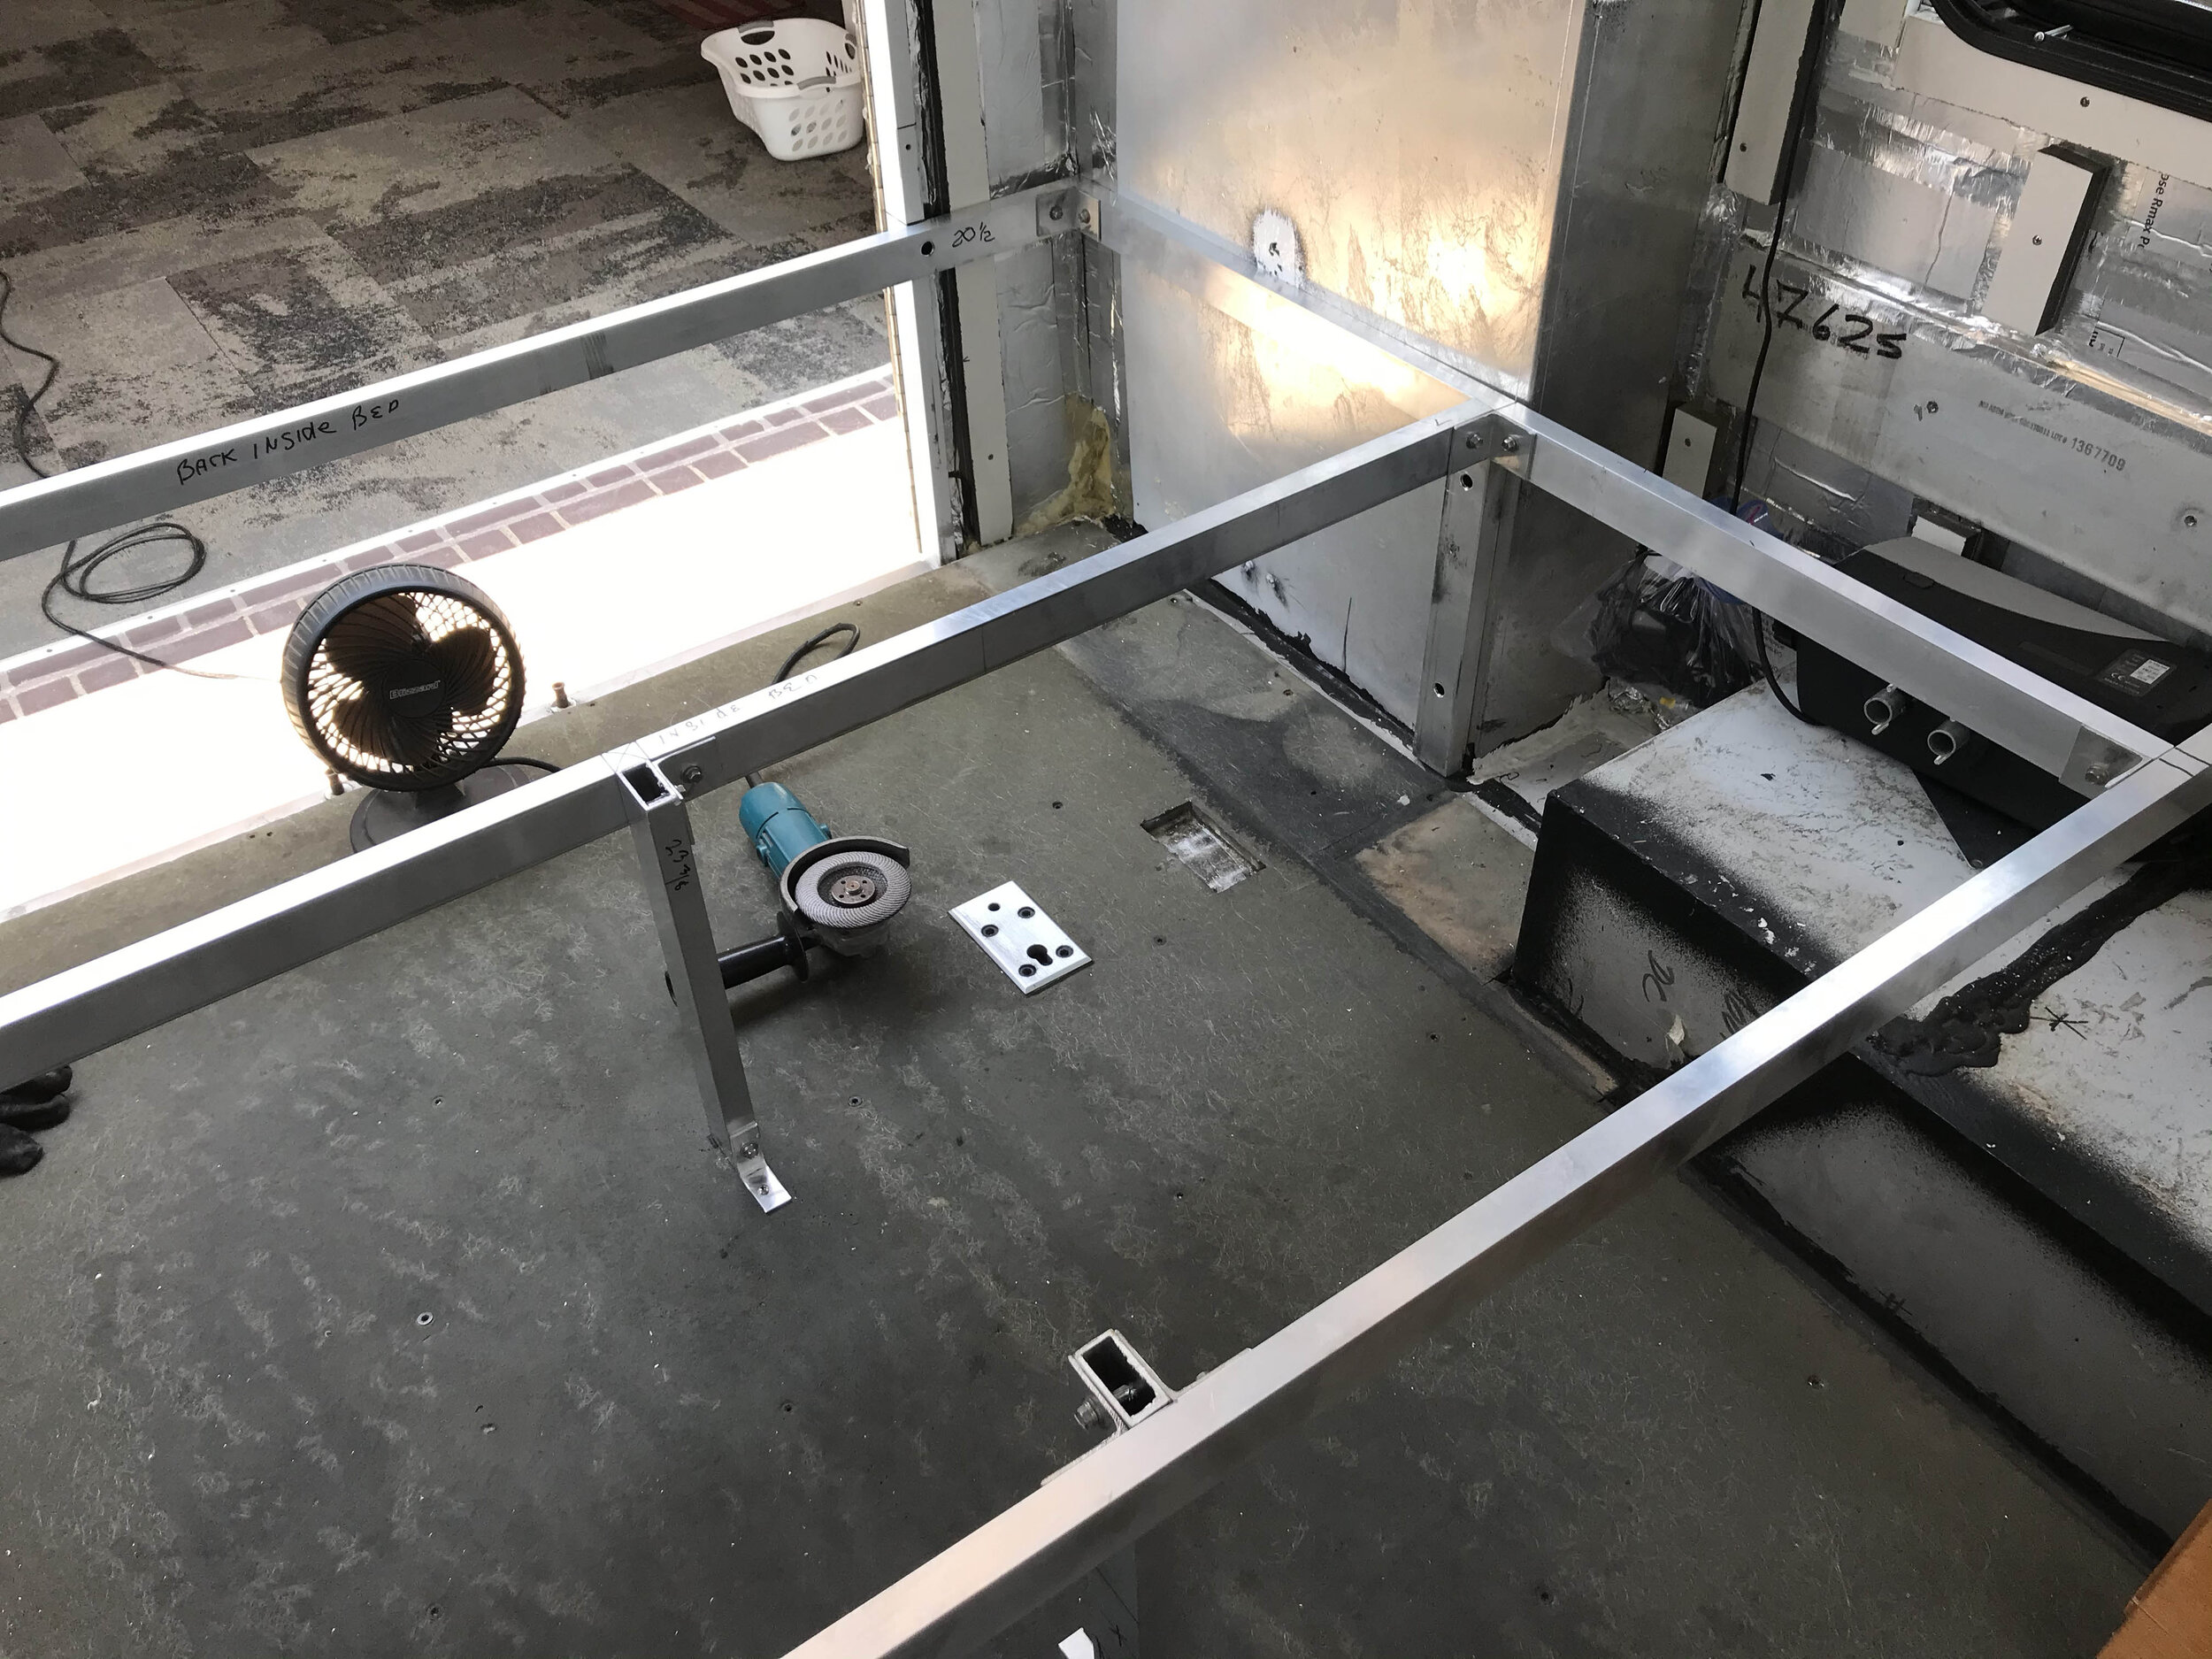
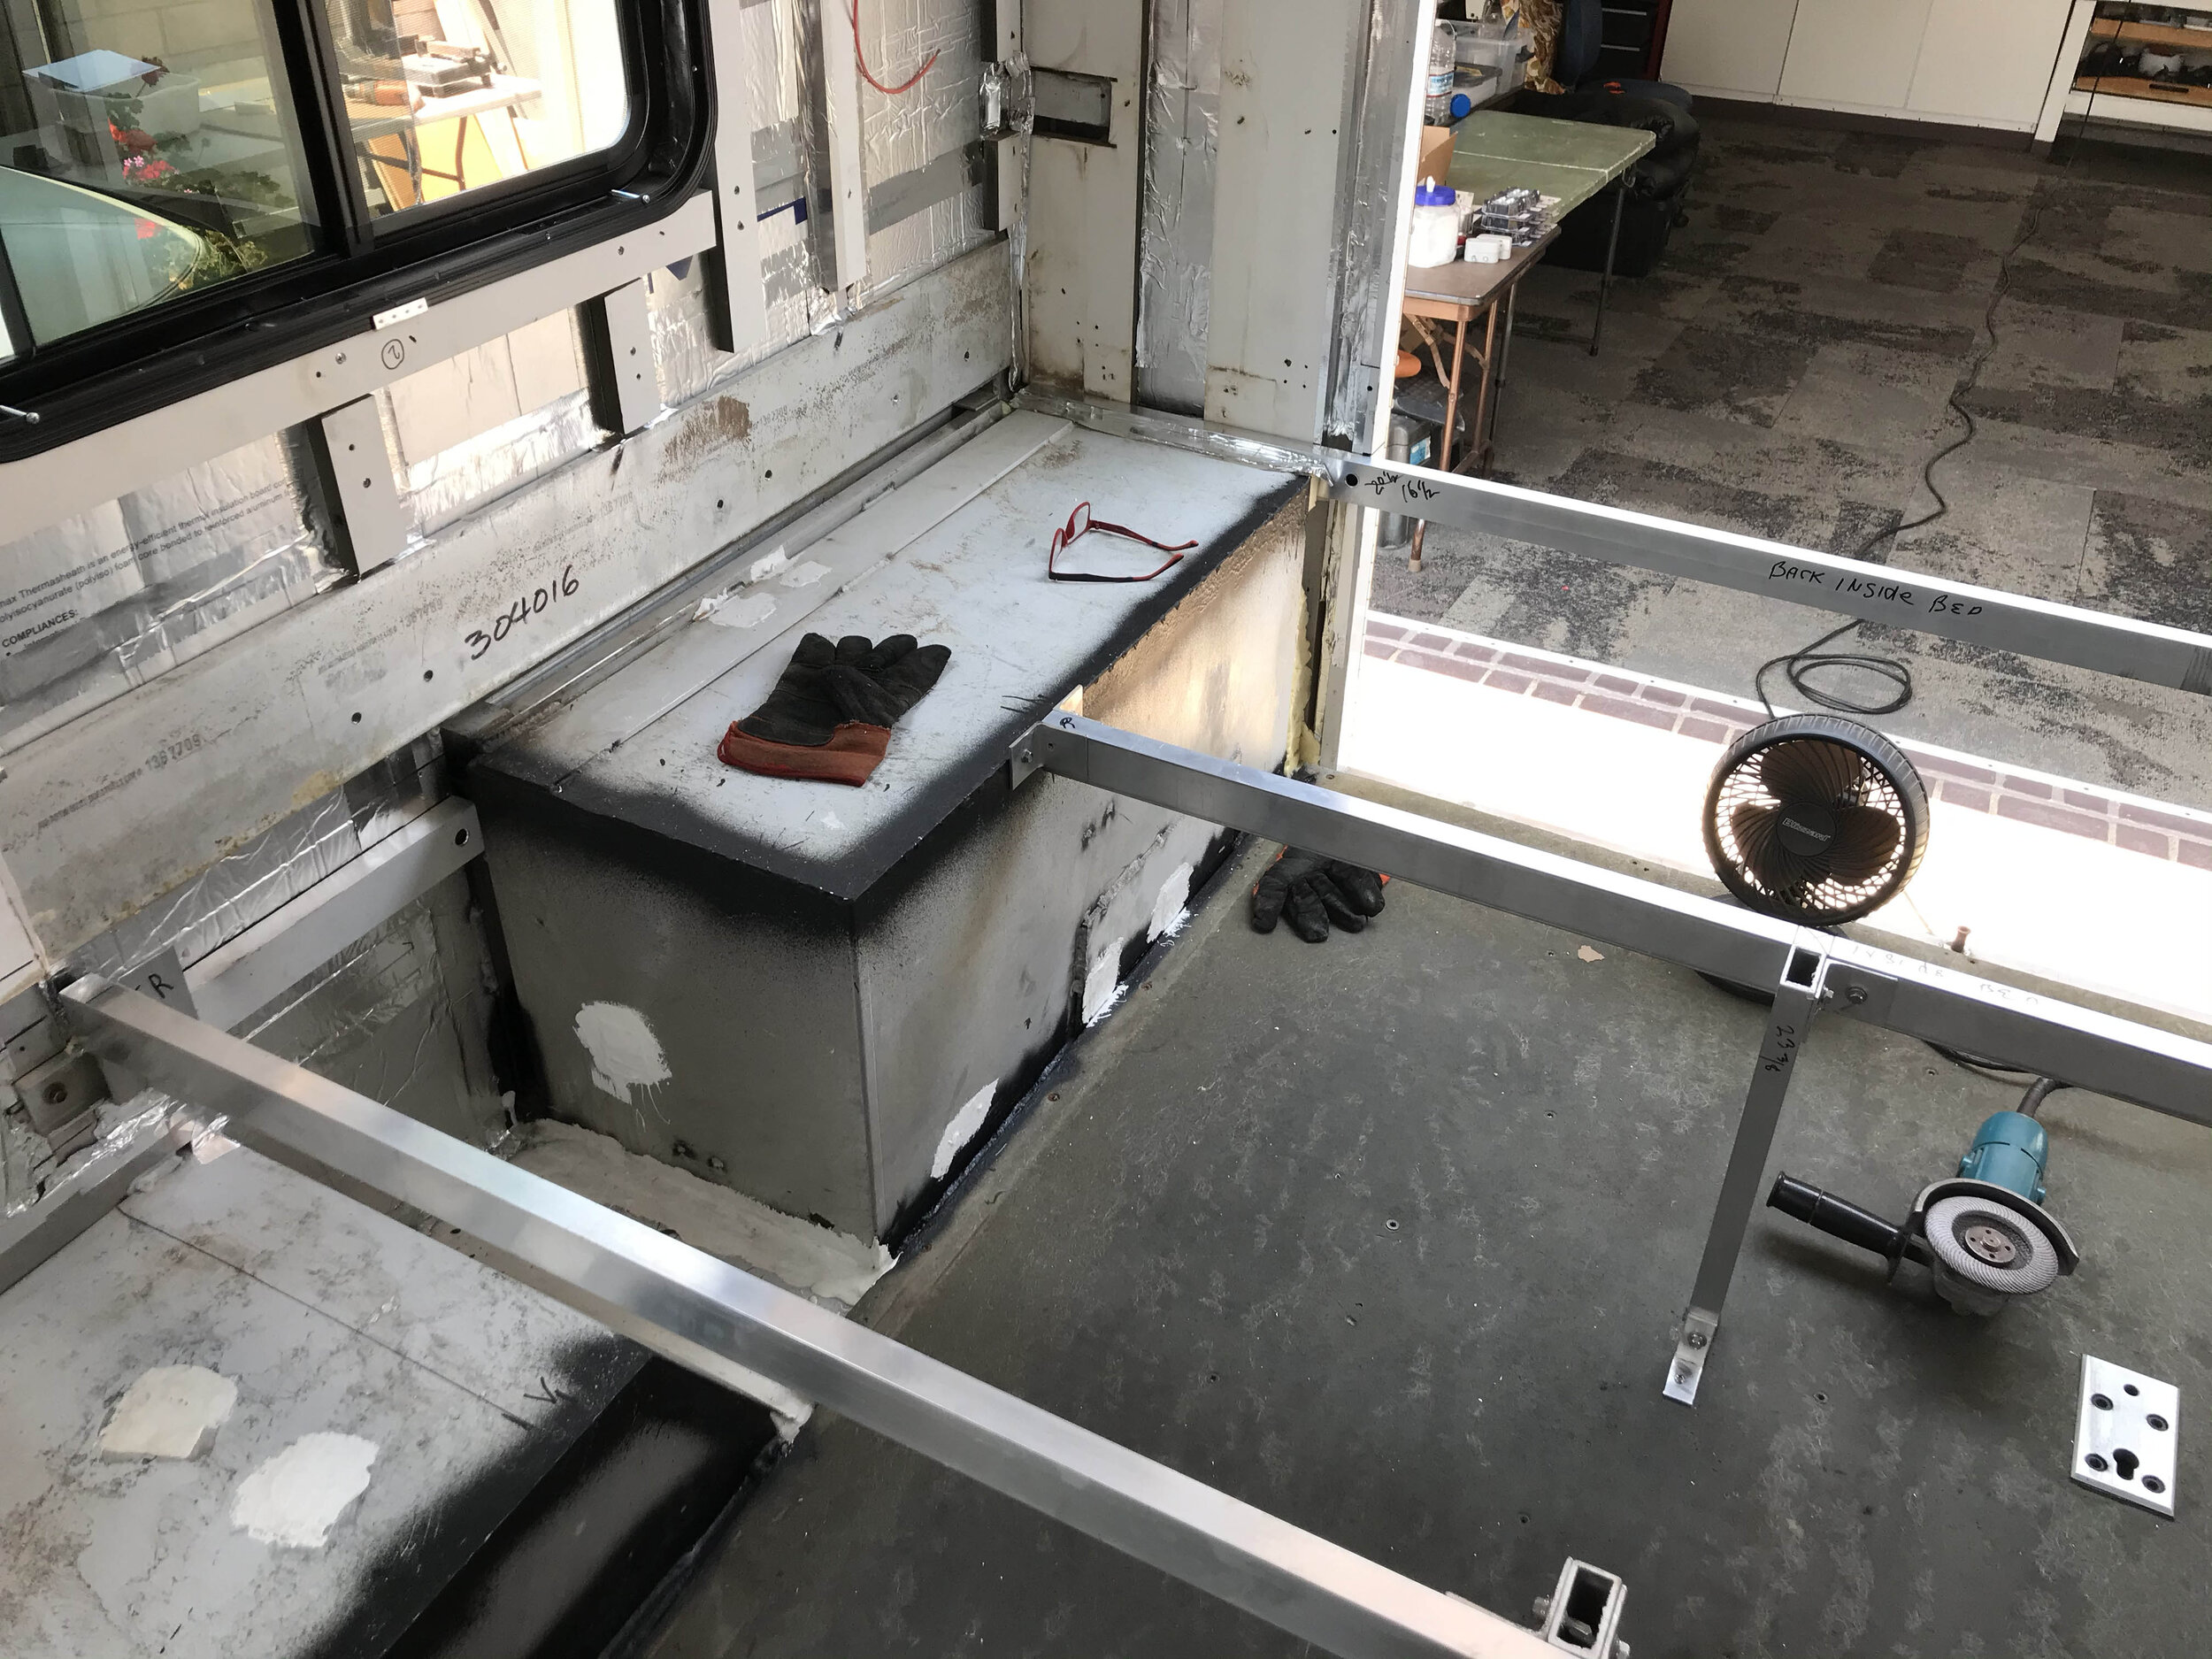
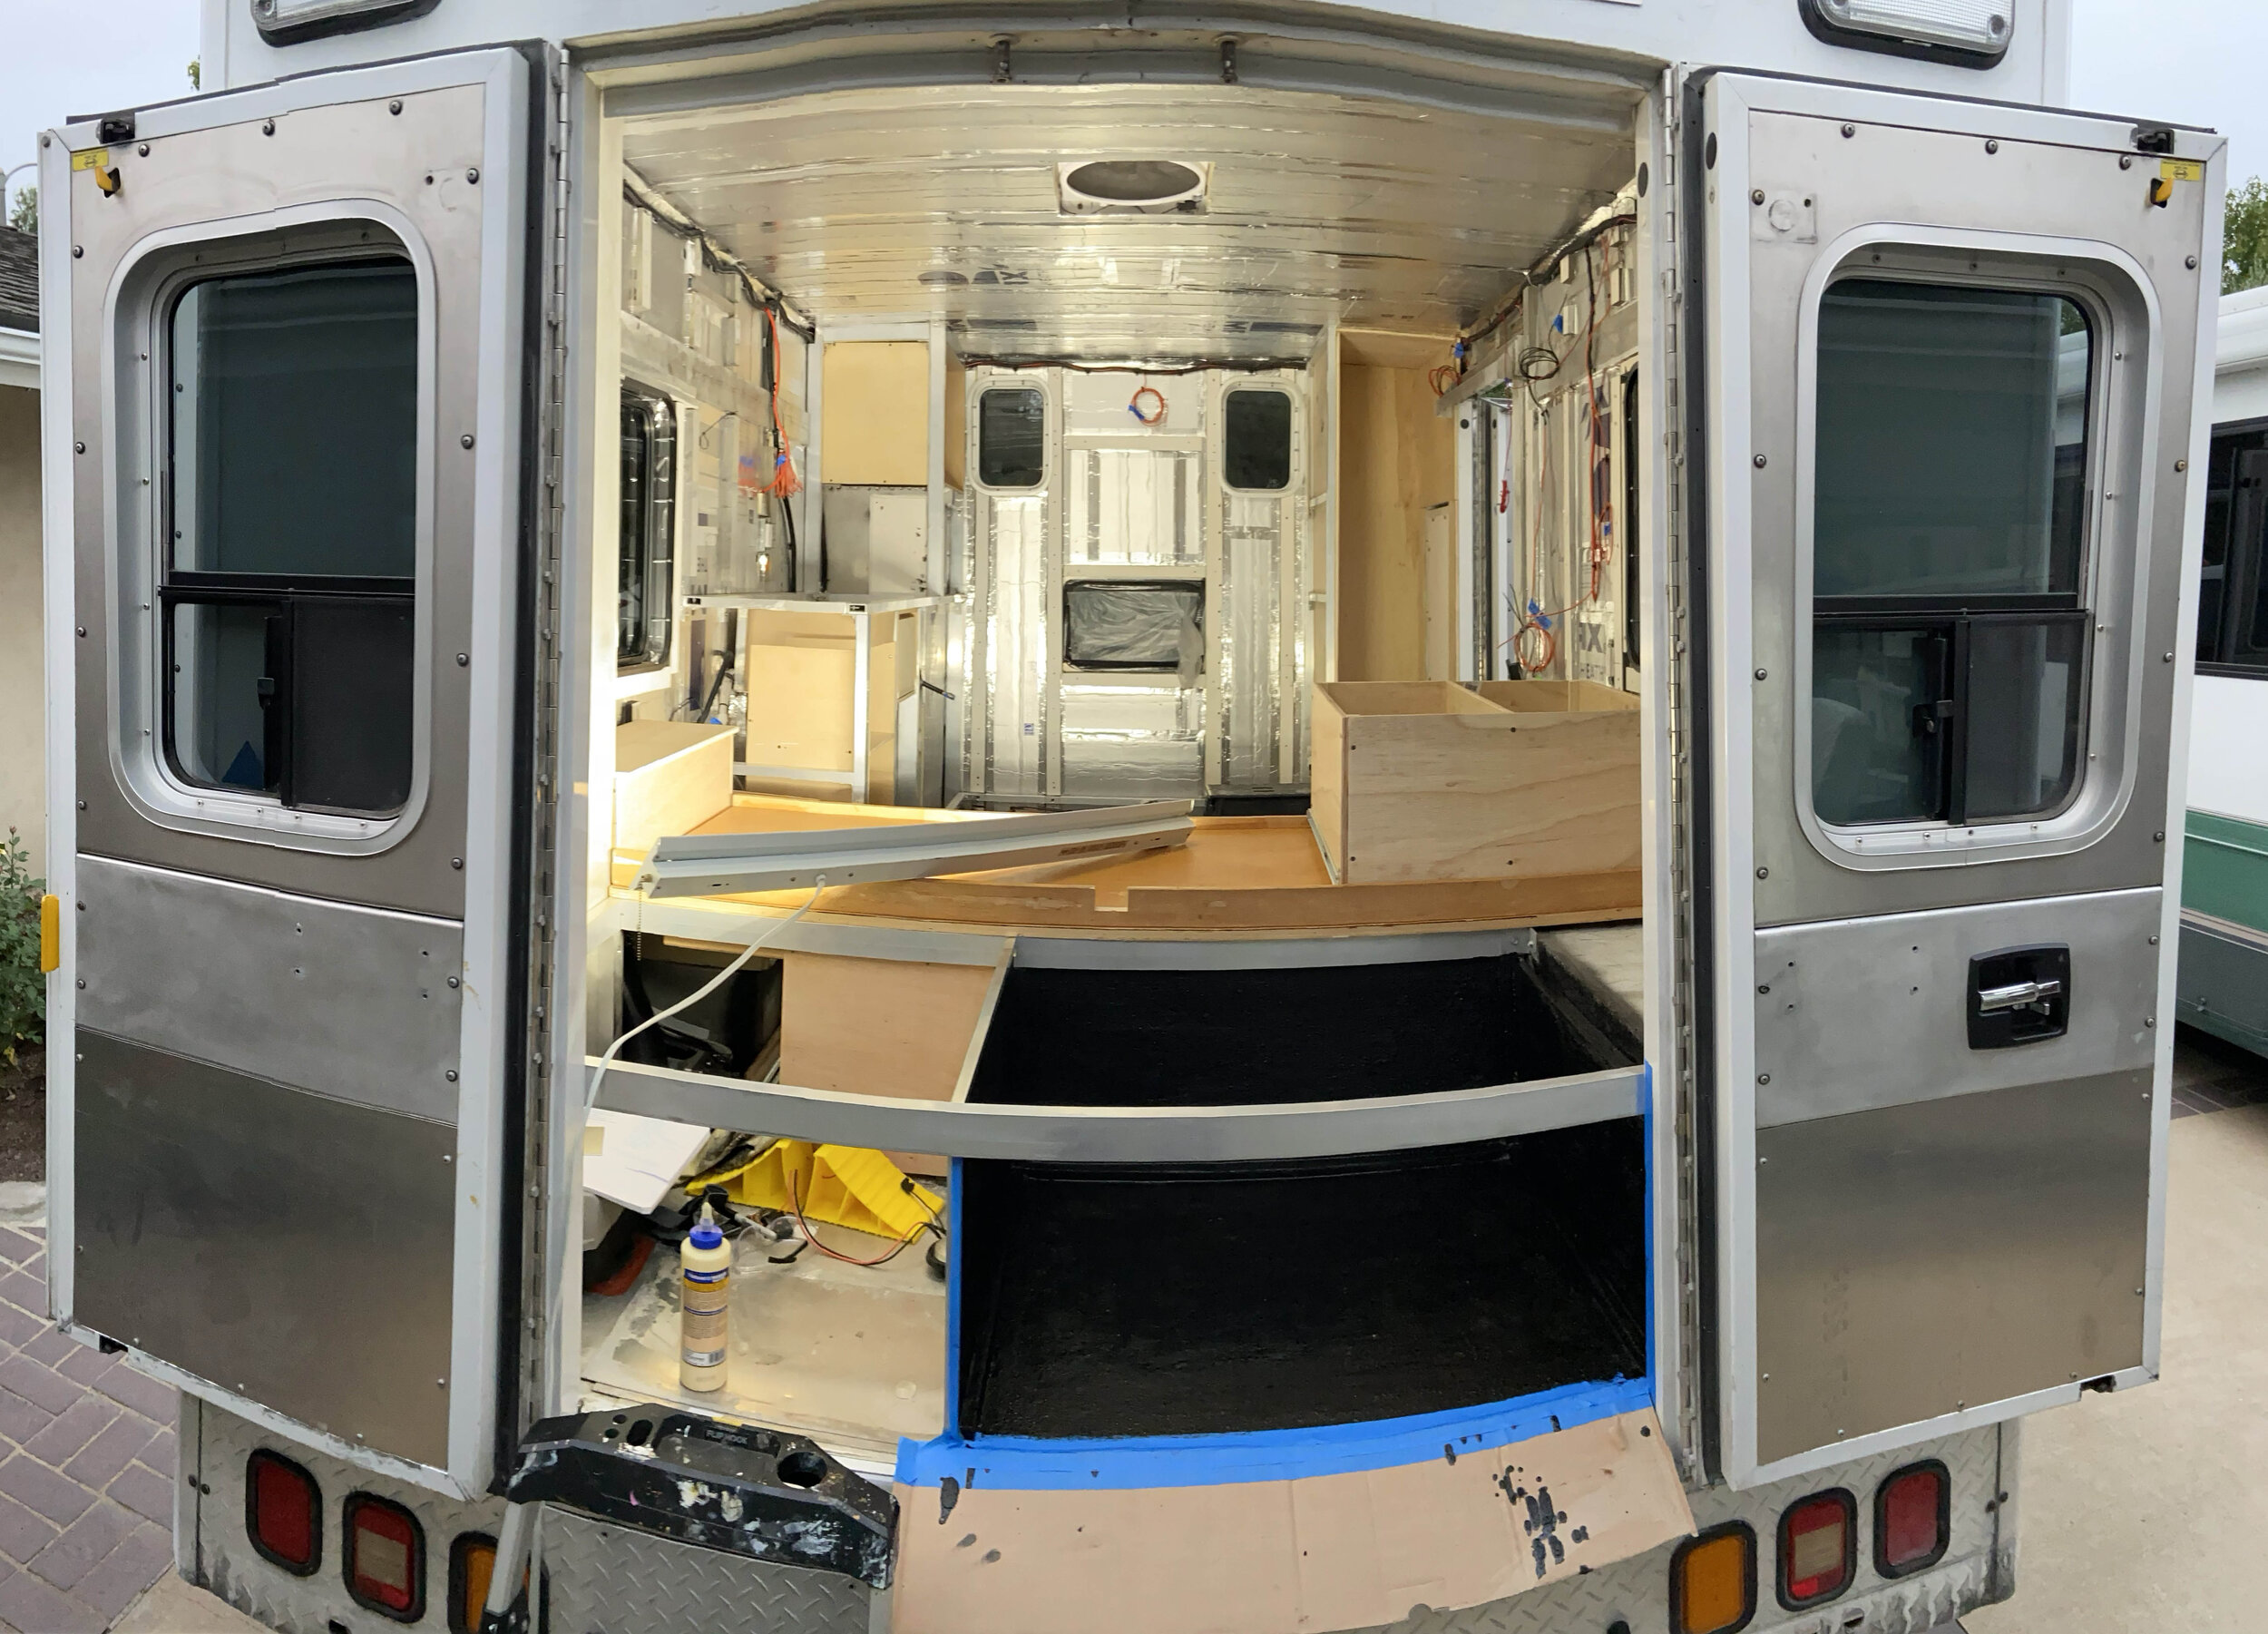
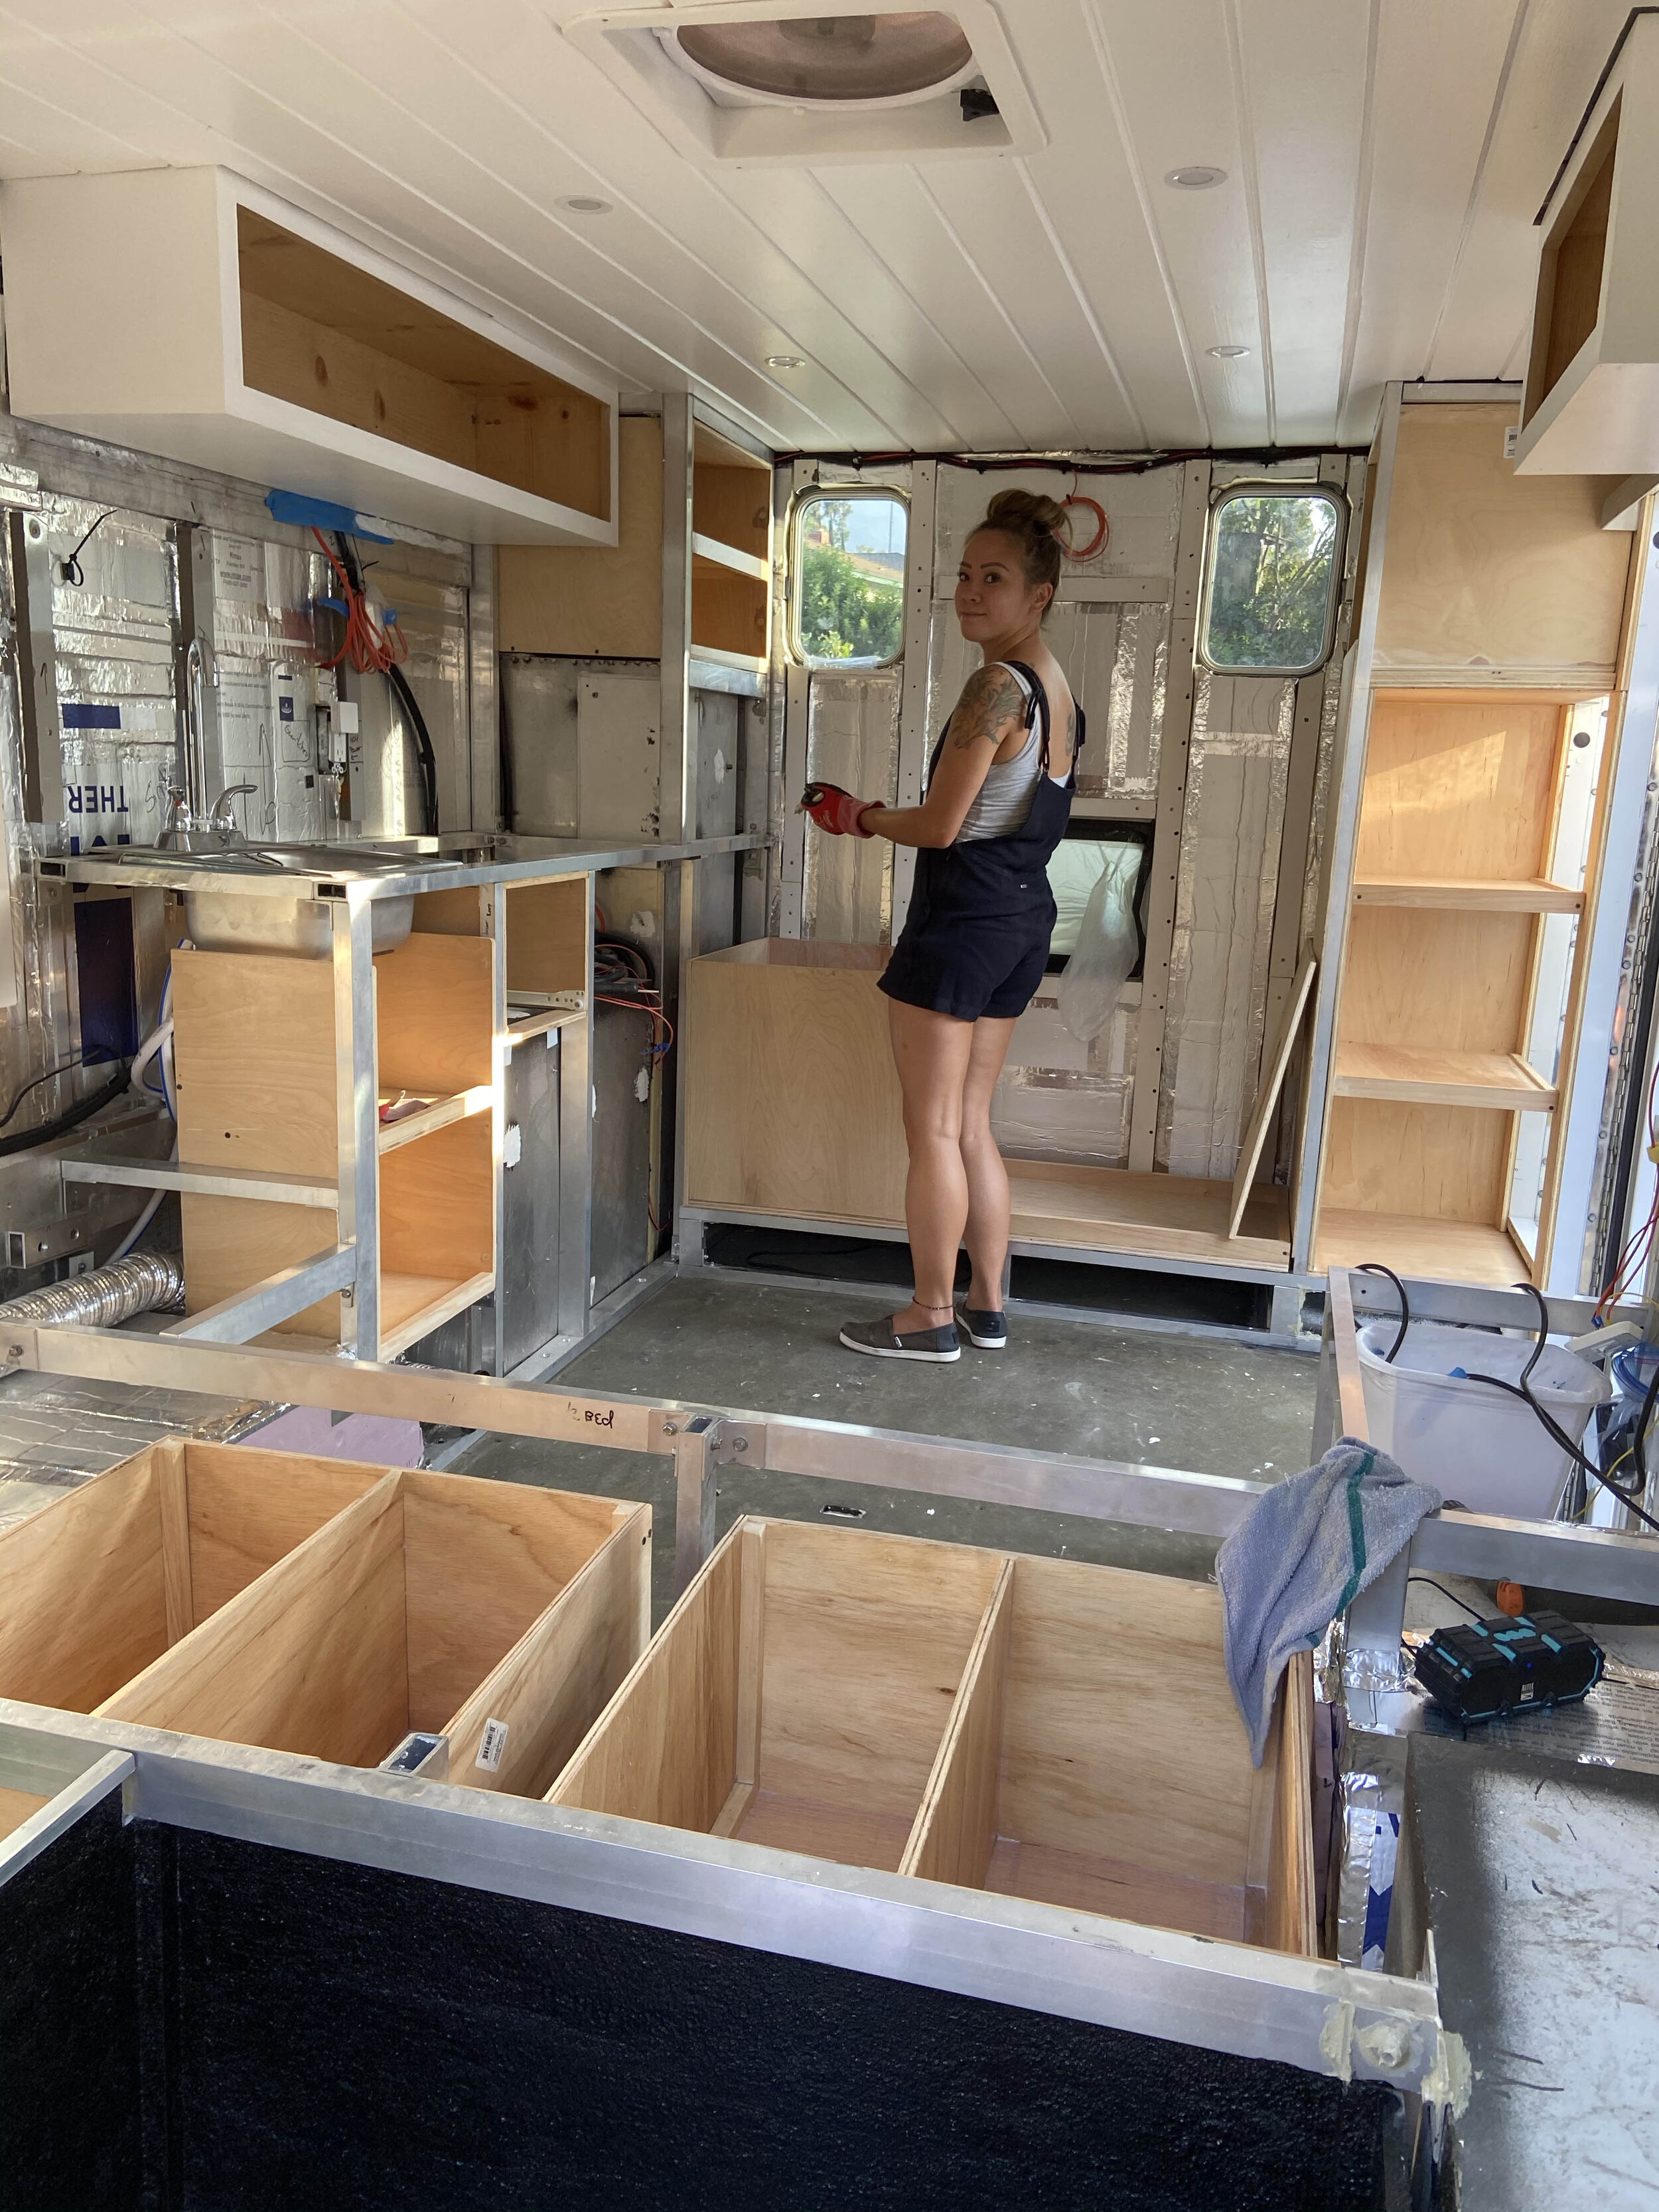
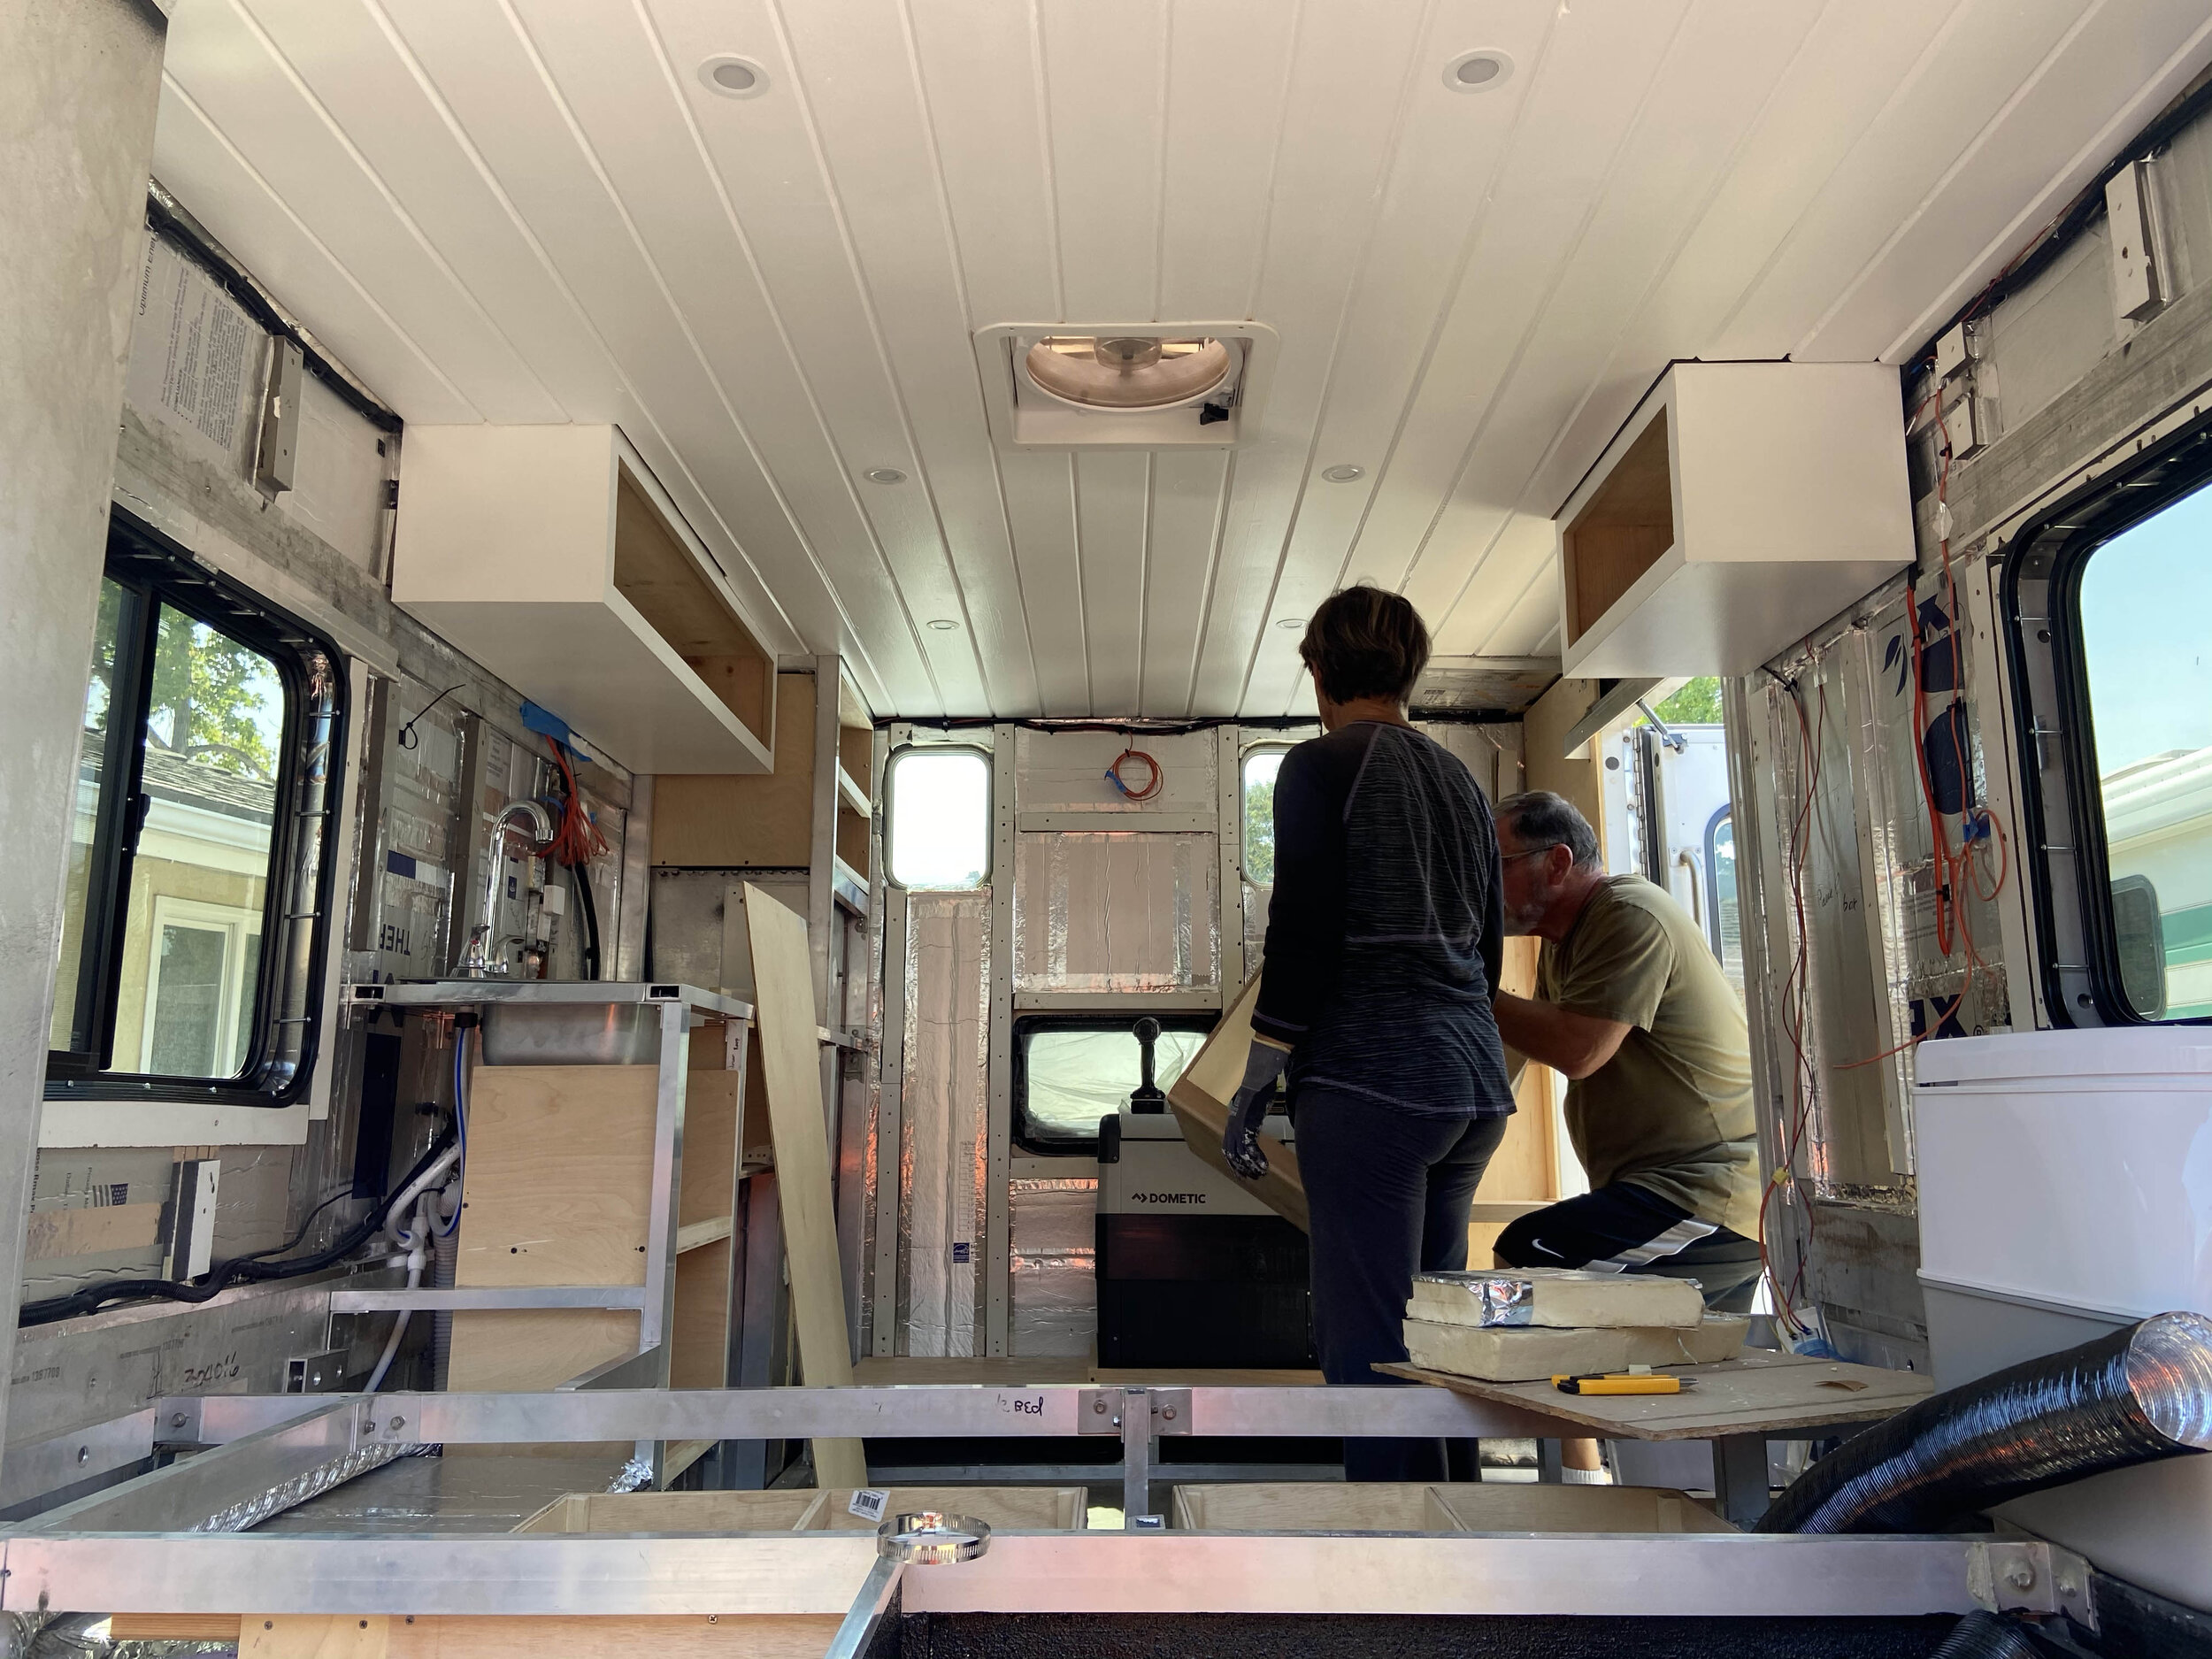
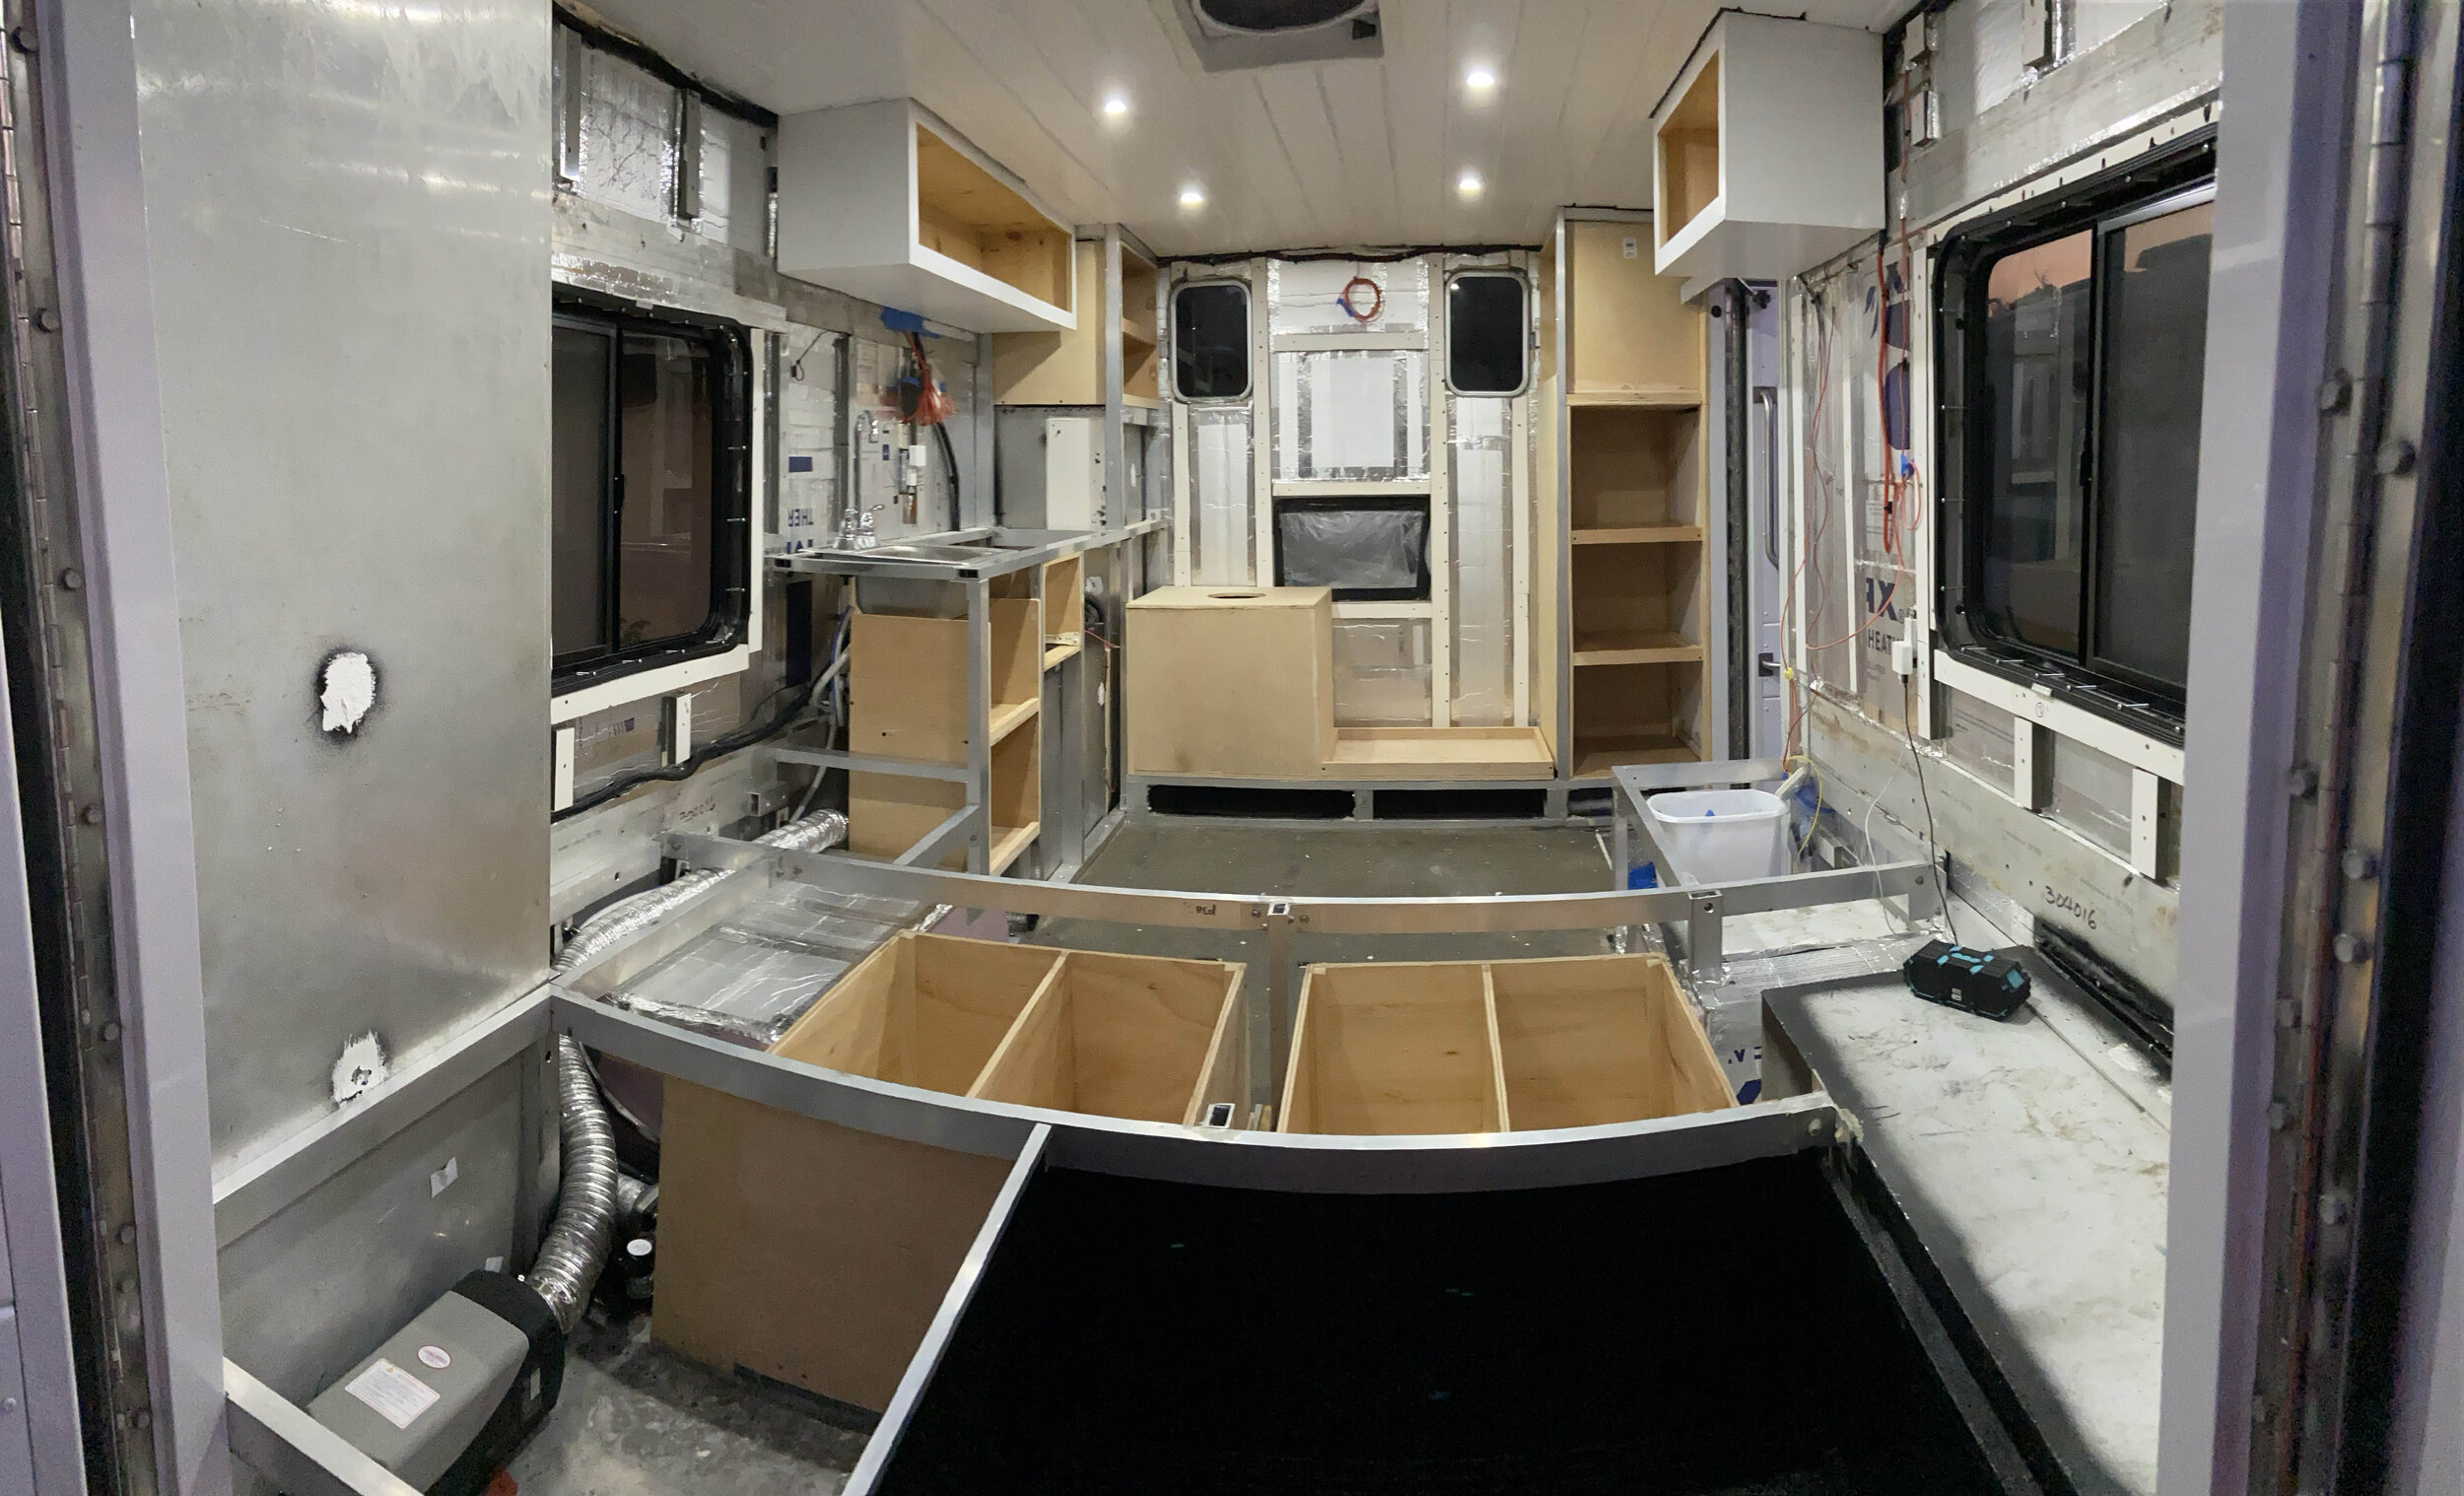
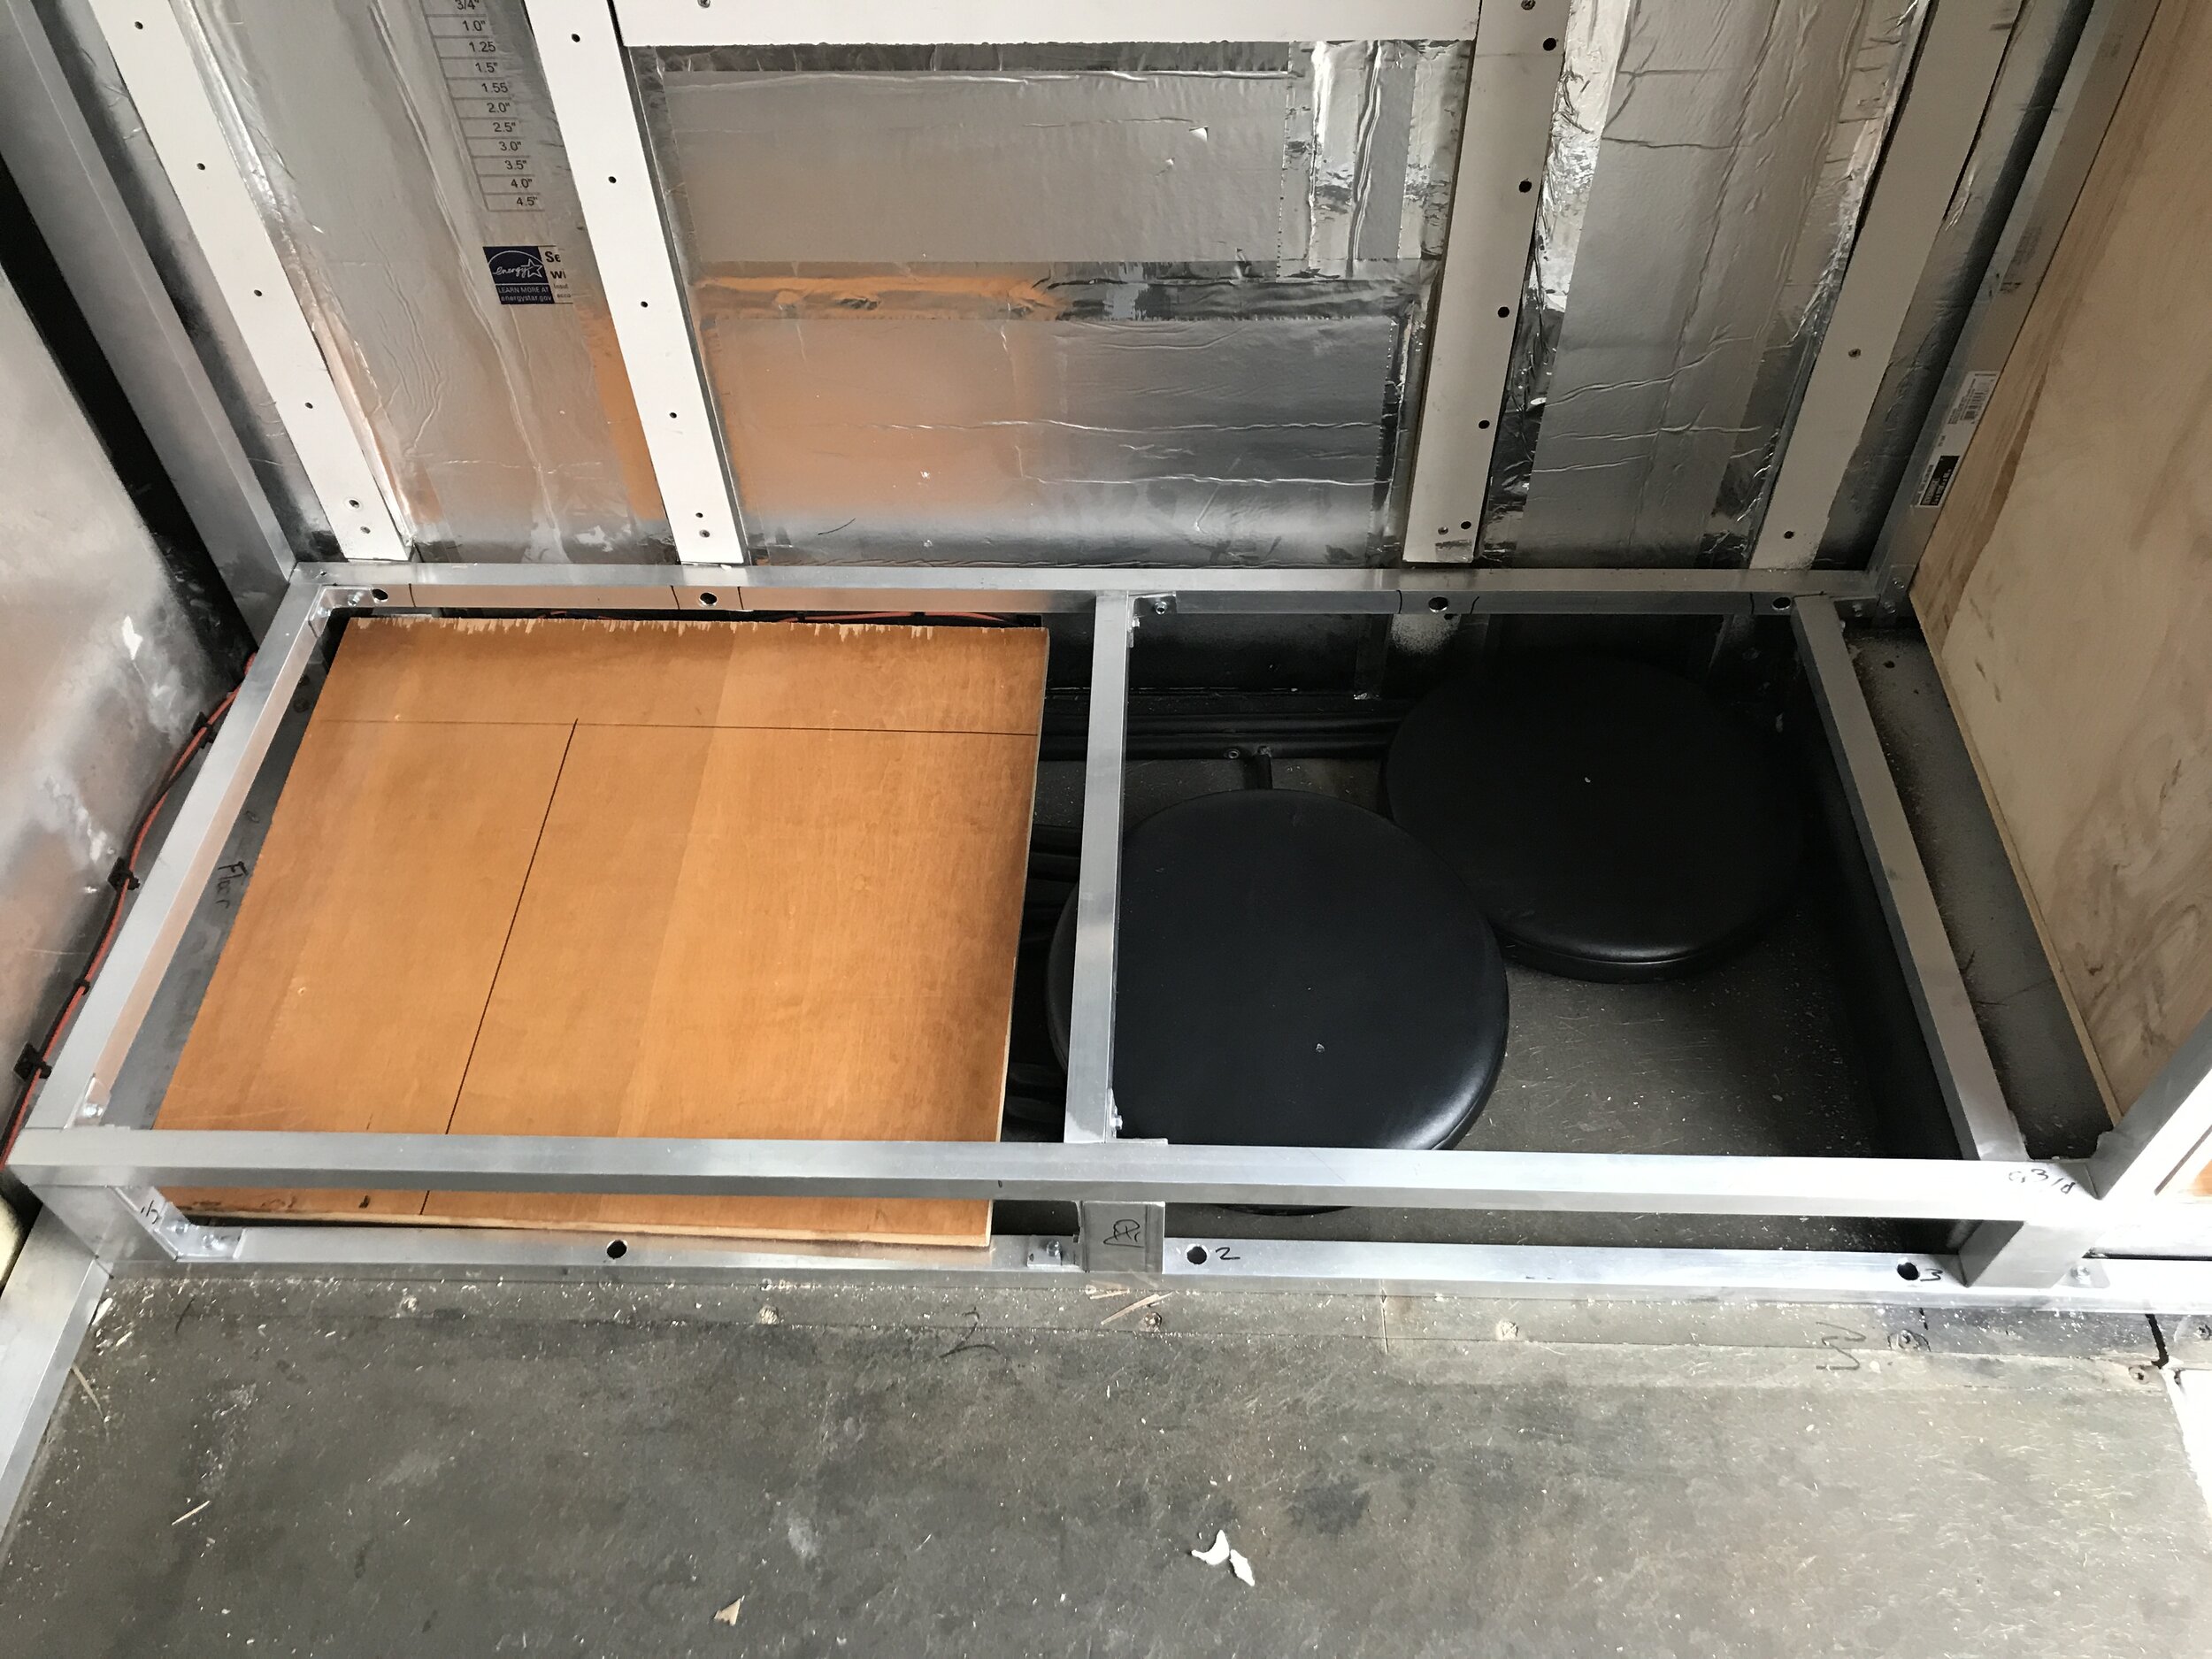
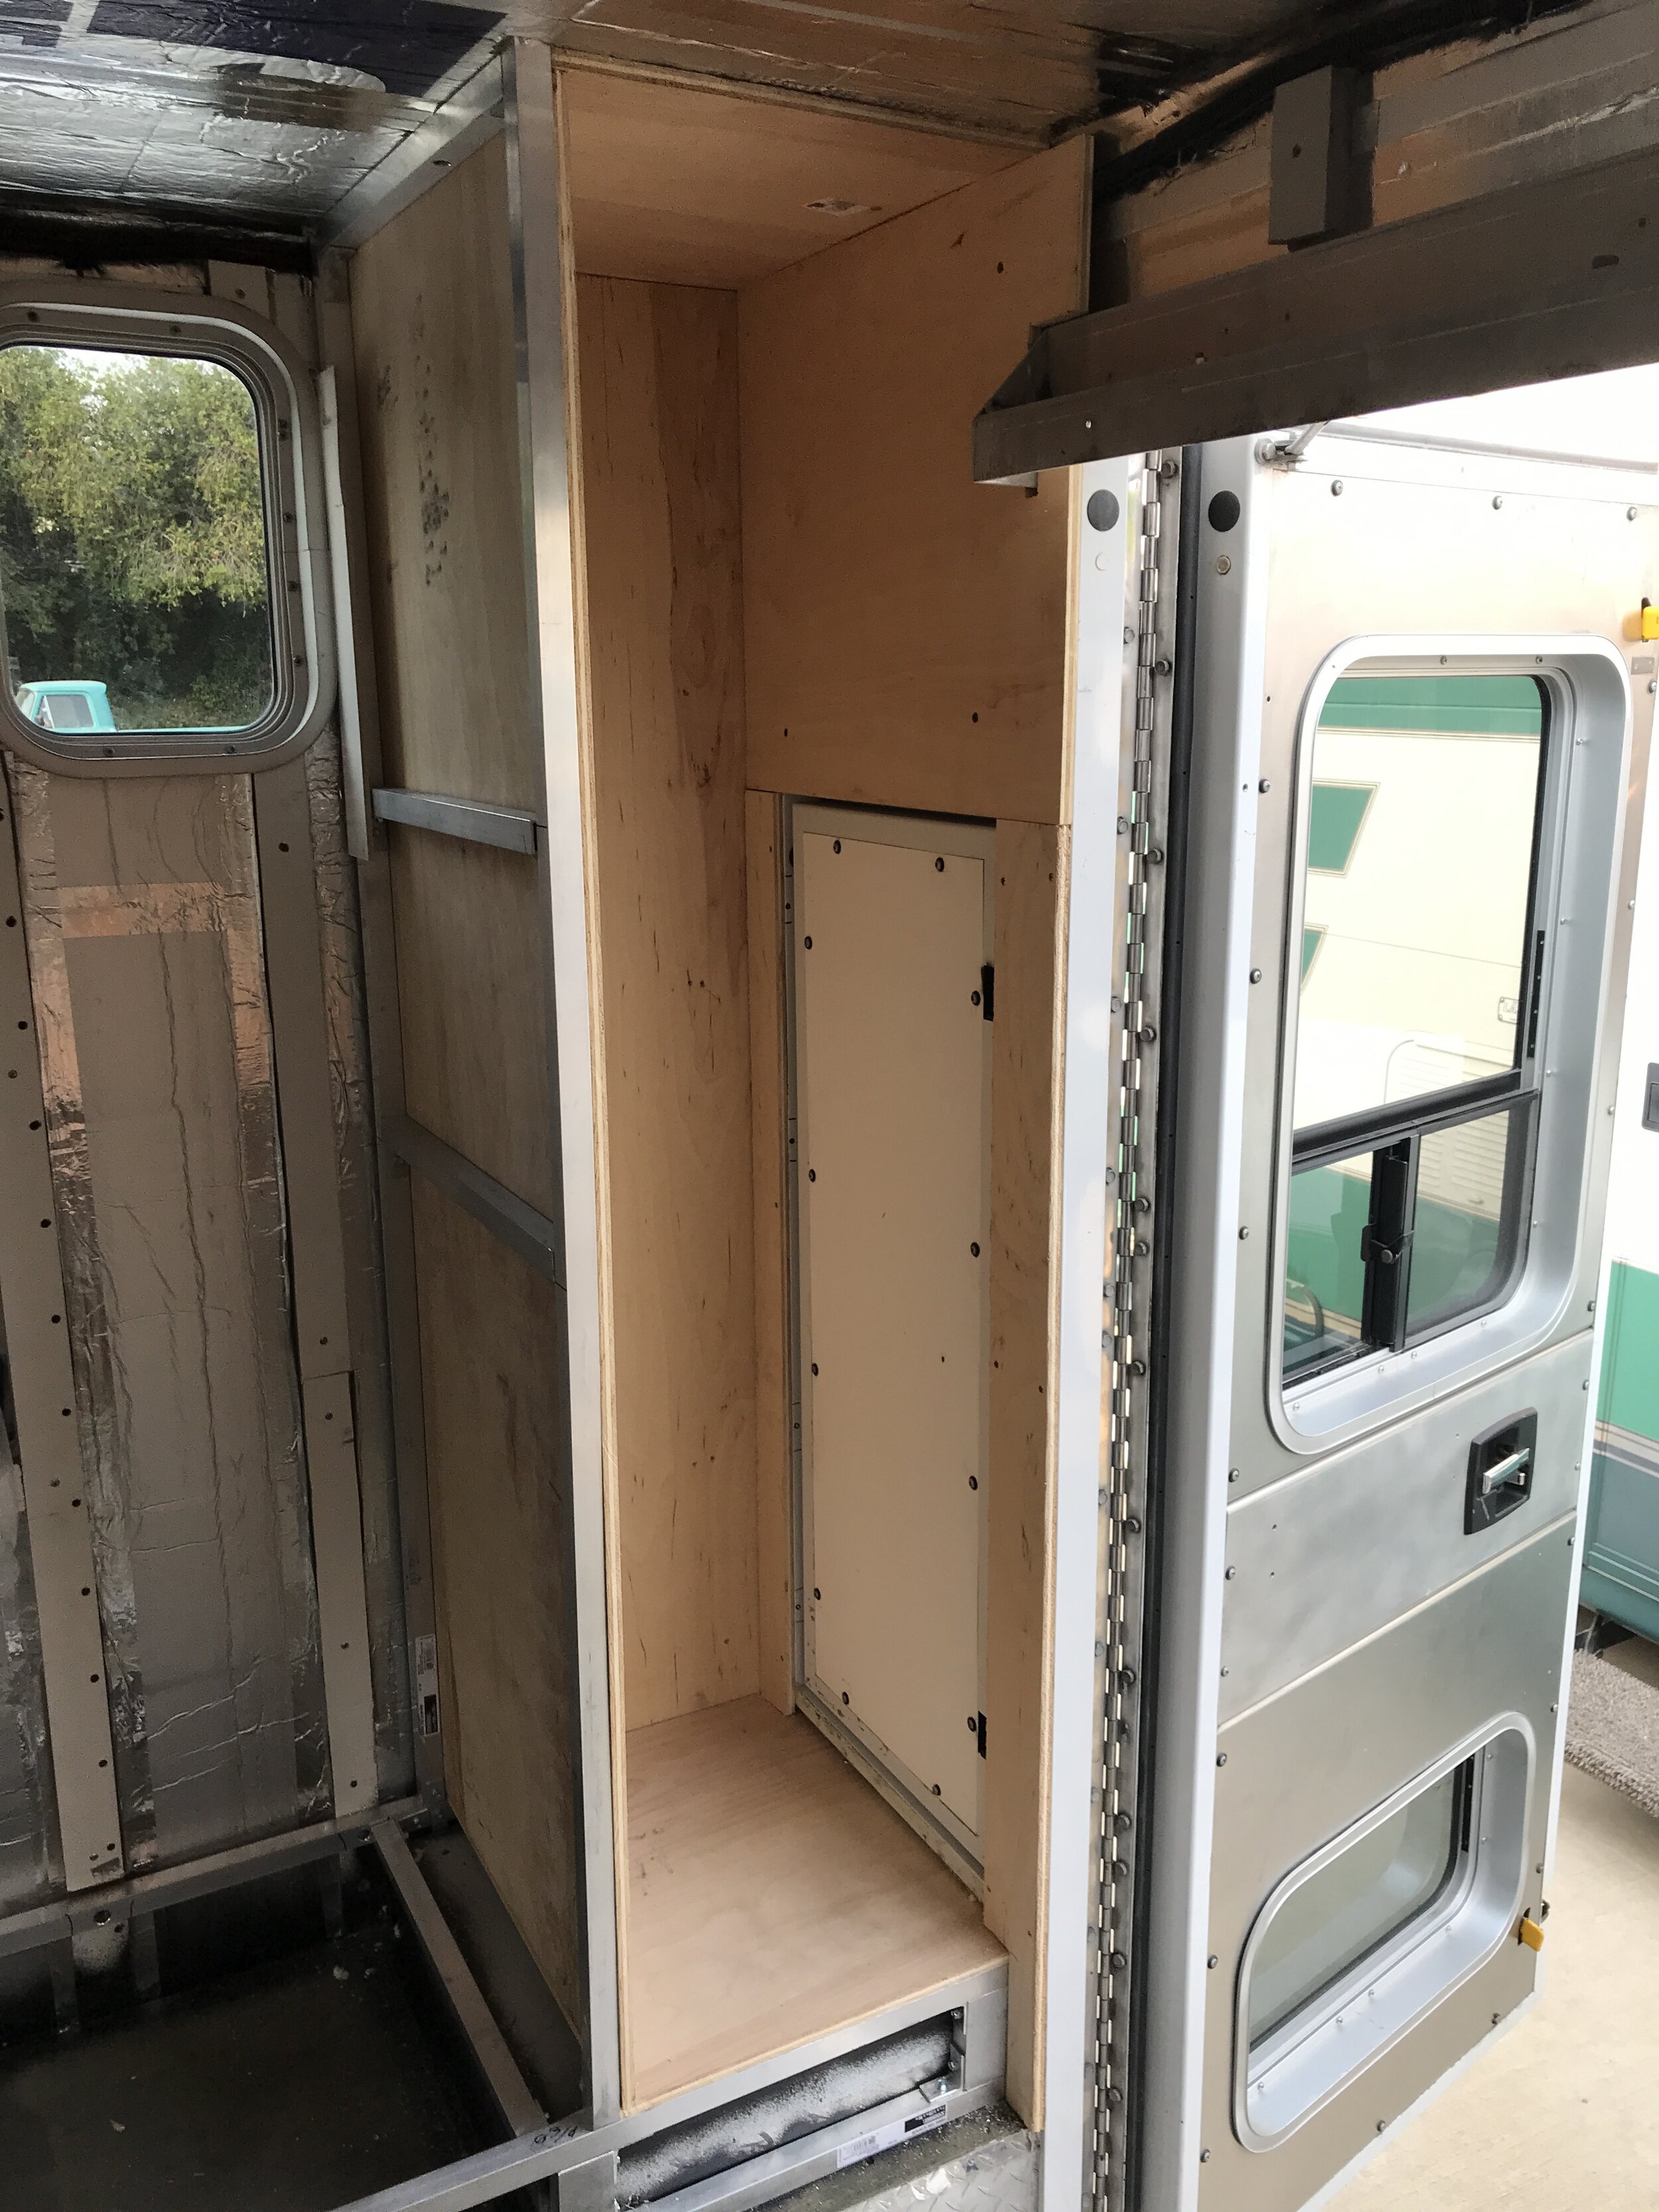
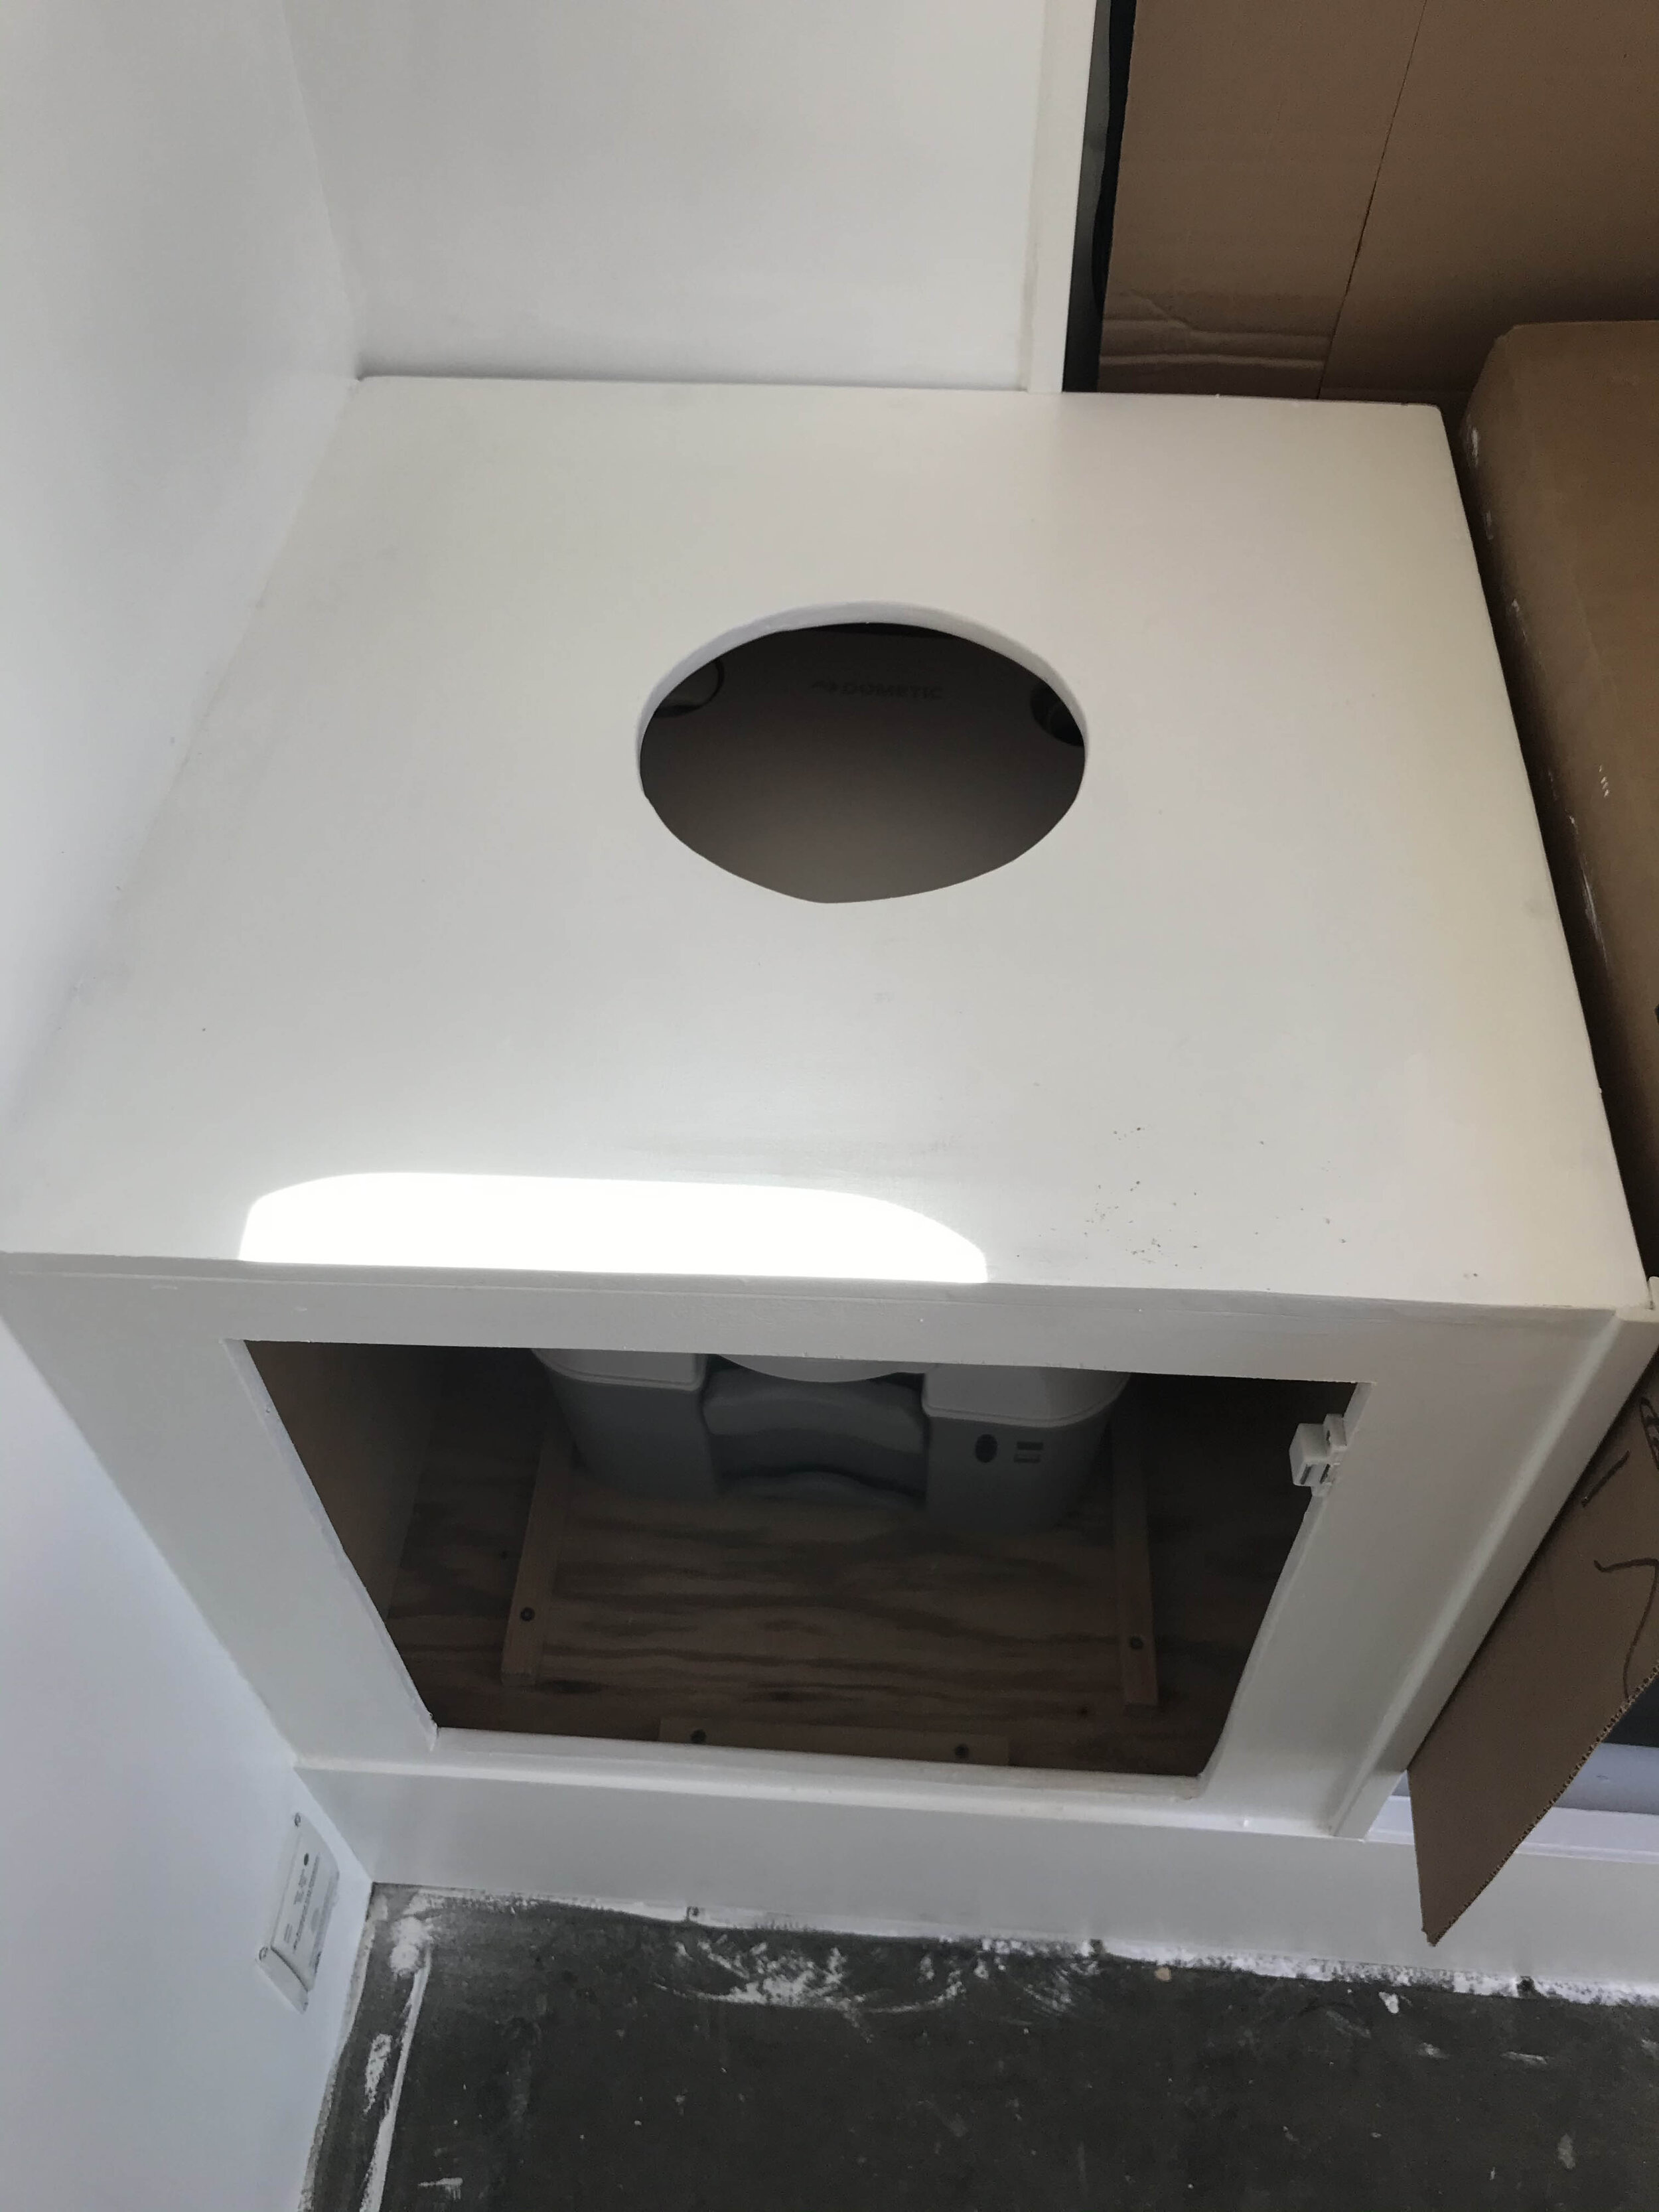
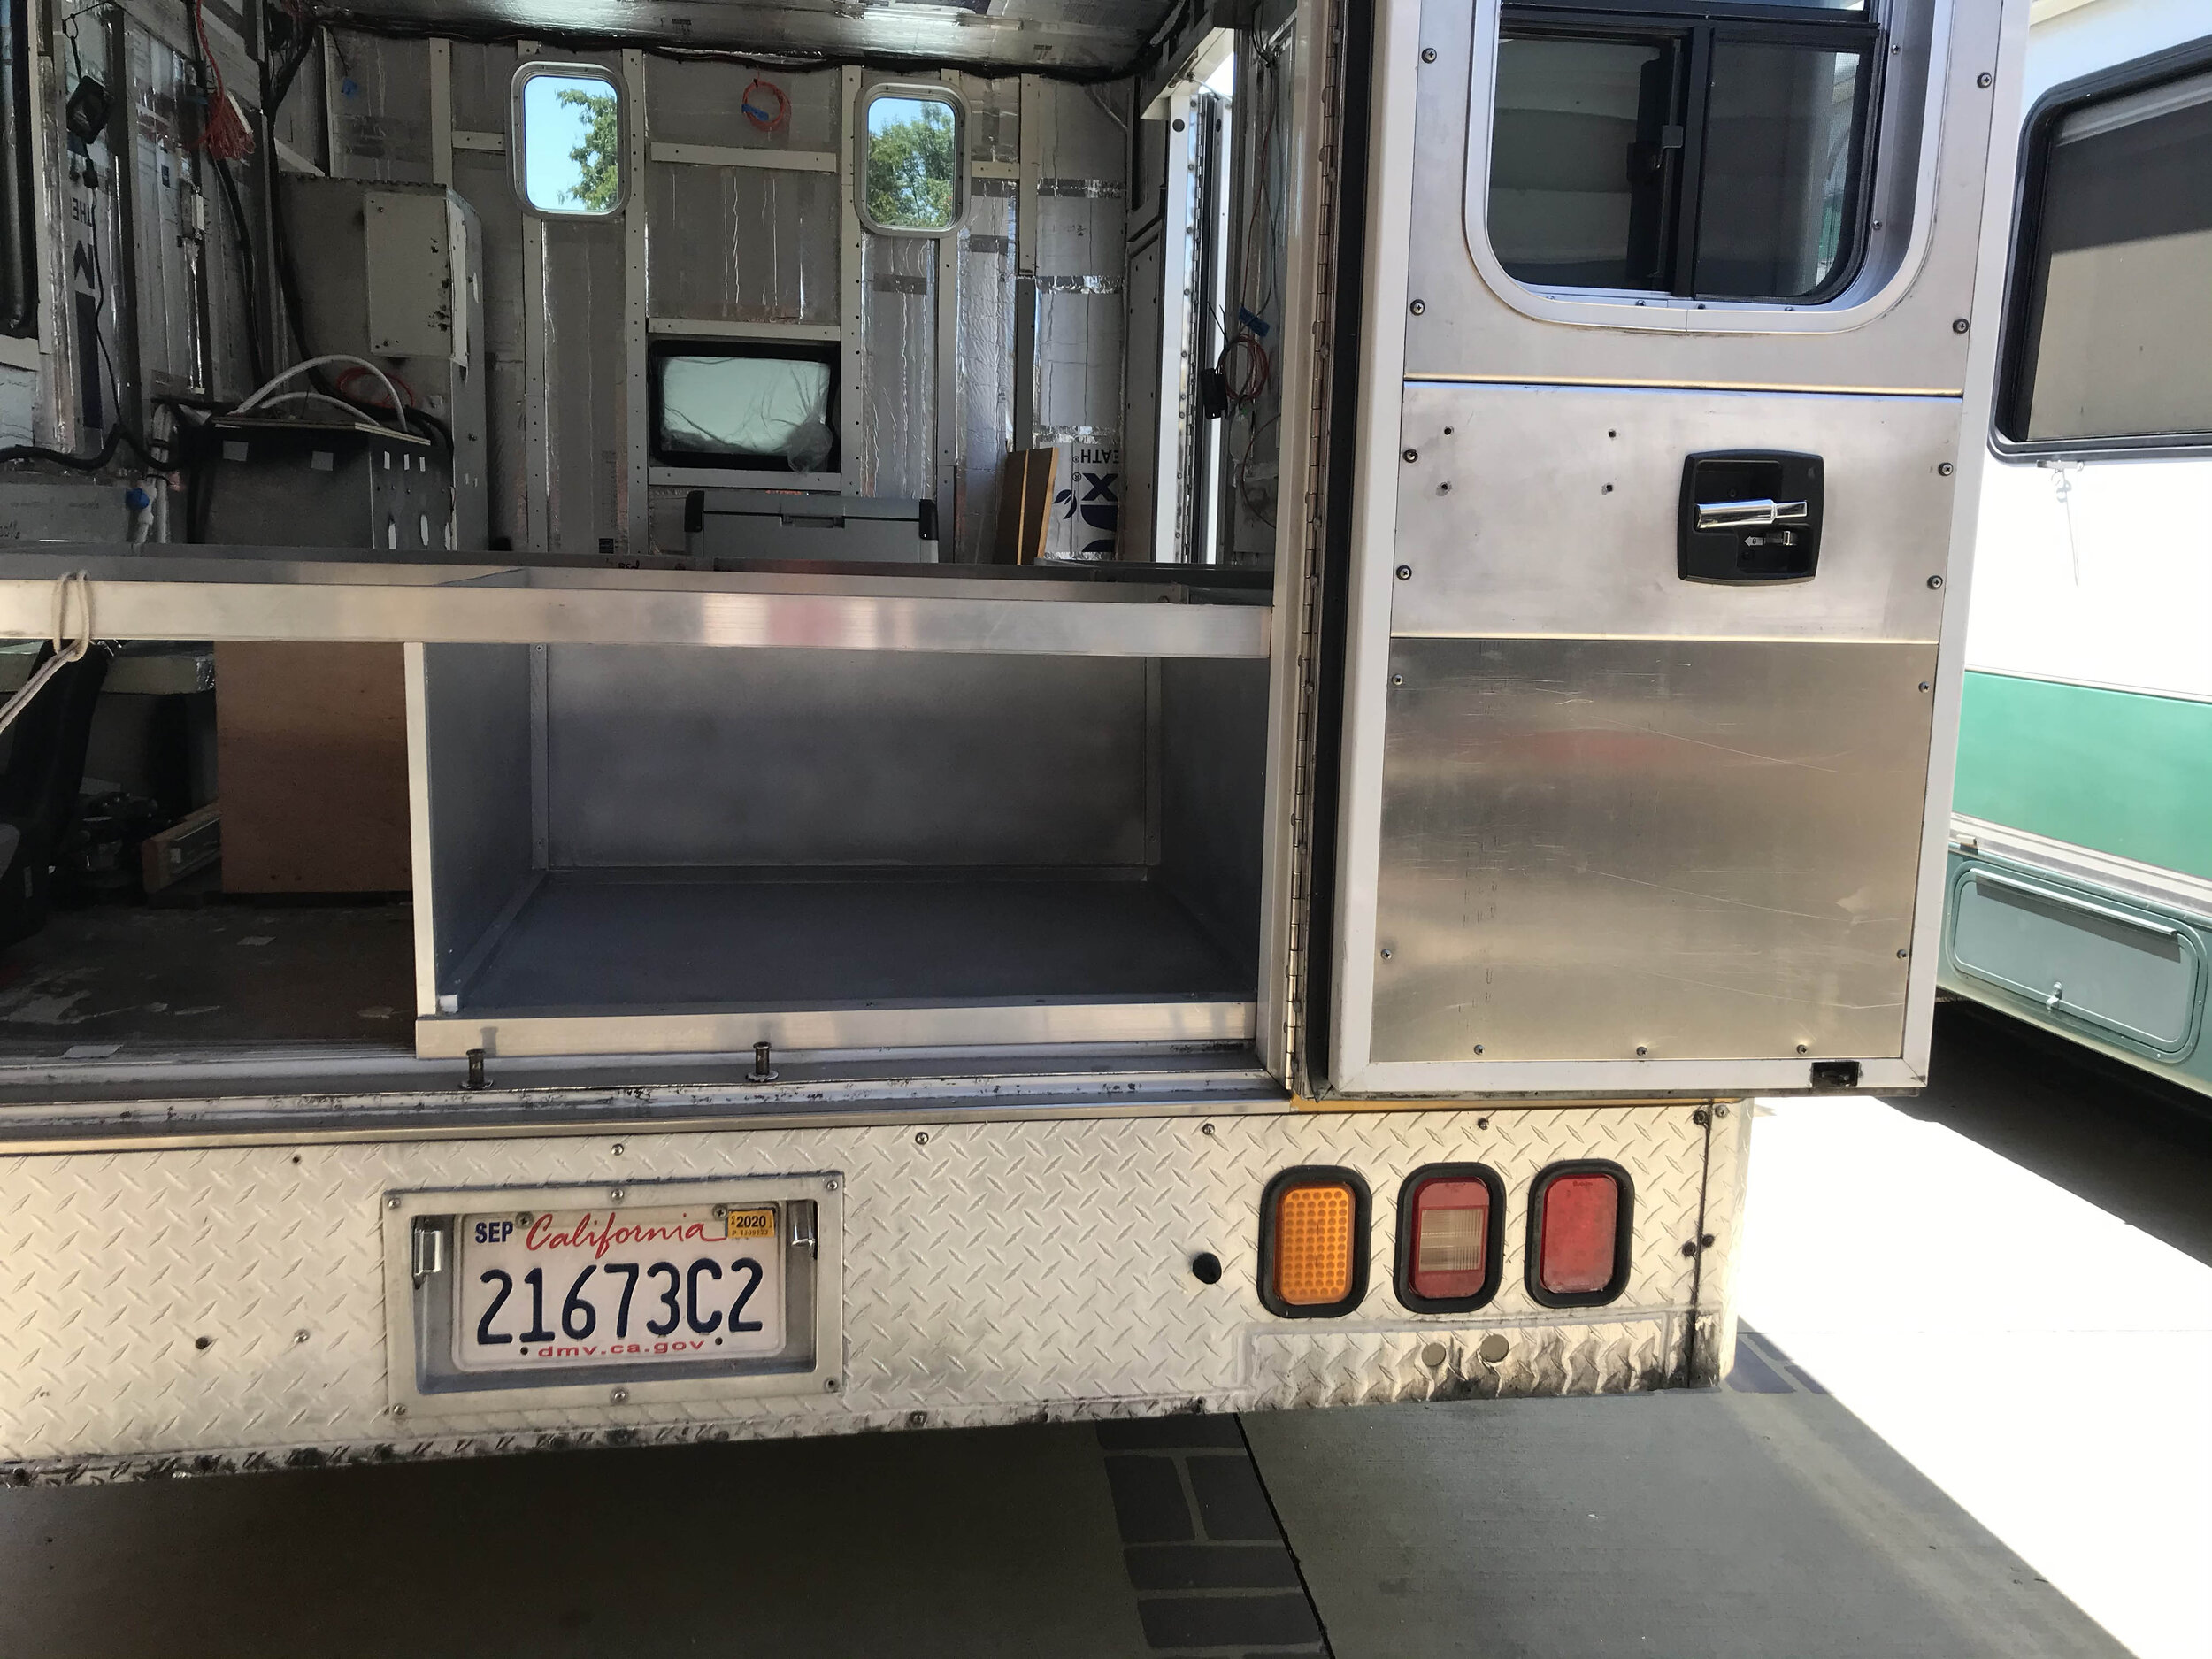
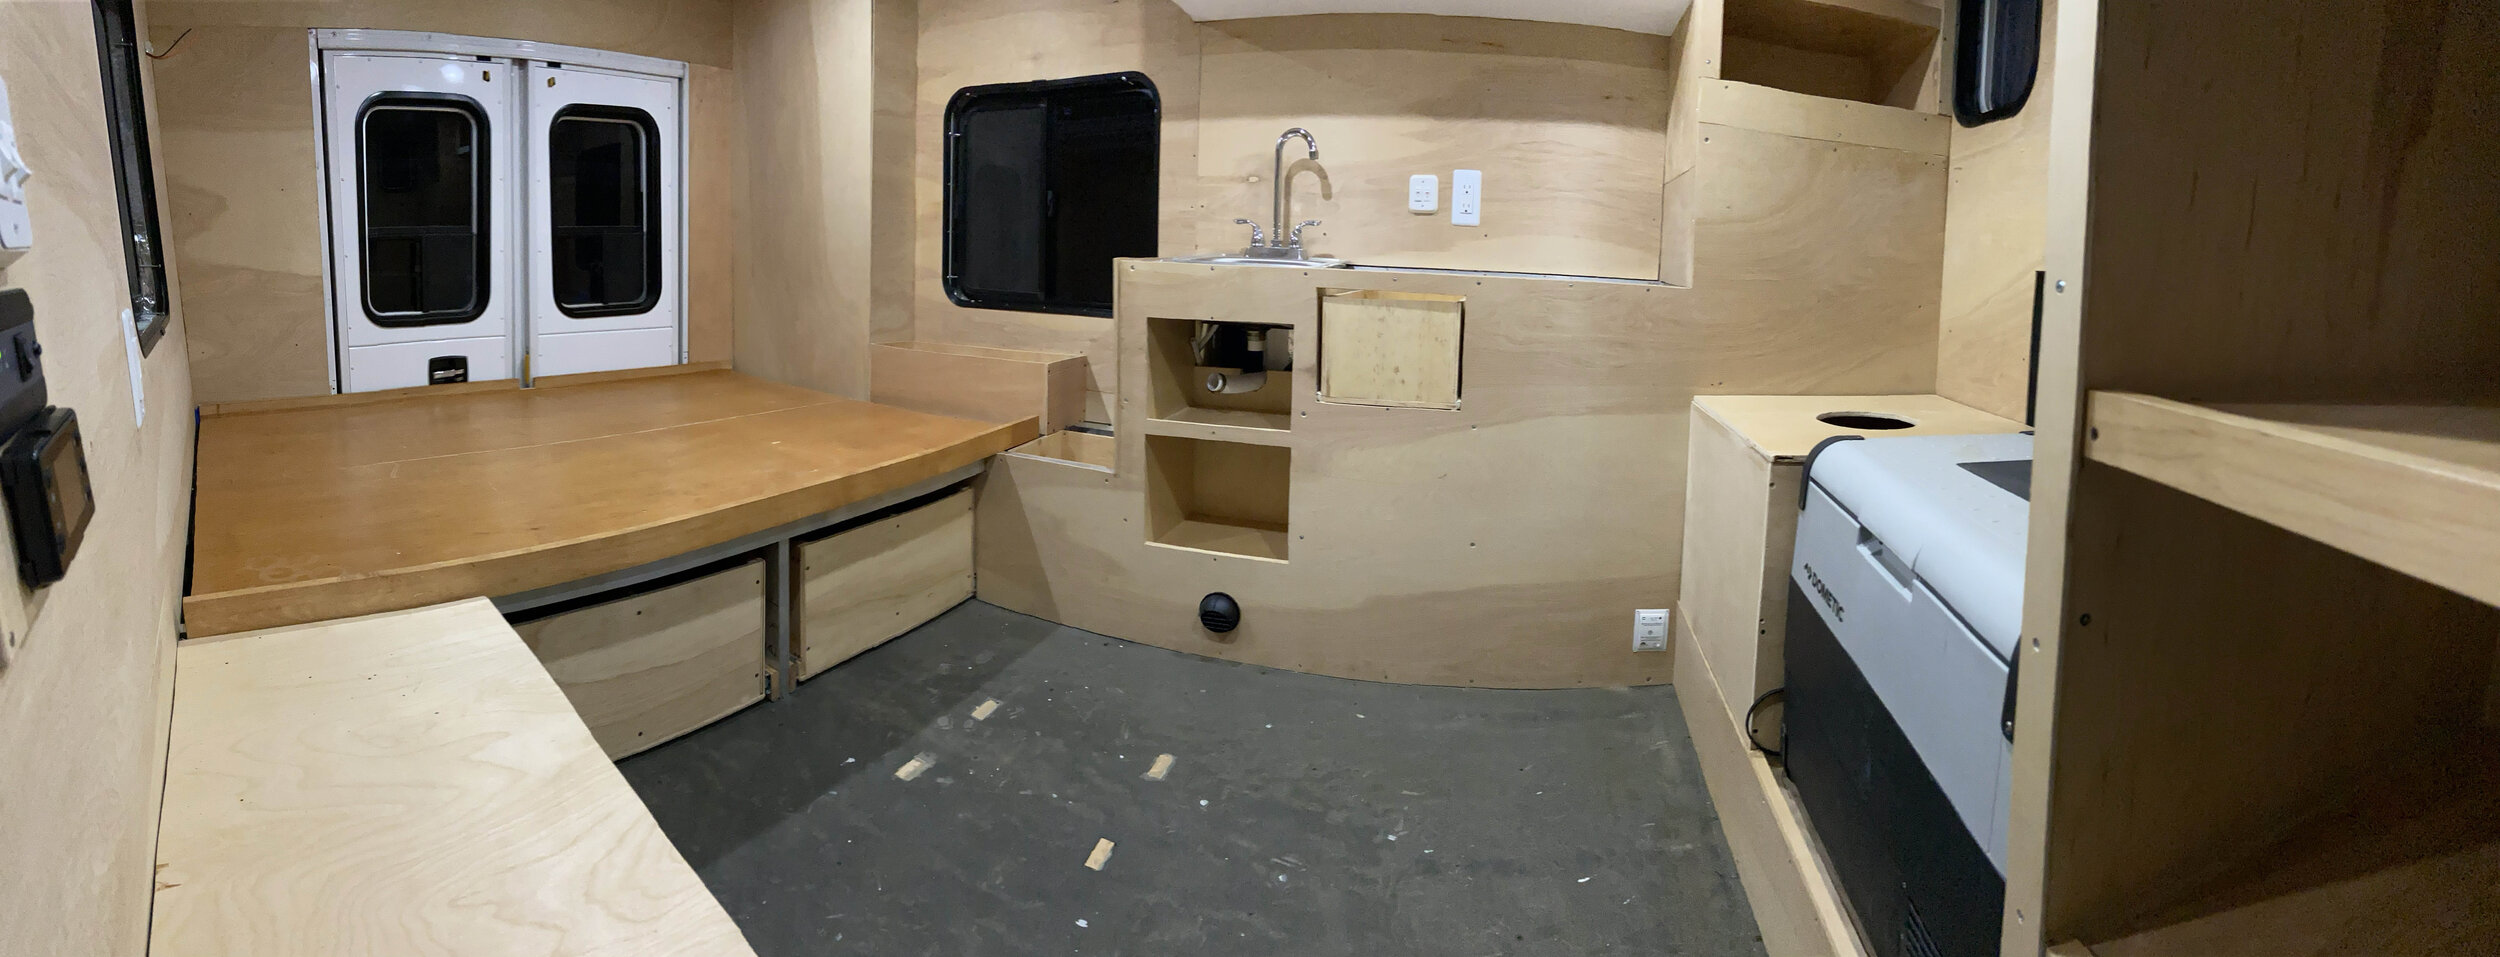
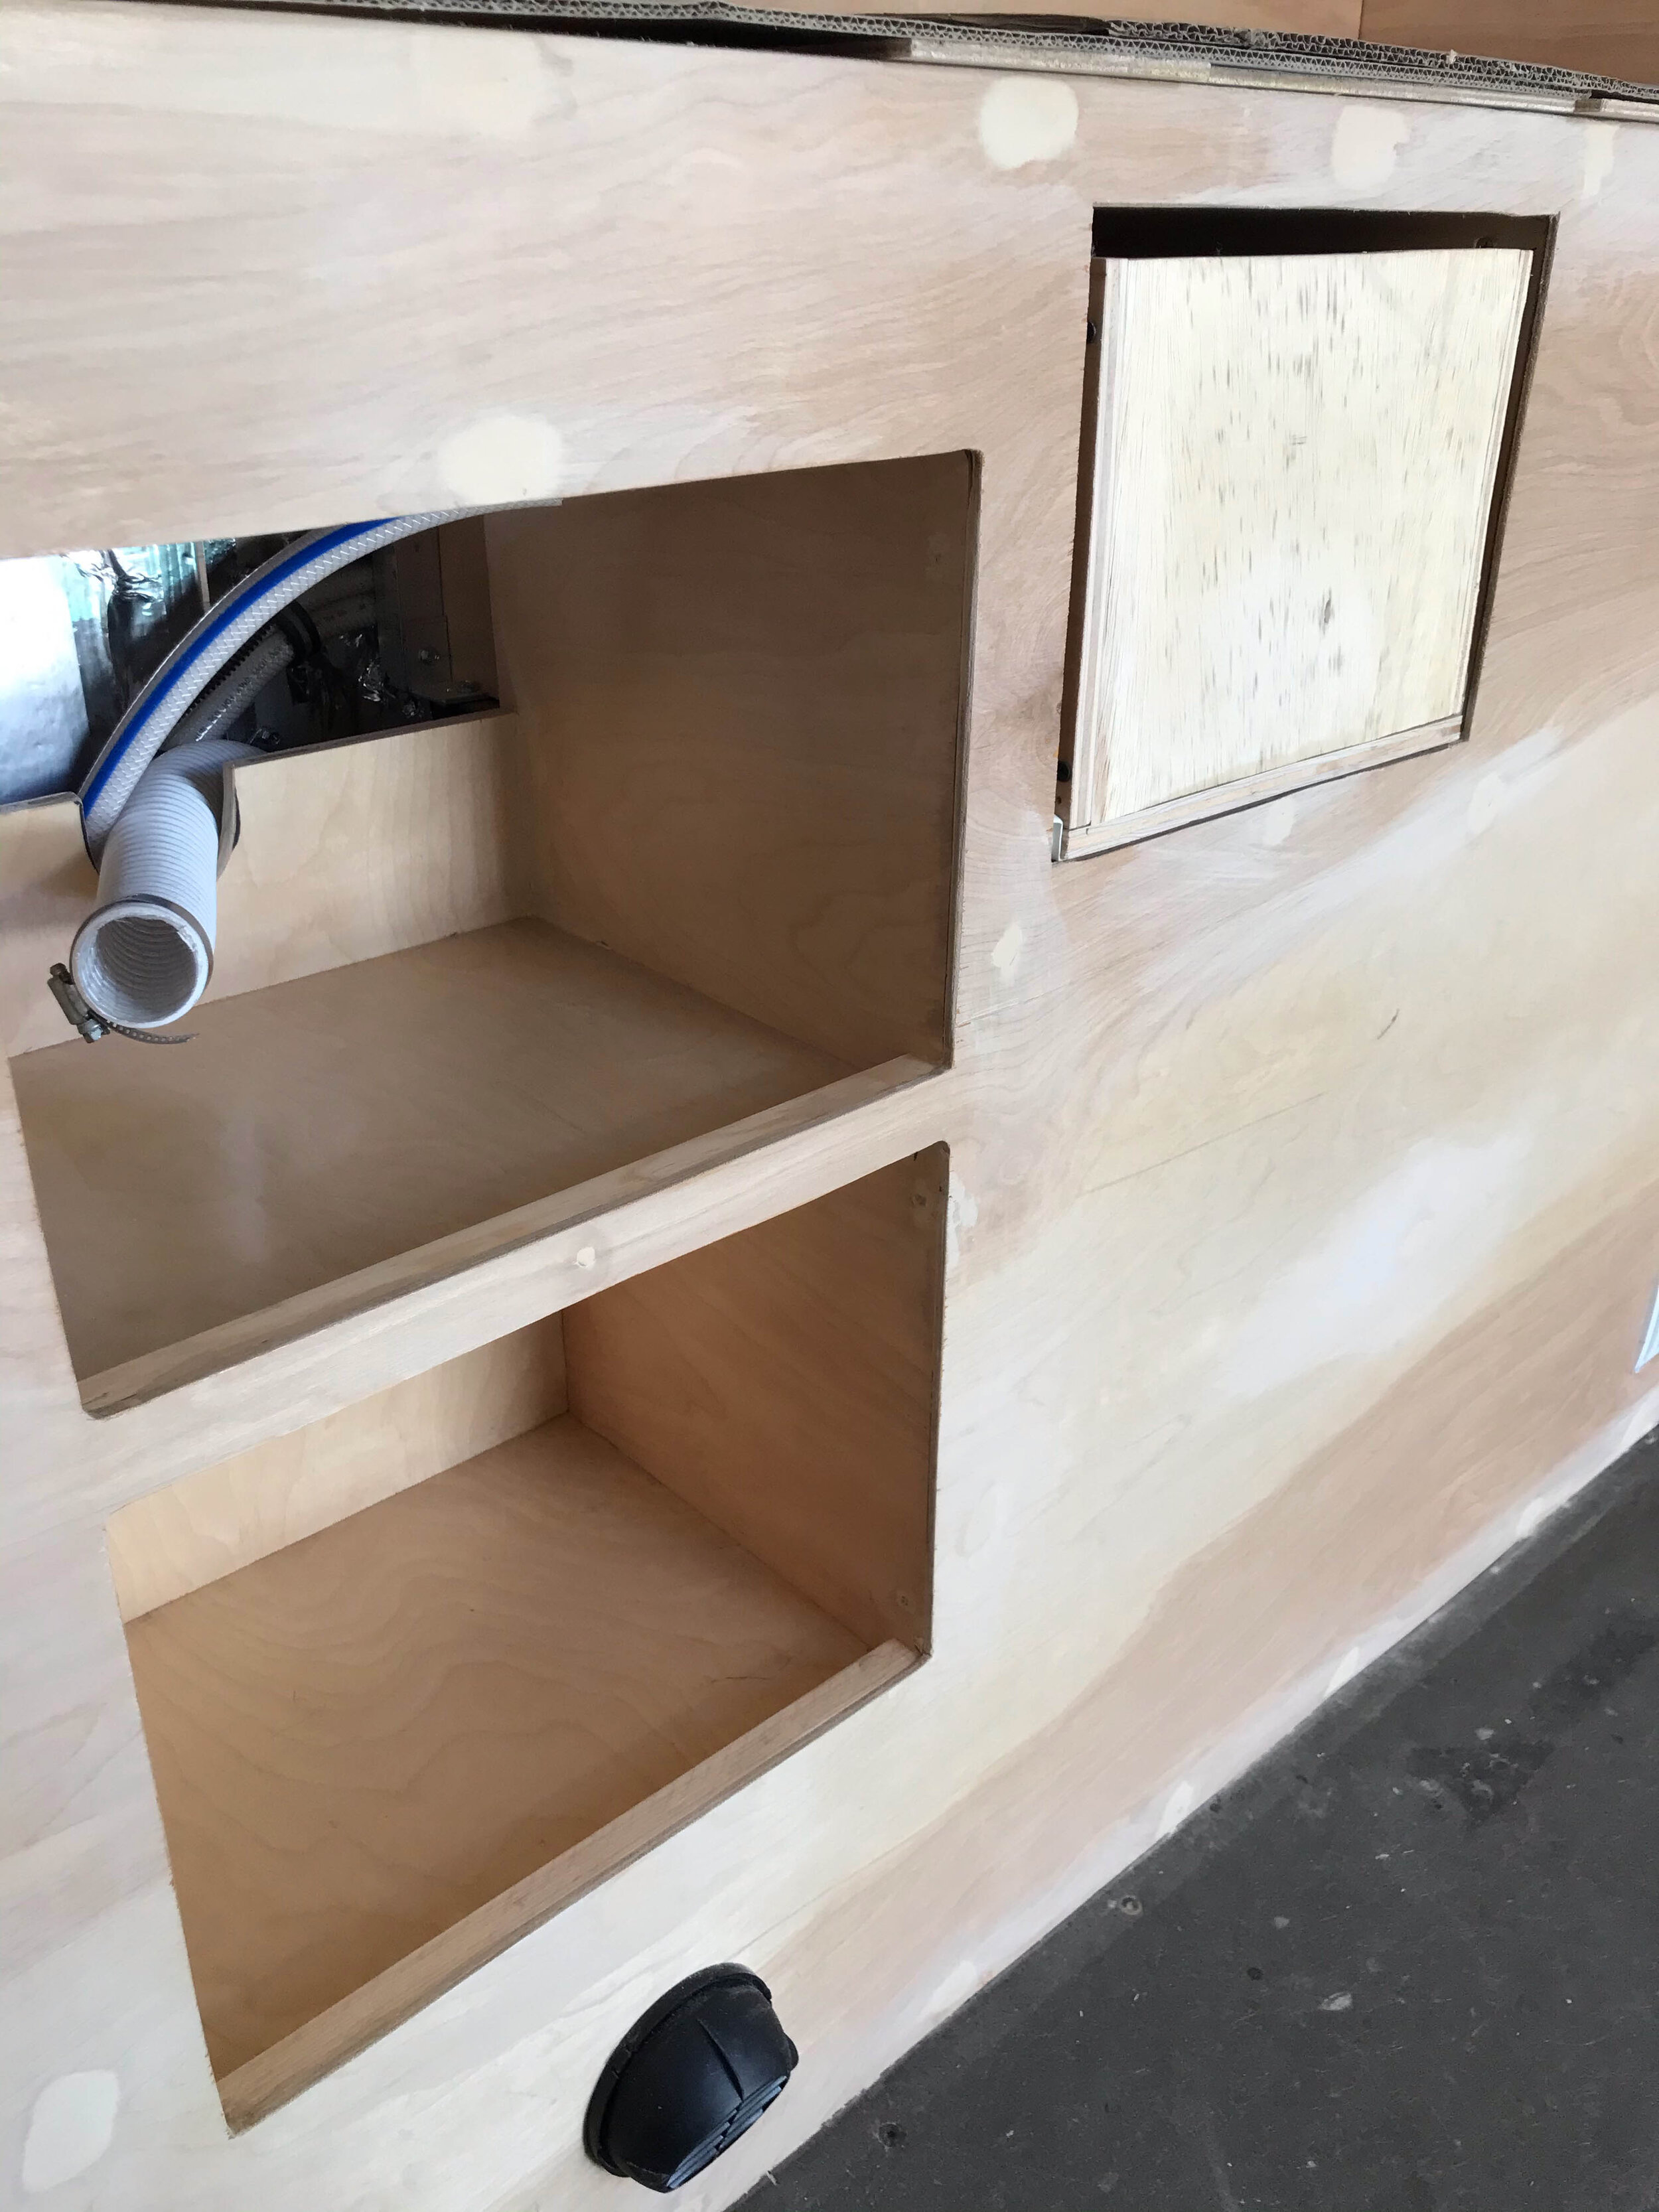
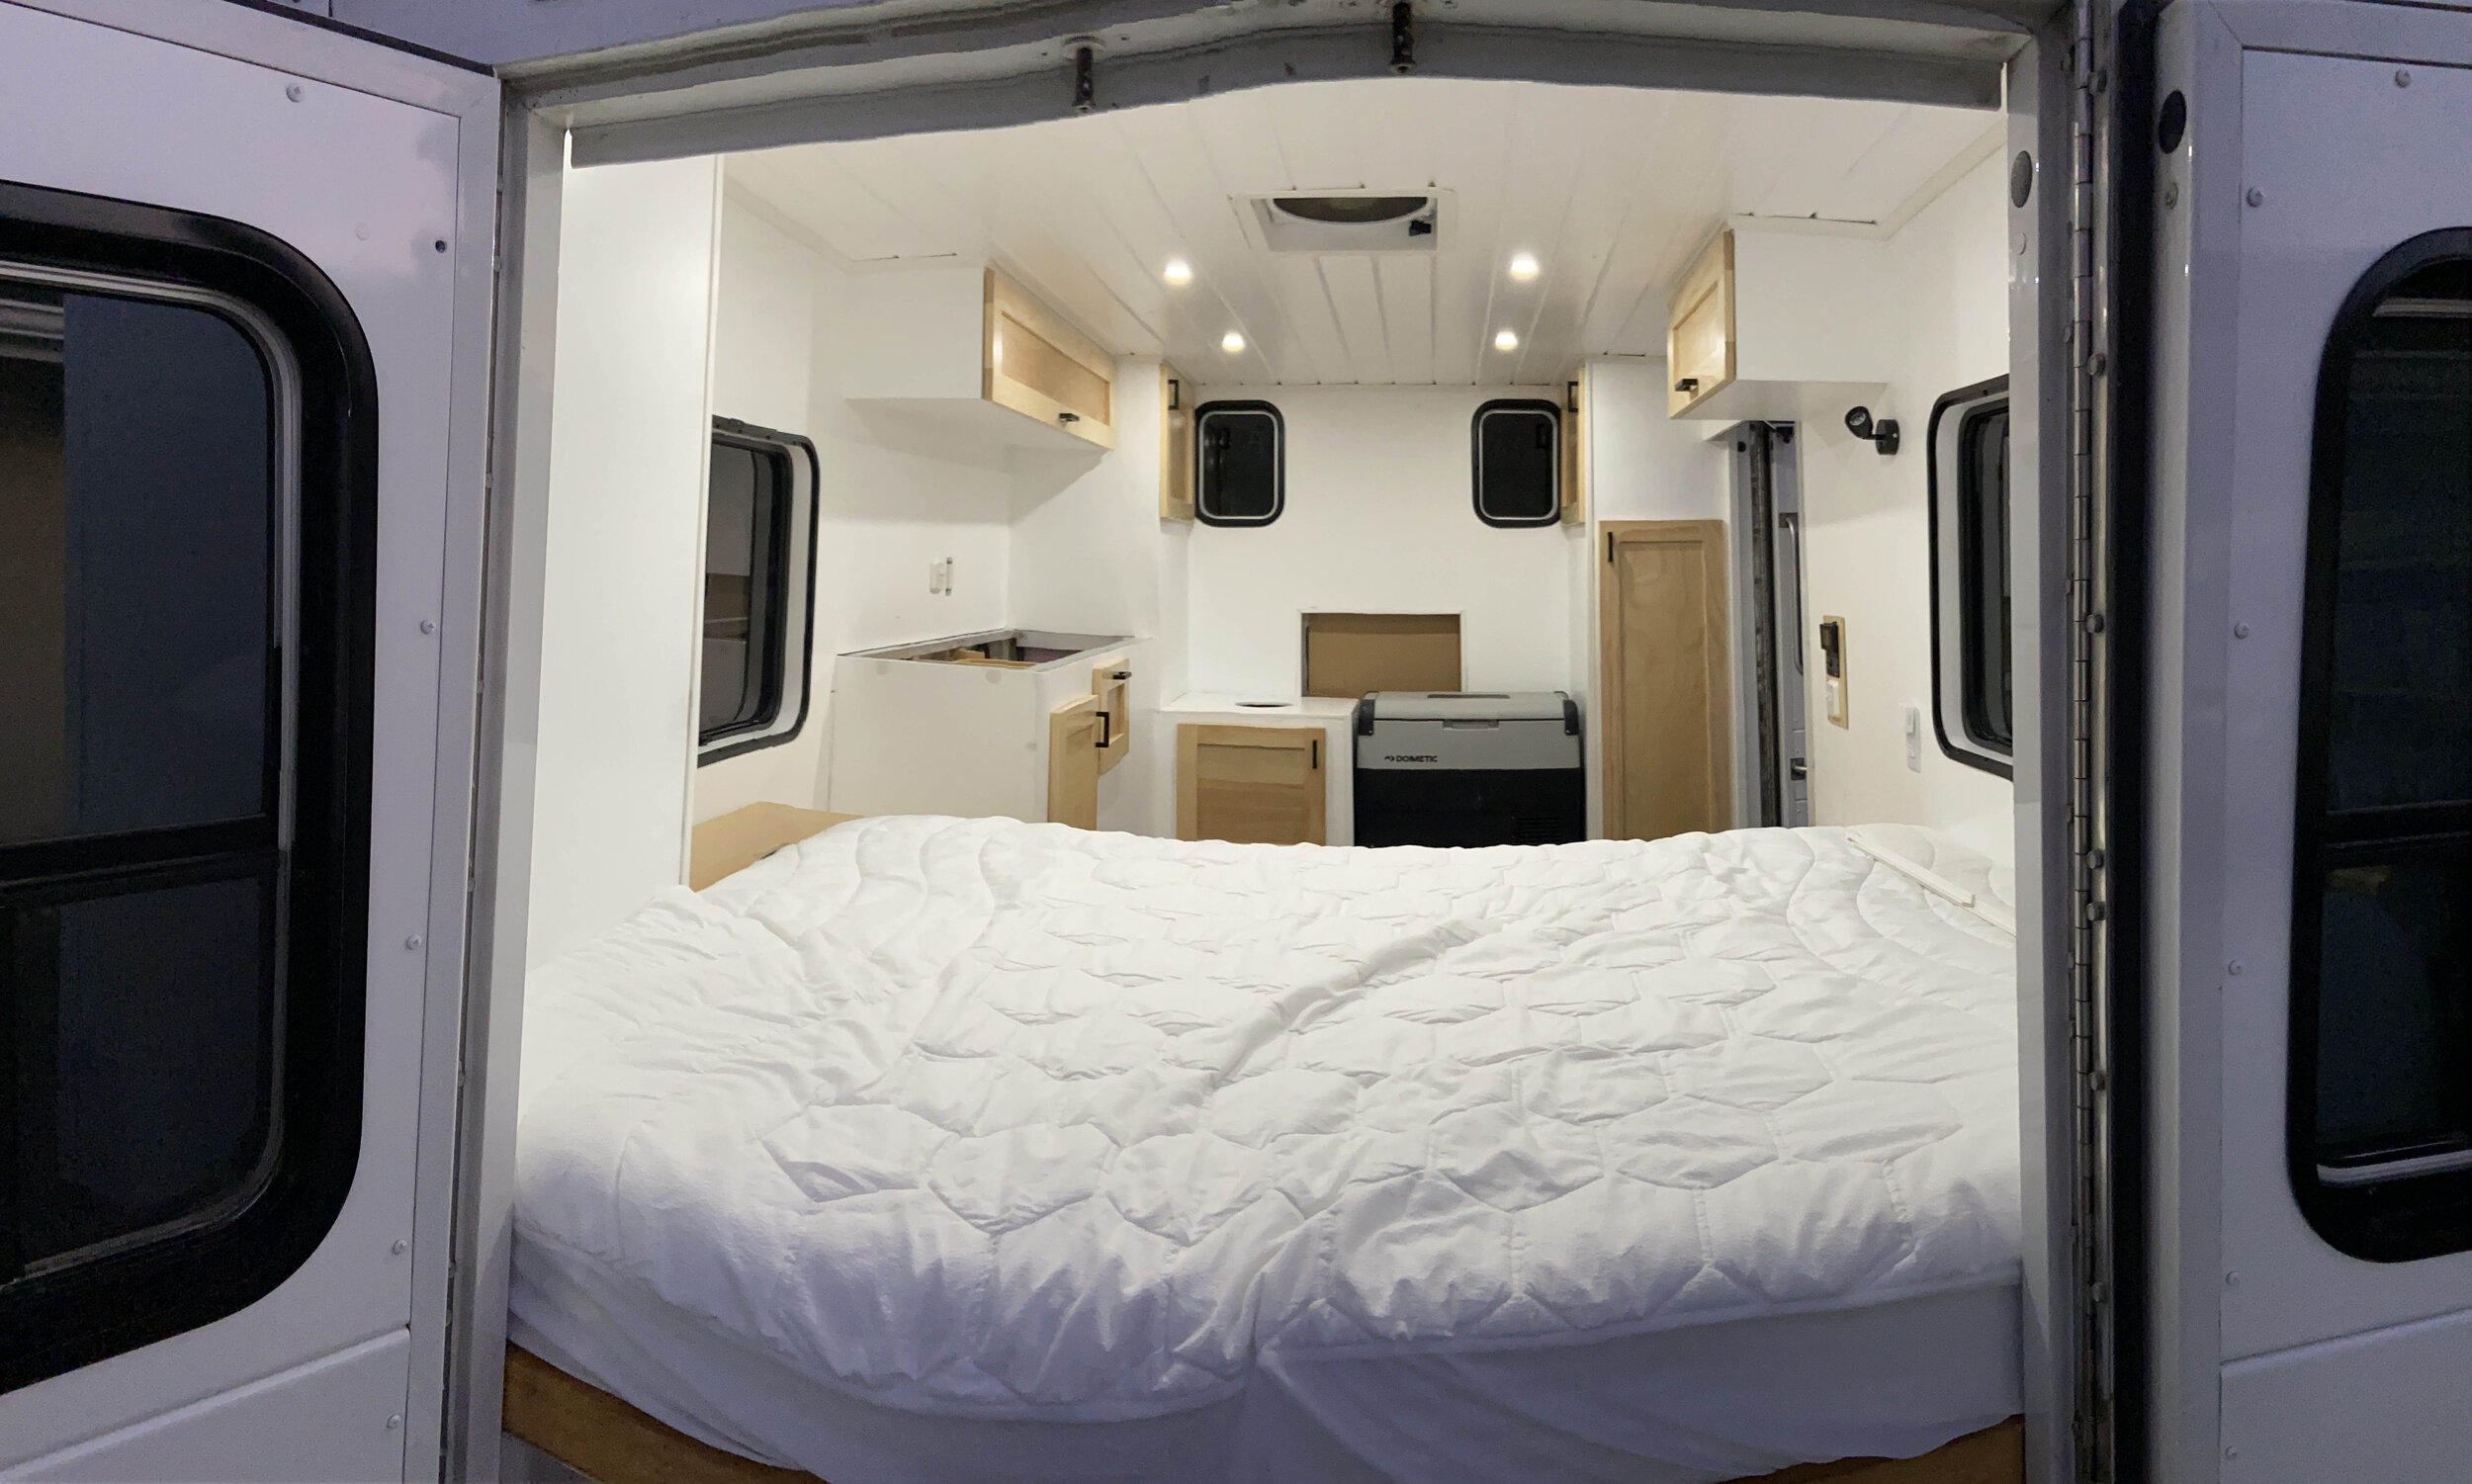
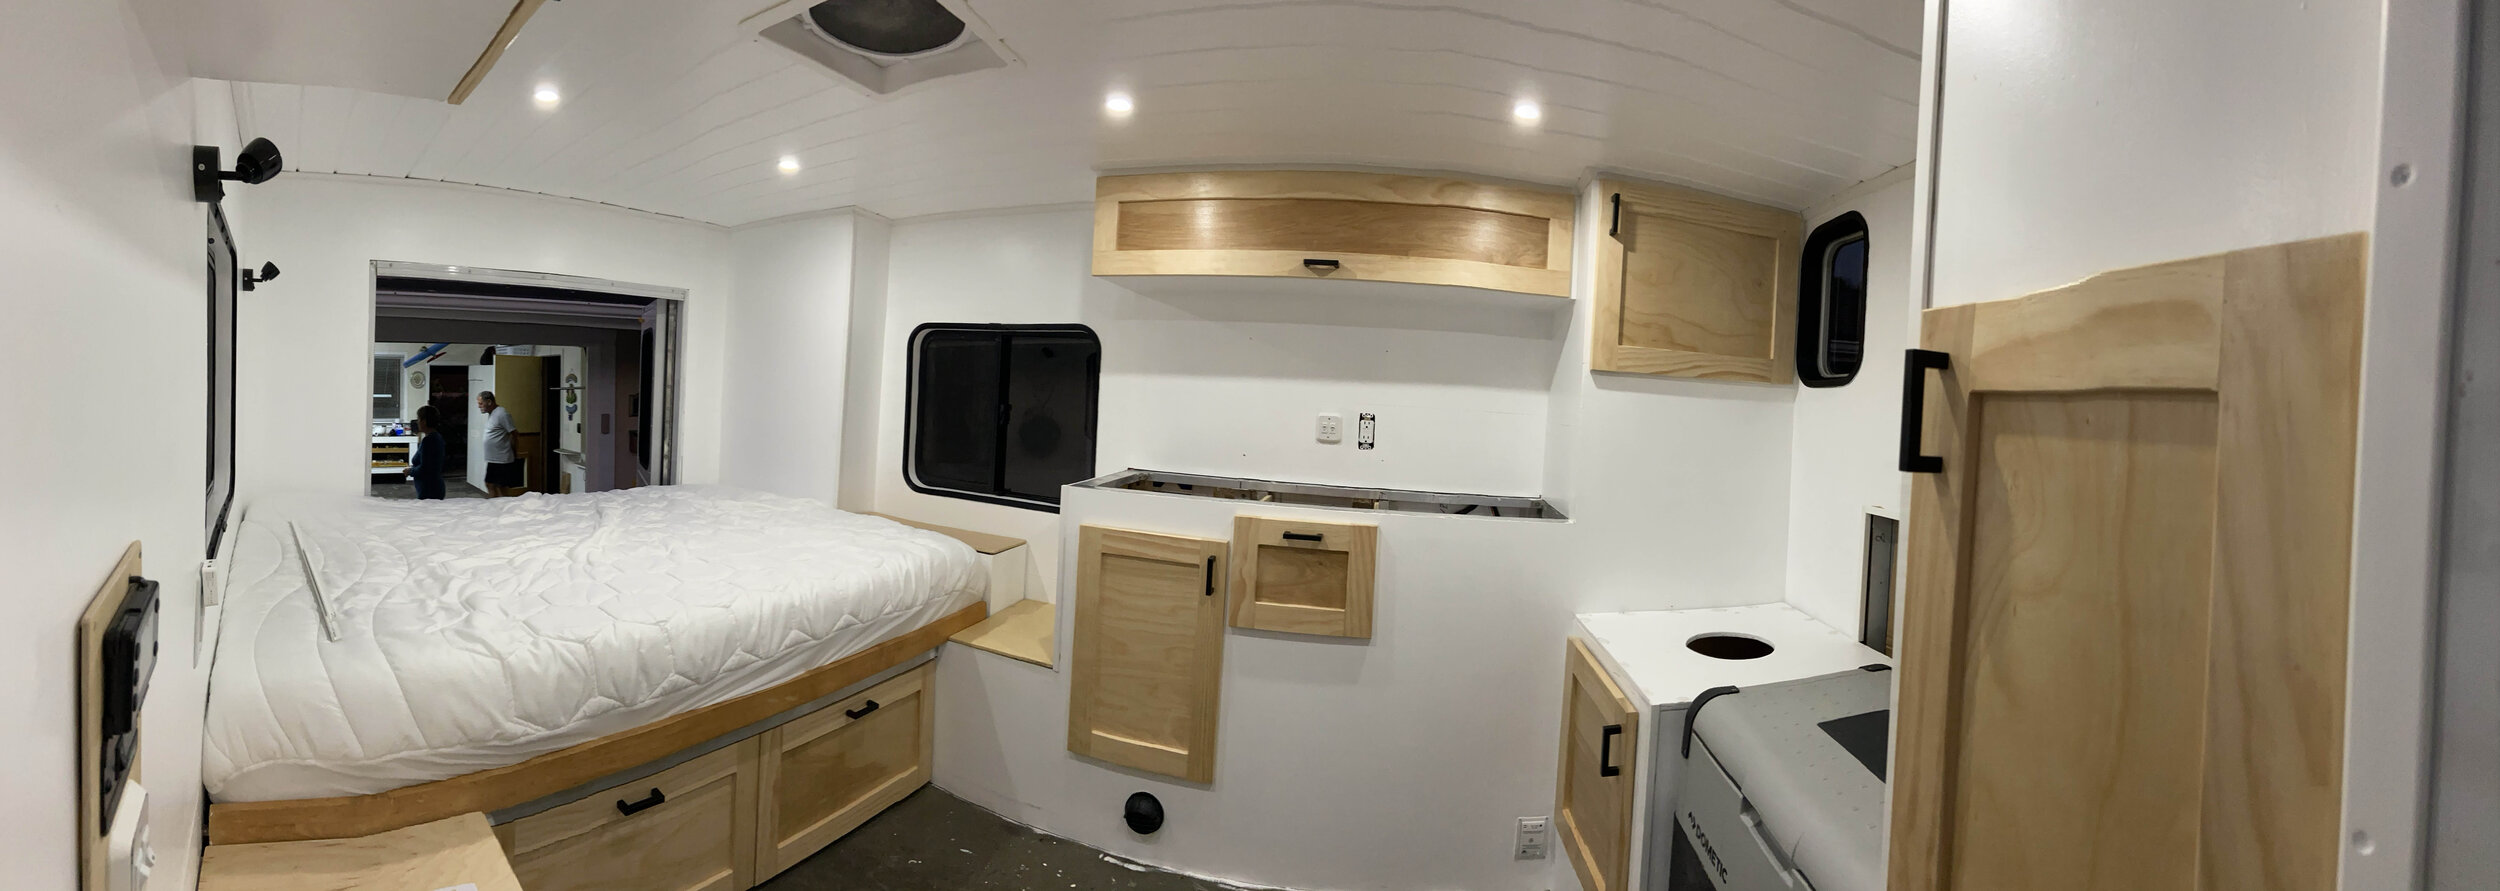
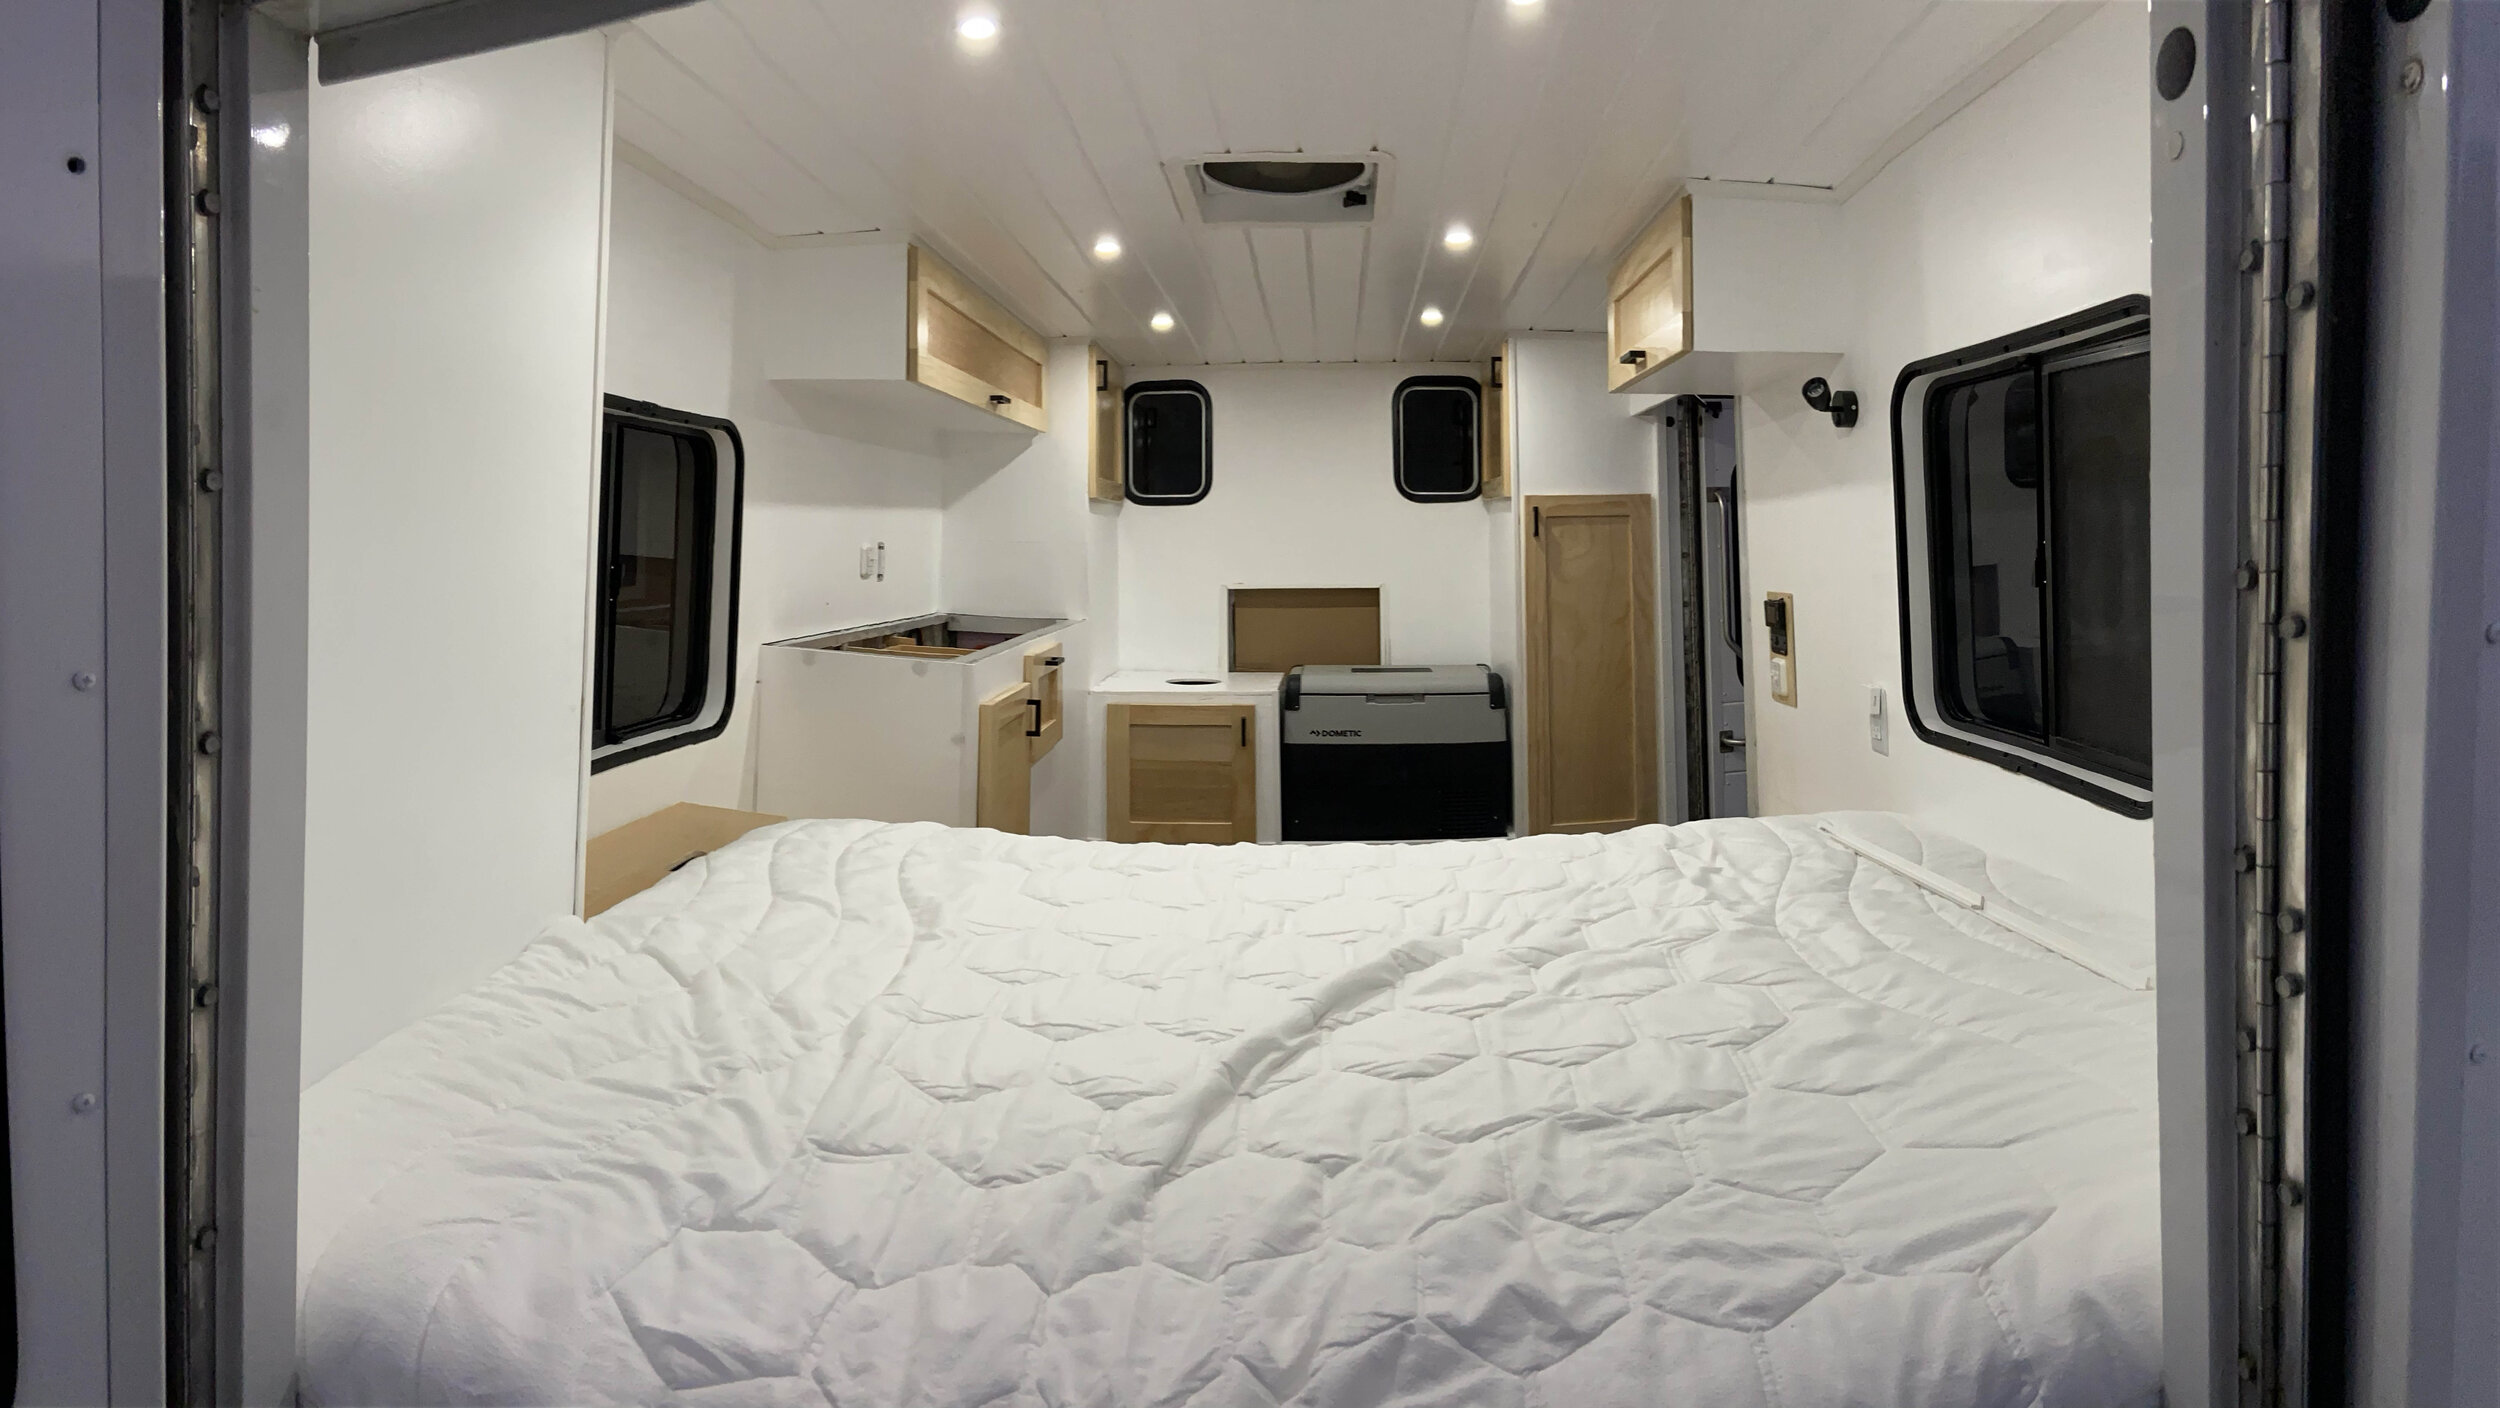
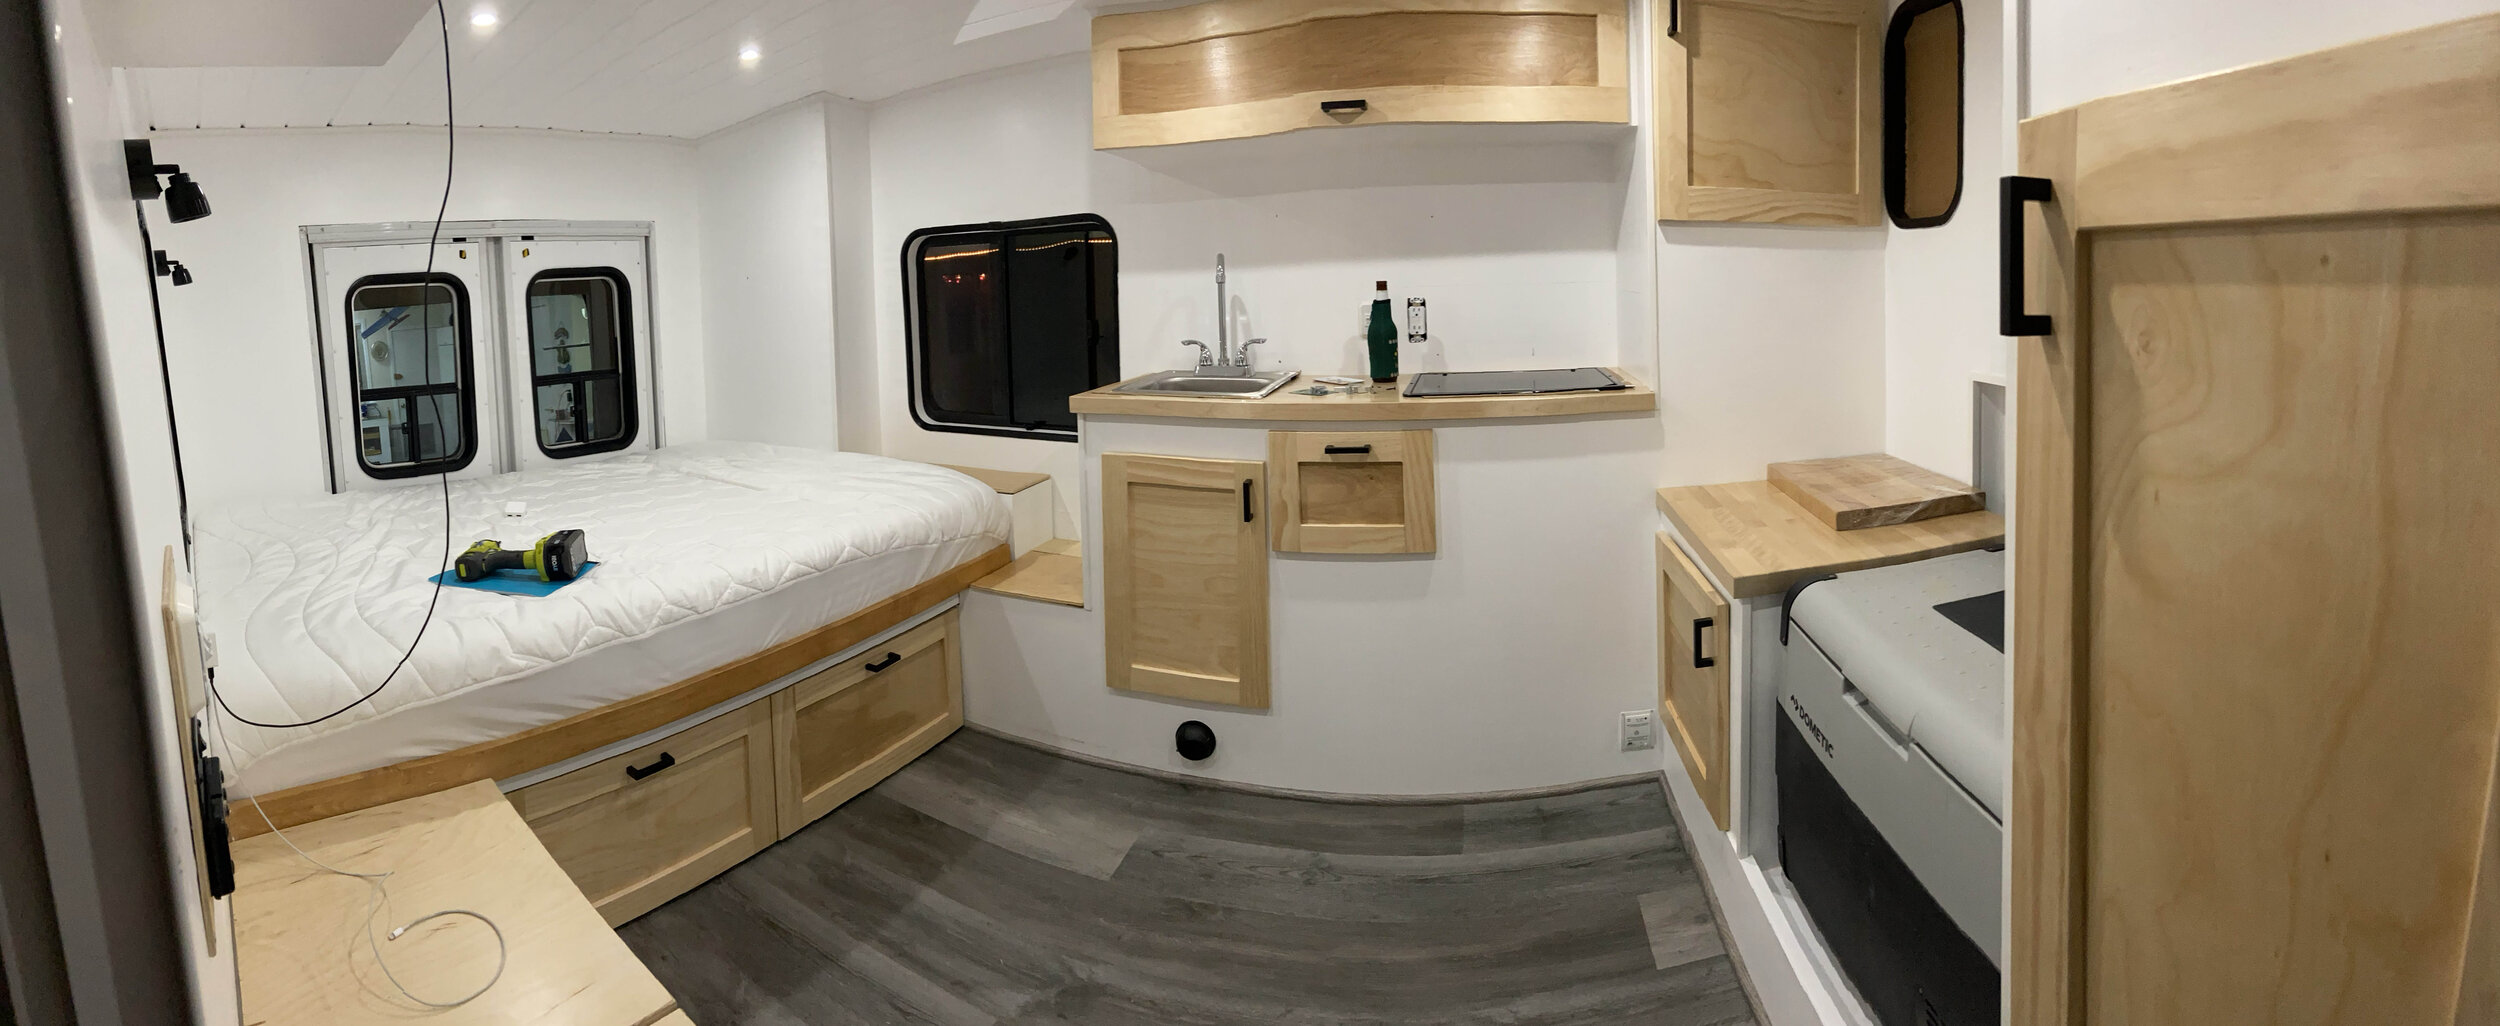
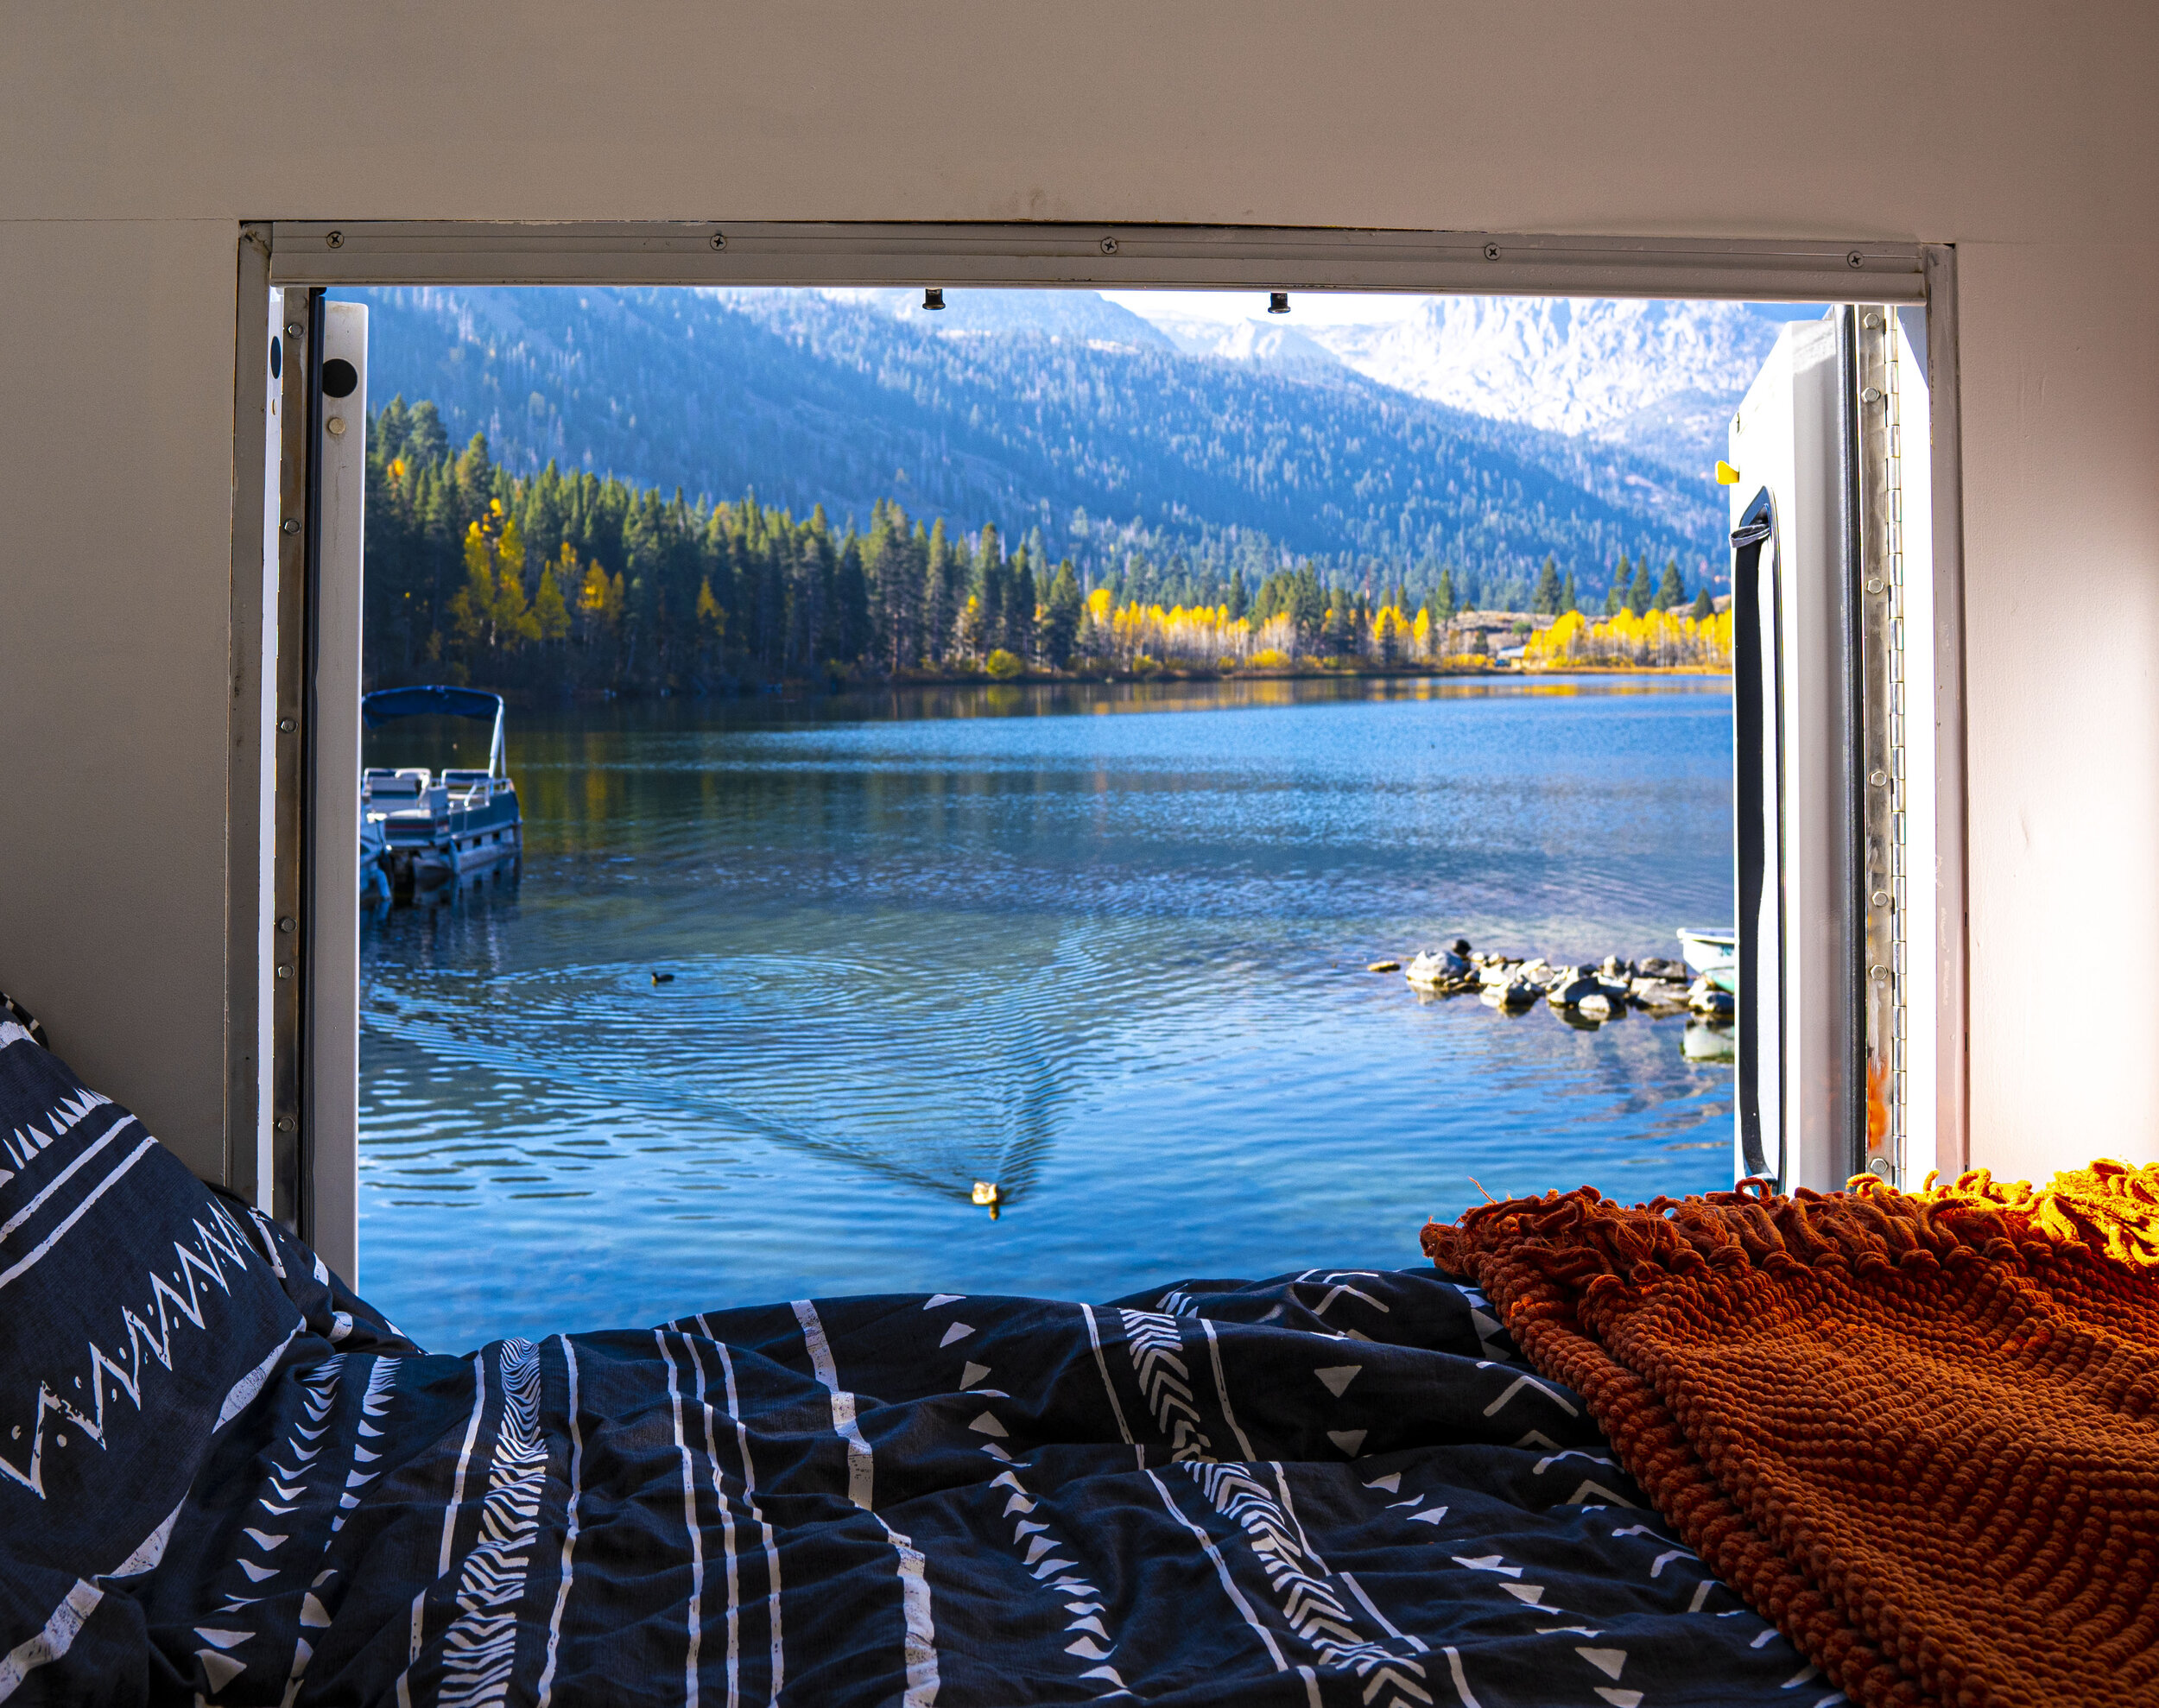
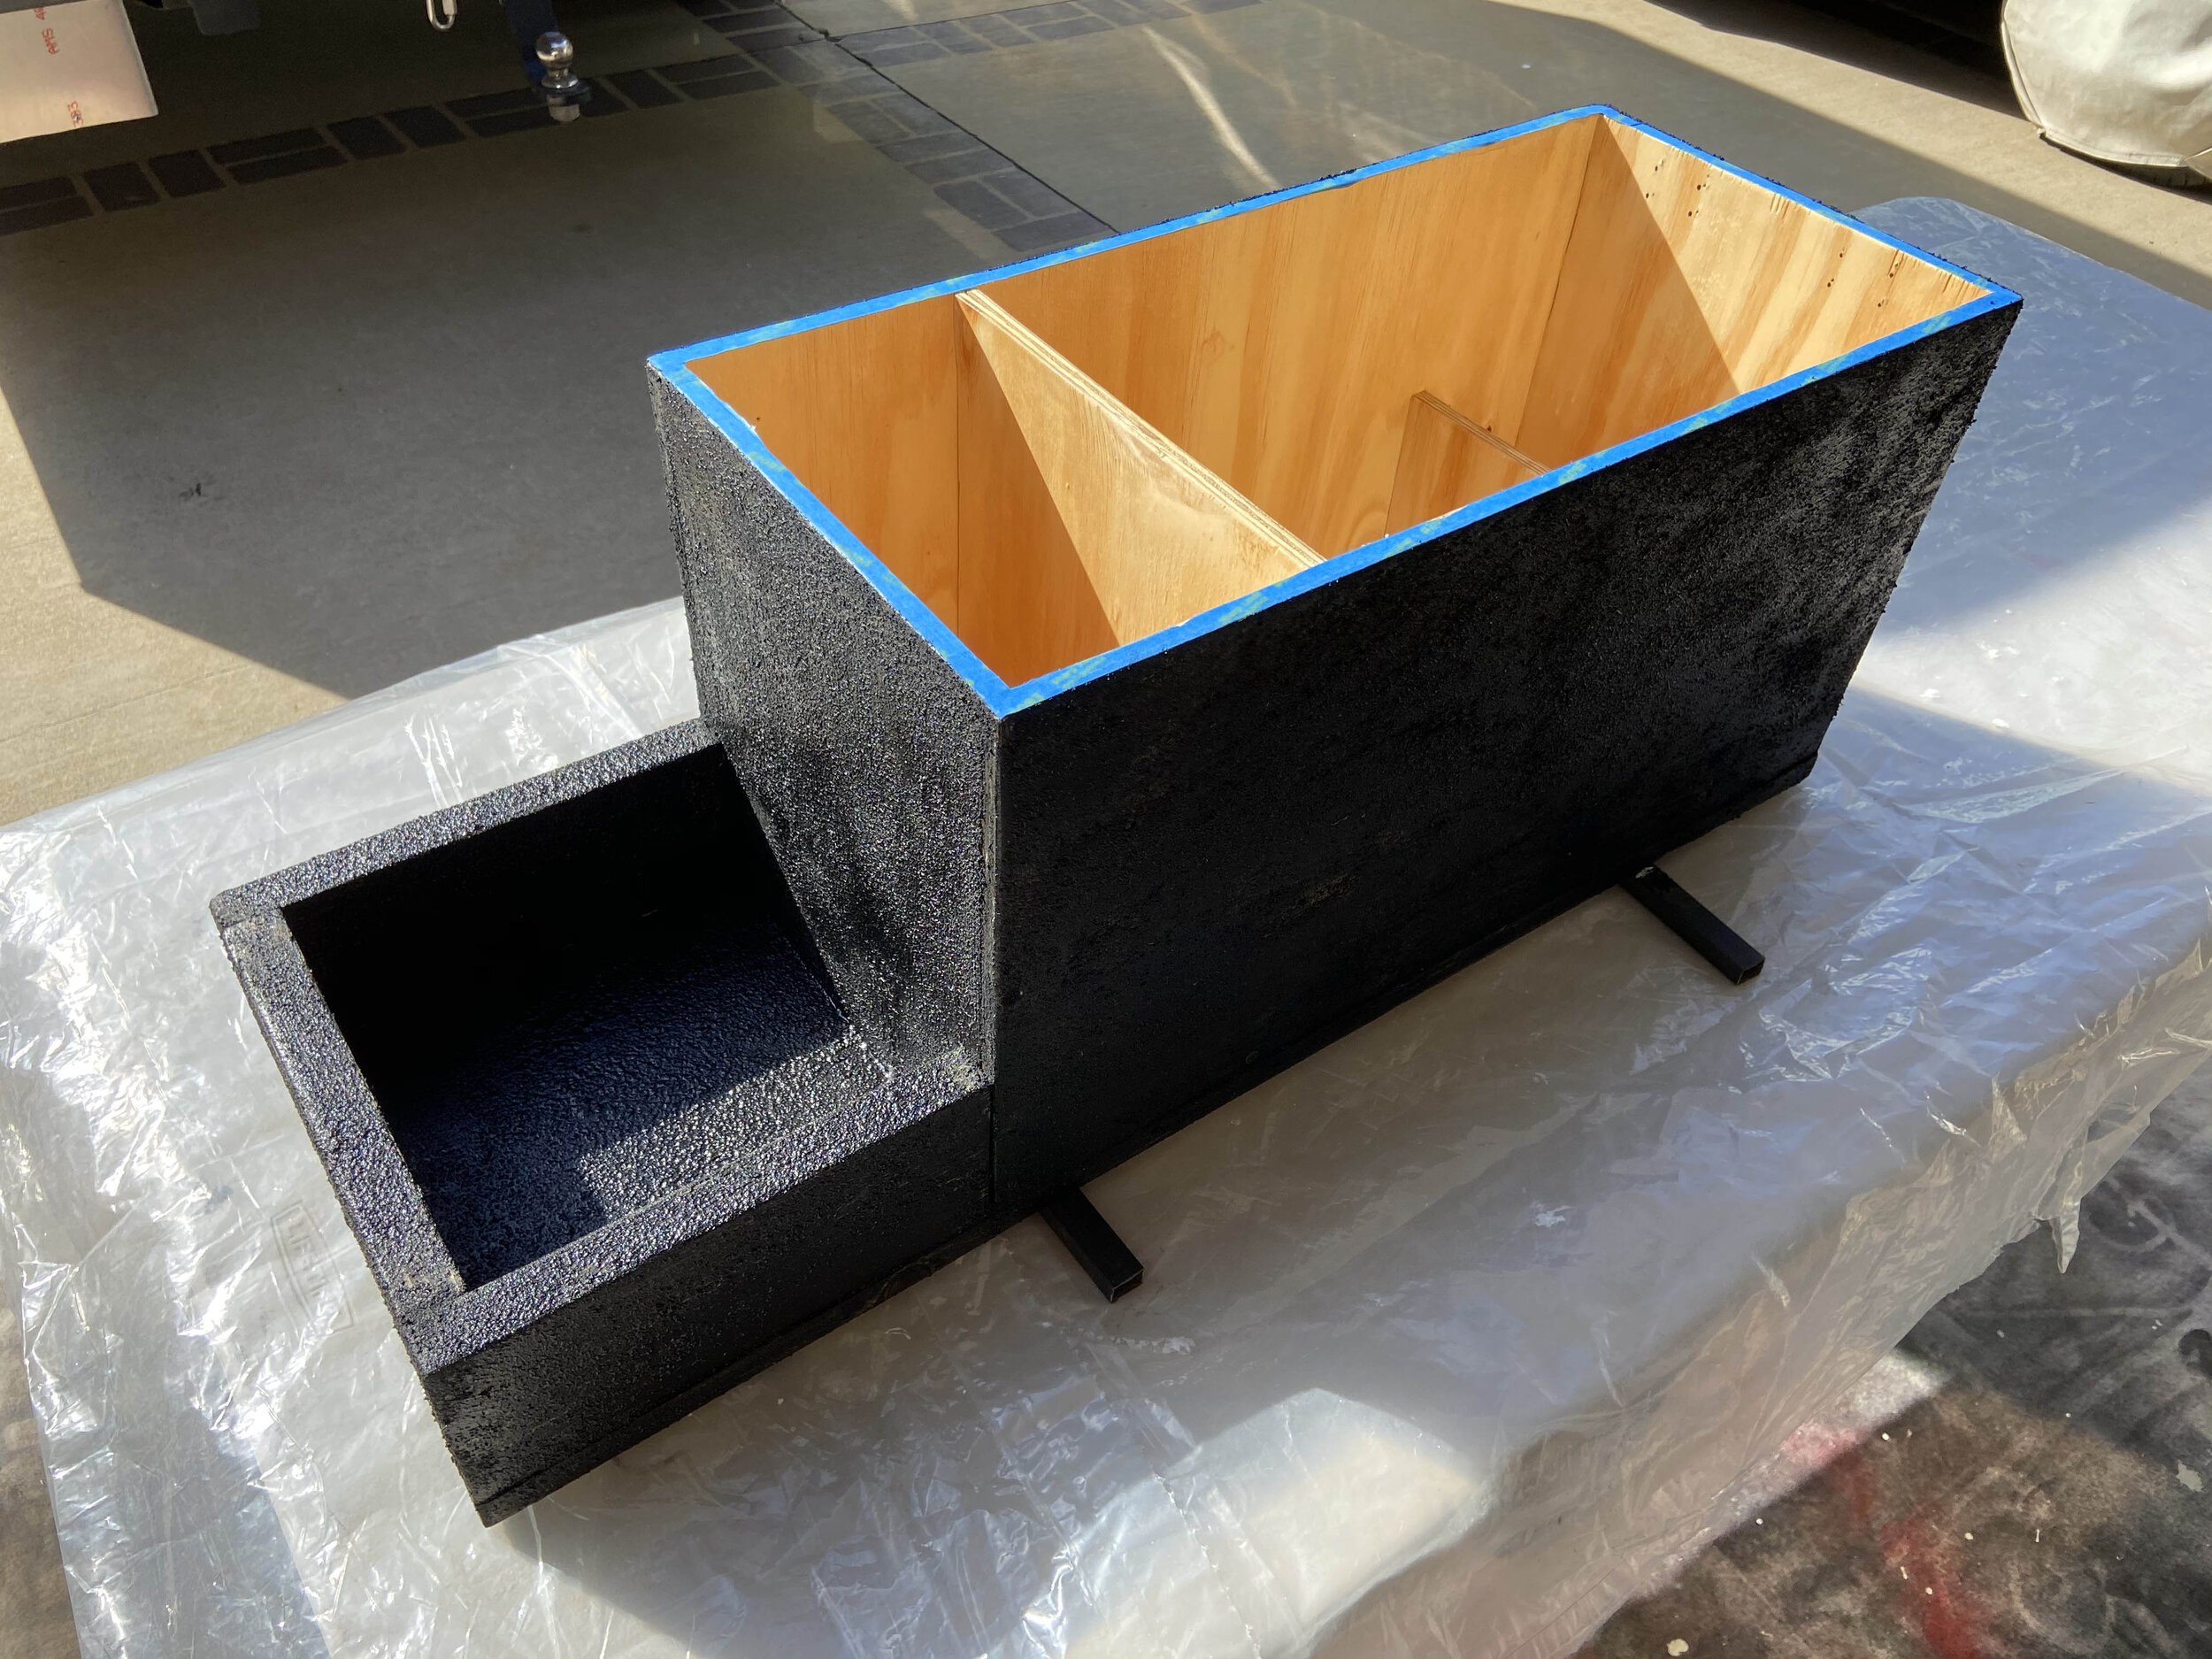
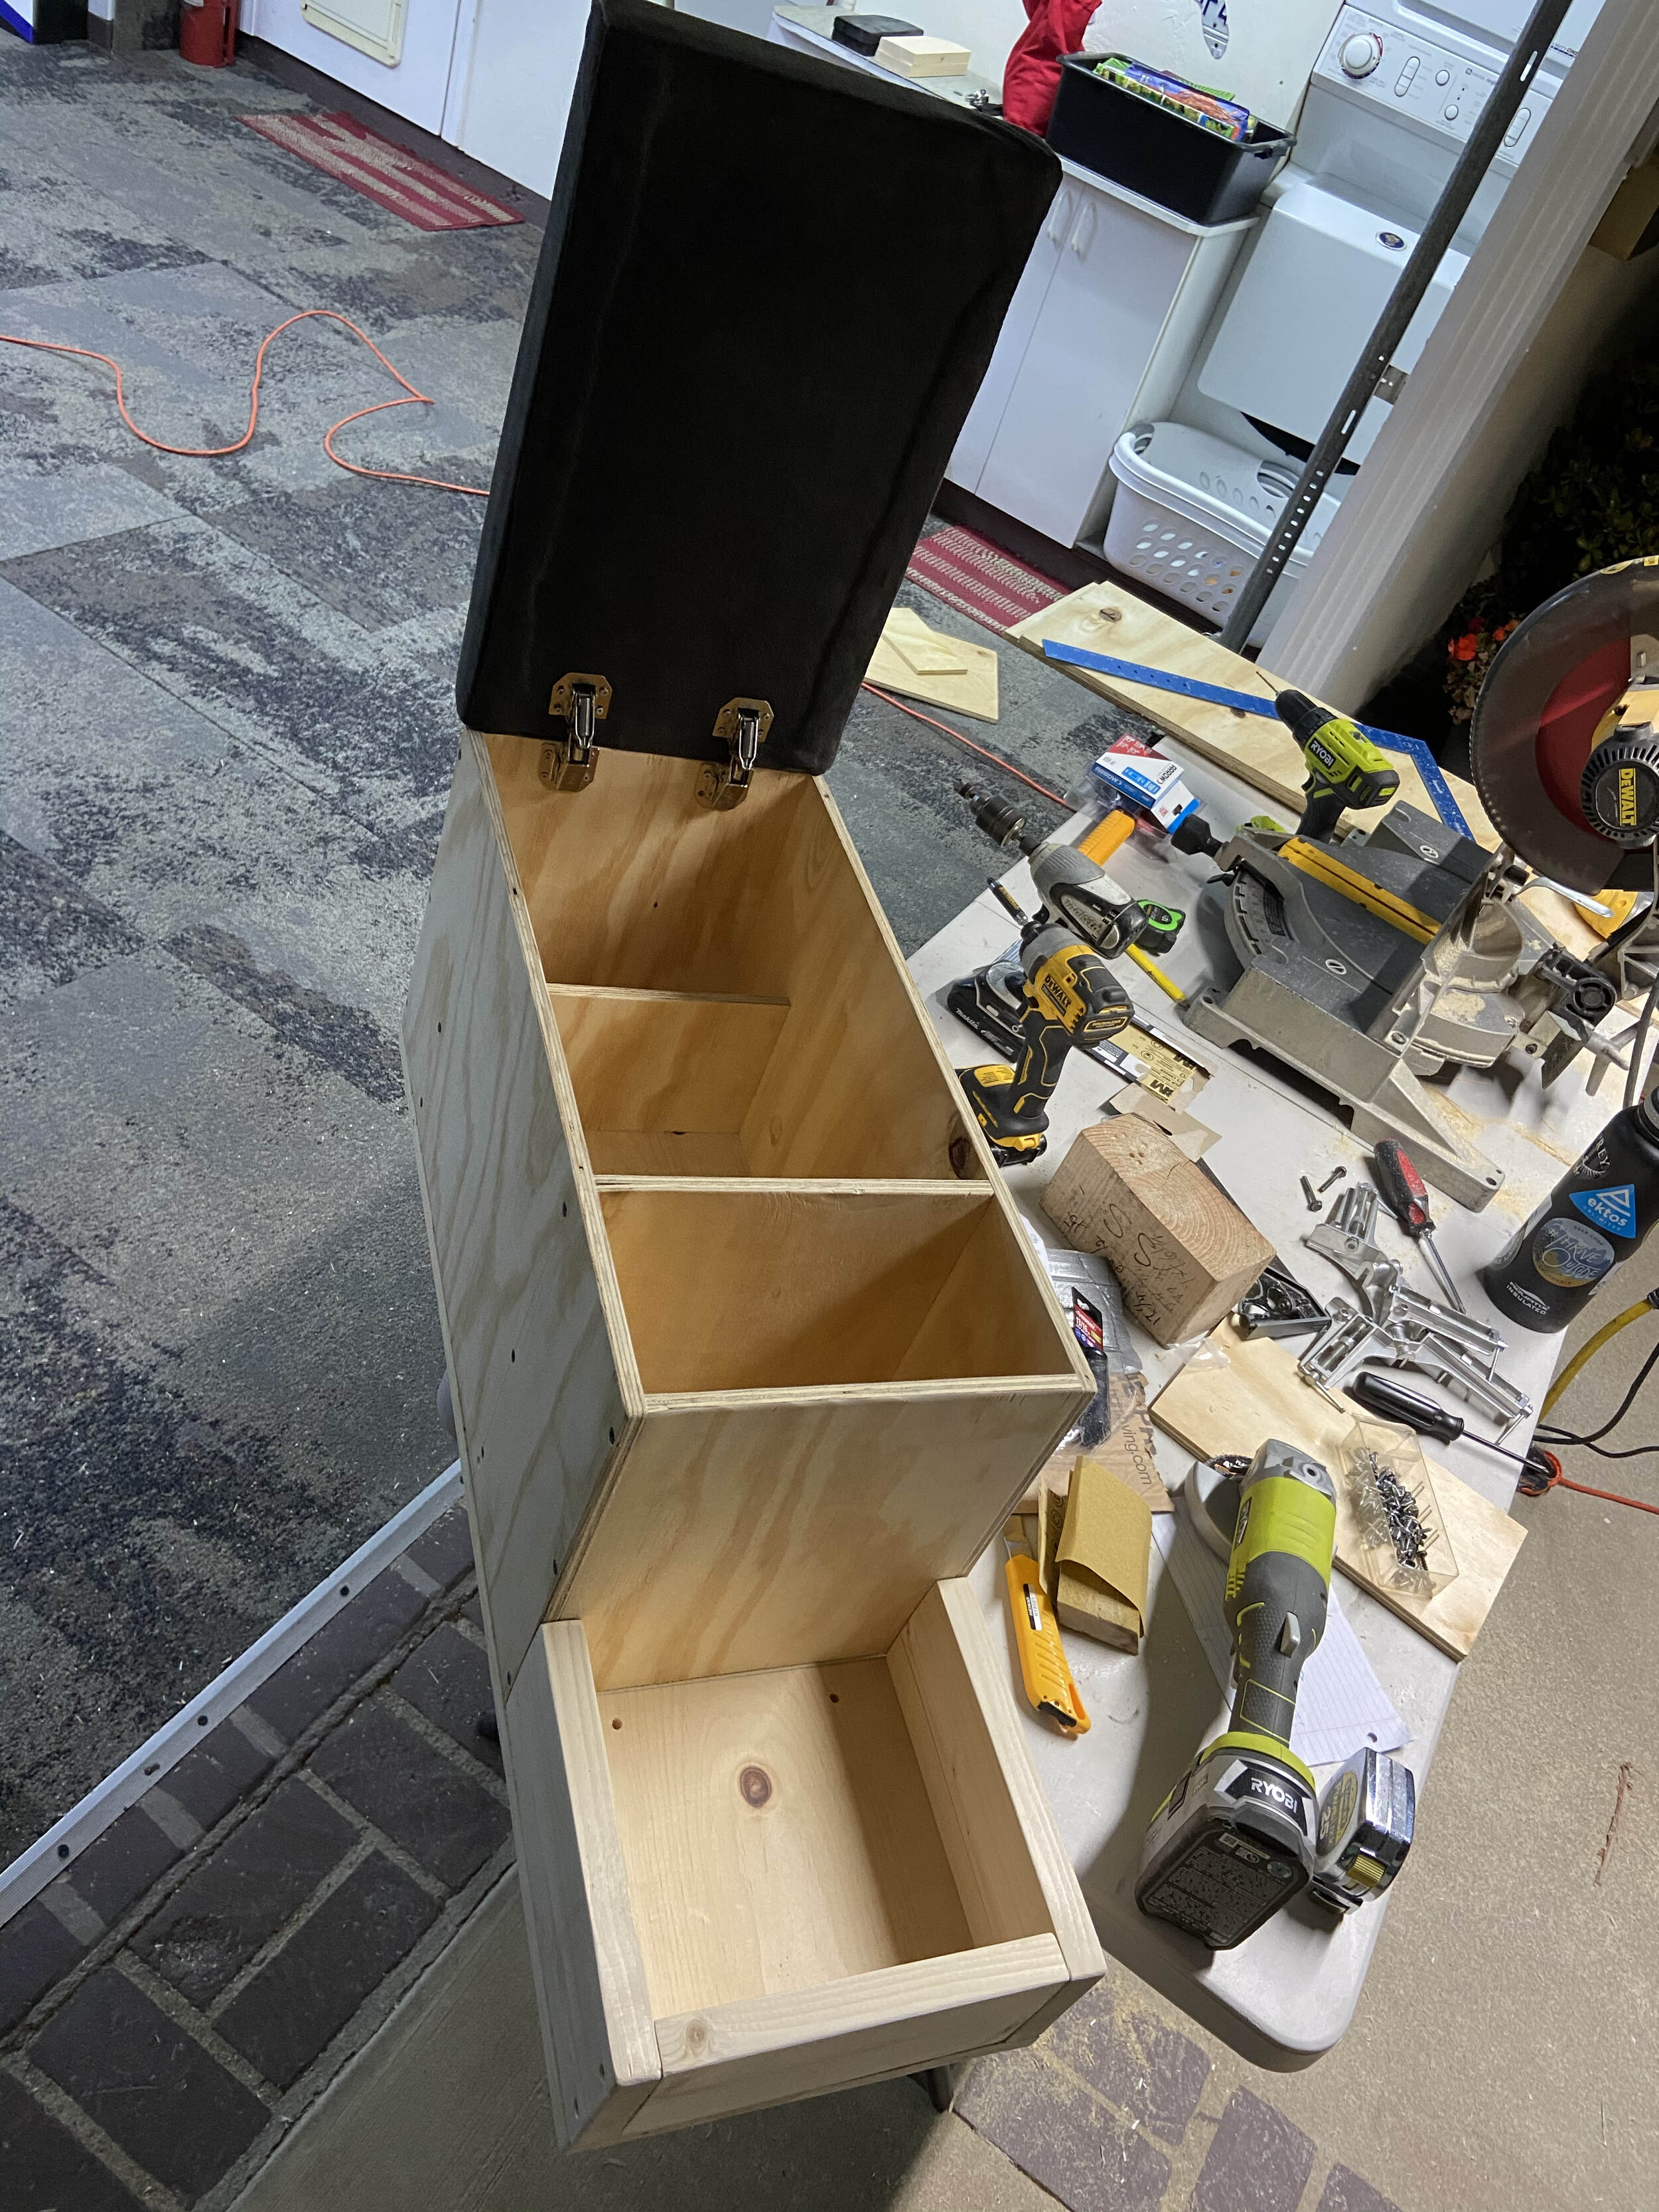
8/24/2020 - Solar compartment, shower compartment and bed installed. I’m using this camper because I’m tired of sleeping in a tent on basic trips. So, with that, I did’nt want to put my bed away every morning. I know there is space loss with a bed configuration like this but it works for me. The two drawers under the bed are 2’ long, 18” wide and 12” deep. Tons of storage for clothing. The water tank is mounted inside the box because I do a lot of cold weather trips and didn’t want anything to freeze up. The water tank holds 24 gallons of water. The water tank is custom and was made by www.plastic-mart.com it turns out this lasts us about 4 days of continuous use including 2 adults taking showers. The water tank was made in Anaheim CA. All the framing was done with AL. This saved a boat load of weight, made the structure much stronger and long lasting. All the AL came from IMS (Industrial Metal Supply). It is more expensive however this structure will outlast me. Installation of the 5kW heater was a painless task. There is also trunk space accessible for the rear door.
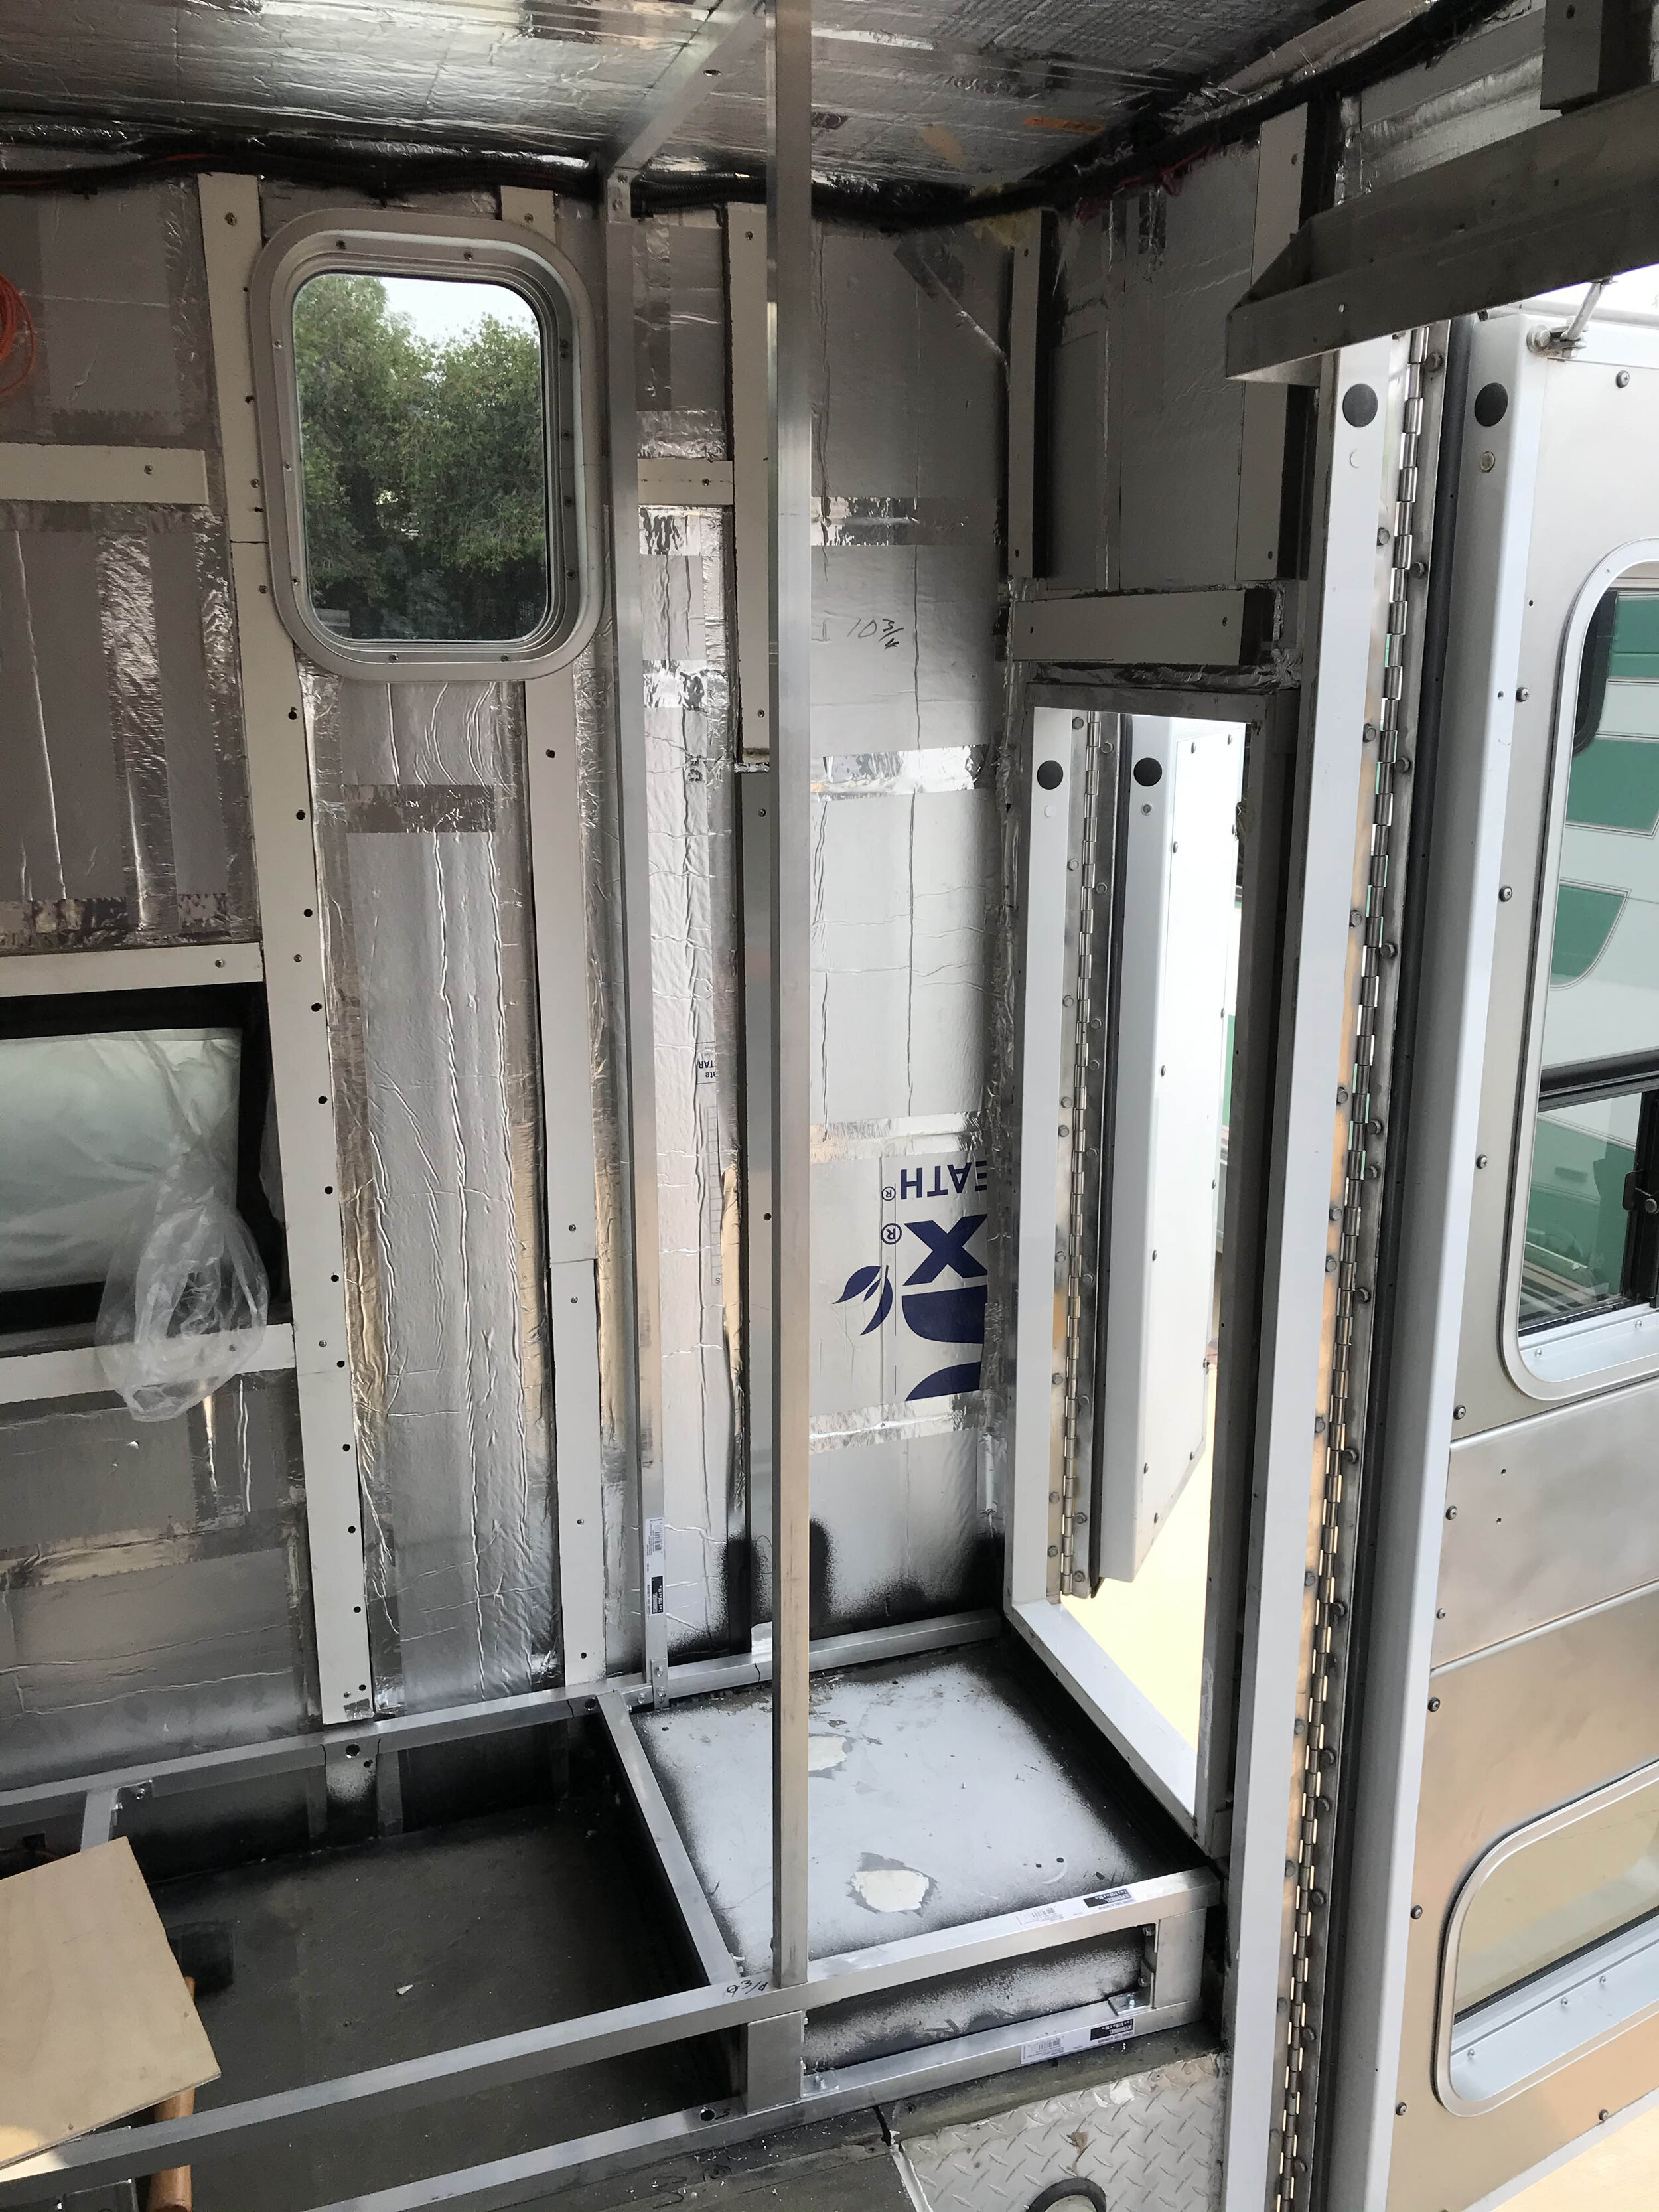
All the water lines, tankless water heater(which is awesome!), shelf and solar board were installed. These were all dry fits to ensure everything would fit correctly. It all got pulled back out so that we could apply Herculiner to all the compartments. This adds durability and further waterproofing for the interior. I mounted the shower head to the door and that seemed to work out great. The door swings out to 120 degrees. Im going to mount a teak wood decking so that you have something to stand on when you shower. I added the 3/4” plywood boxes to the solar compartment floor for additional electrical storage.
framing - cabinetry
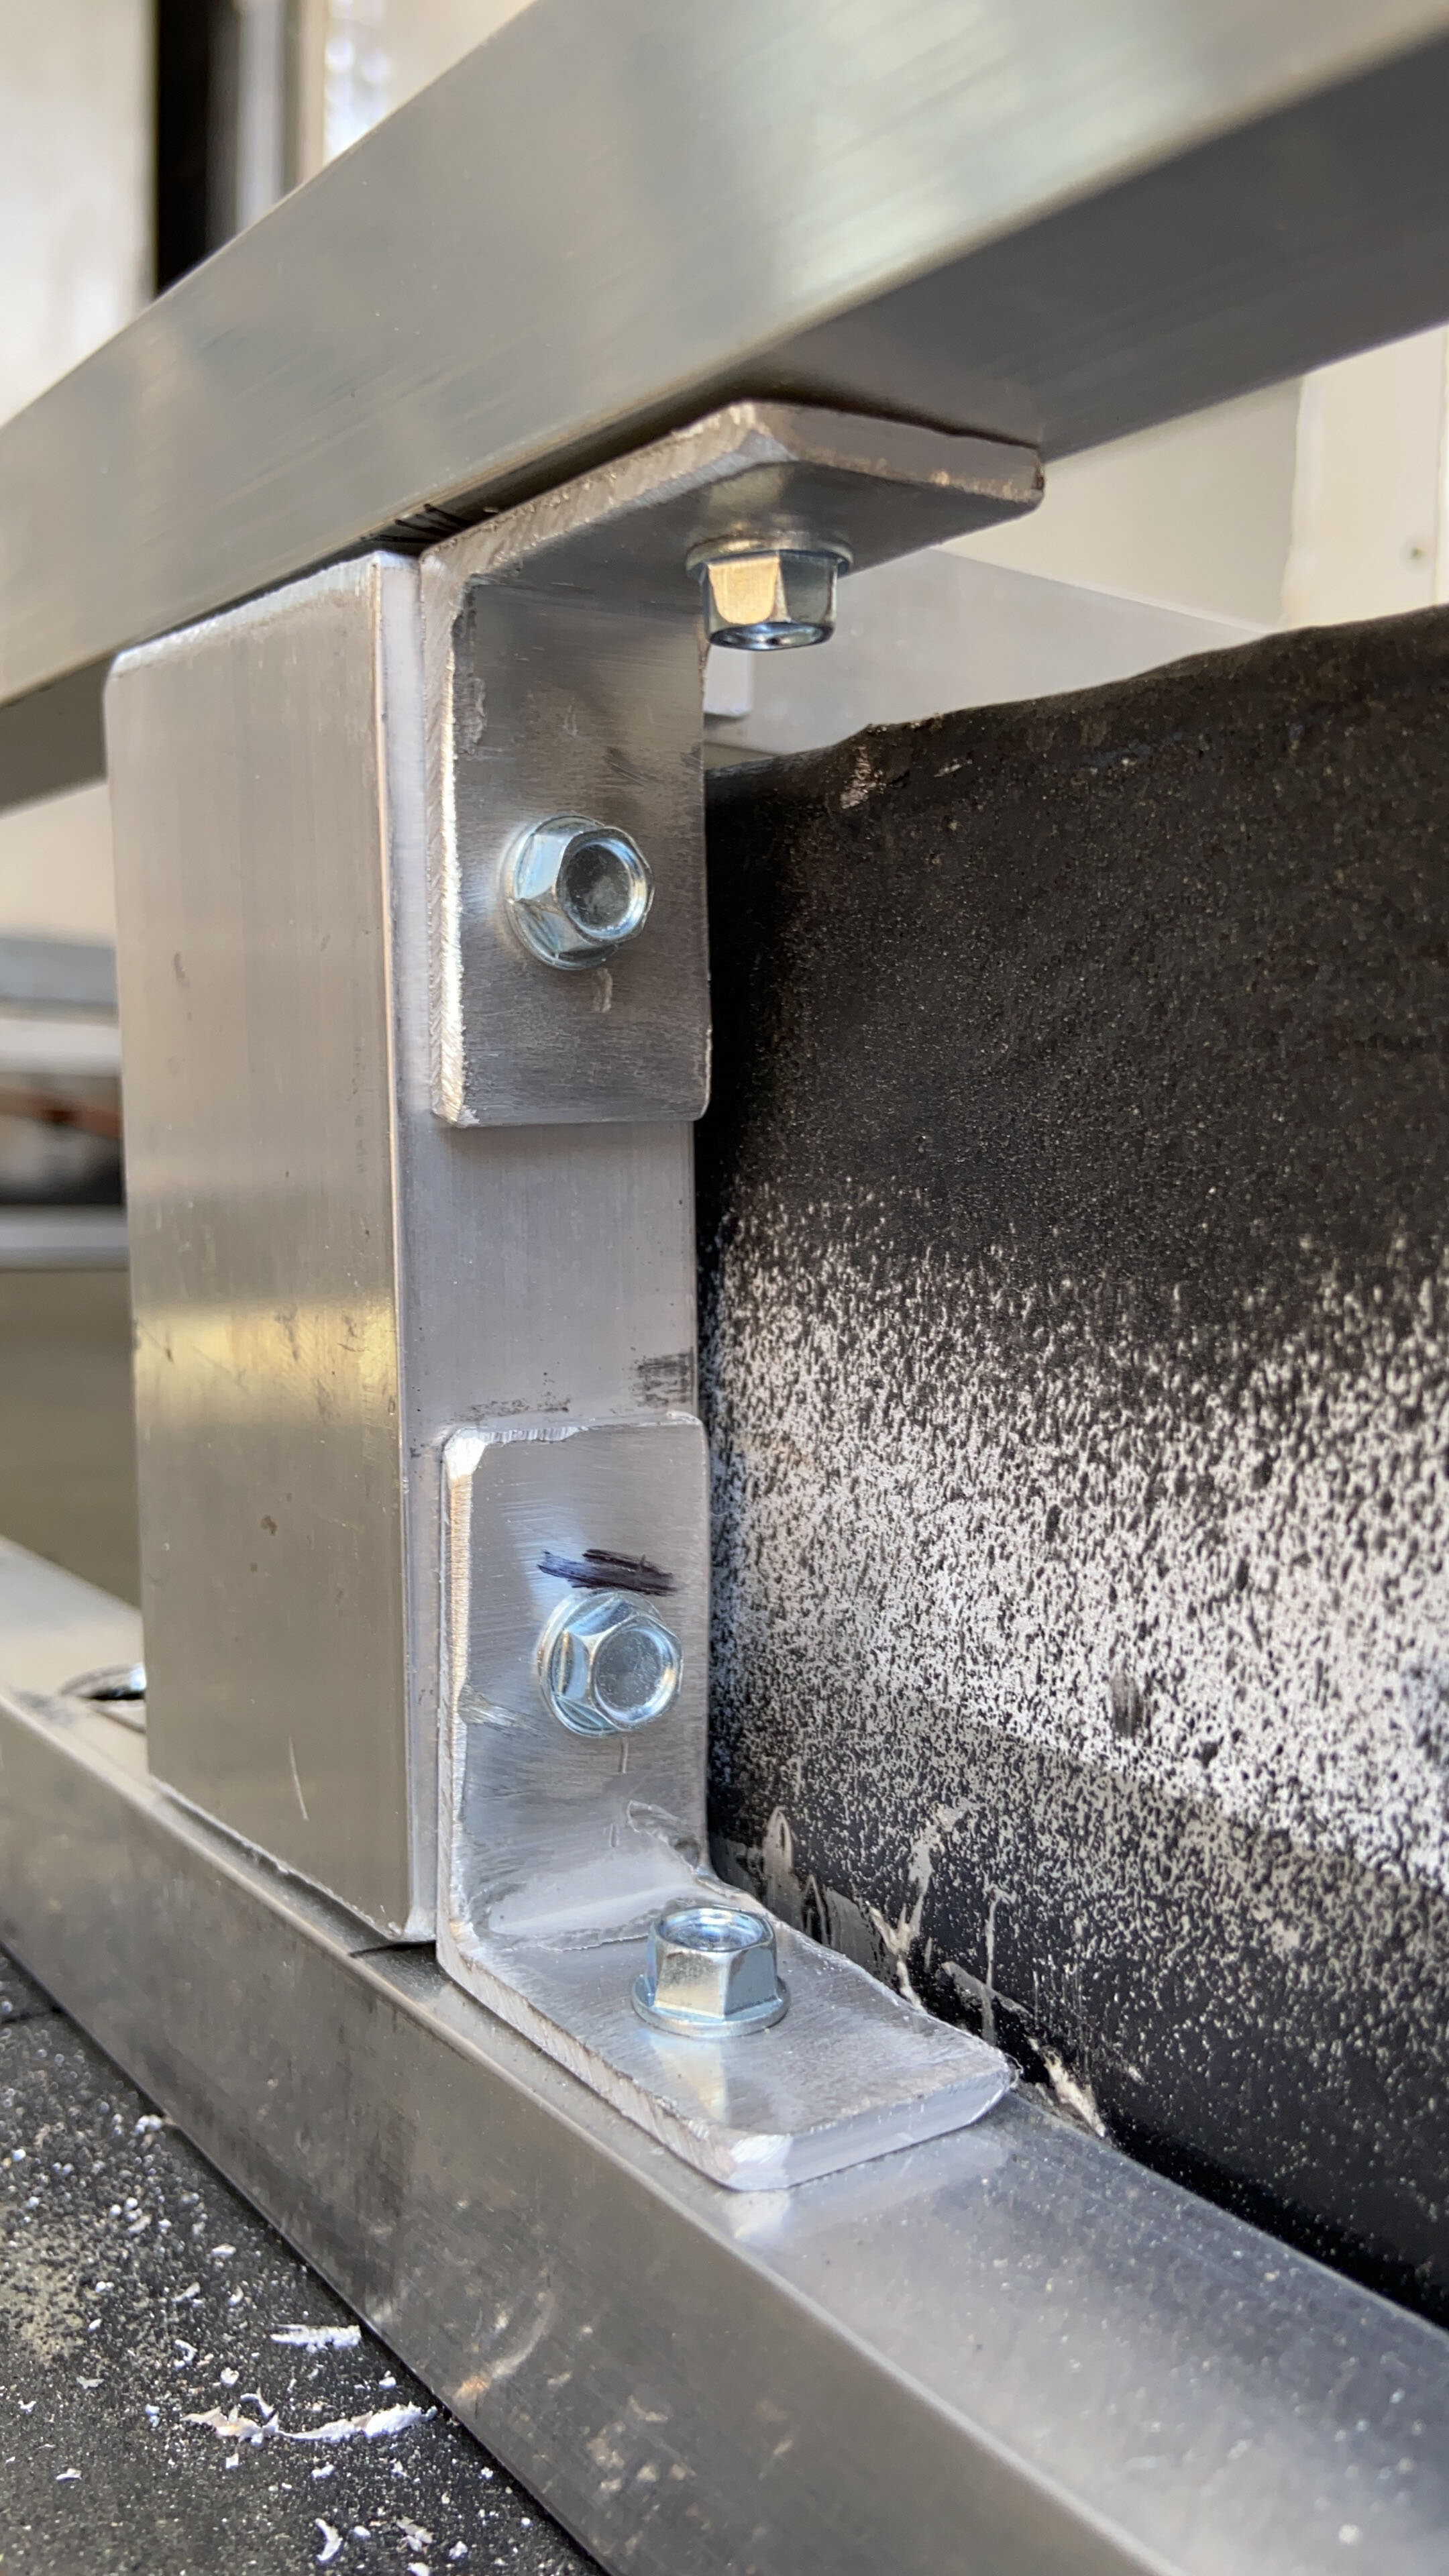
9/7/2020 - Aluminum framing process. I paid about $500 in total for all the AL used for the framing process. I cannot weld AL so we decided to cut 2” angle AL into 2” wide pieces. We used these angle AL pieces with 2 holes drilled on each face to attach the AL together. The AL we used was .063 2”x1” rectangular tubing. There were some places where we used 1”x1” to save weight. These places were non load-bearing structures. We used #10 Stainless 1” self tapping screws. In the places where the screws could possibly see torsional forces we applied Locktight x8 premium to the threads. This structure is not coming apart.
The electrical system was zip tied every 6-12”. There was a perfect sized gap in the upper corners of the ceiling to run the wiring.


tire rack - tow hitches
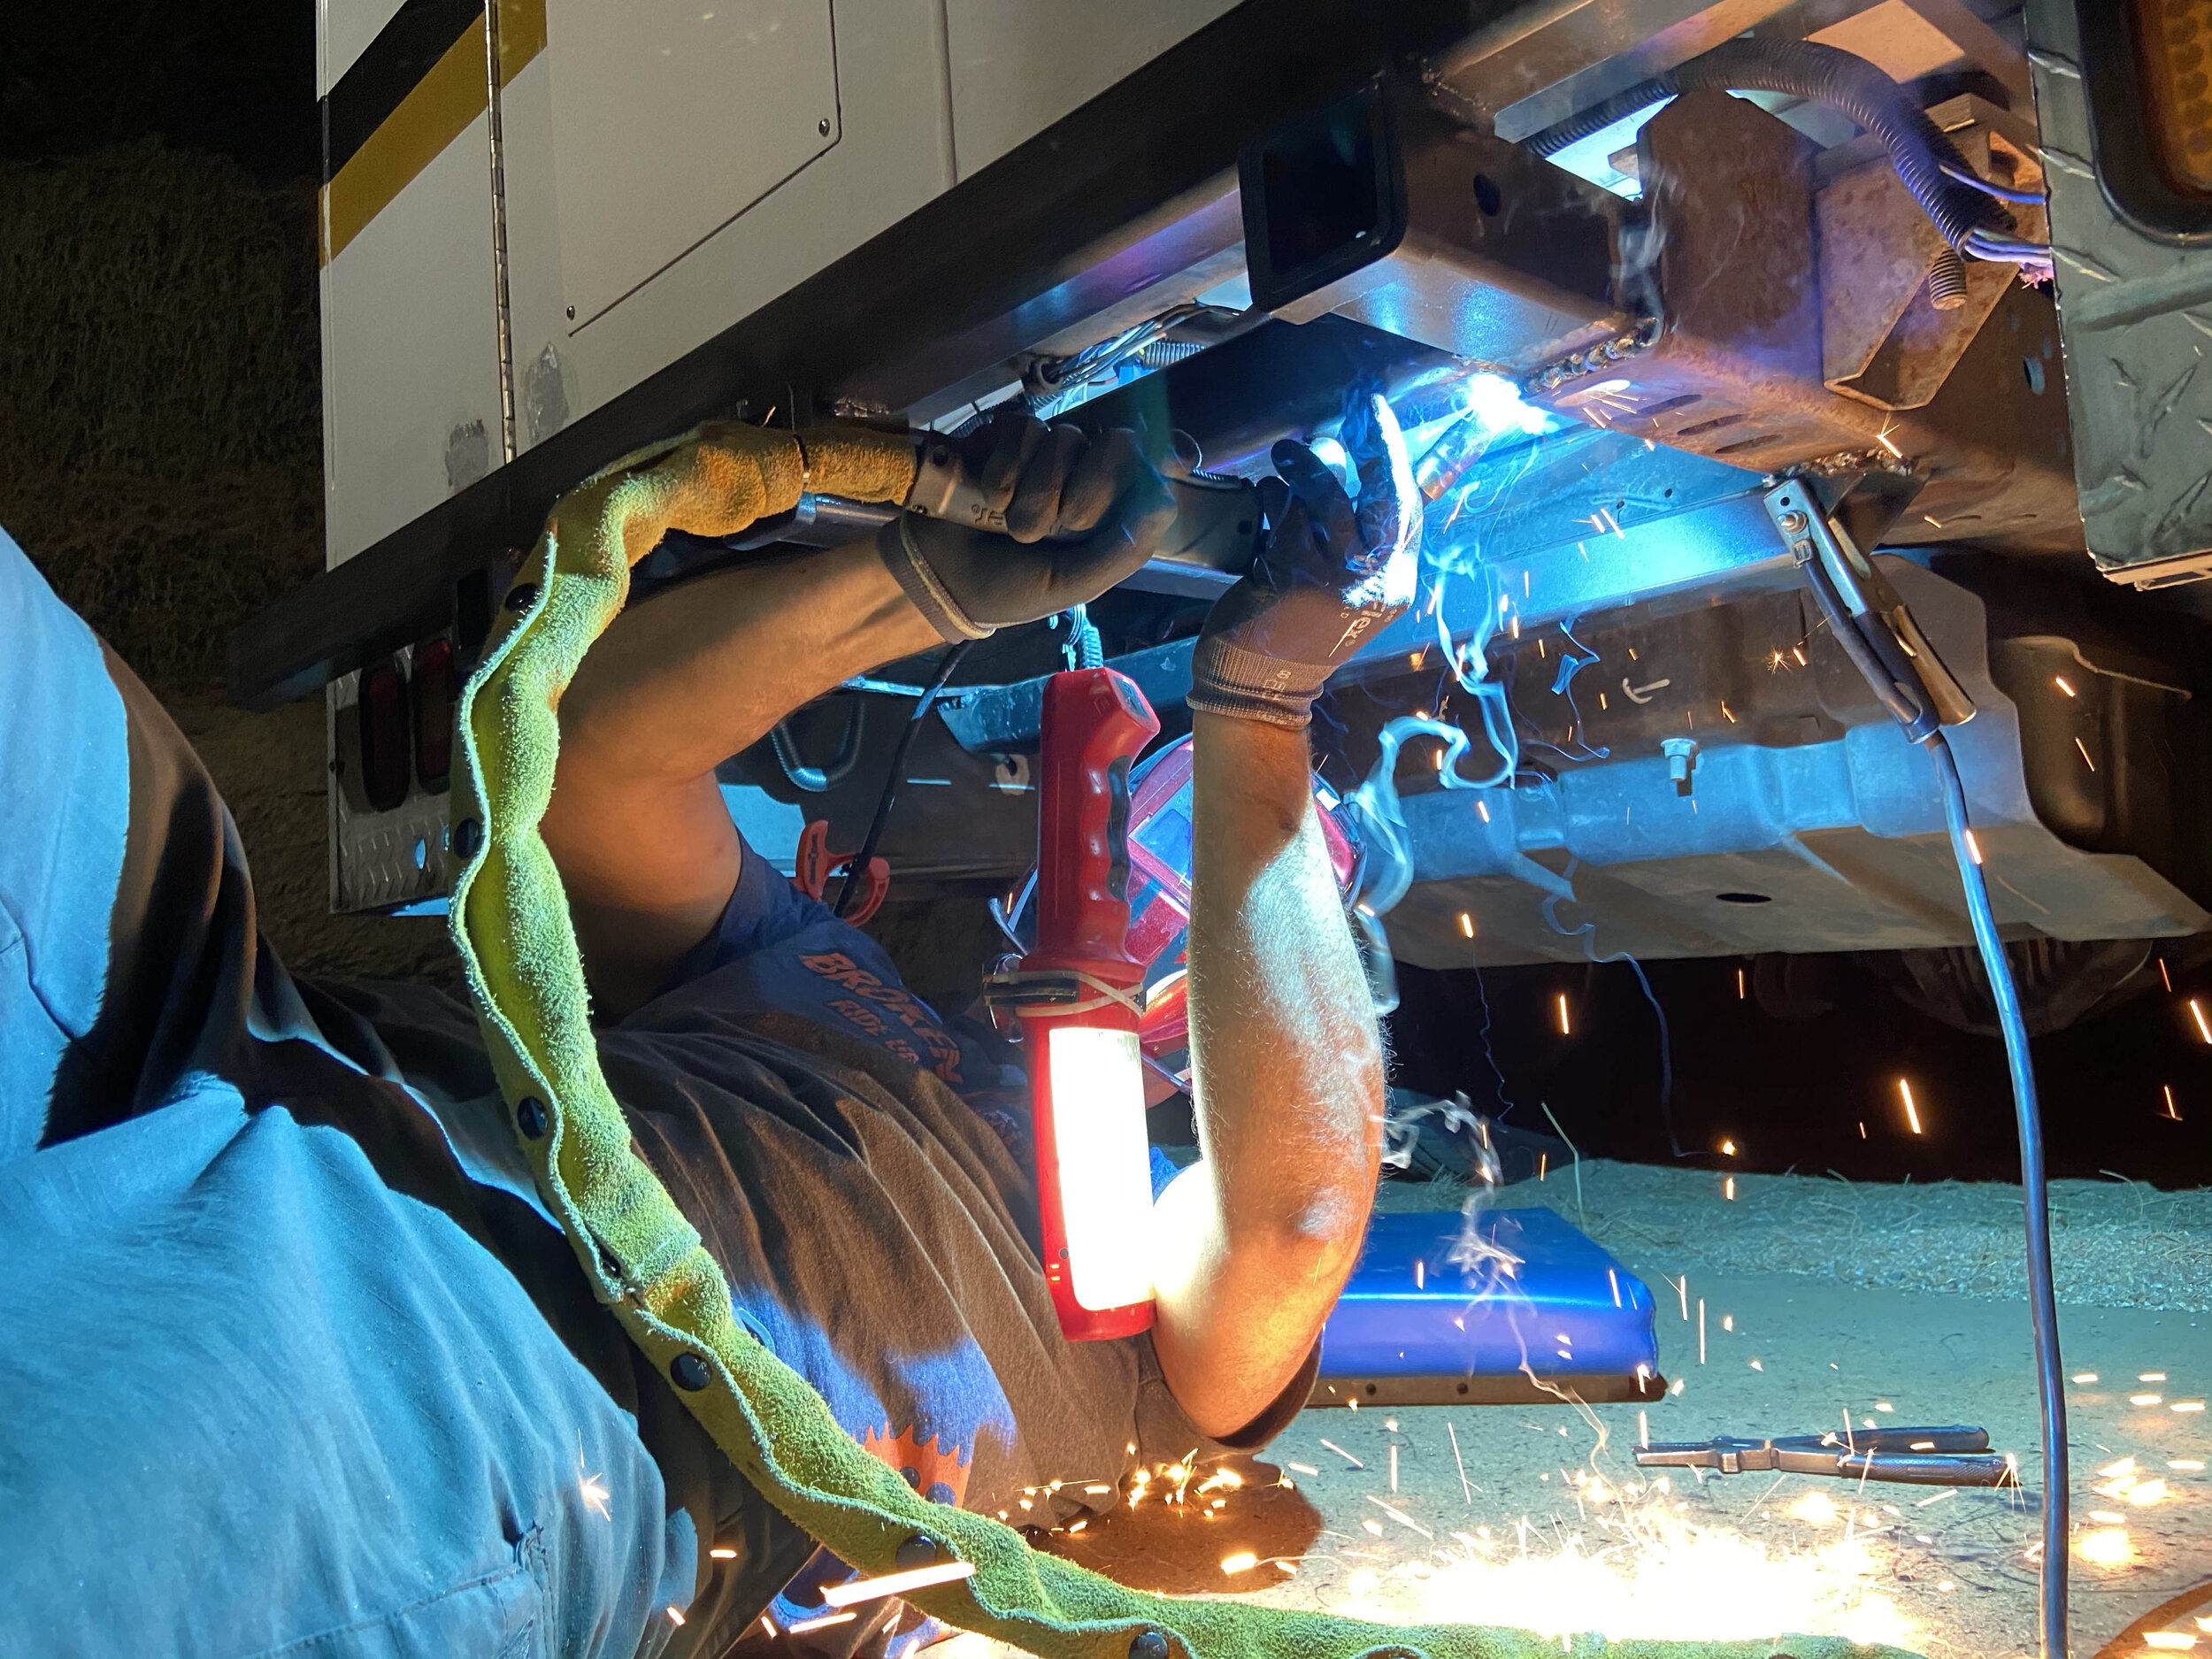
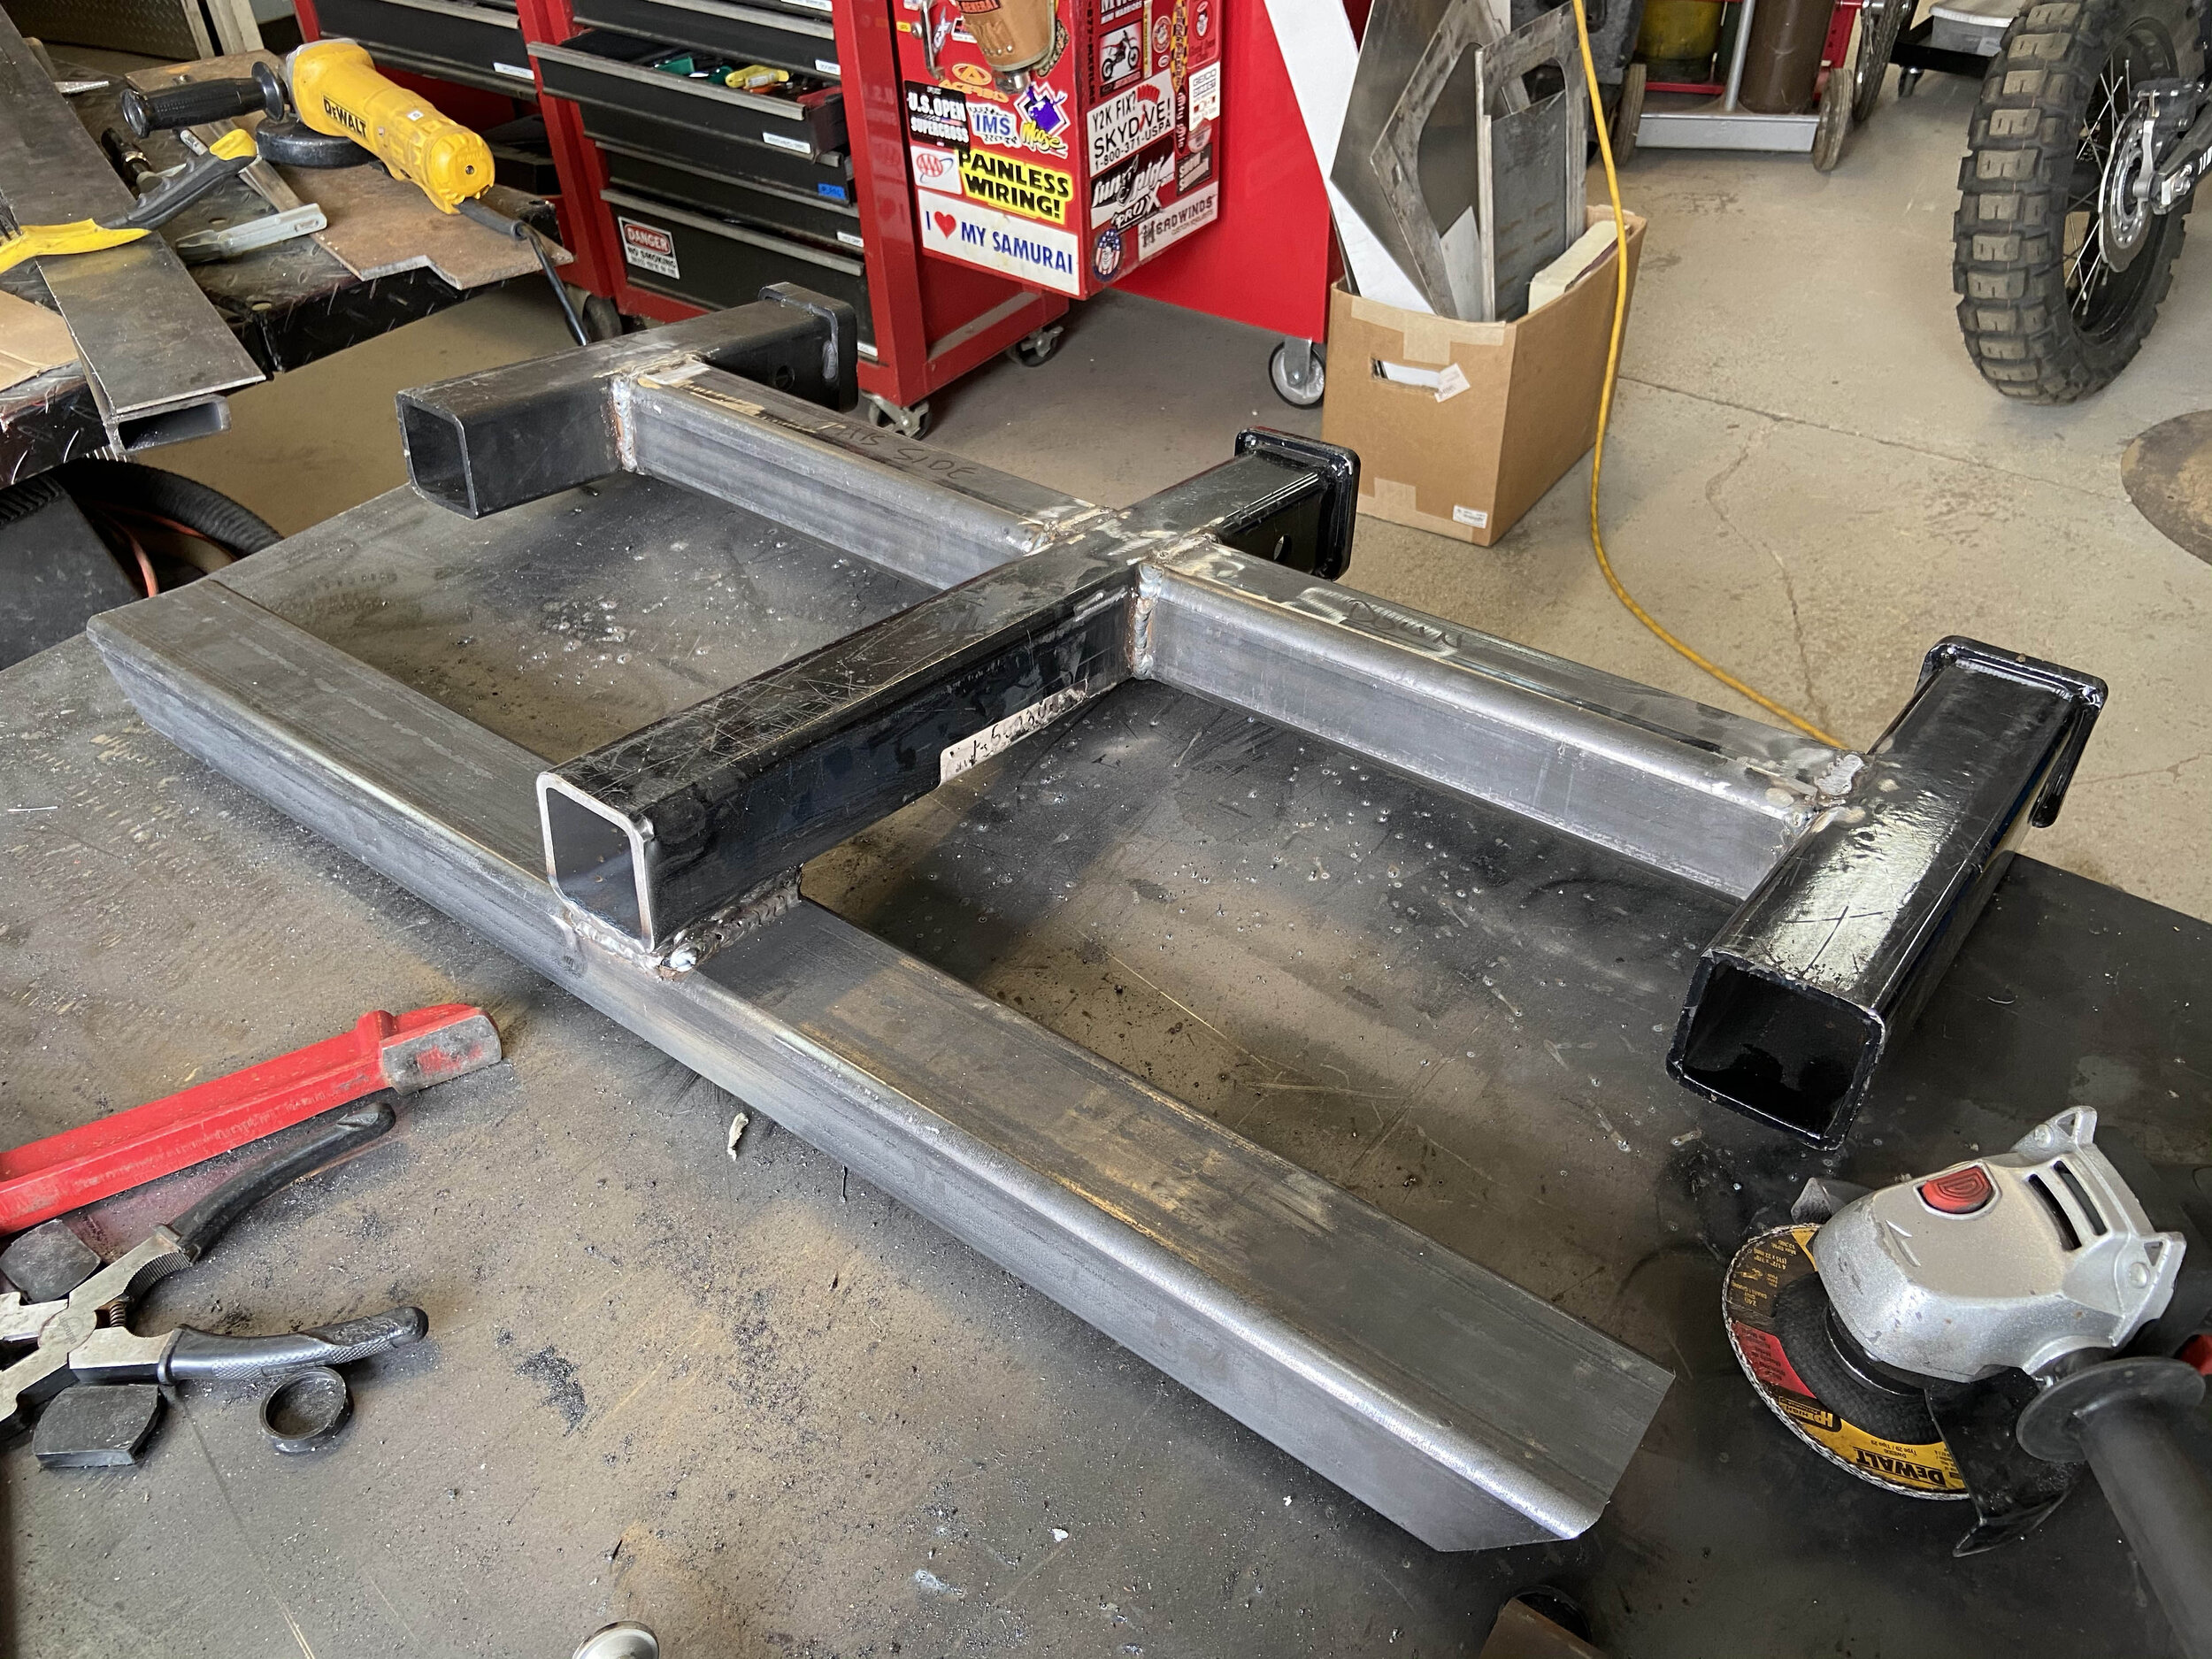
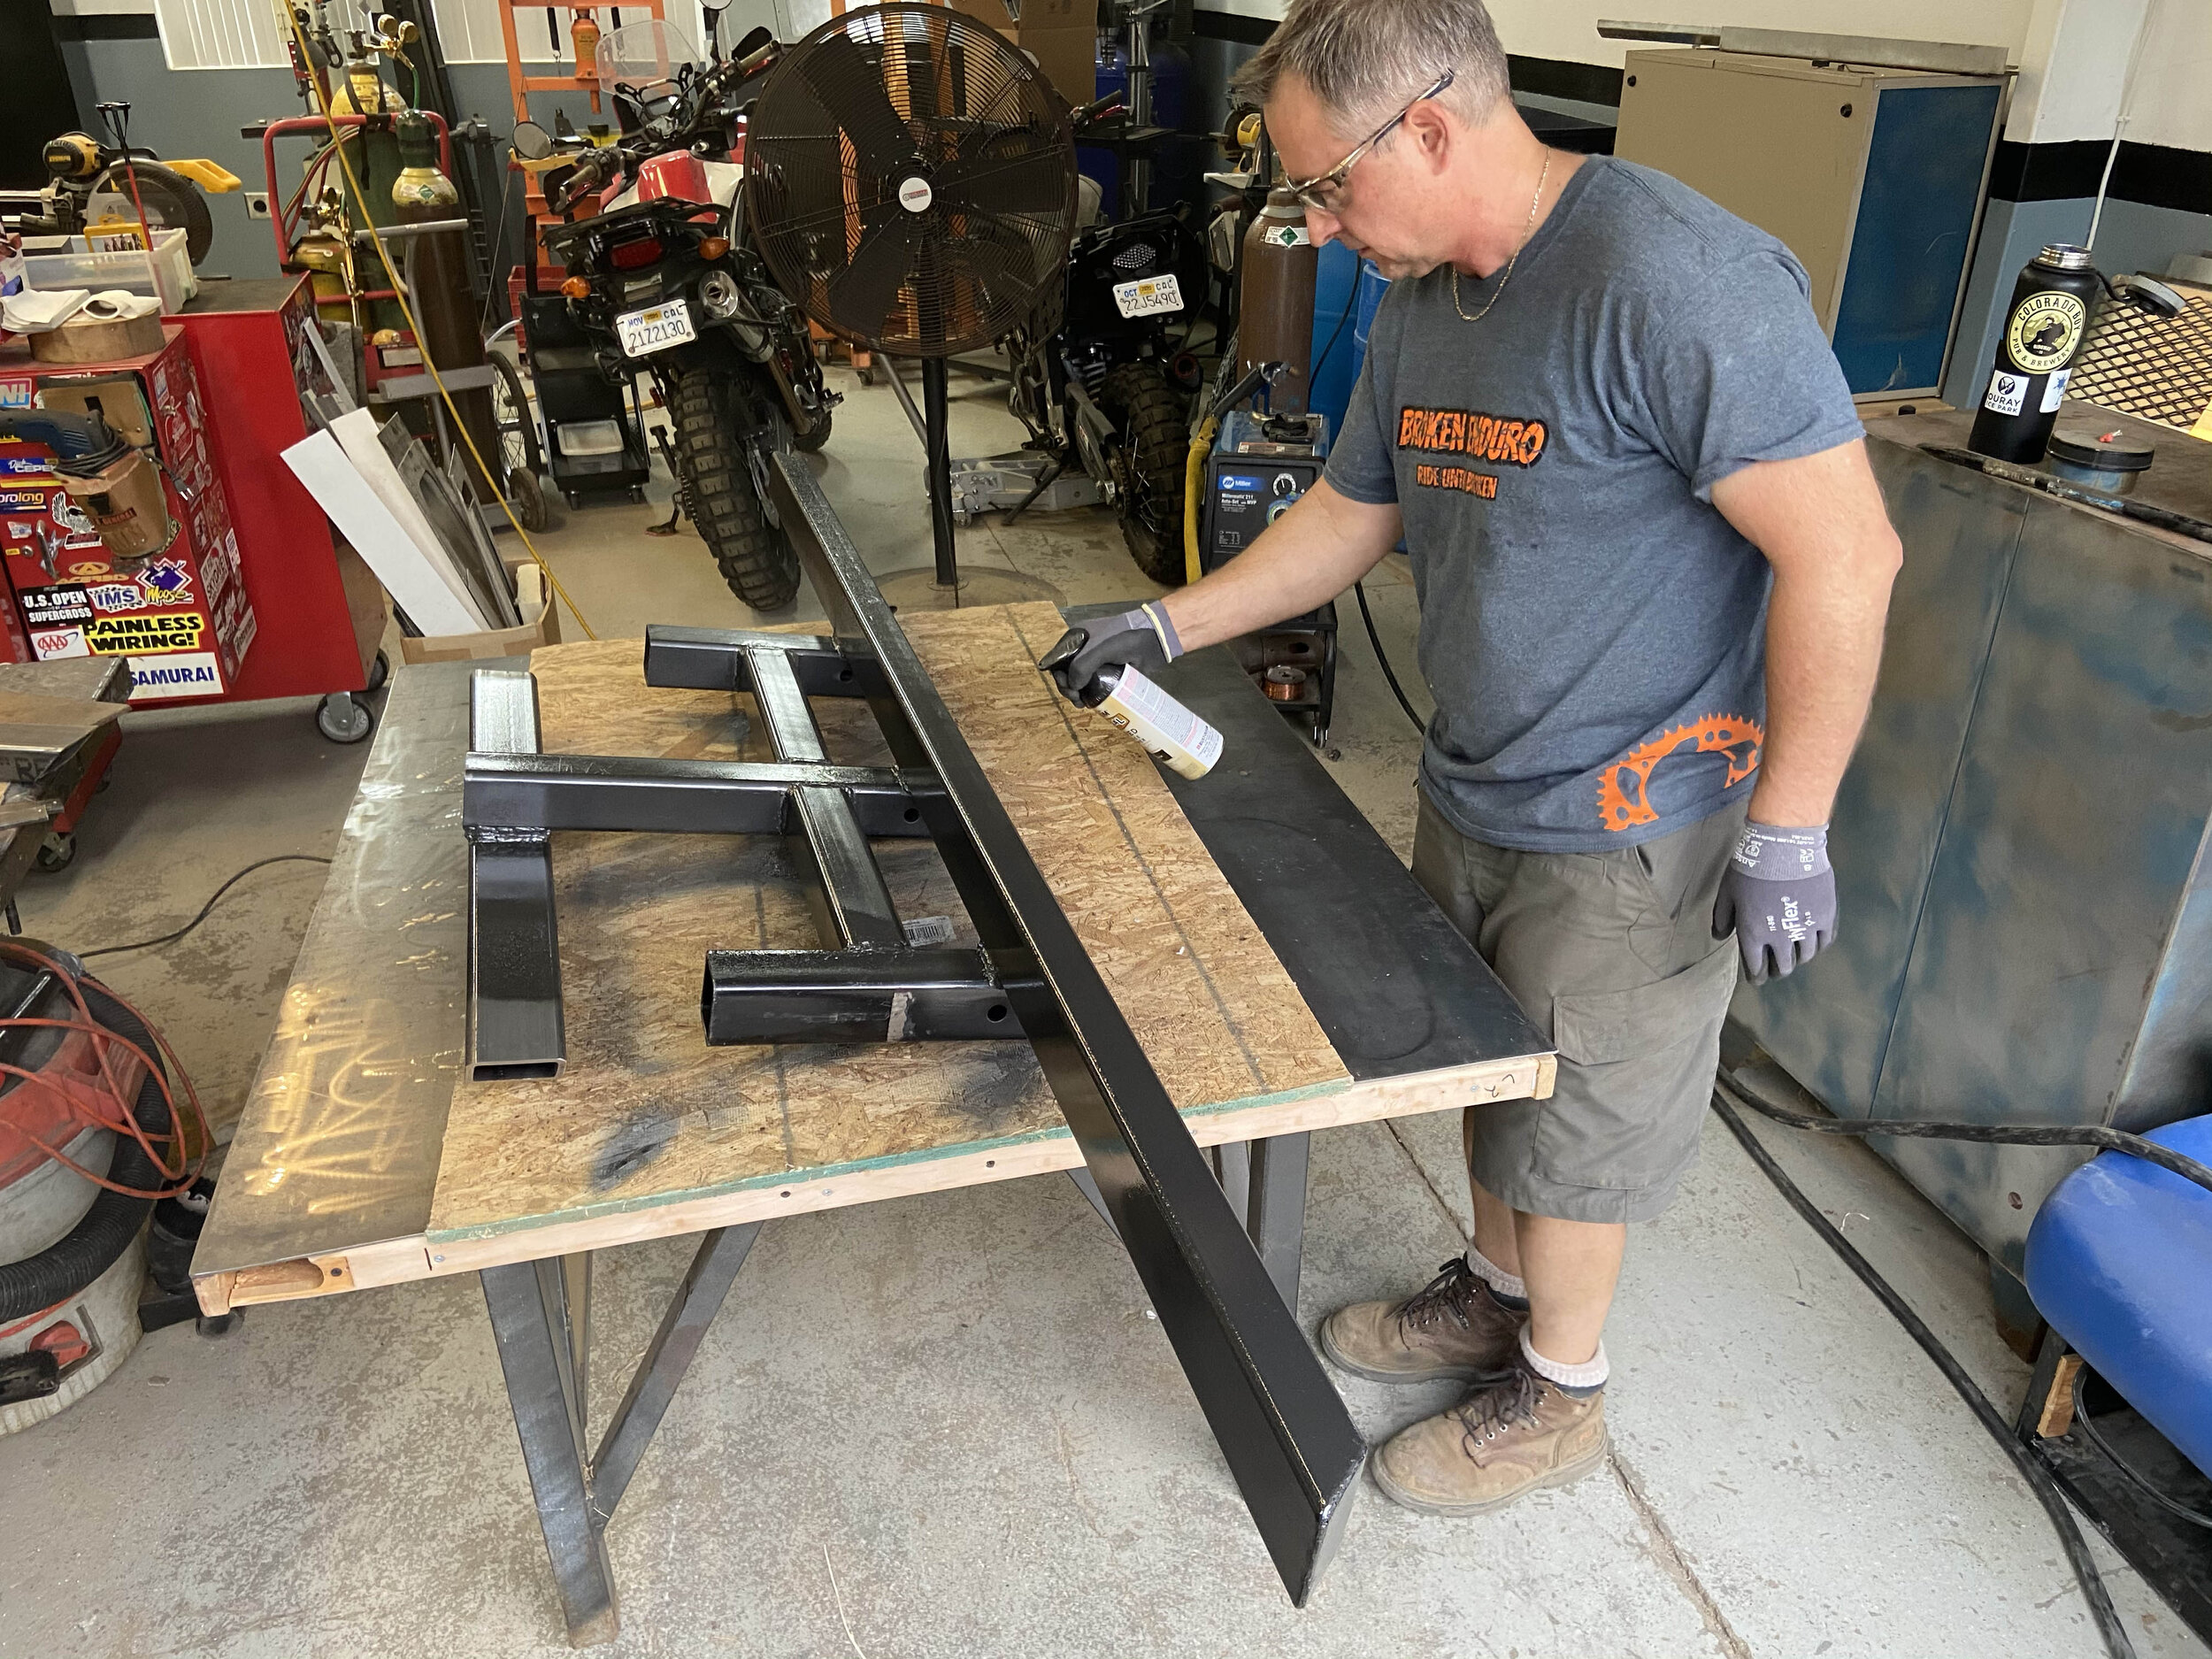
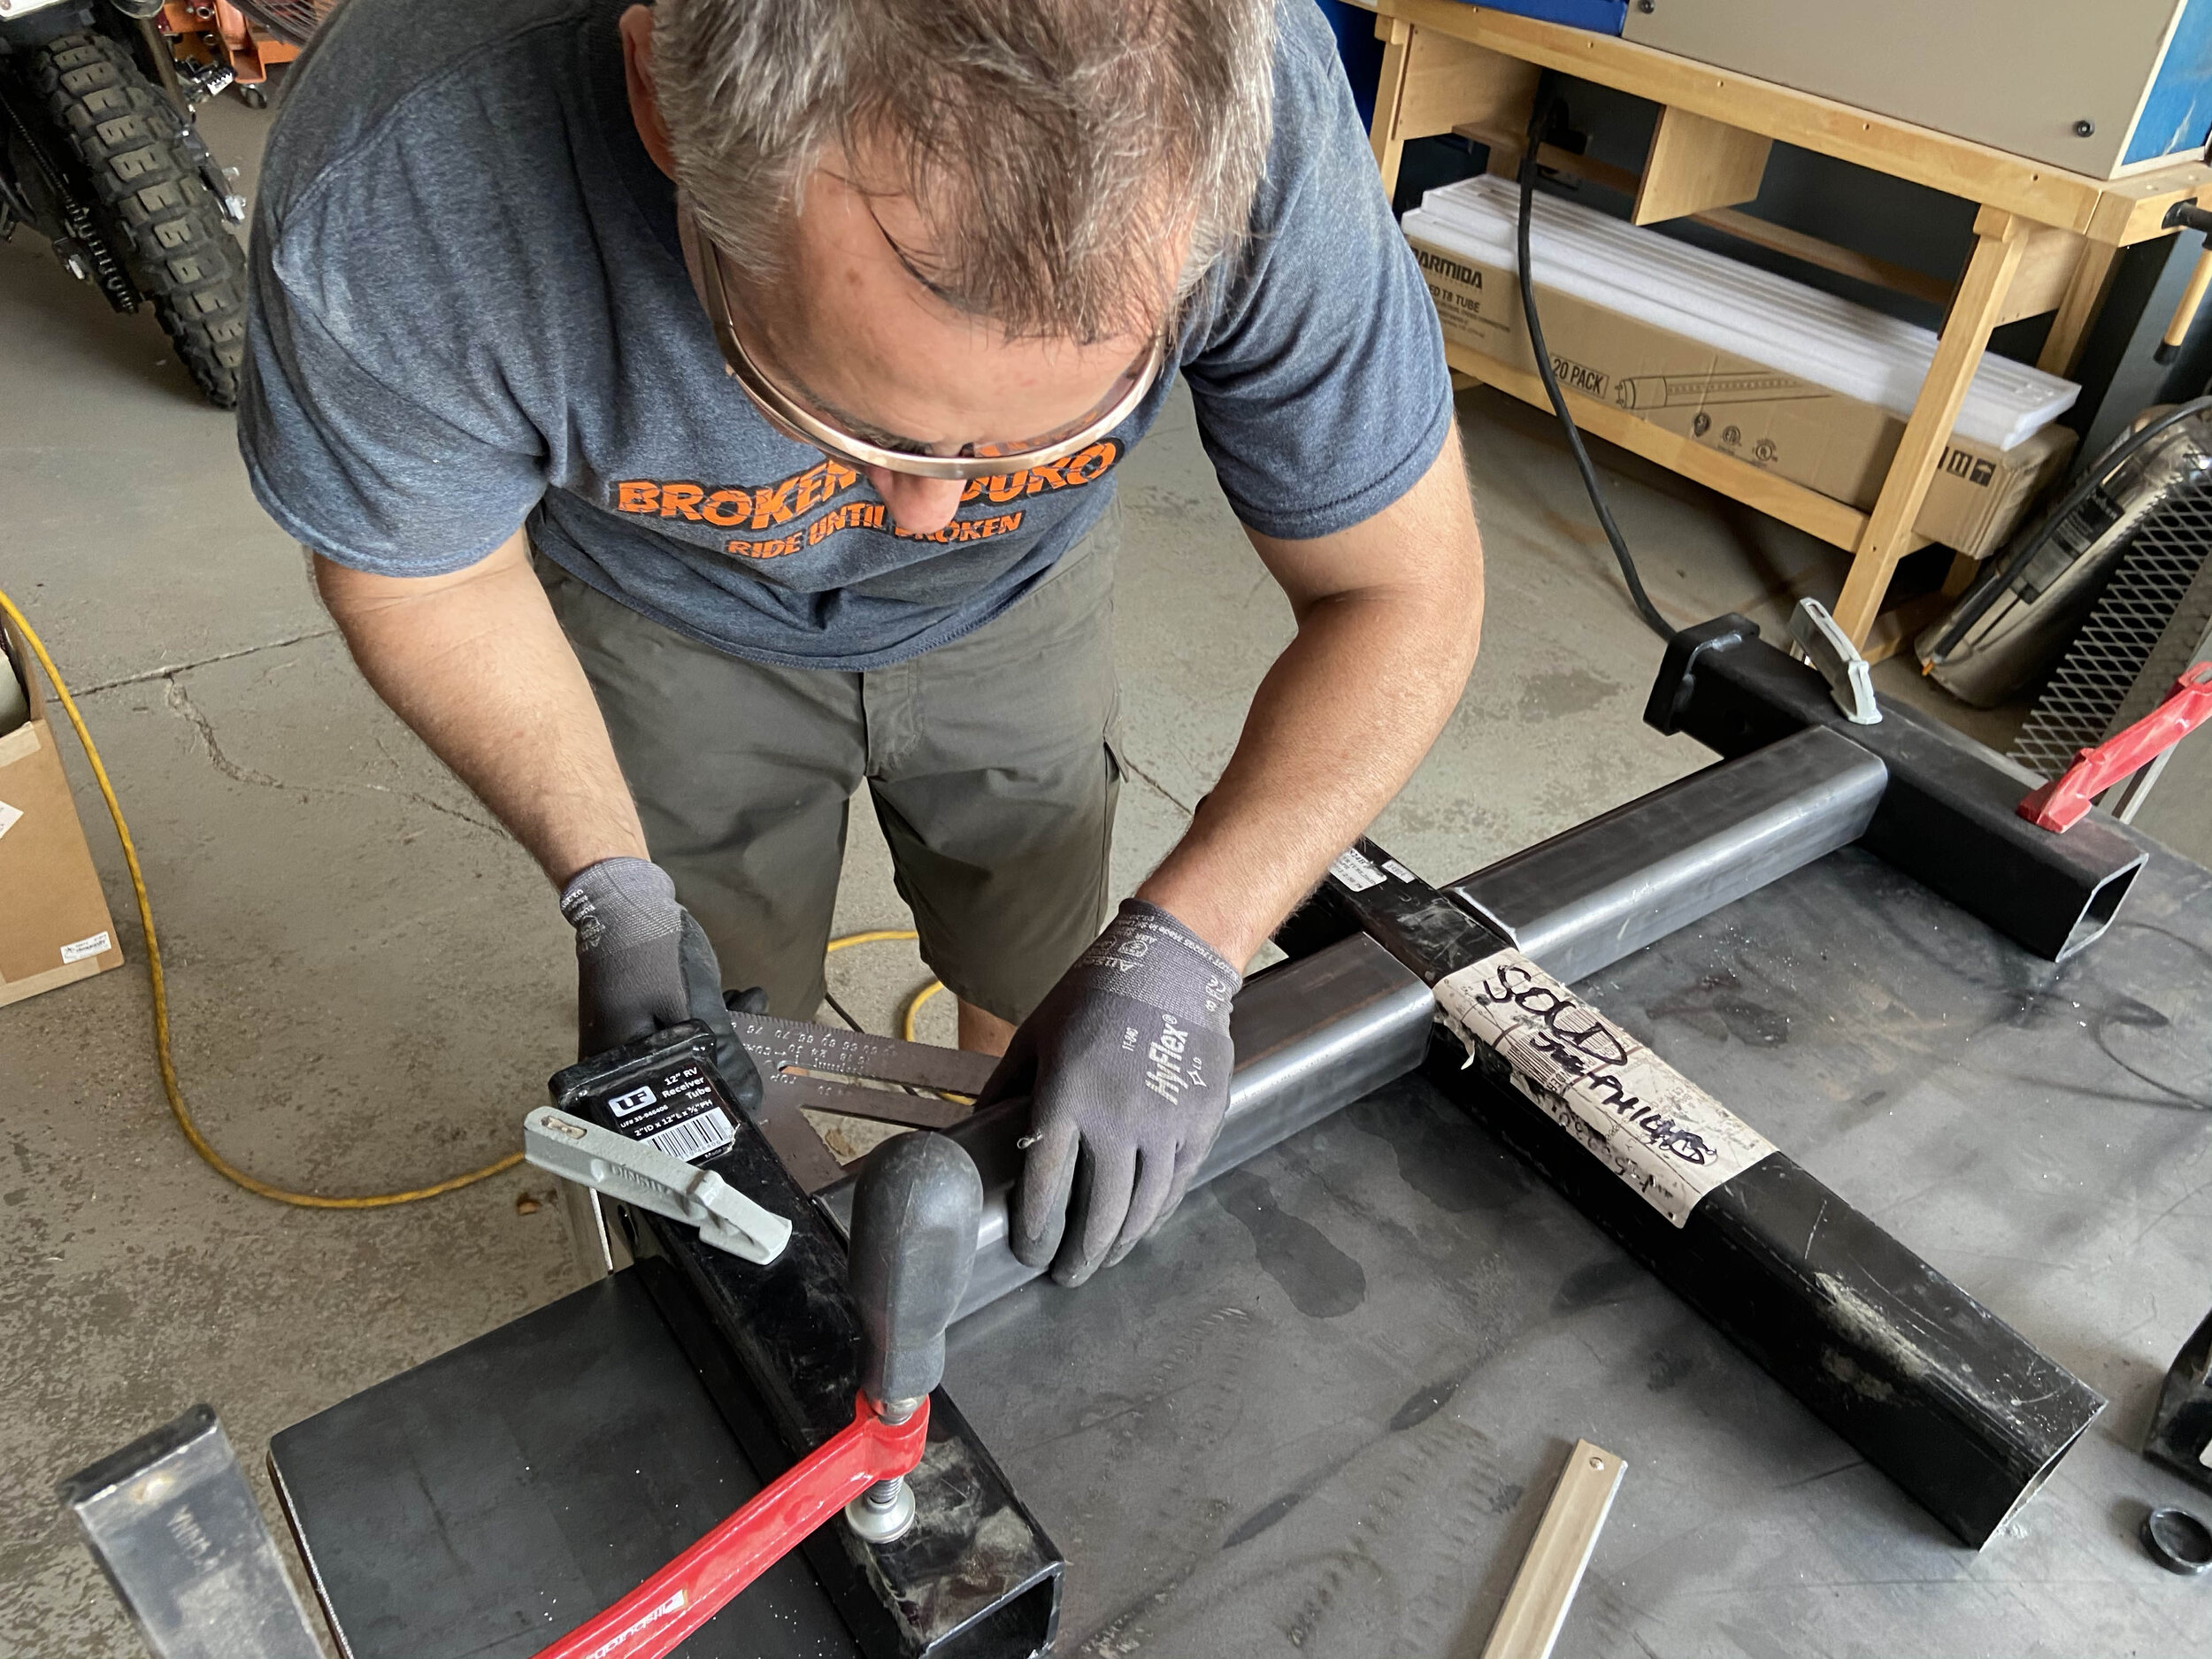
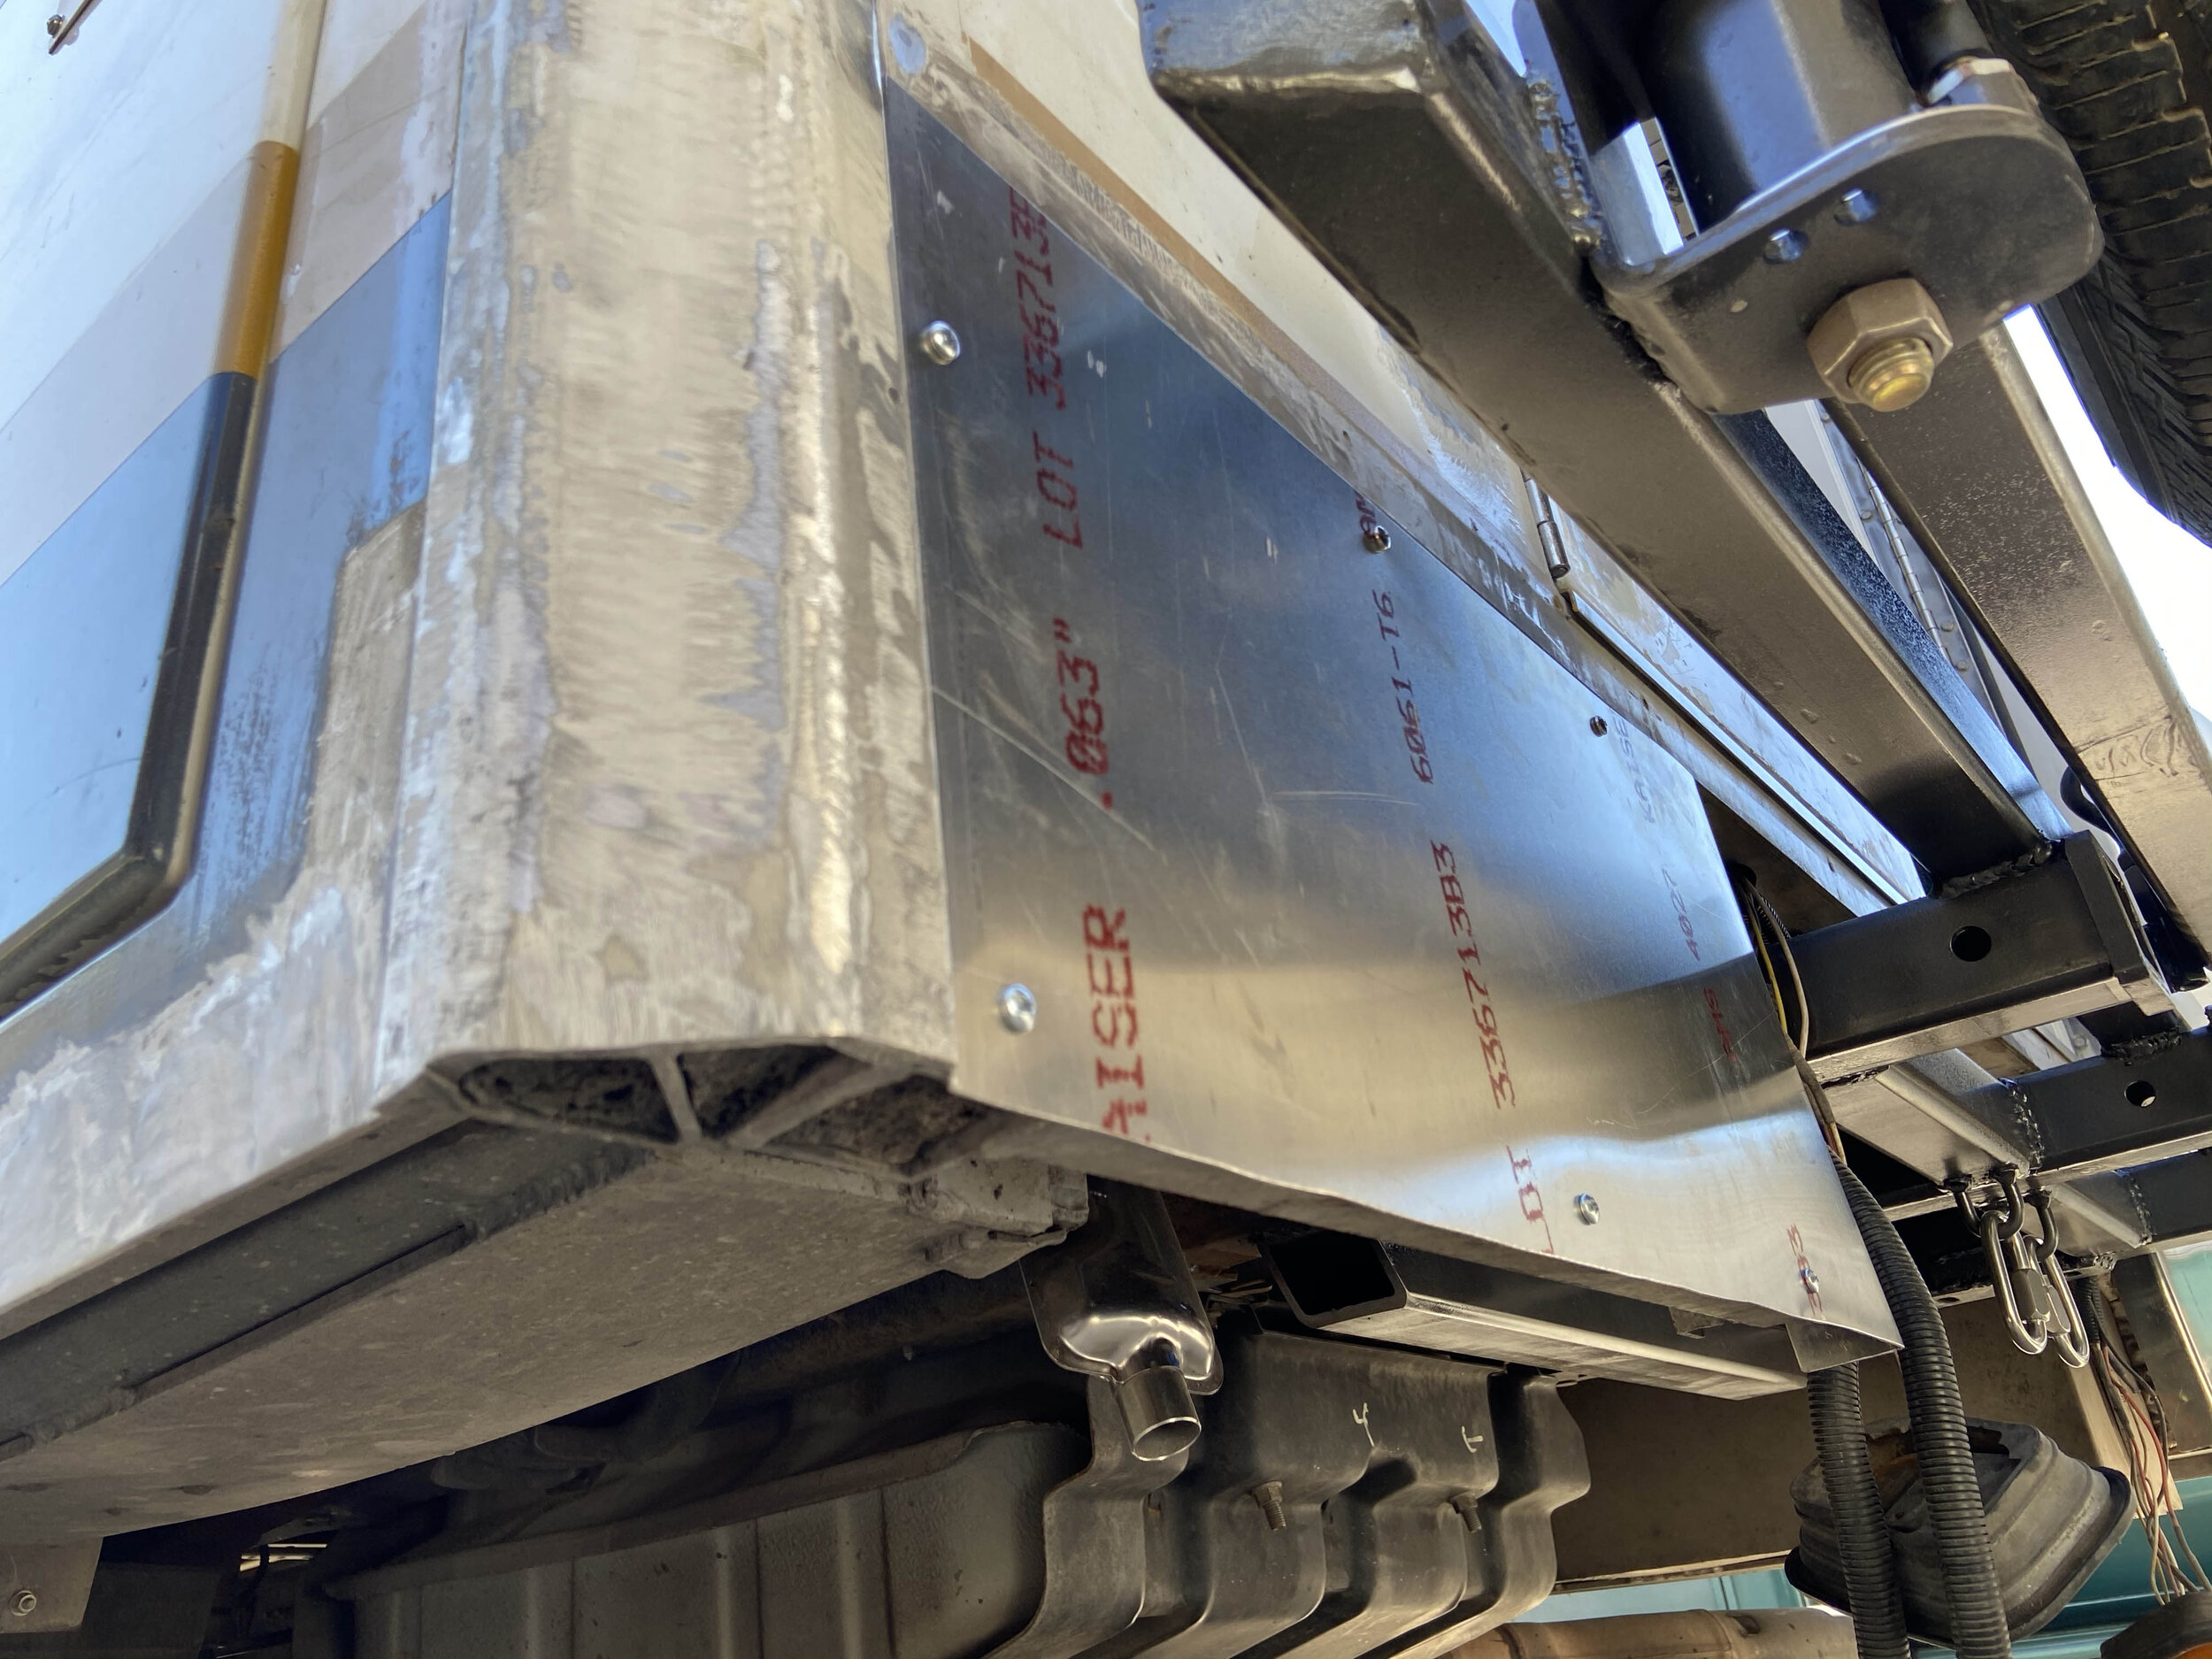
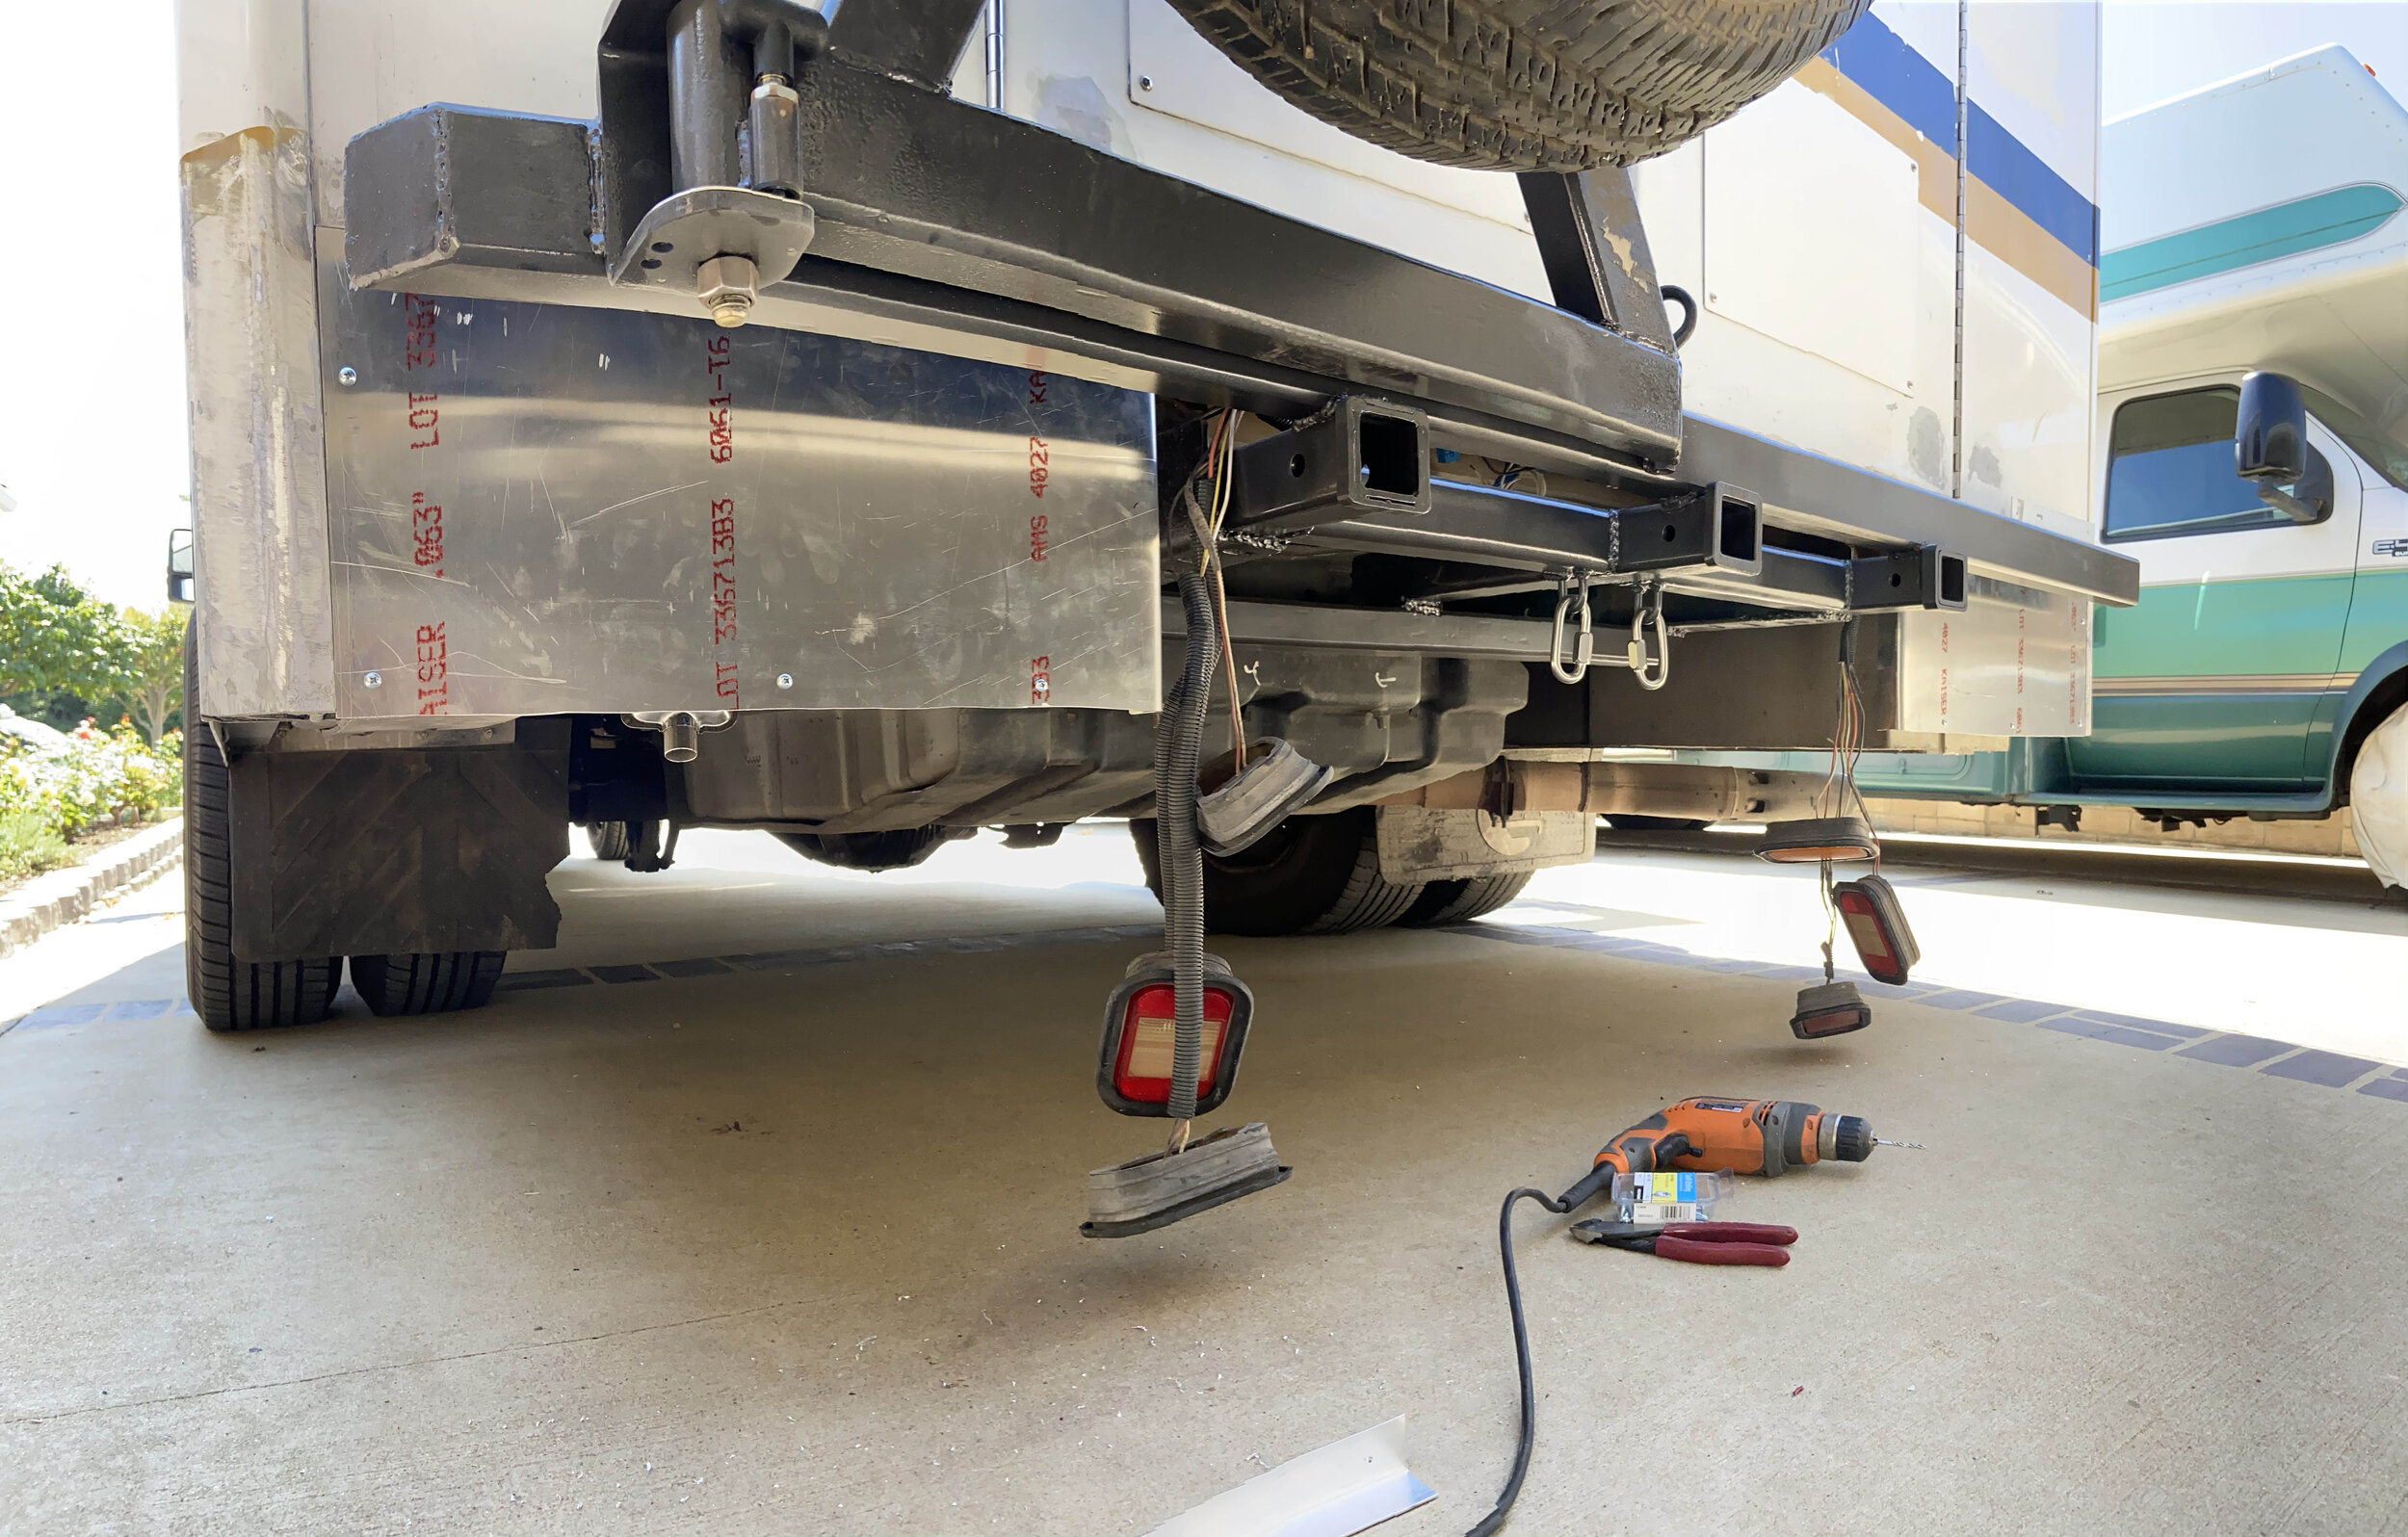
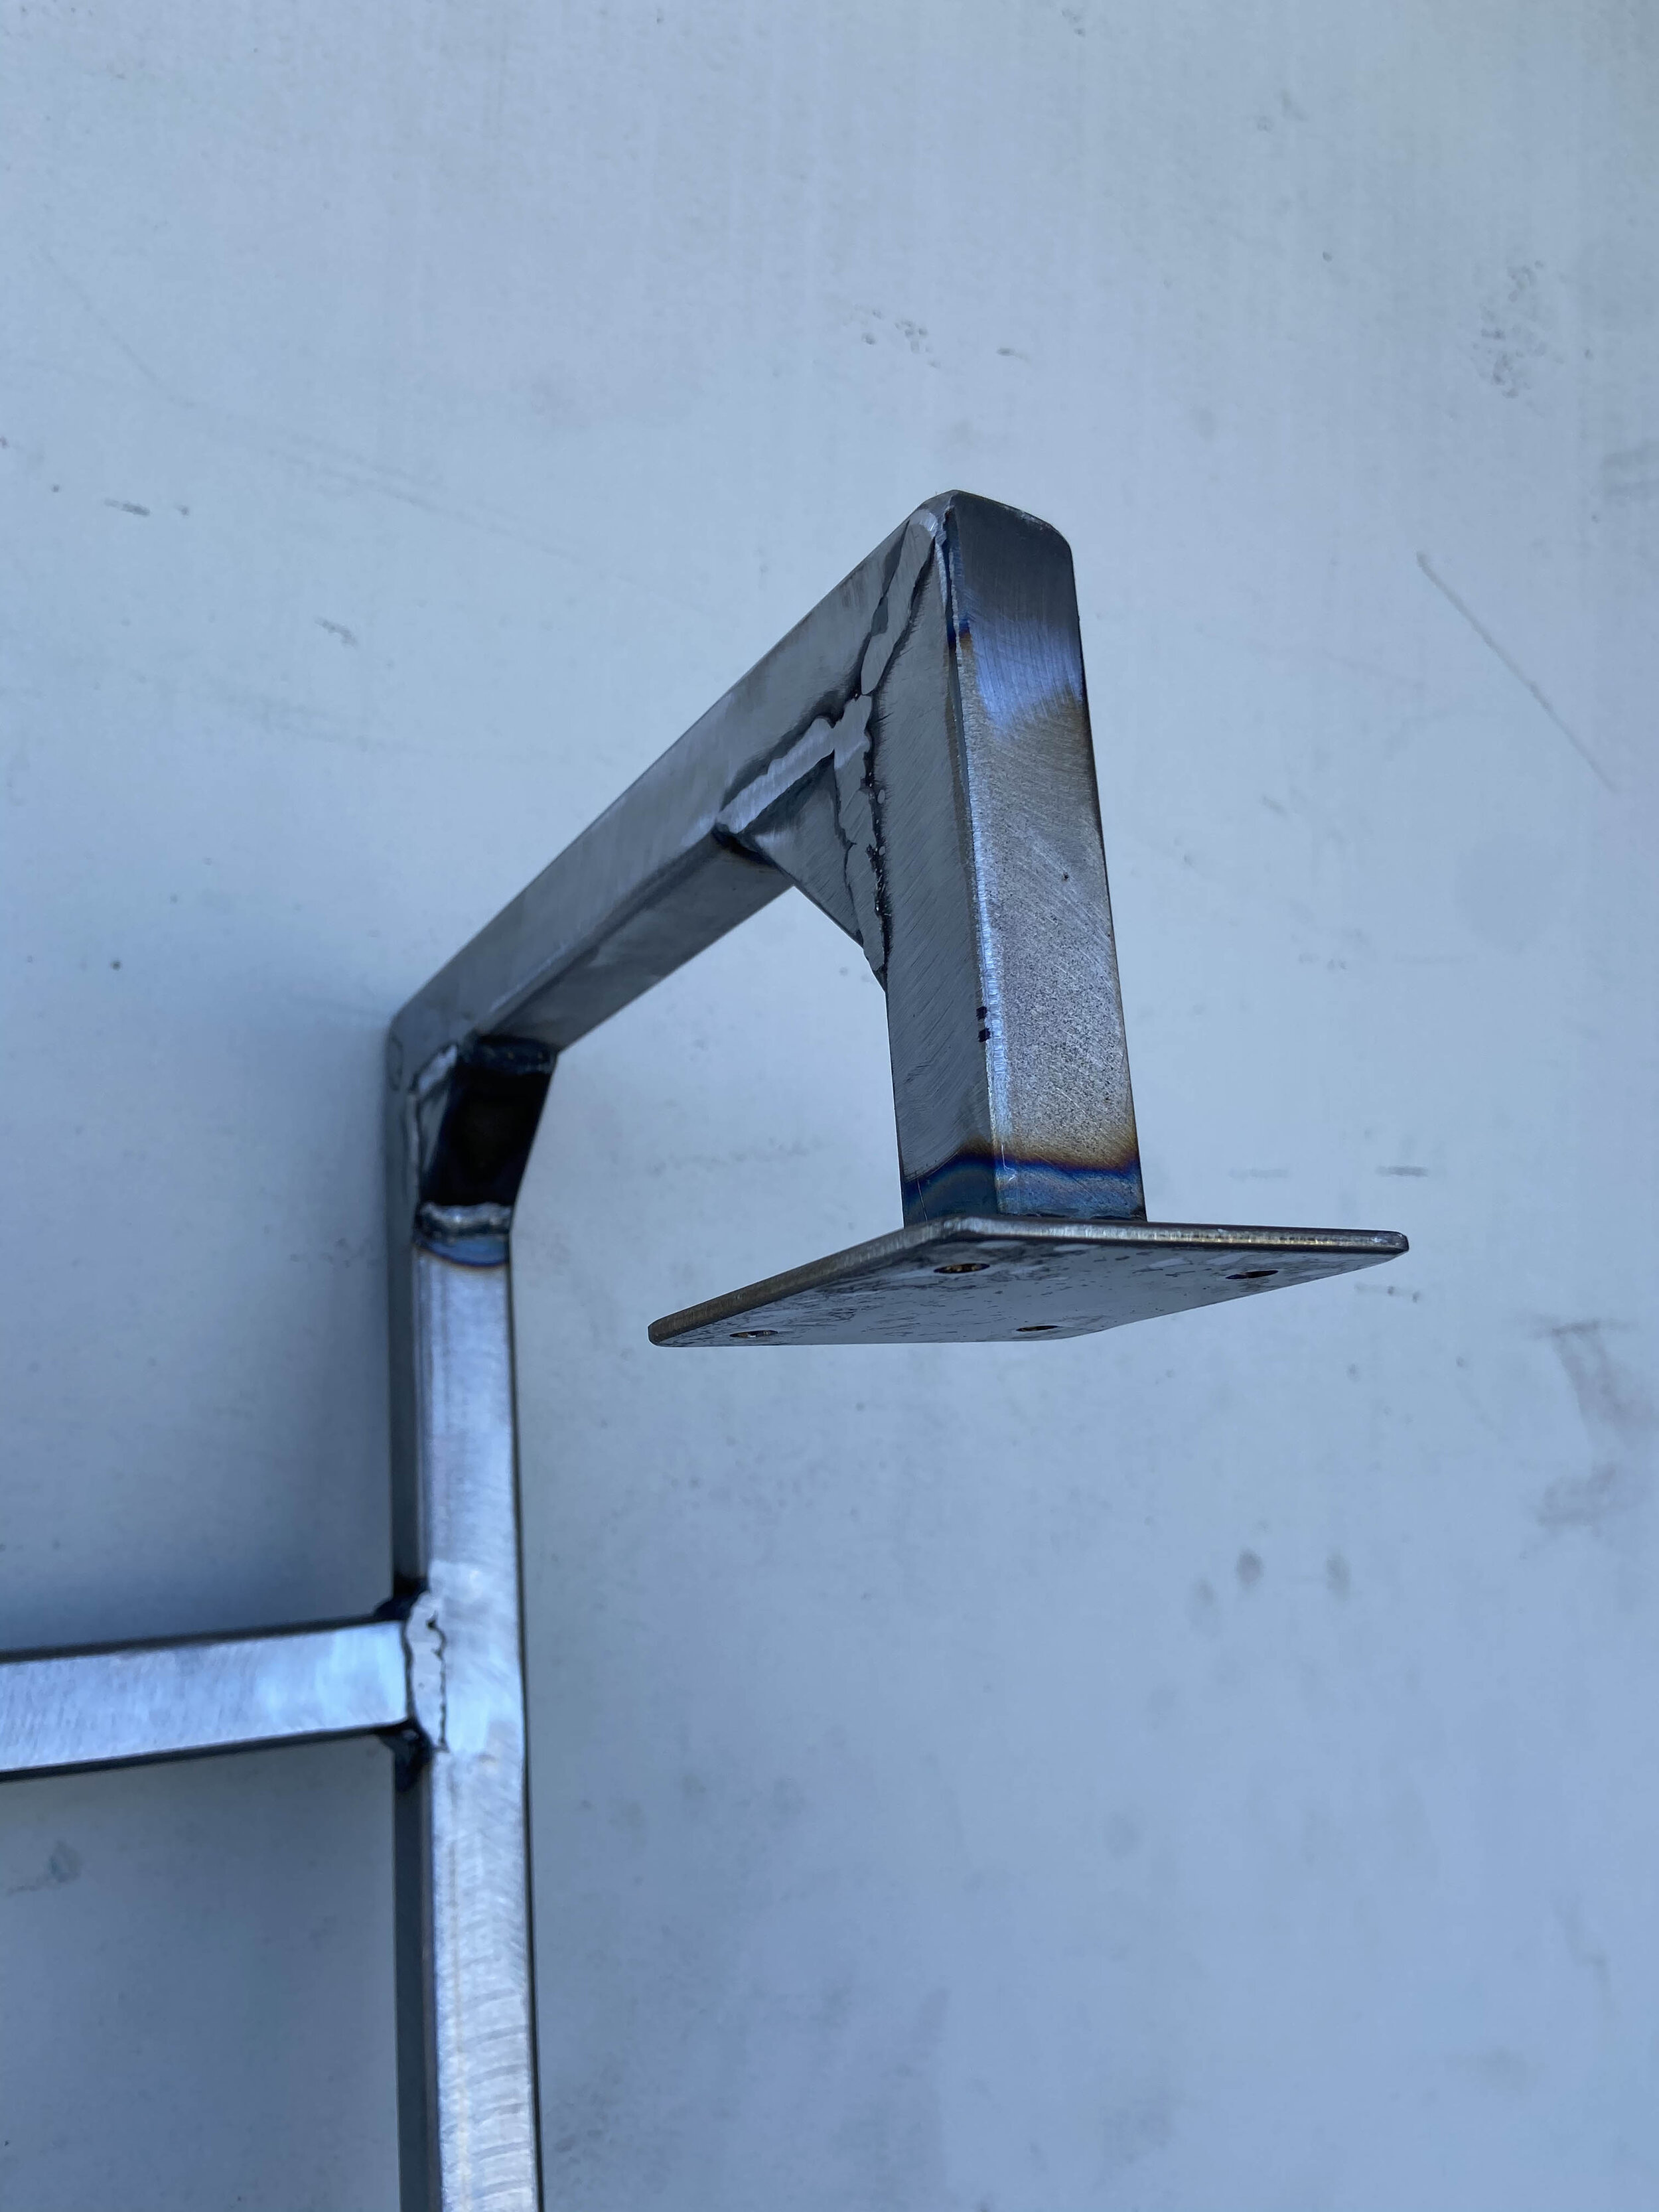
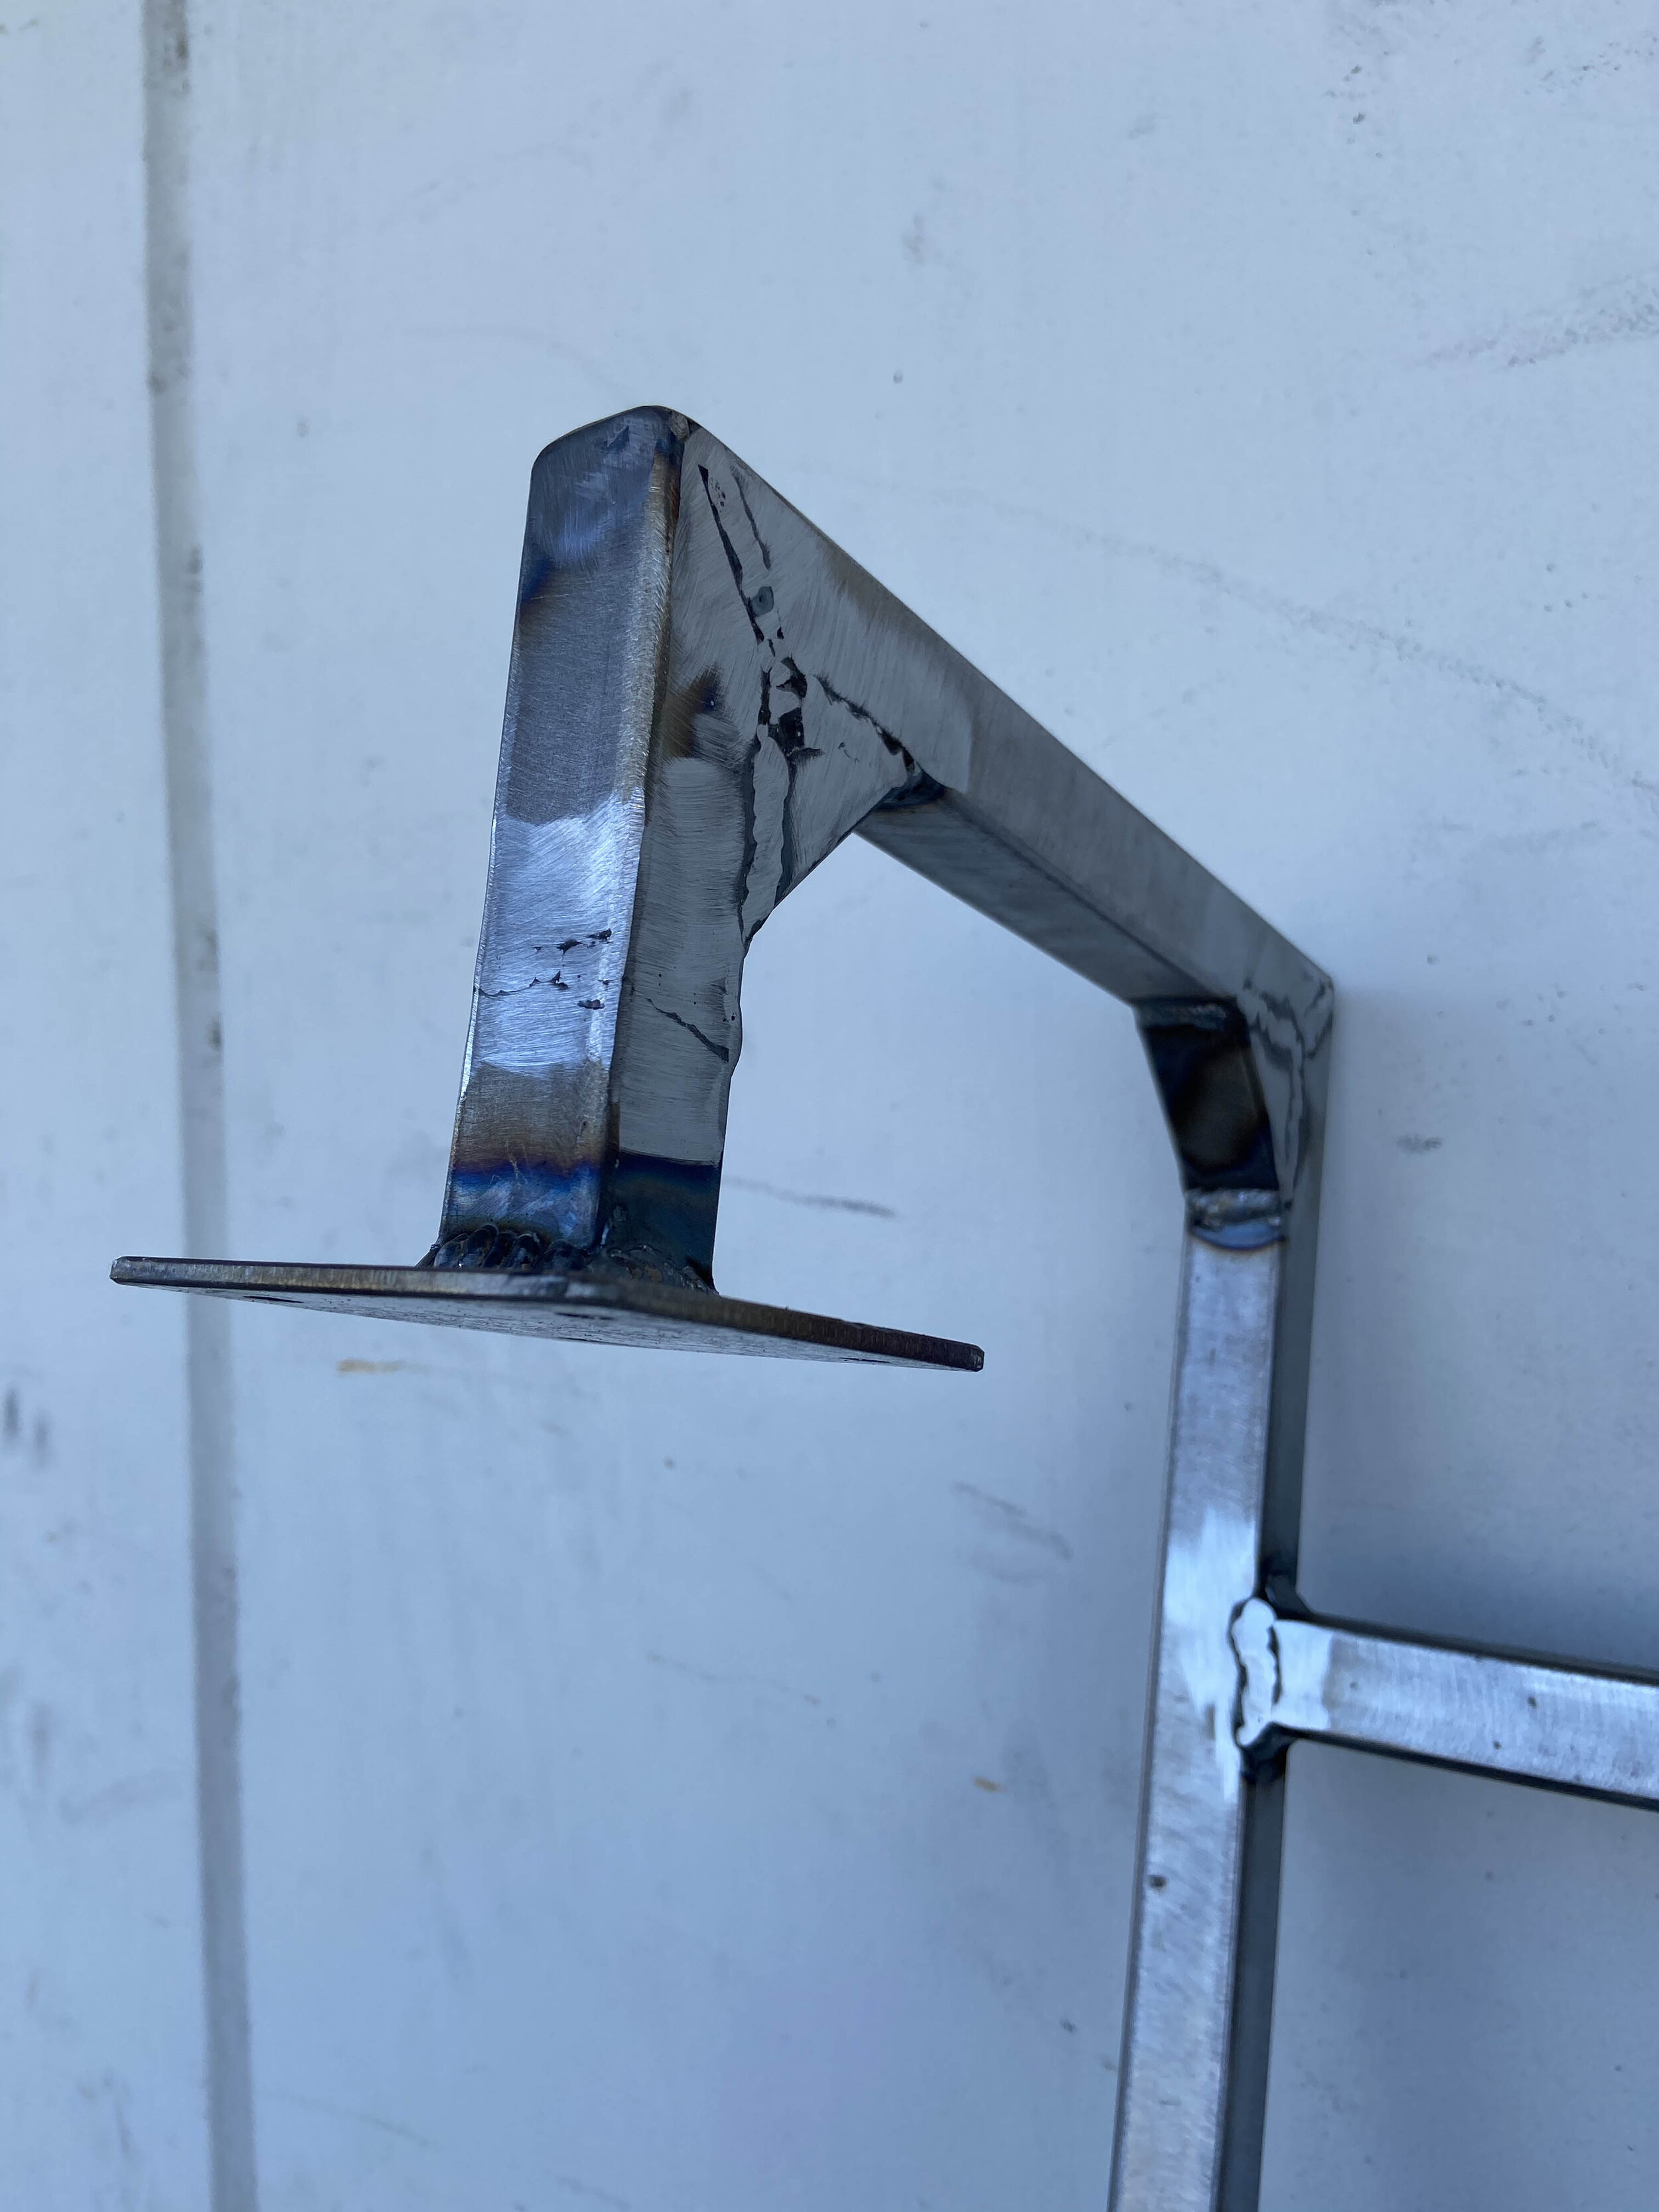
9/12/2020 - Completed shower/propane compartment, welding the tow hitches and tire rack. Welding the tow hitches and tire rack took a total of 10 hours. Cost was approximately $370 in supplies. Im lucky in that I have a brother that welds very well. I did most of the welds however they looked like shit. My brother came in behind me and fixed my mess. He also did all the visible welds. The design of the rack was all done by my brother.
The spare tire was originally kept in the rear passenger side compartment. The weight of the tire cracked the floor and caused a great deal of damage to the compartment. All the damage was fixed and the tire remounted to the rear. The hinge used to swing the tire out was purchased by my brother from someone in CO. It is a VERY well engineered piece of work. On our second trip in the camper to the Eastern Sierra’s we went to Bodie. Bodie is an abandoned mine town in CA. It’s a 6 mile round trip on a dirt road. I drove the dirt road faster (35mph) than normal to test out the welds and cabinetry. Everything held.


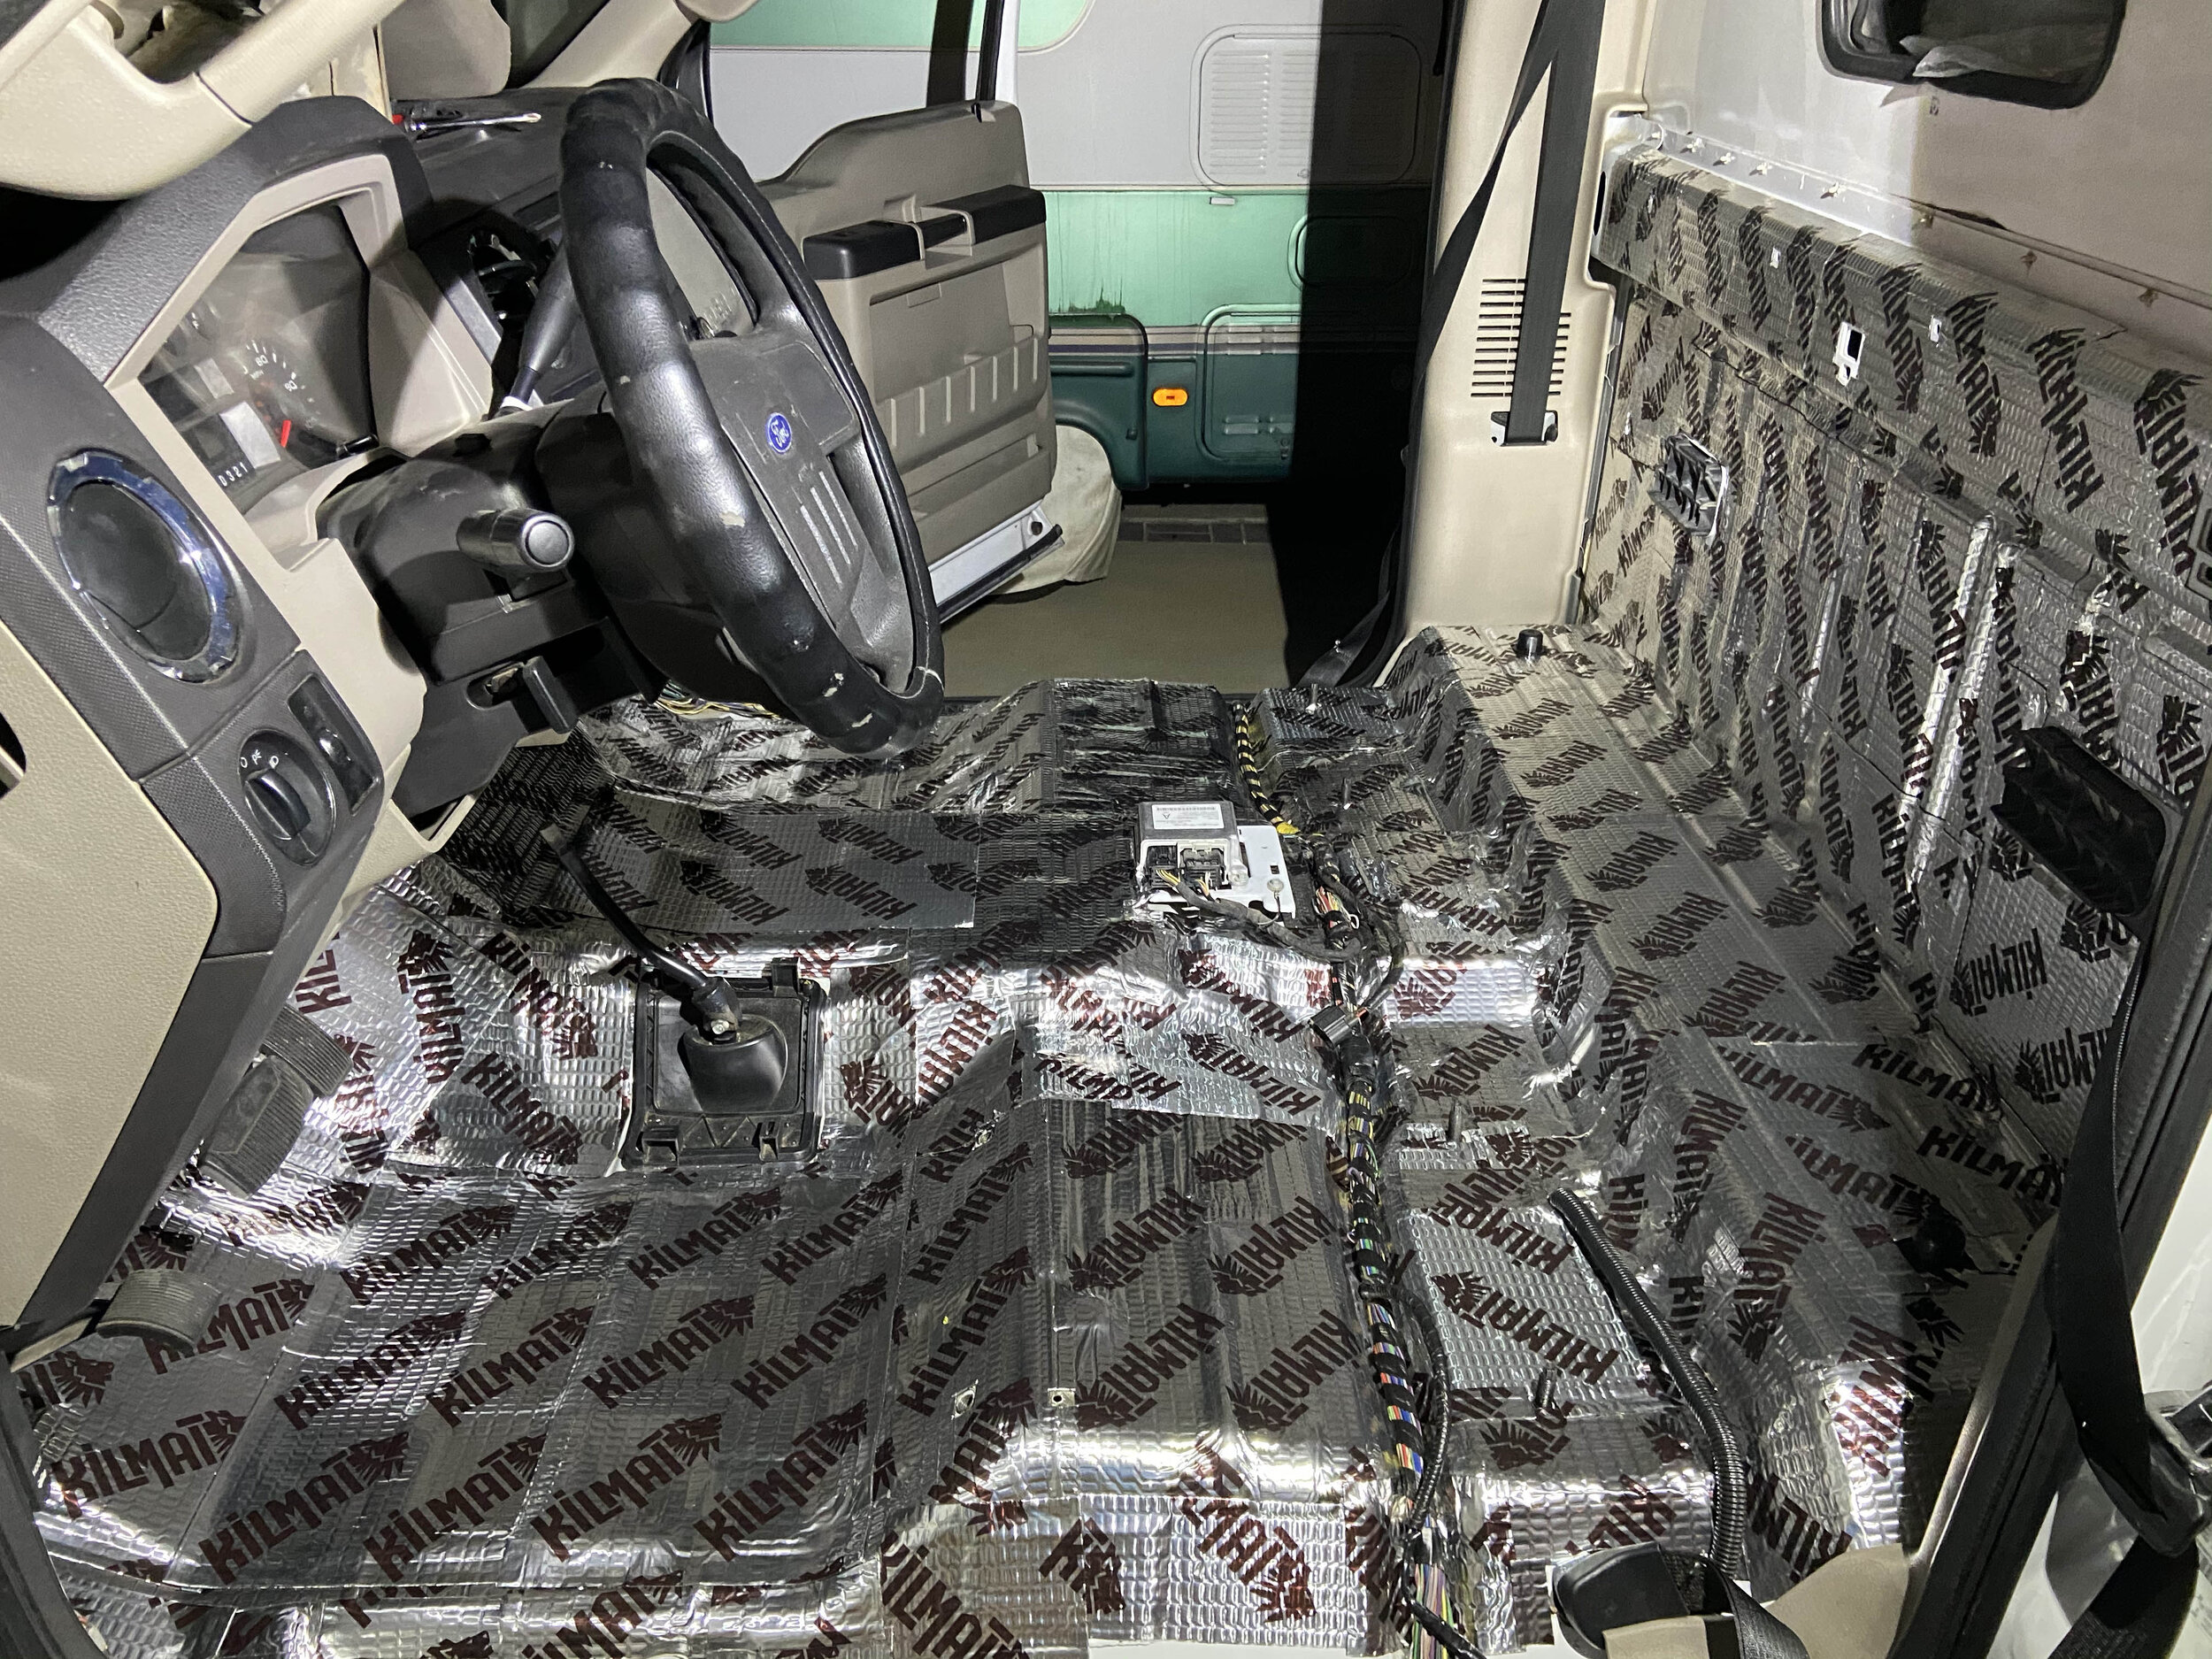
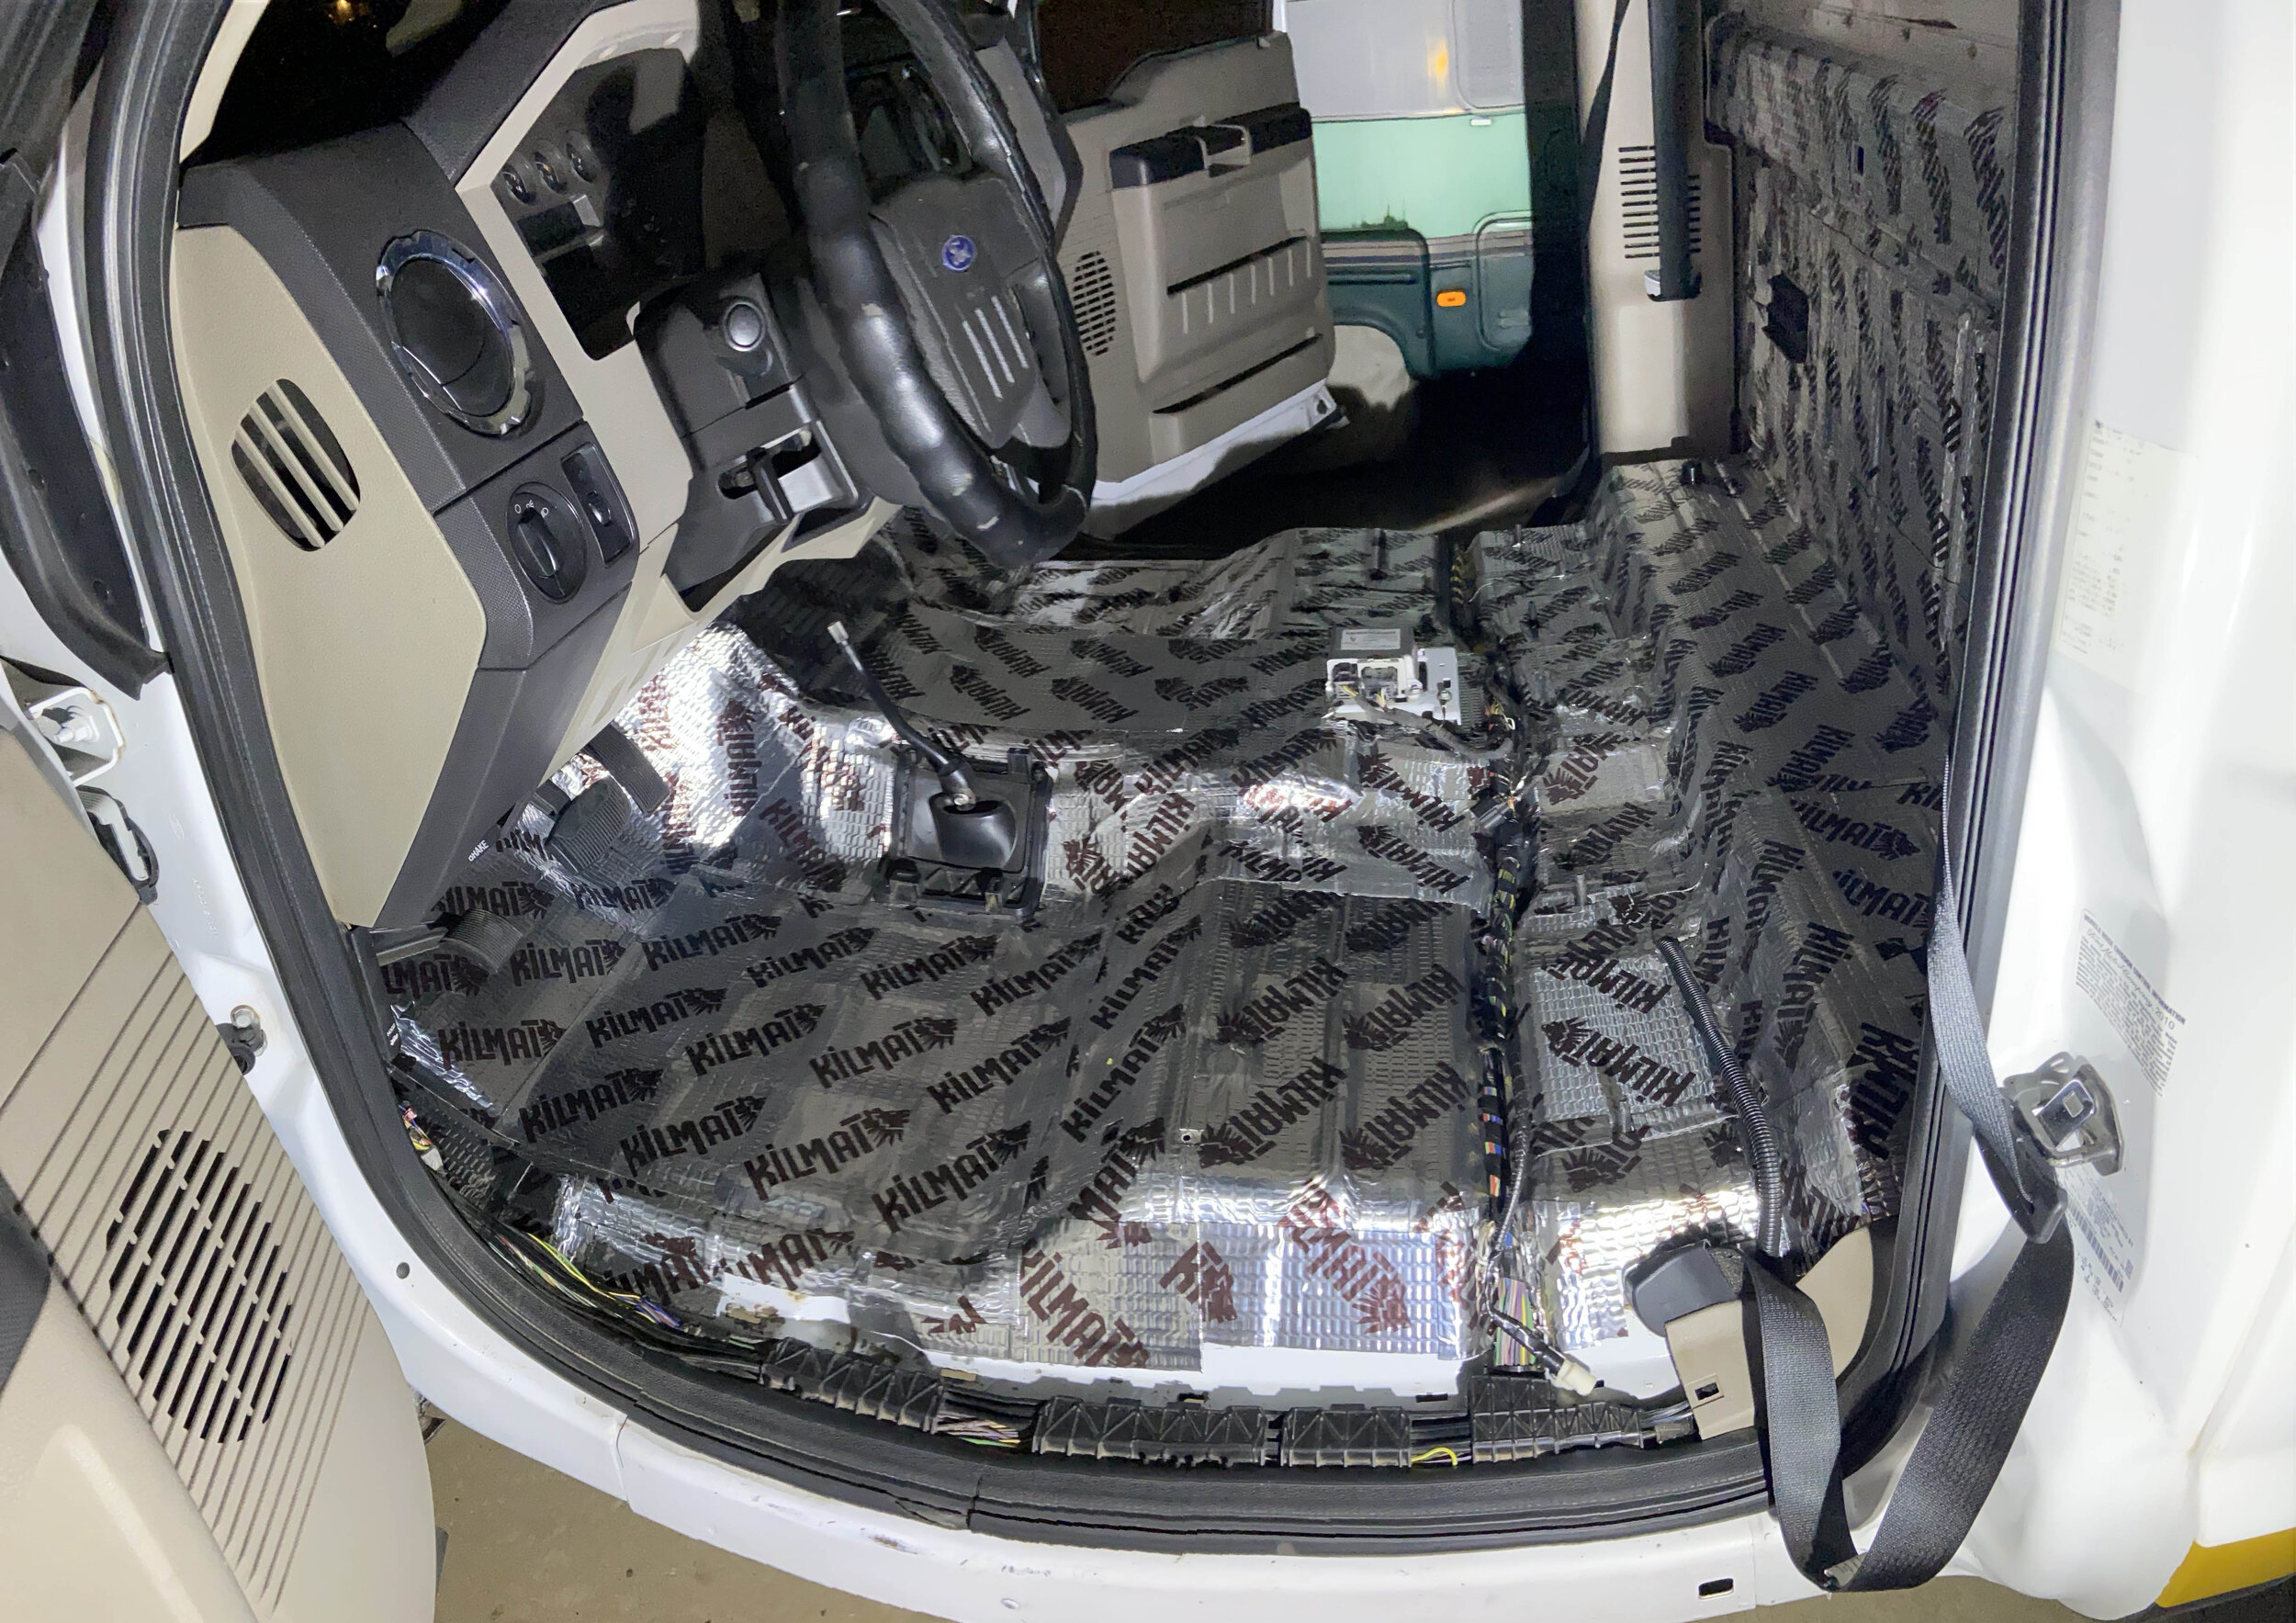
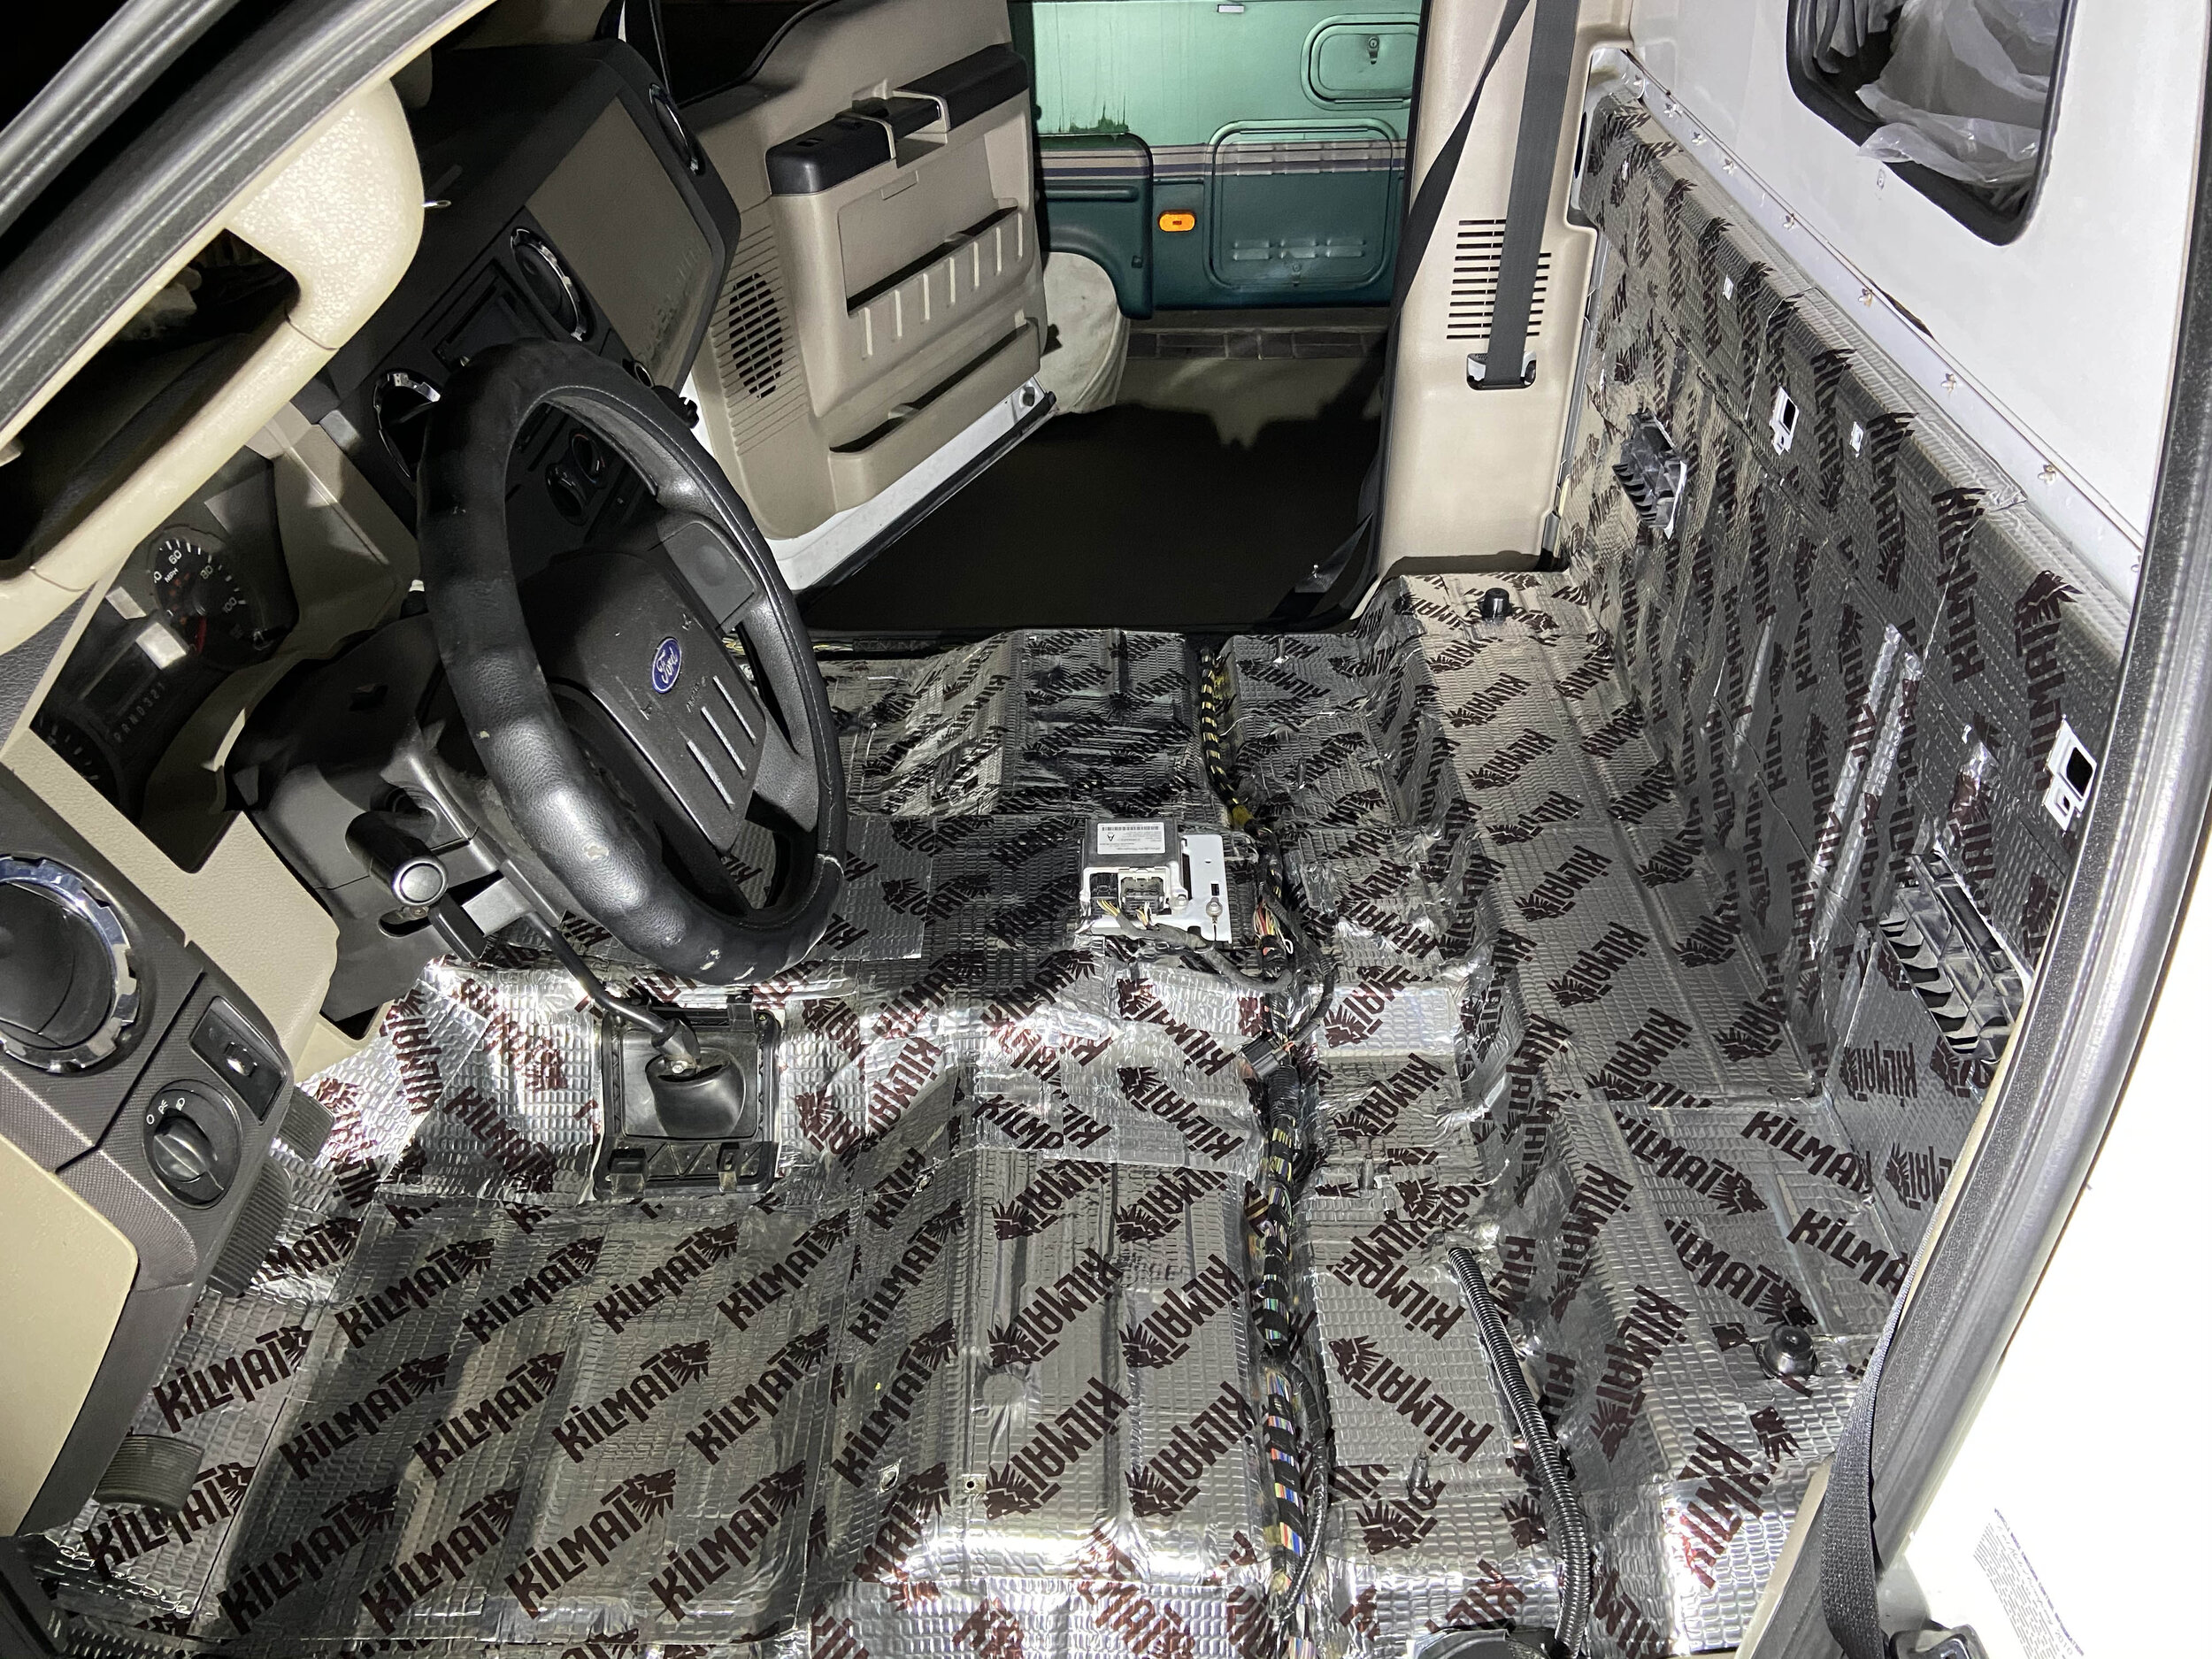
9/16/2020 - Installing the Kilmat. I purchased 50 square feet of 50 mill Kilmat from Amazon. IT WORKS VERY WELL. I took the camper on a drive and took a mental note of the road noise. I did it again once everything was reinstalled. What a difference. The Kilmat is very easy to install. The cab took about 2 hours in total. Its definitely worth the cost/effort to install this stuff. I don’t know how much better Dynamat is but I know I was not going to spend $50 per square foot!!
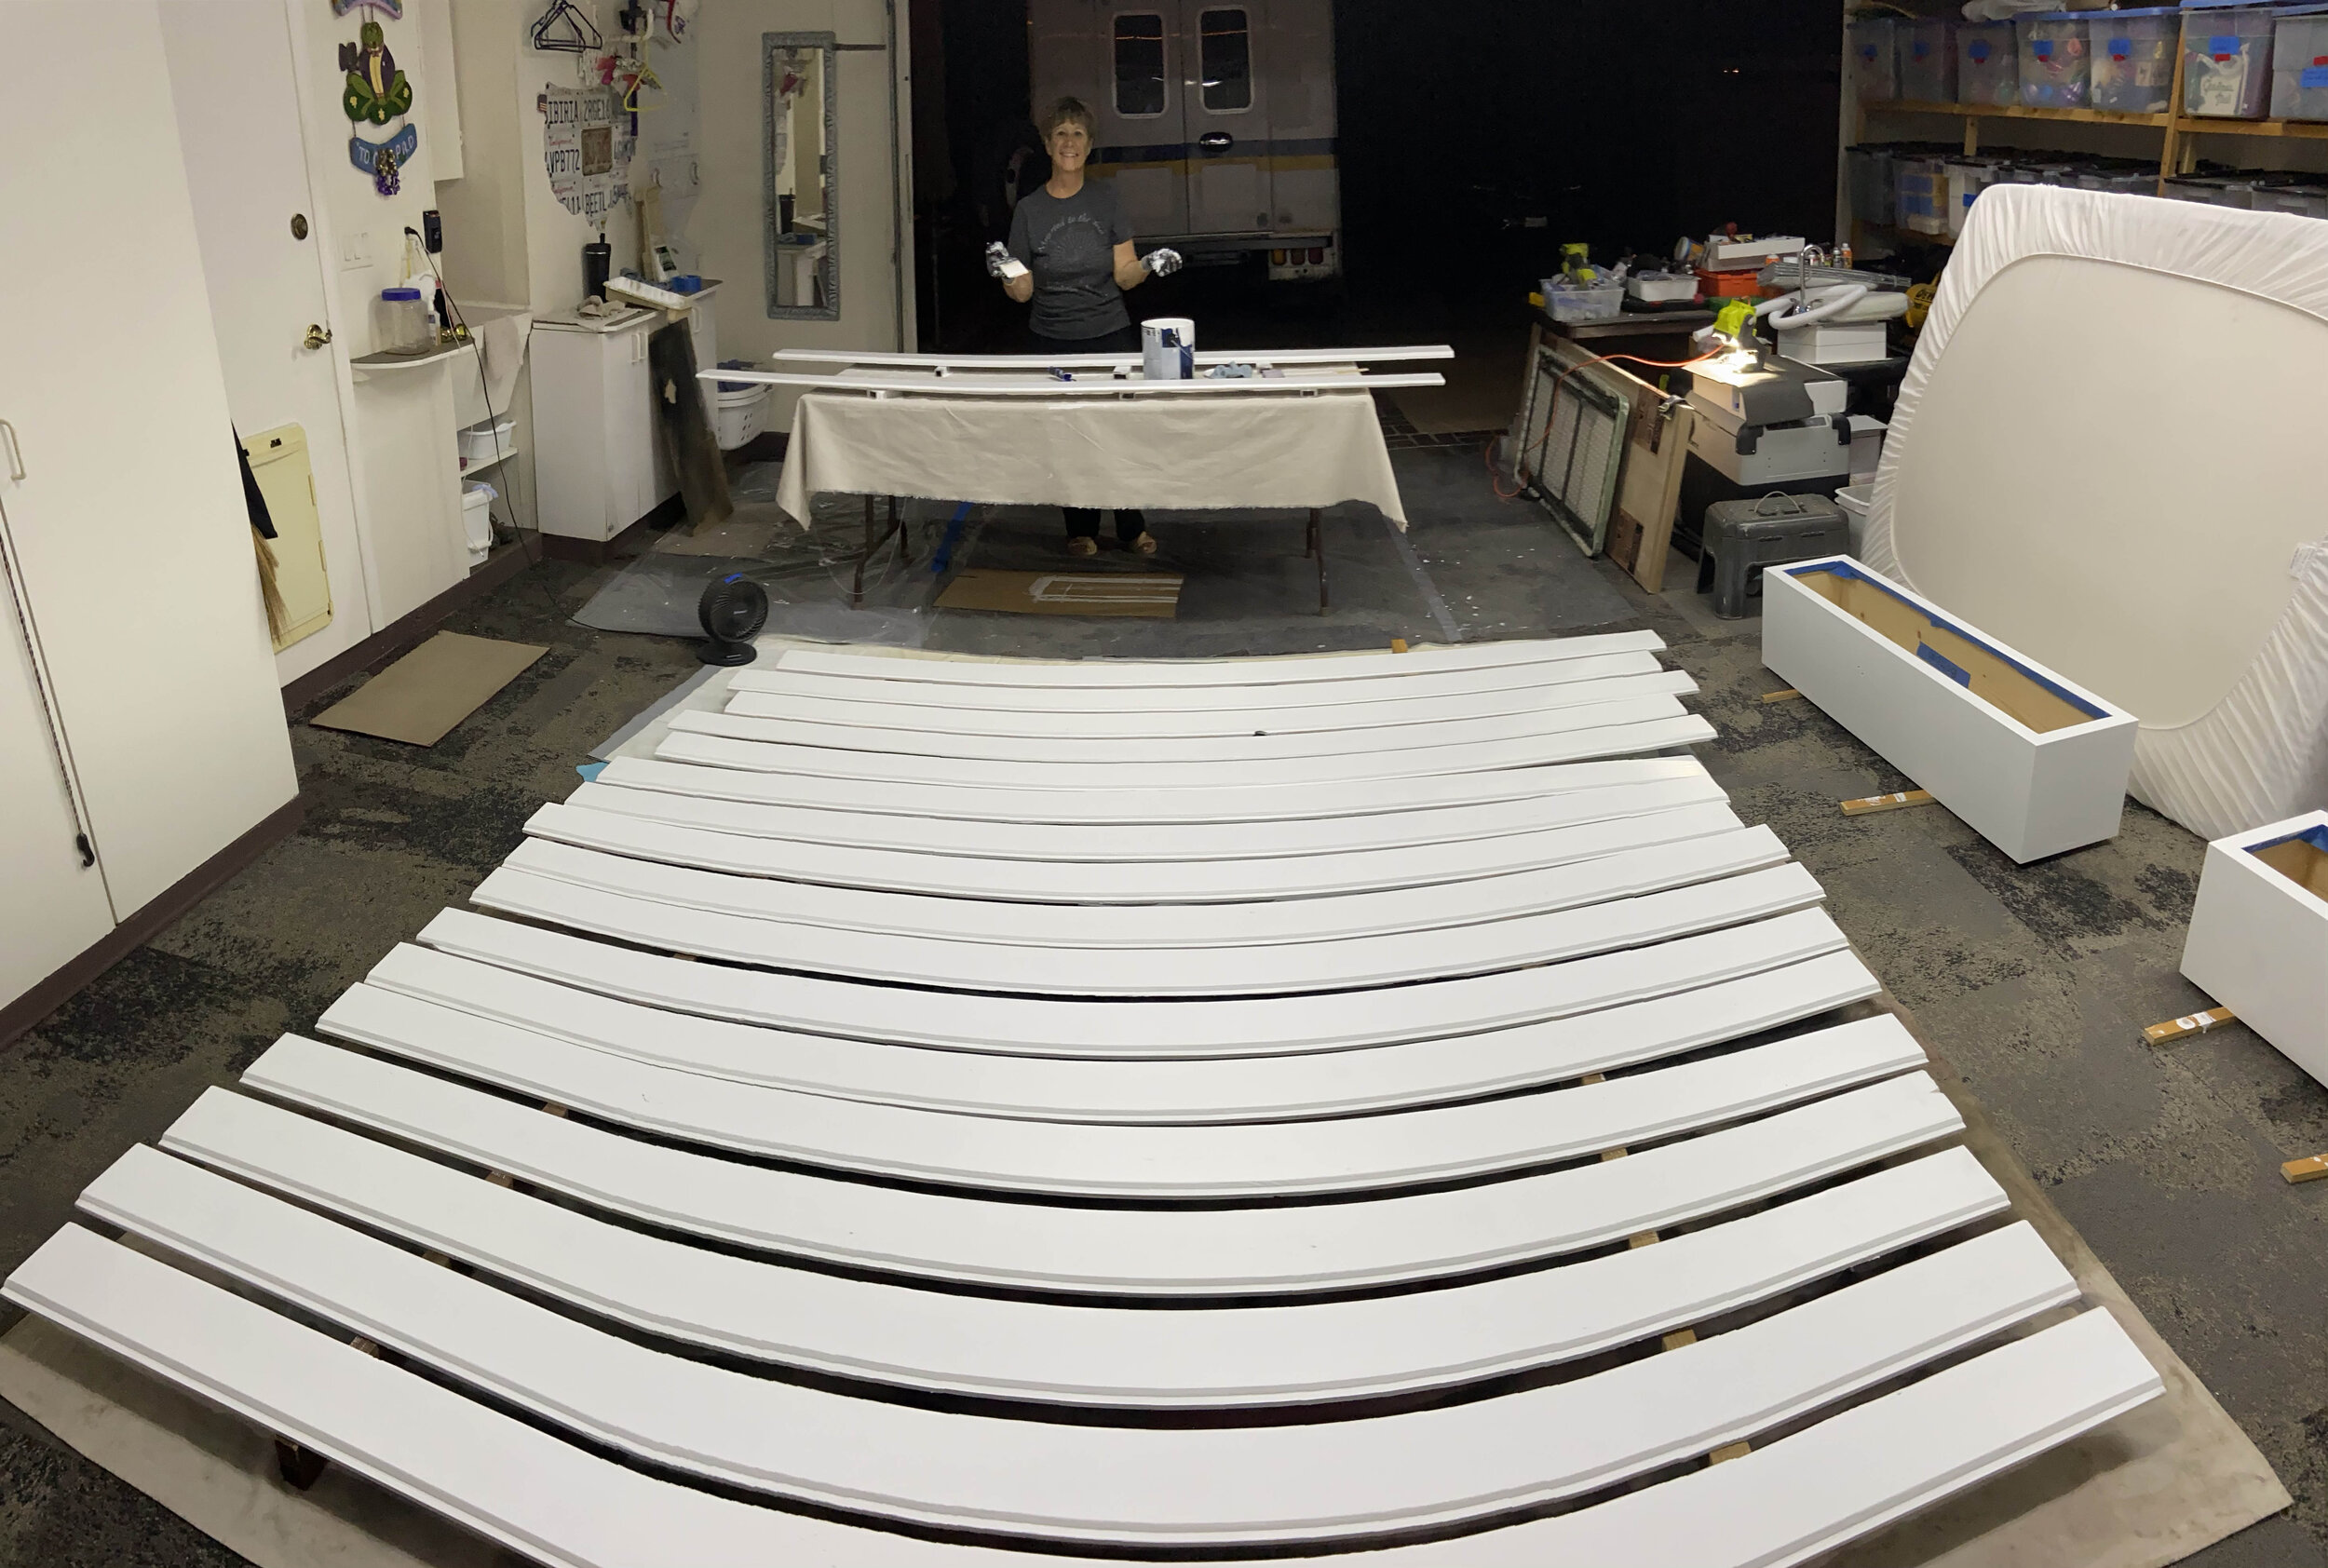
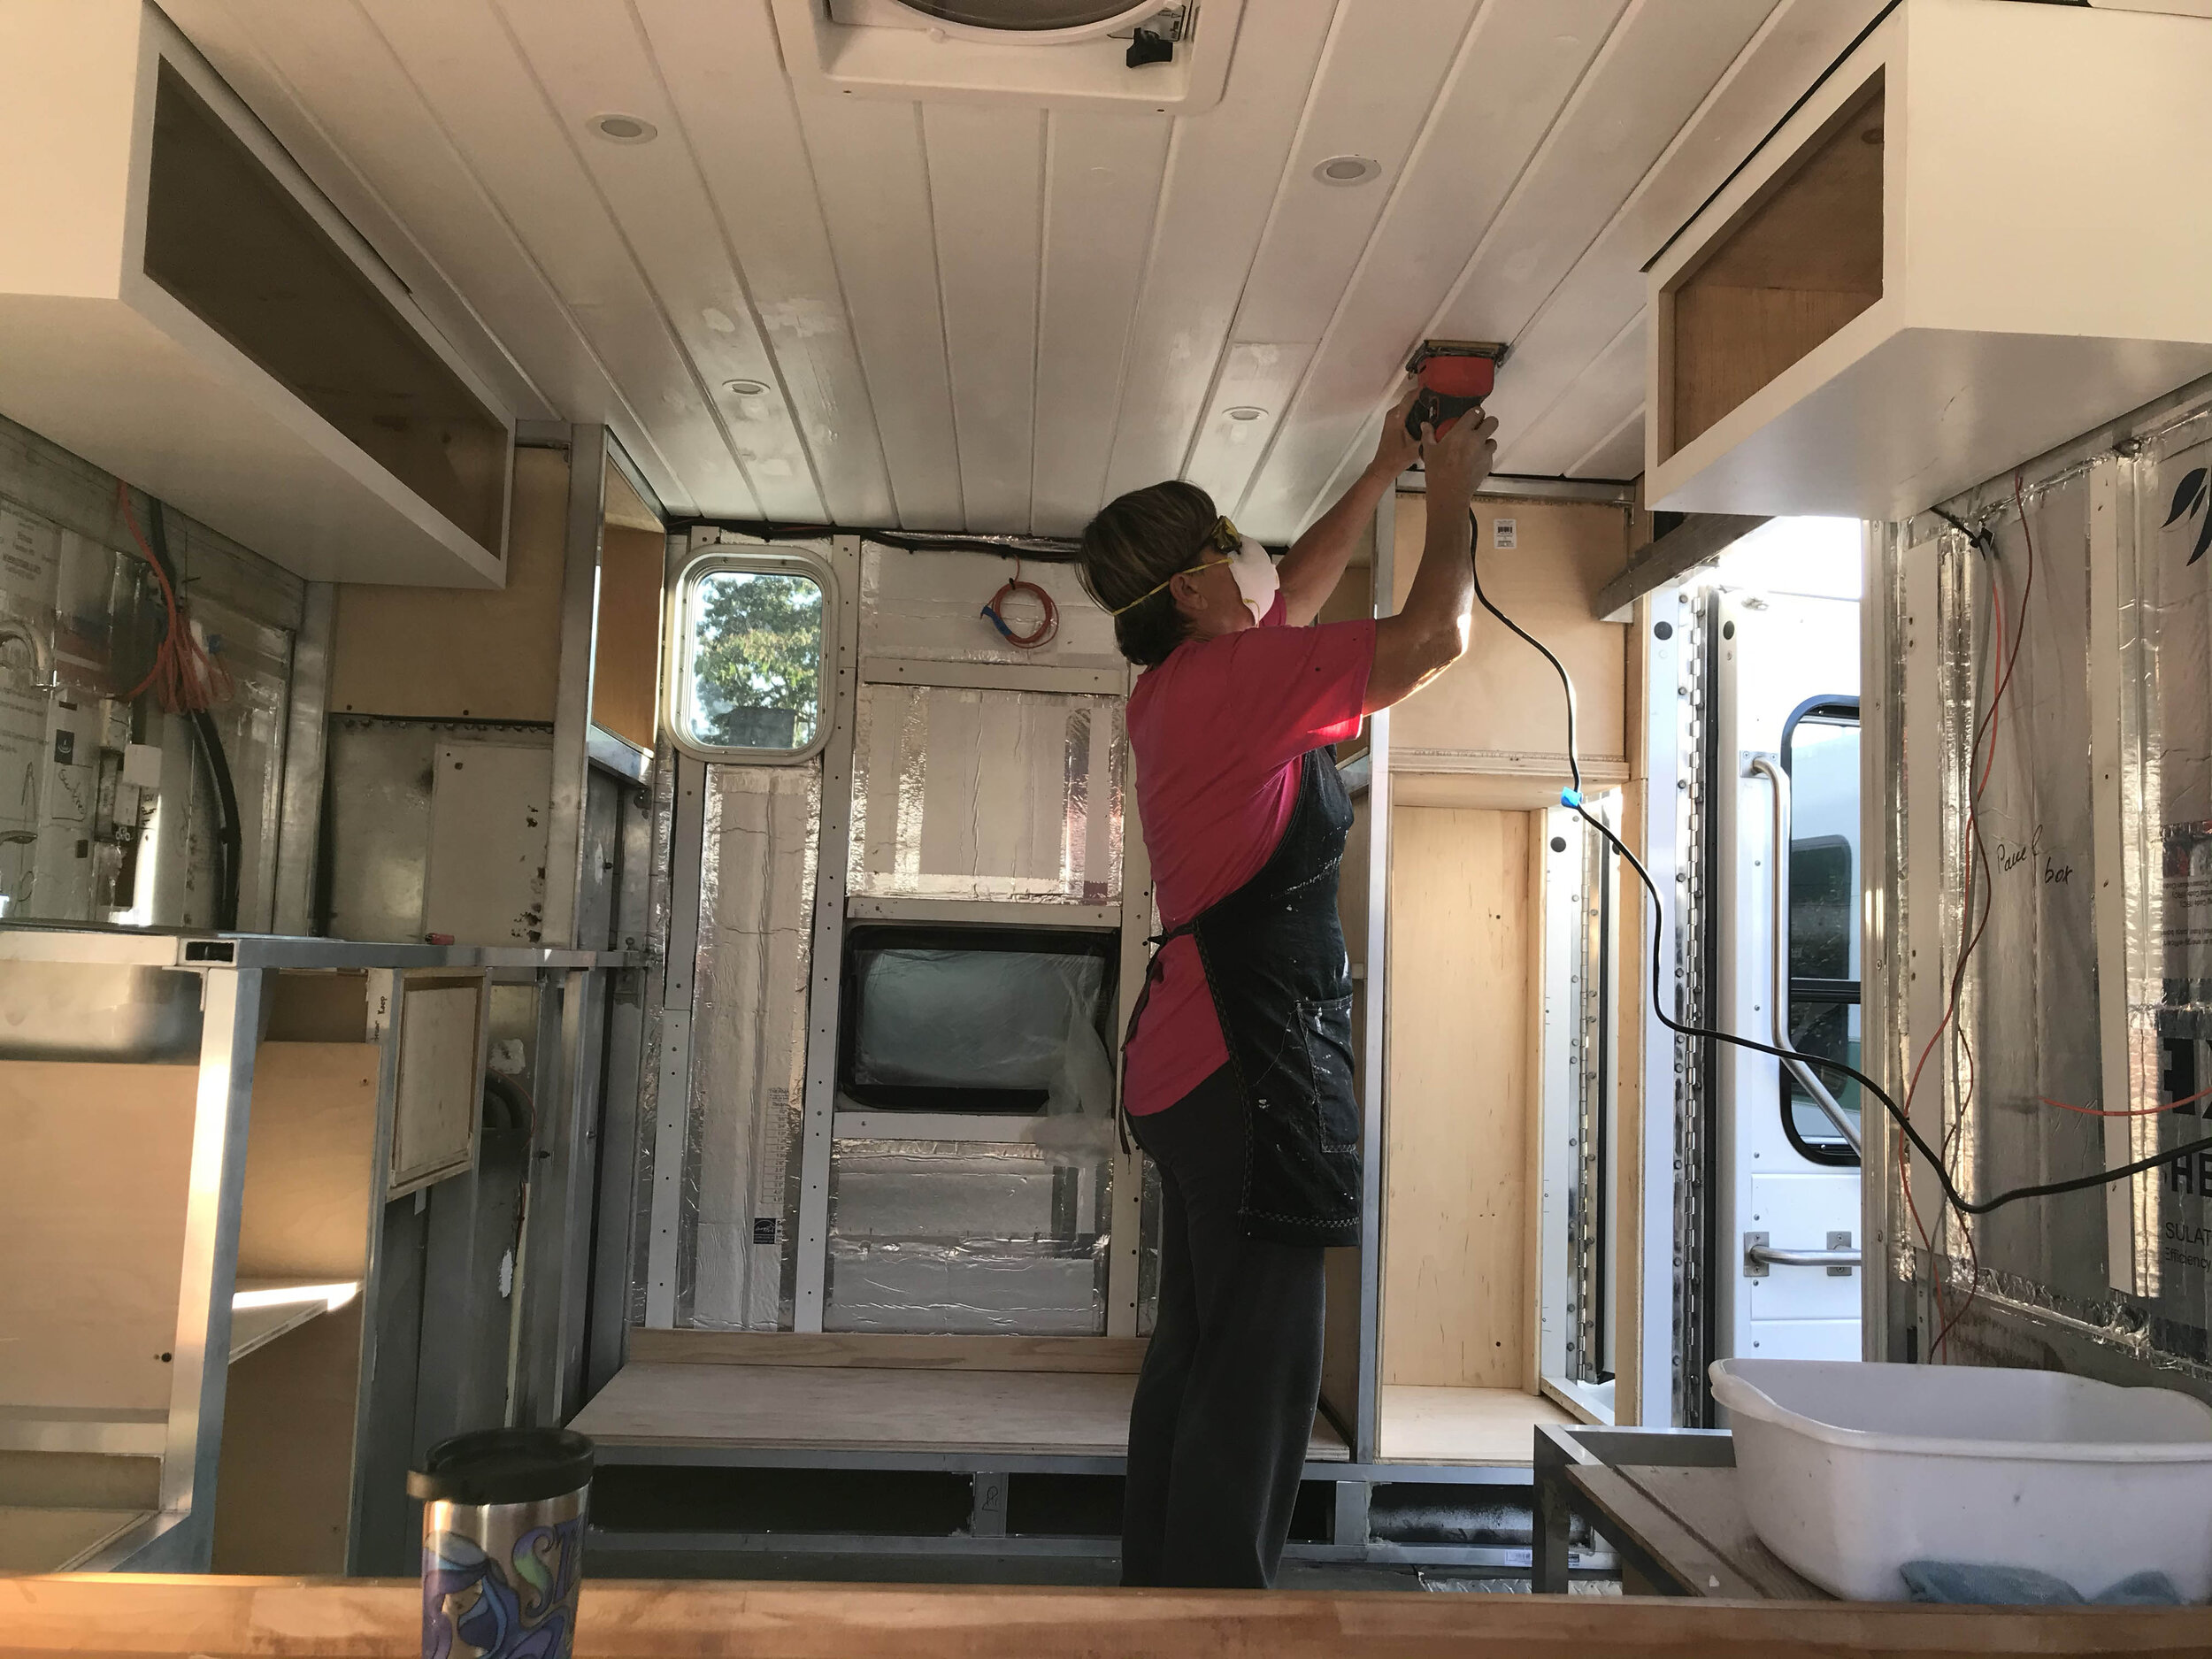
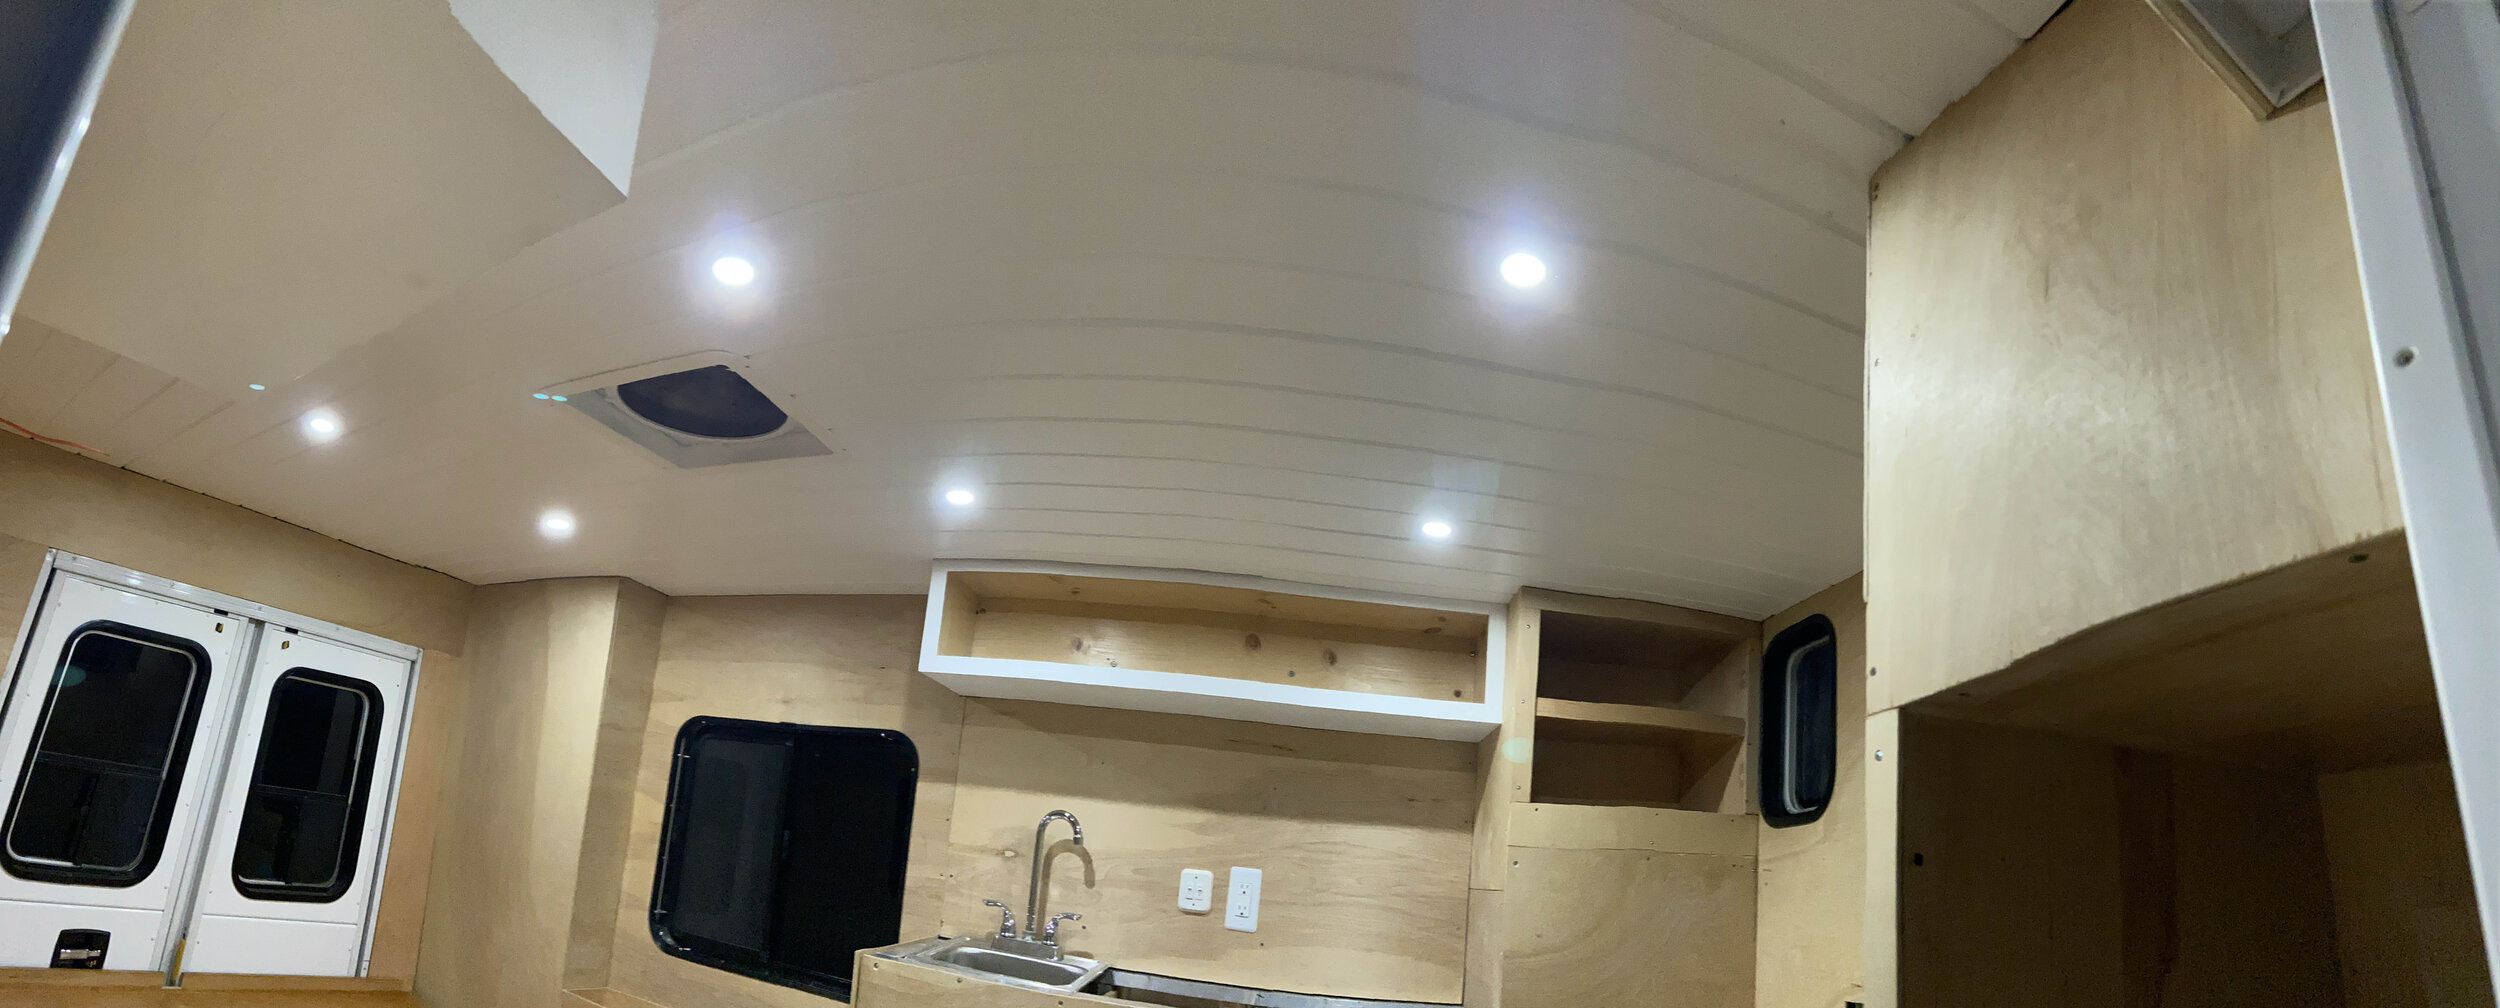
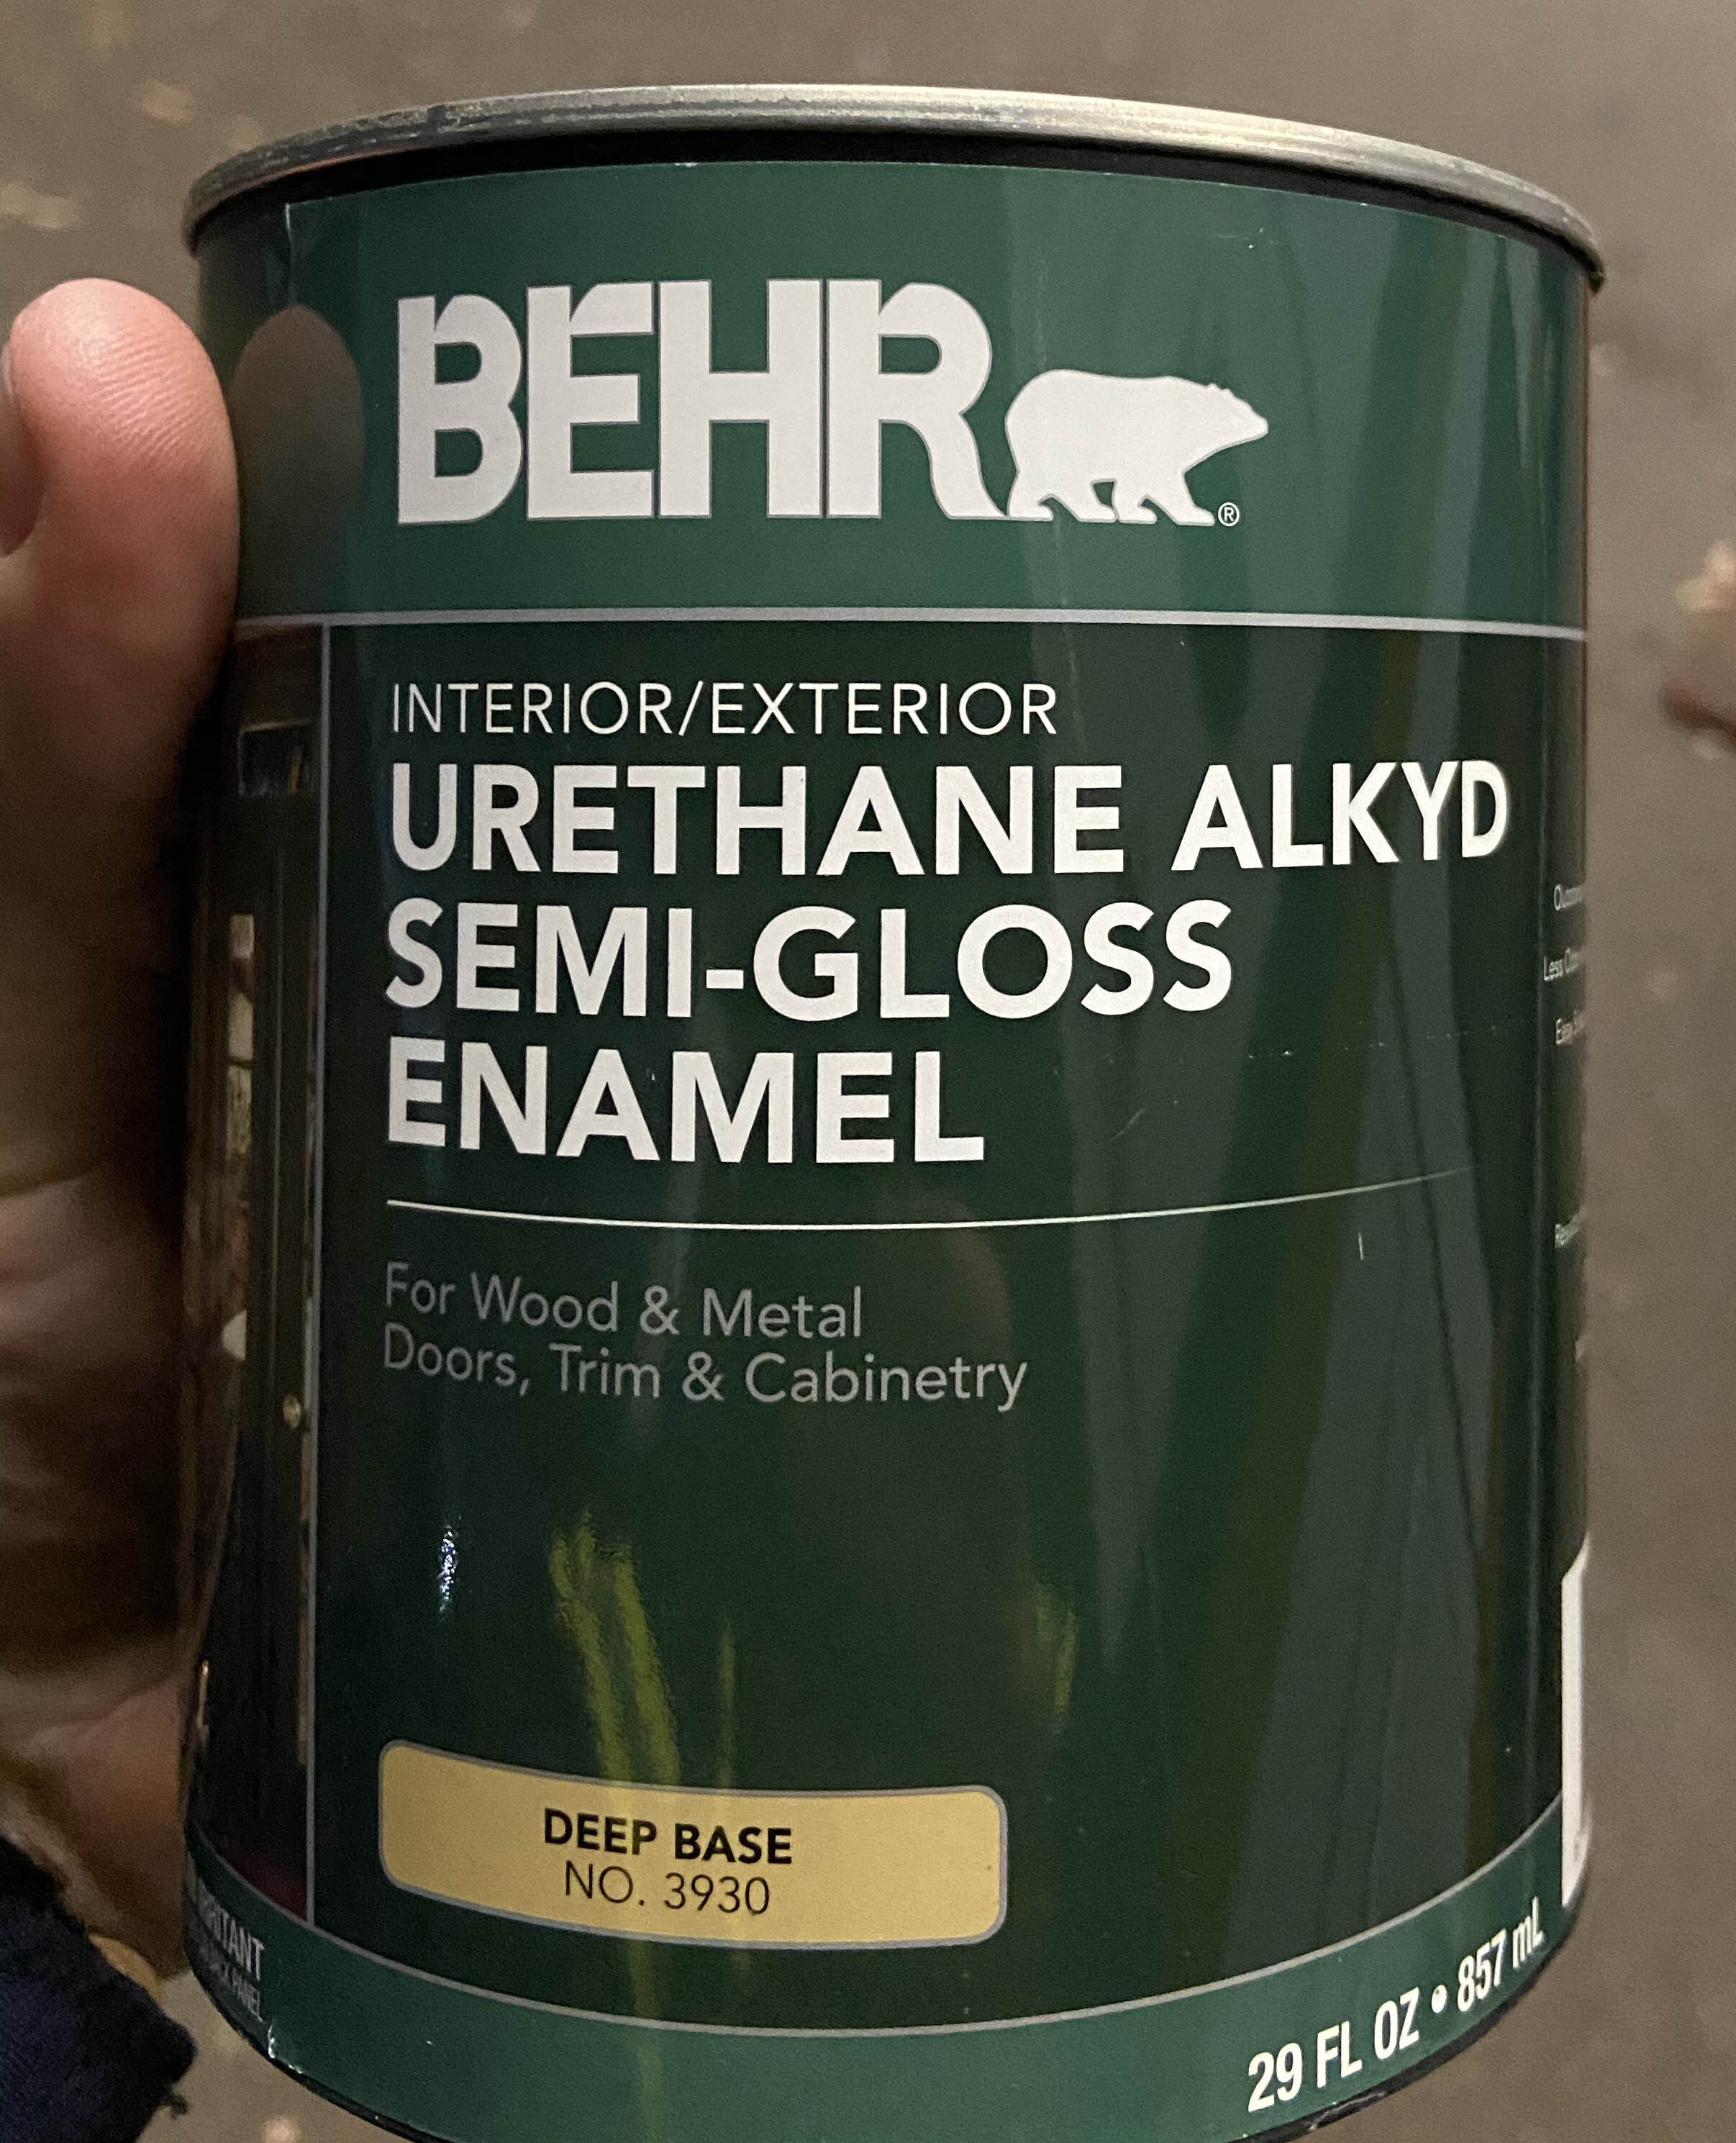
9/20/2020 - Installing the ceiling and painting the exterior doors. The ceiling is made of 8’x6” Ship Lap pine boards. Take your time and look for pieces that are straight and non damaged. This may take time by shopping around or you may get lucky and find the right pieces straight away. I screwed the pieces in every horizontal brace. I wanted a very strong structure. I mounted the lights in the center of each board. This made for a cleaner look and was much easier to install. My amazing mother painted the boards before we installed them. Primer coat and then 2 coats of semi gloss white. Had to go back and use wood putty to fill the screw holes. Remember to counter sink all screws so that they sit flush. Makes the floating process easier after the install. (4 days to complete the ceiling)
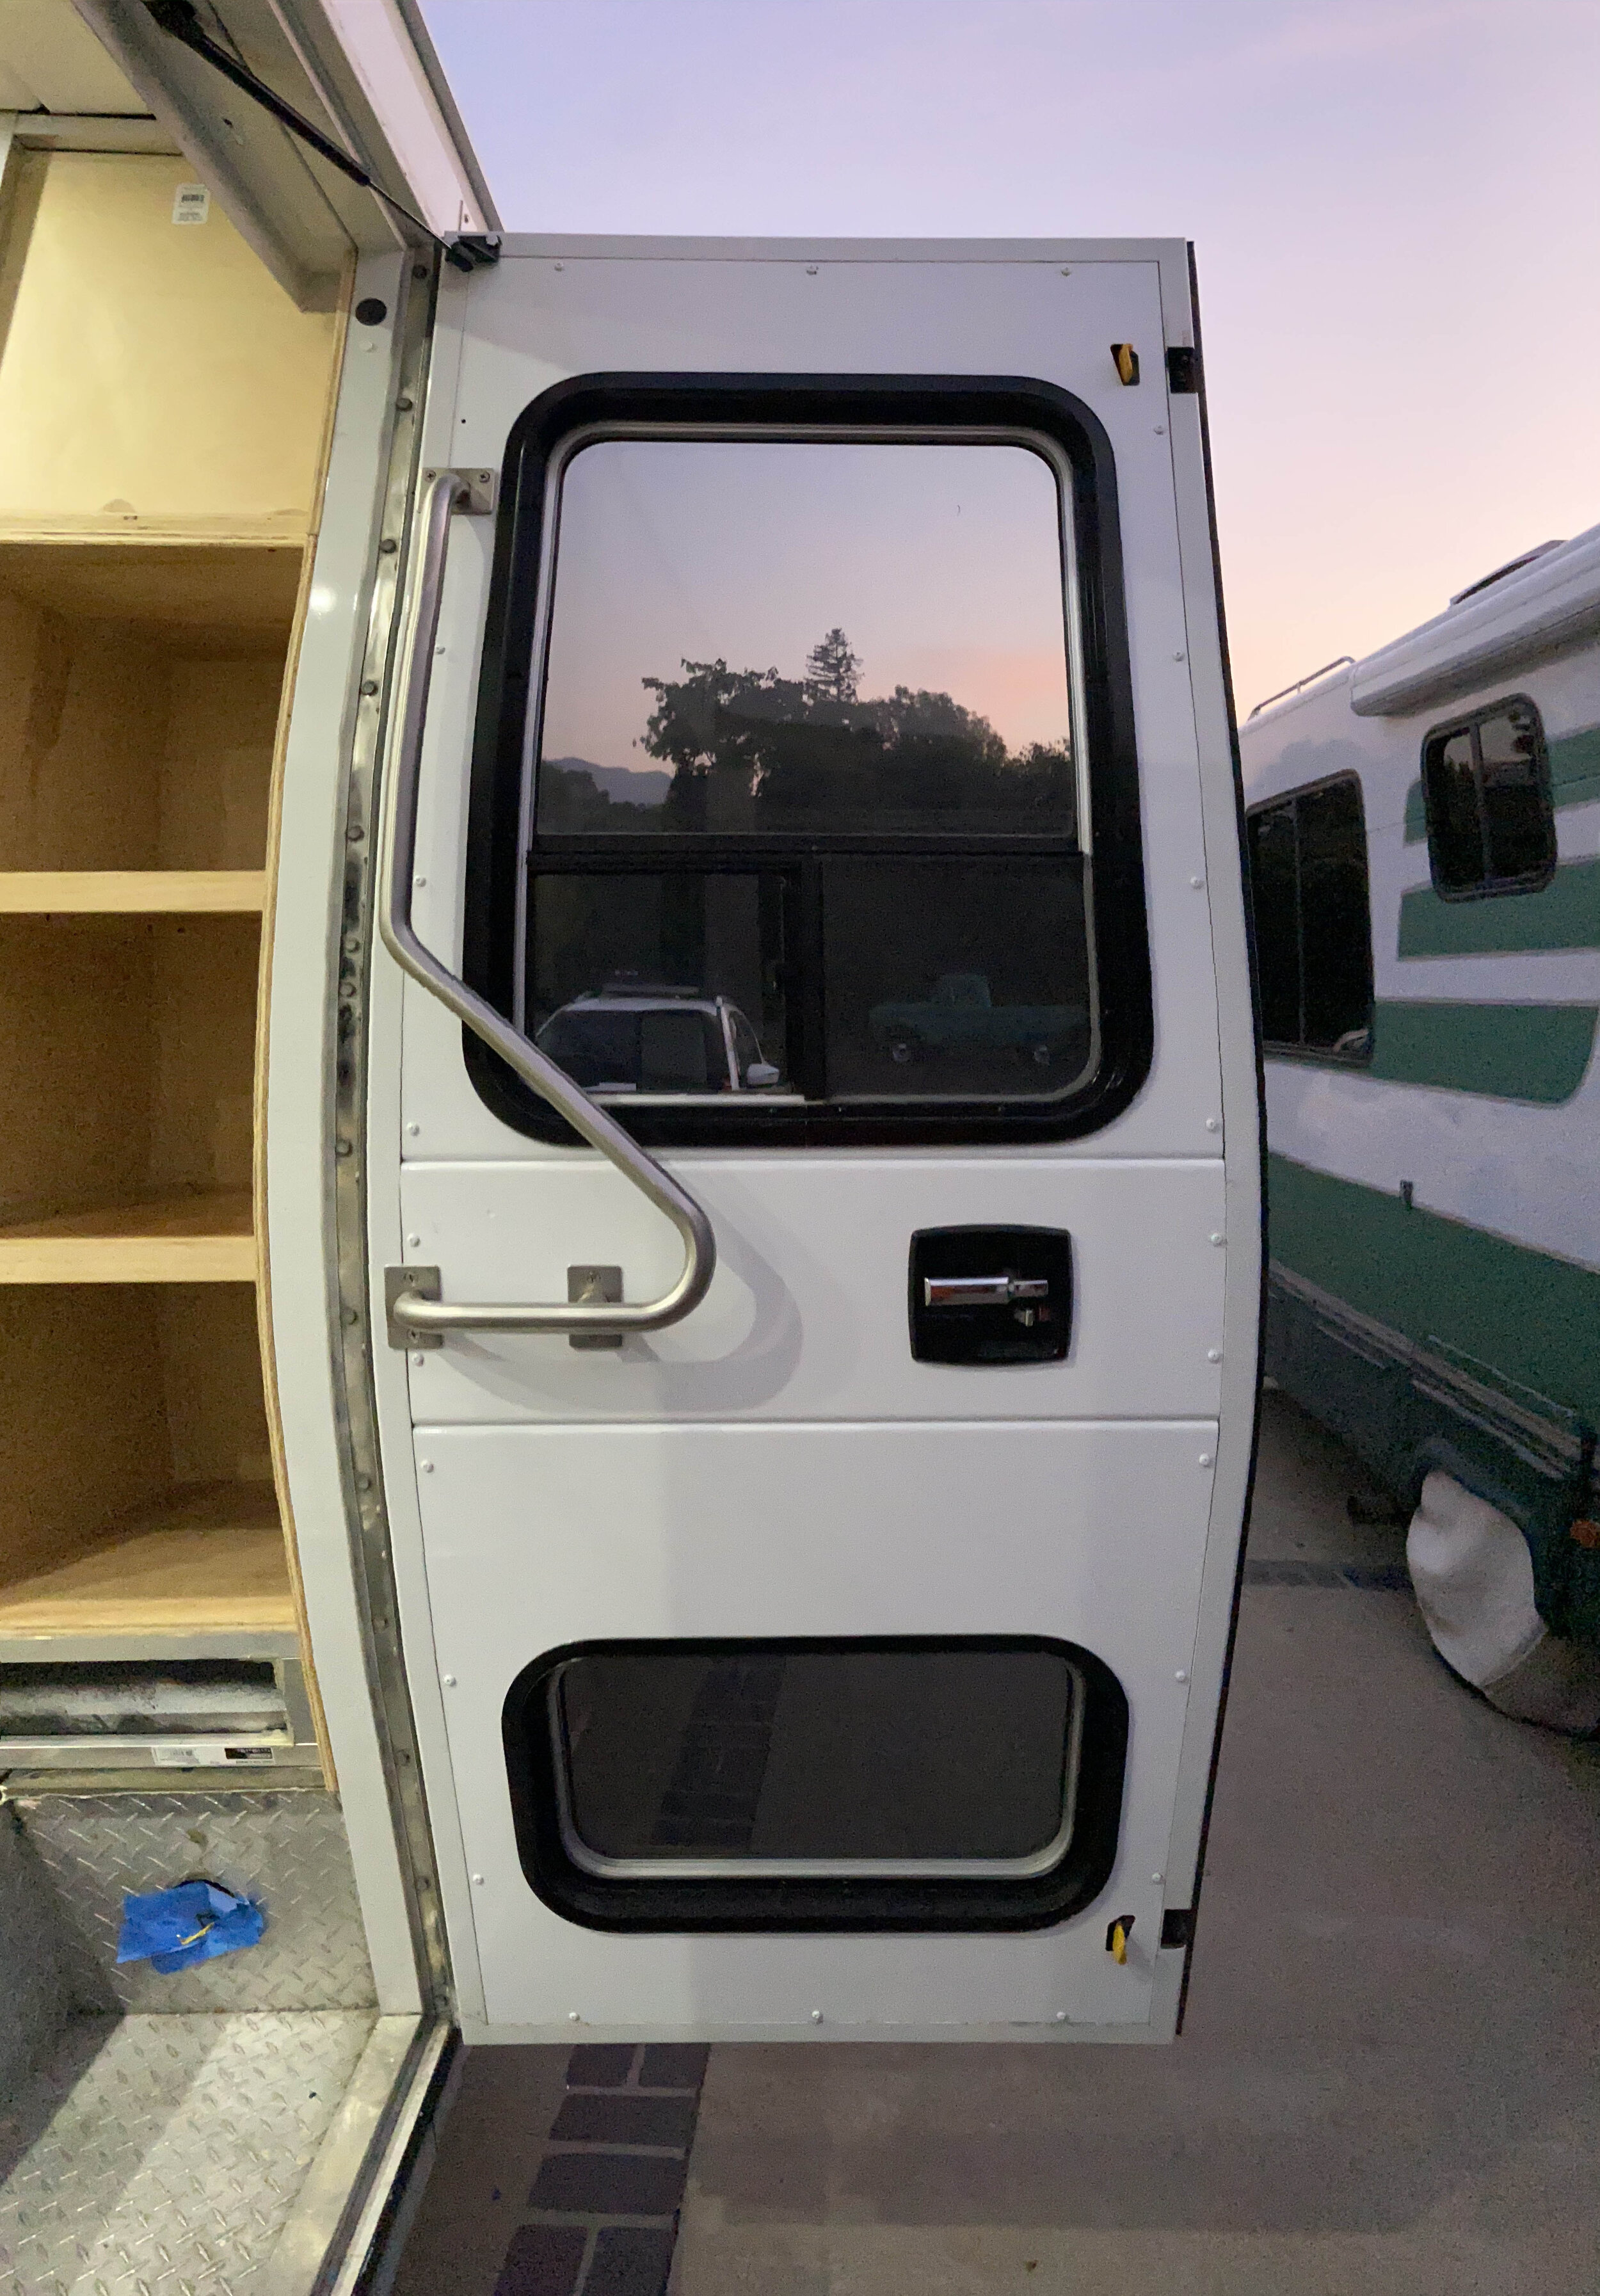
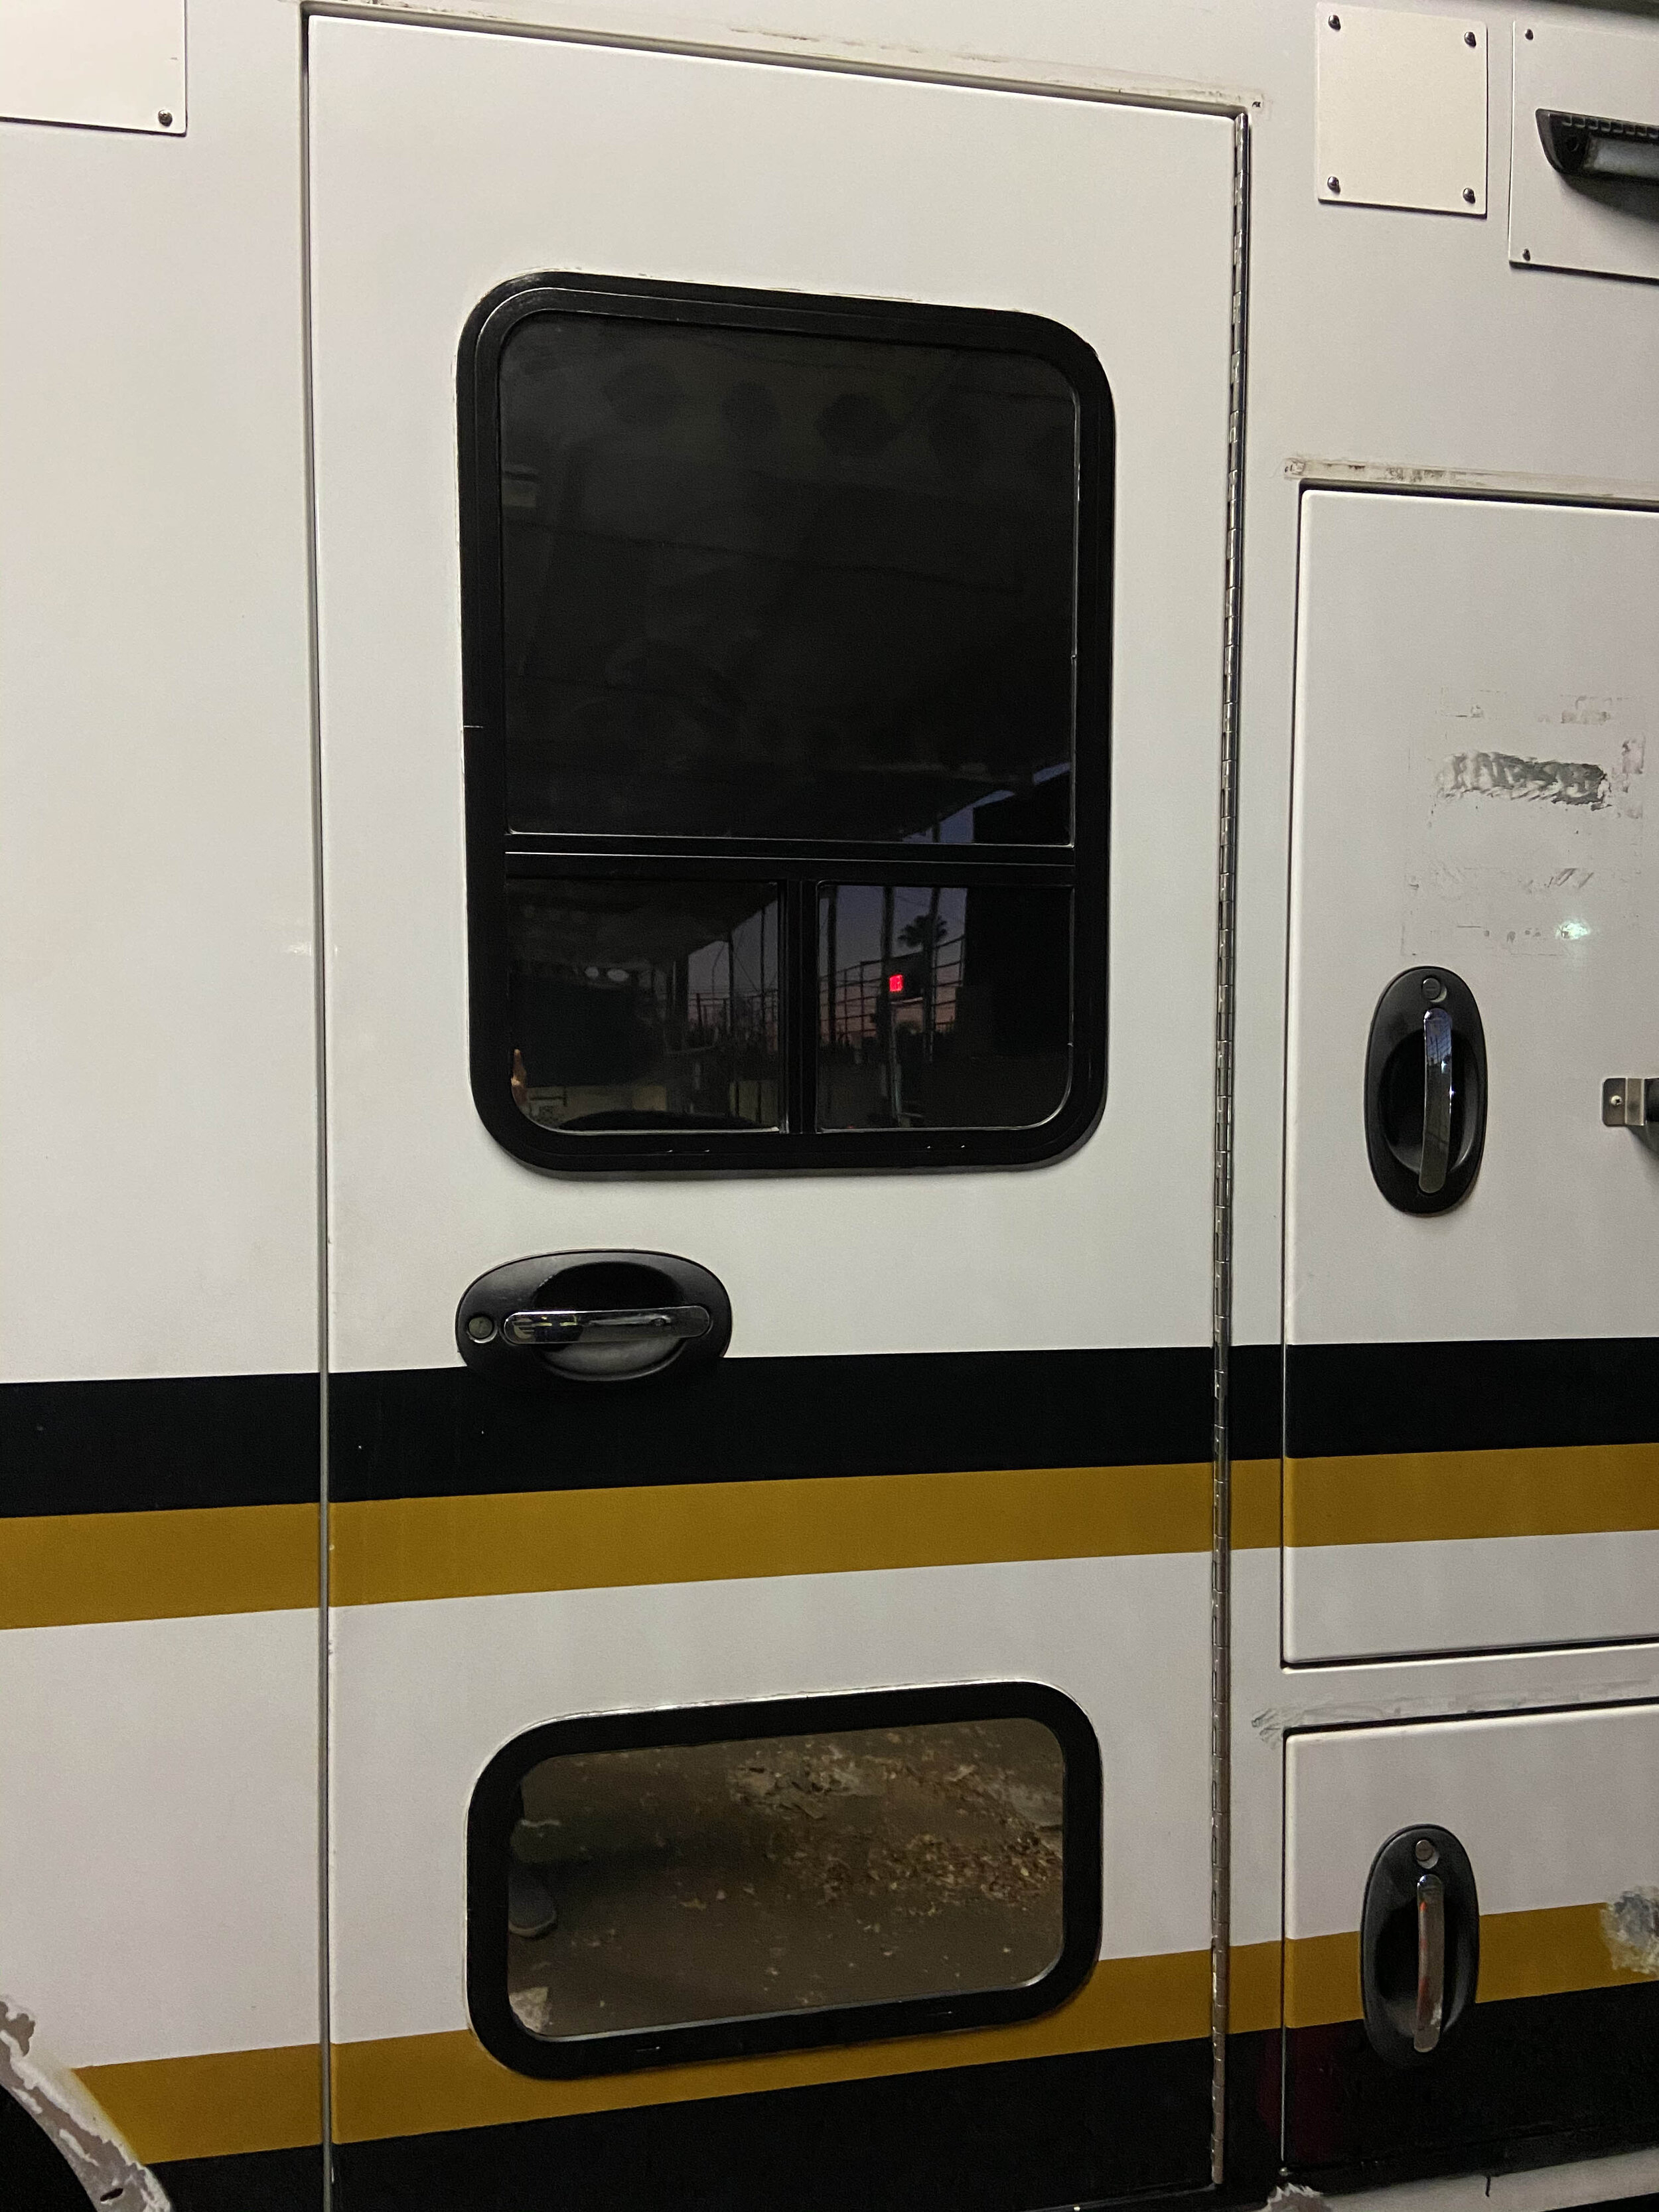
I painted the exterior doors to match the interior walls. This made the inside of the camper appear much larger. I painted all the silver window trip with black paint so that they would all match.


exterior lighting
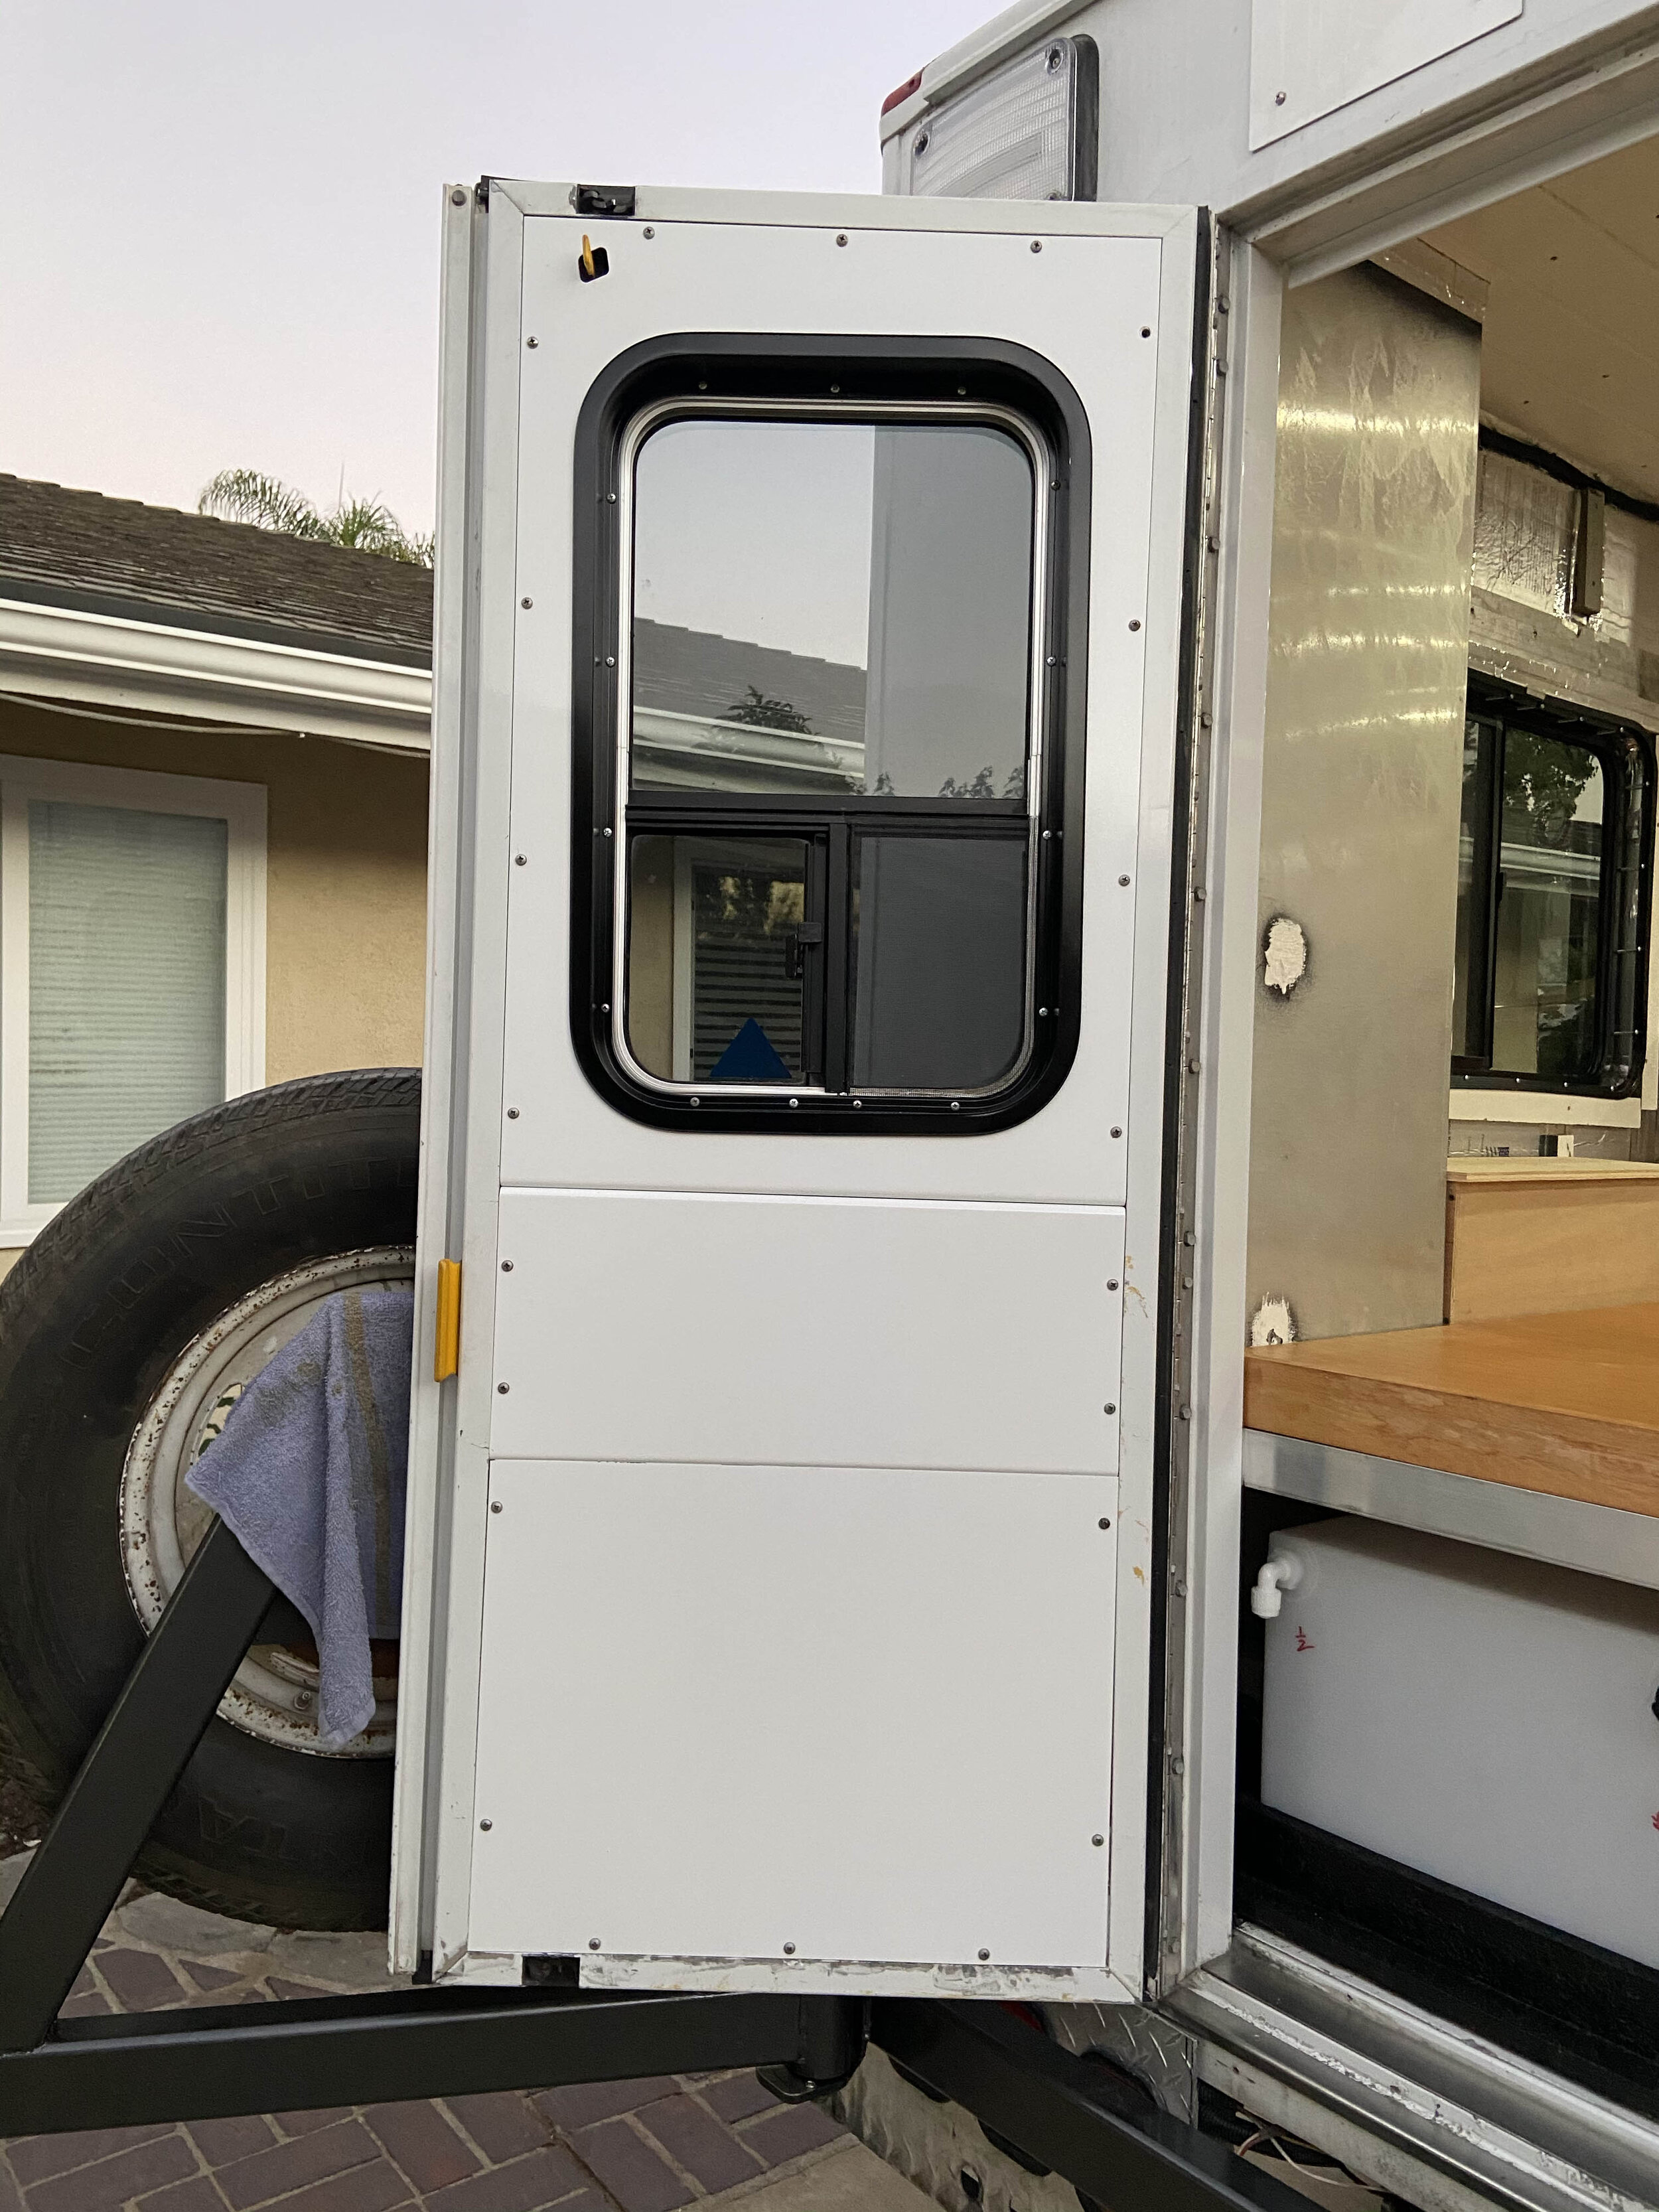
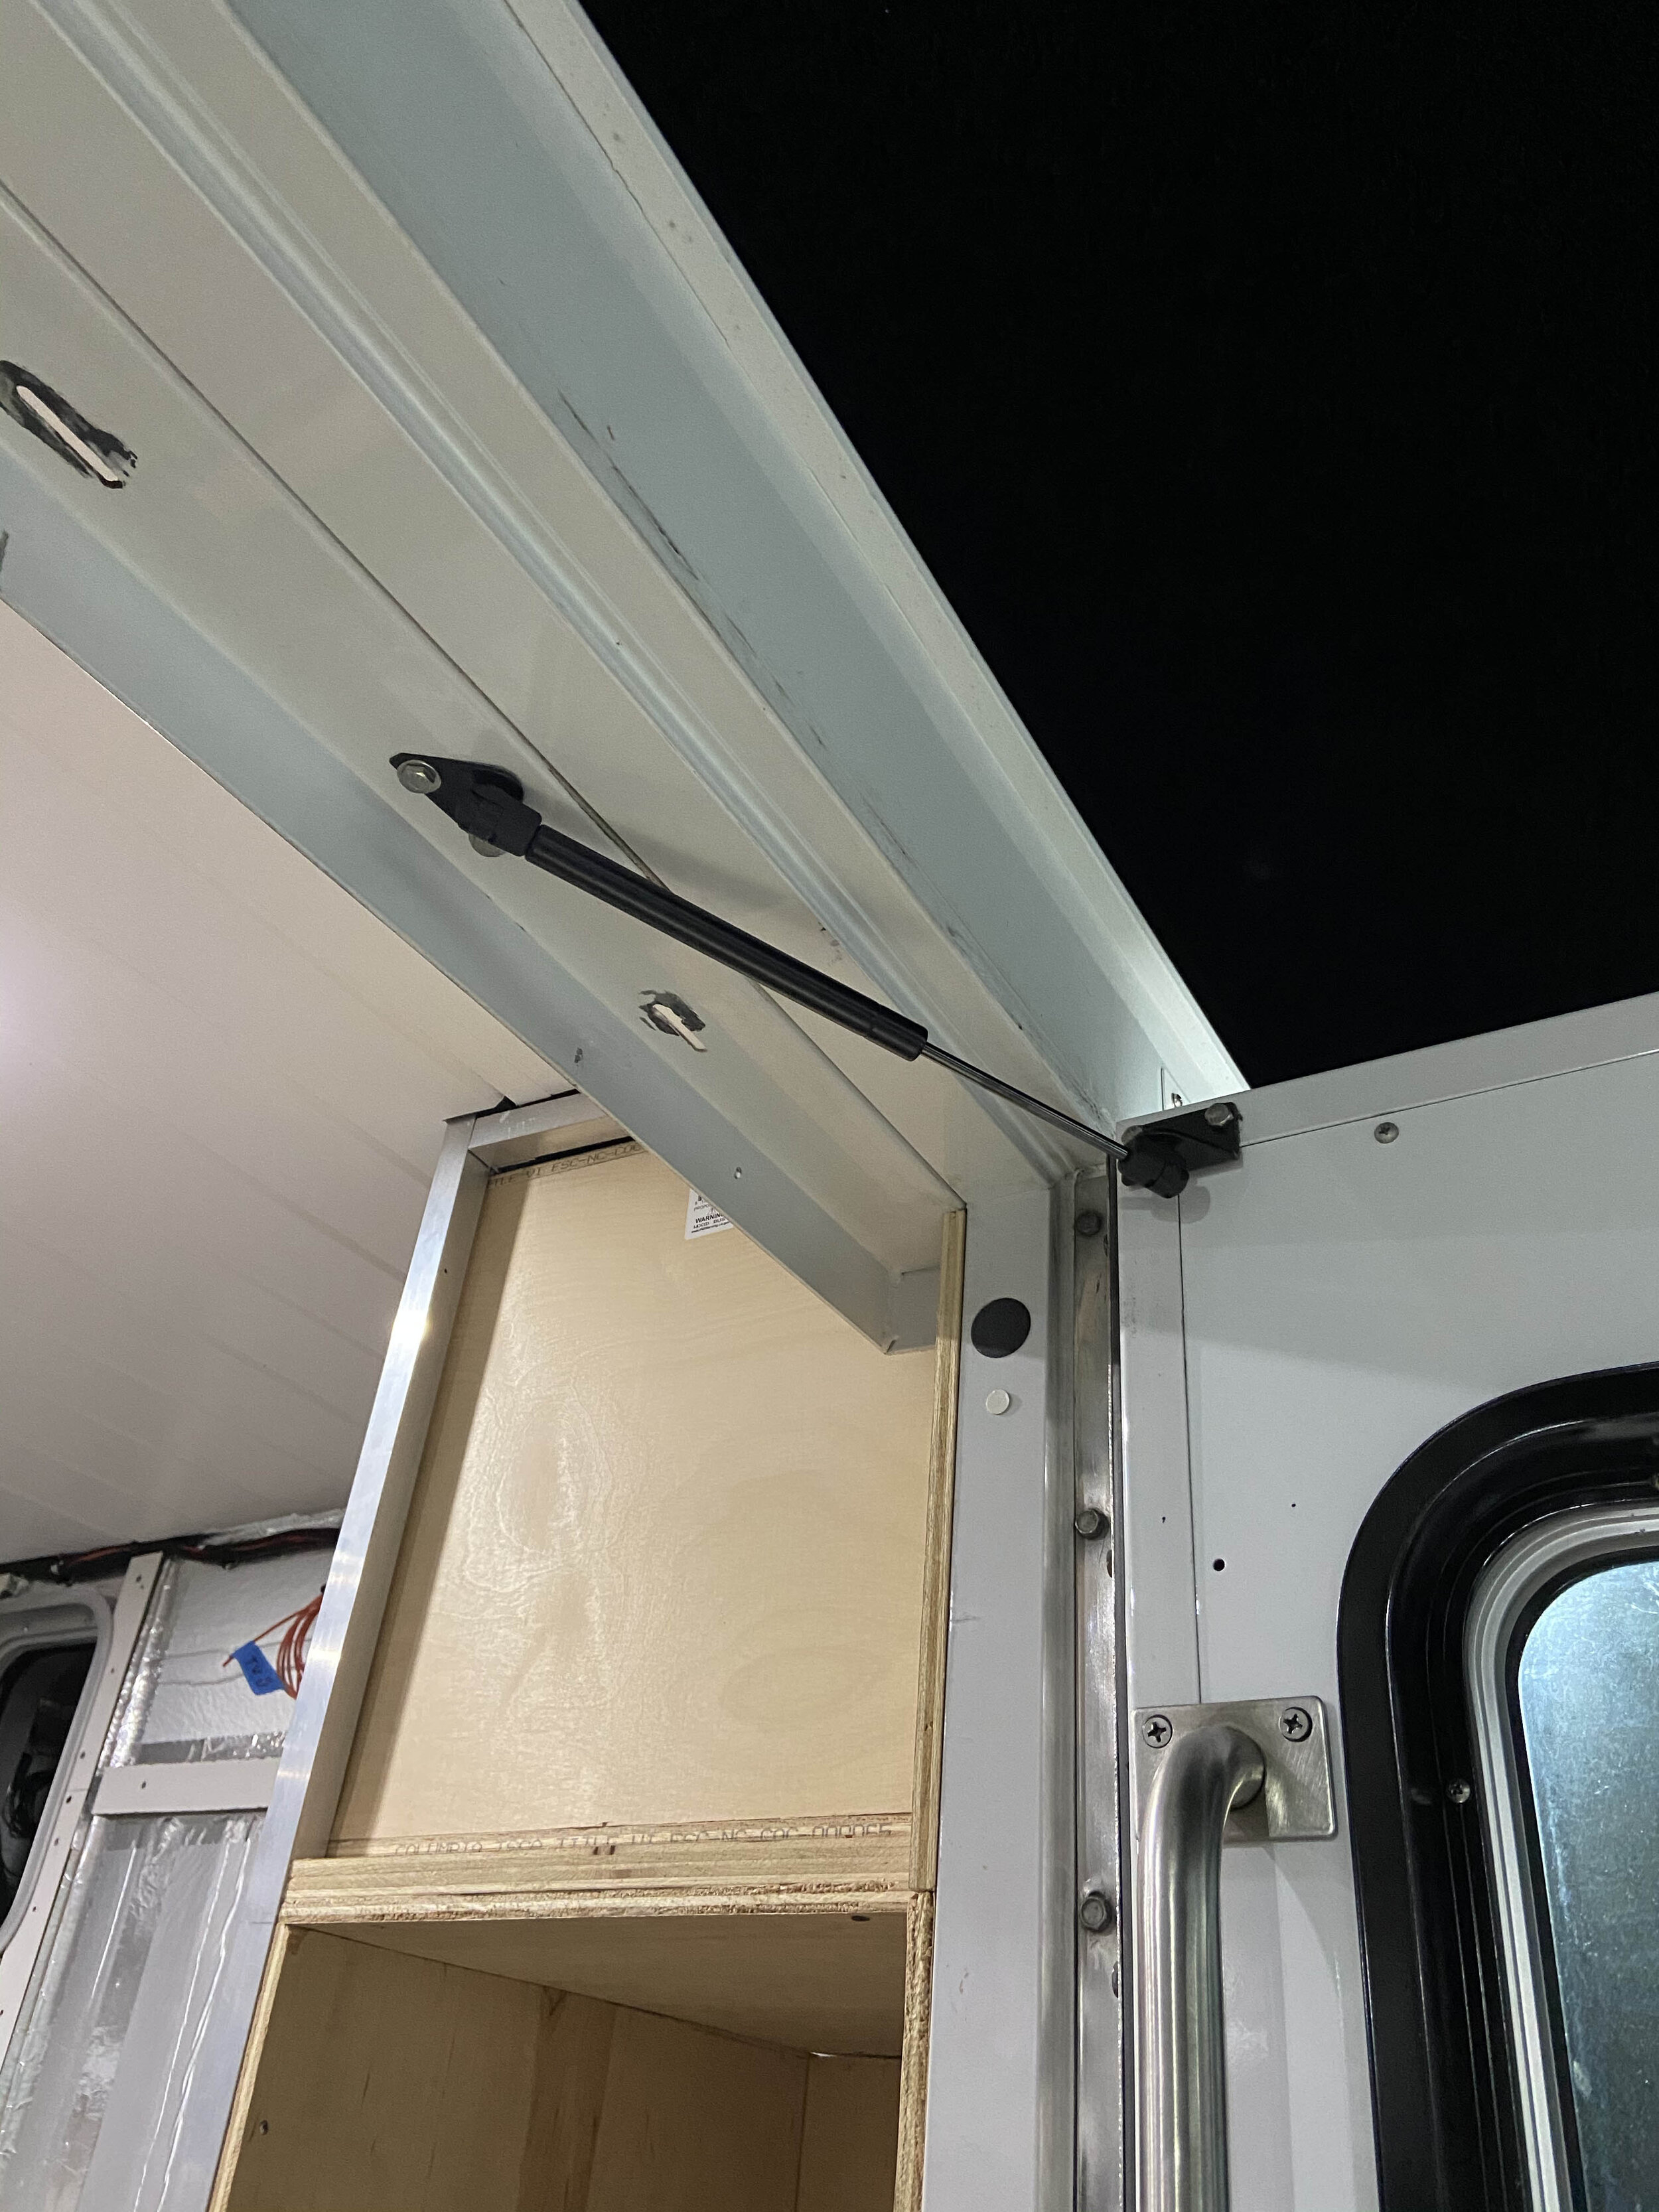
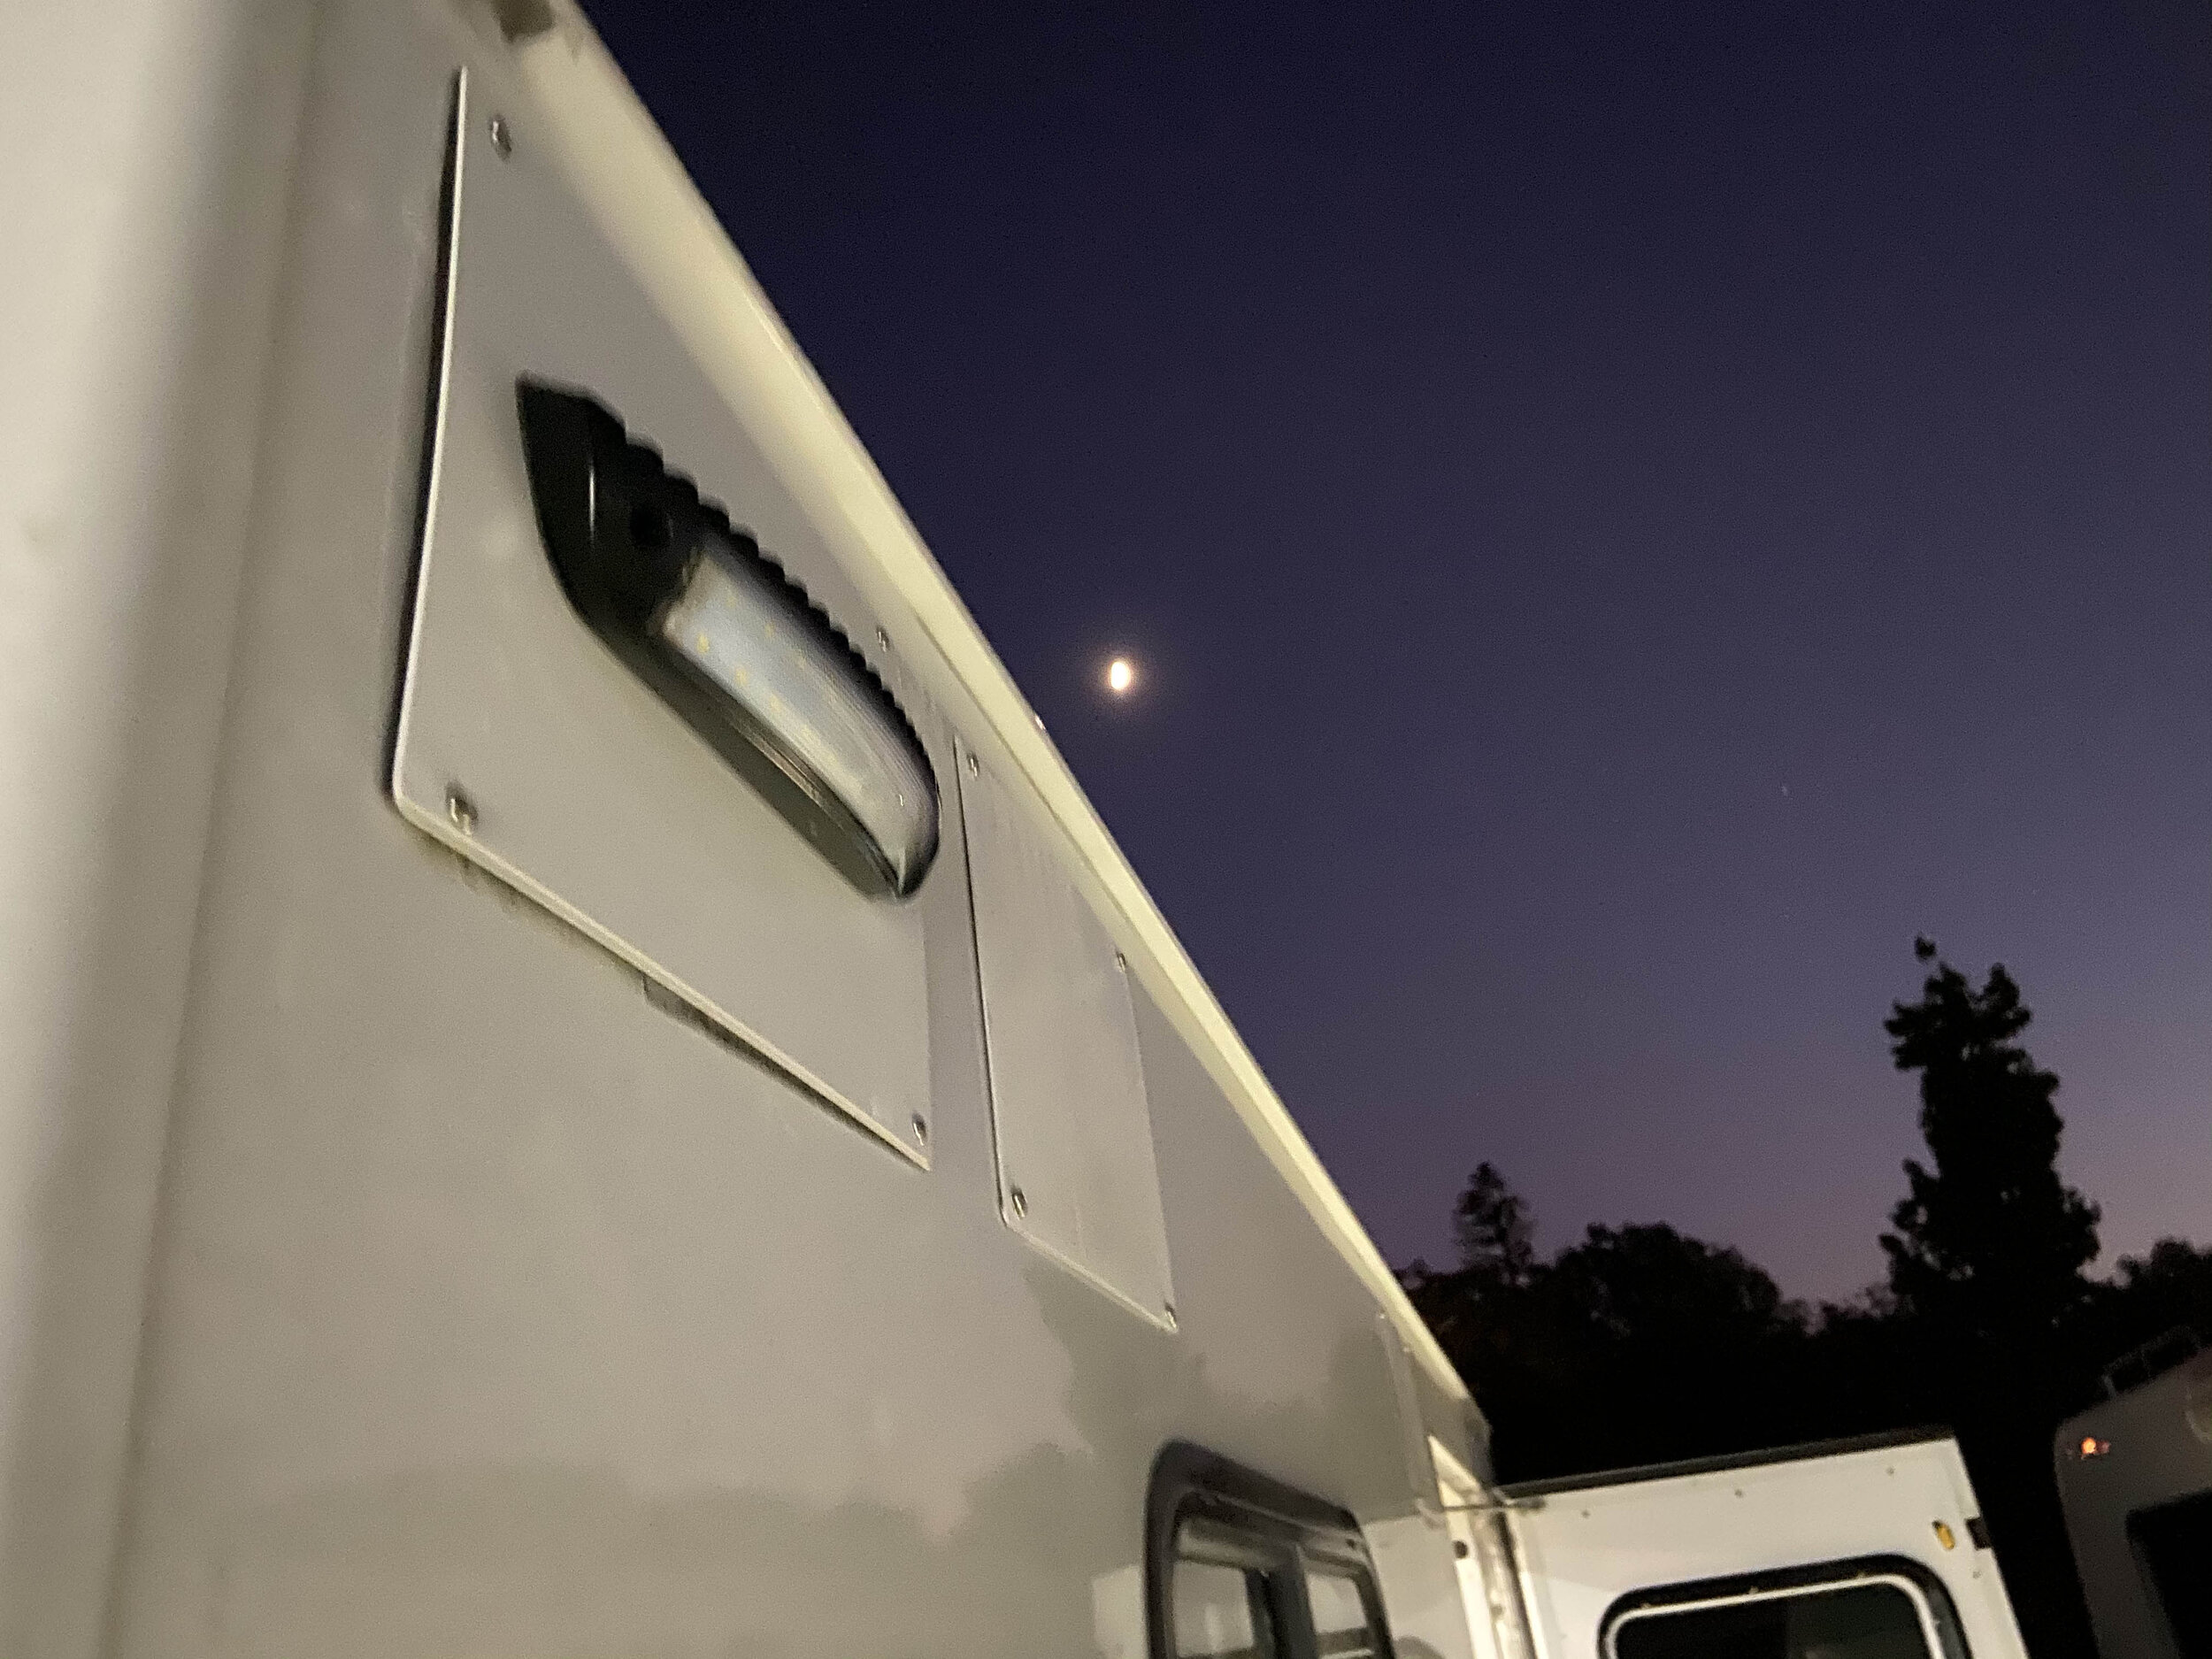
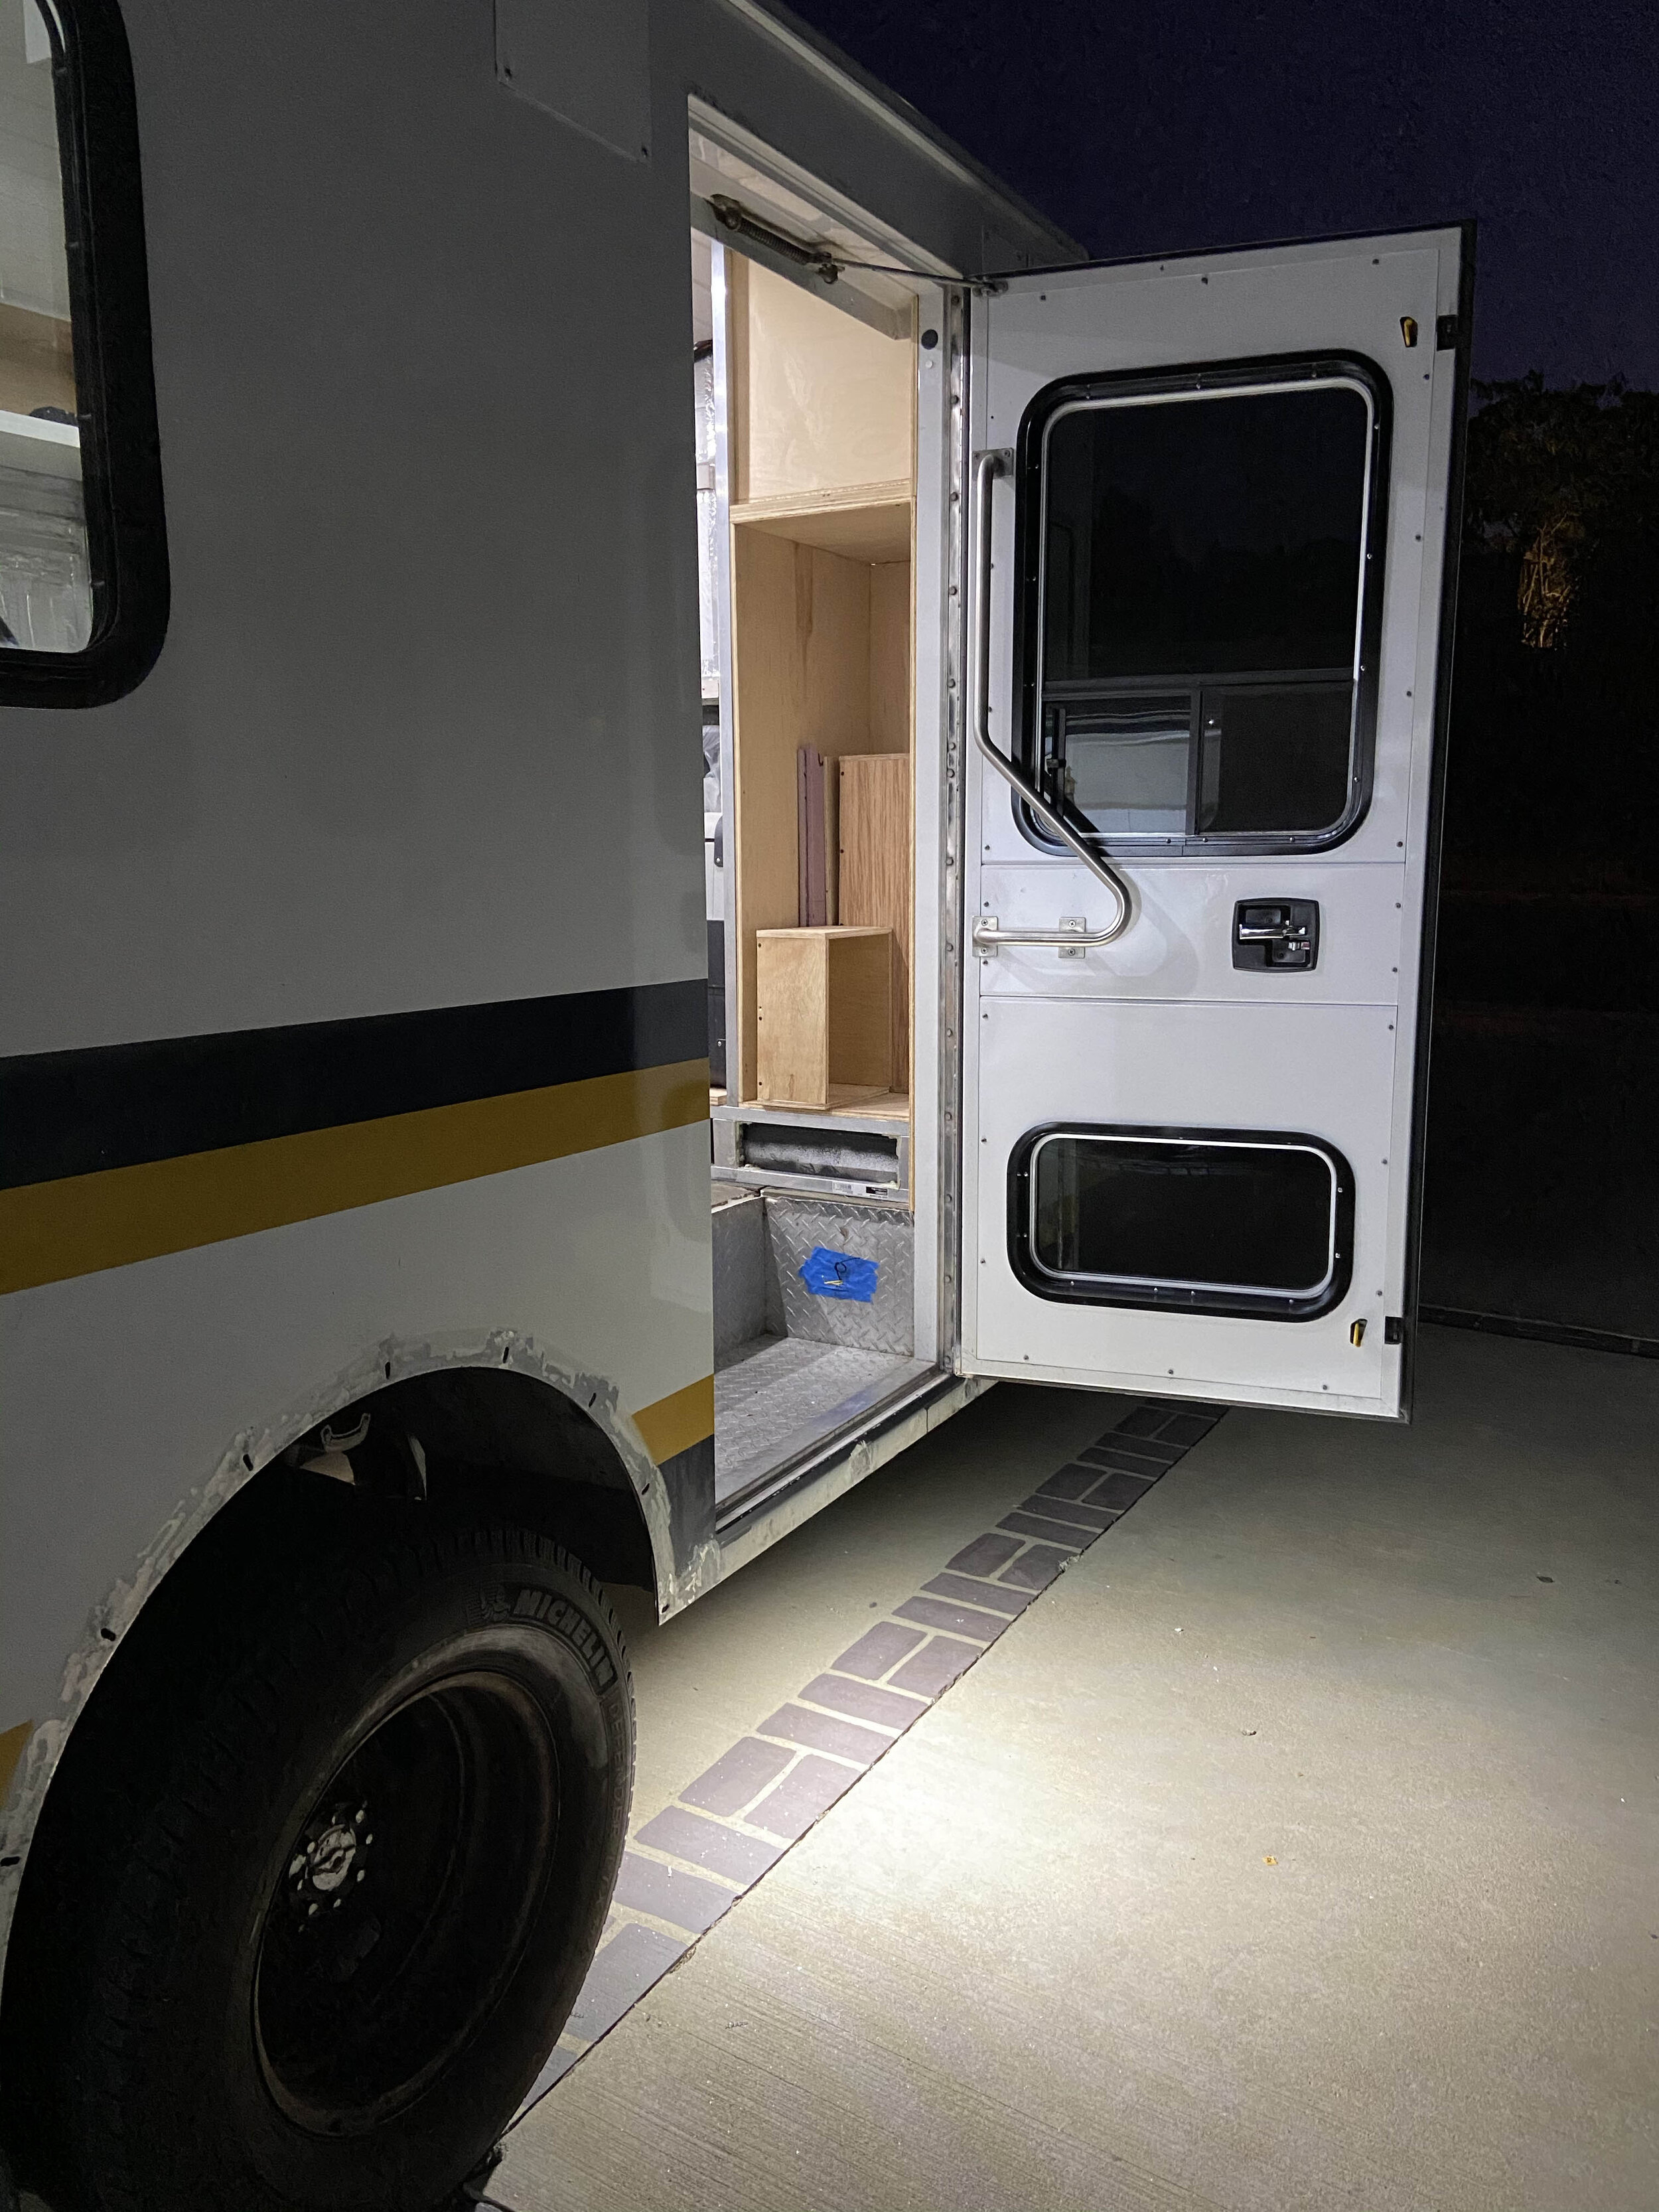
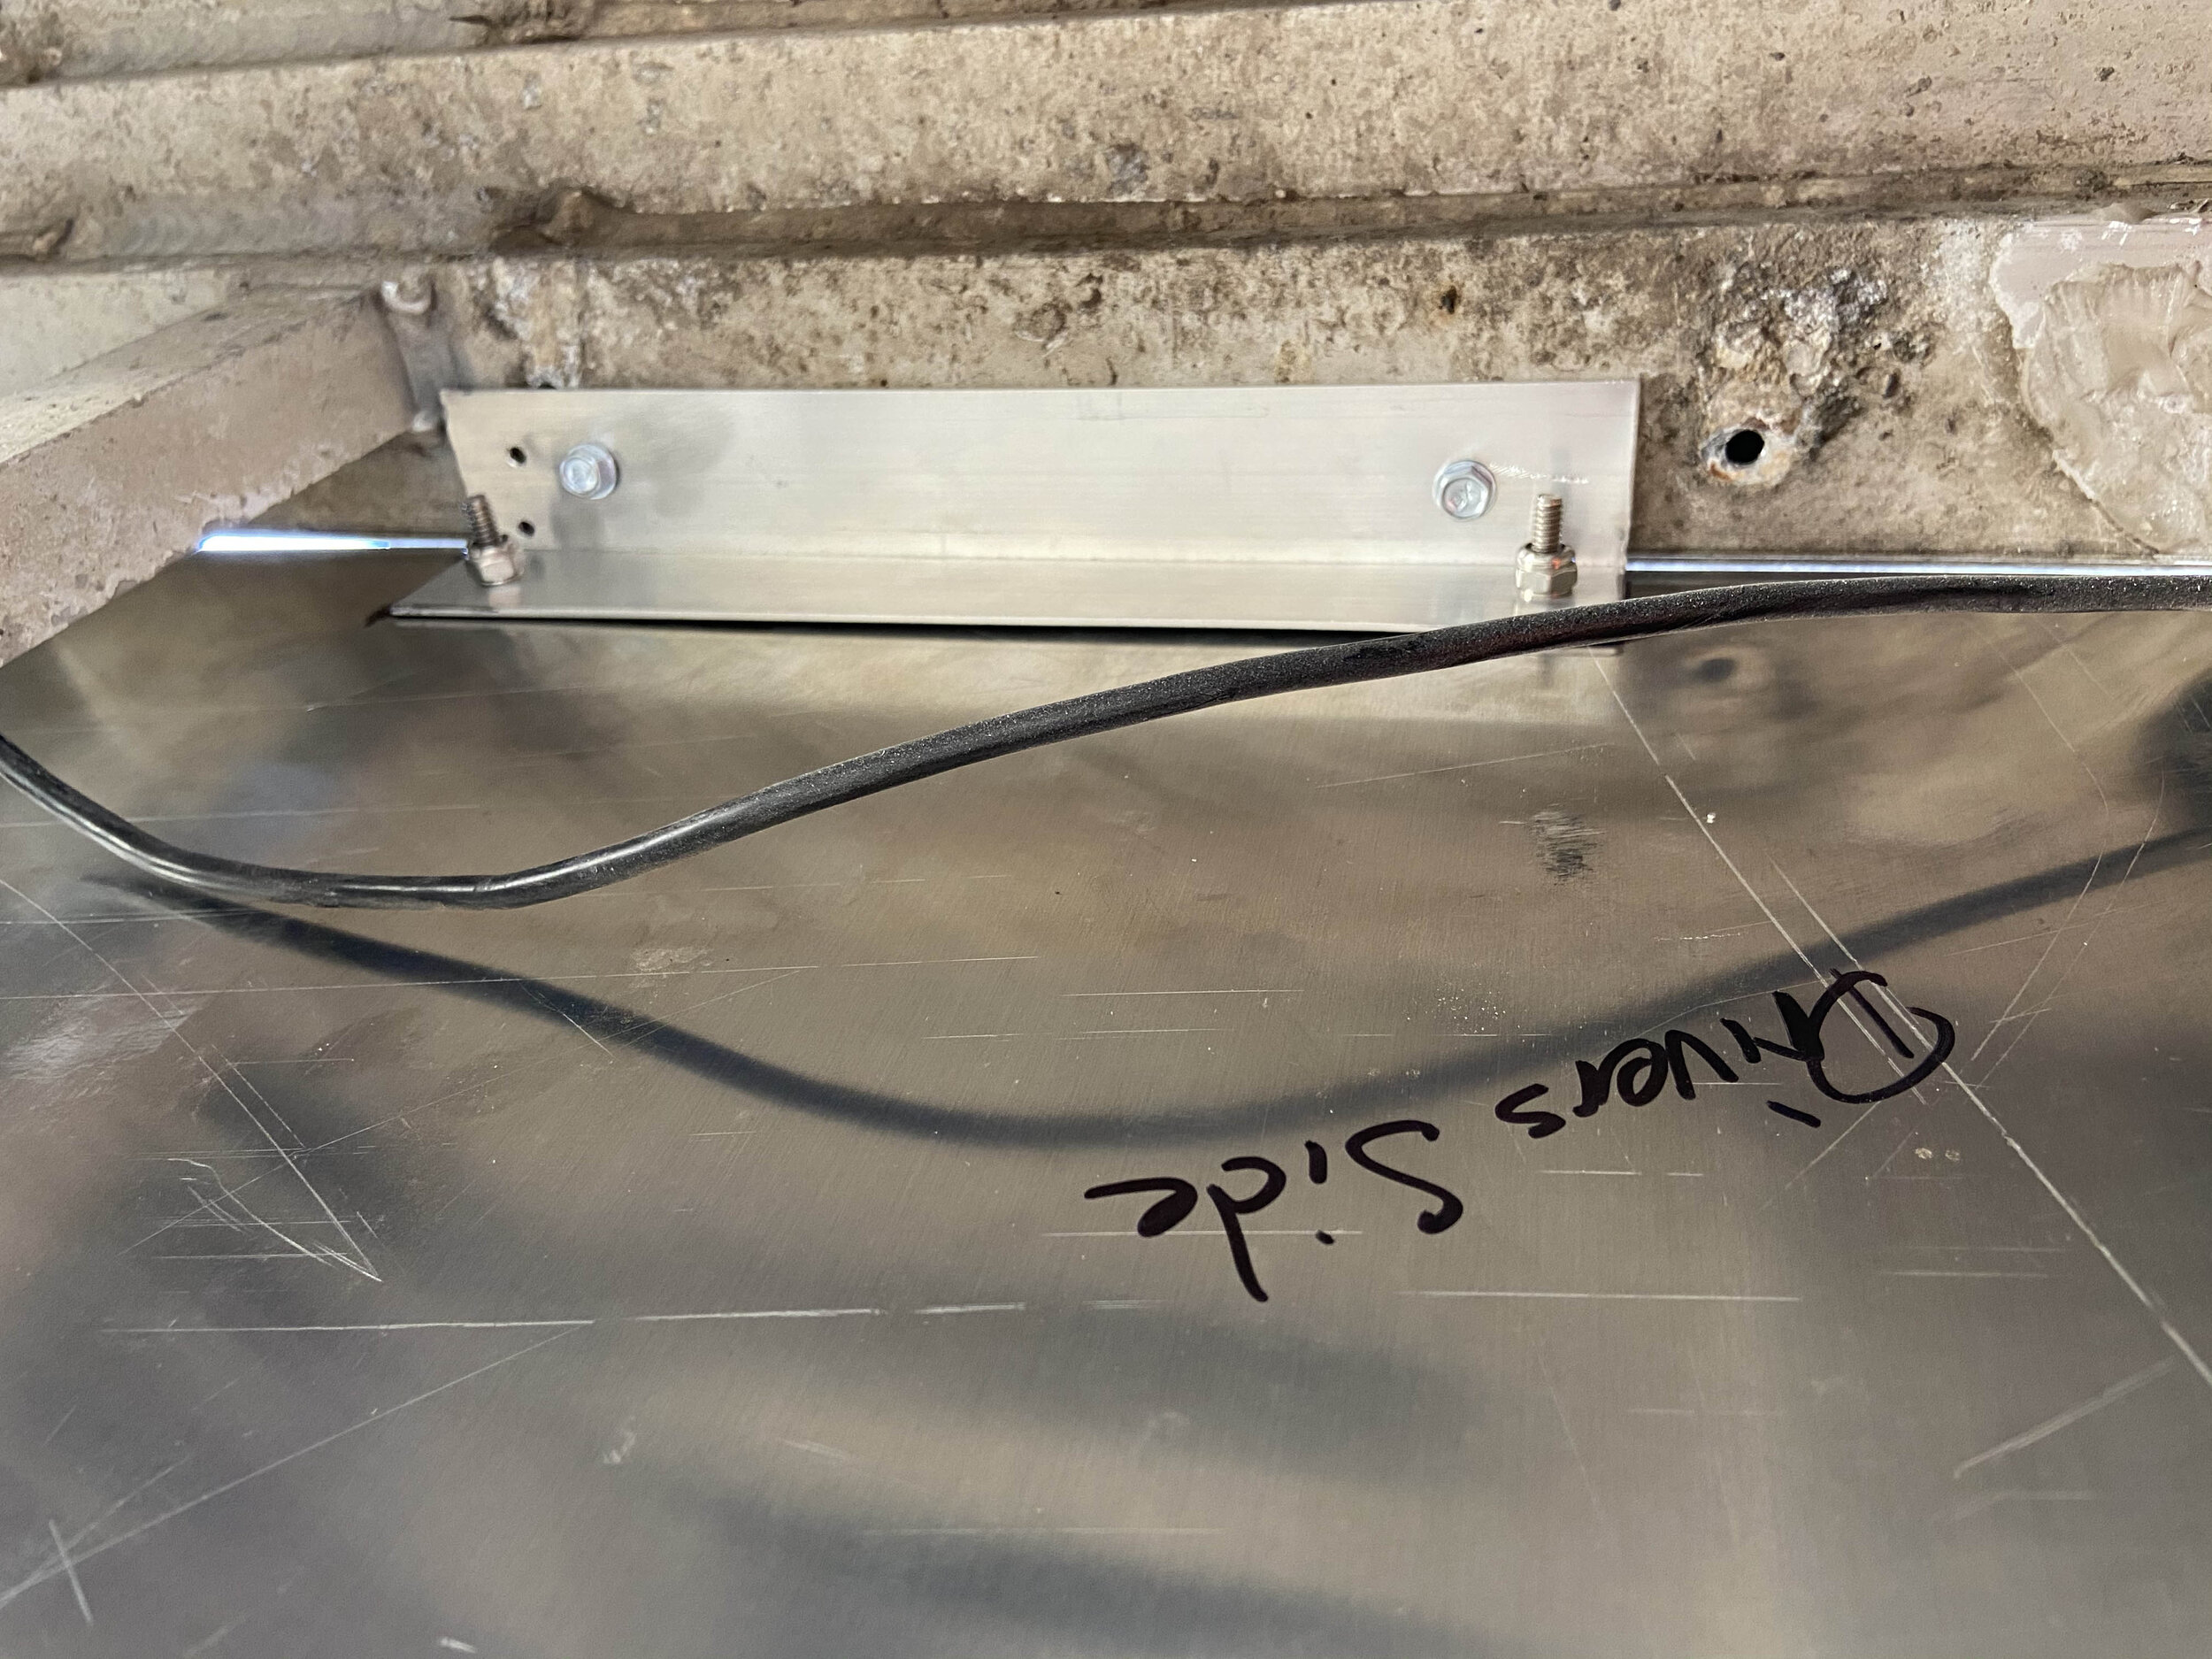
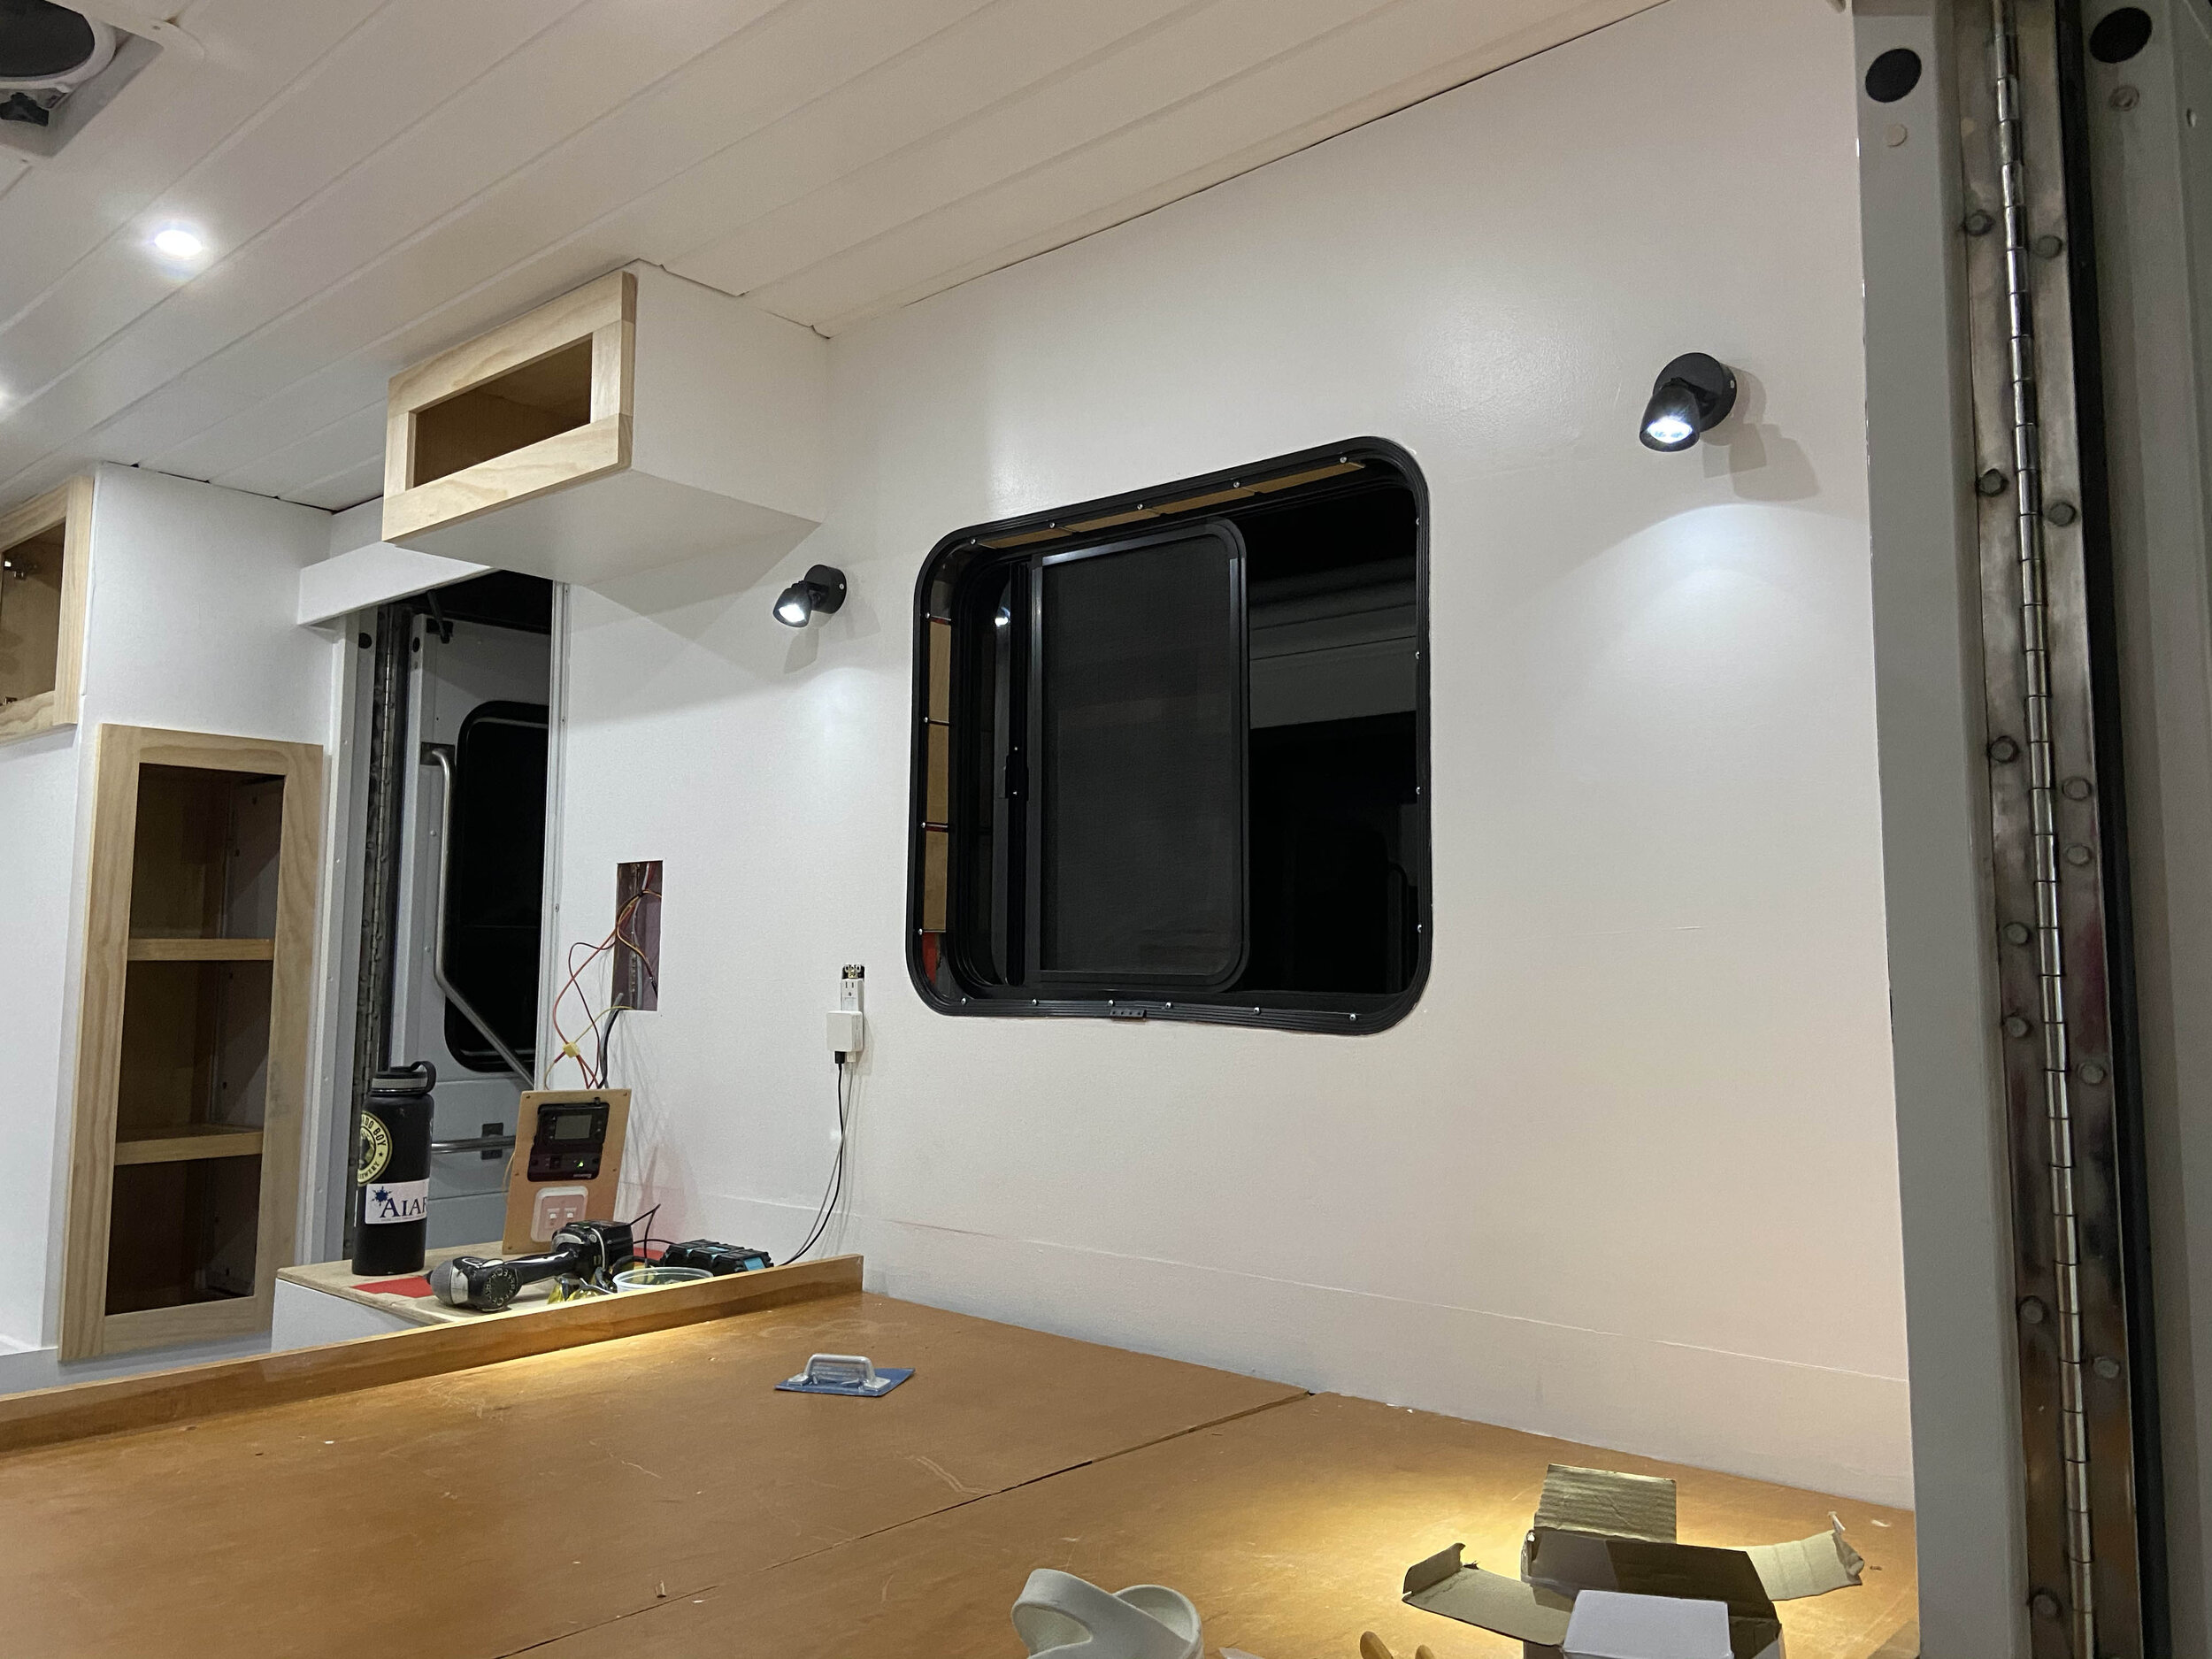
9/23/2020 - Installing the exterior LED lighting. Much better than the stock ambulance exterior lighting. Installed a pneumatic shock for the side door to replace the stock spring mechanism. All the exterior LED lighting was purchased from superbrightleds.com. Each exterior LED light is attached to a .063 AL plate. The plate it attached to the preexisting hole where the ambulance lights were. I added weather stripping to the backside and the electrical connections are all plugs. This makes the lights/panels removable and serviceable. The upper lights are really low profile and provide 120 degrees of lighting. Let me tell you. These are bright as can be. MUCH brighter than the halogen Whelen 900’s that were there before. The rear lights are 6” flood lights. I added an under cab light under the side access door. This way you can clearly see where you are stepping when you exit the camper at night.
I switched out the spring door retainer for the passenger side for a pneumatic arm. This made it a much softer close and easier to close when standing inside the camper.


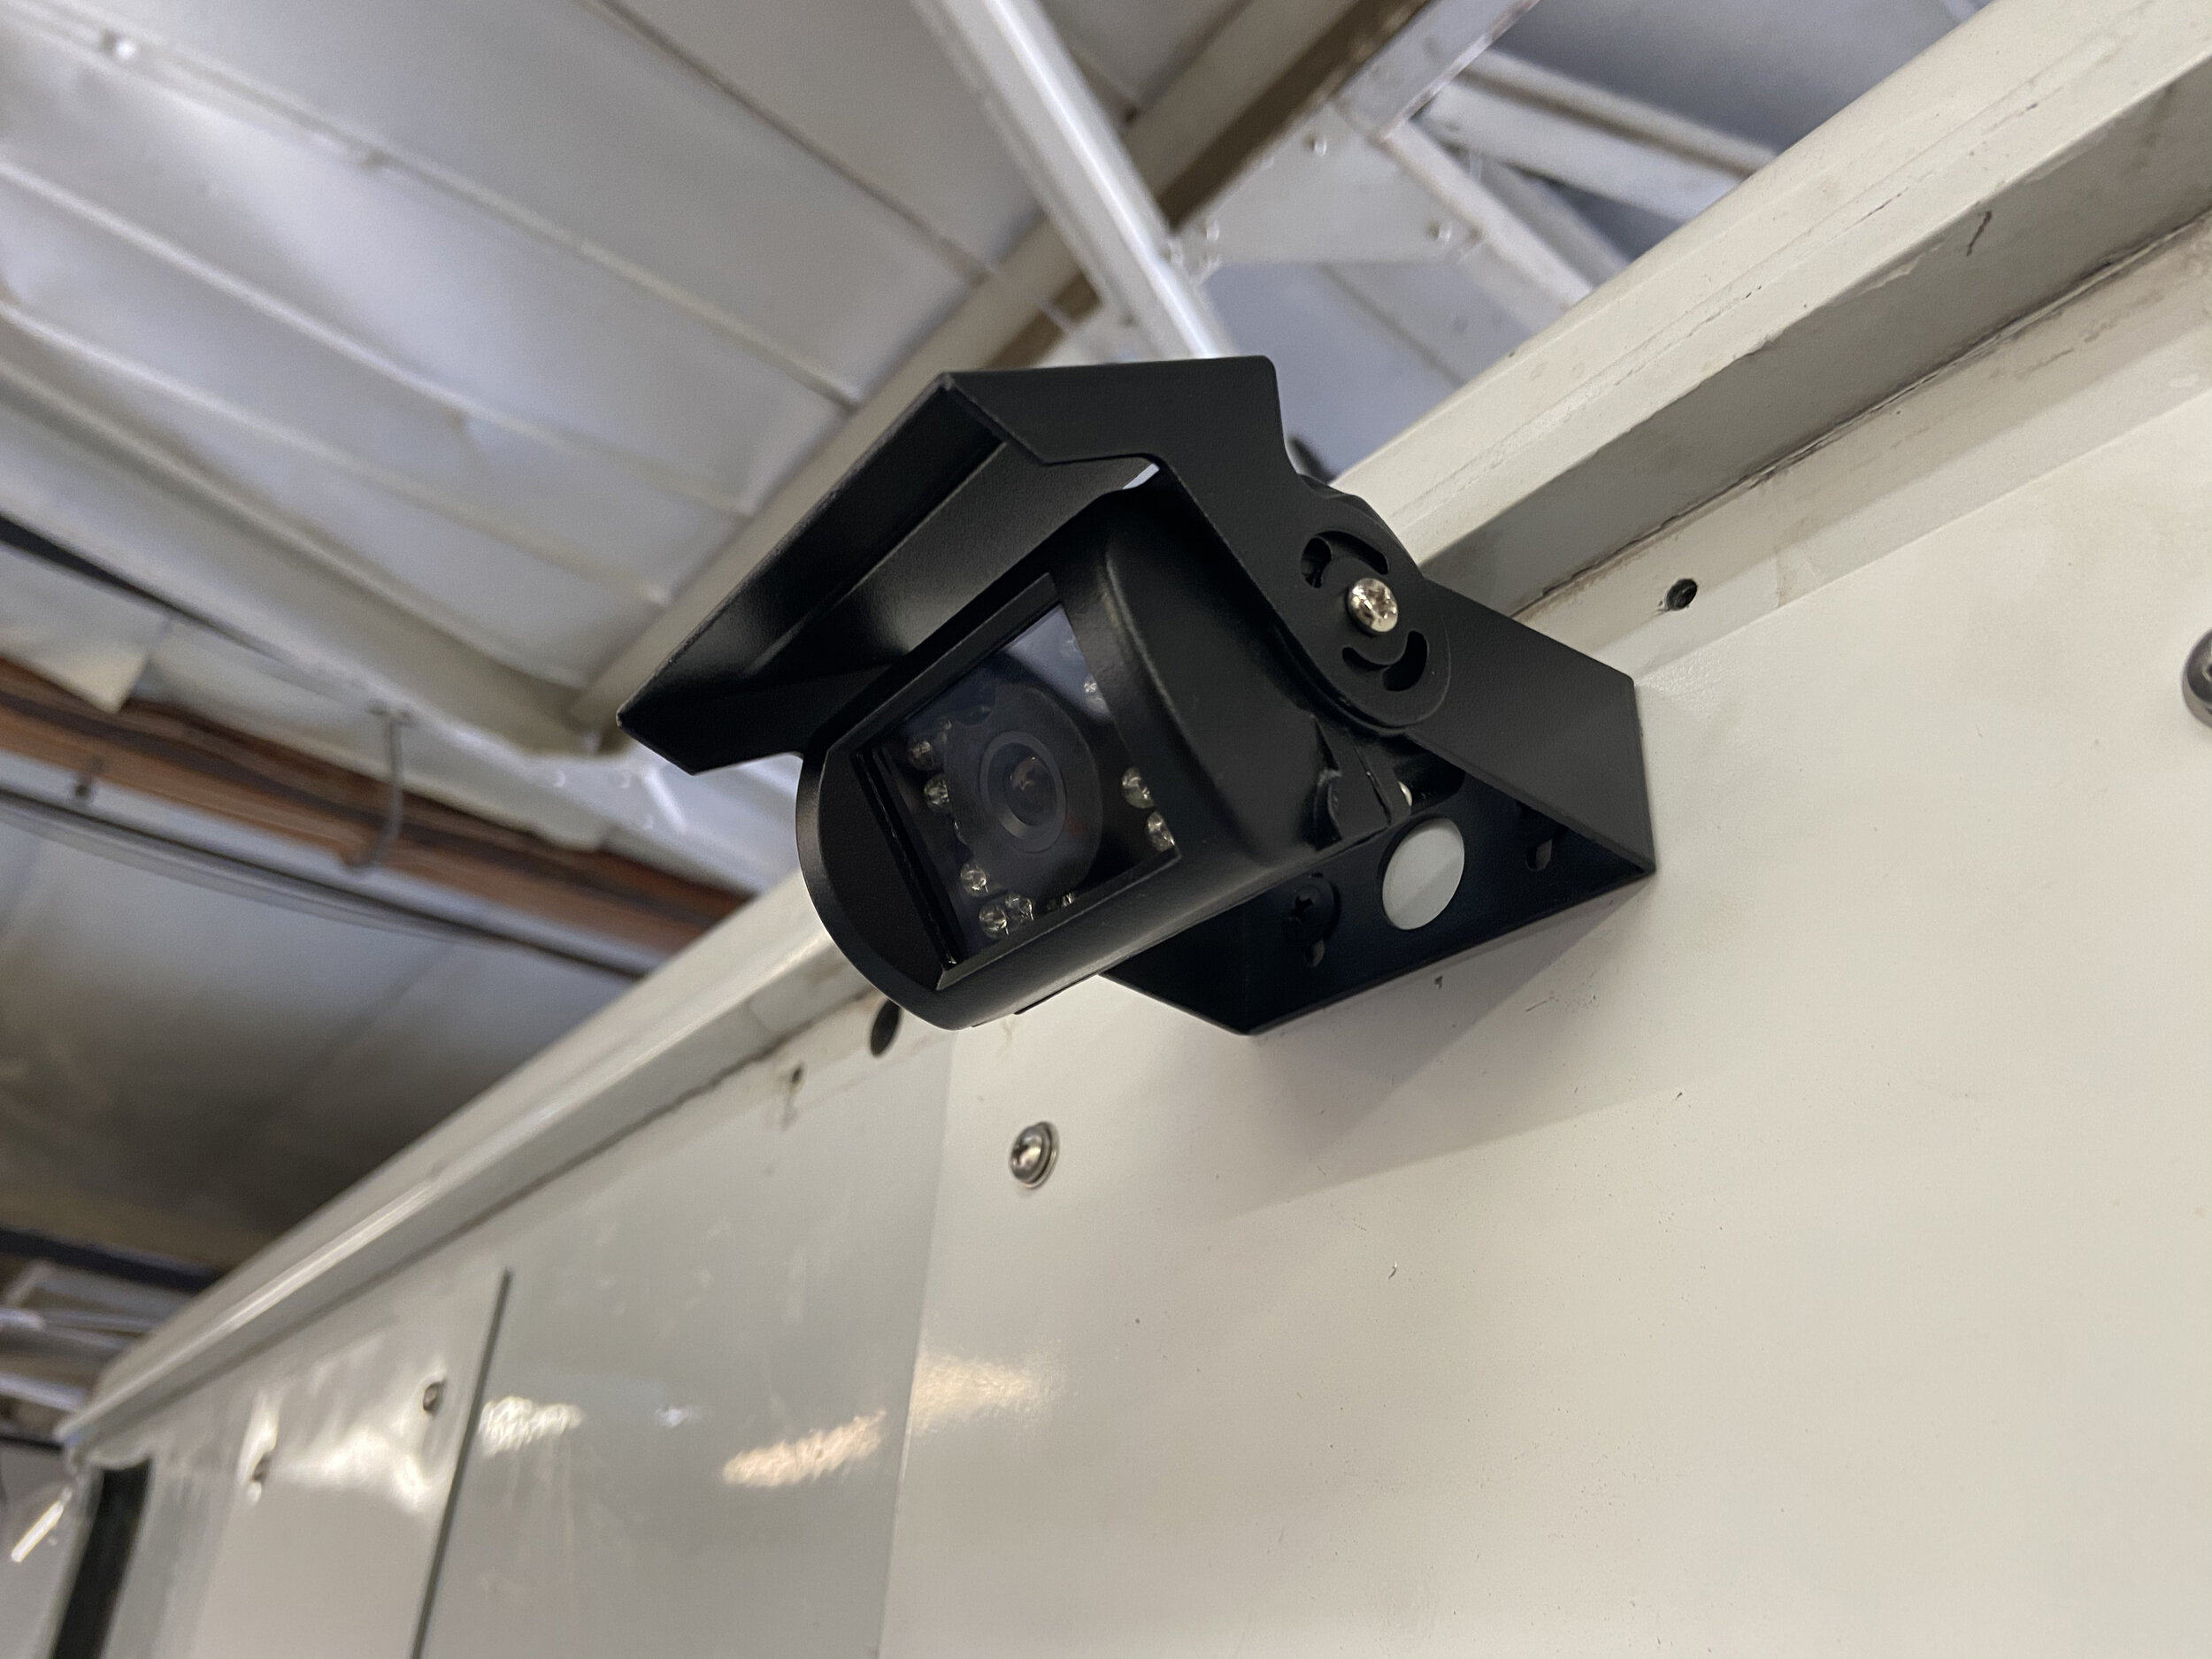
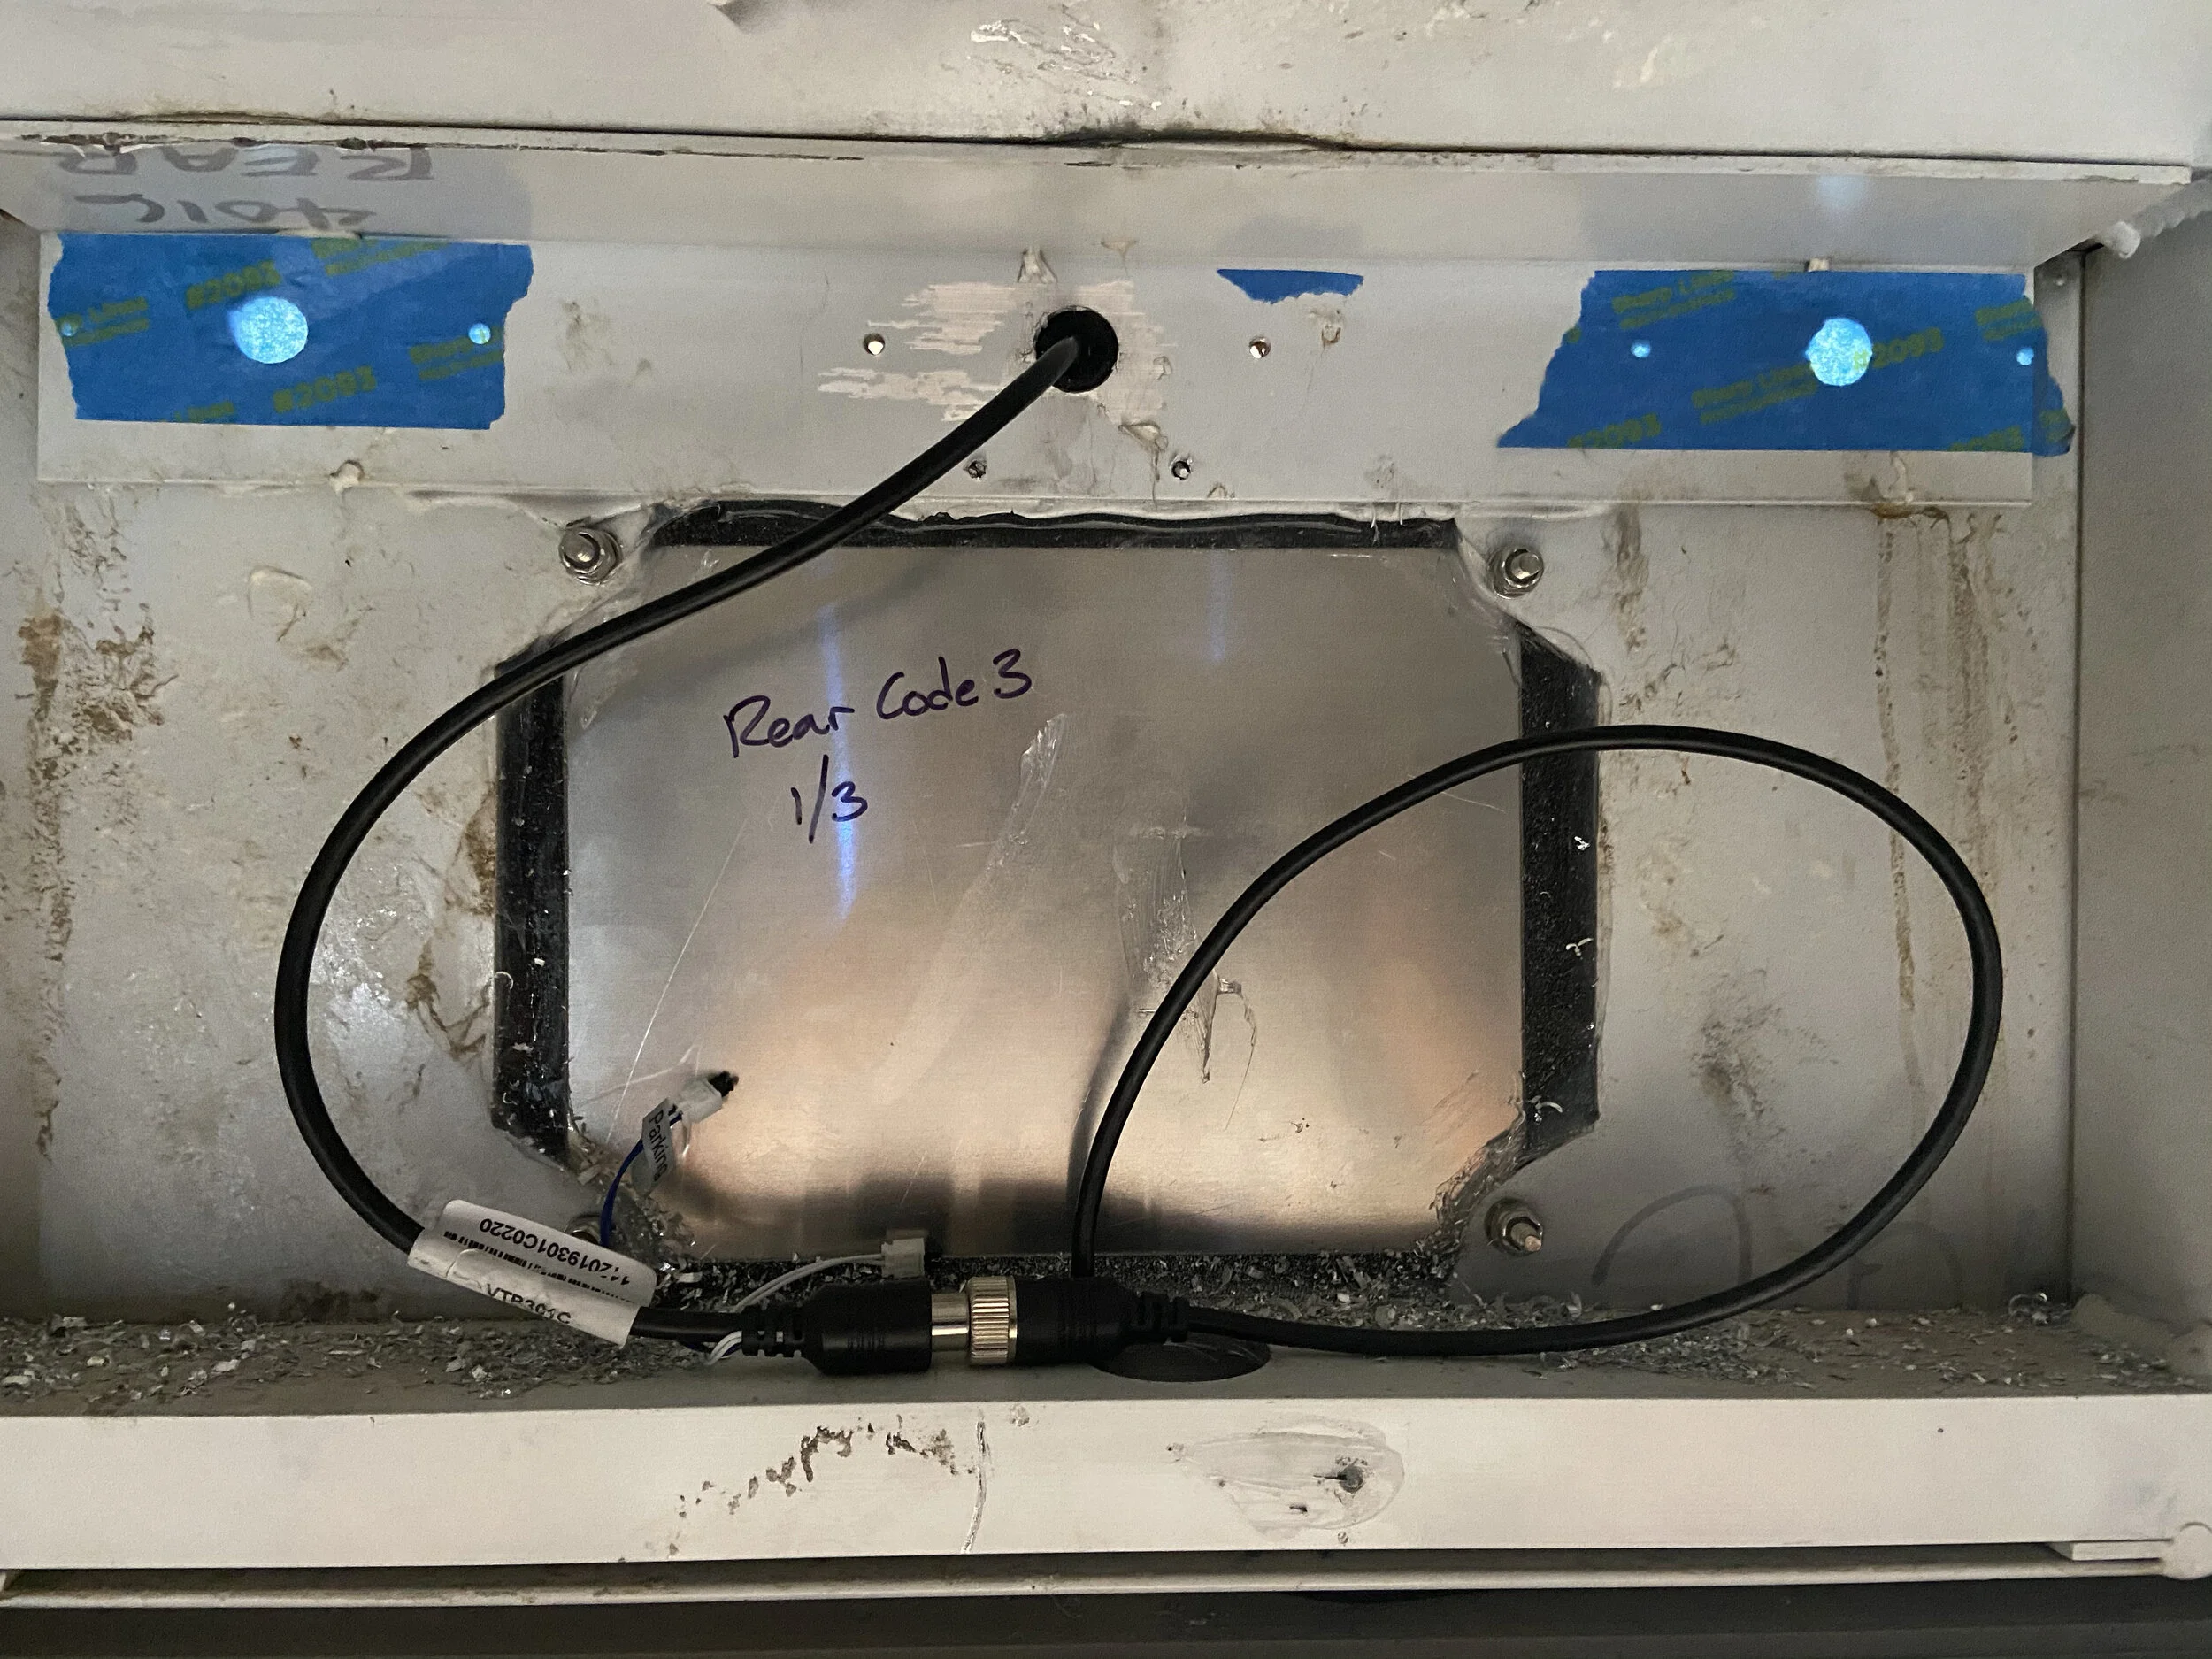
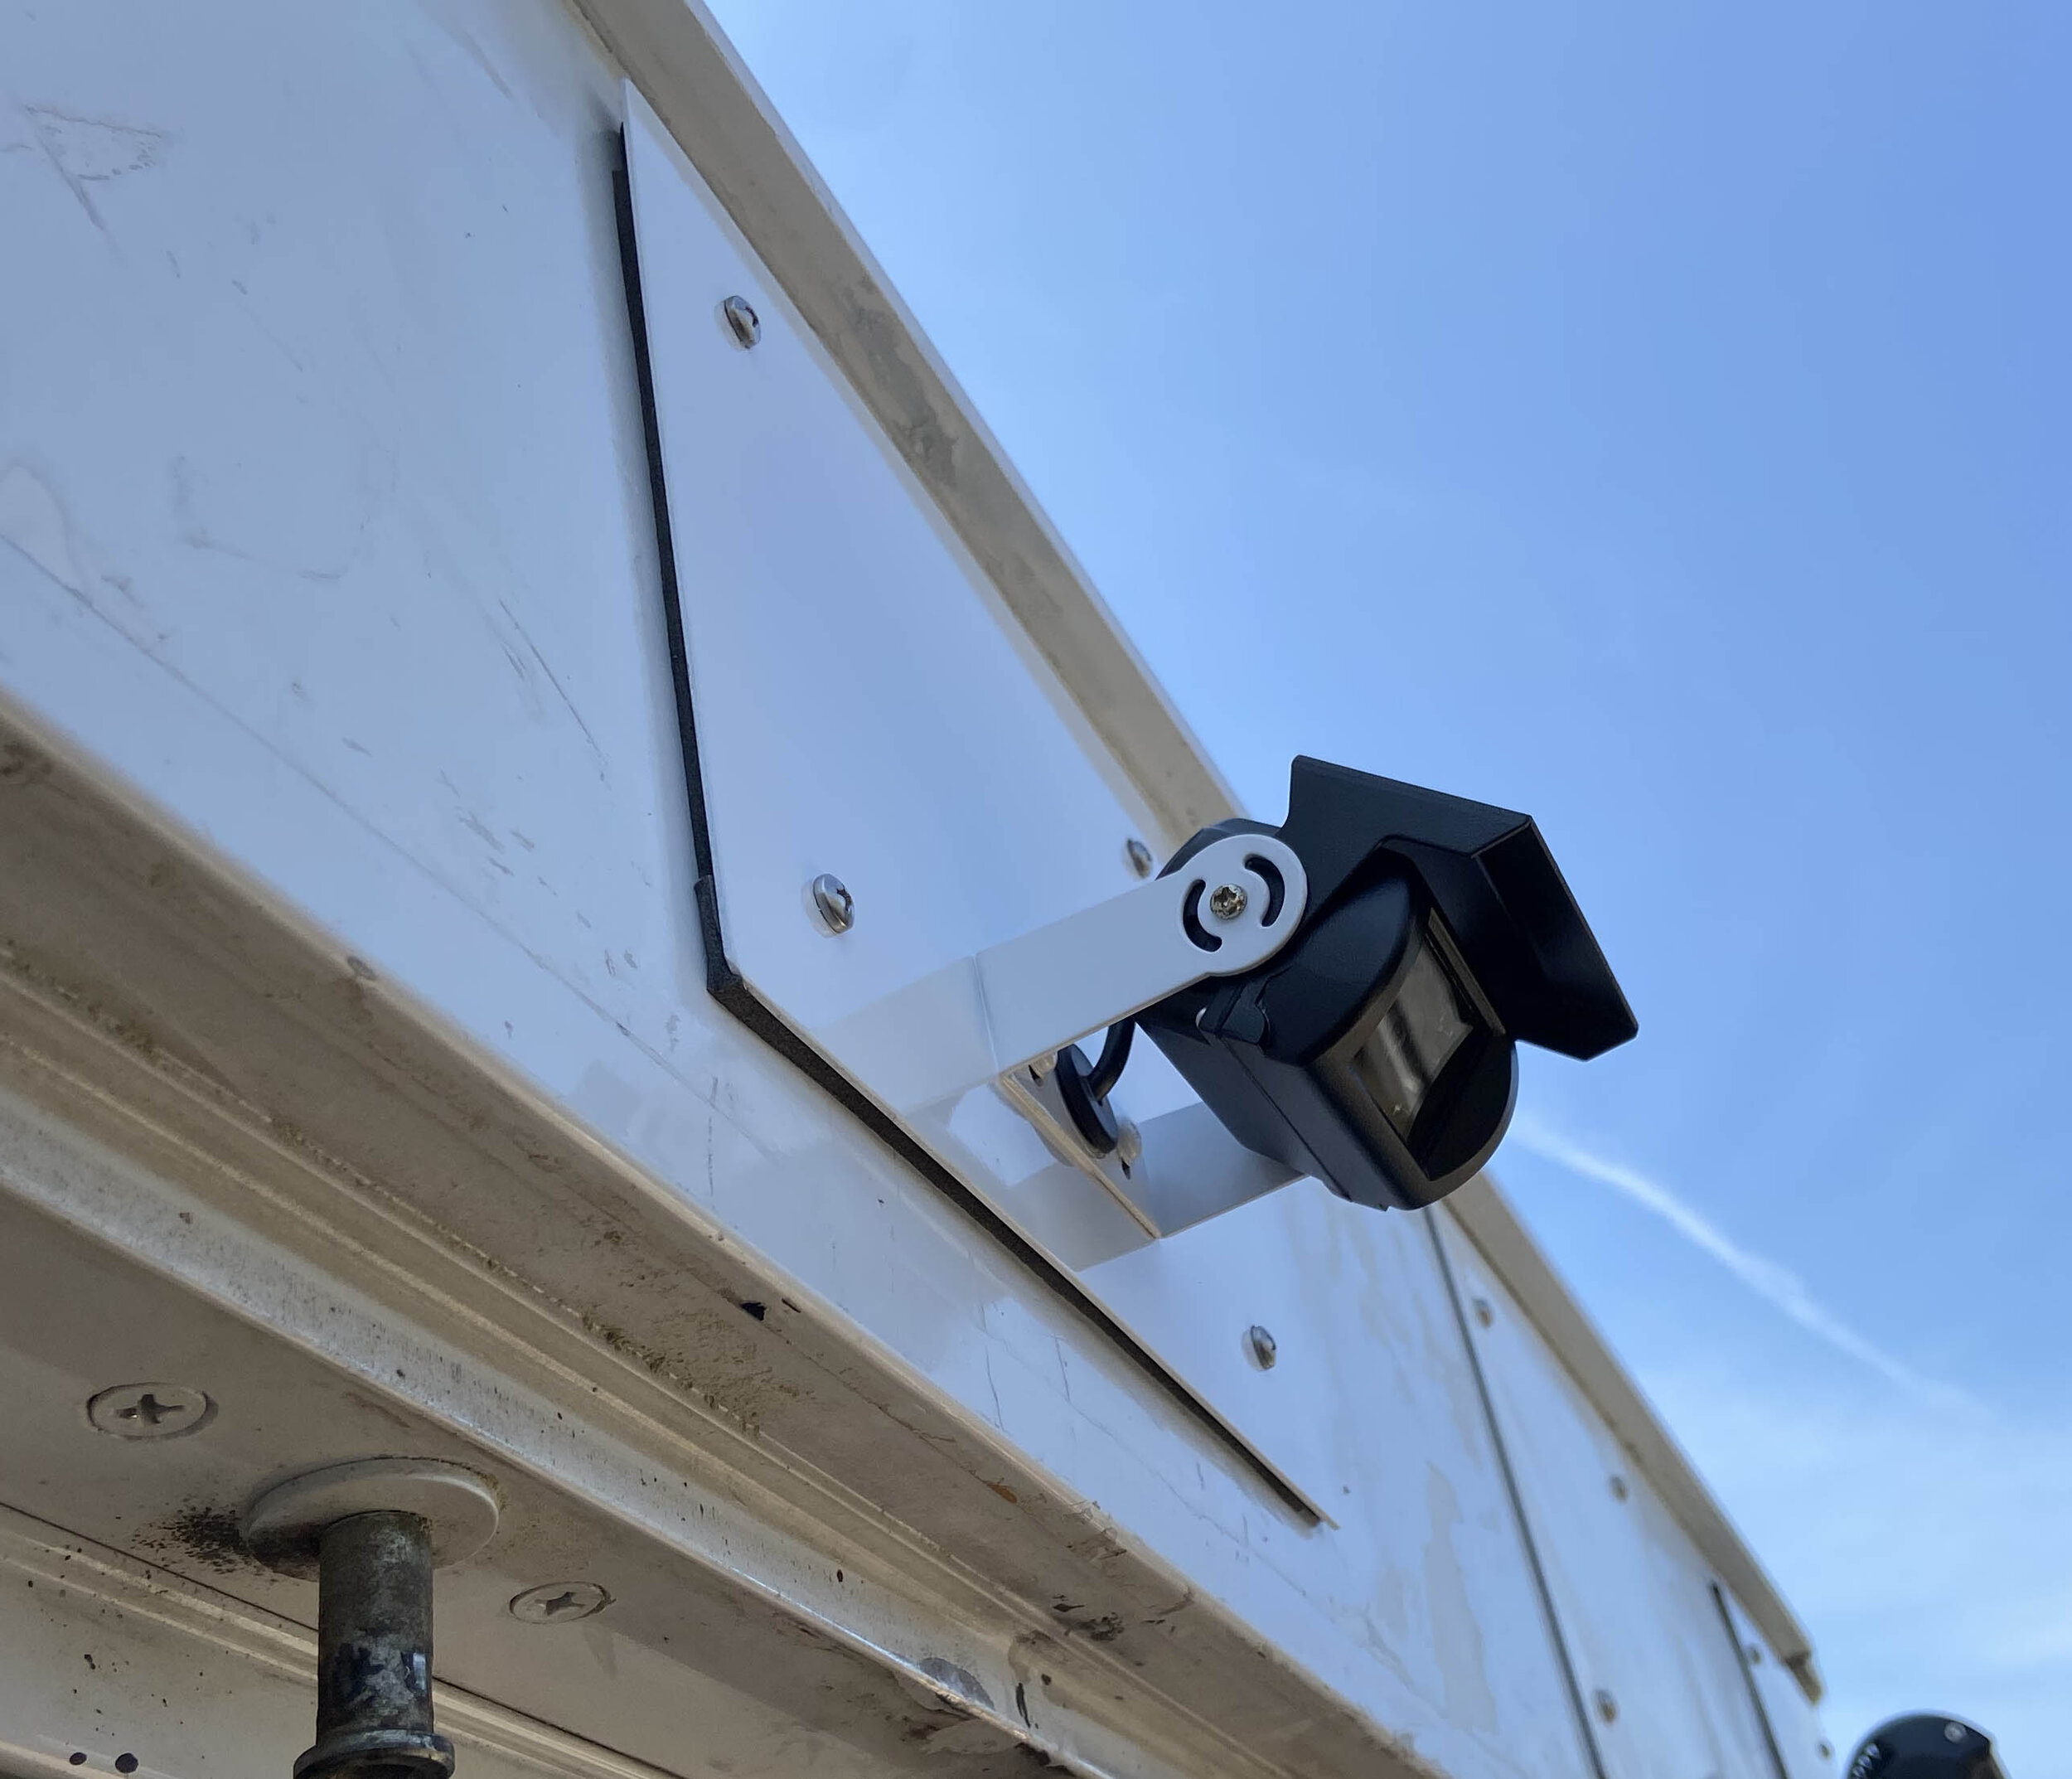
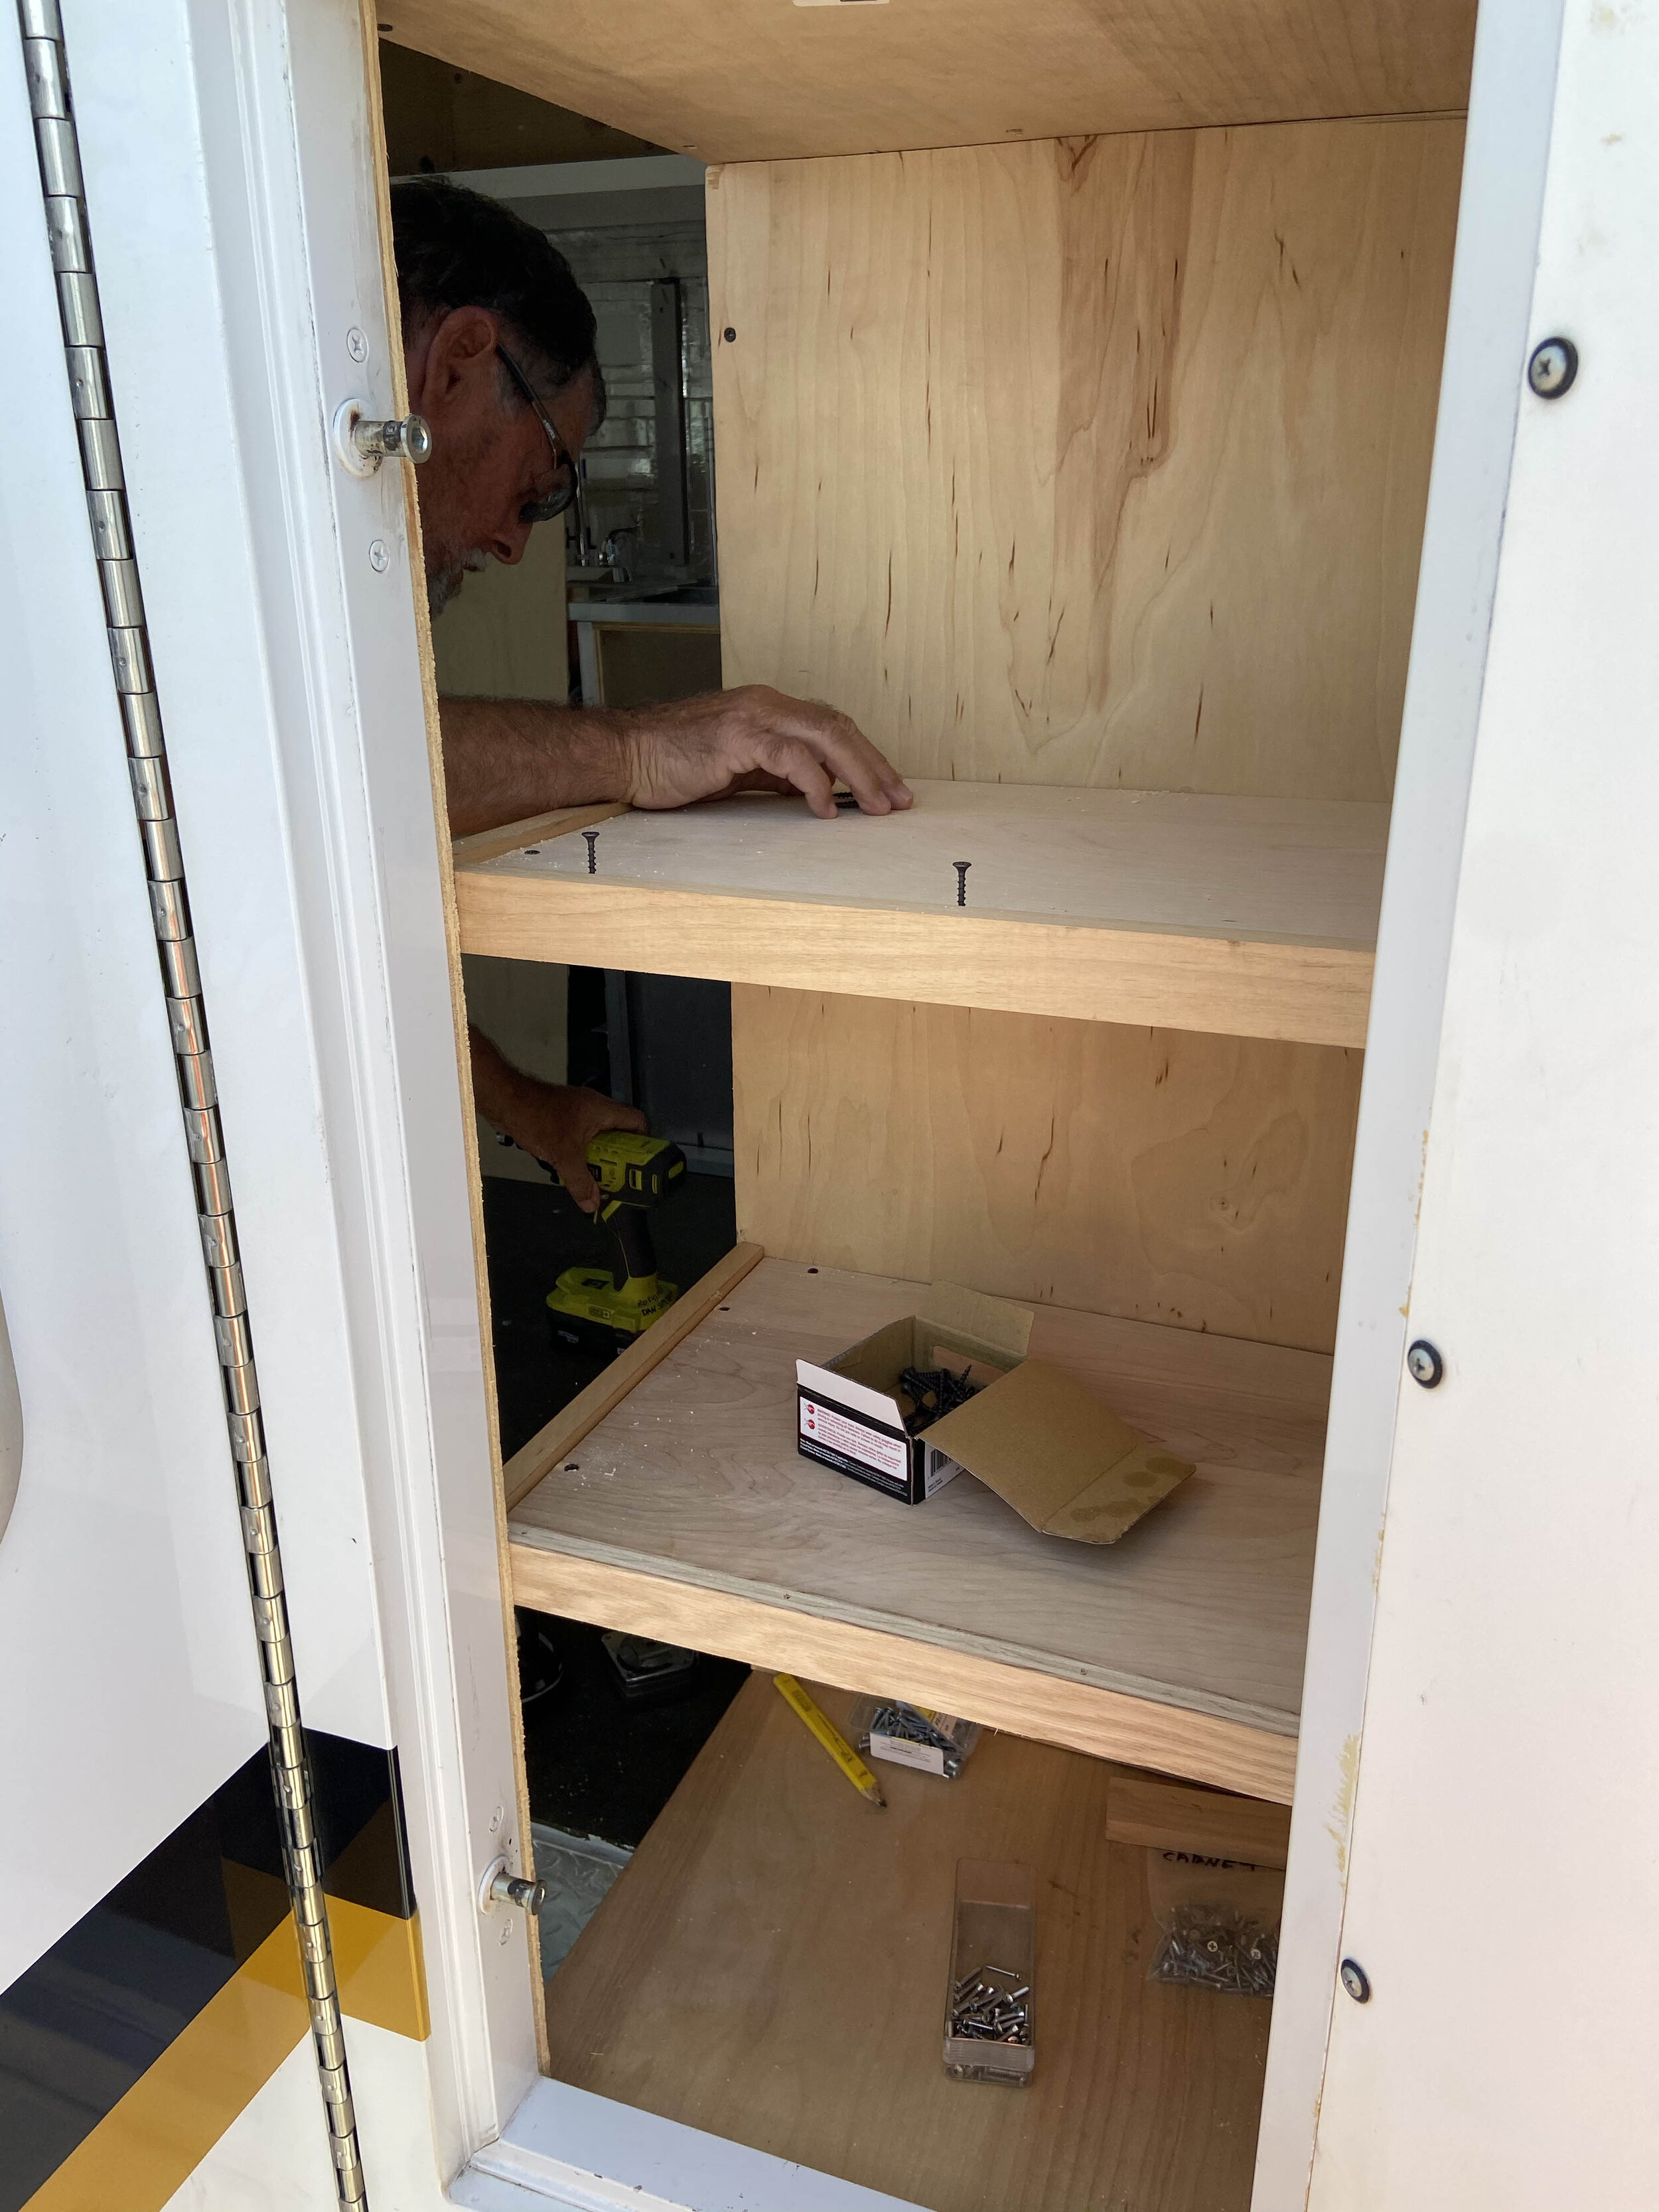
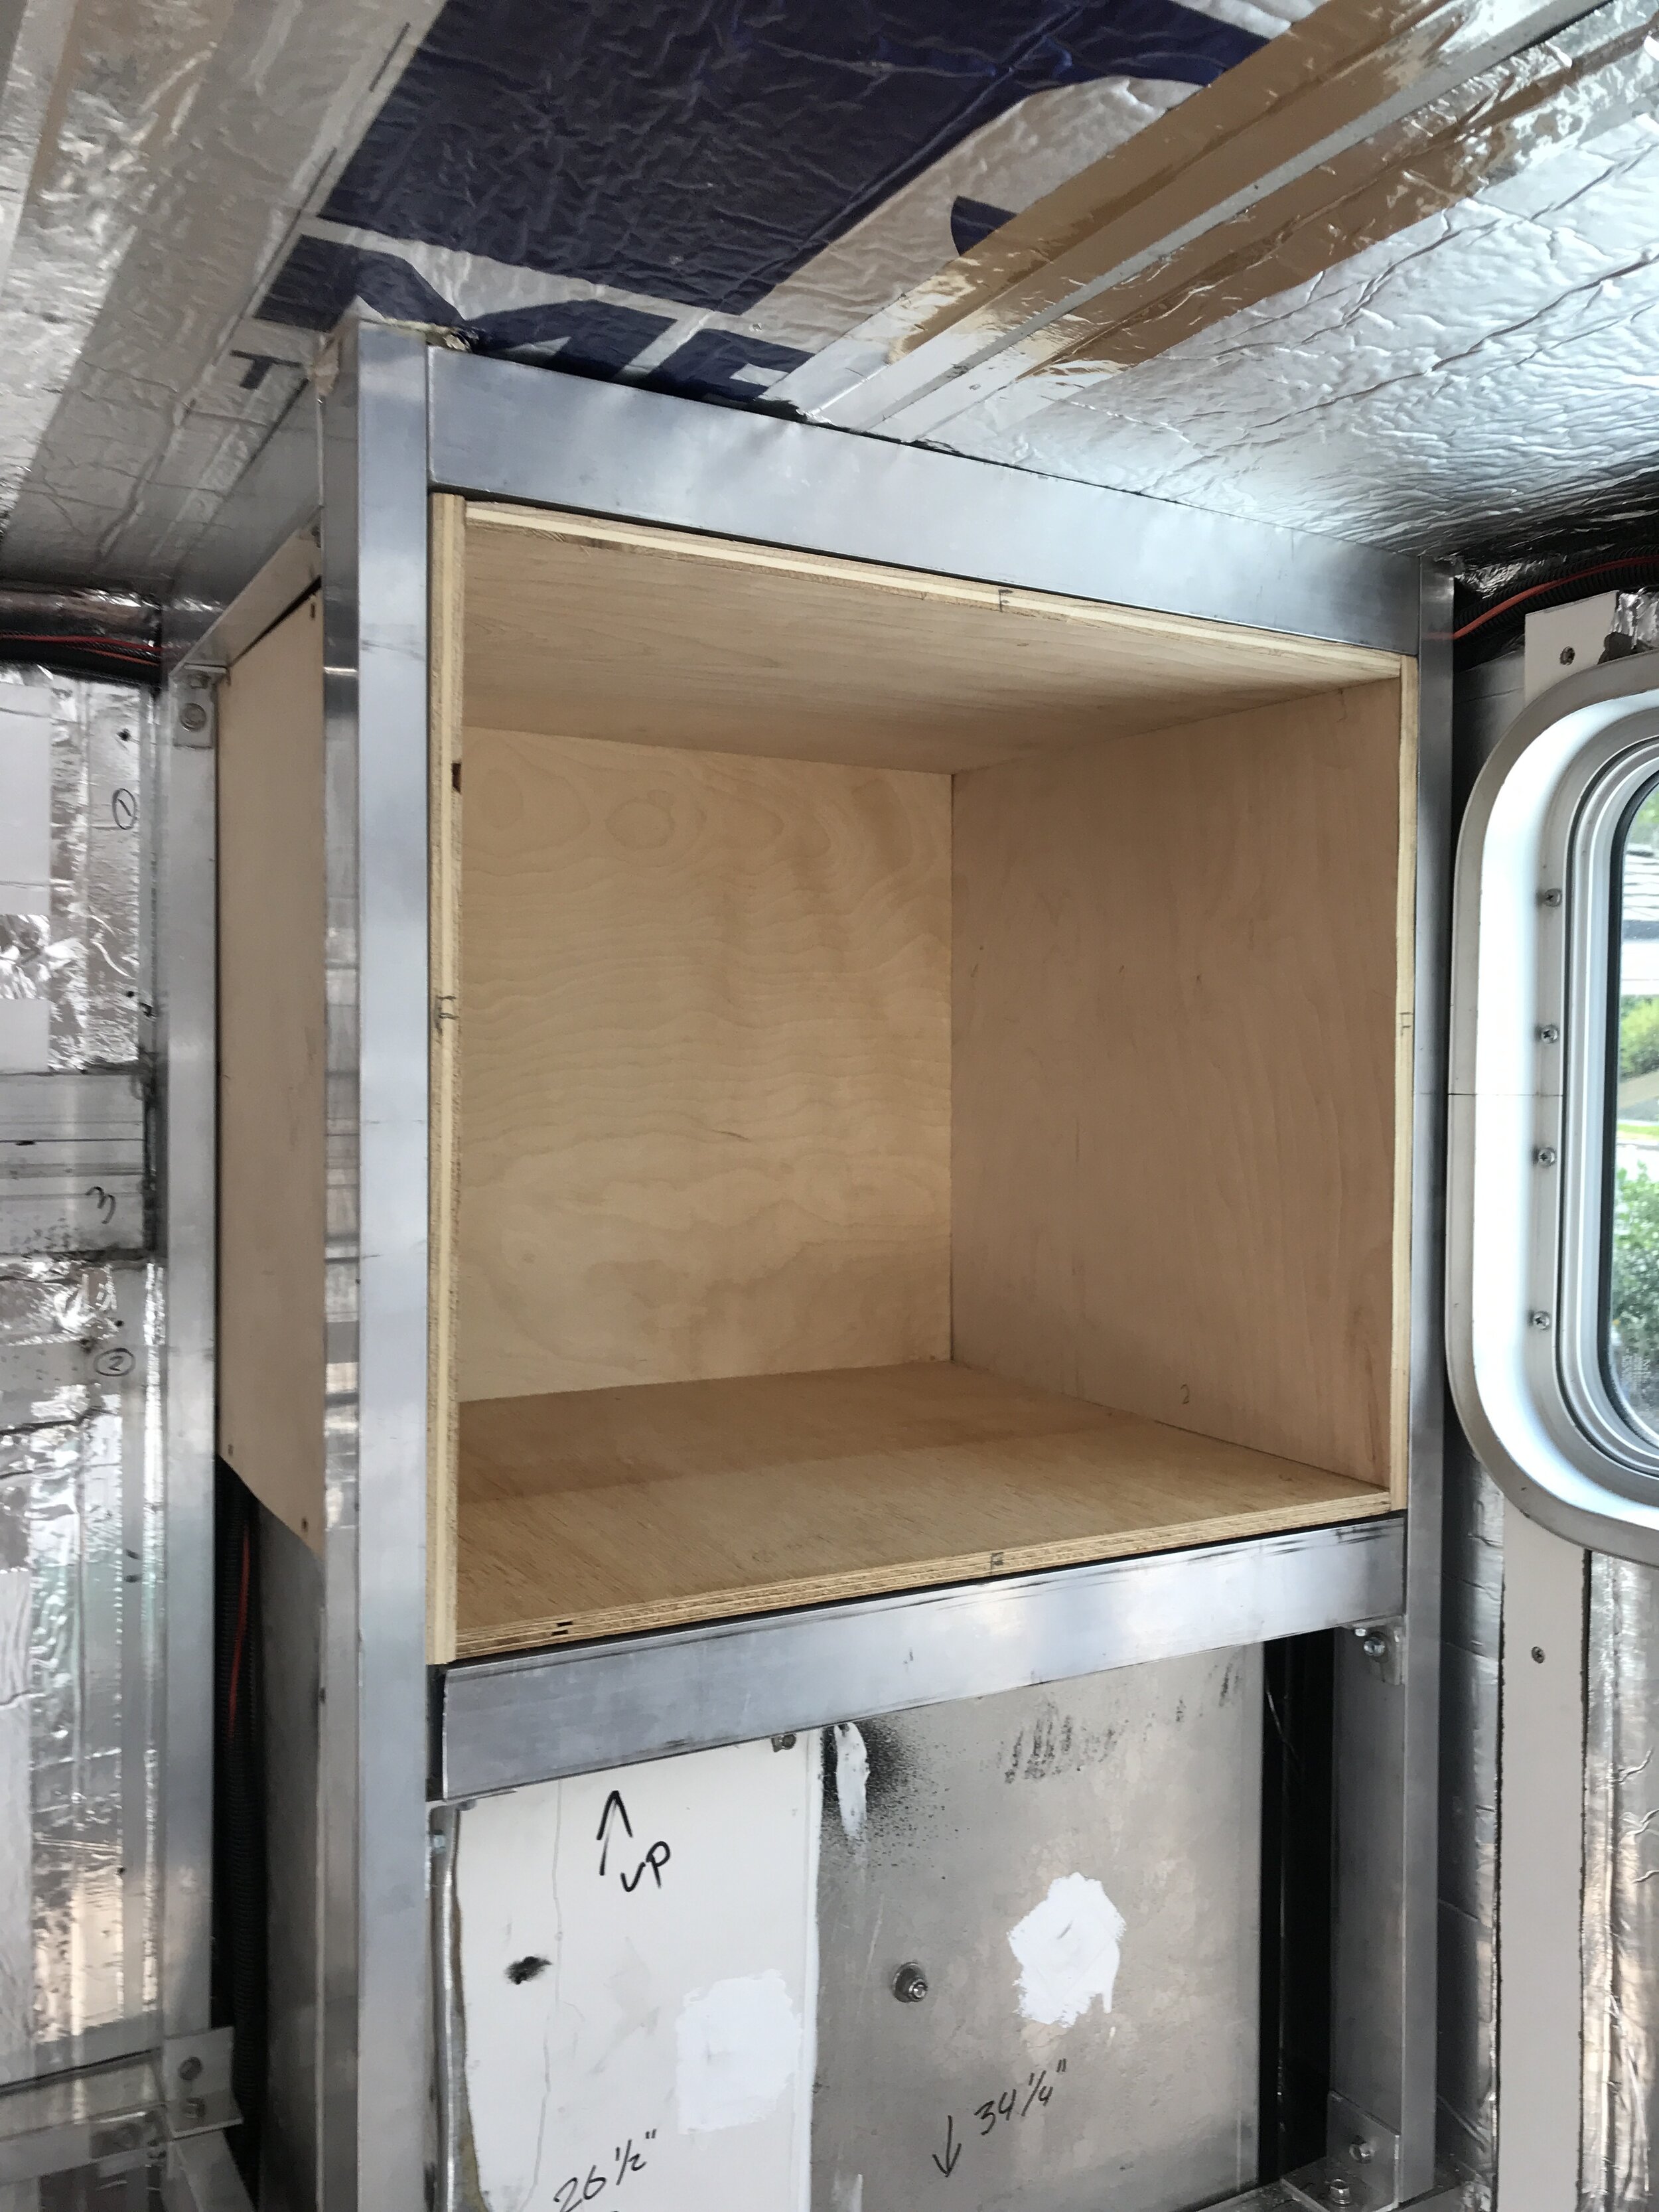
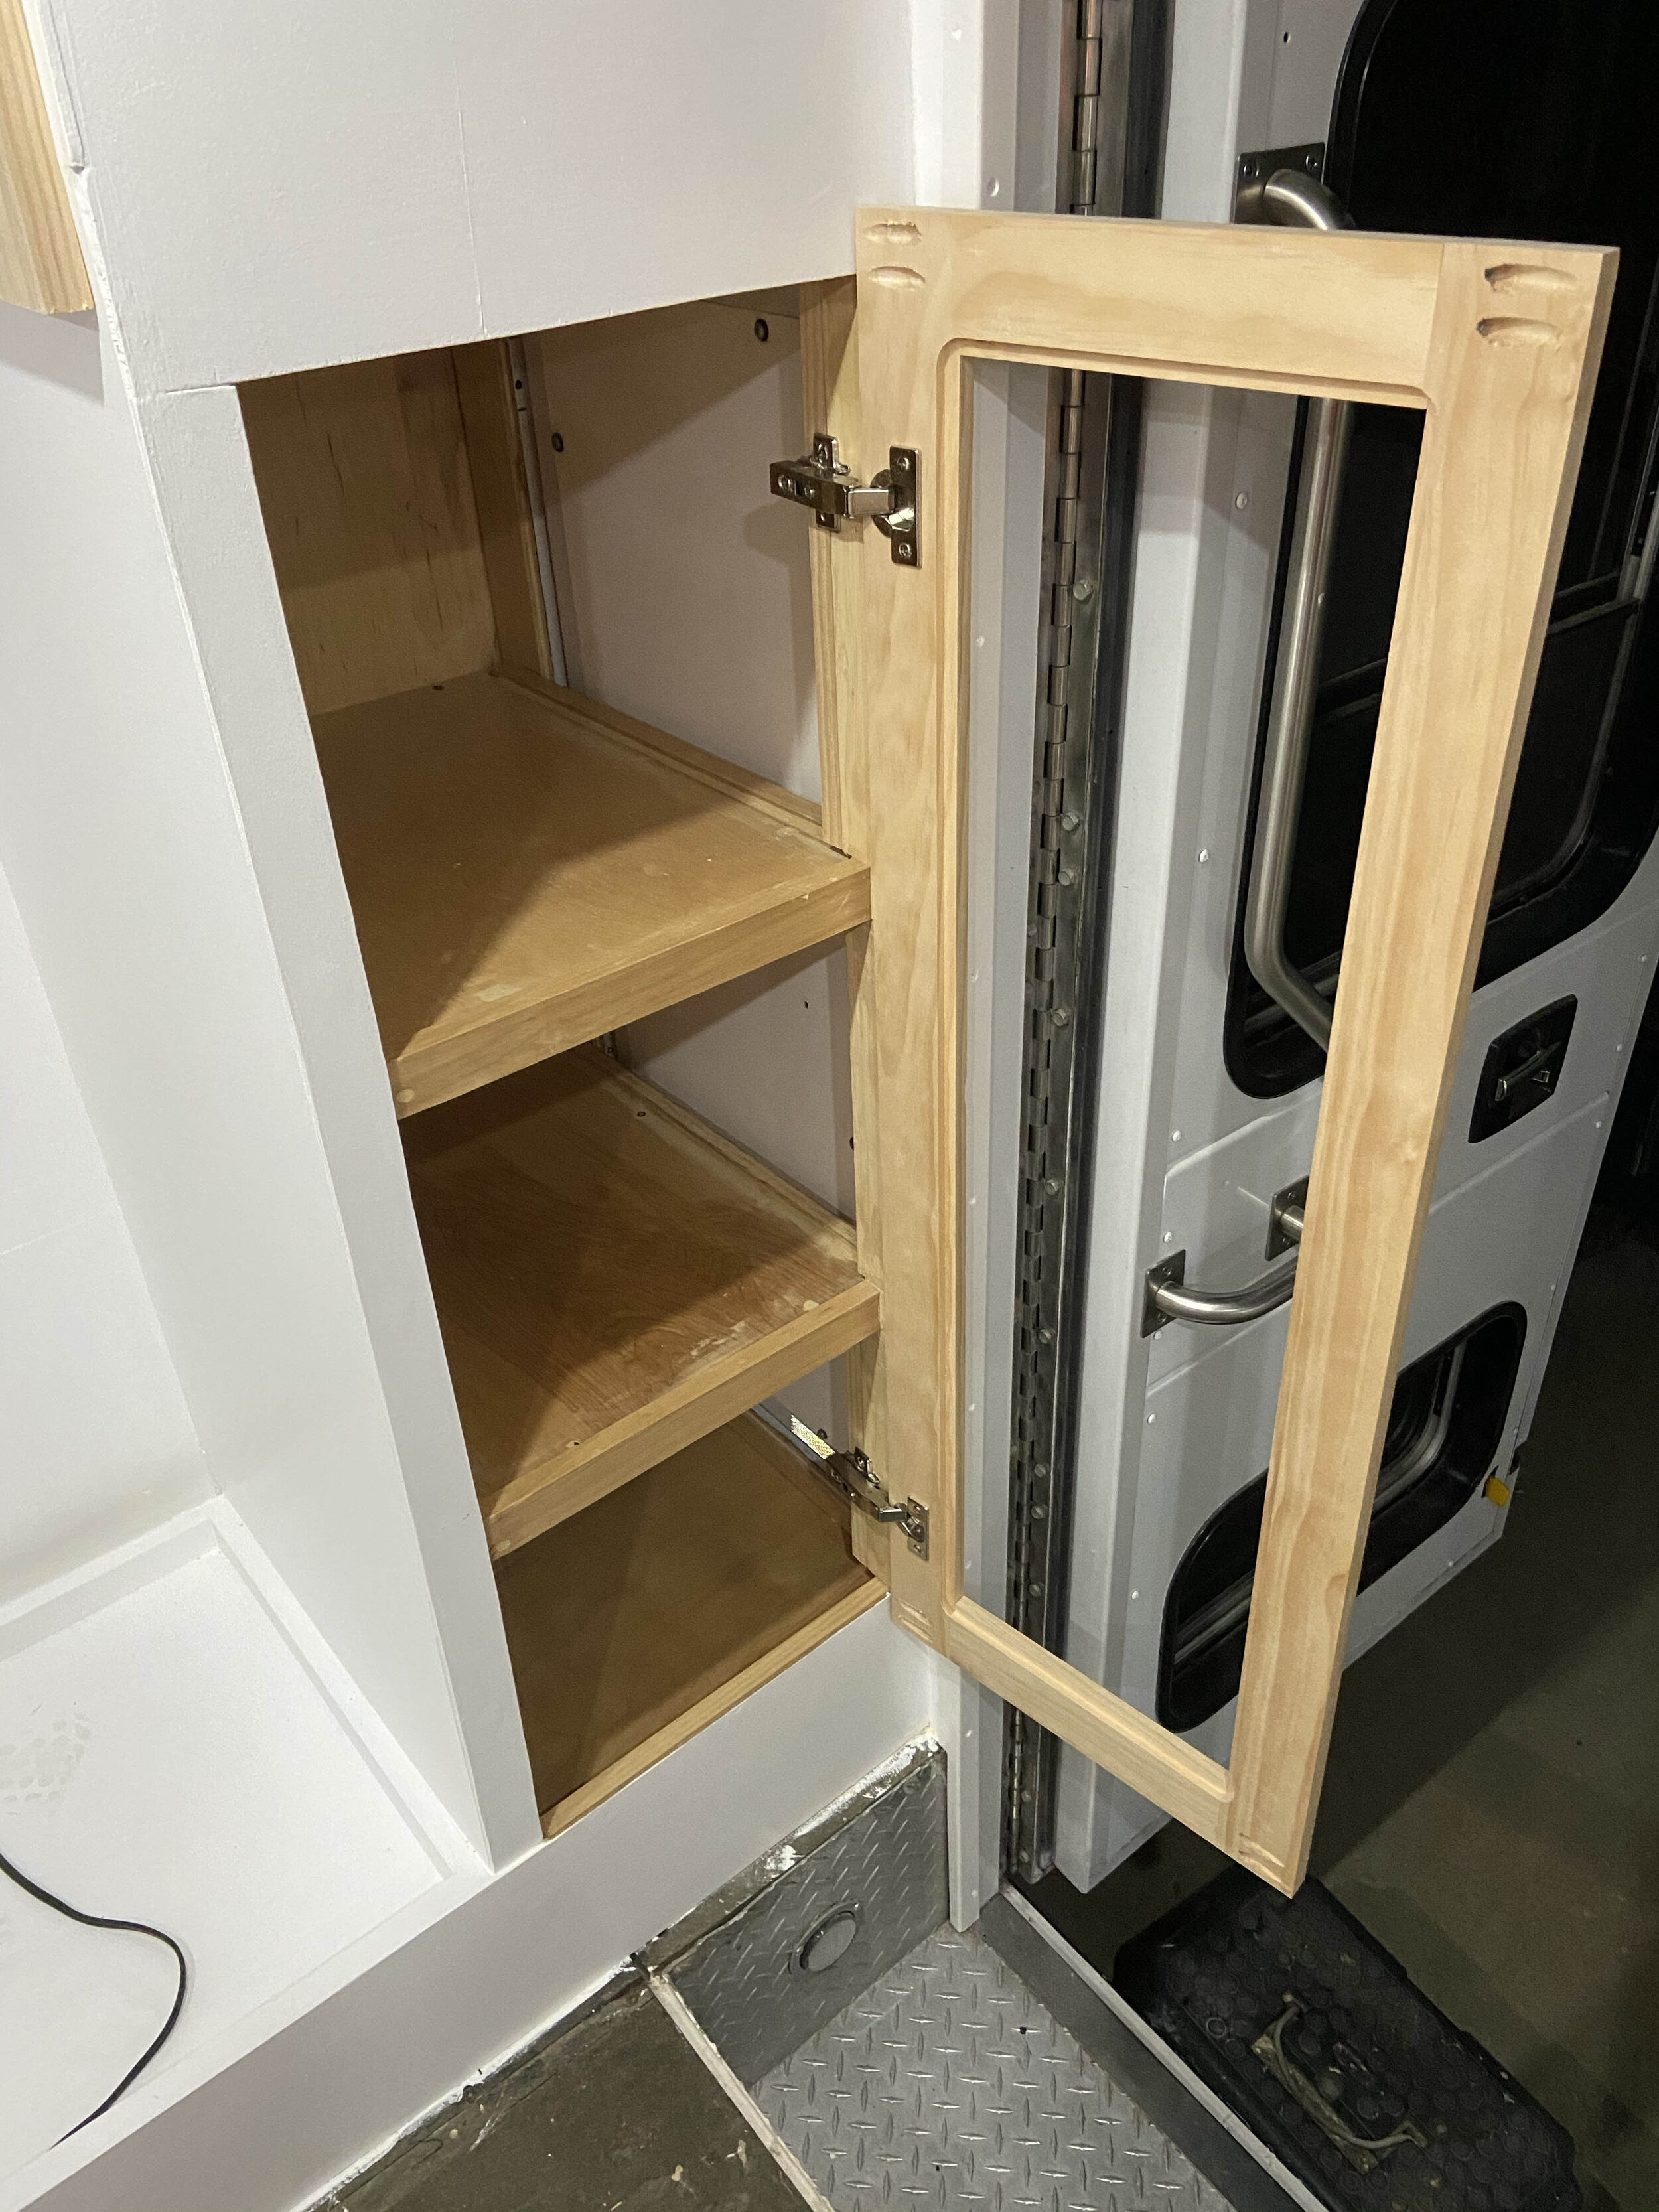
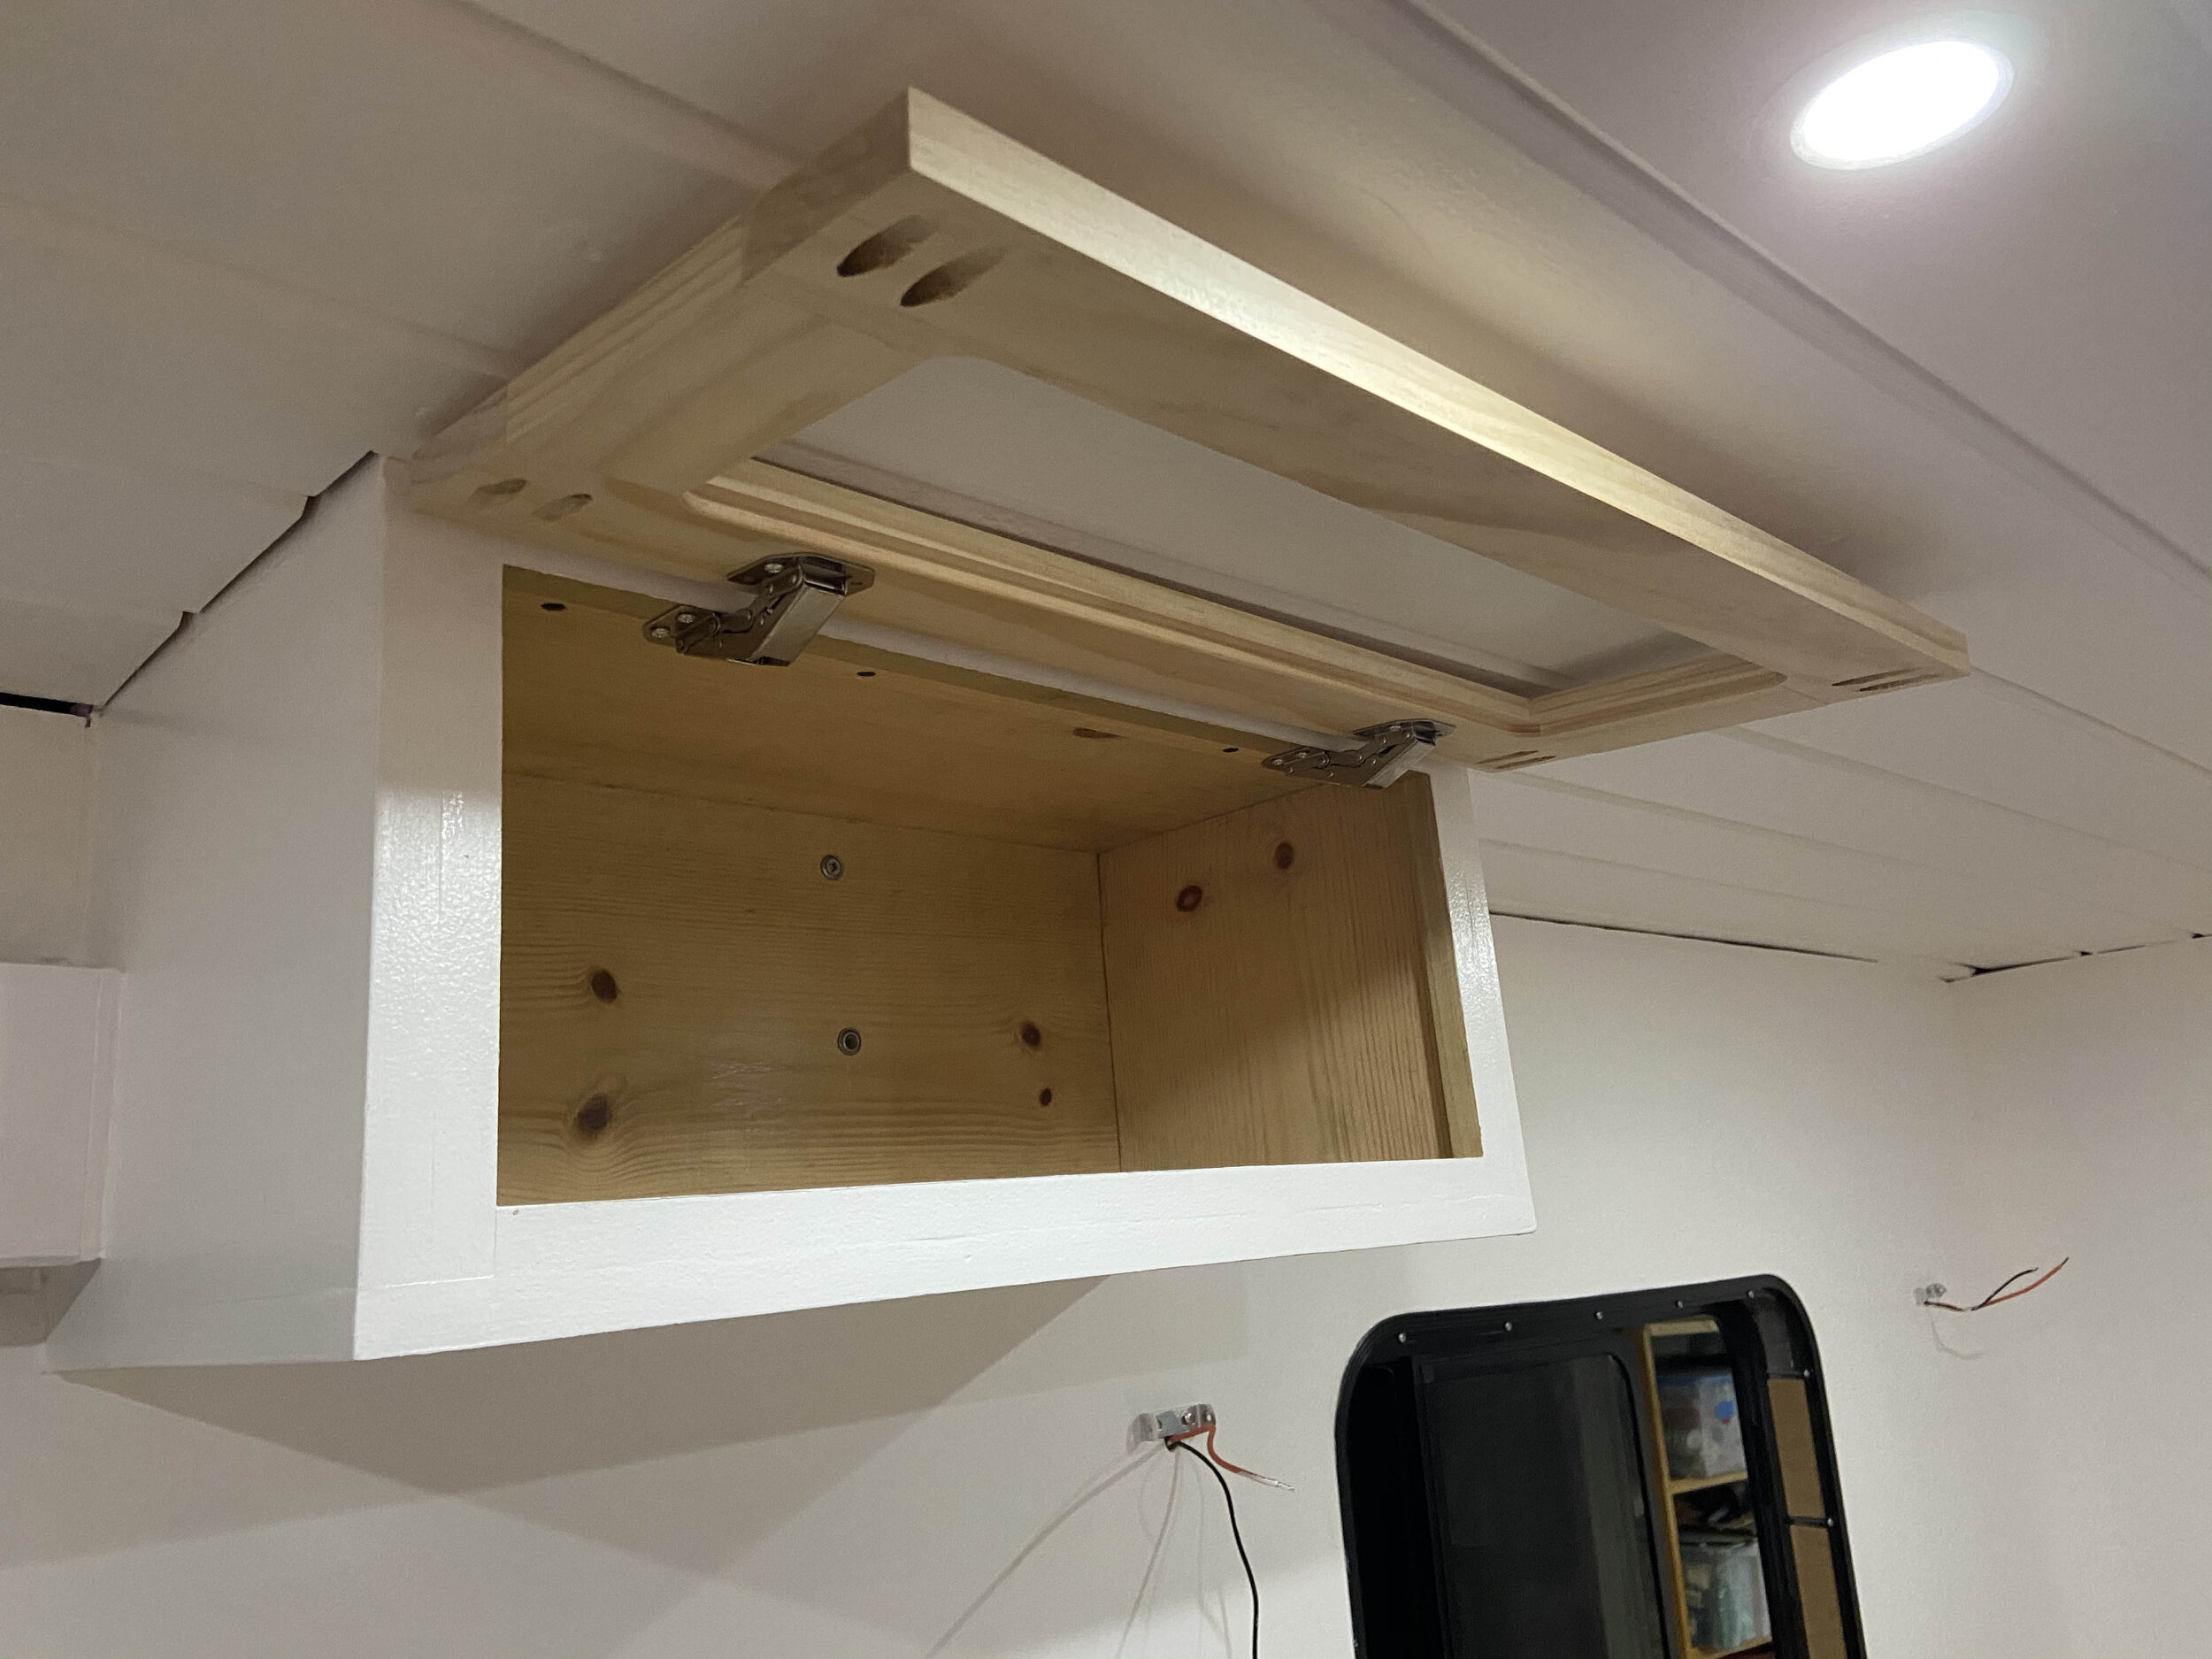
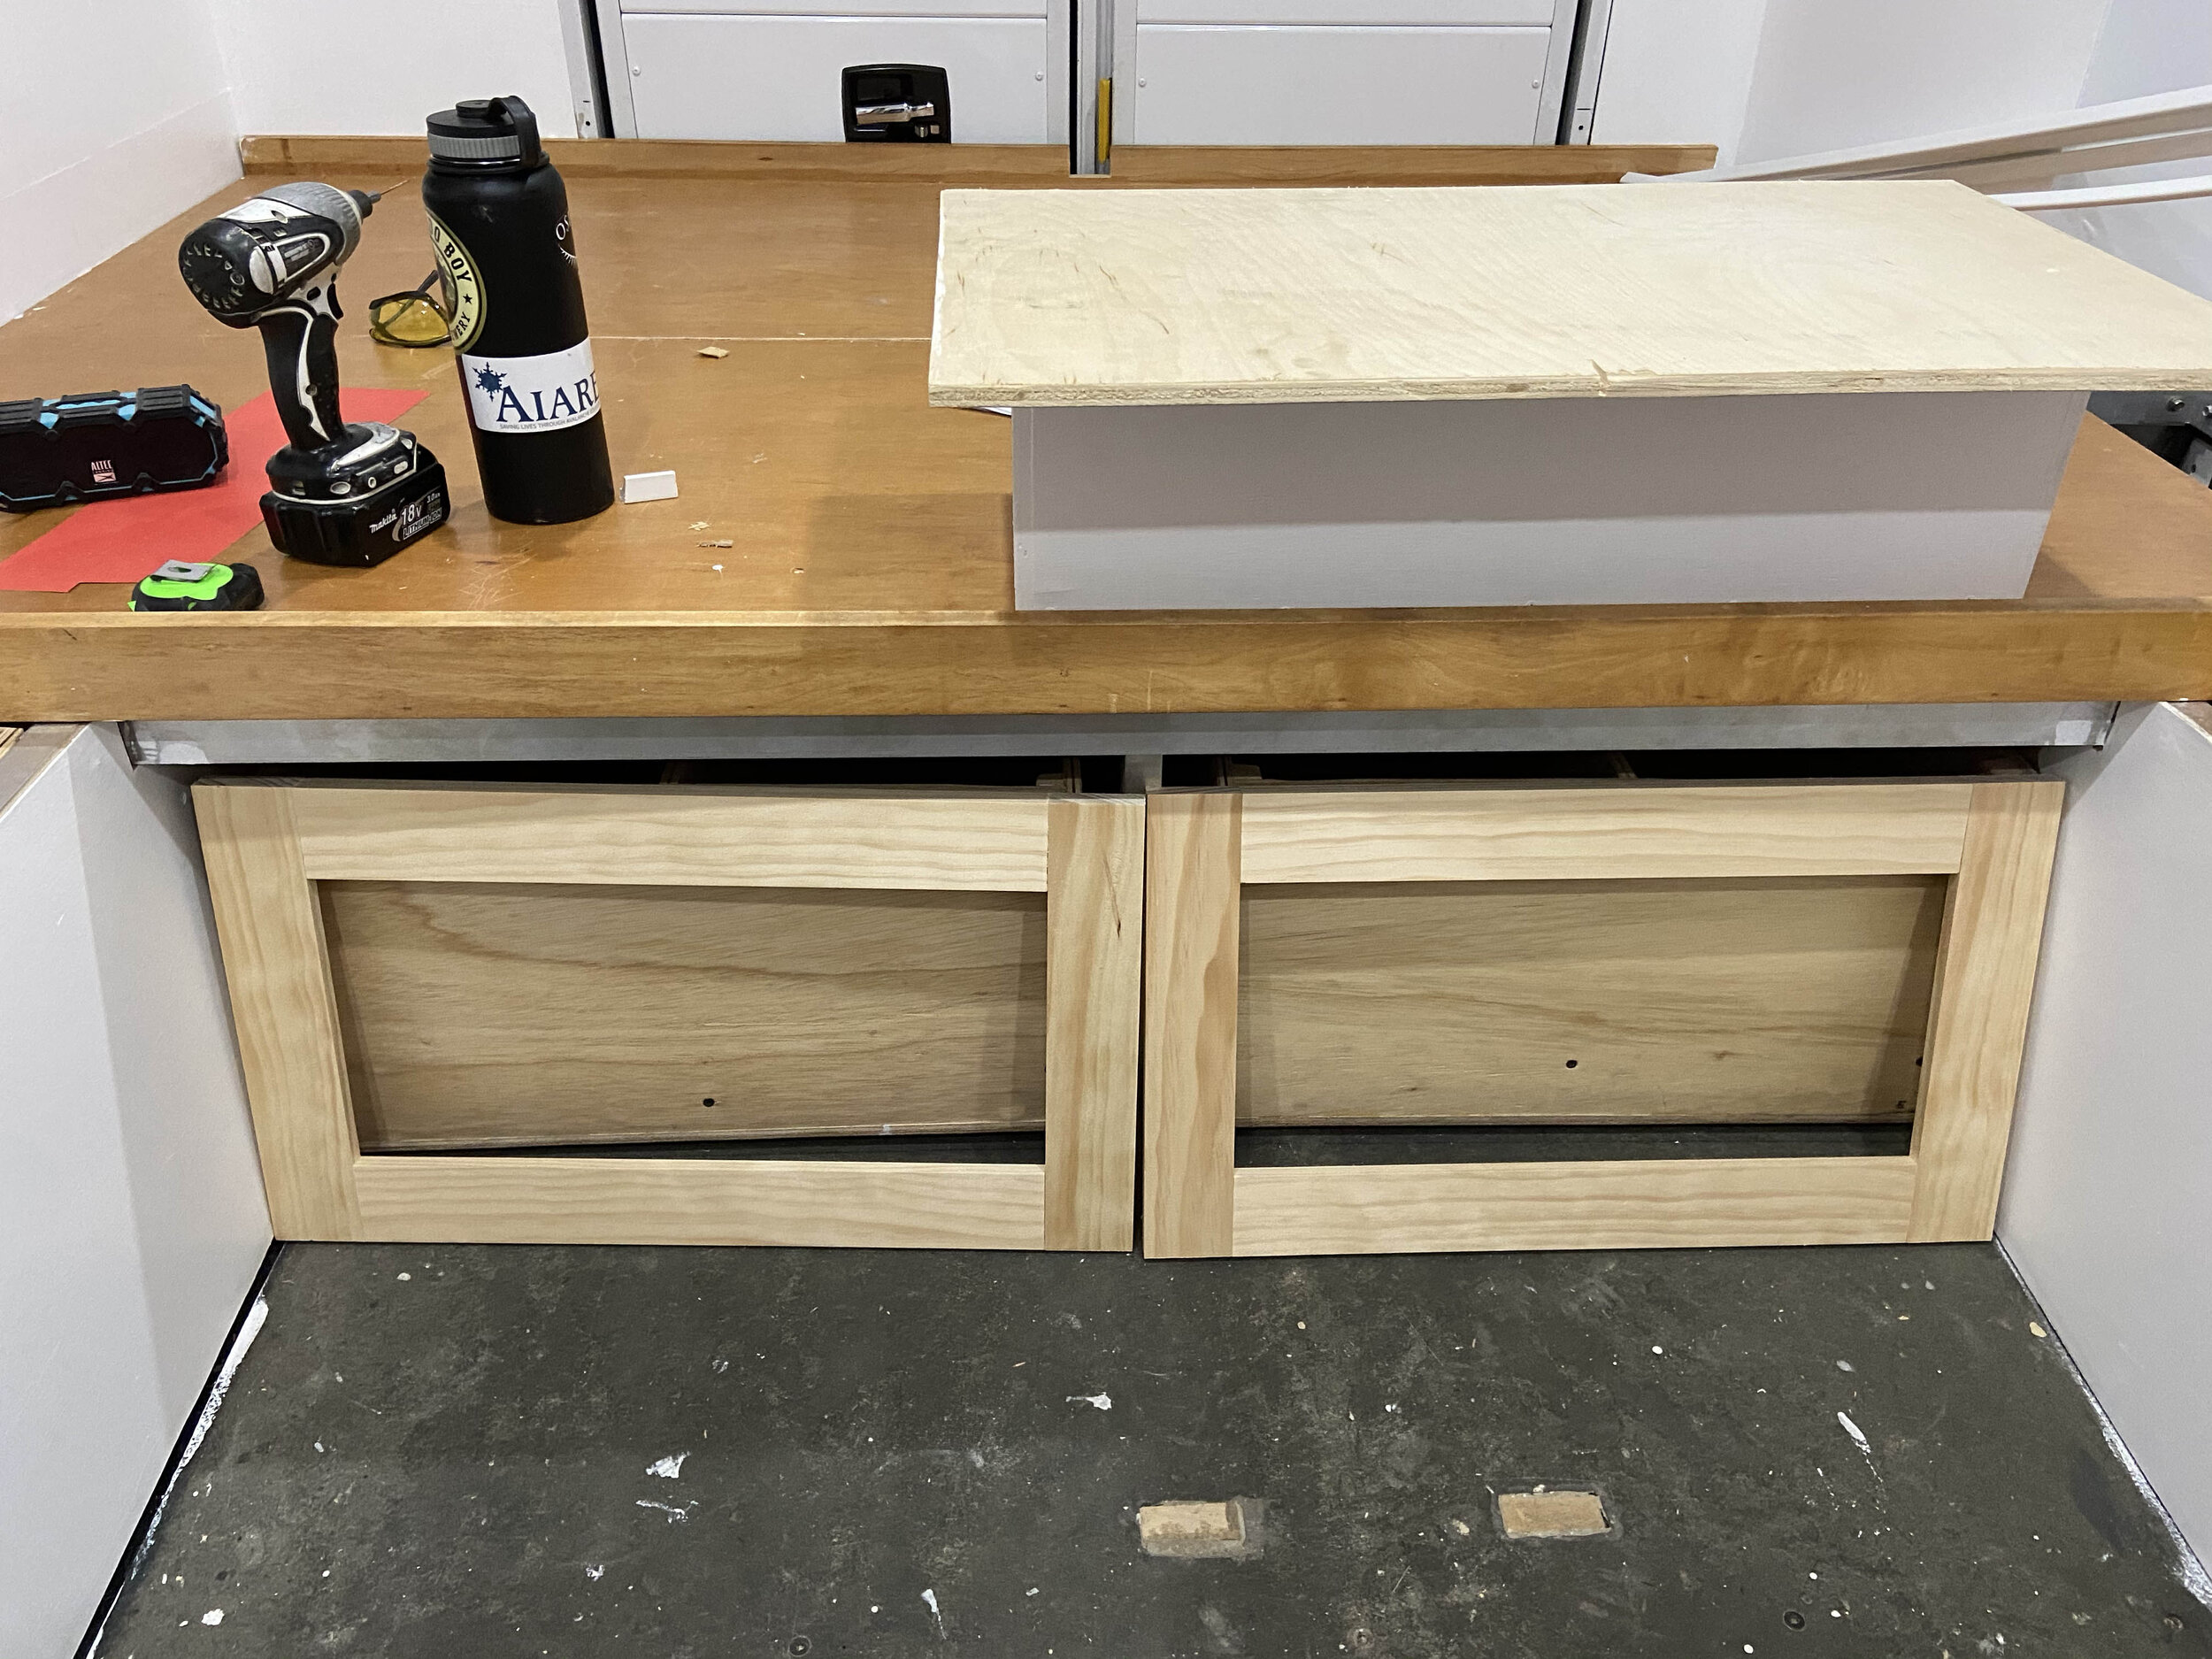
9/27/2020 - Finishing touches on the ceiling, installing the cabinetry, installing the new taillights and moving the backup camera onto a removable panel for ease of access in the future. I moved the backup camera lower to improve the sight angle as well as mounted it to a removable plate. This made it so I could service the camera if needed without having to break apart the interior walls.
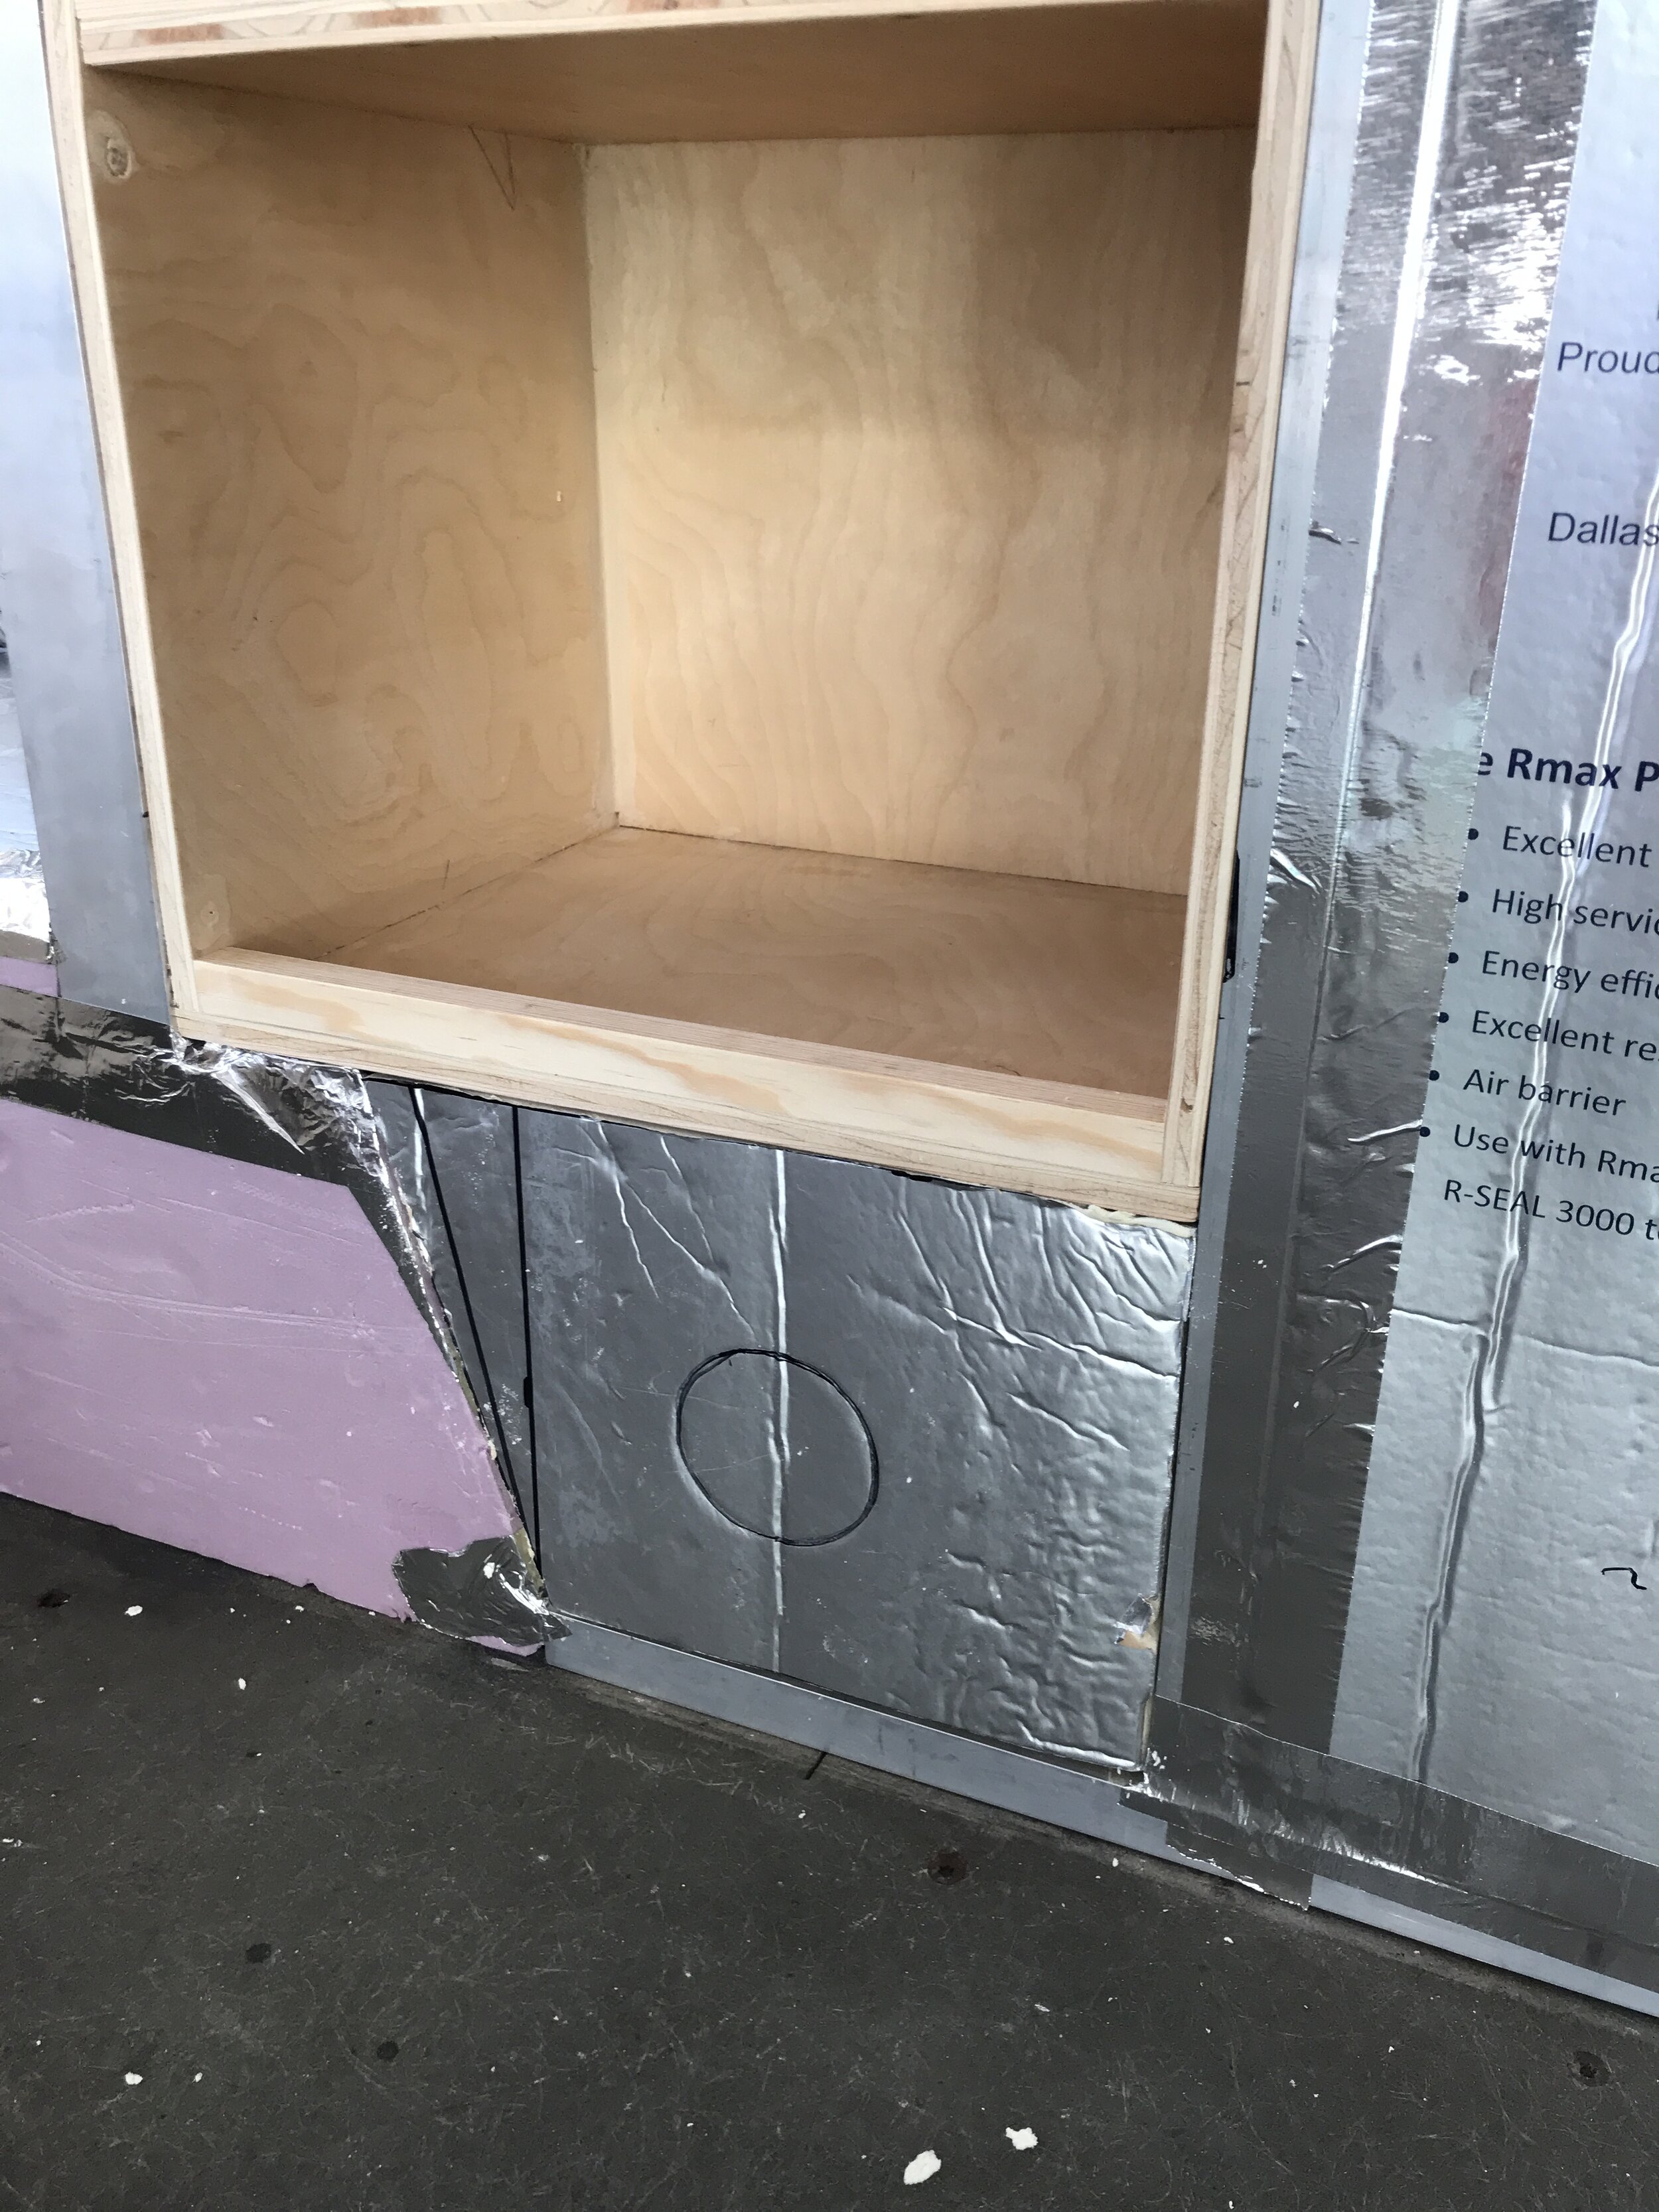
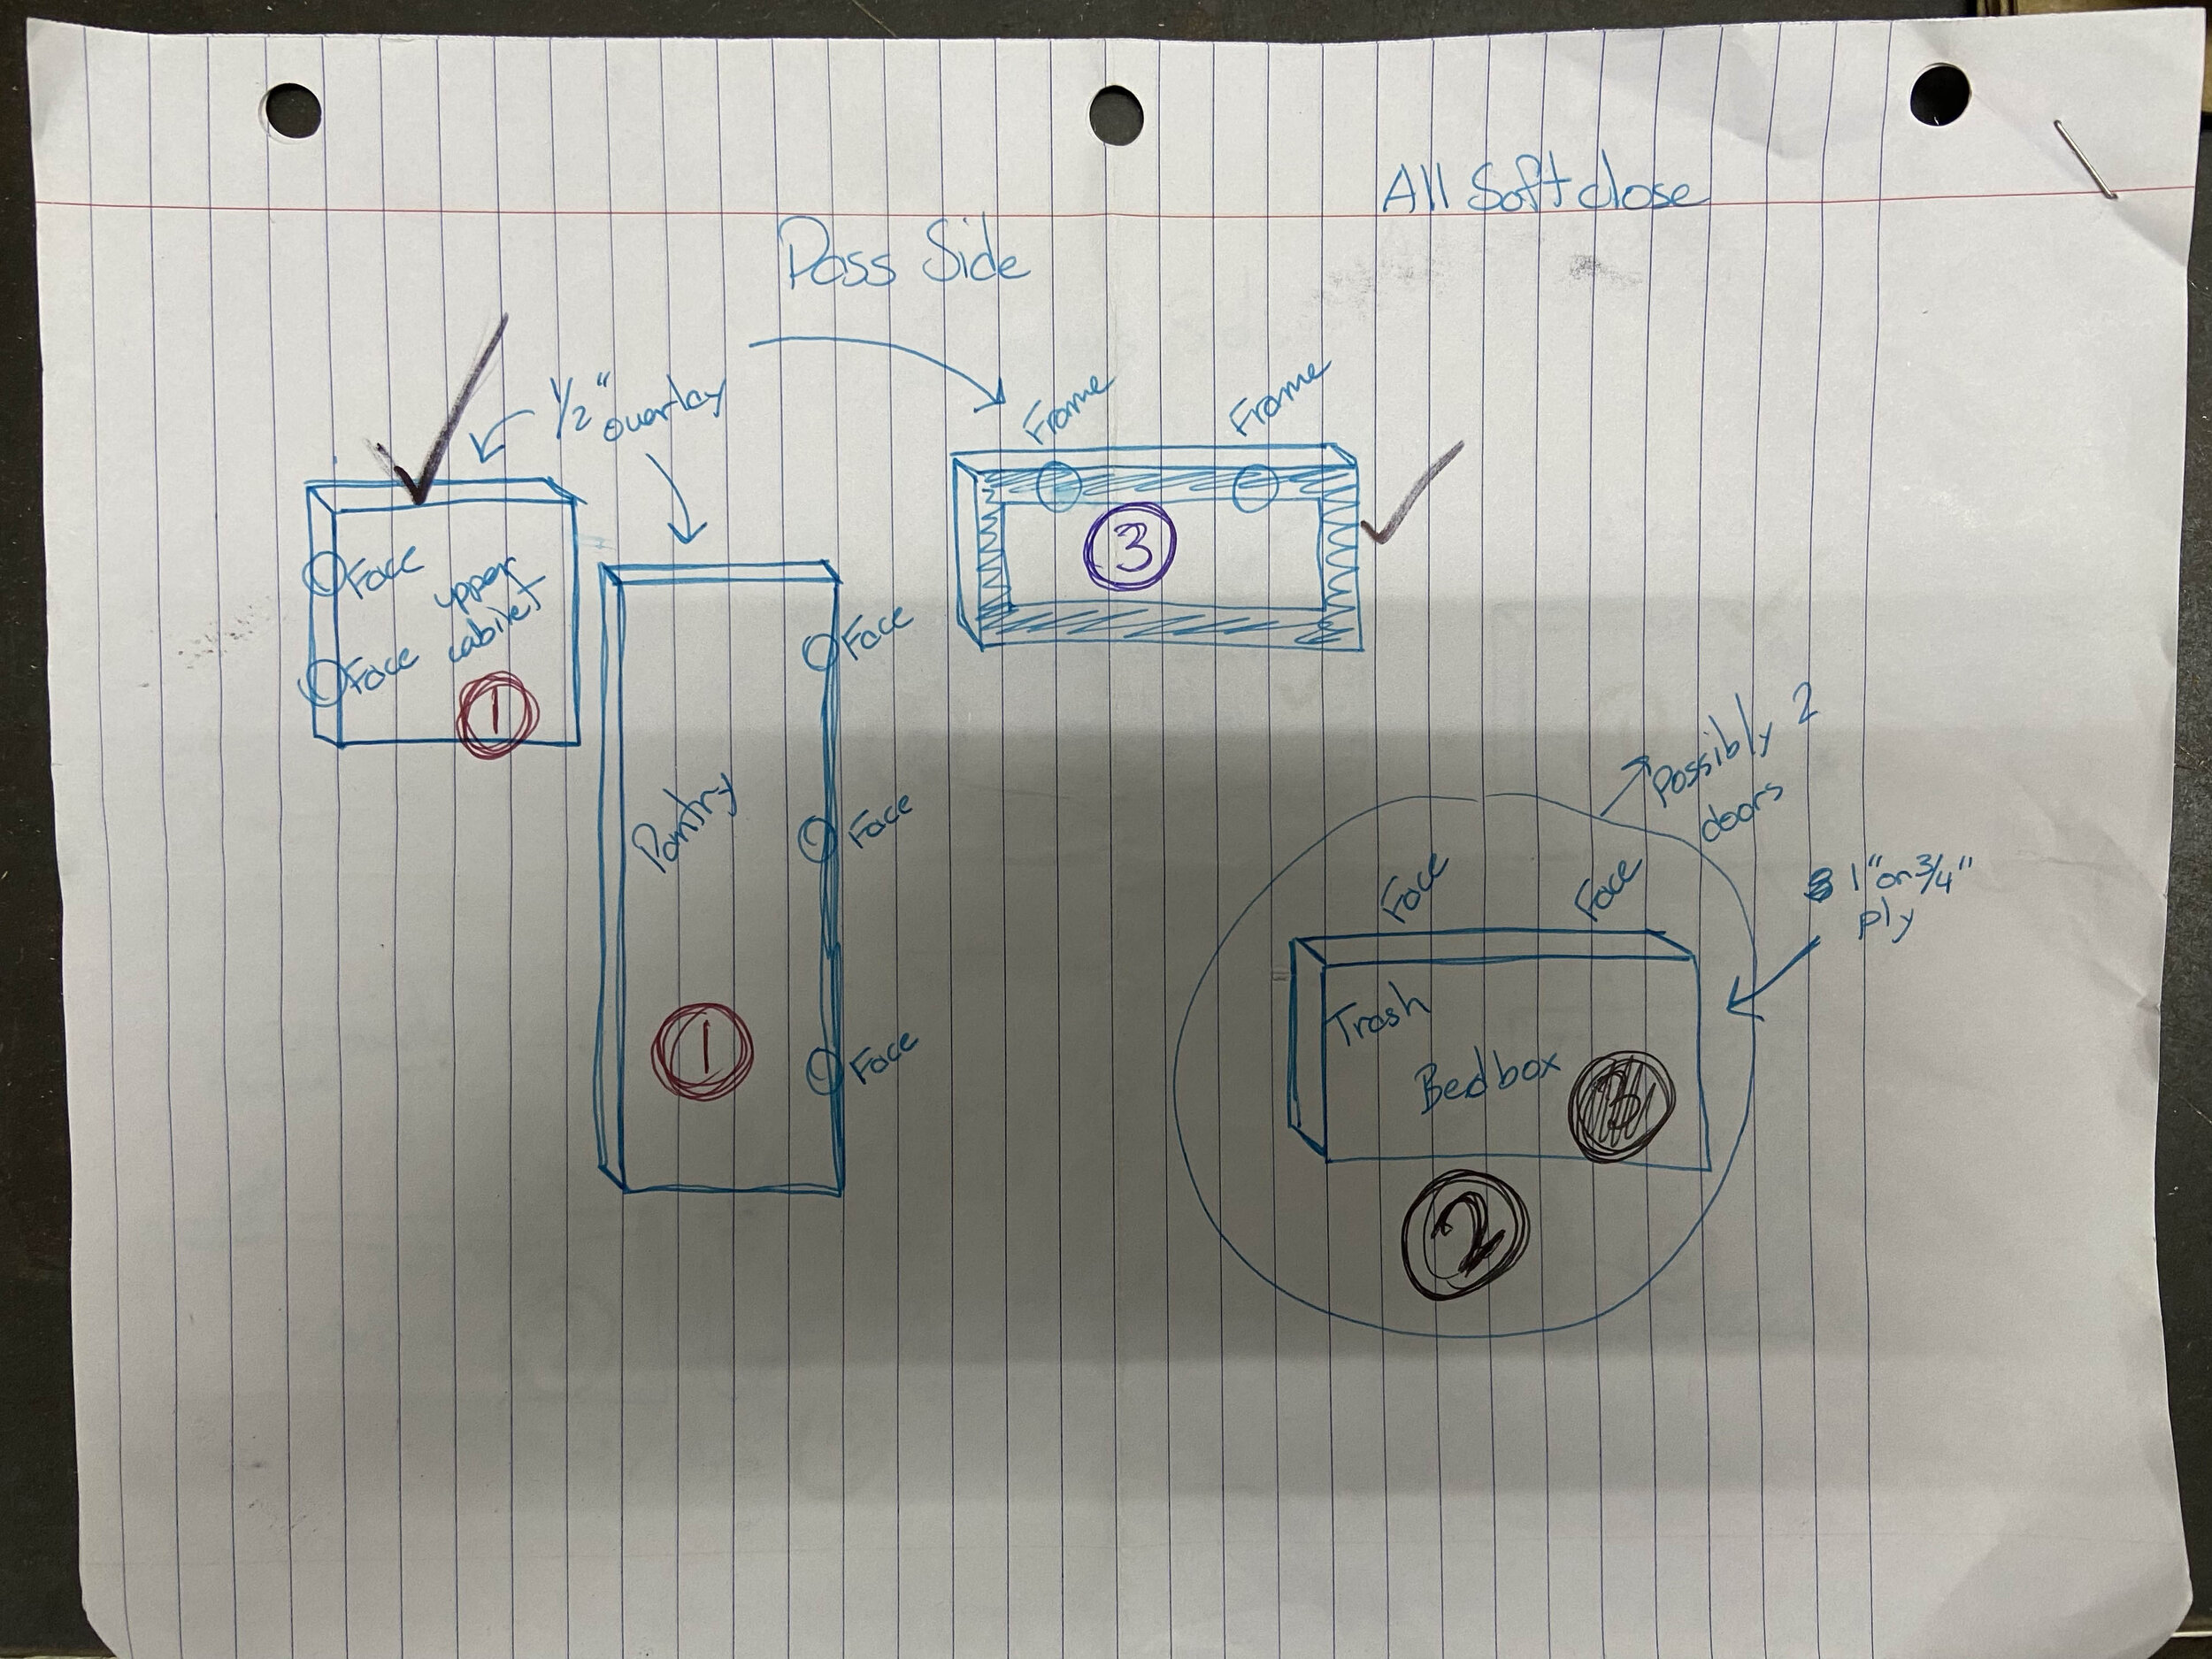
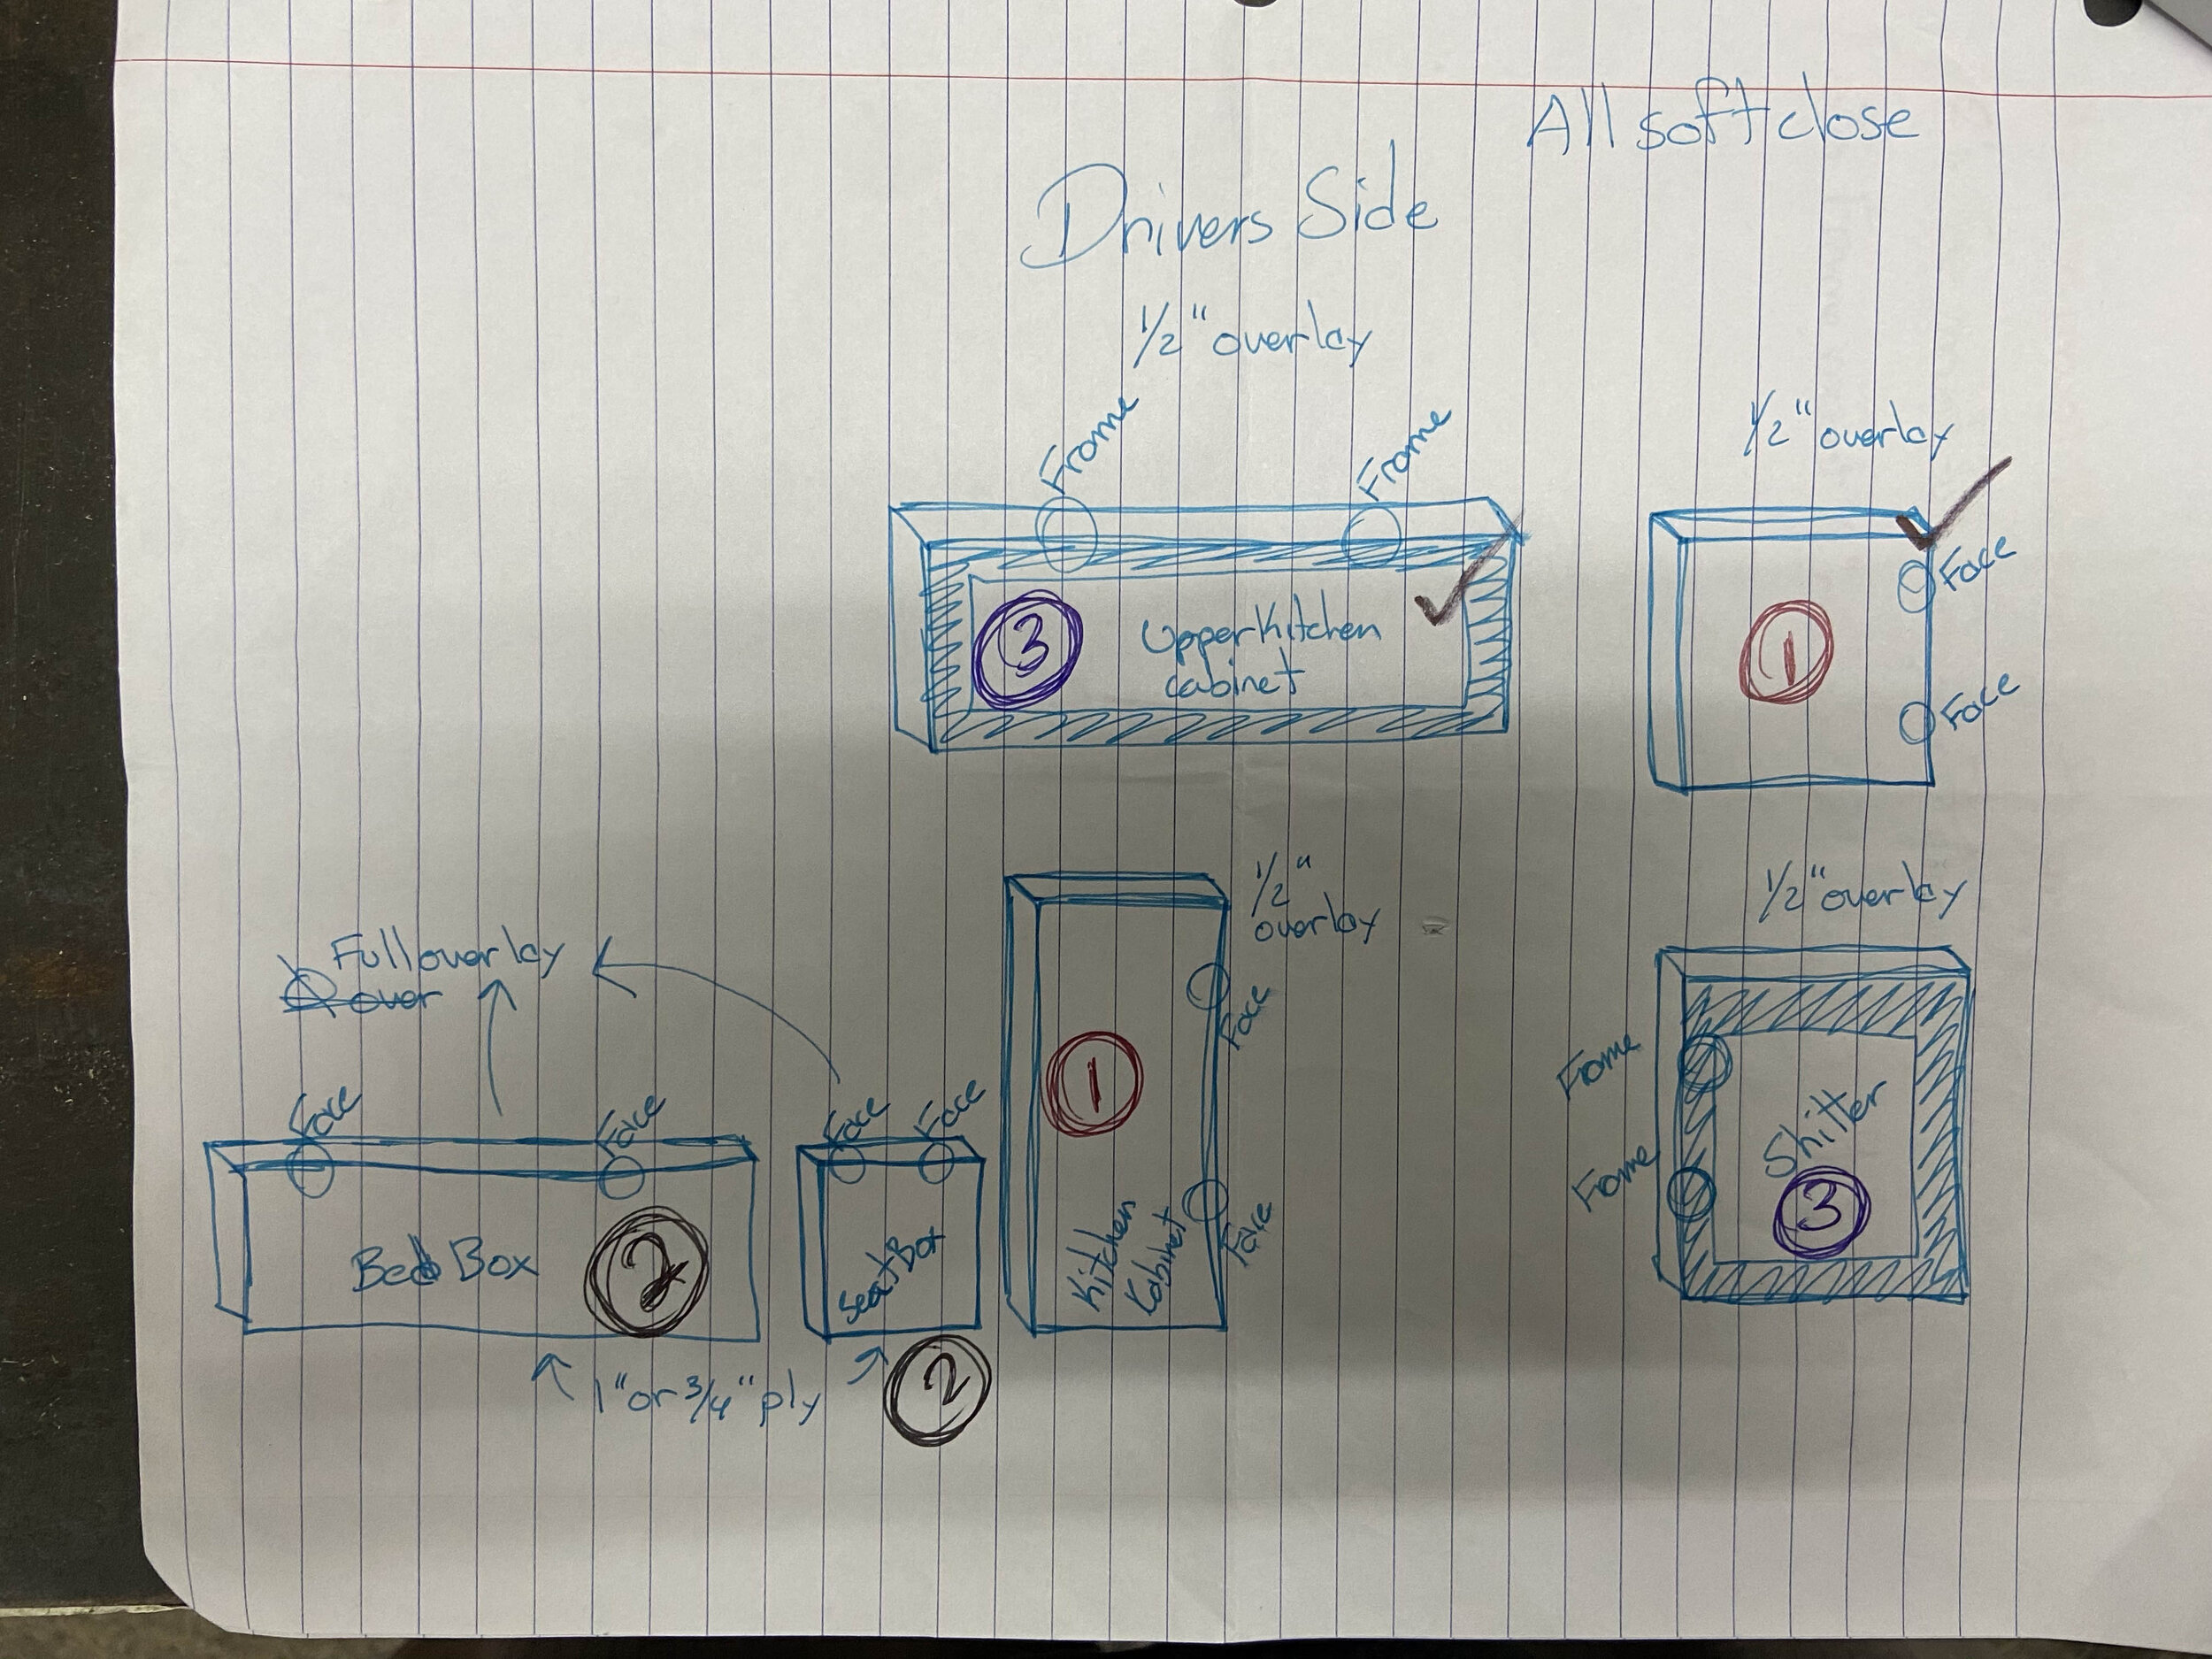
The cabinets took a bit of planning. We thought long and hard about where and what style of cabinets would serve us best. All of the cabinets were constructed with 1/2” birch plywood and 1”x2” AL rectangular beams.
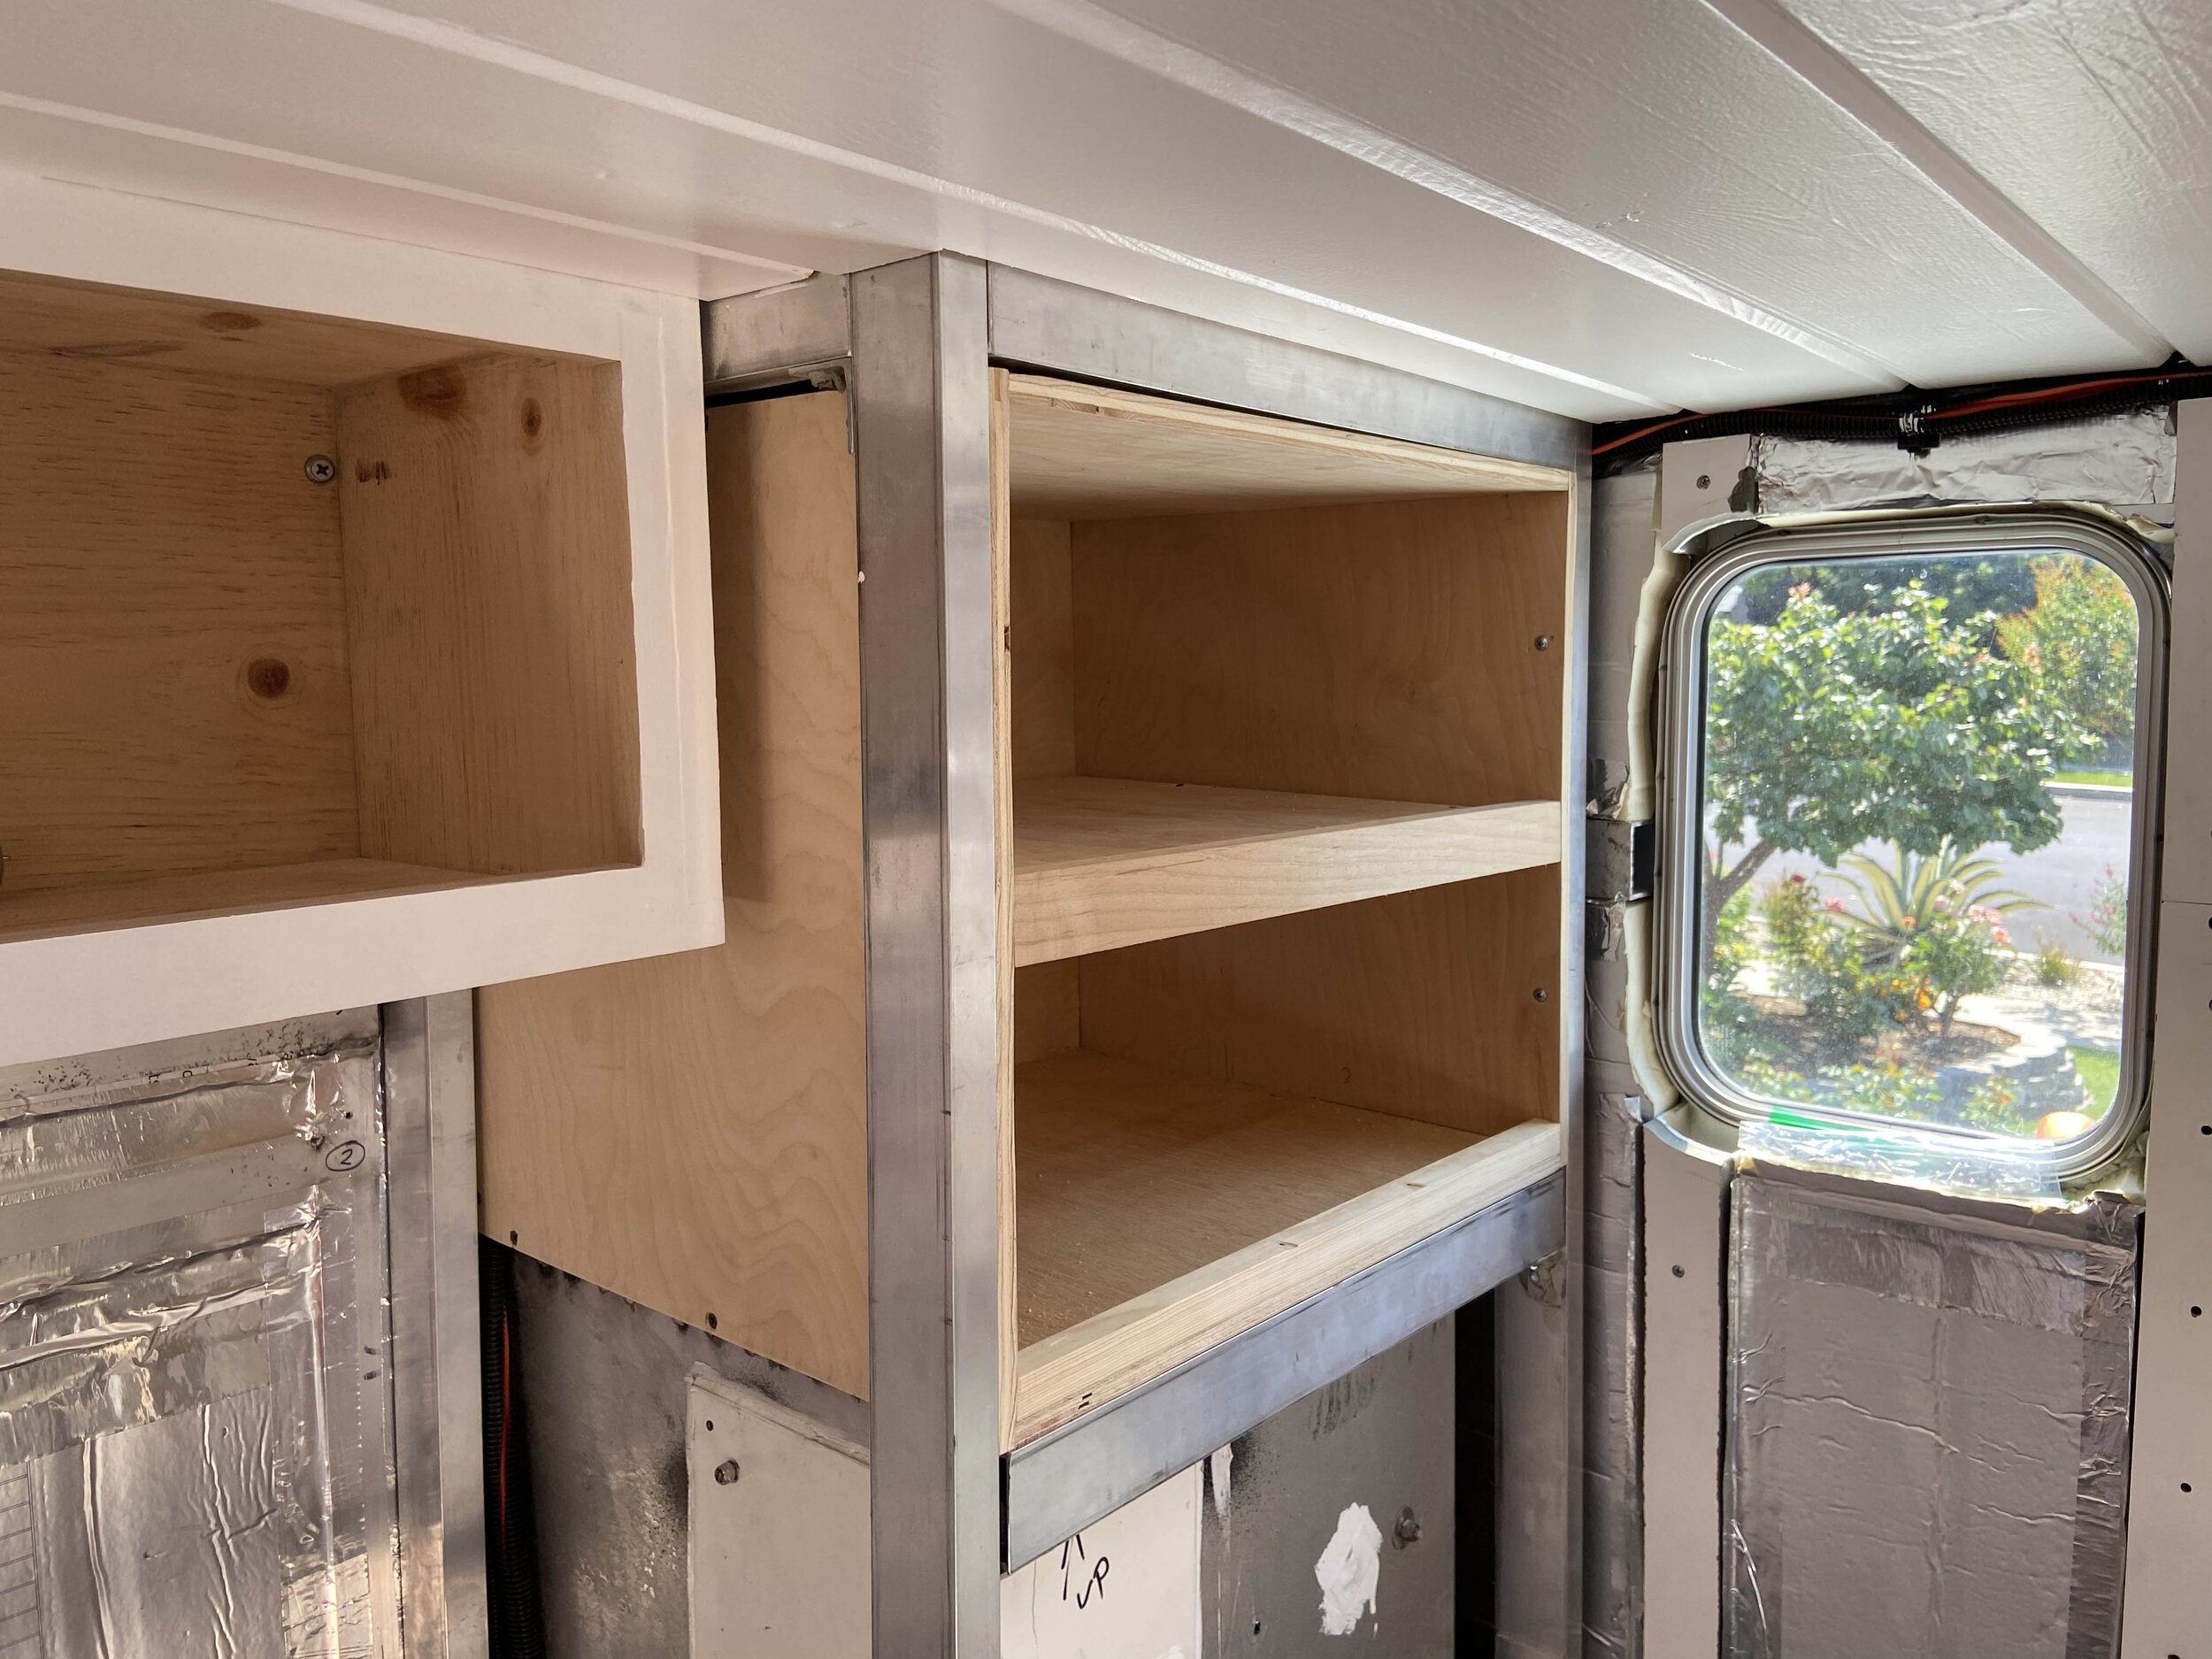
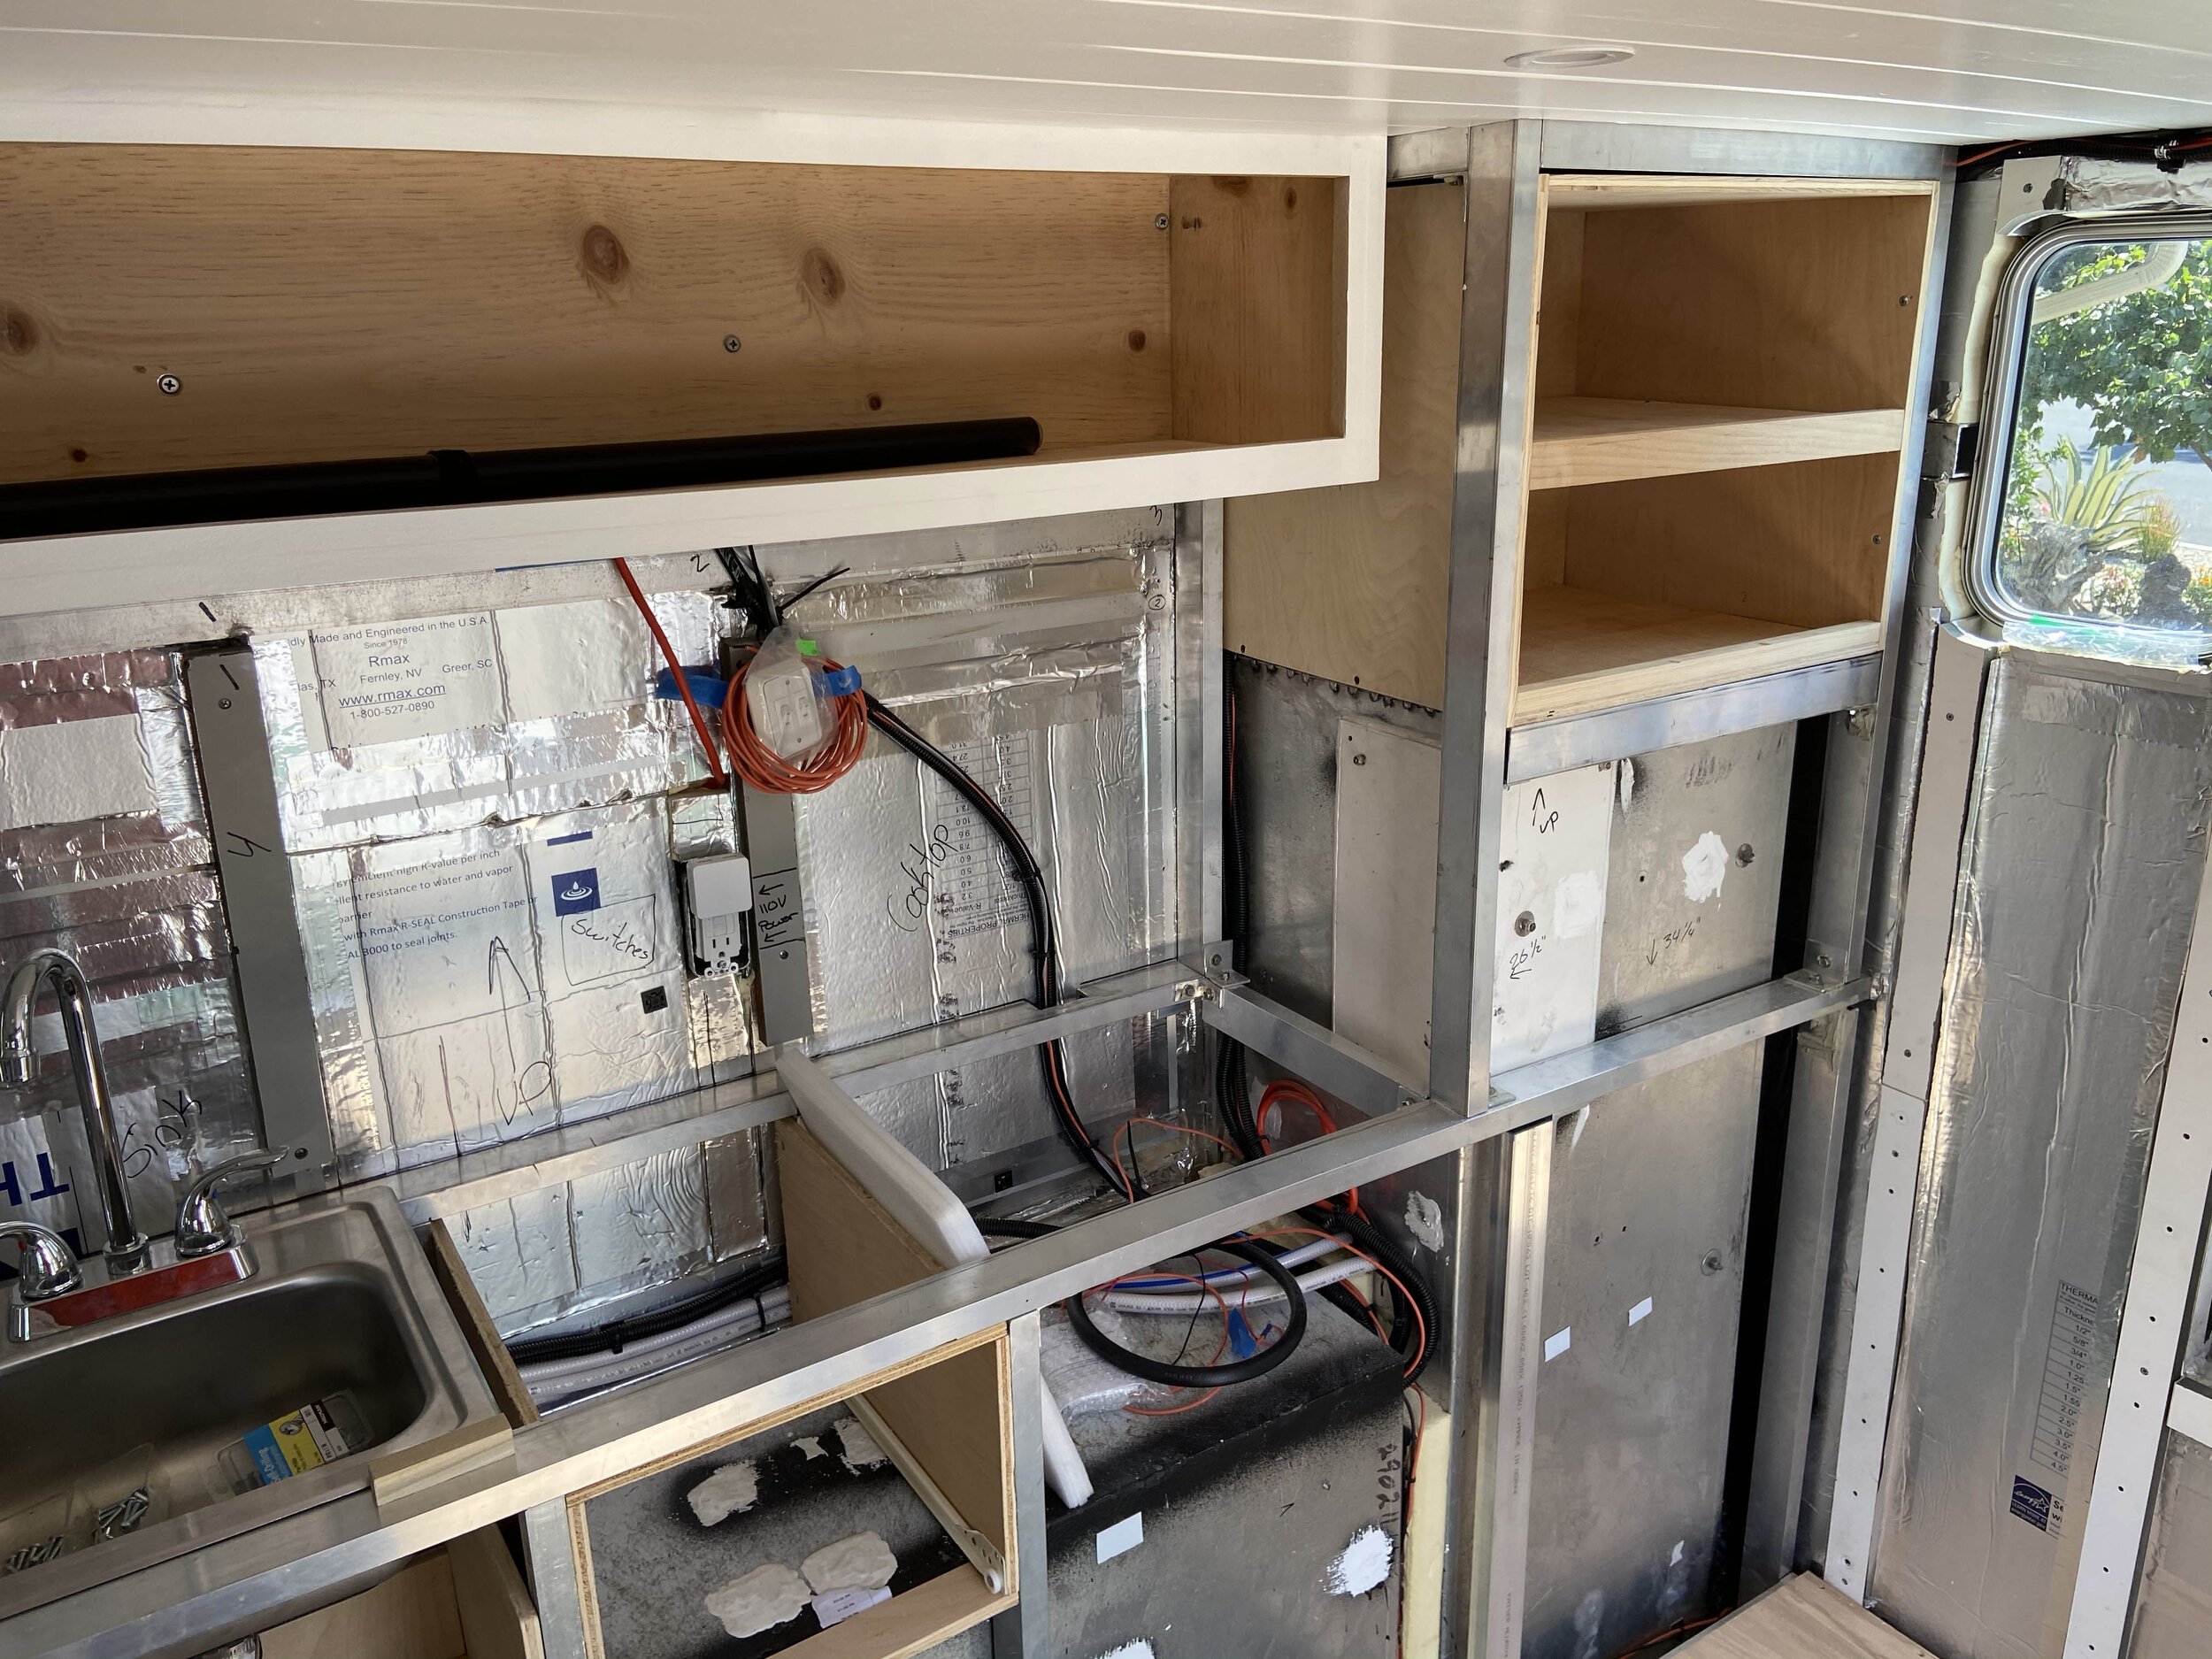


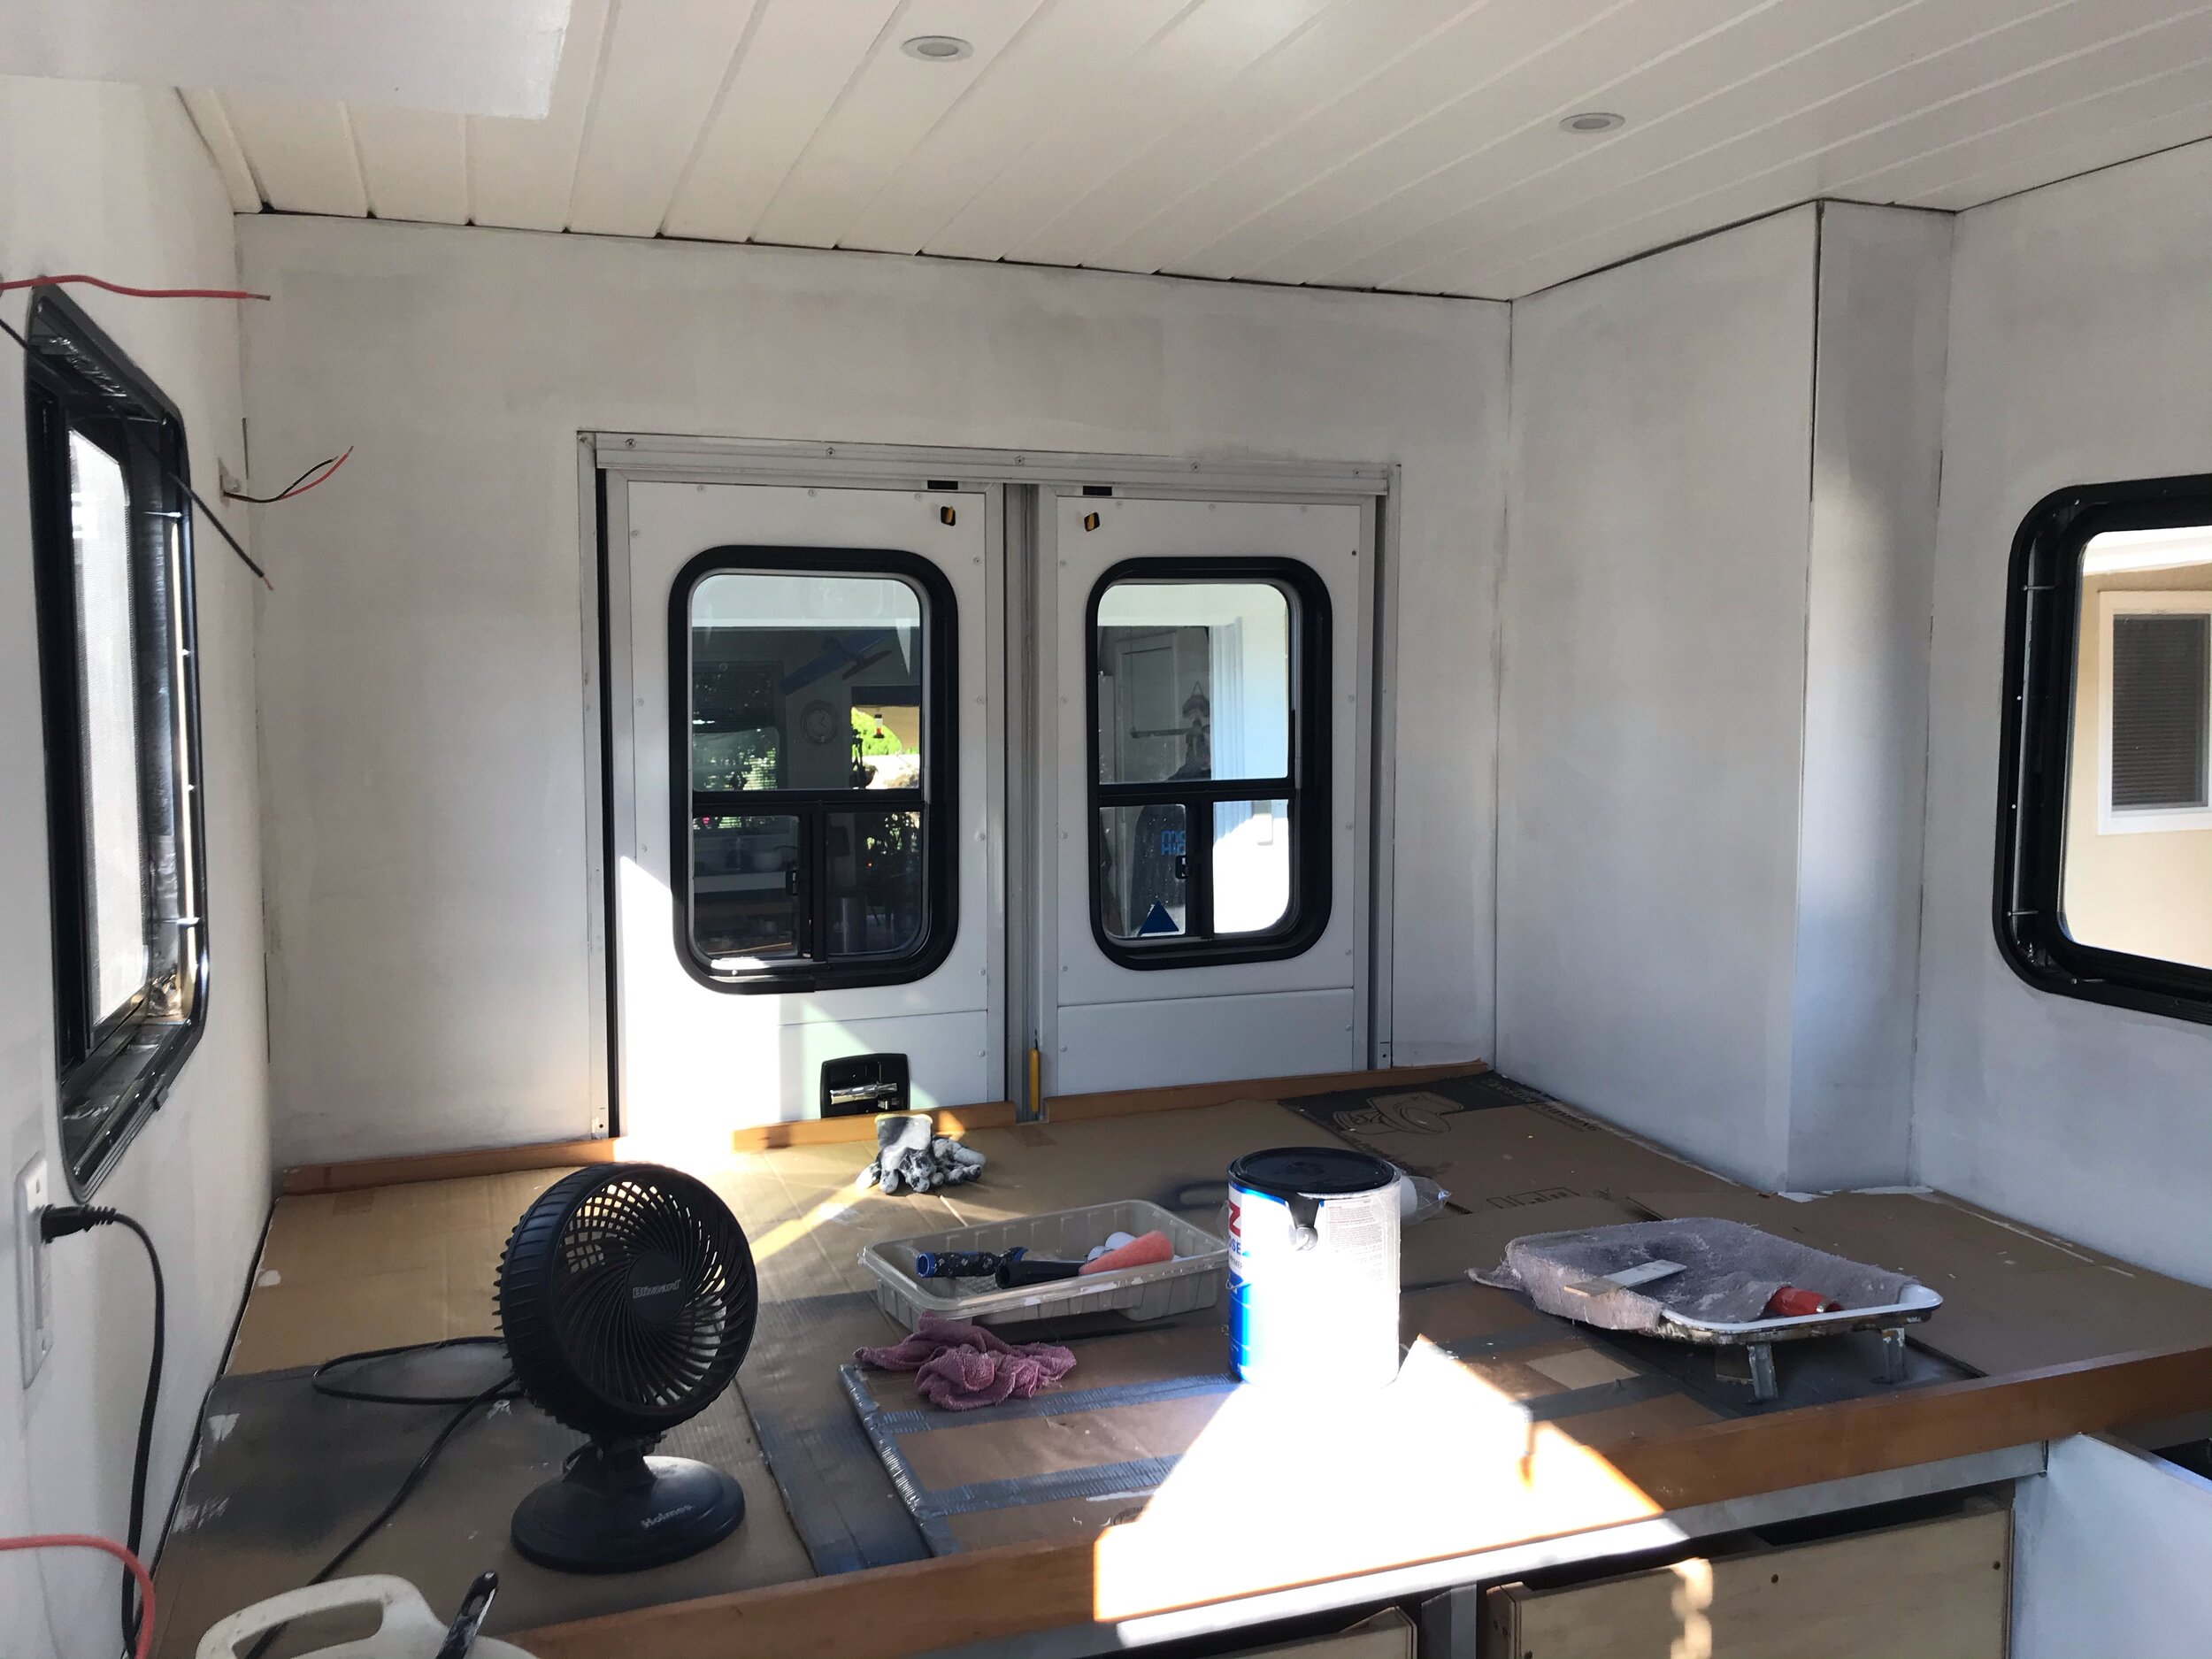
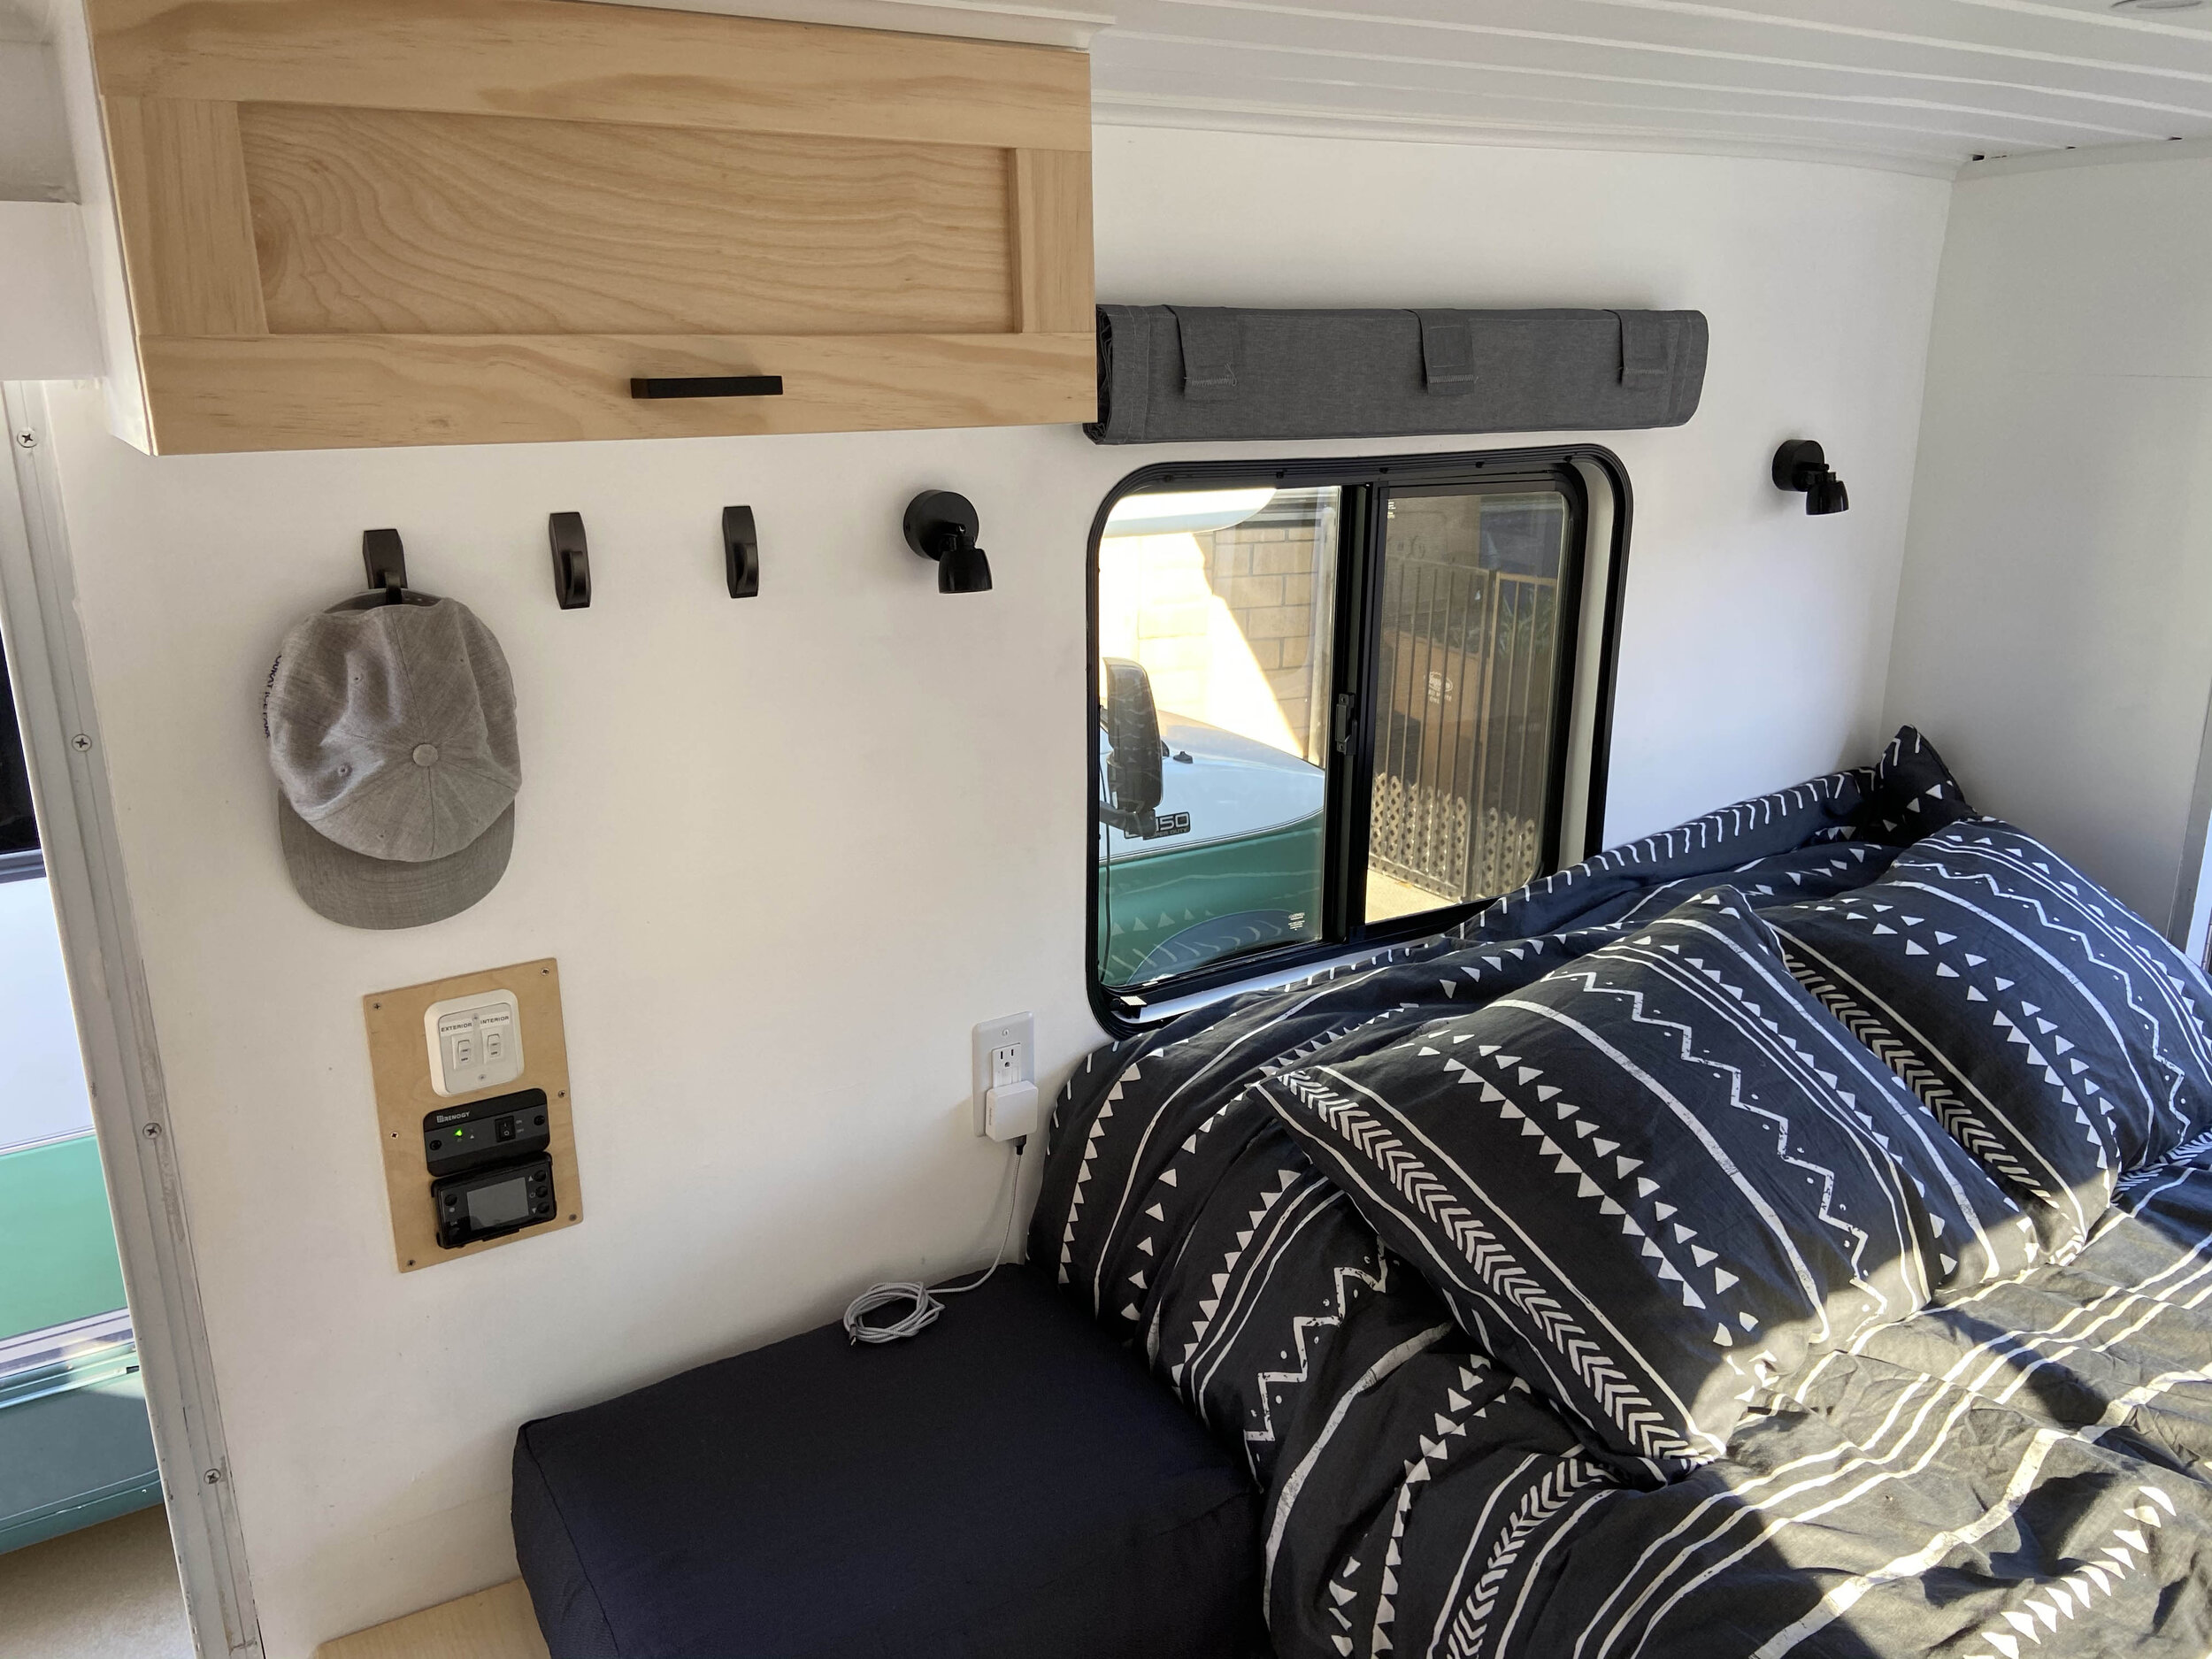
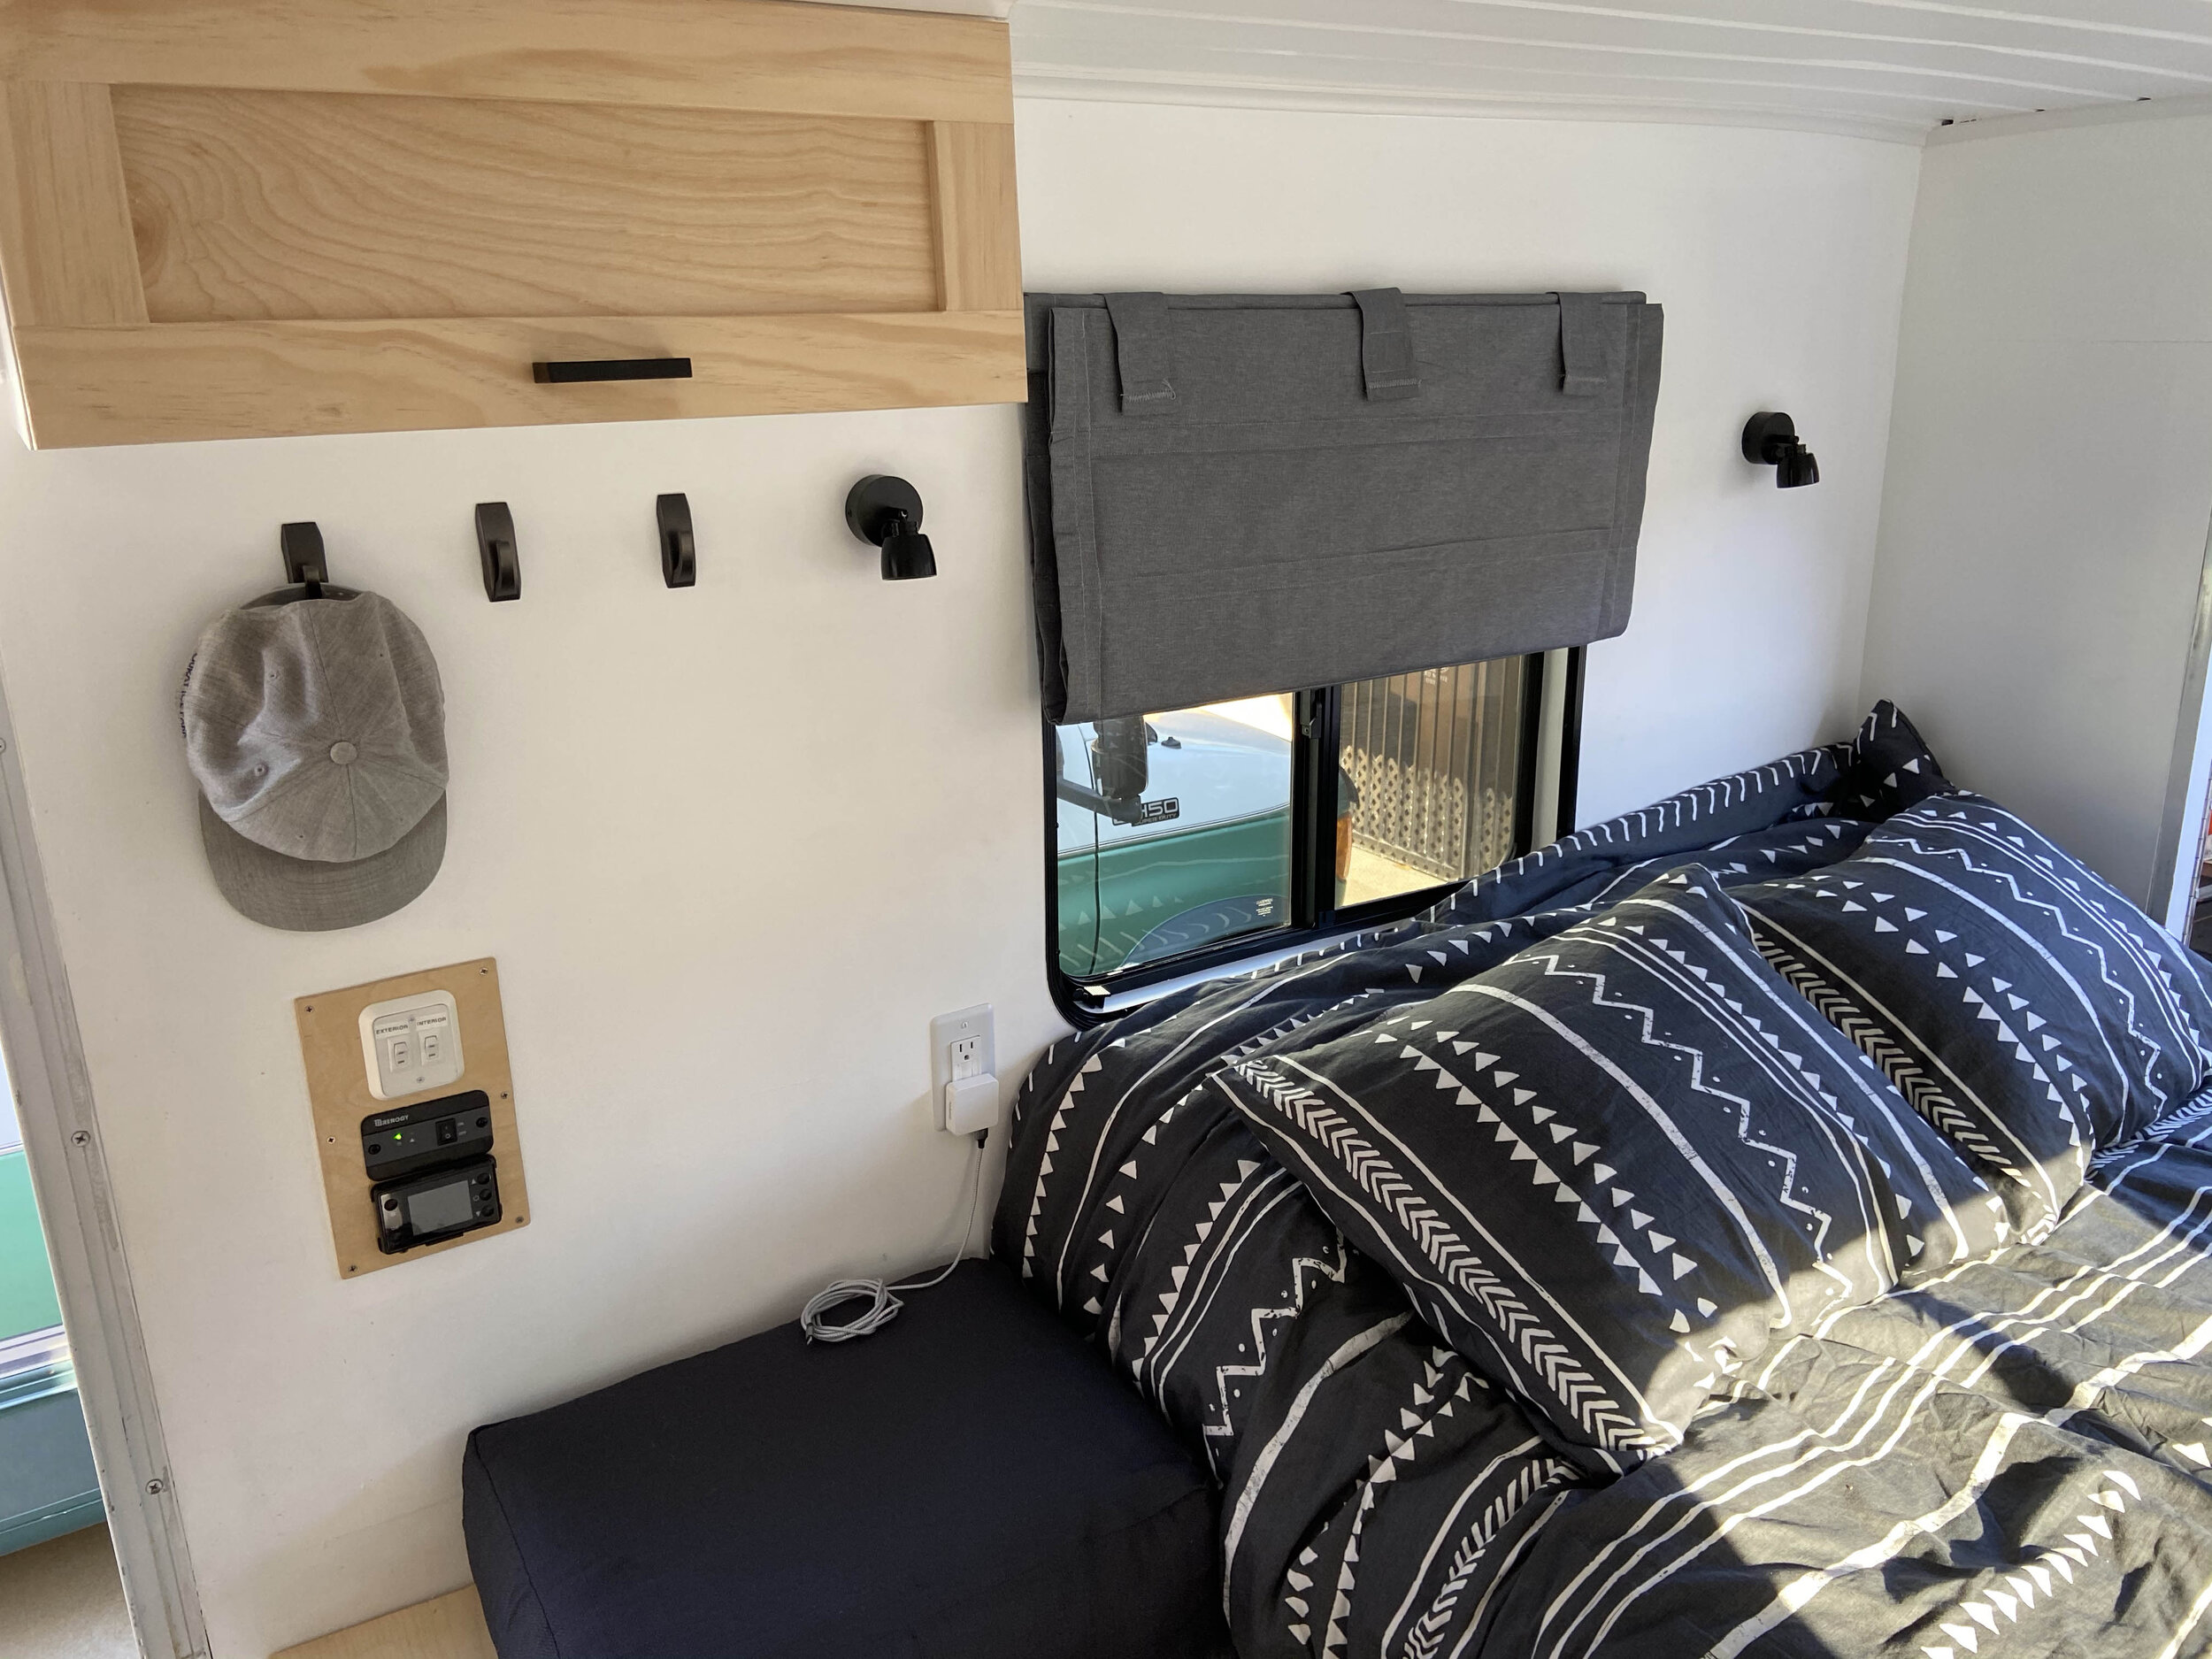
10-4-2020 - Interior walls, switch panel. All of the interior walls are constructed of 1/4” birch plywood. Again single coat of primer followed by 2 coats of semi gloss white. We used full sheets wherever possible so that there were no seams visible. Attention to detail at this stage made the outcome look more professional. I placed a lot of self tapping stainless screws into the birch plywood so that there would be no movement in the walls. The structure is far stronger with this method. Where the plywood met the floor I placed a self tapping screw every 6” so that the floor installation would follow a cleaner/straighter line. If I had not there was a possibility the bottom of the wall being uneven. This would have made the flood installation more difficult. Behind the walls between each compartment we added additional 2” closed cell foam. This combined with the compartment doors being insulated added more thermal protection.
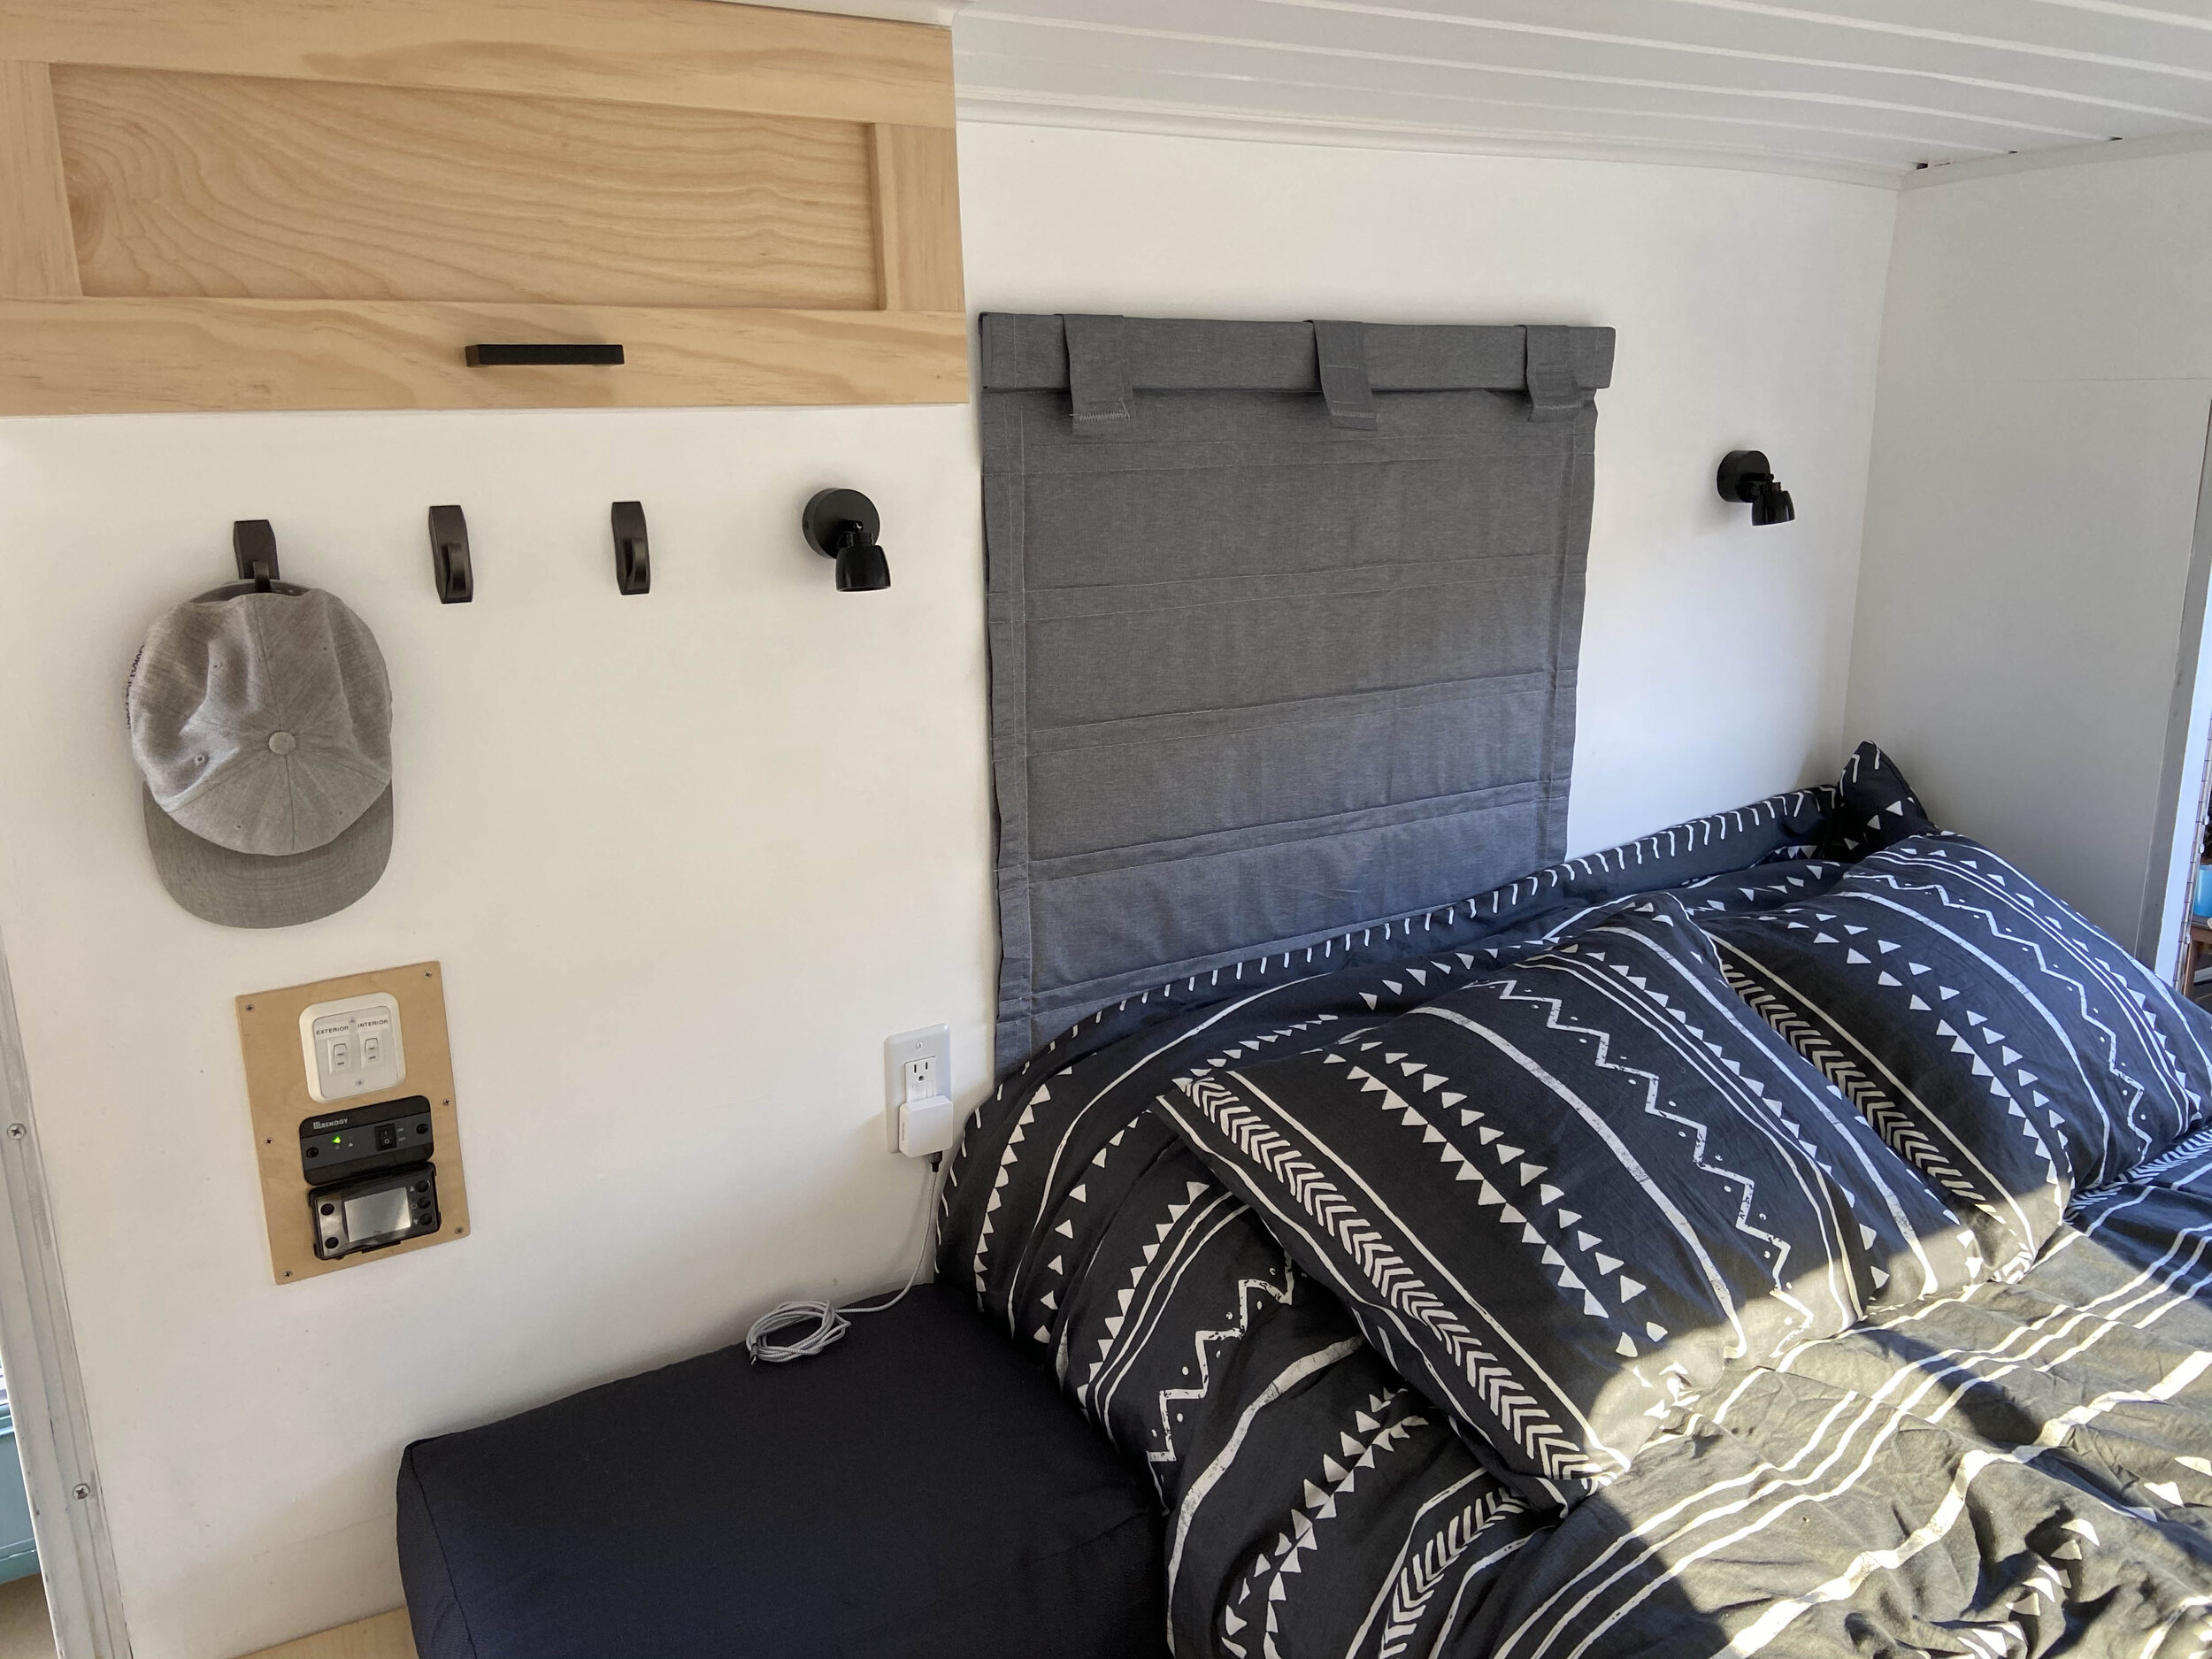
Rather than mounting each power switch, heater control panel and inverter control panel individually I decided to mount them all to a separate piece of birch ply. I did this so that servicing that electrical point would be much easier in the future. Plus that panel was coated in polyurethane so it looked a bit better.


10-11-2020 - Cabinet doors and painting the interior walls. When you have a mother that loves you very much she will paint walls for you. :-) The painting of the interior walls took a couple days to ensure that each coat dried fully prior to applying the next coat. She also used wood putty to fill and sand every screw hole and imperfection in the walls. I was at work when this was happening so I cannot take any credit for how amazing the paint job looks!
Each cabinet received 3 coats of polyurethane and was sanded smooth between coats. They are smooth as a babys’ bottom. Again I was at work and give all the credit to my folks. They did an amazing job! I added 1/4” toolbox foam to the floor of each cabinet to protect the wood and the contents of the cabinets. This reduced the rattle and kept everything in the cabinets from moving around when driving.
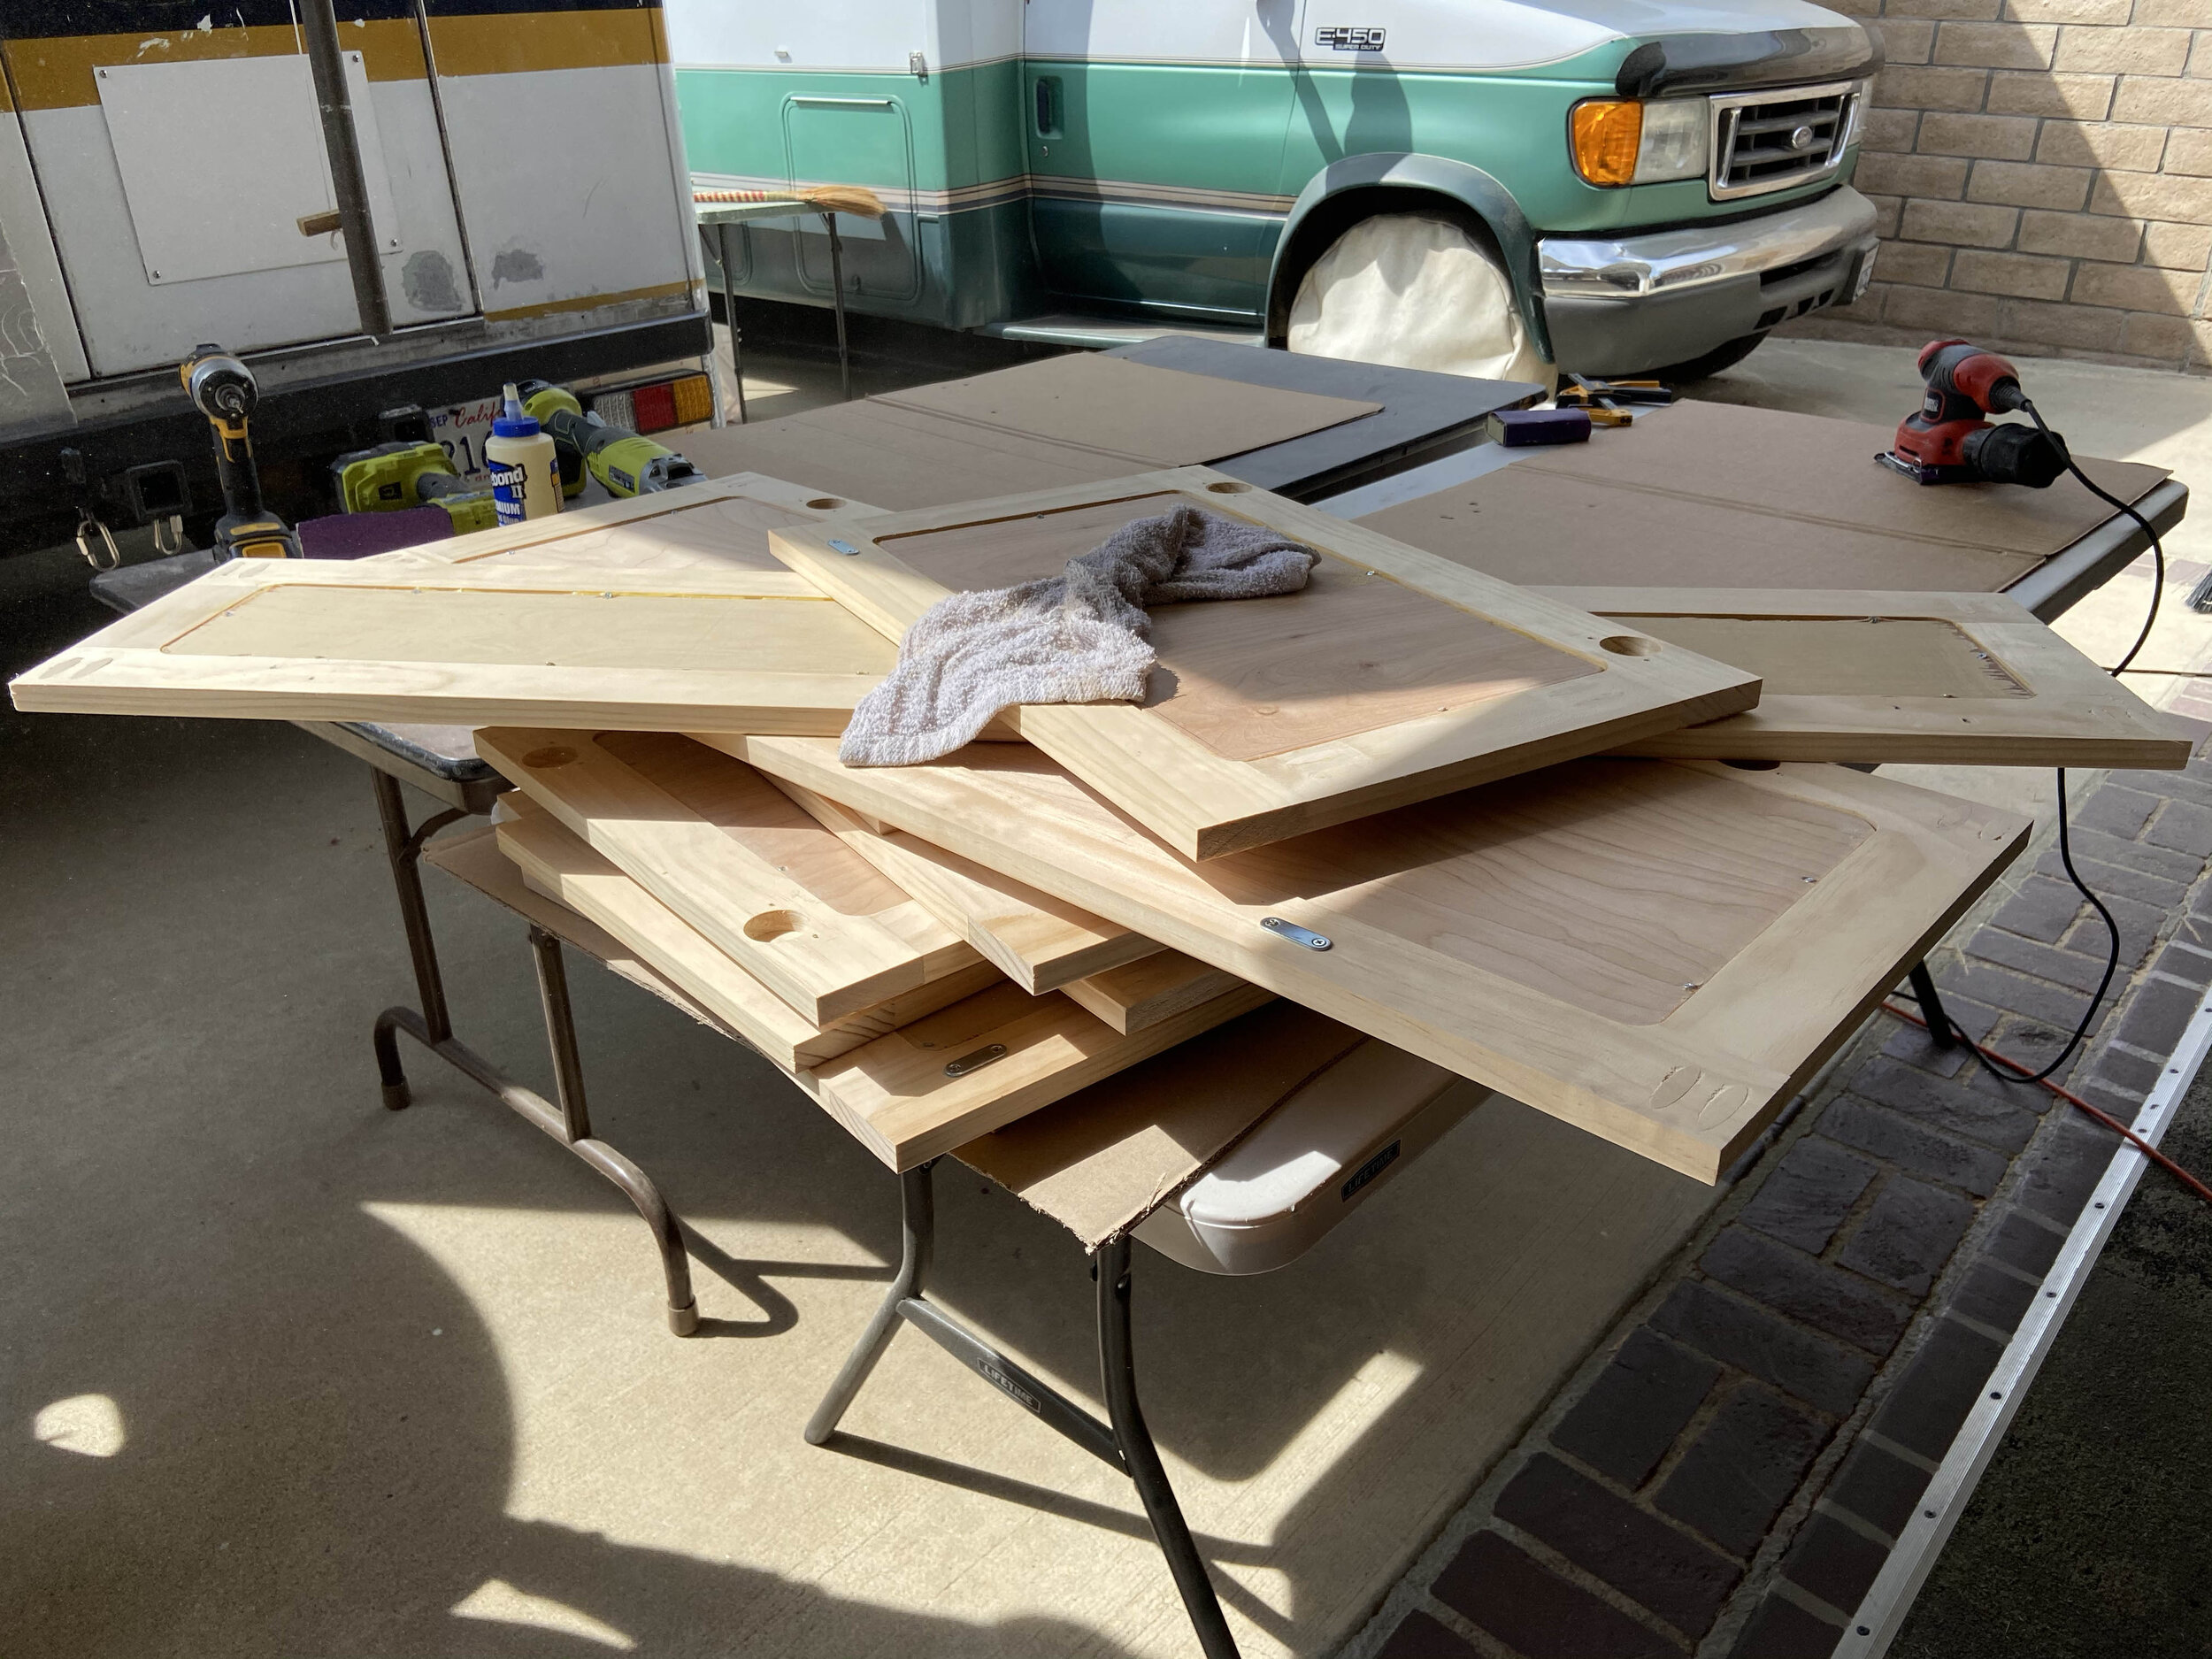
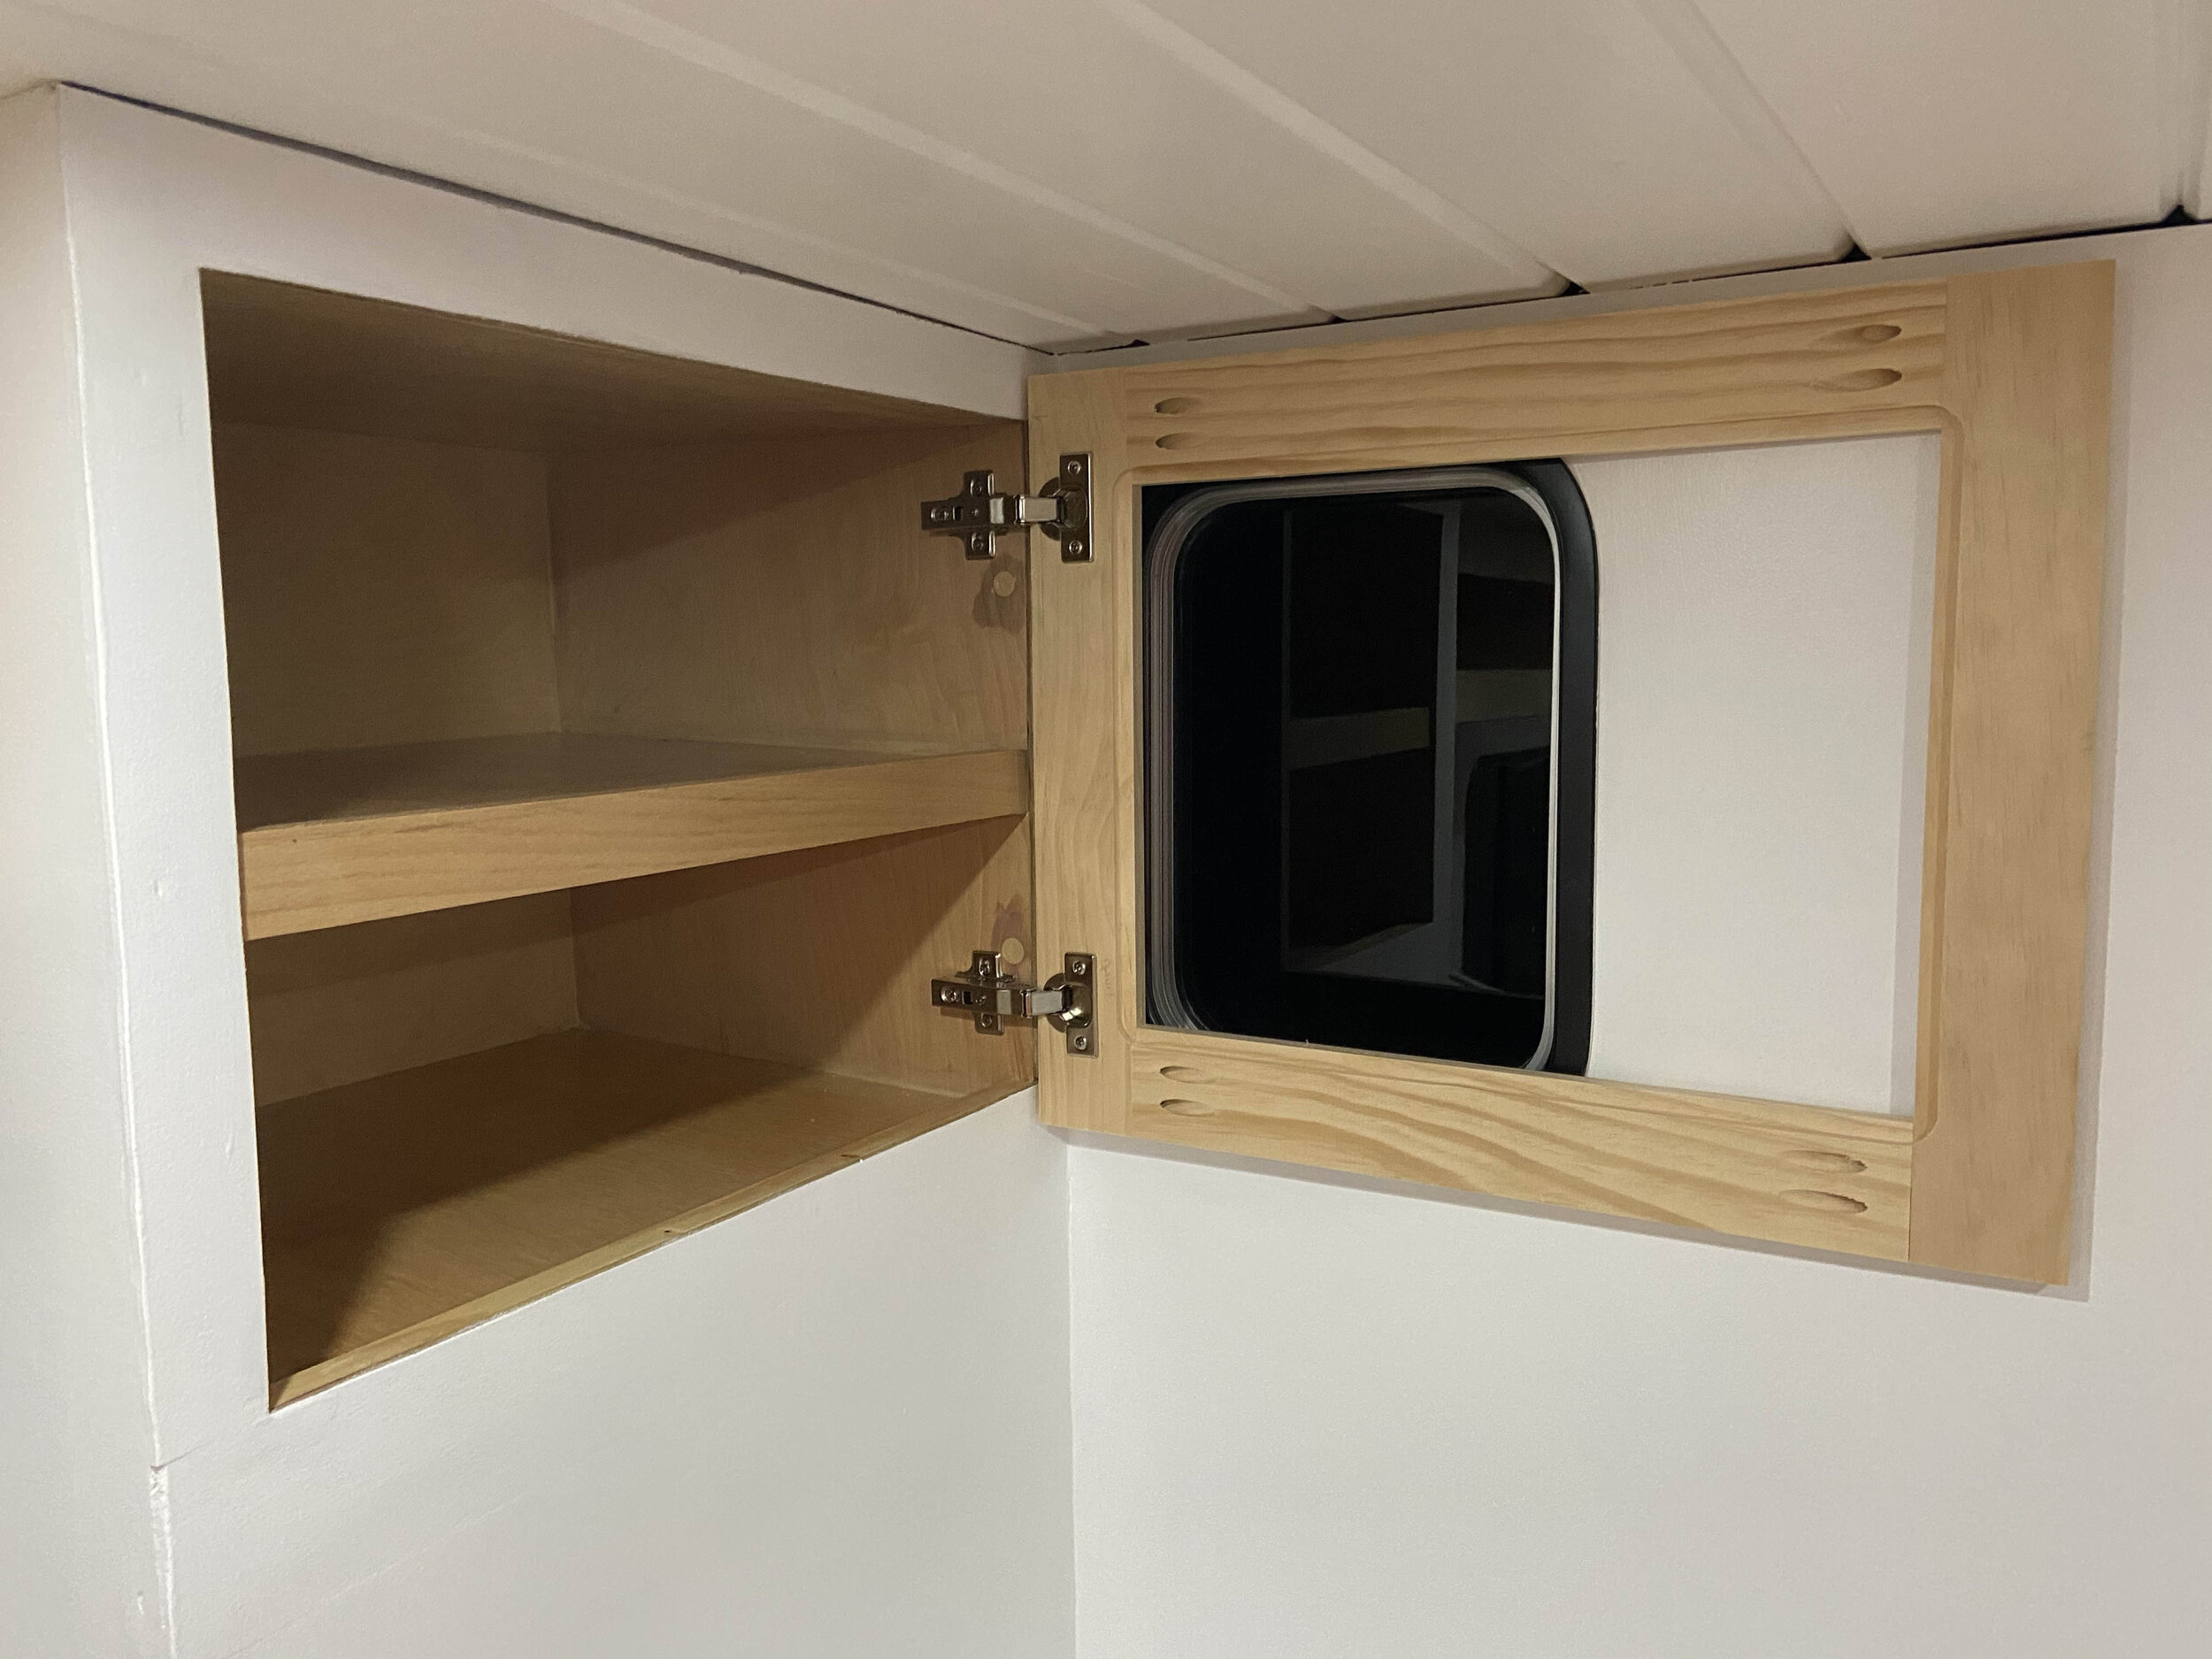
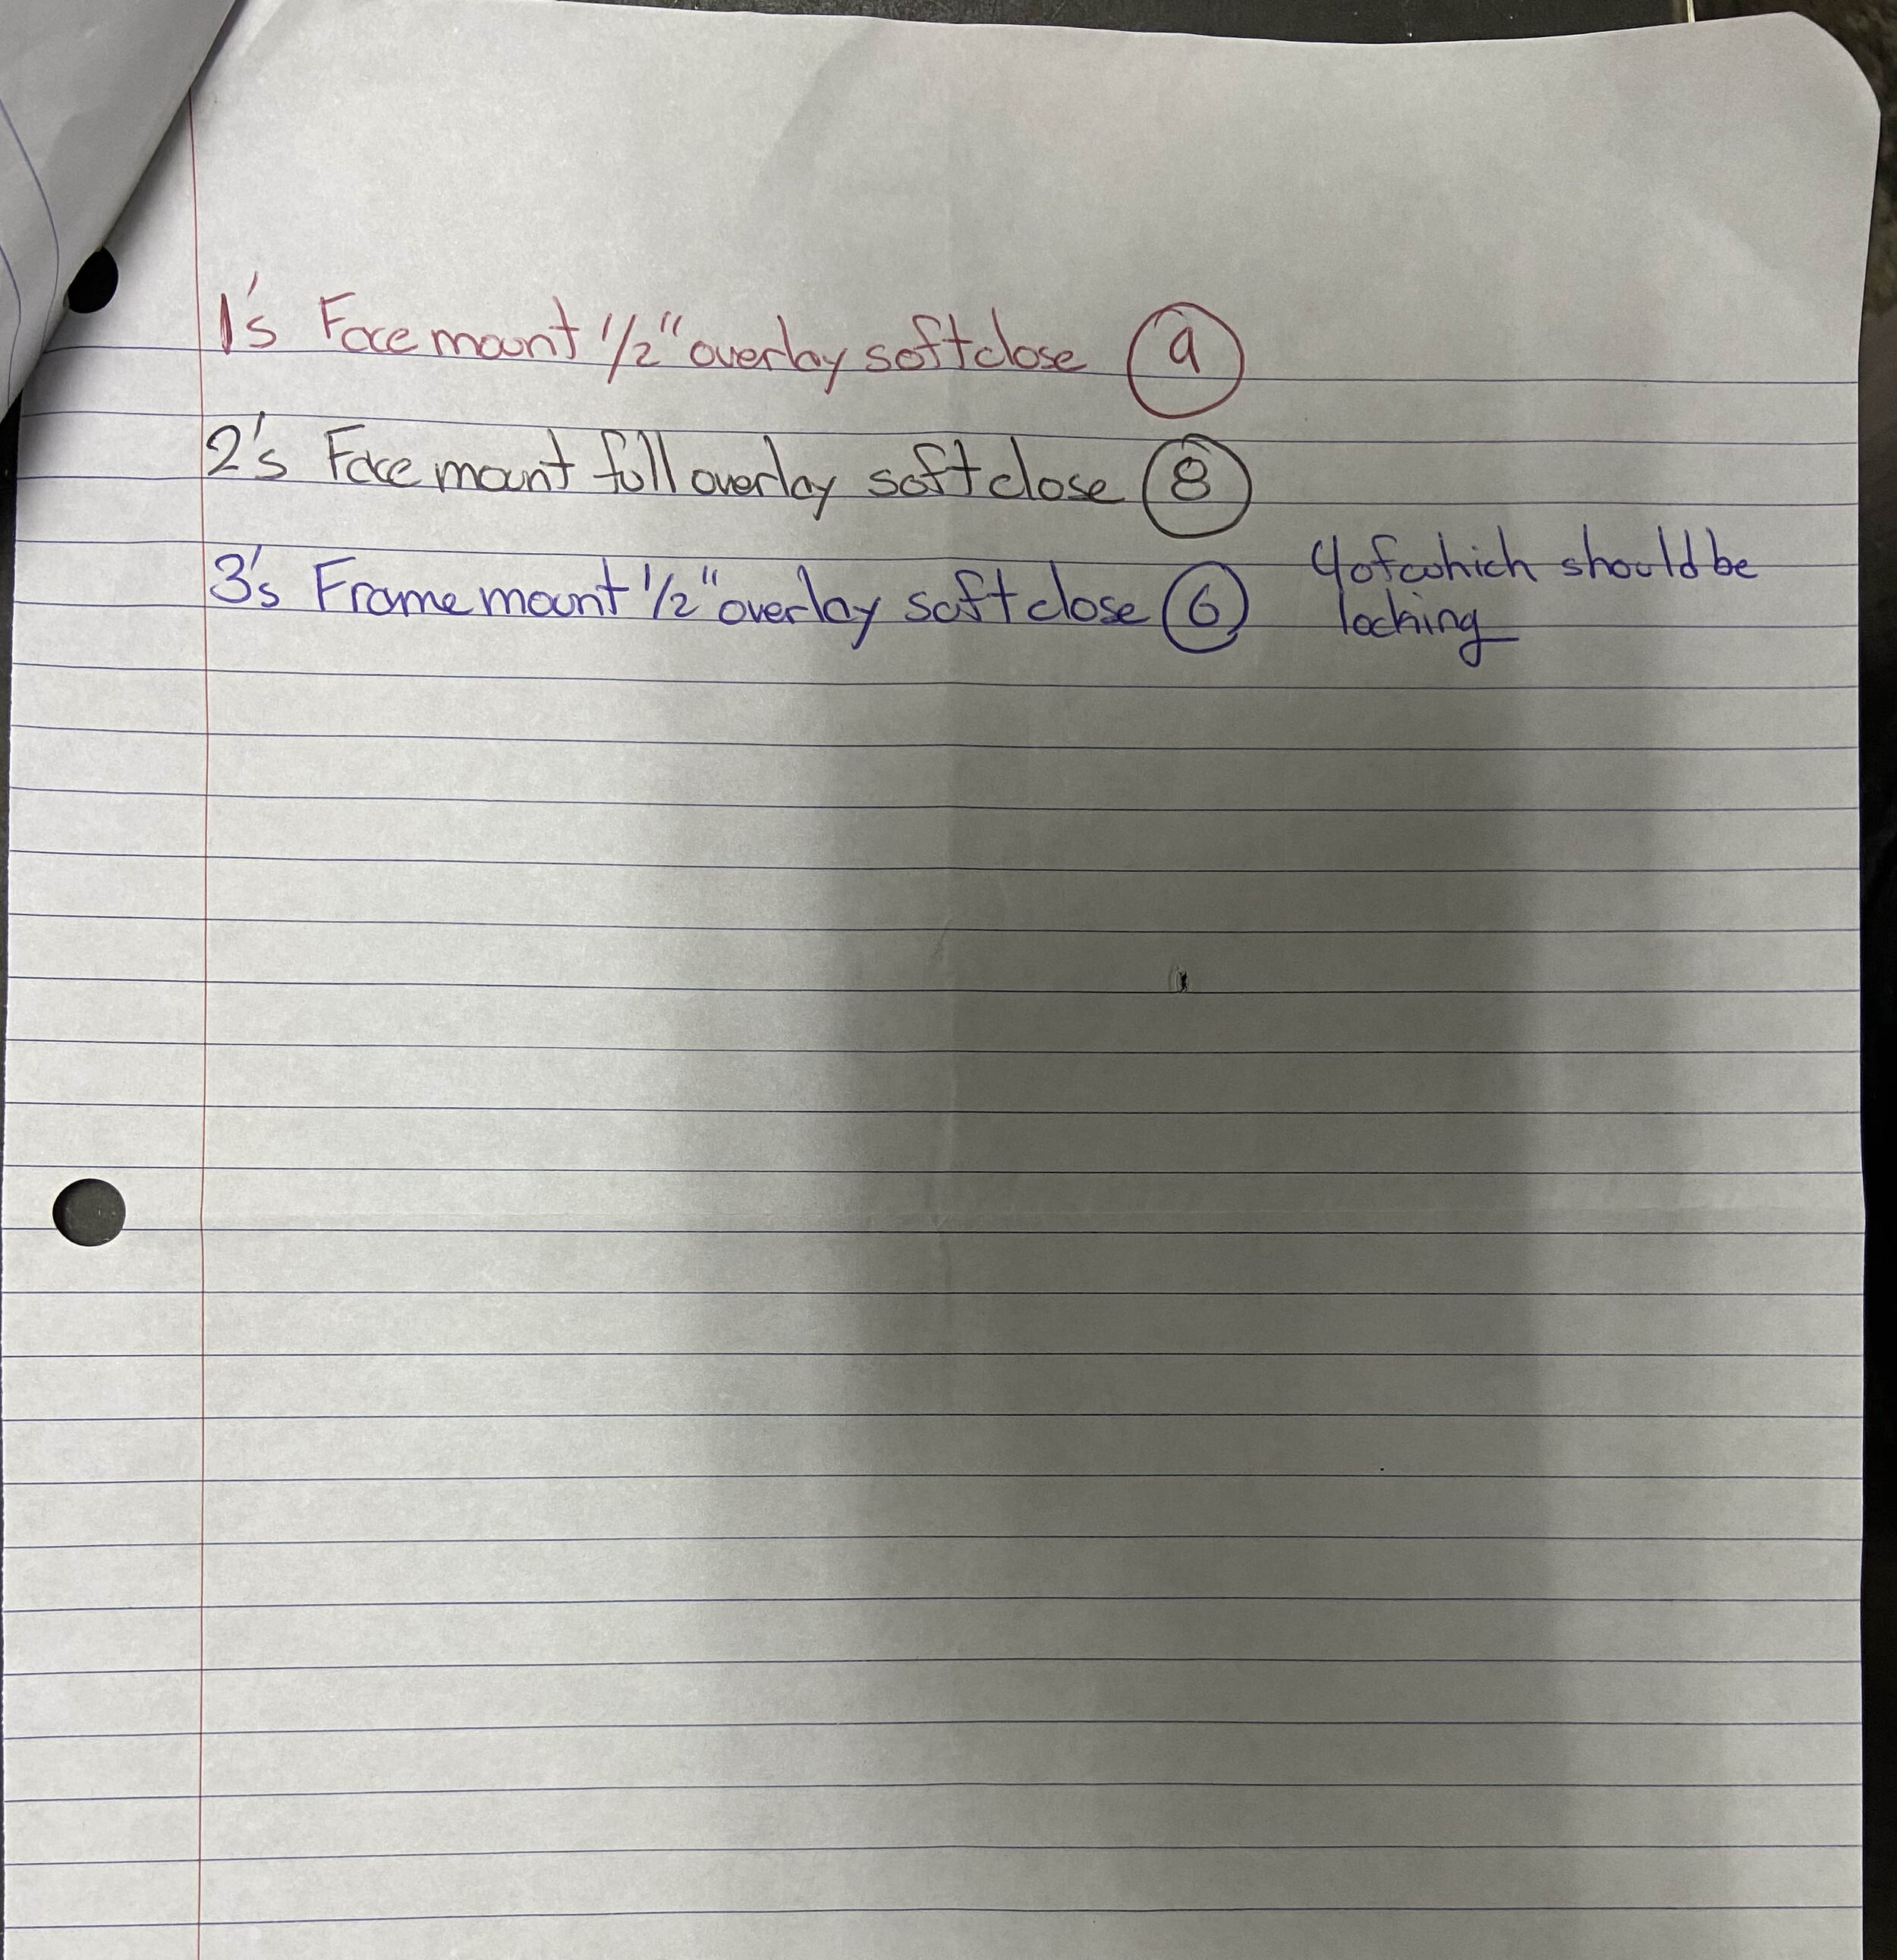
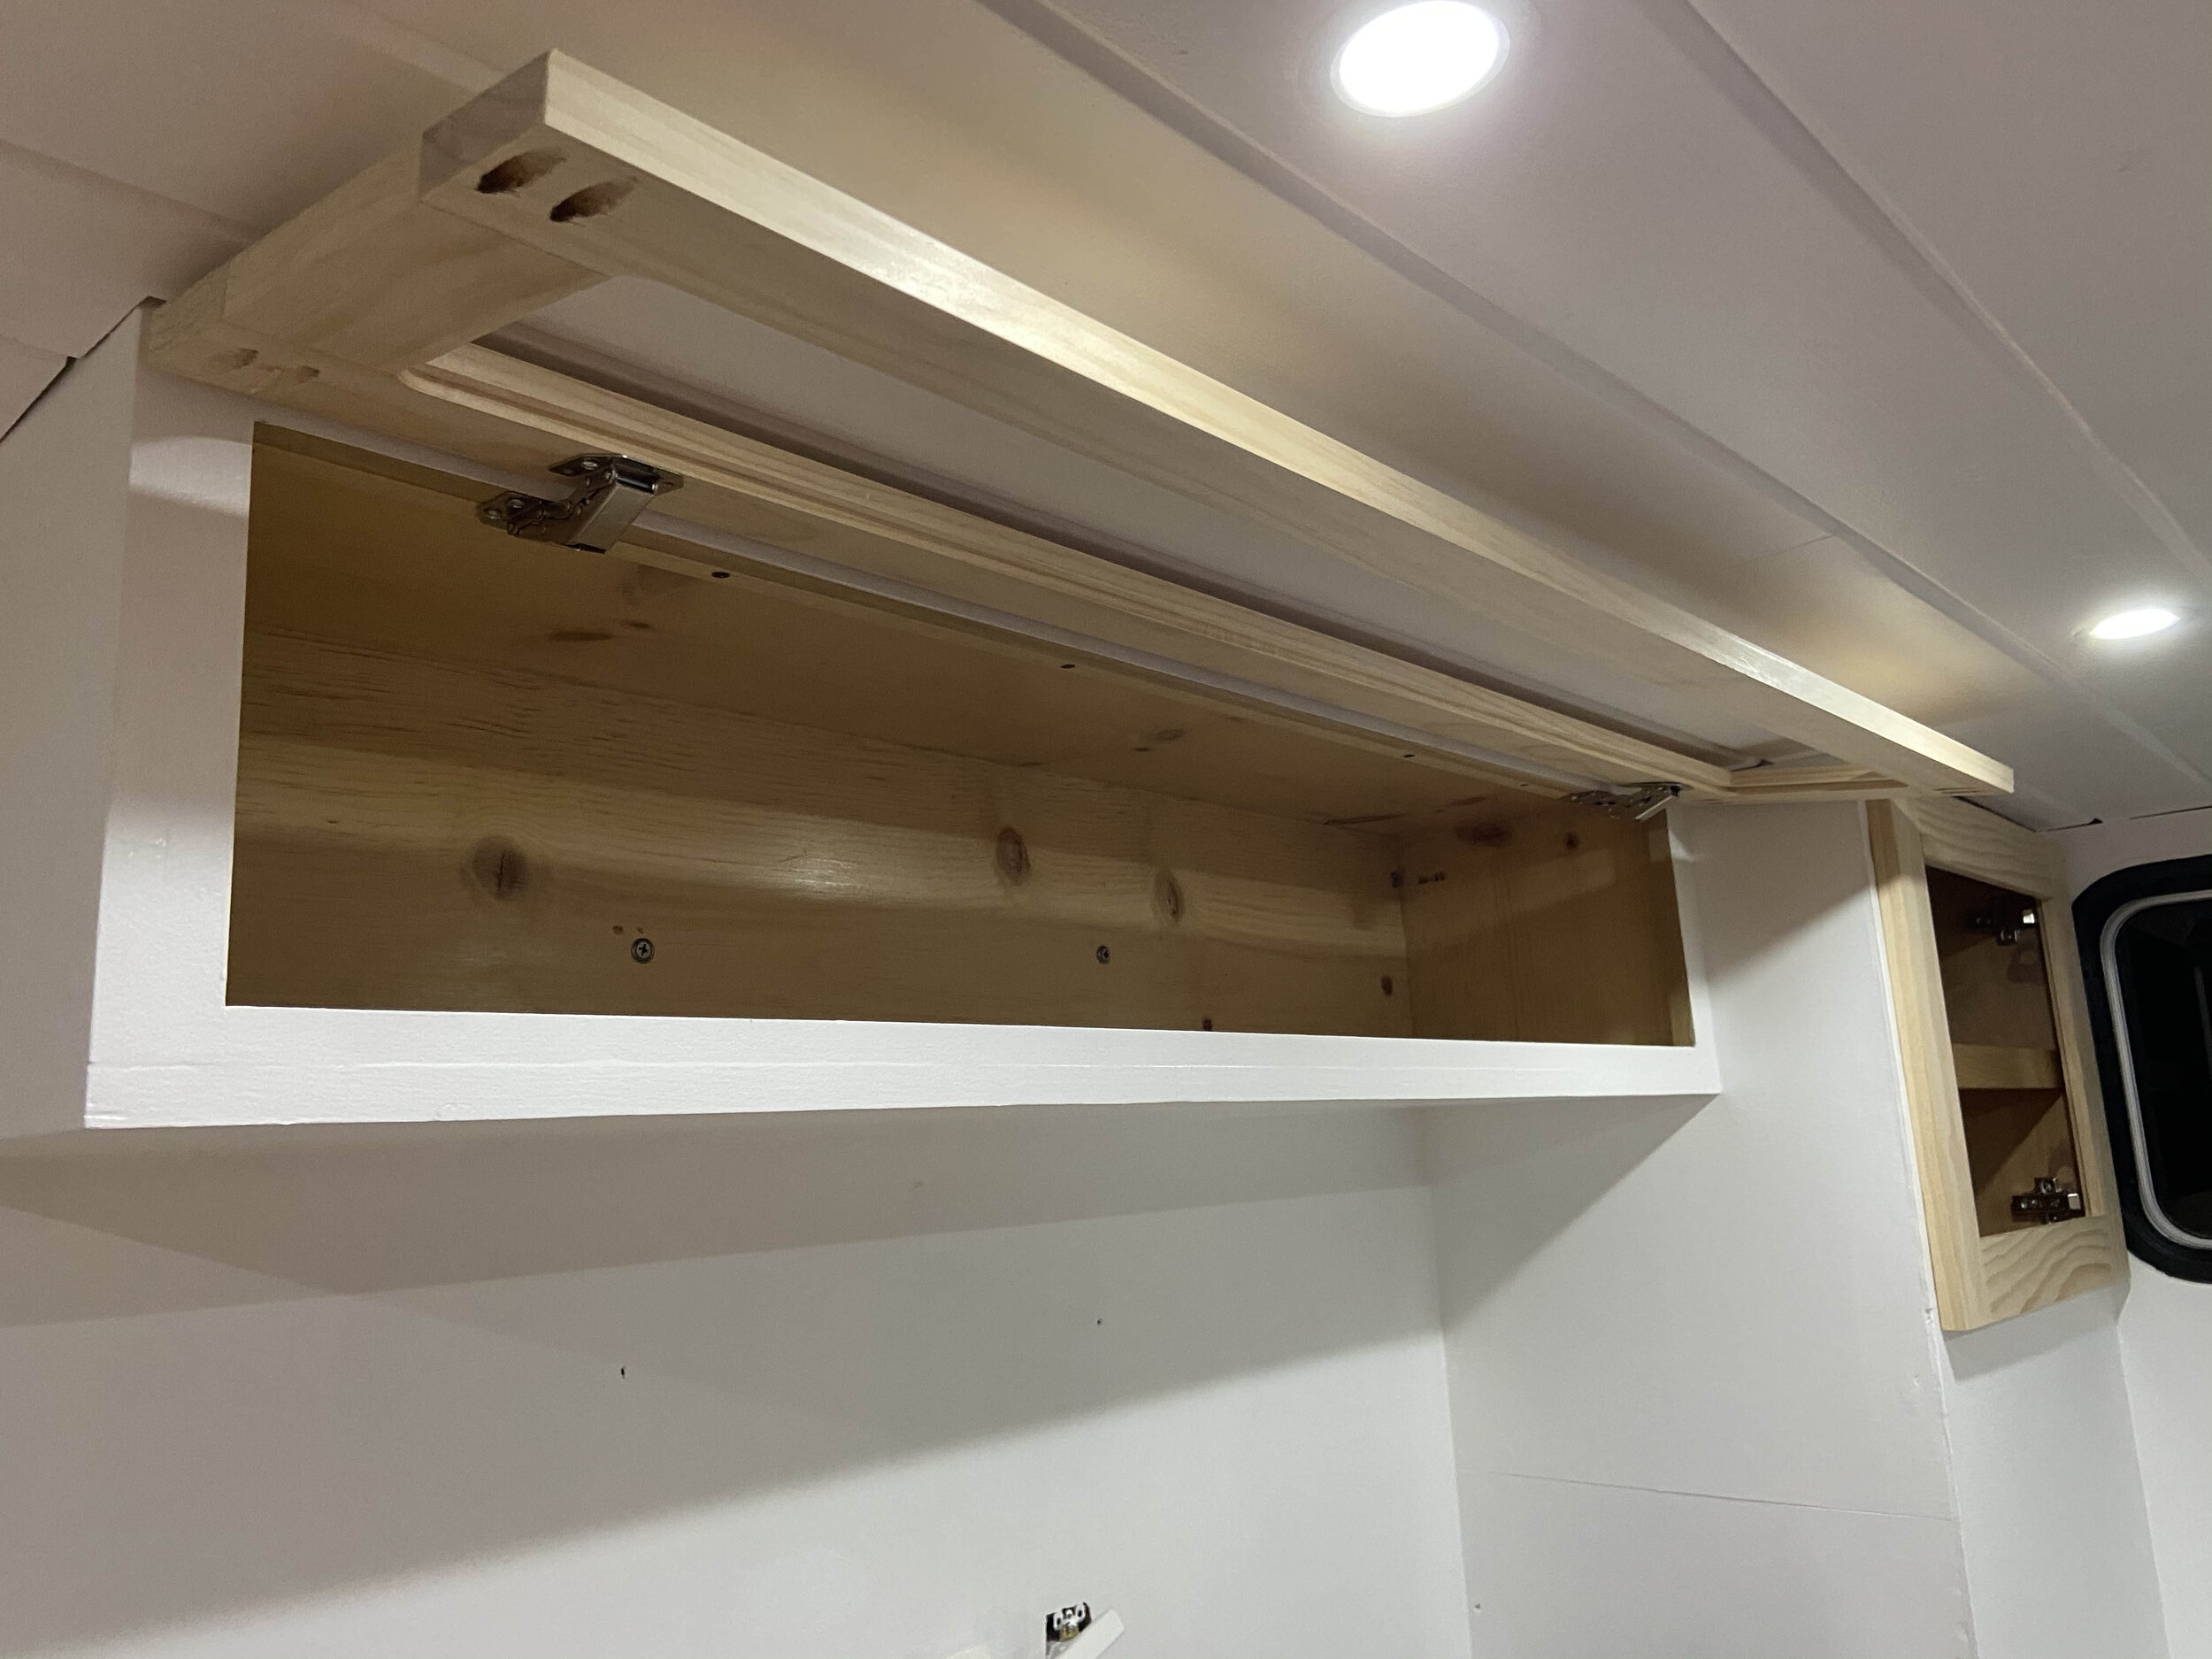
The cabinet doors took two weeks of internet/youtube tutorial before I had a good grasp of how to create shaker doors and install soft close hinges. Rather than installing pneumatic arms for the upward opening cabinets I chose to use open locking 90 degree hinges. This allowed more space for storage and less chance of something failing. I used Kreg jigs for the pocket holes and a Kreg jig for the cabinet door handles. I HIGHLY reccomend using the jigs. It made life so much easier and made for a far better product. I contacted several cabinet makers in the greater Los Angeles area and the average cost per door (unfinished and unmounted) was $100 per door. After purchasing all the supplies needed to create and mount the doors I paid a total of $380. This included all the wood. I made 10 cabinet doors and 4 compartment doors. This would have costed $1,400 for the doors alone. Not including the hinges and mounting. The $1,400 did not include painting or the finishing the doors either. If you're handy at all I’d recommend doing it yourself. The money I saved covered the cost of the second BattleBorn Battery I needed.
I made the frames for the doors first. Aligned the hinges and mounted them. Then added the 1/4” birch ply to the doors. This made it so I could hold the door where I wanted it, reach through the door and mark the holes for the hinges. Seemed to work really well. This combined with the adjustability of the hinges made it really easy to get the doors just where I wanted them.


Finishing touches - interior
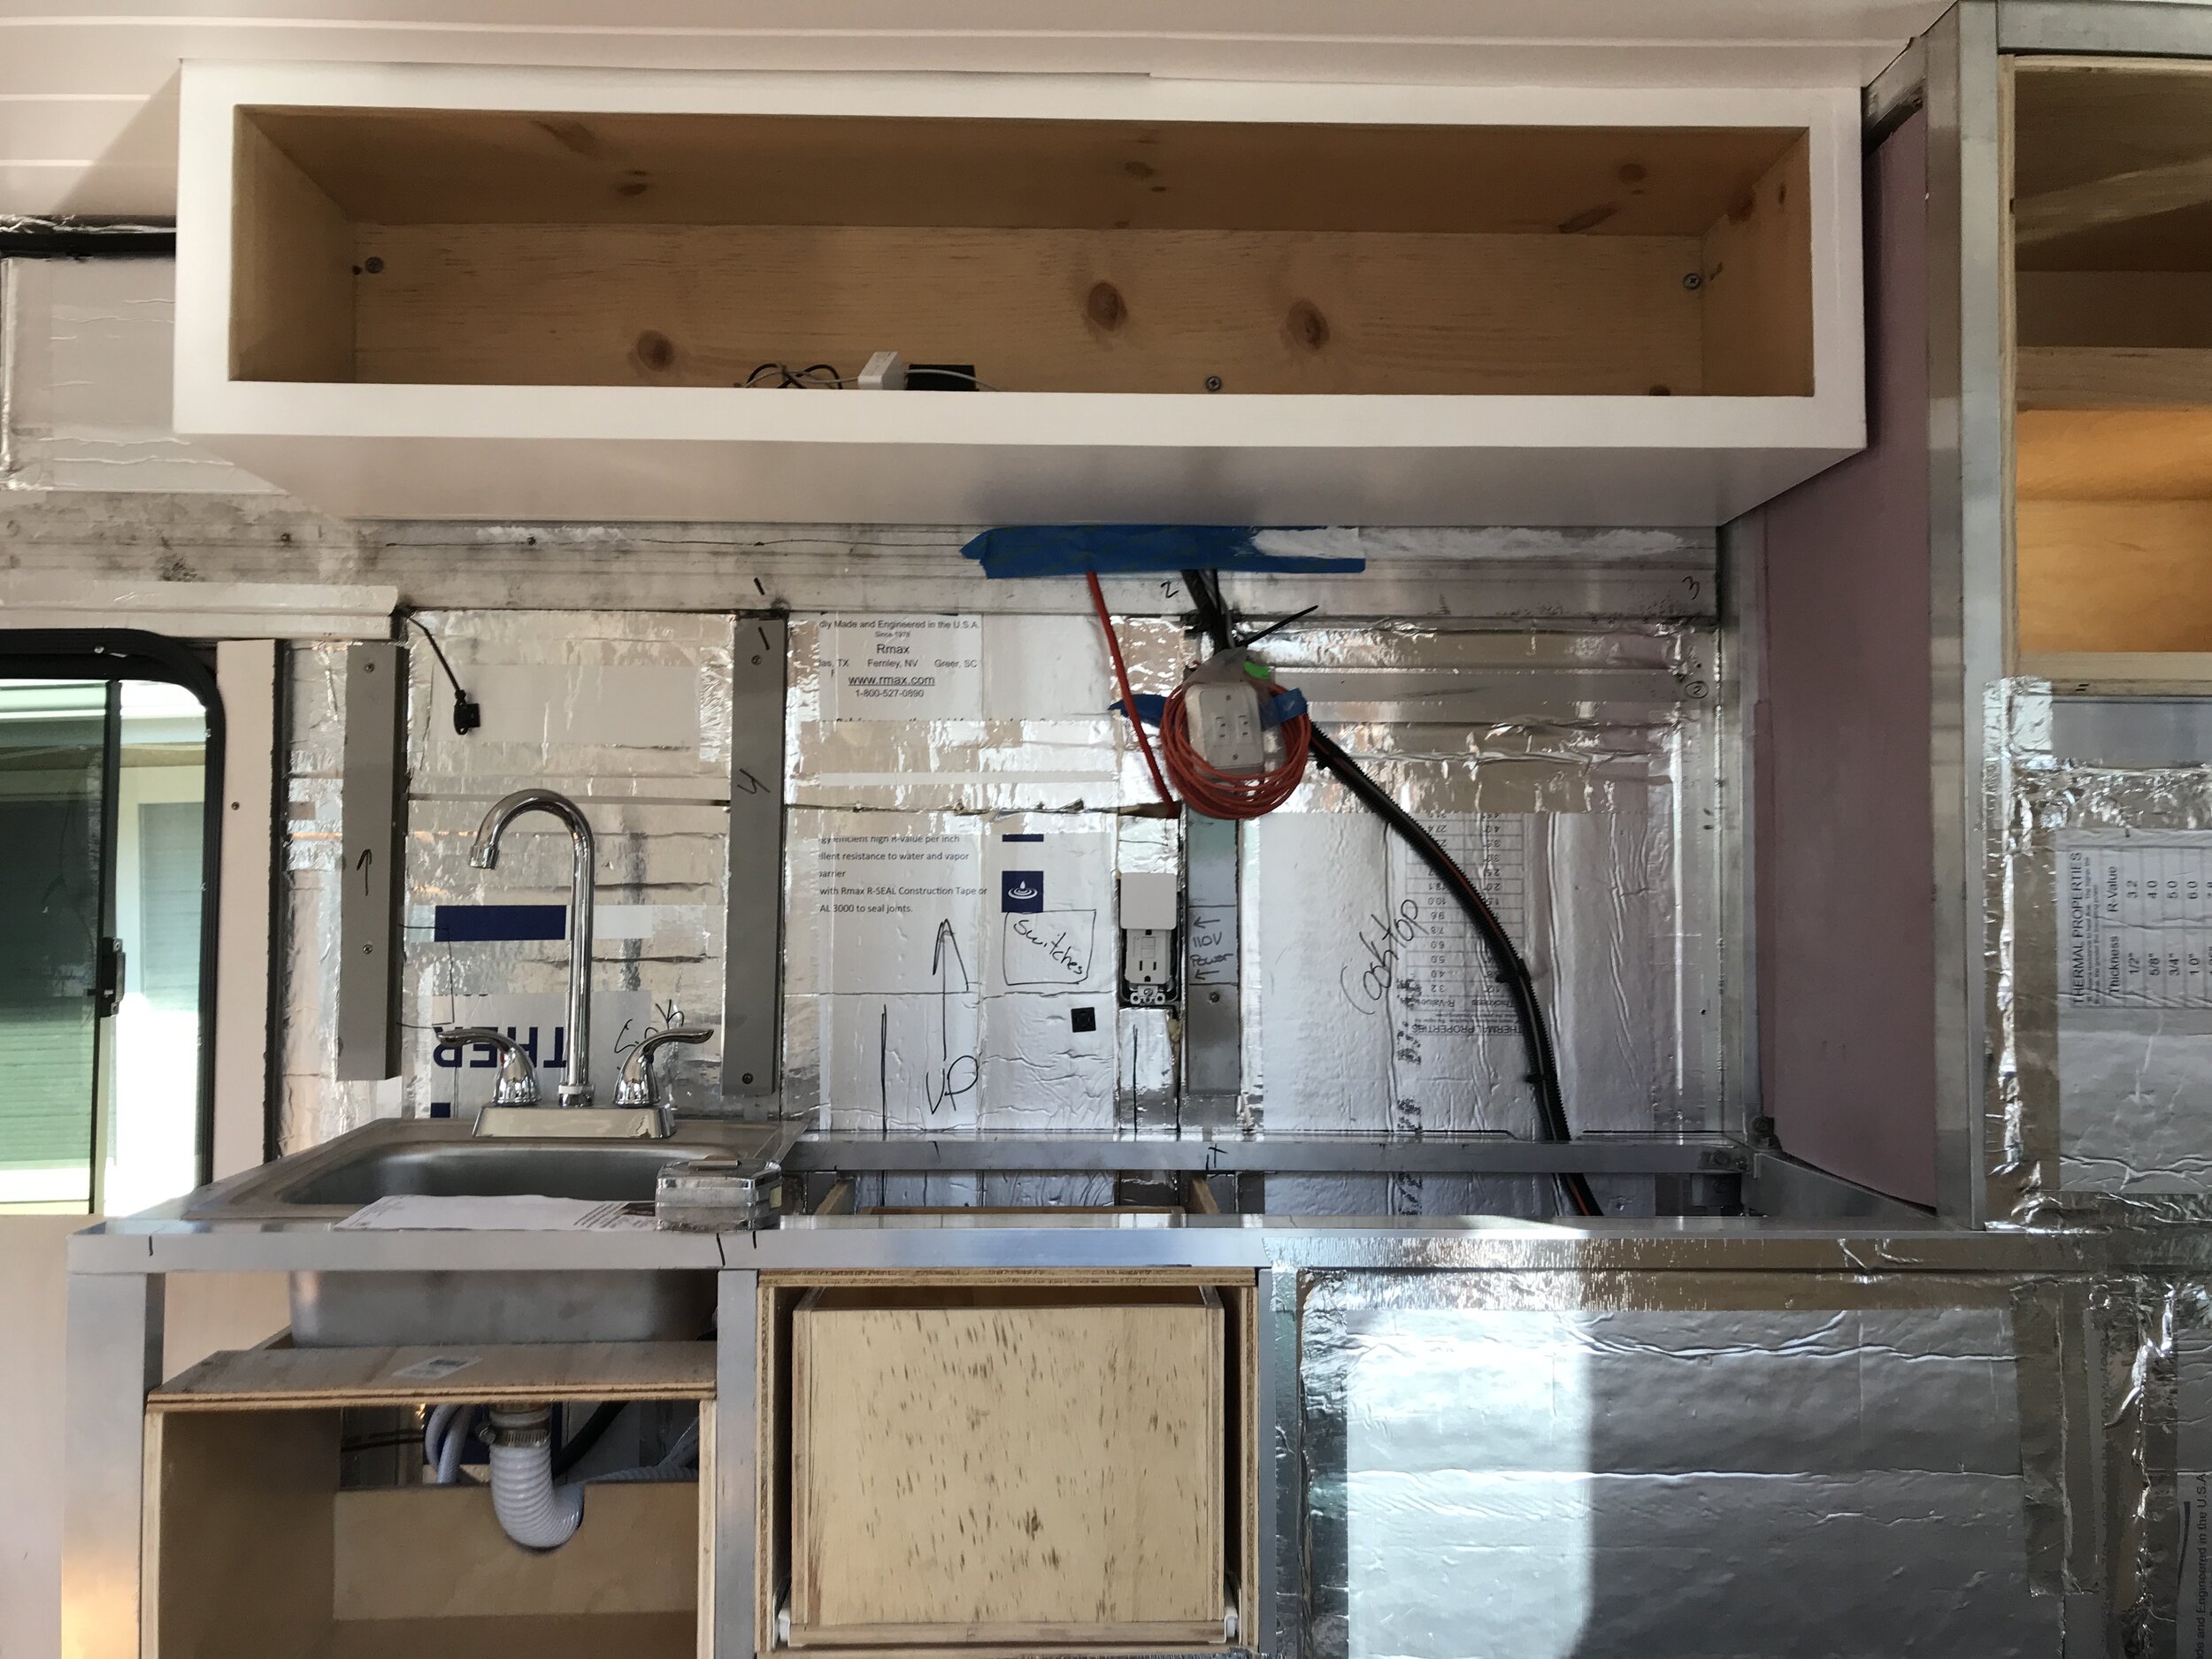
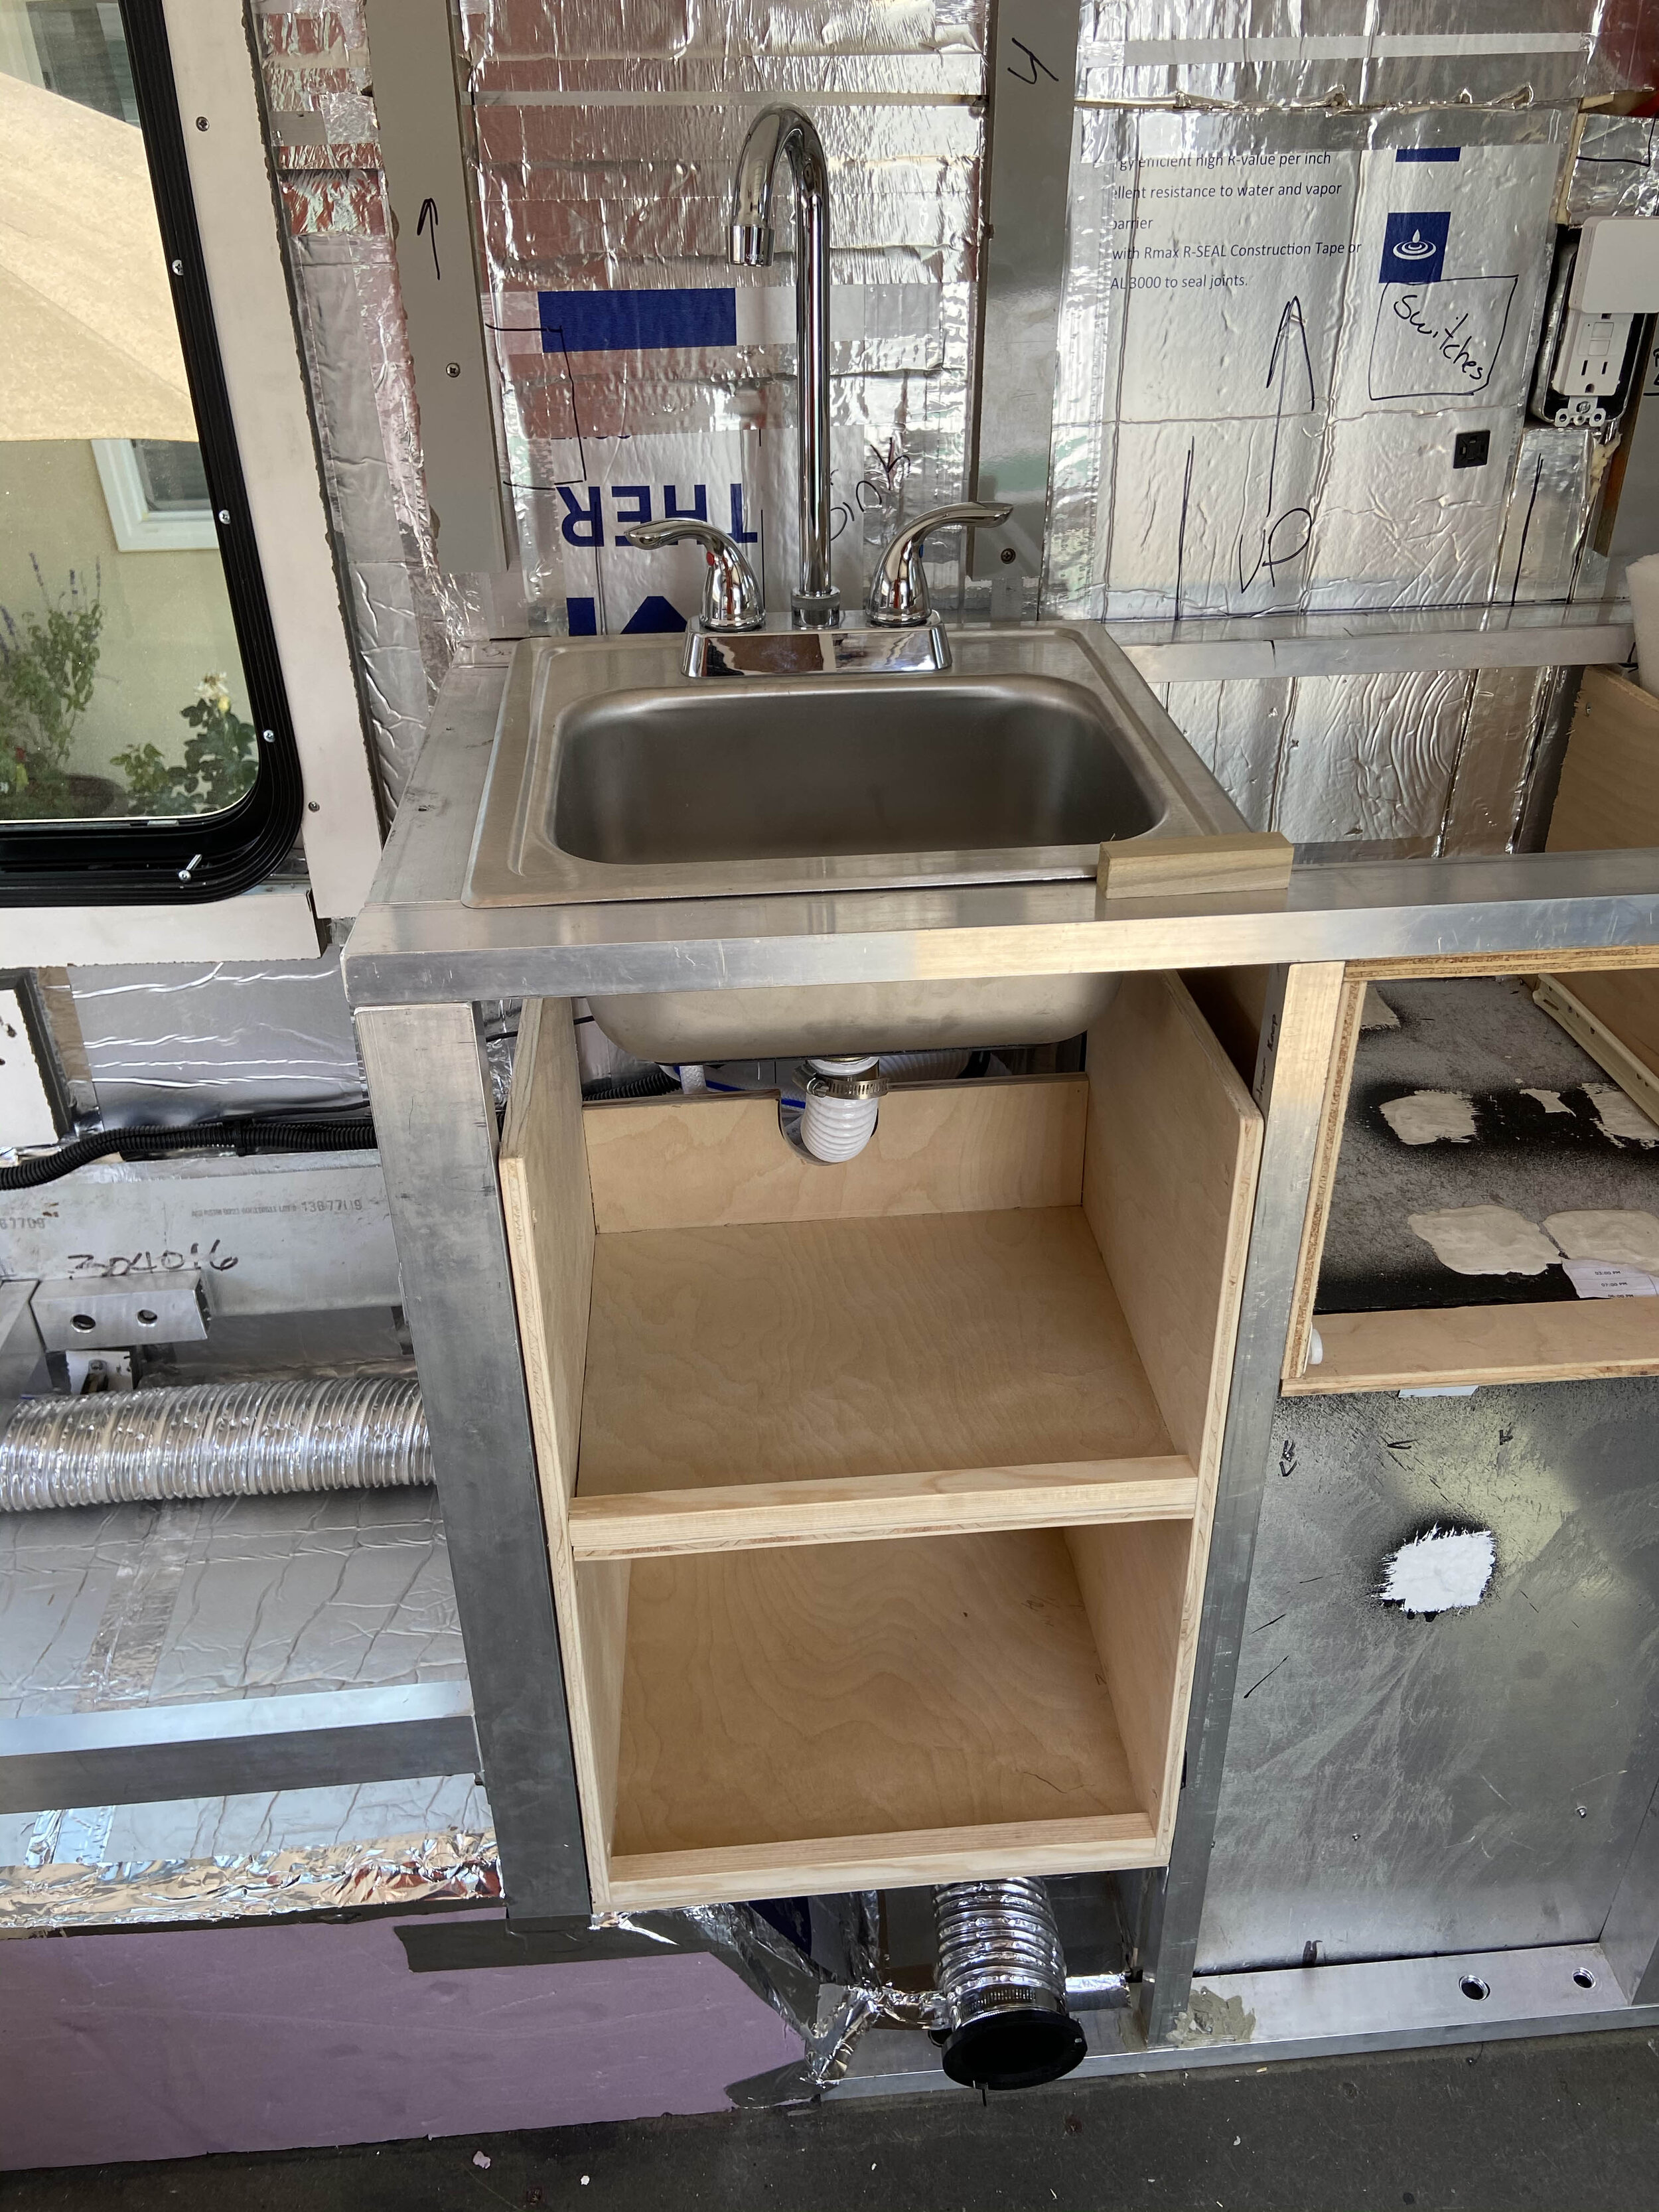
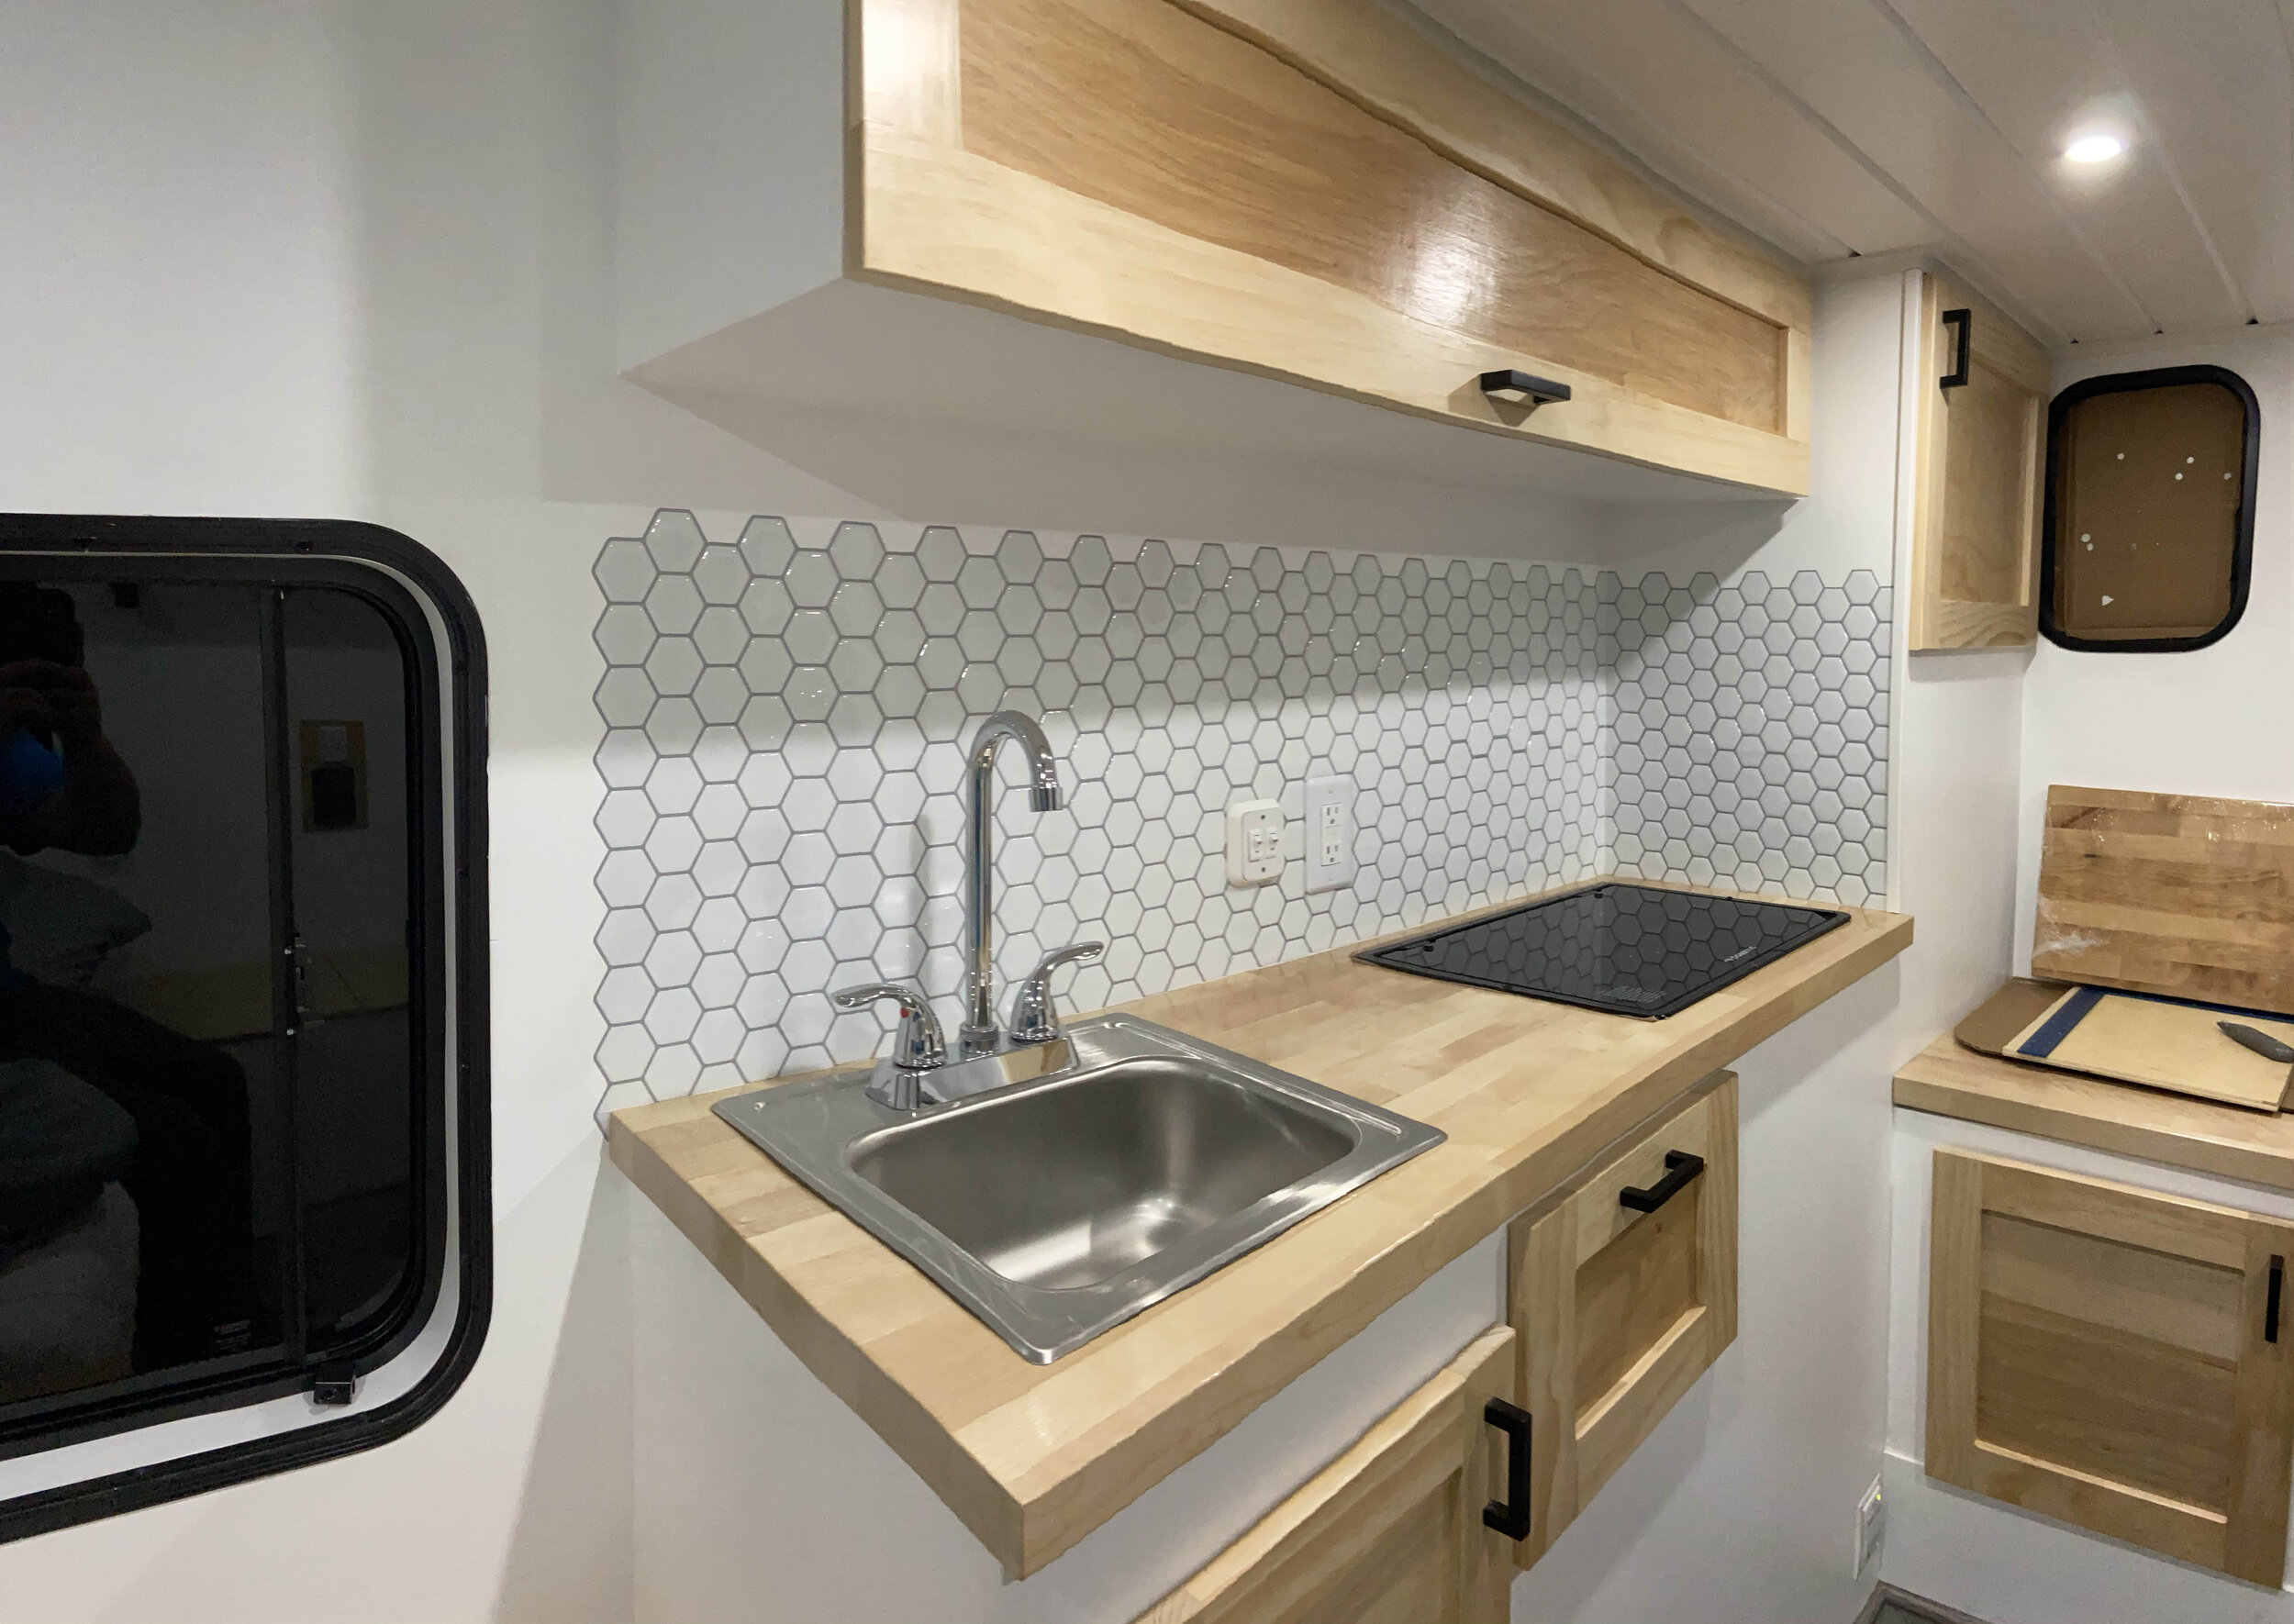
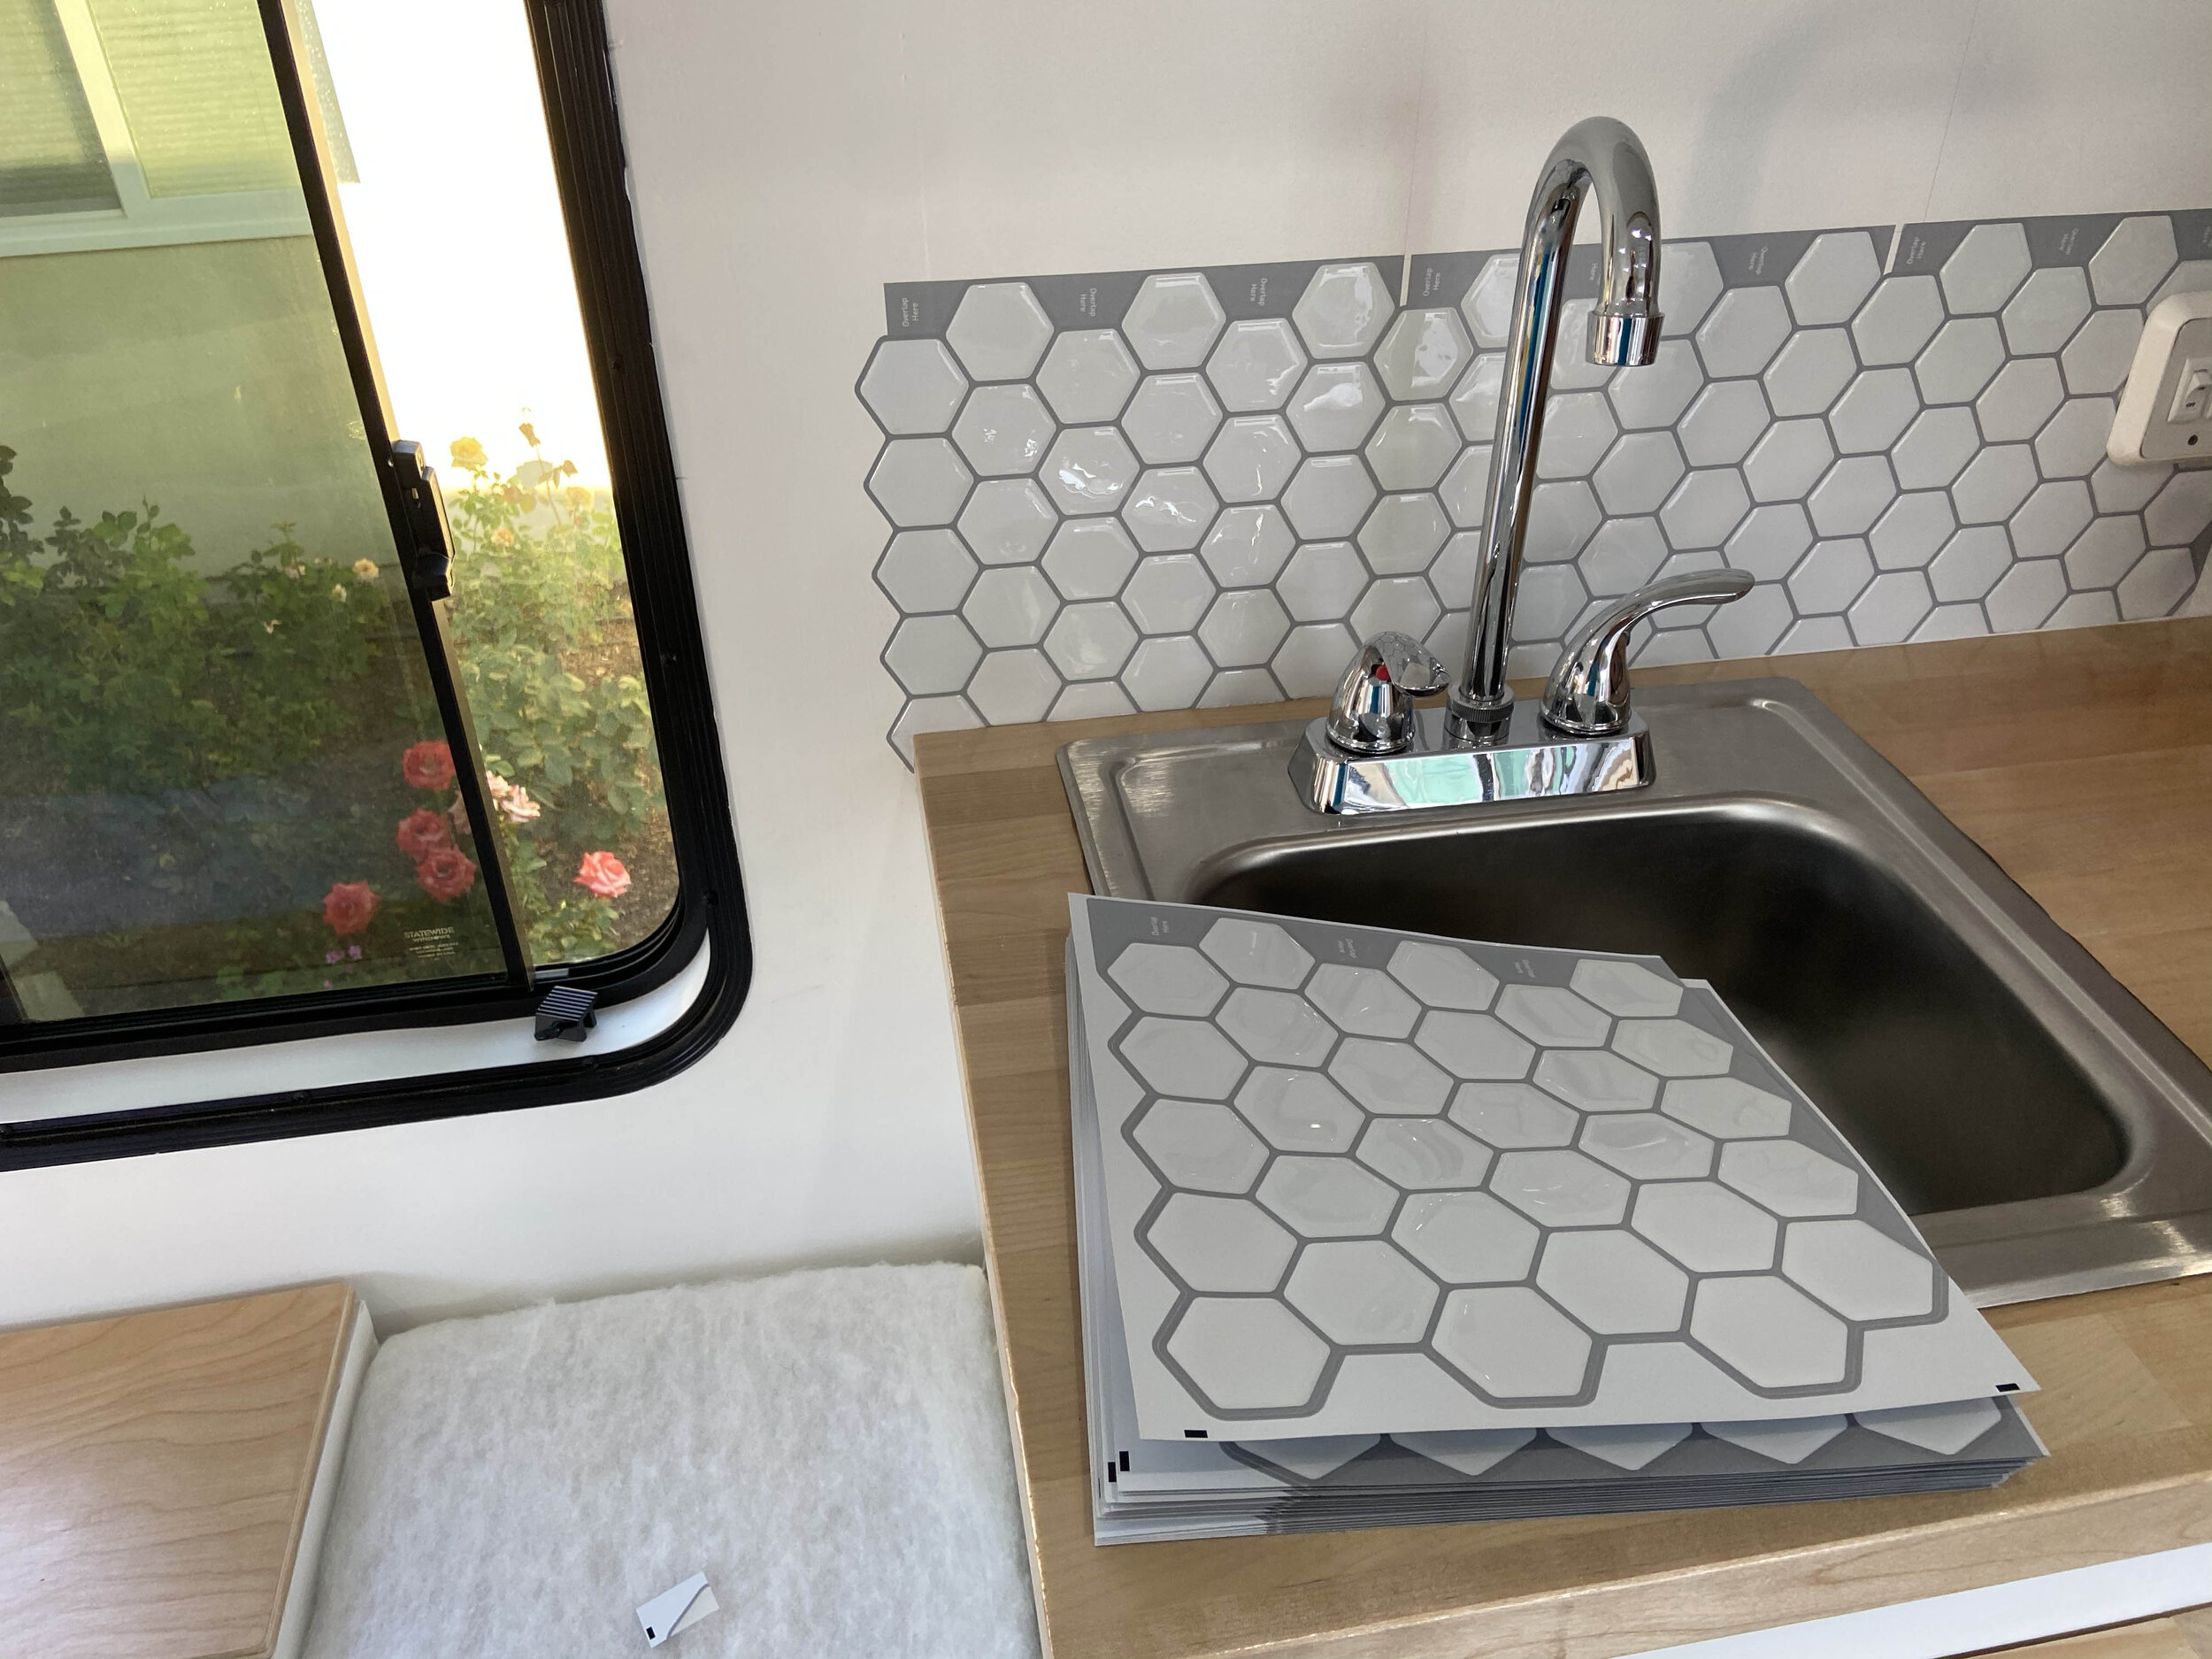
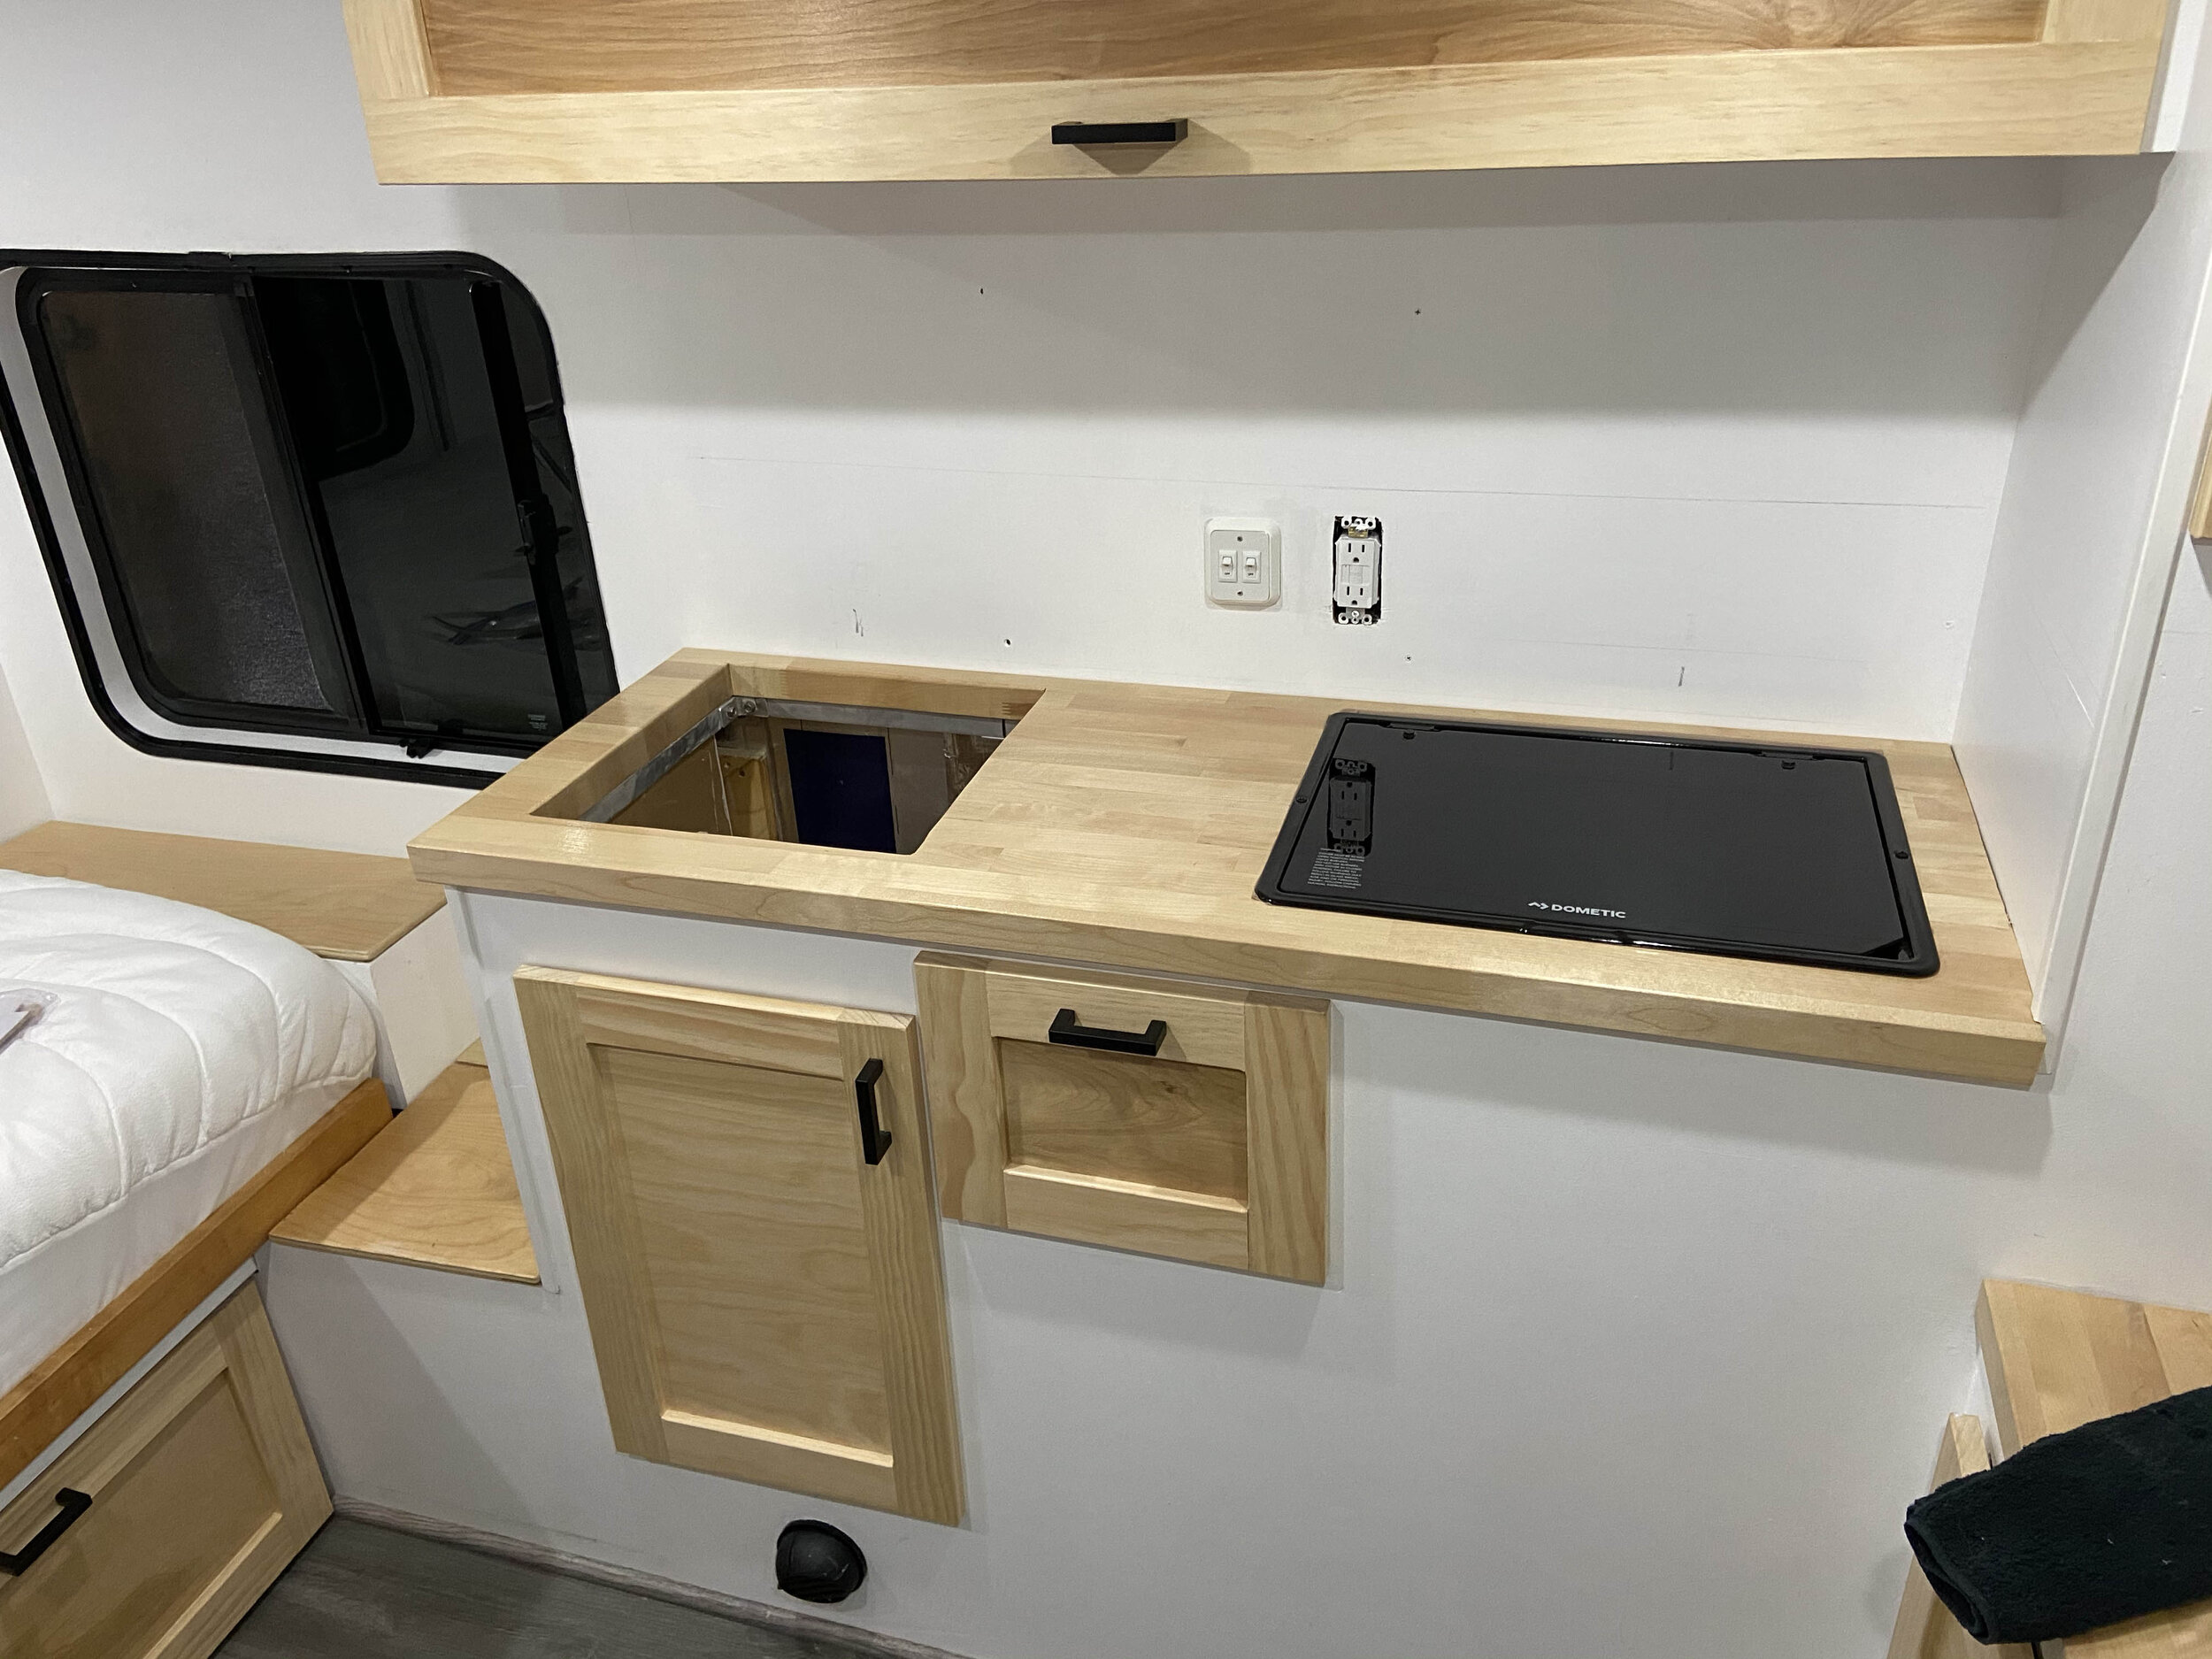
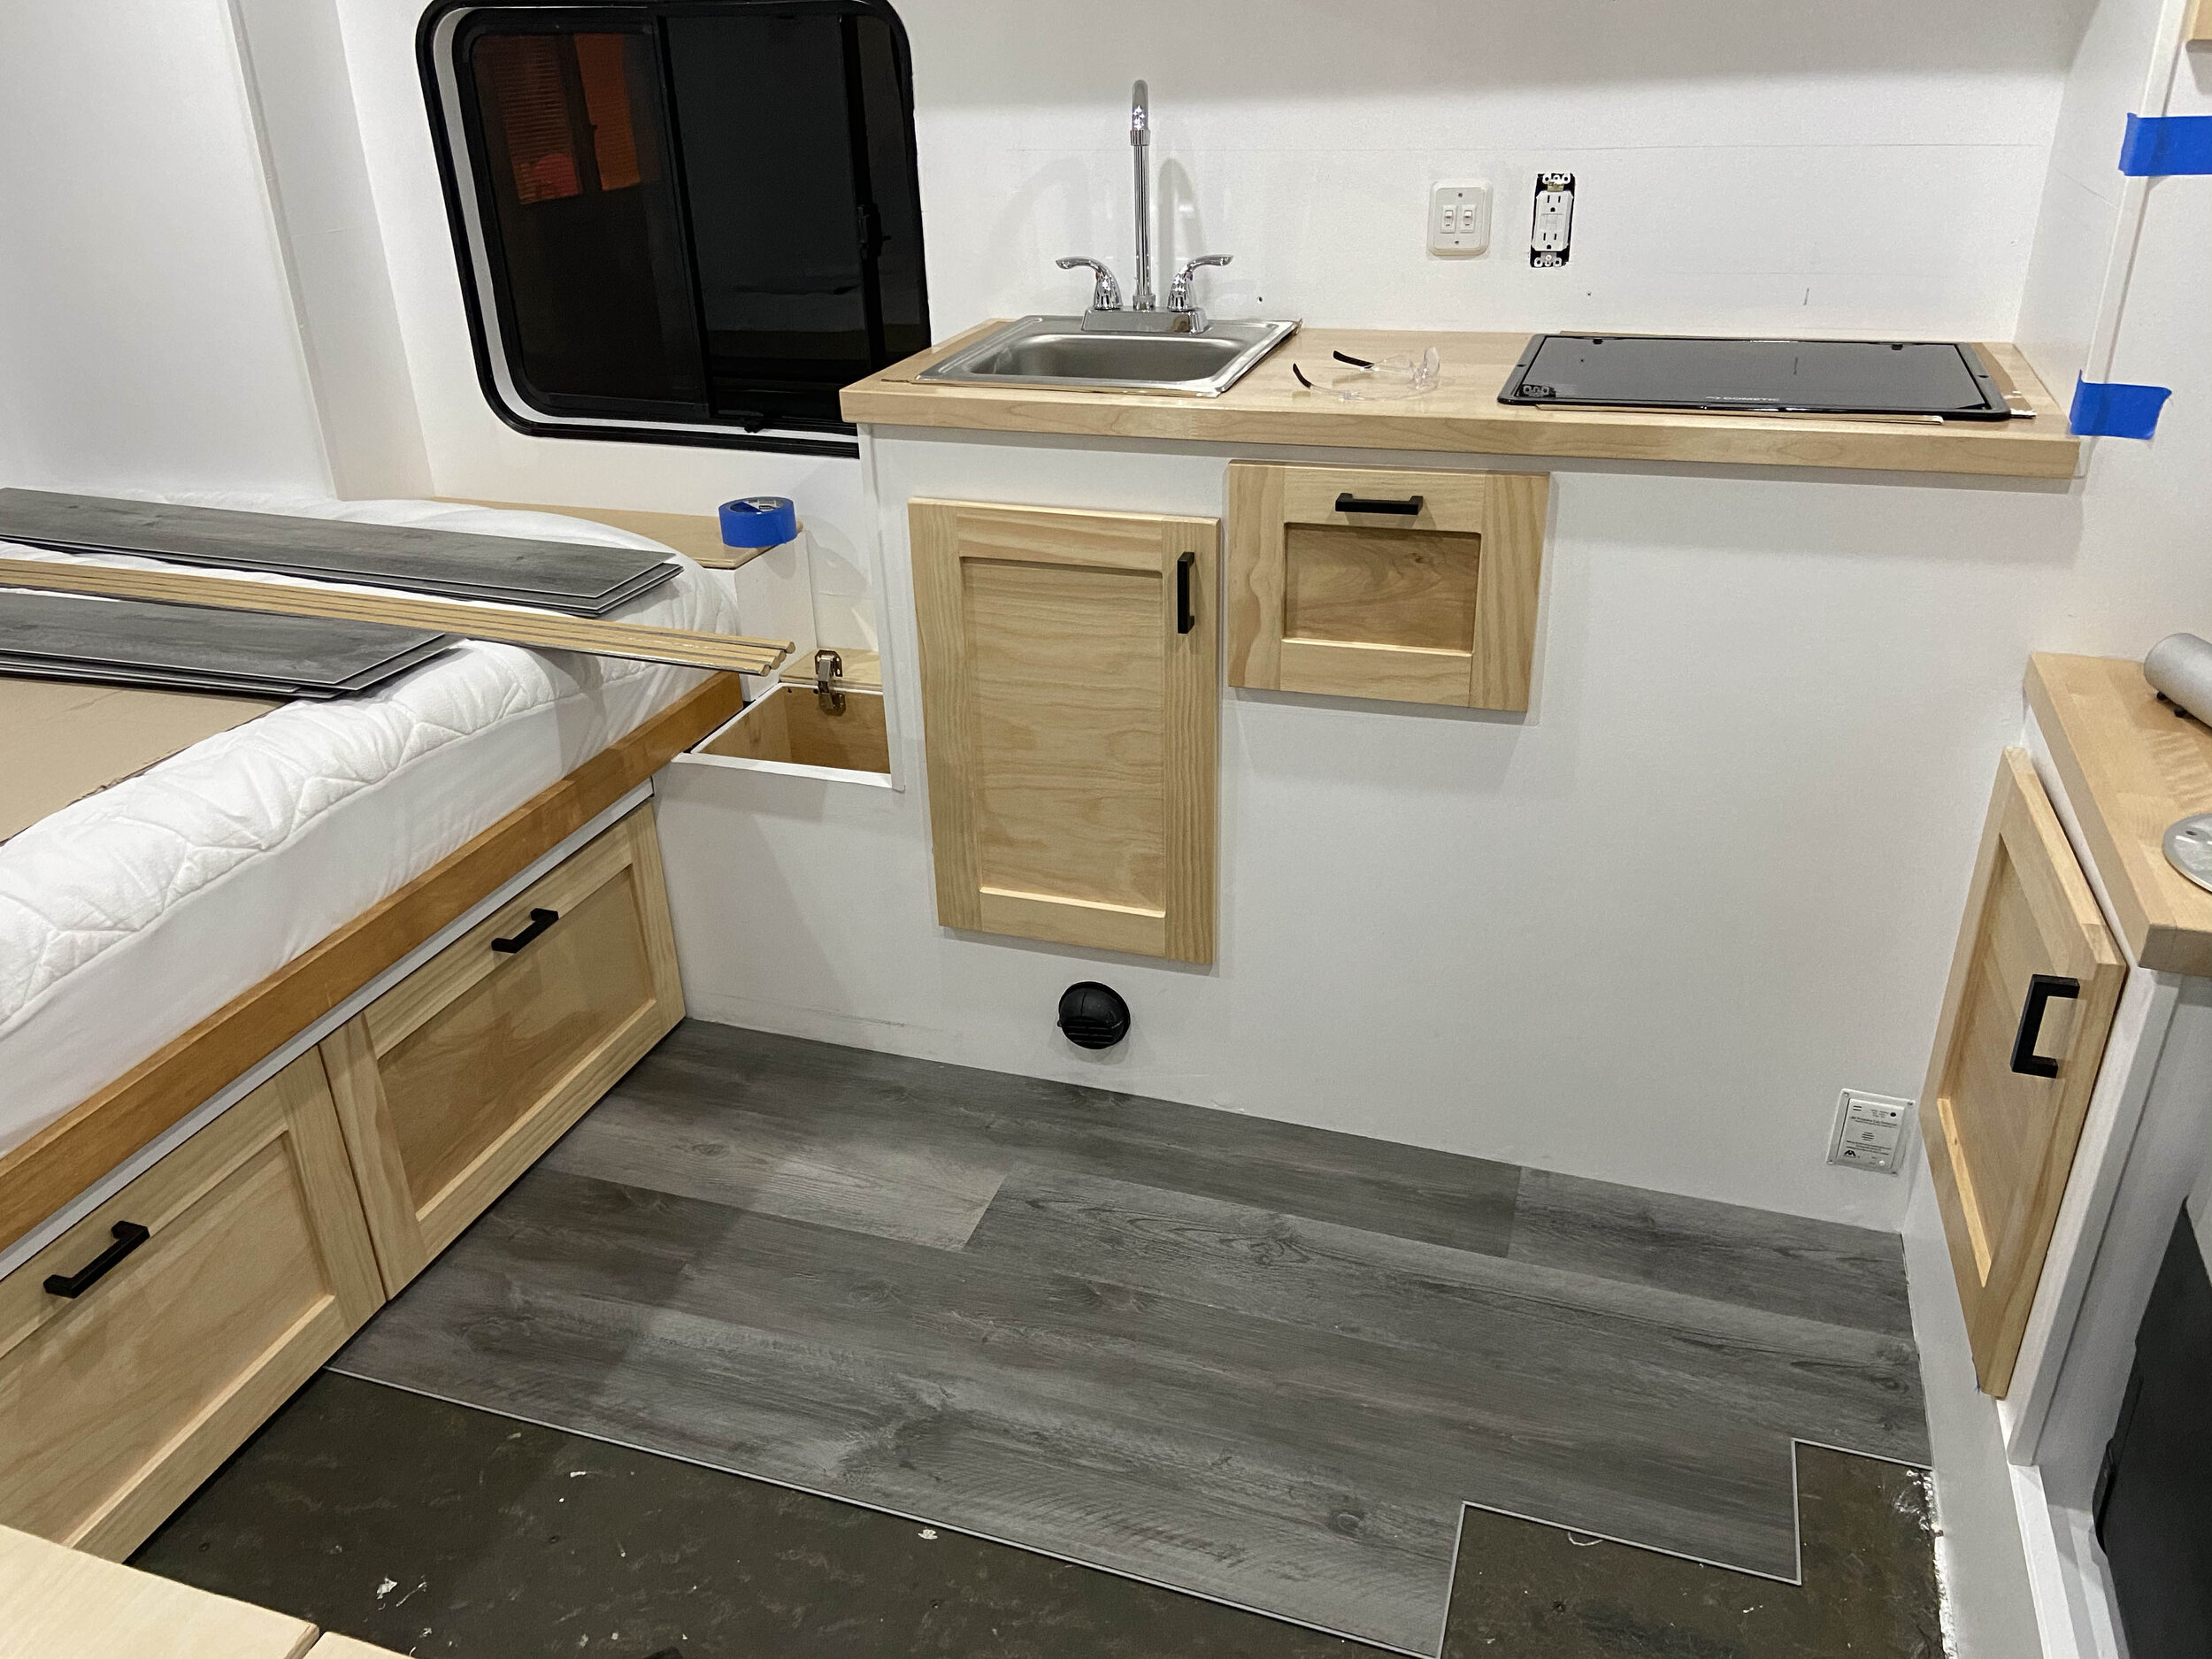
10-14-2020 - Installing the backsplash, cooktop, sink, floor and the rest of the finishing touches on the interior. The backsplash was Lynns choice and it turned out to be a great look! She did a wonderful job alighning it and making it look good. The stove is made by Dometic and it’s the two burner drop in. I opted to purchase the tempered glass cover too. The sink is a Home Depot purchase. It is a 15” drop in bar top sink. Both were super easy to install. The kitchen countertop is from Home Depot as well. I purchased a $170 birch butcher block and made templates for the cutouts. This received 5 coats of polyurethane and was sanded between coats.
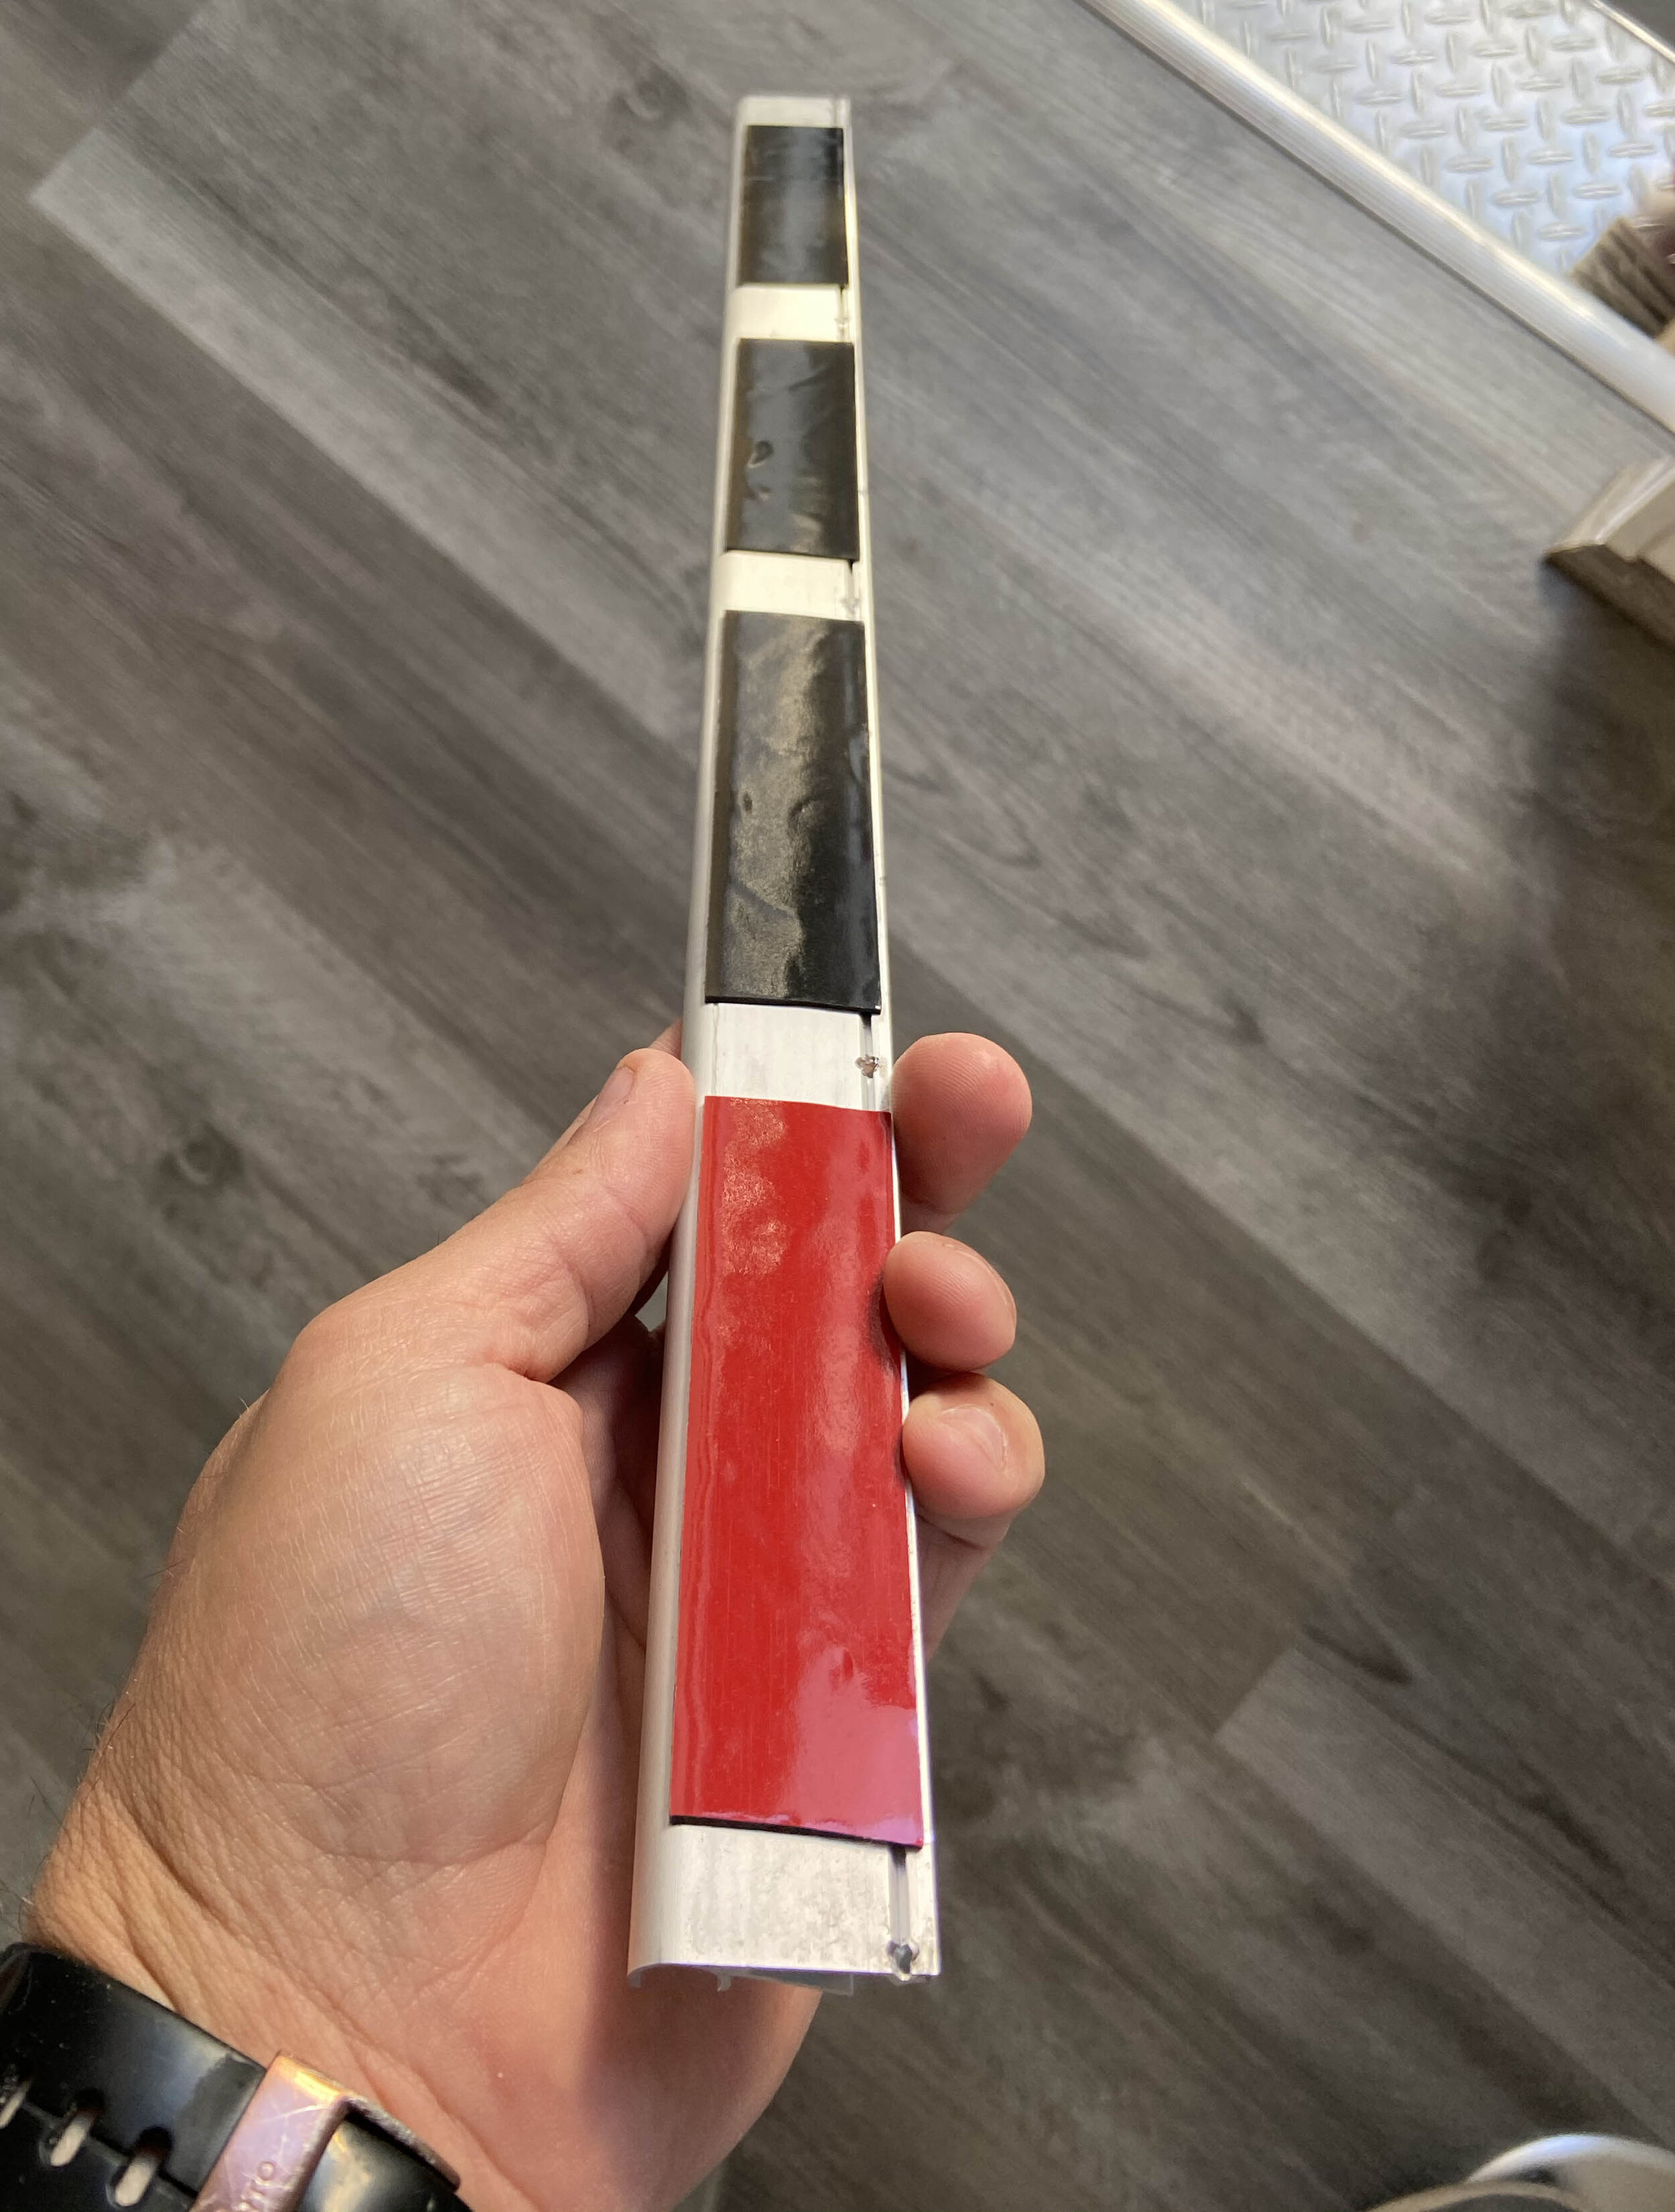
The floor was from Home Depot and is a 12mm GrayWood vinyl snaplock floor. After watching a few hours of YouTube videos I gave it a go. Purchased 50 square feet and had it installed in an hour. Pretty easy going. I added 1/2” quarter round on the edges to fill any gaps. The vinyl flooring was on sale at Home Depot so the total cost for all the flooring was $108. There was only 30 square feet to cover.
This marked a great point in the construction phase. WOOHOO. I spent the night in the camper and slept like a baby. The next day I went to the DMV and passed inspection. It’s now registered as a Motor Home.


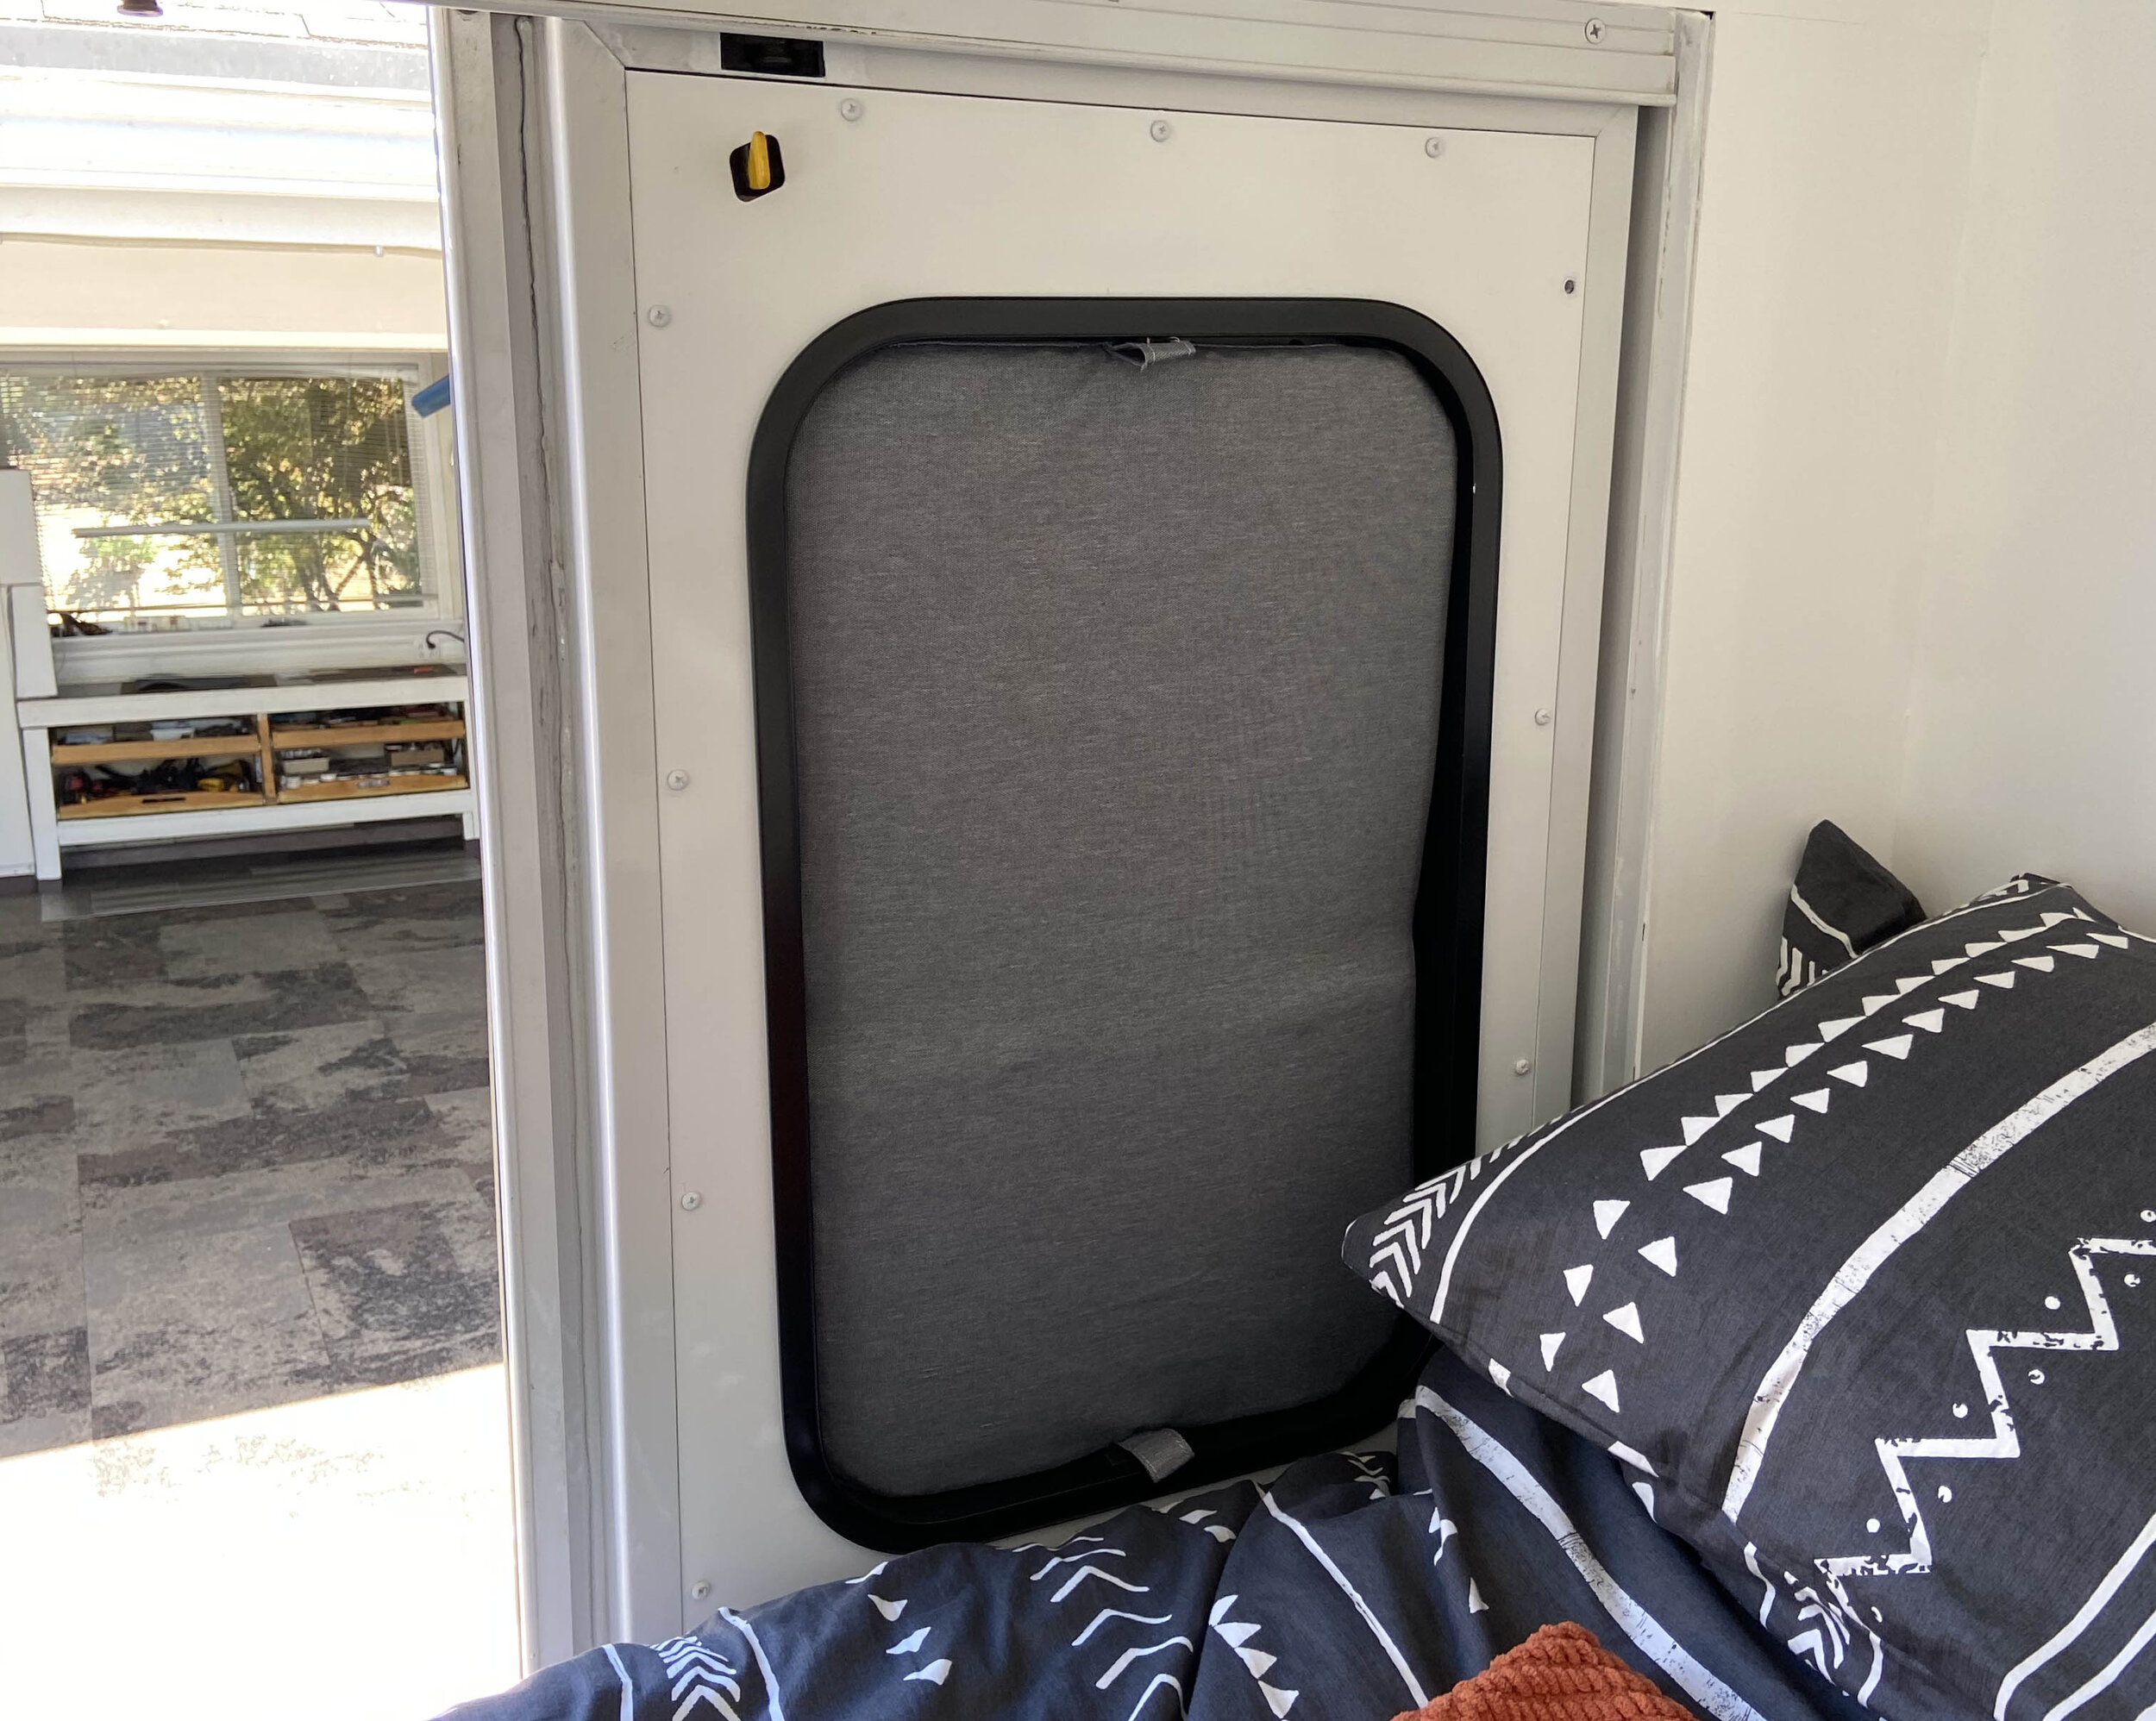
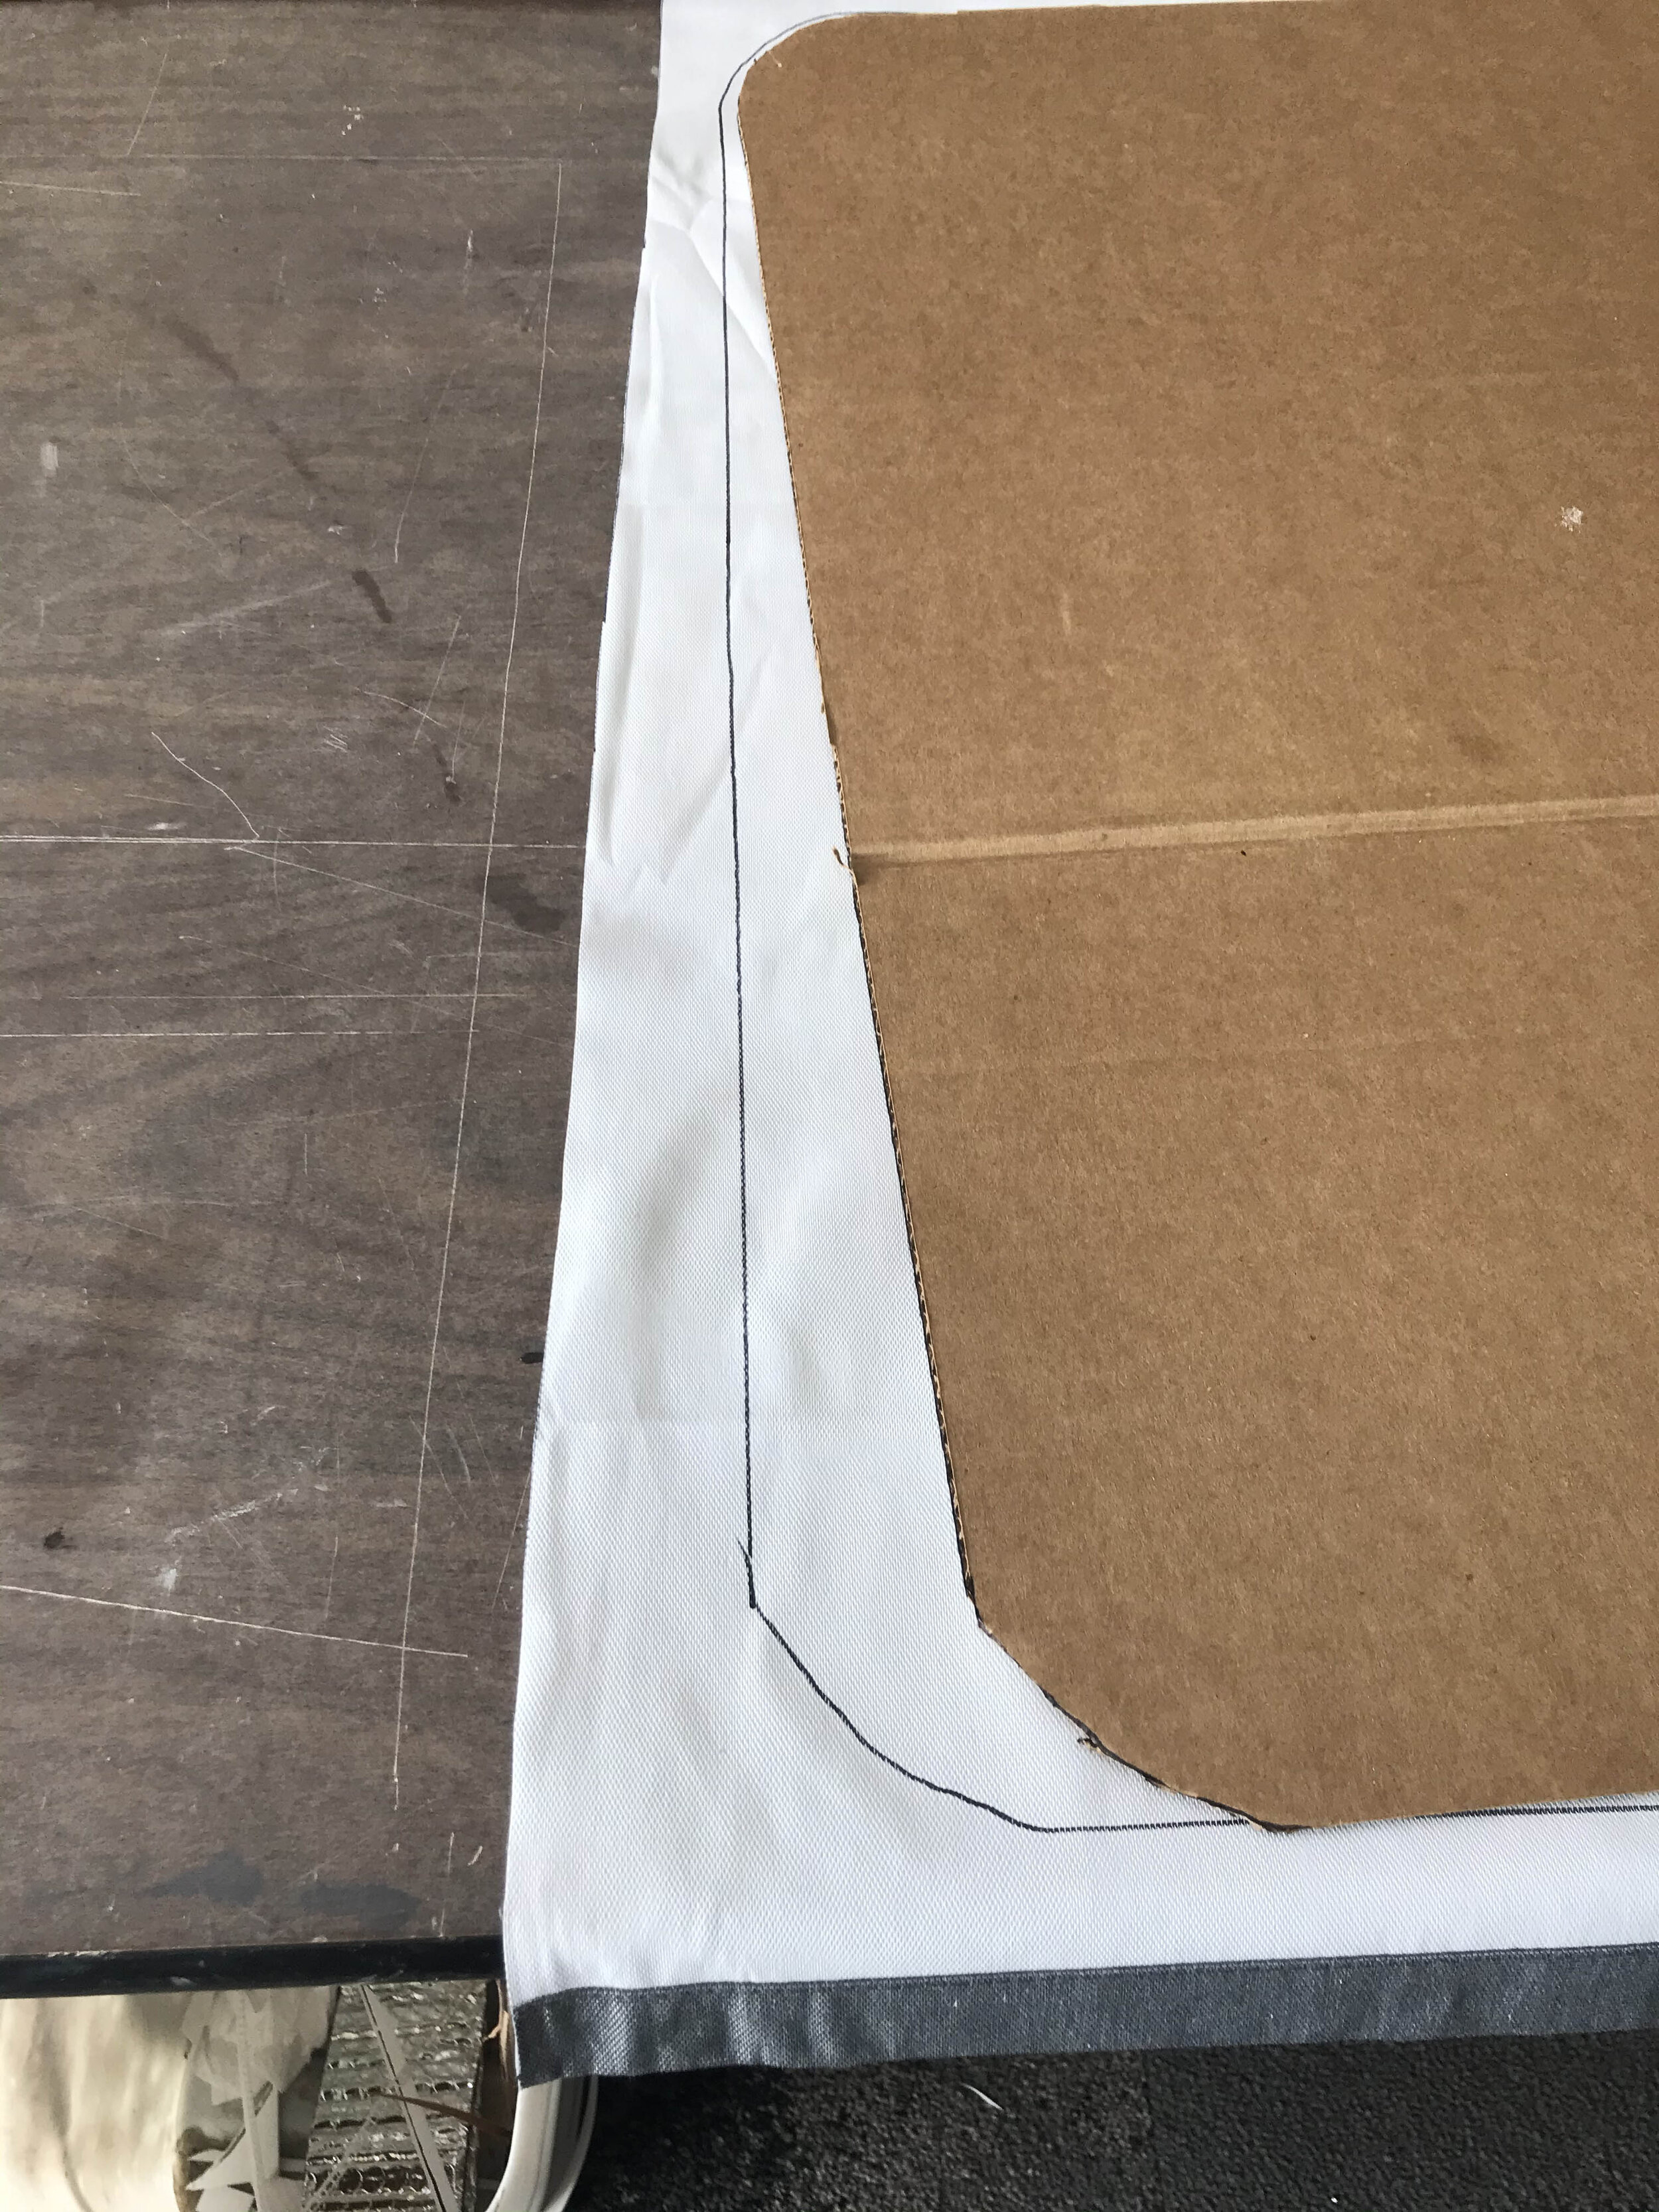
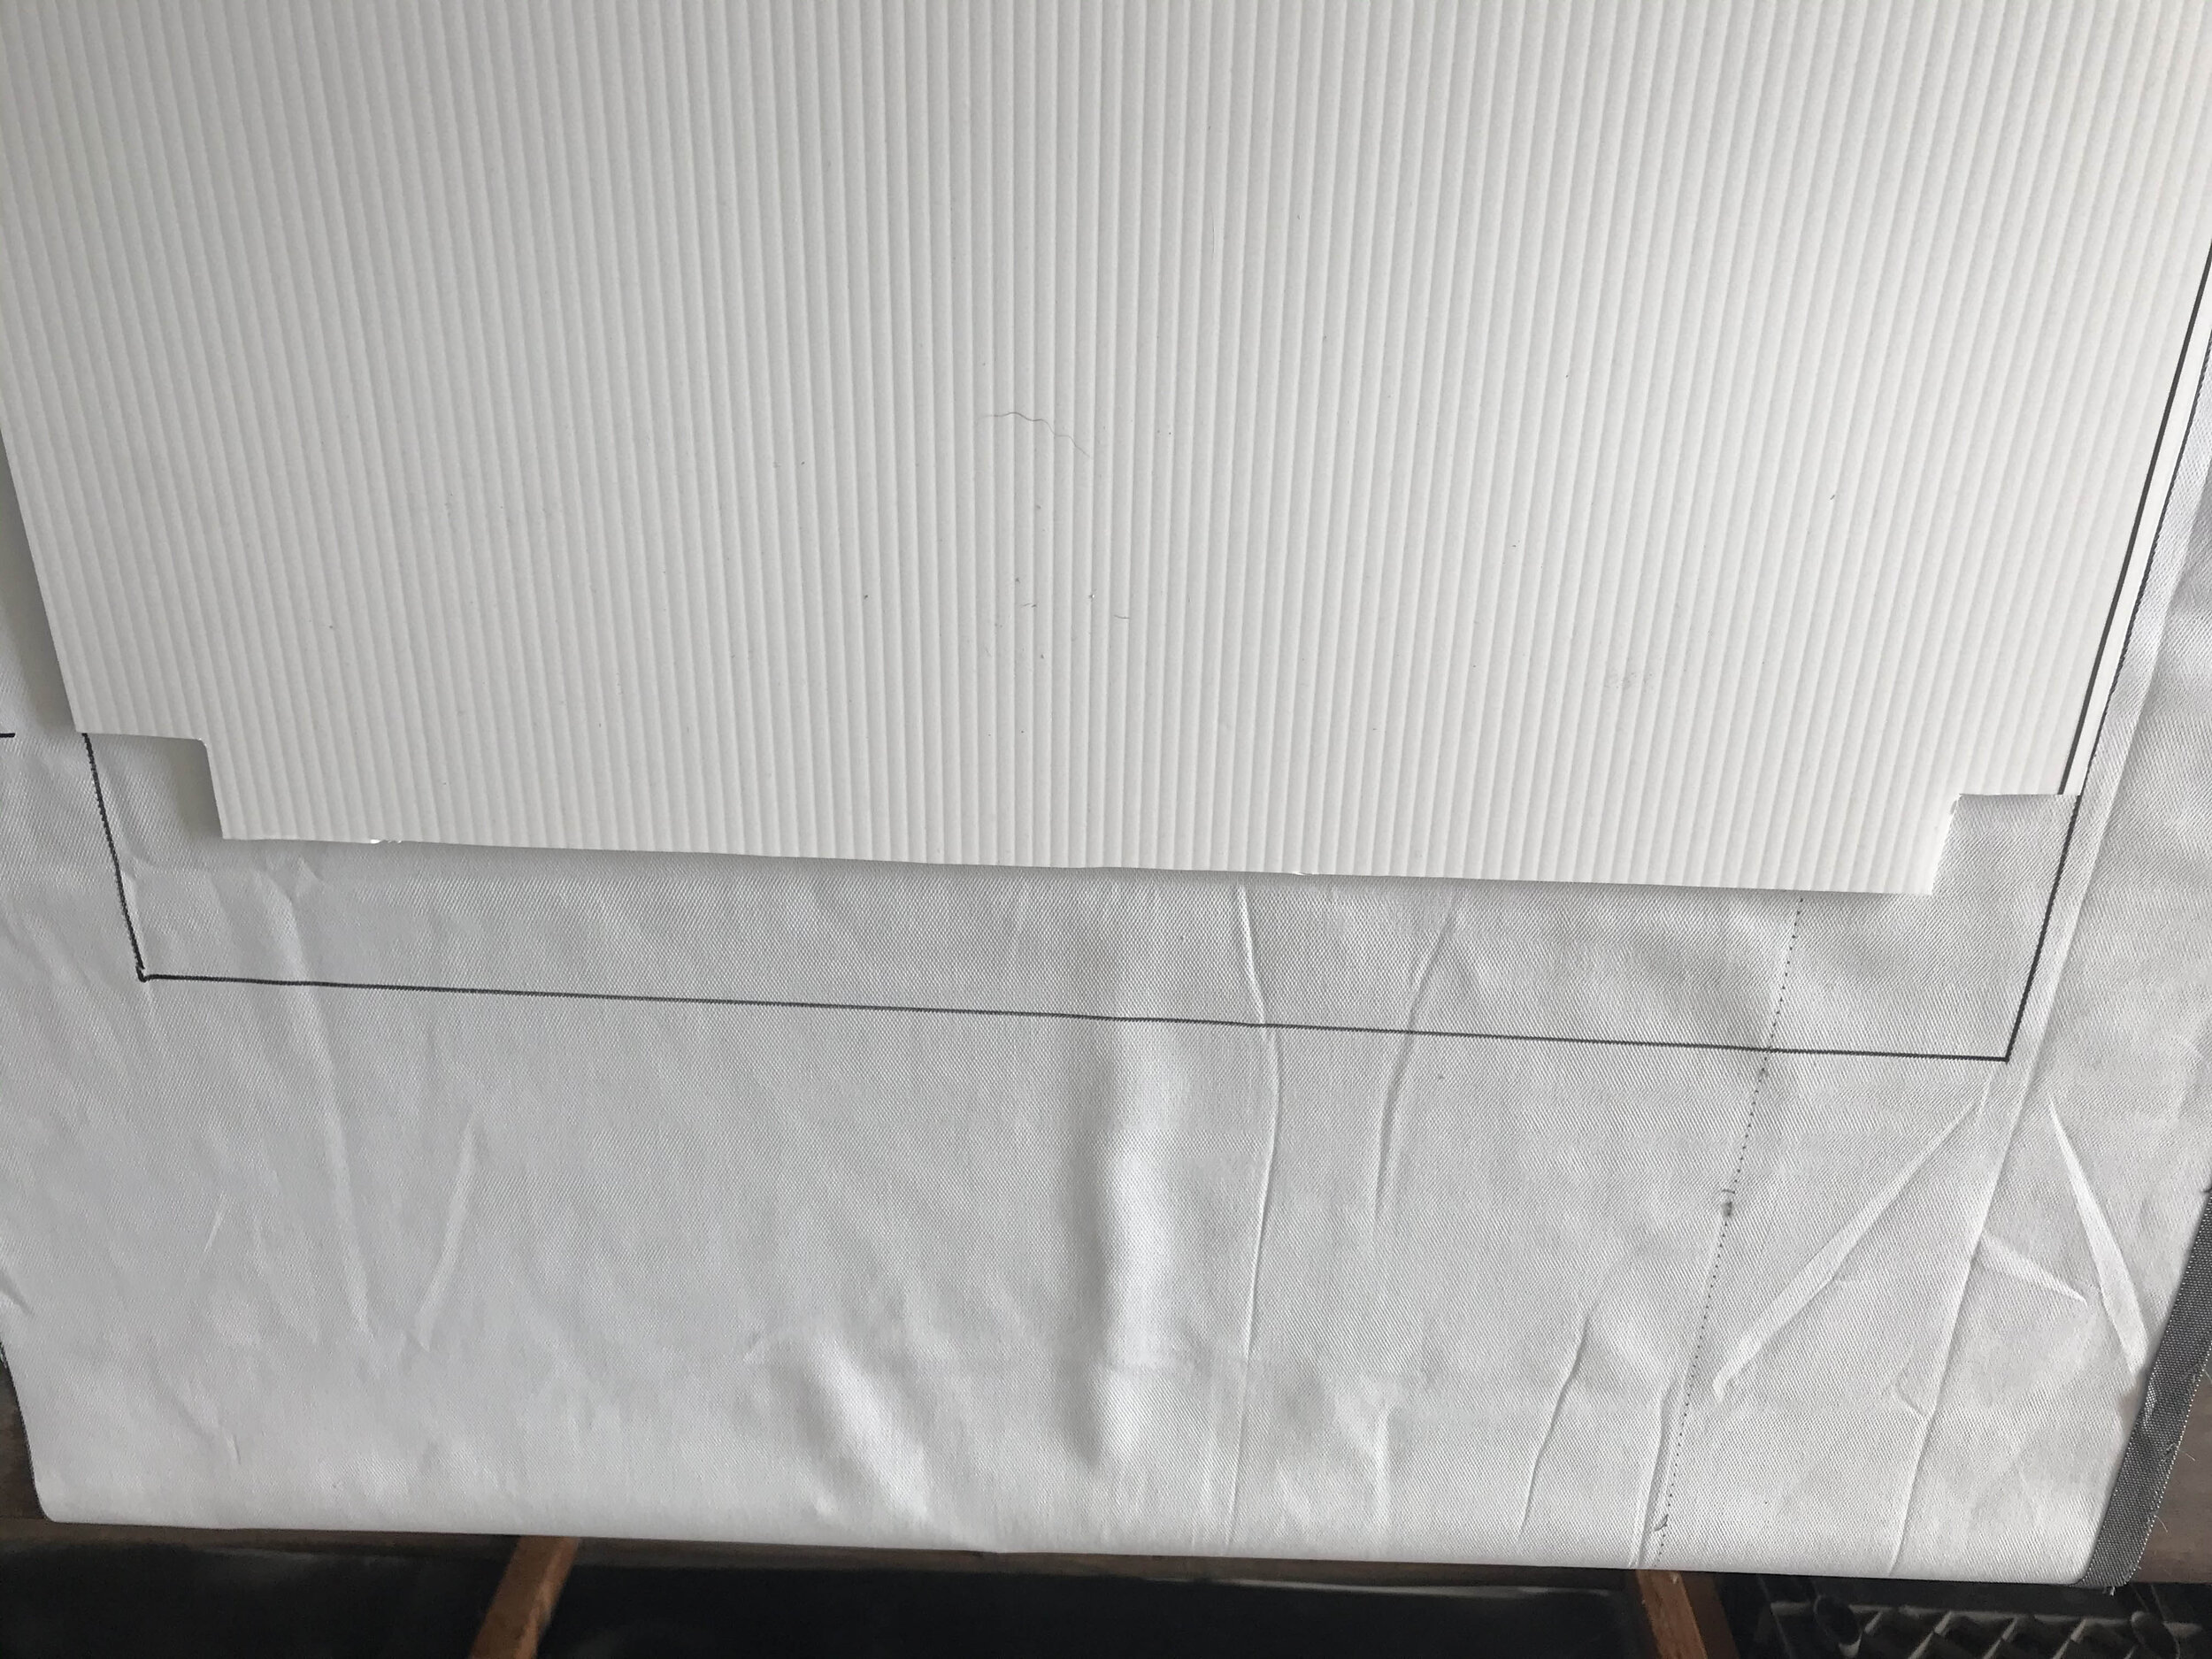
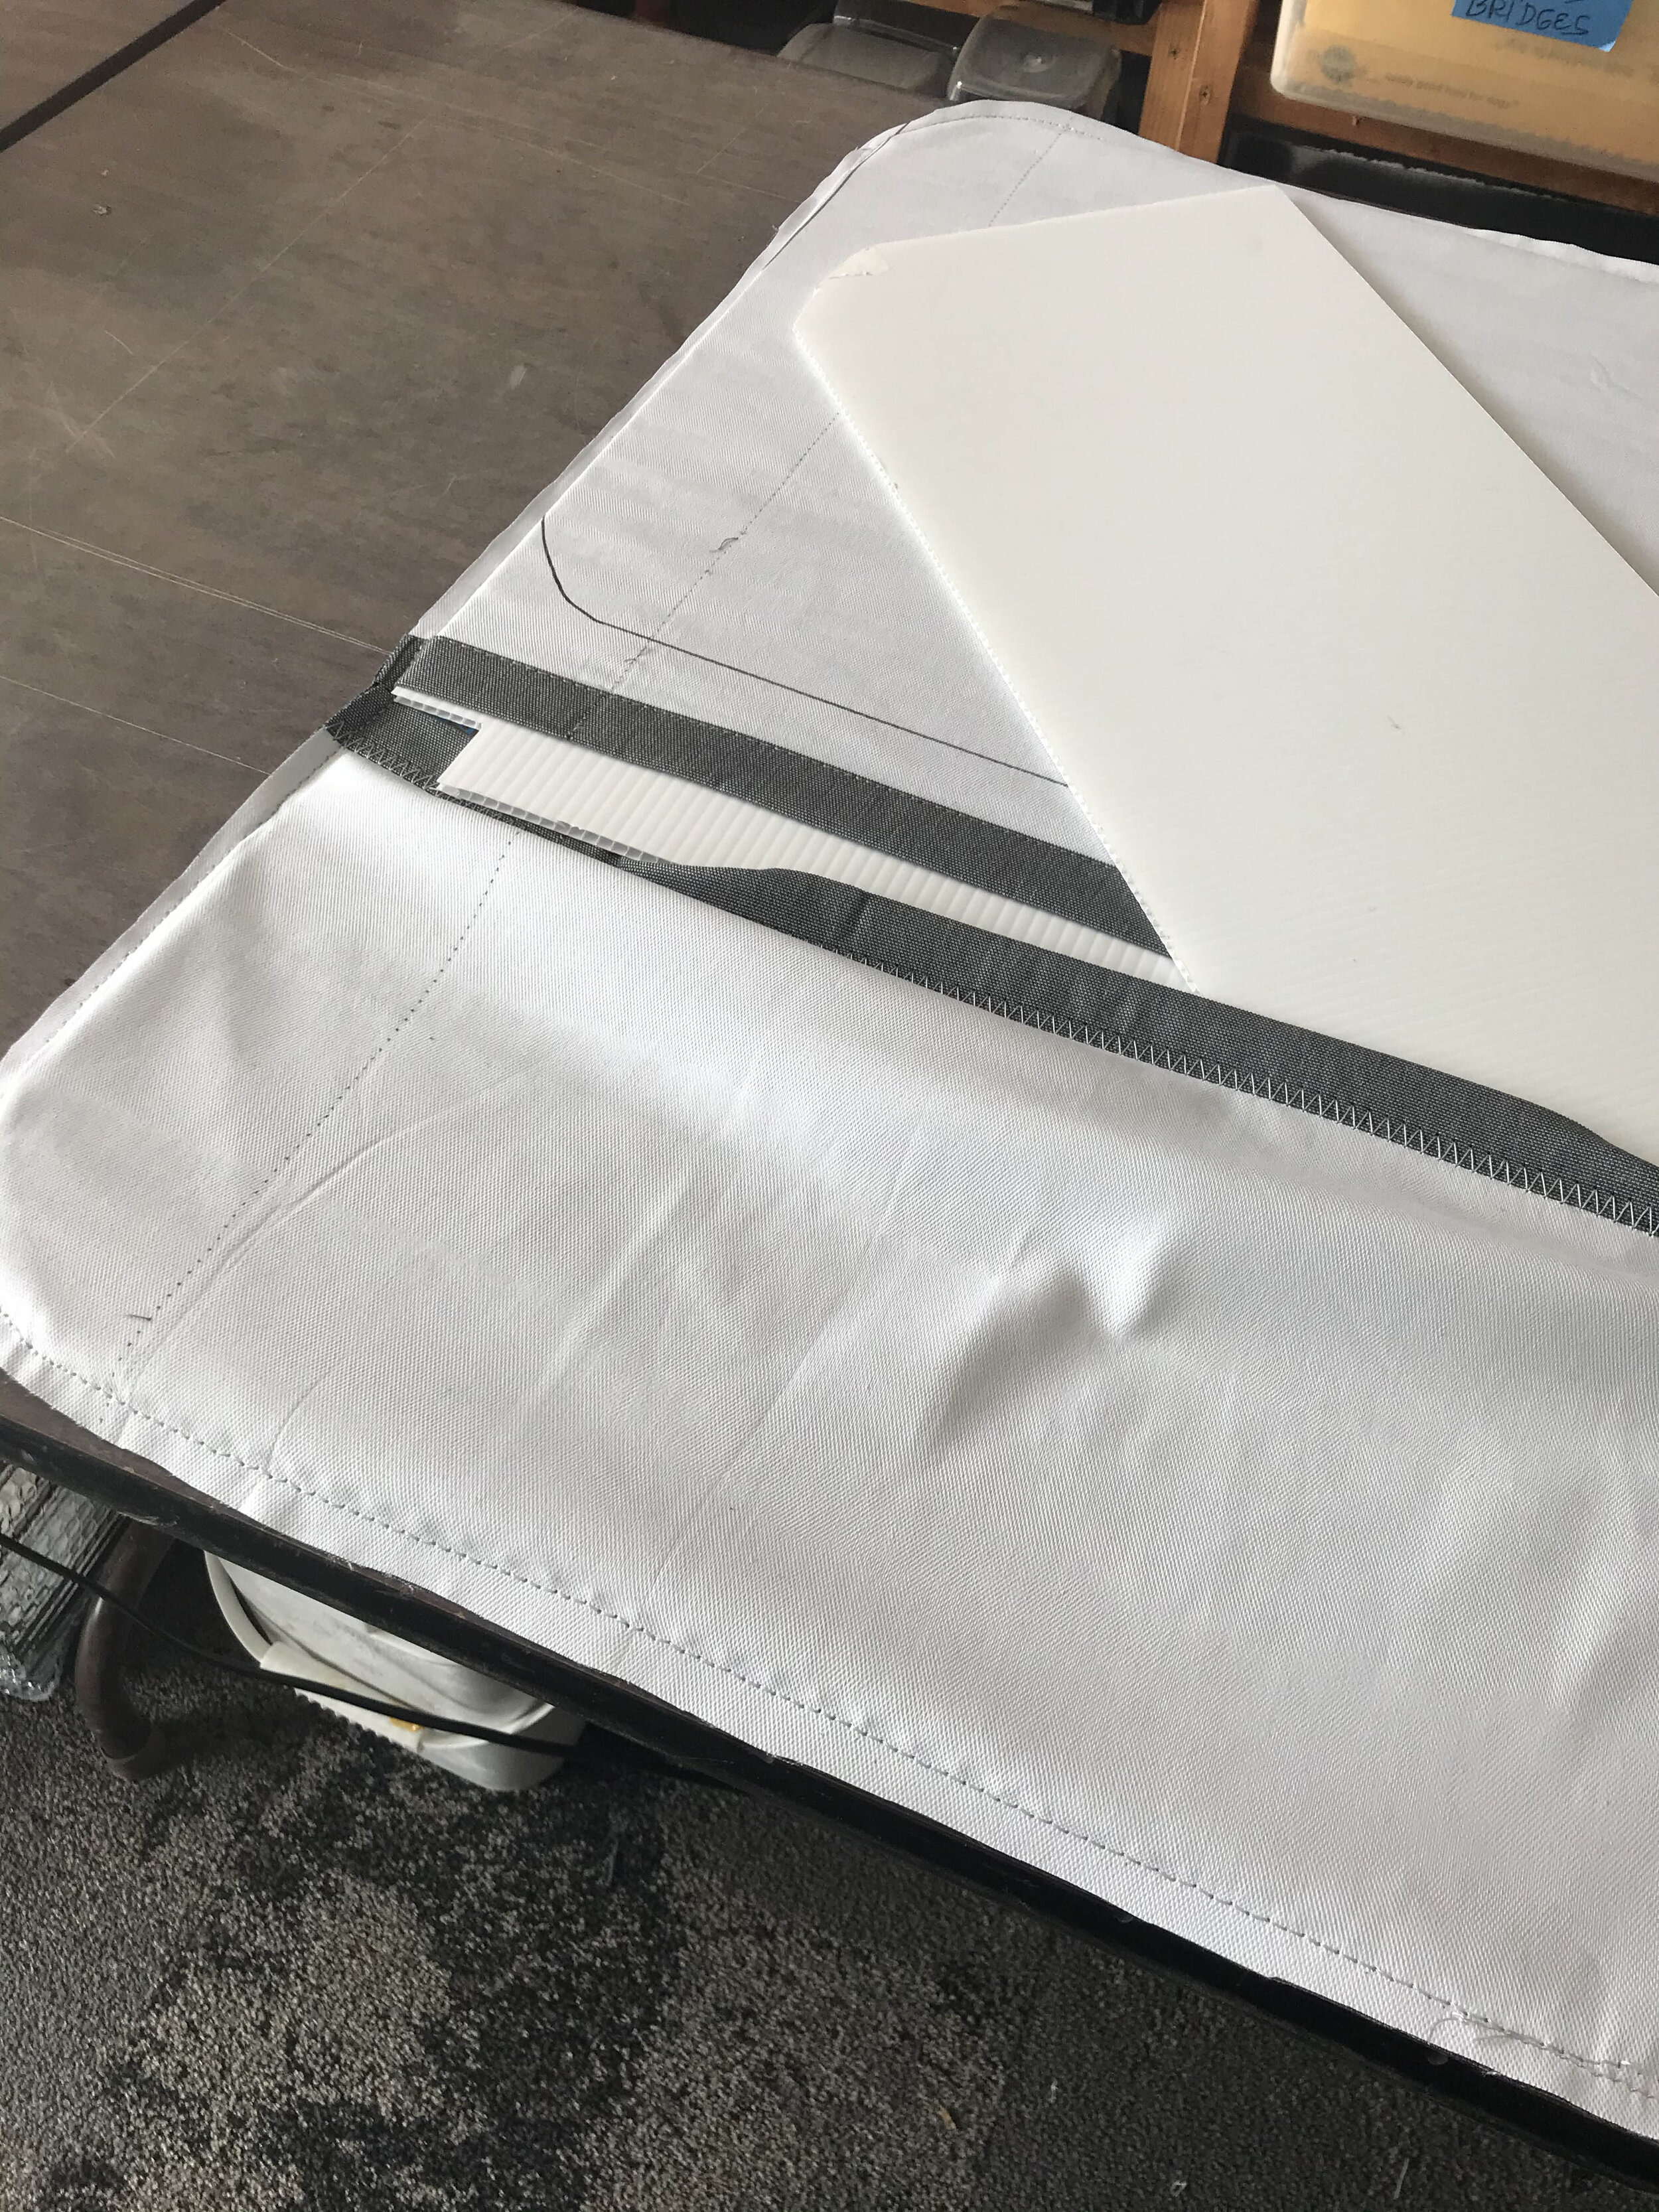
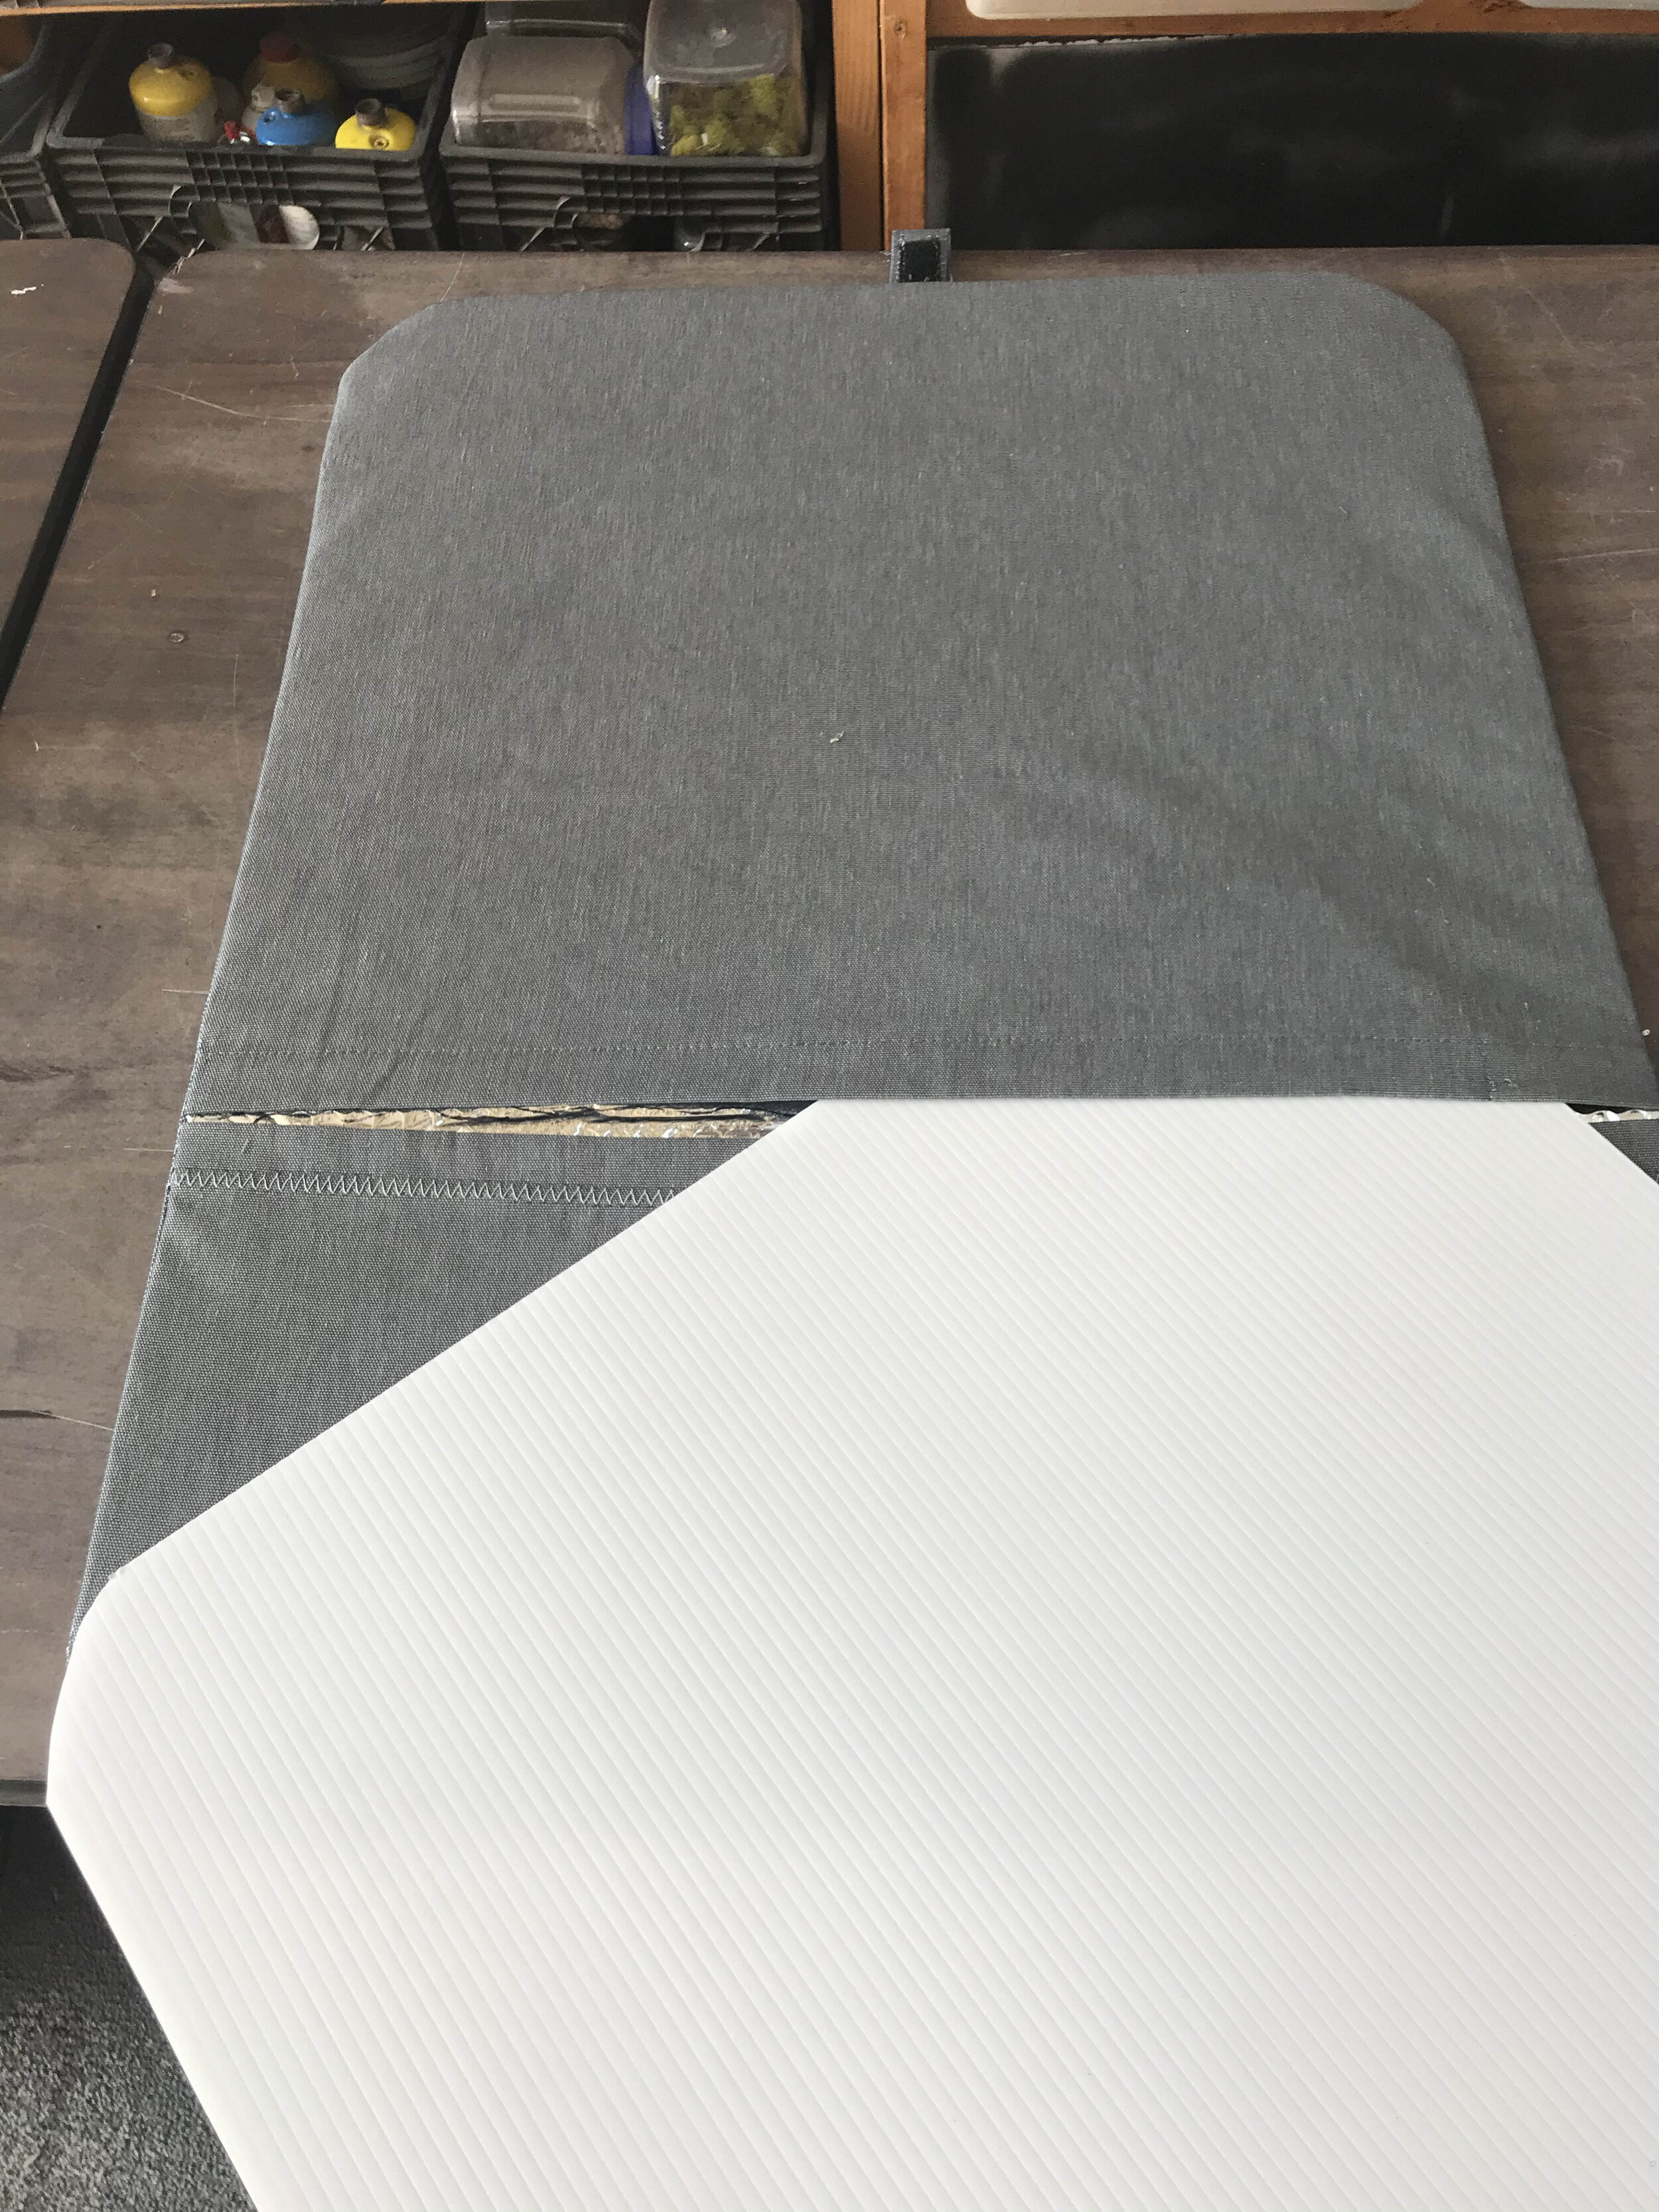
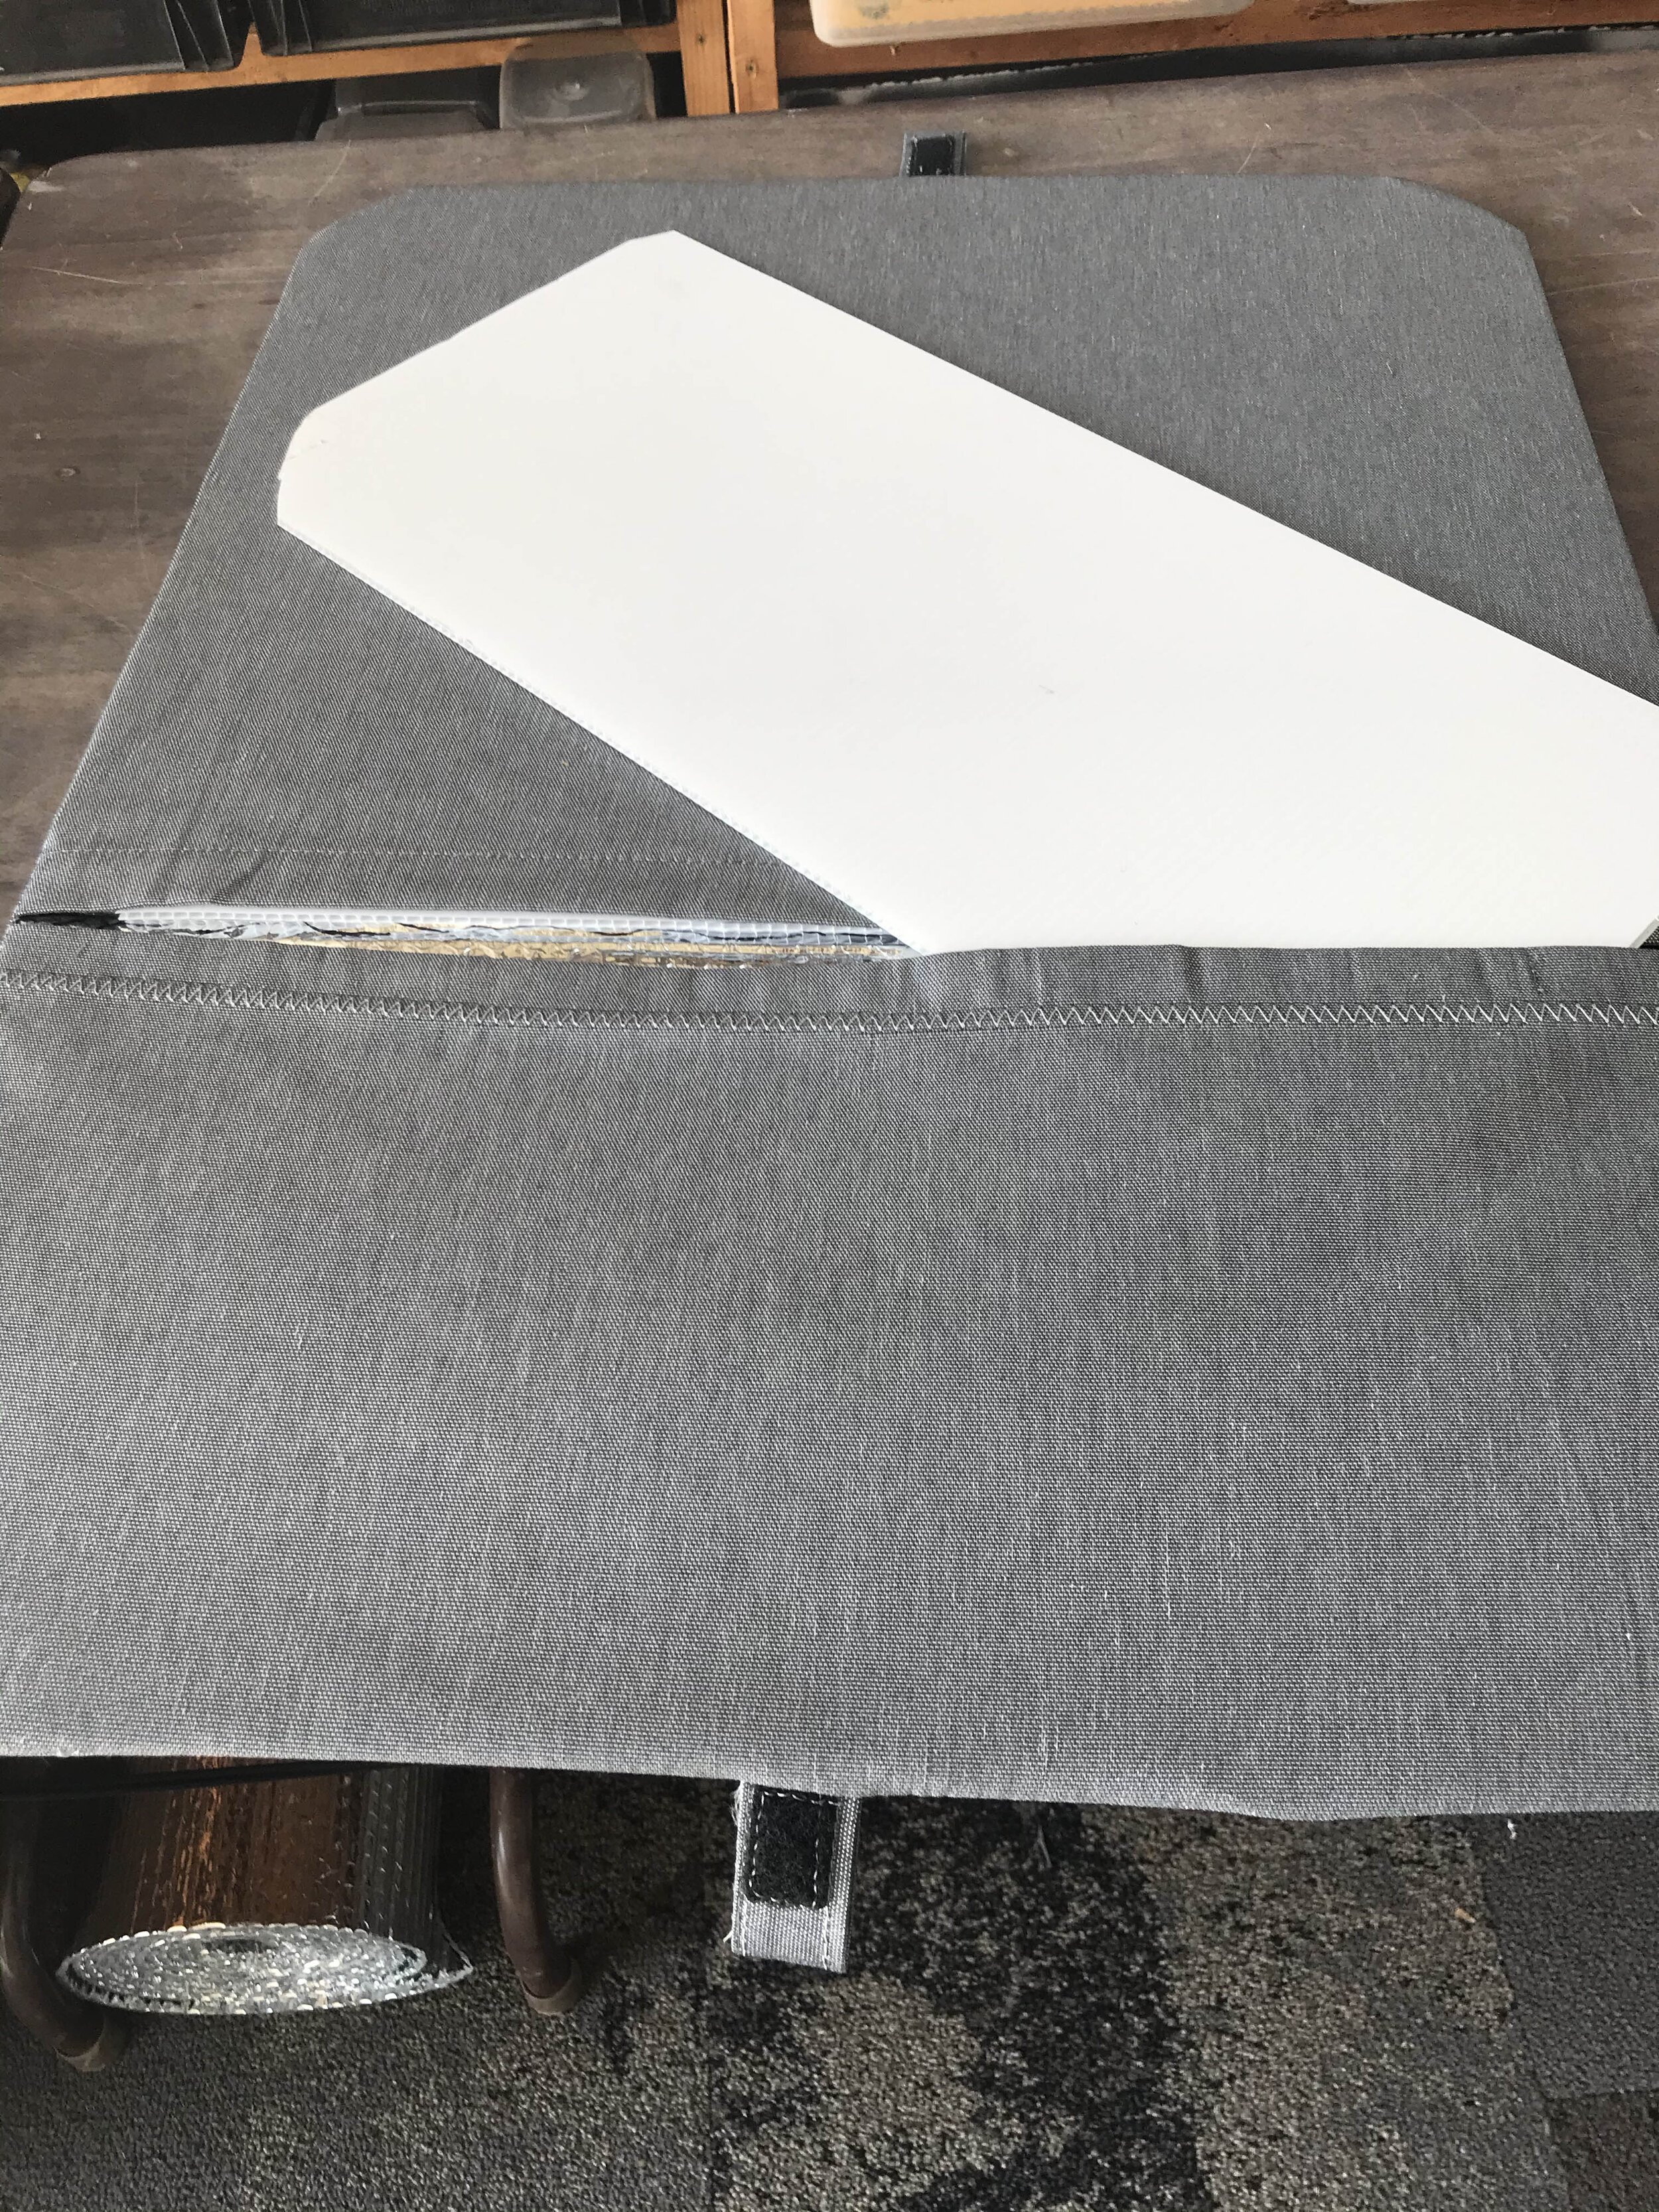
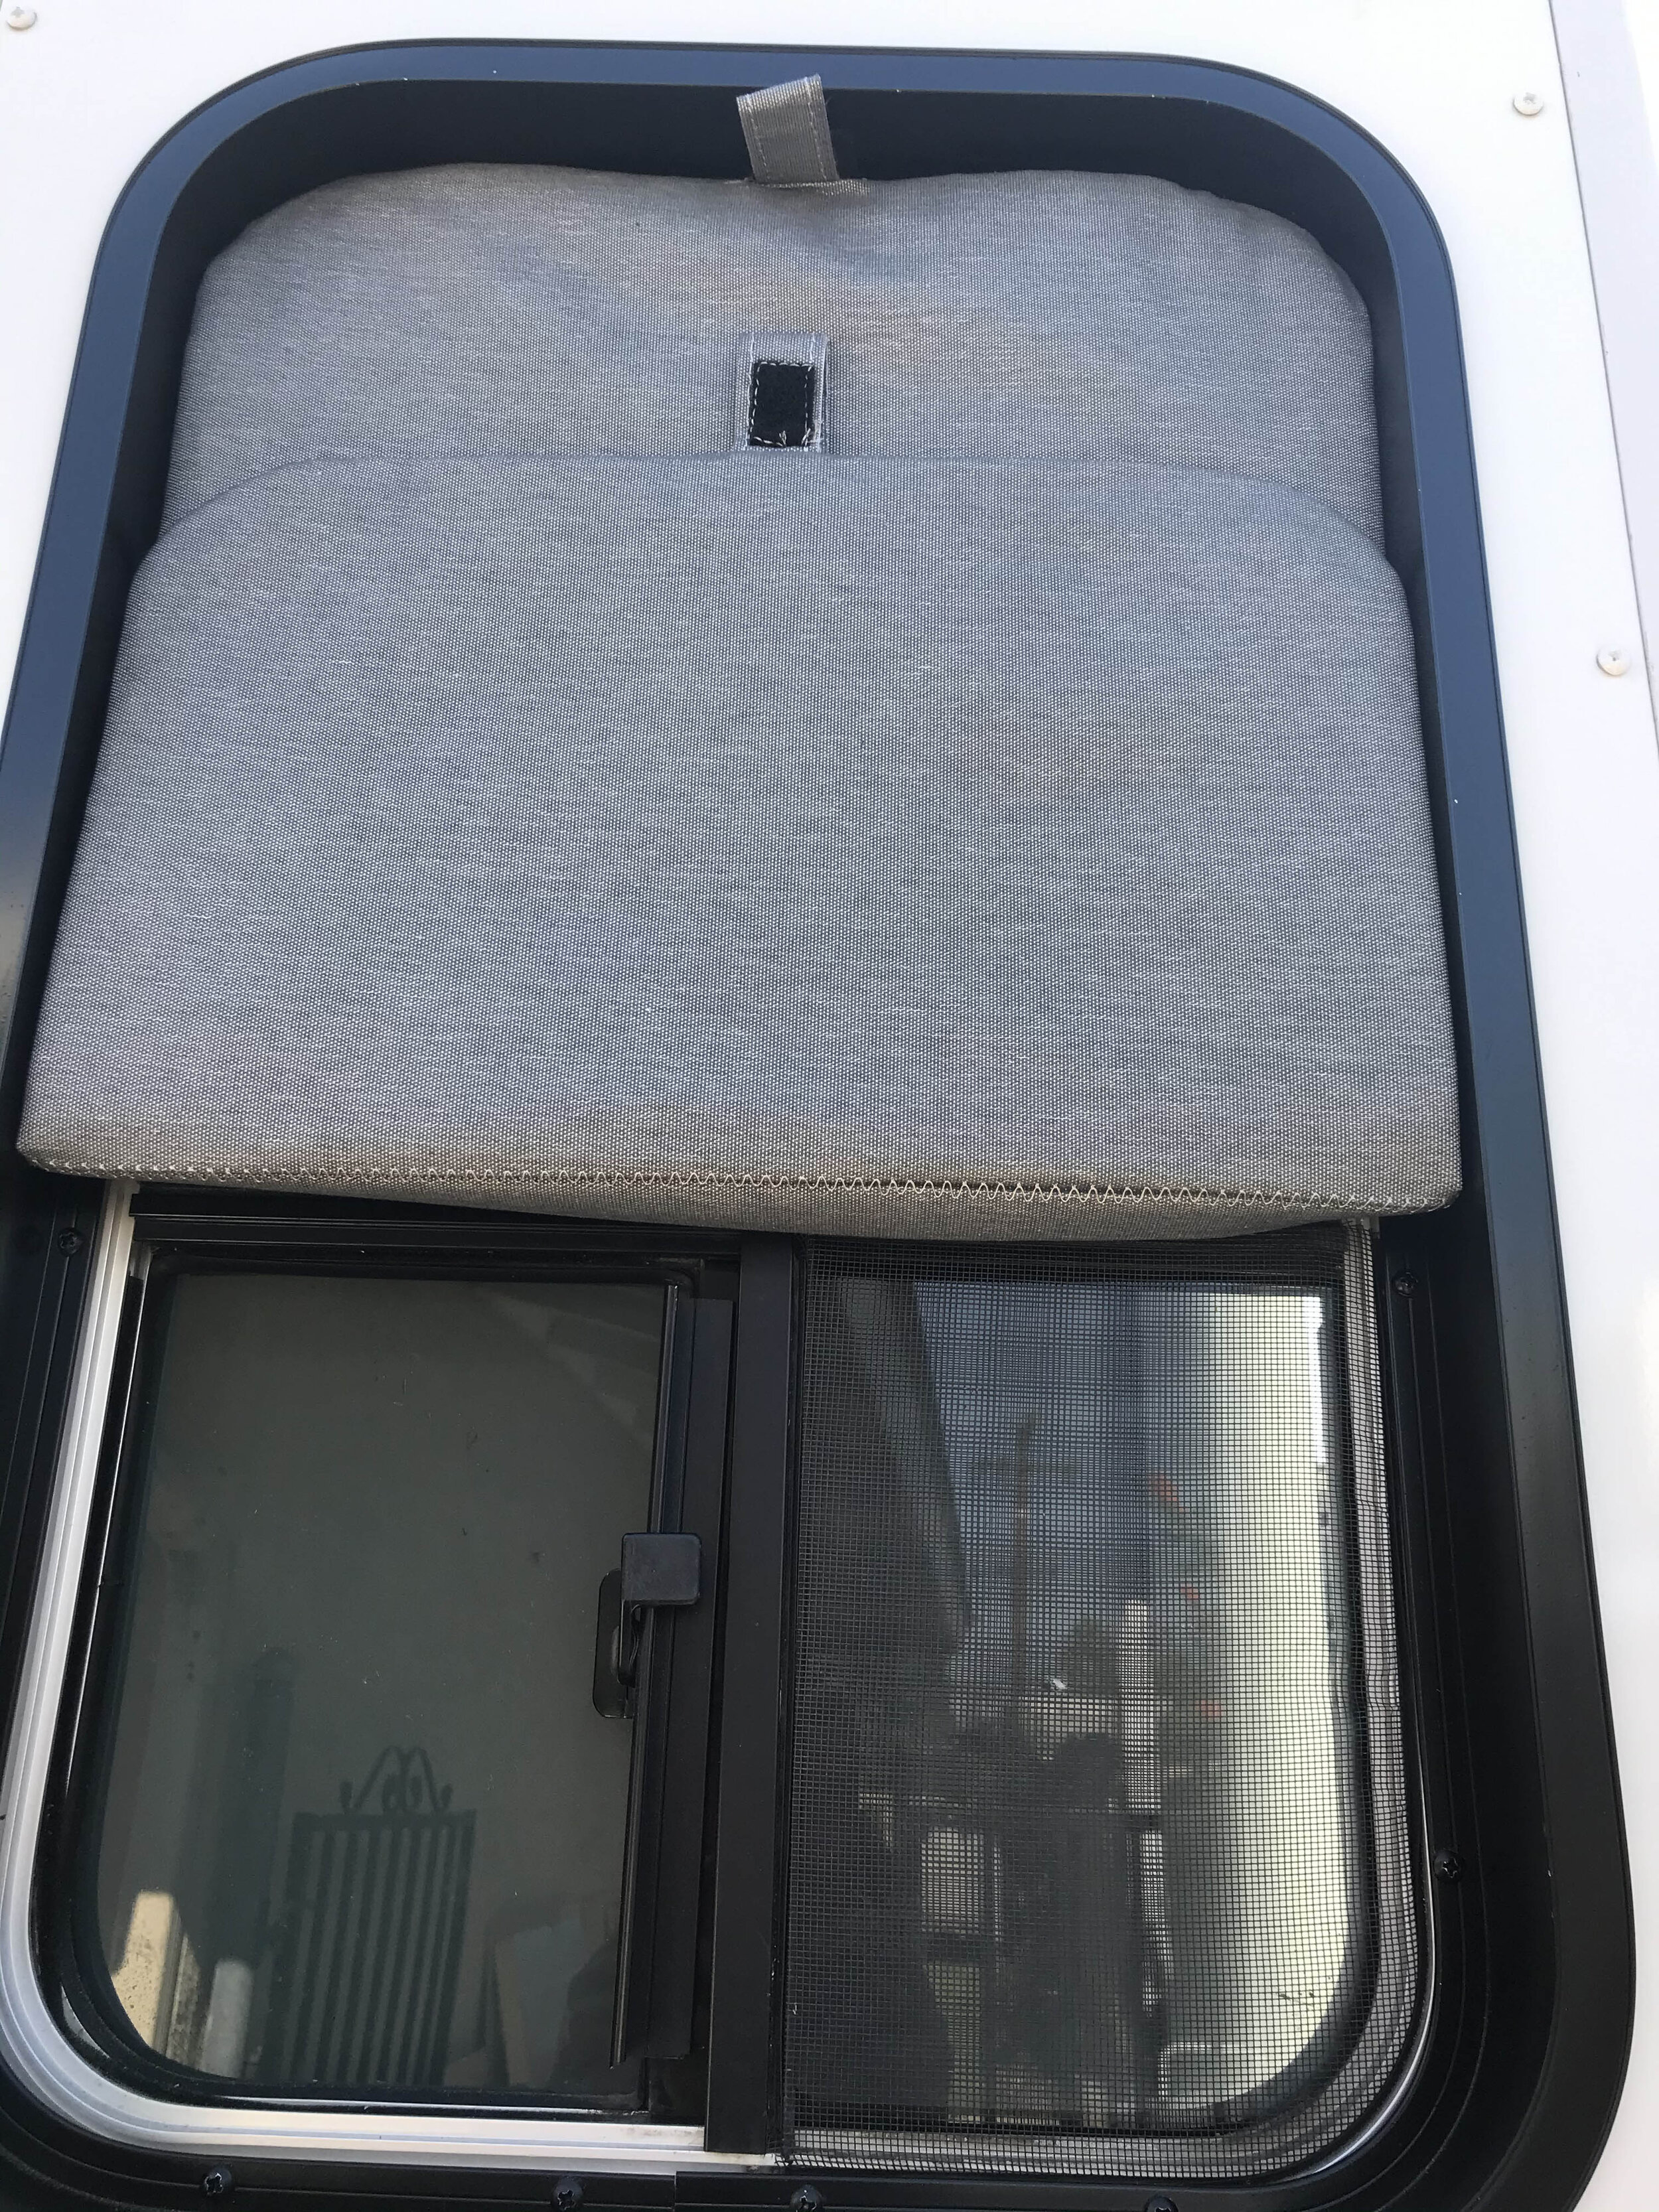
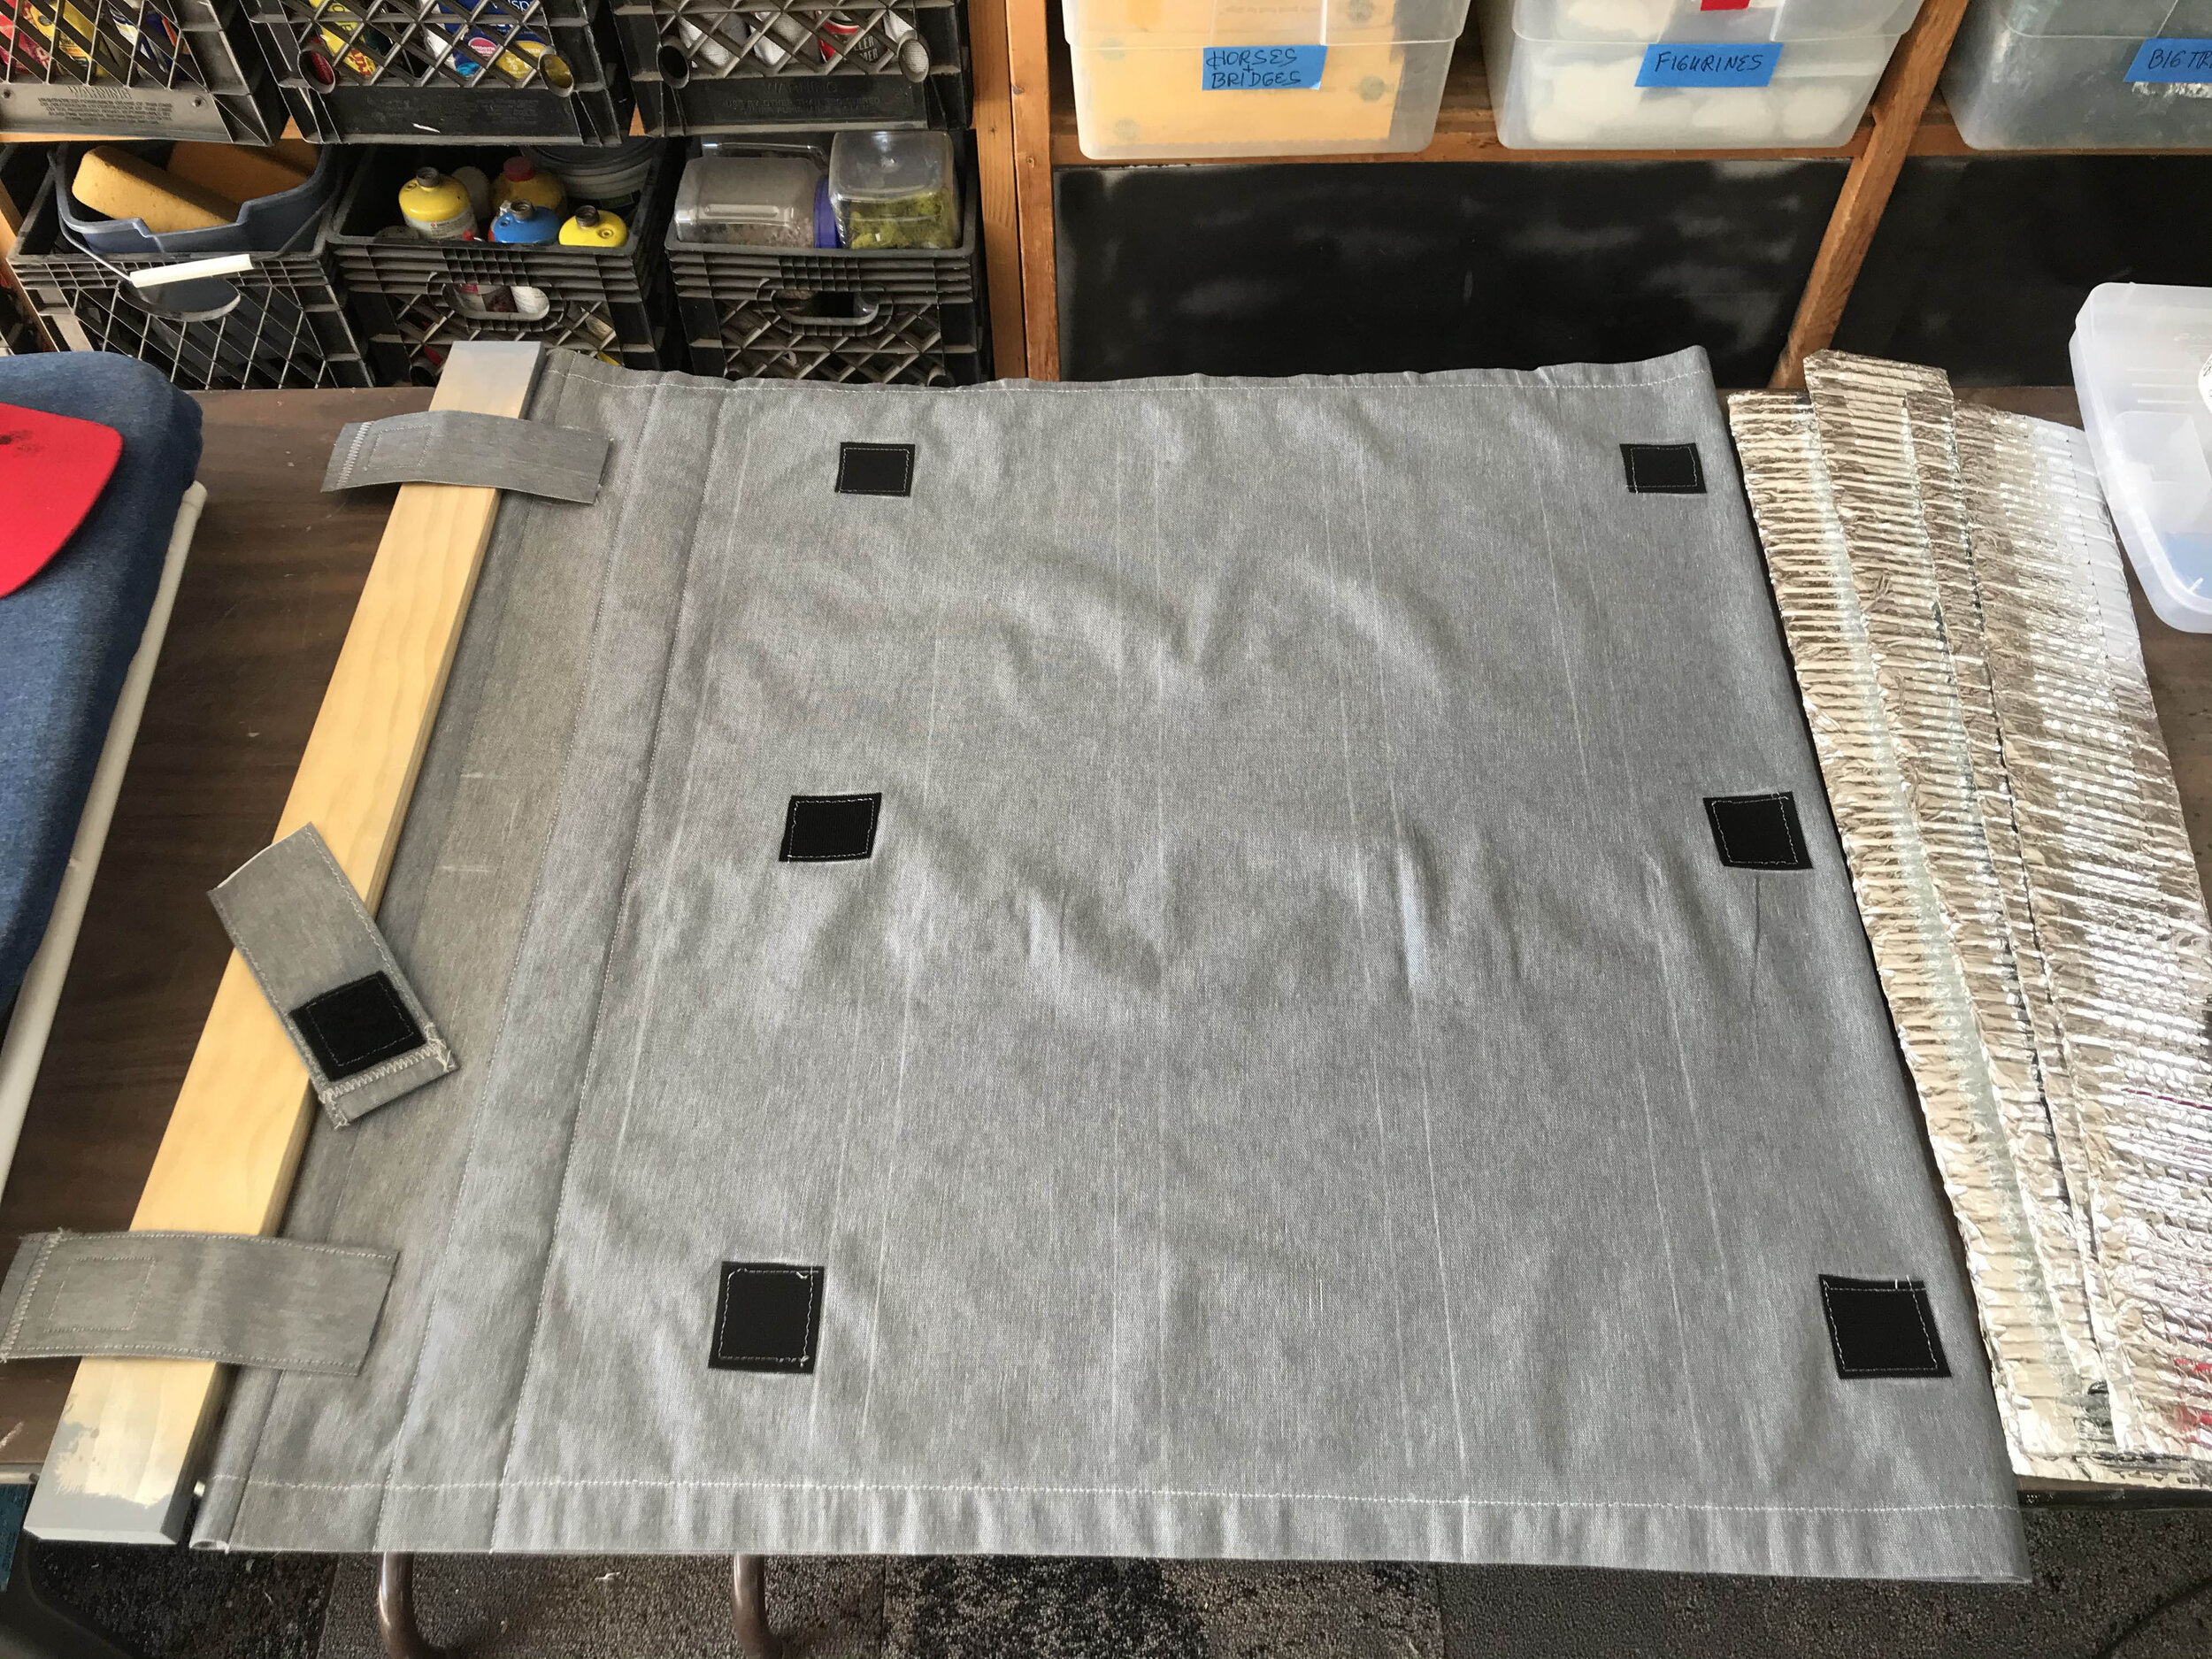
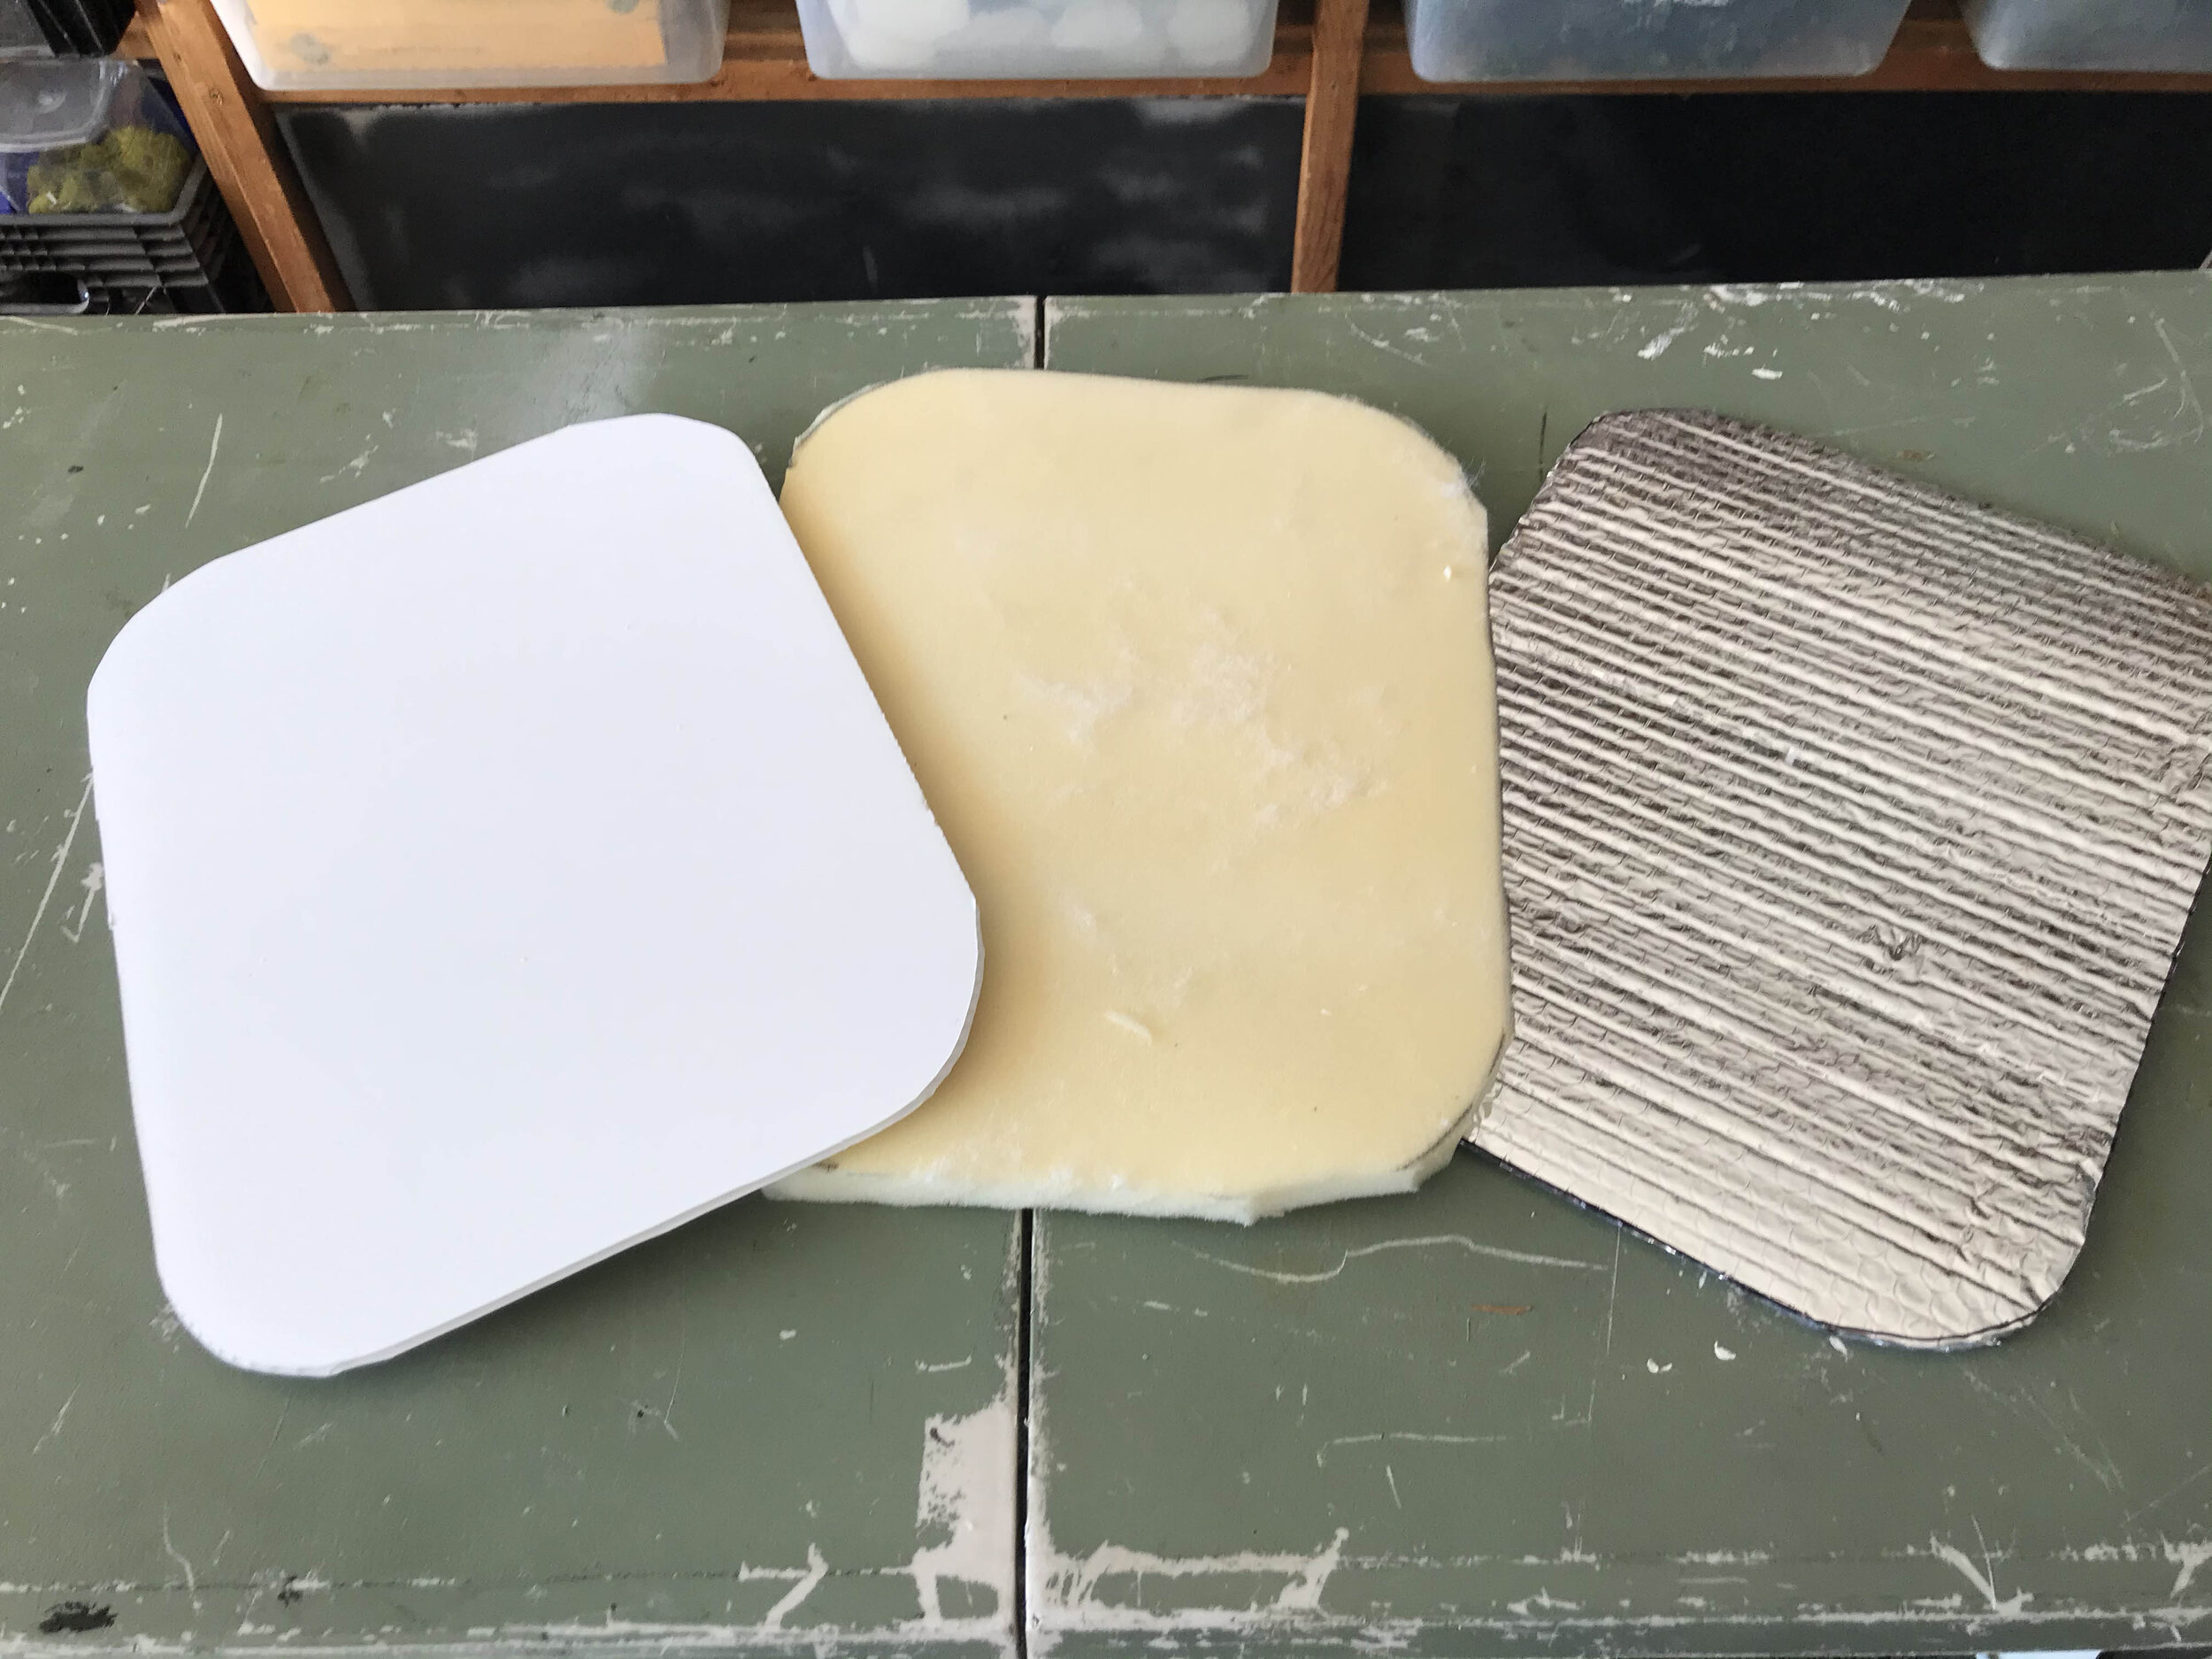
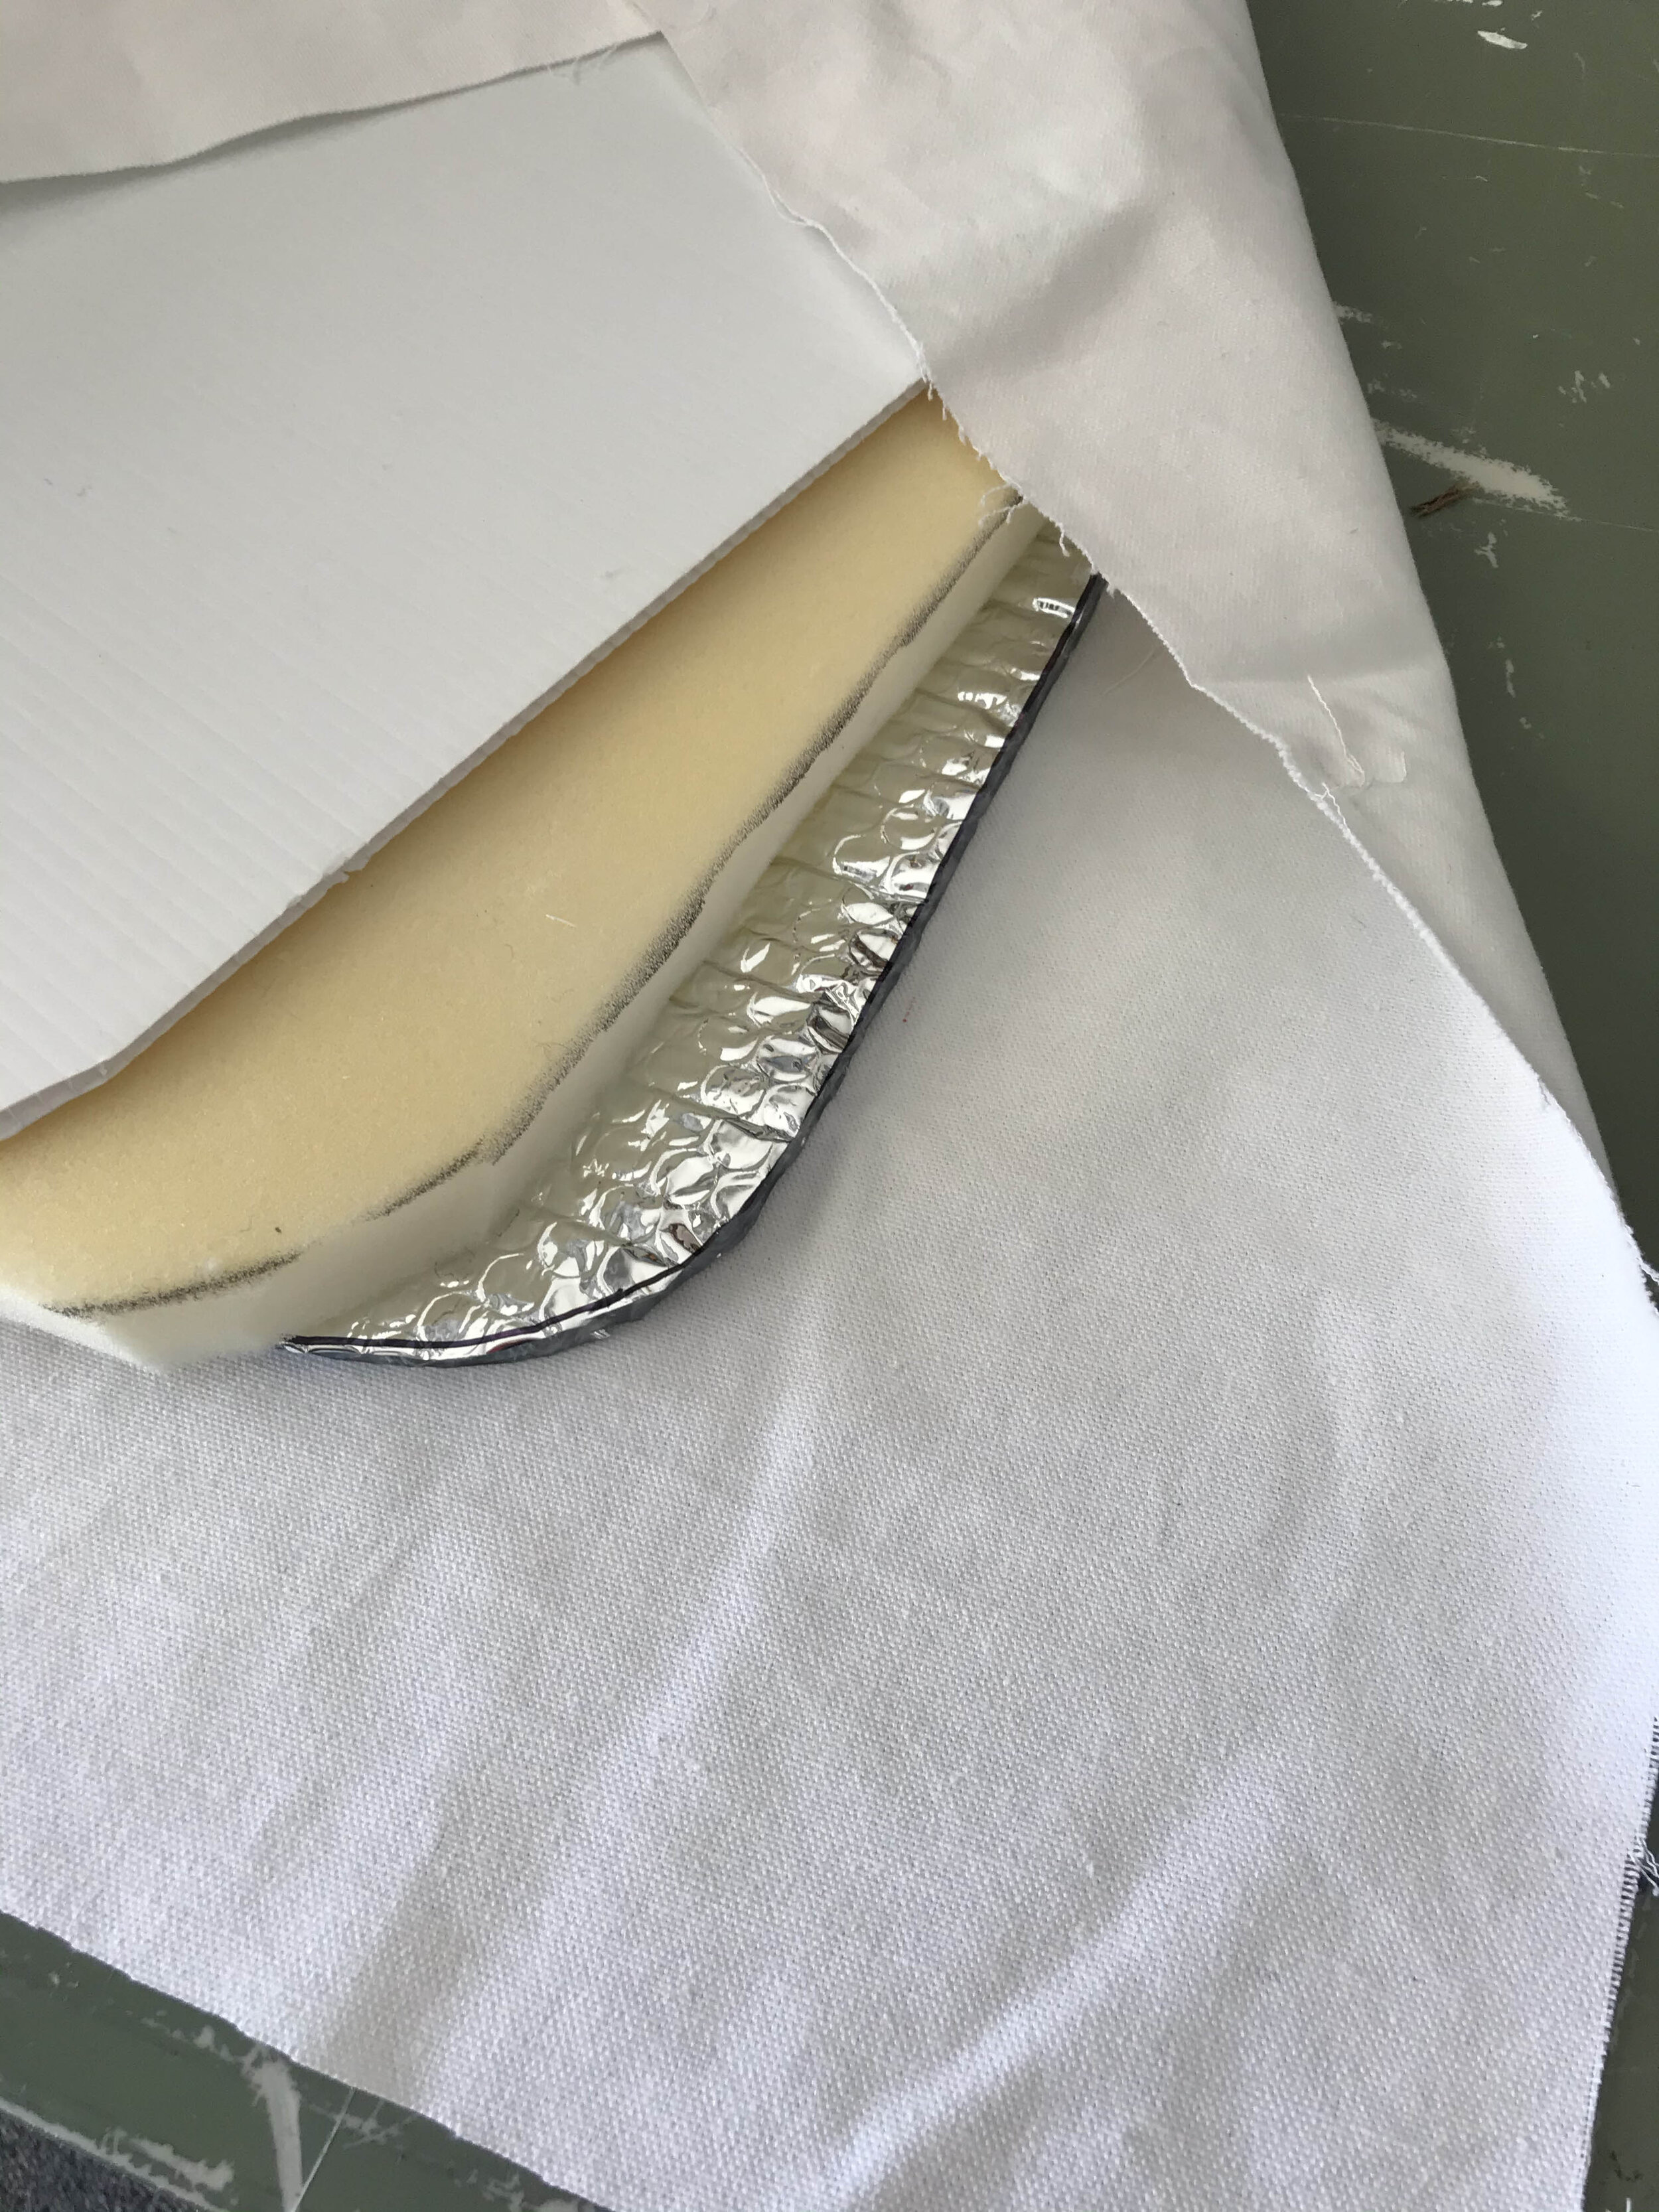
Creating the window covers
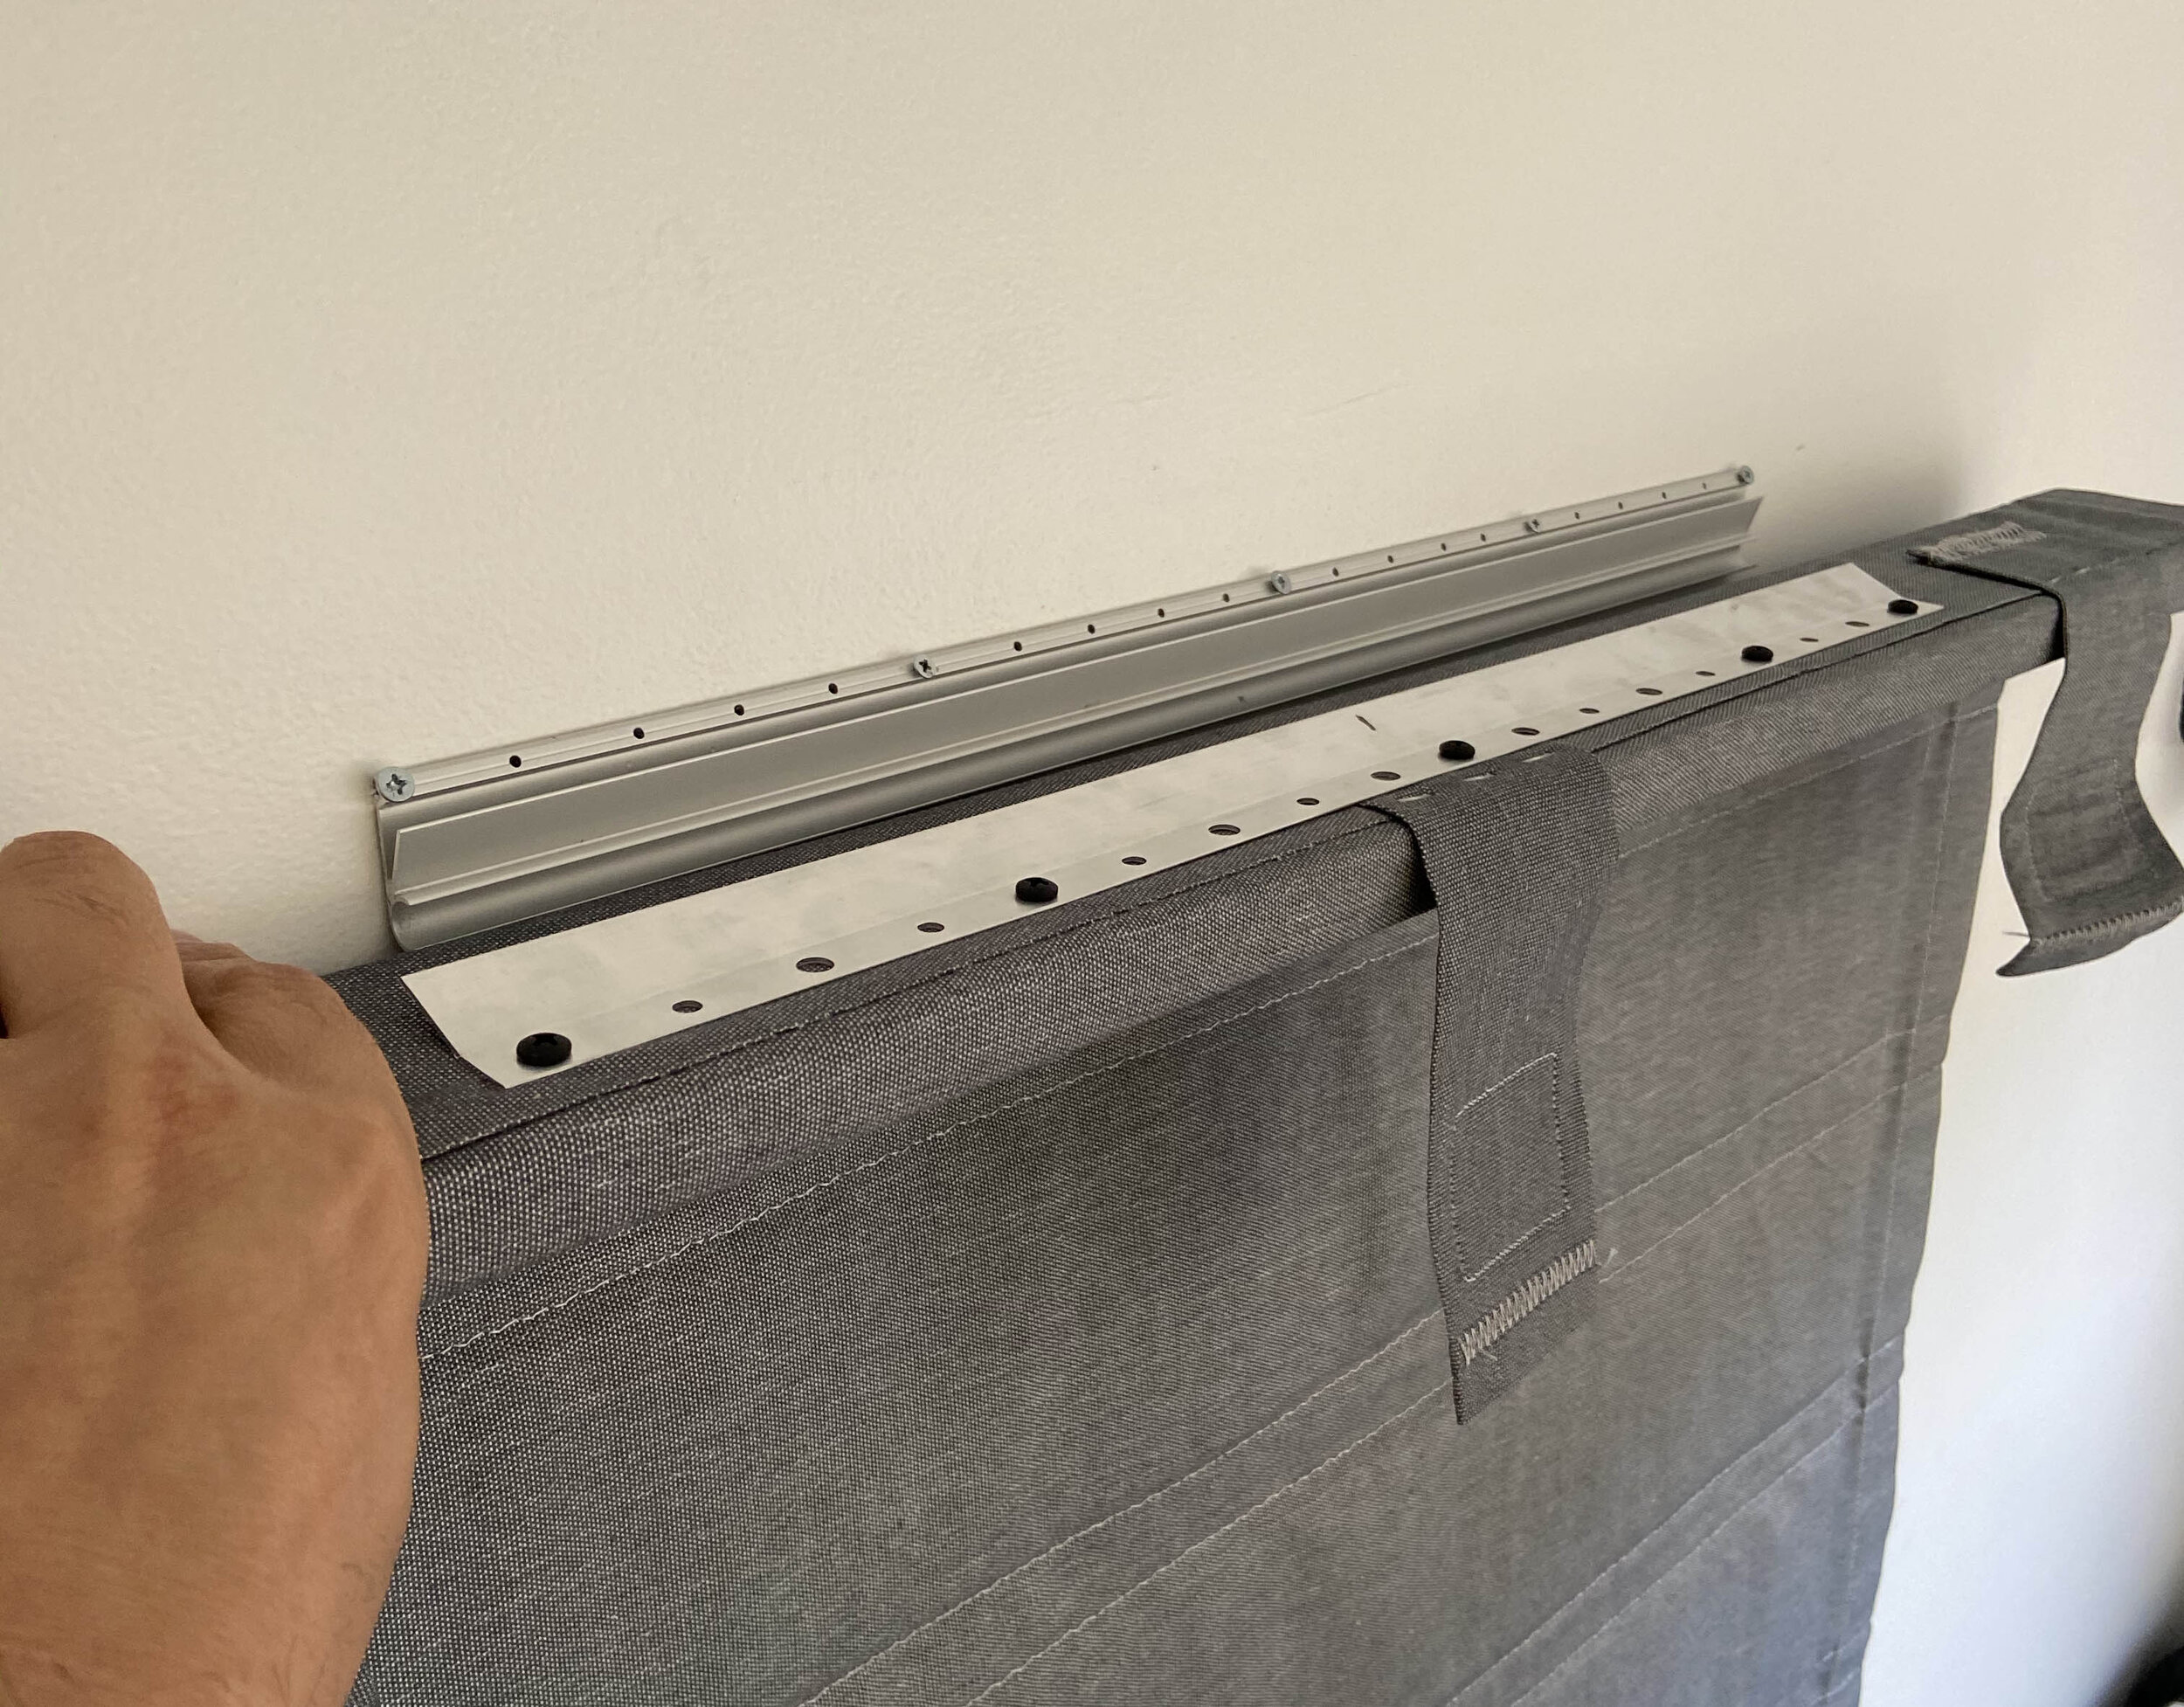
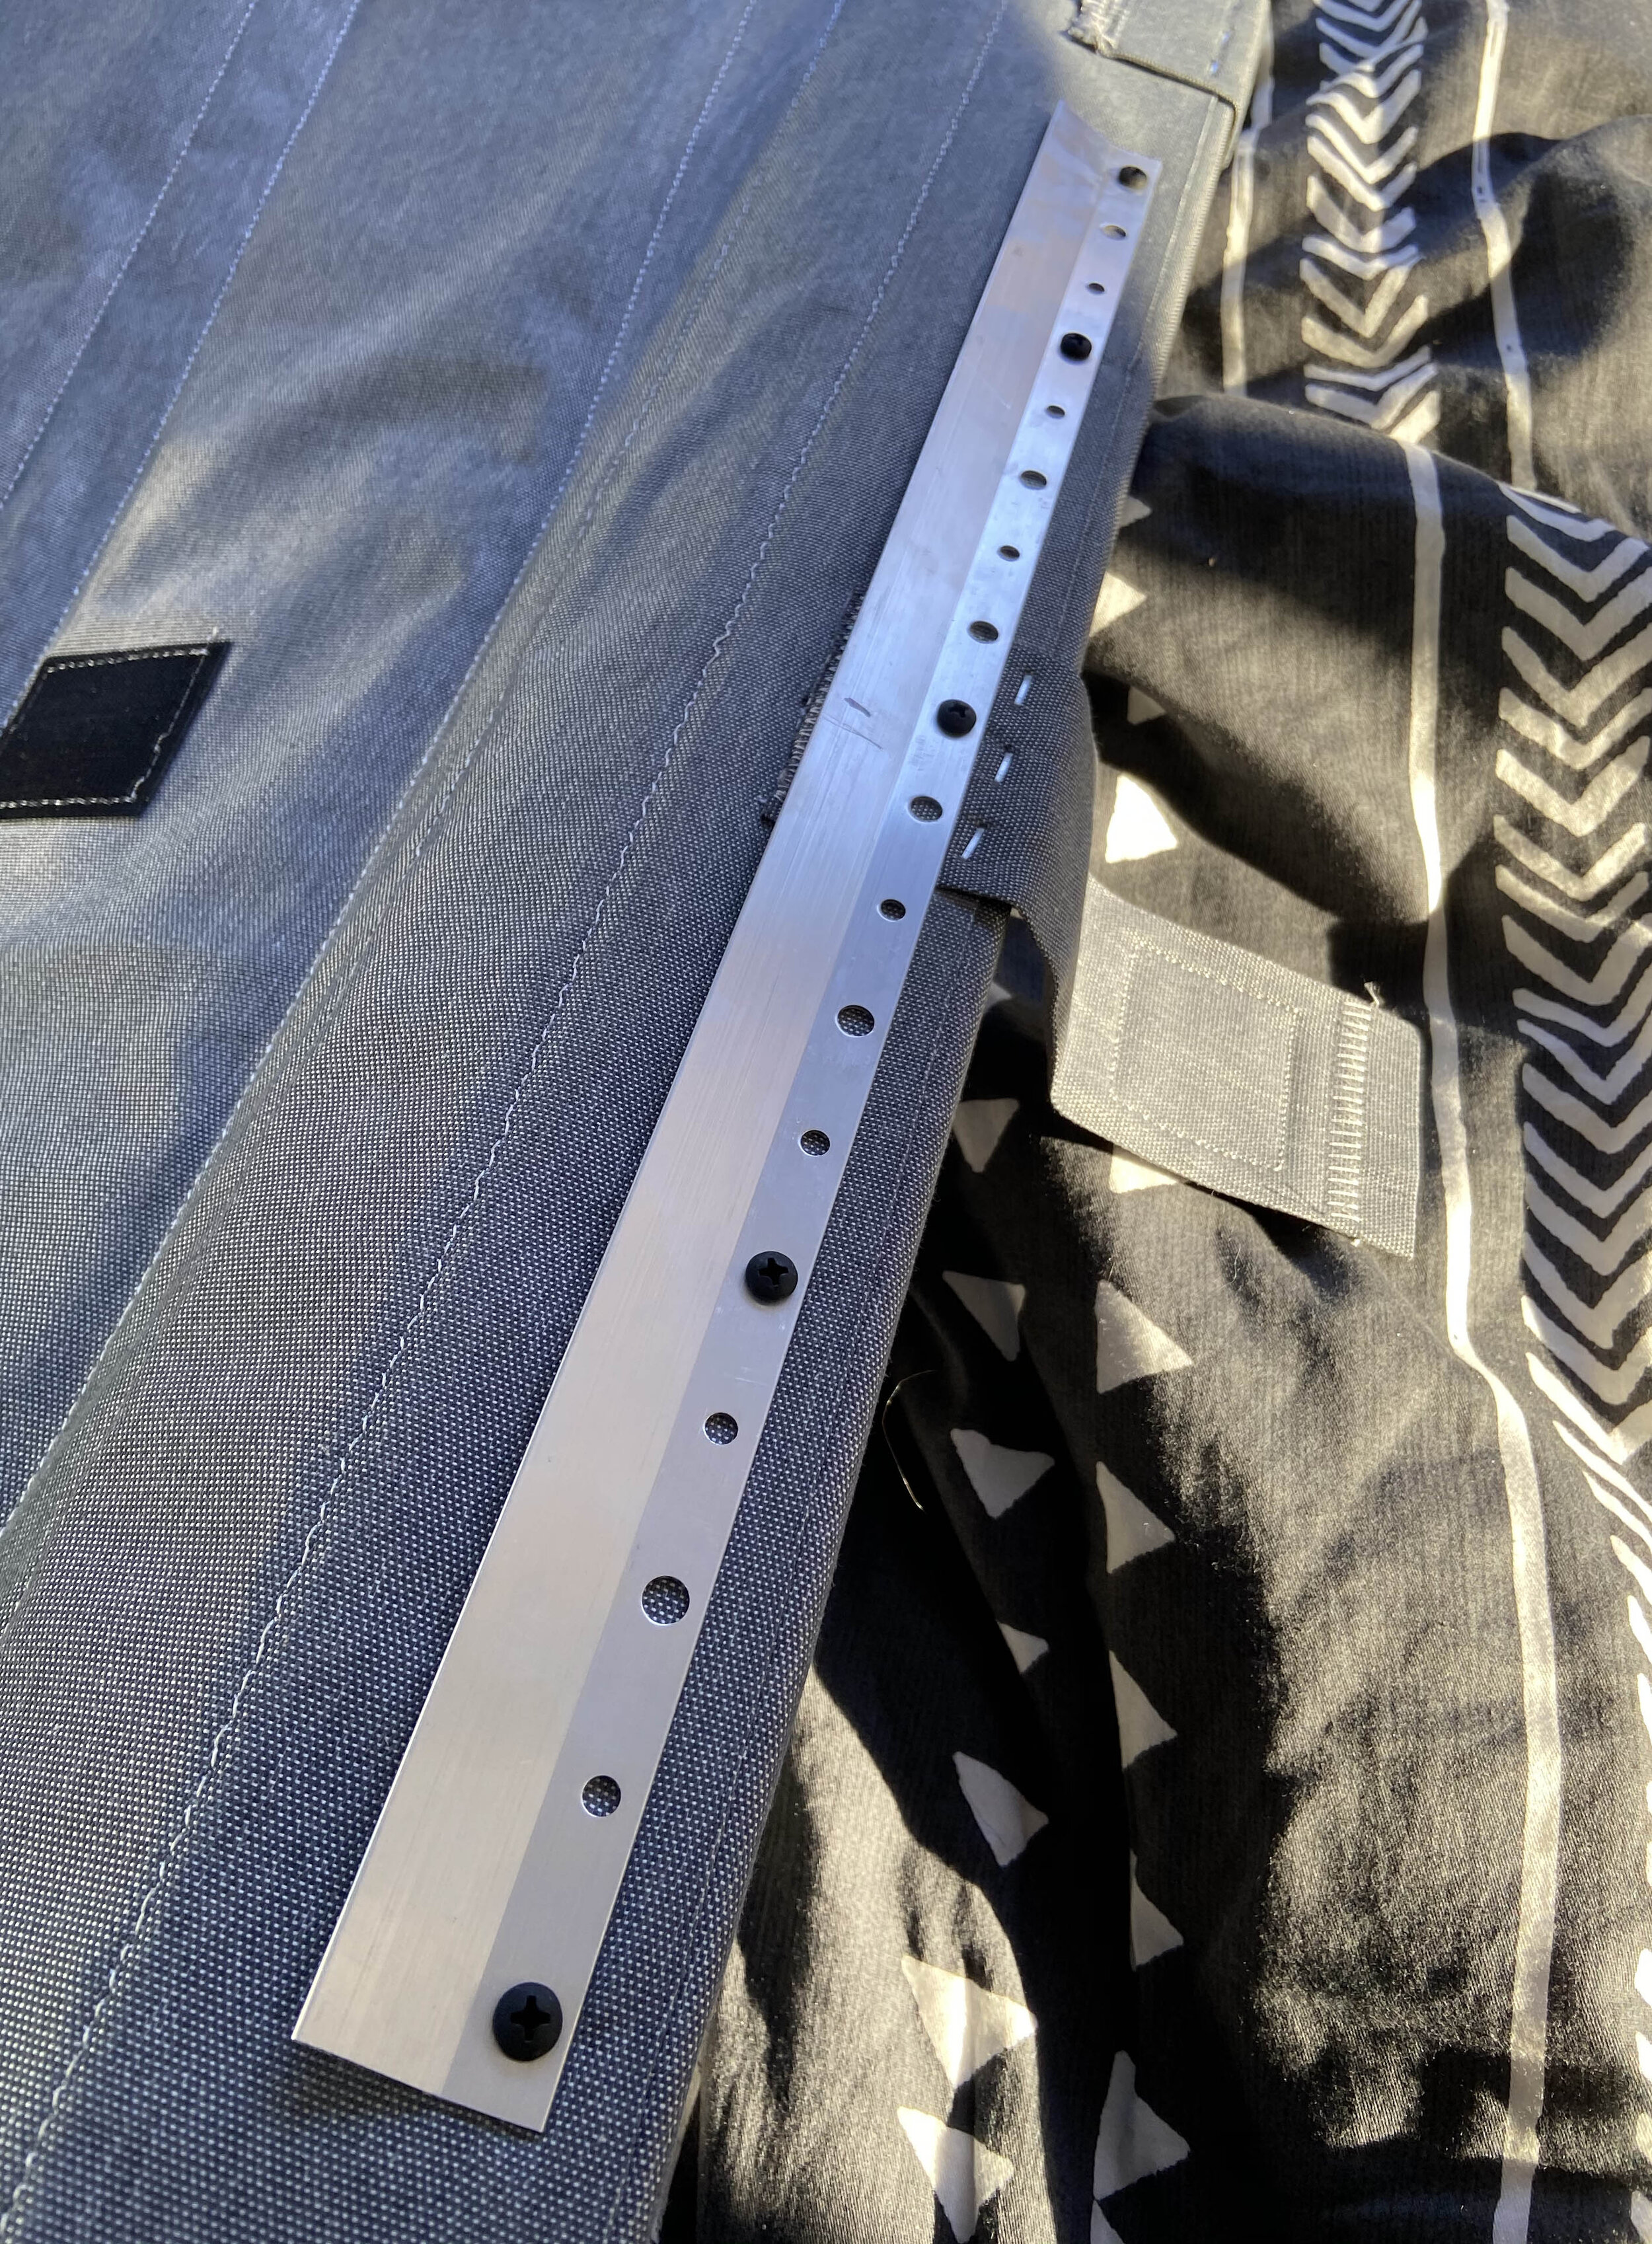
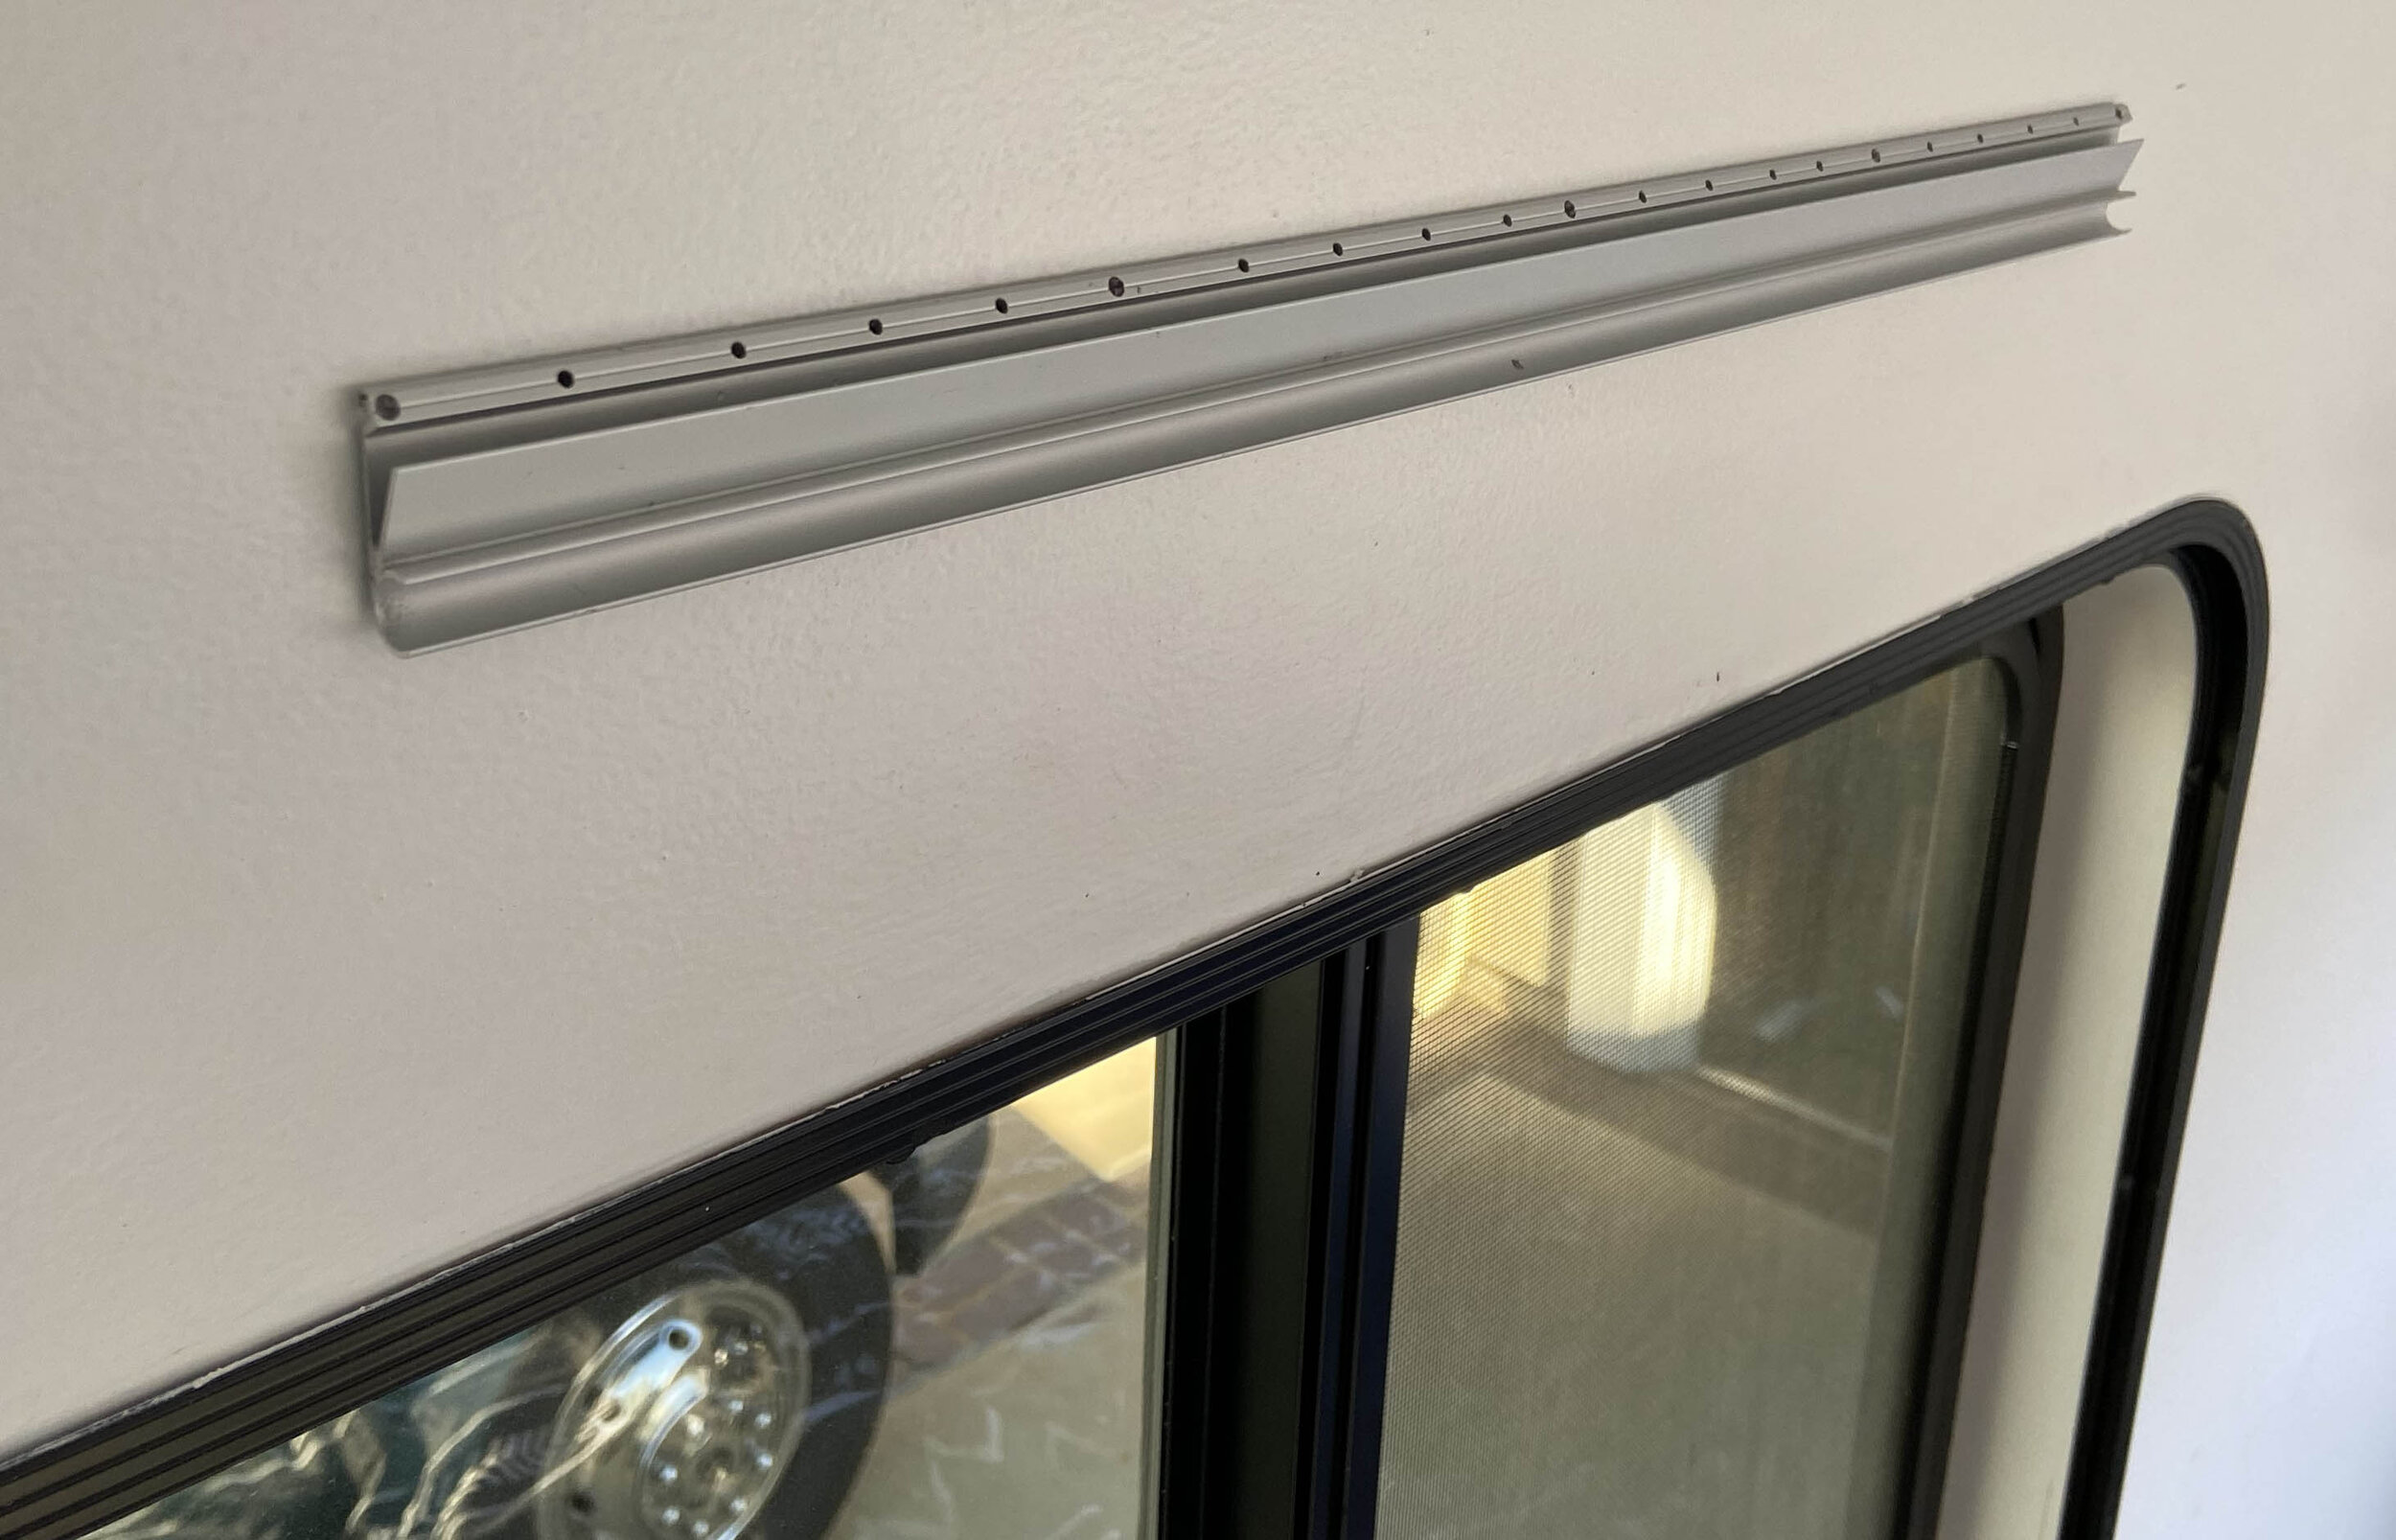
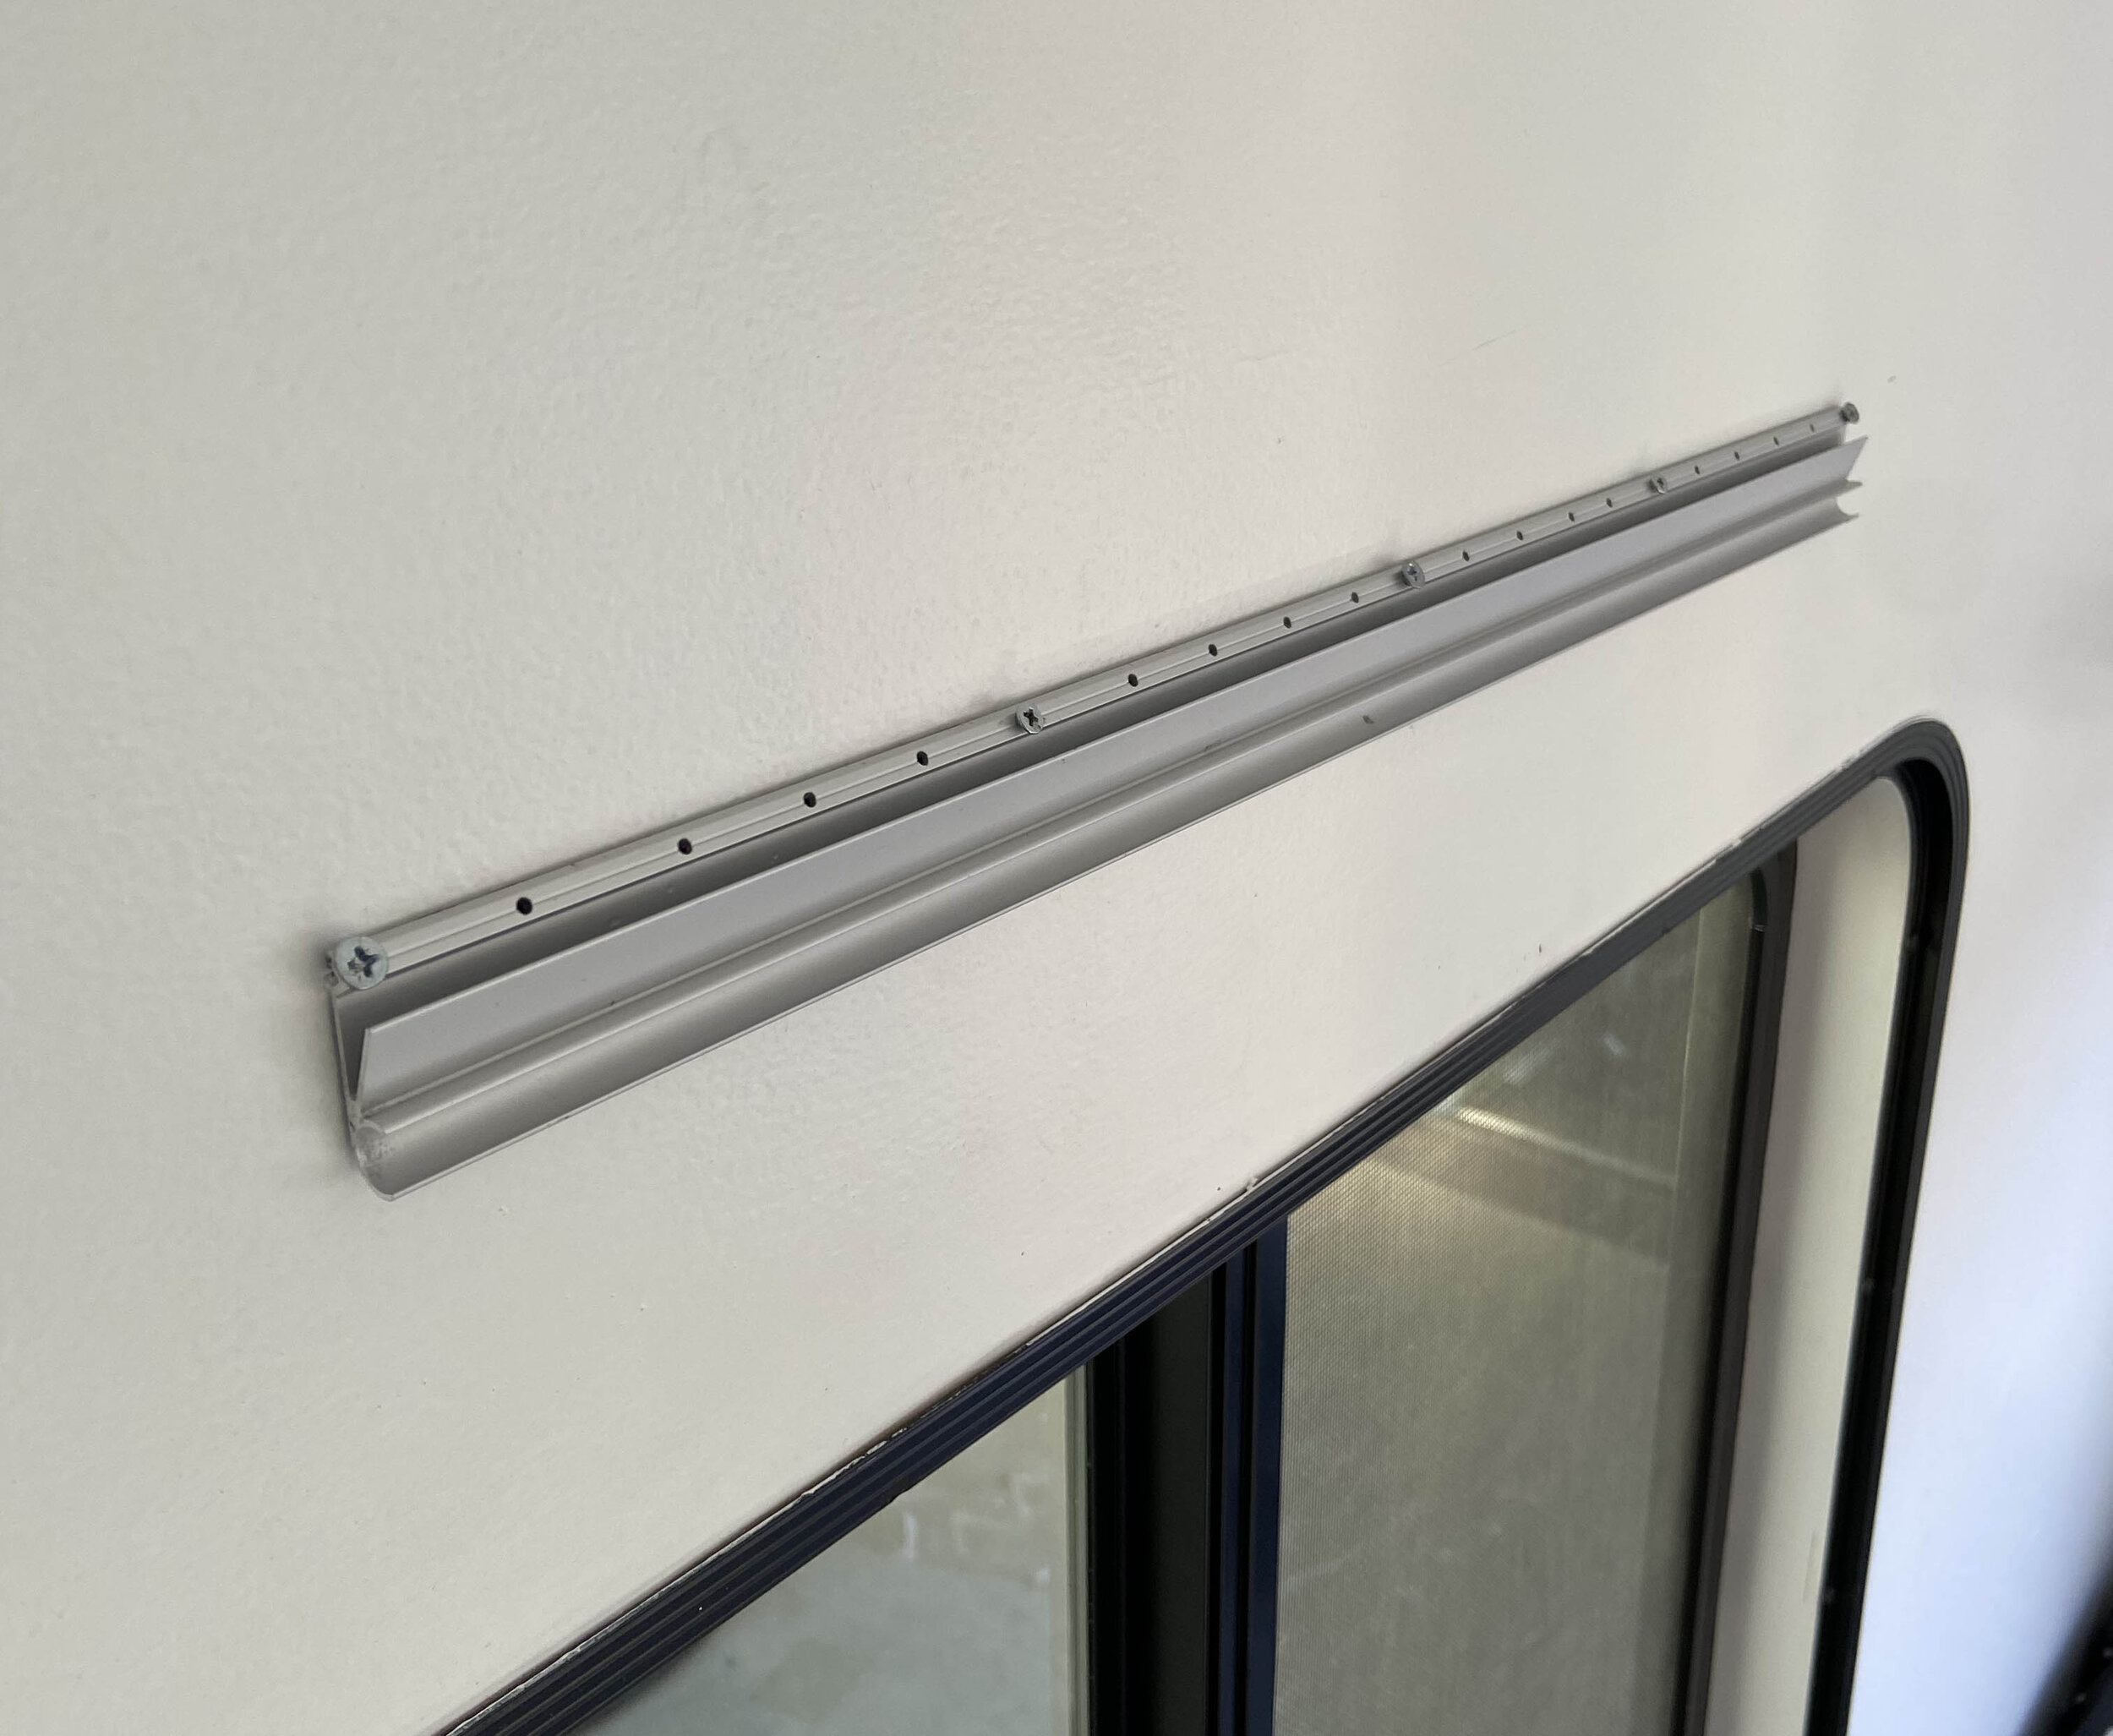
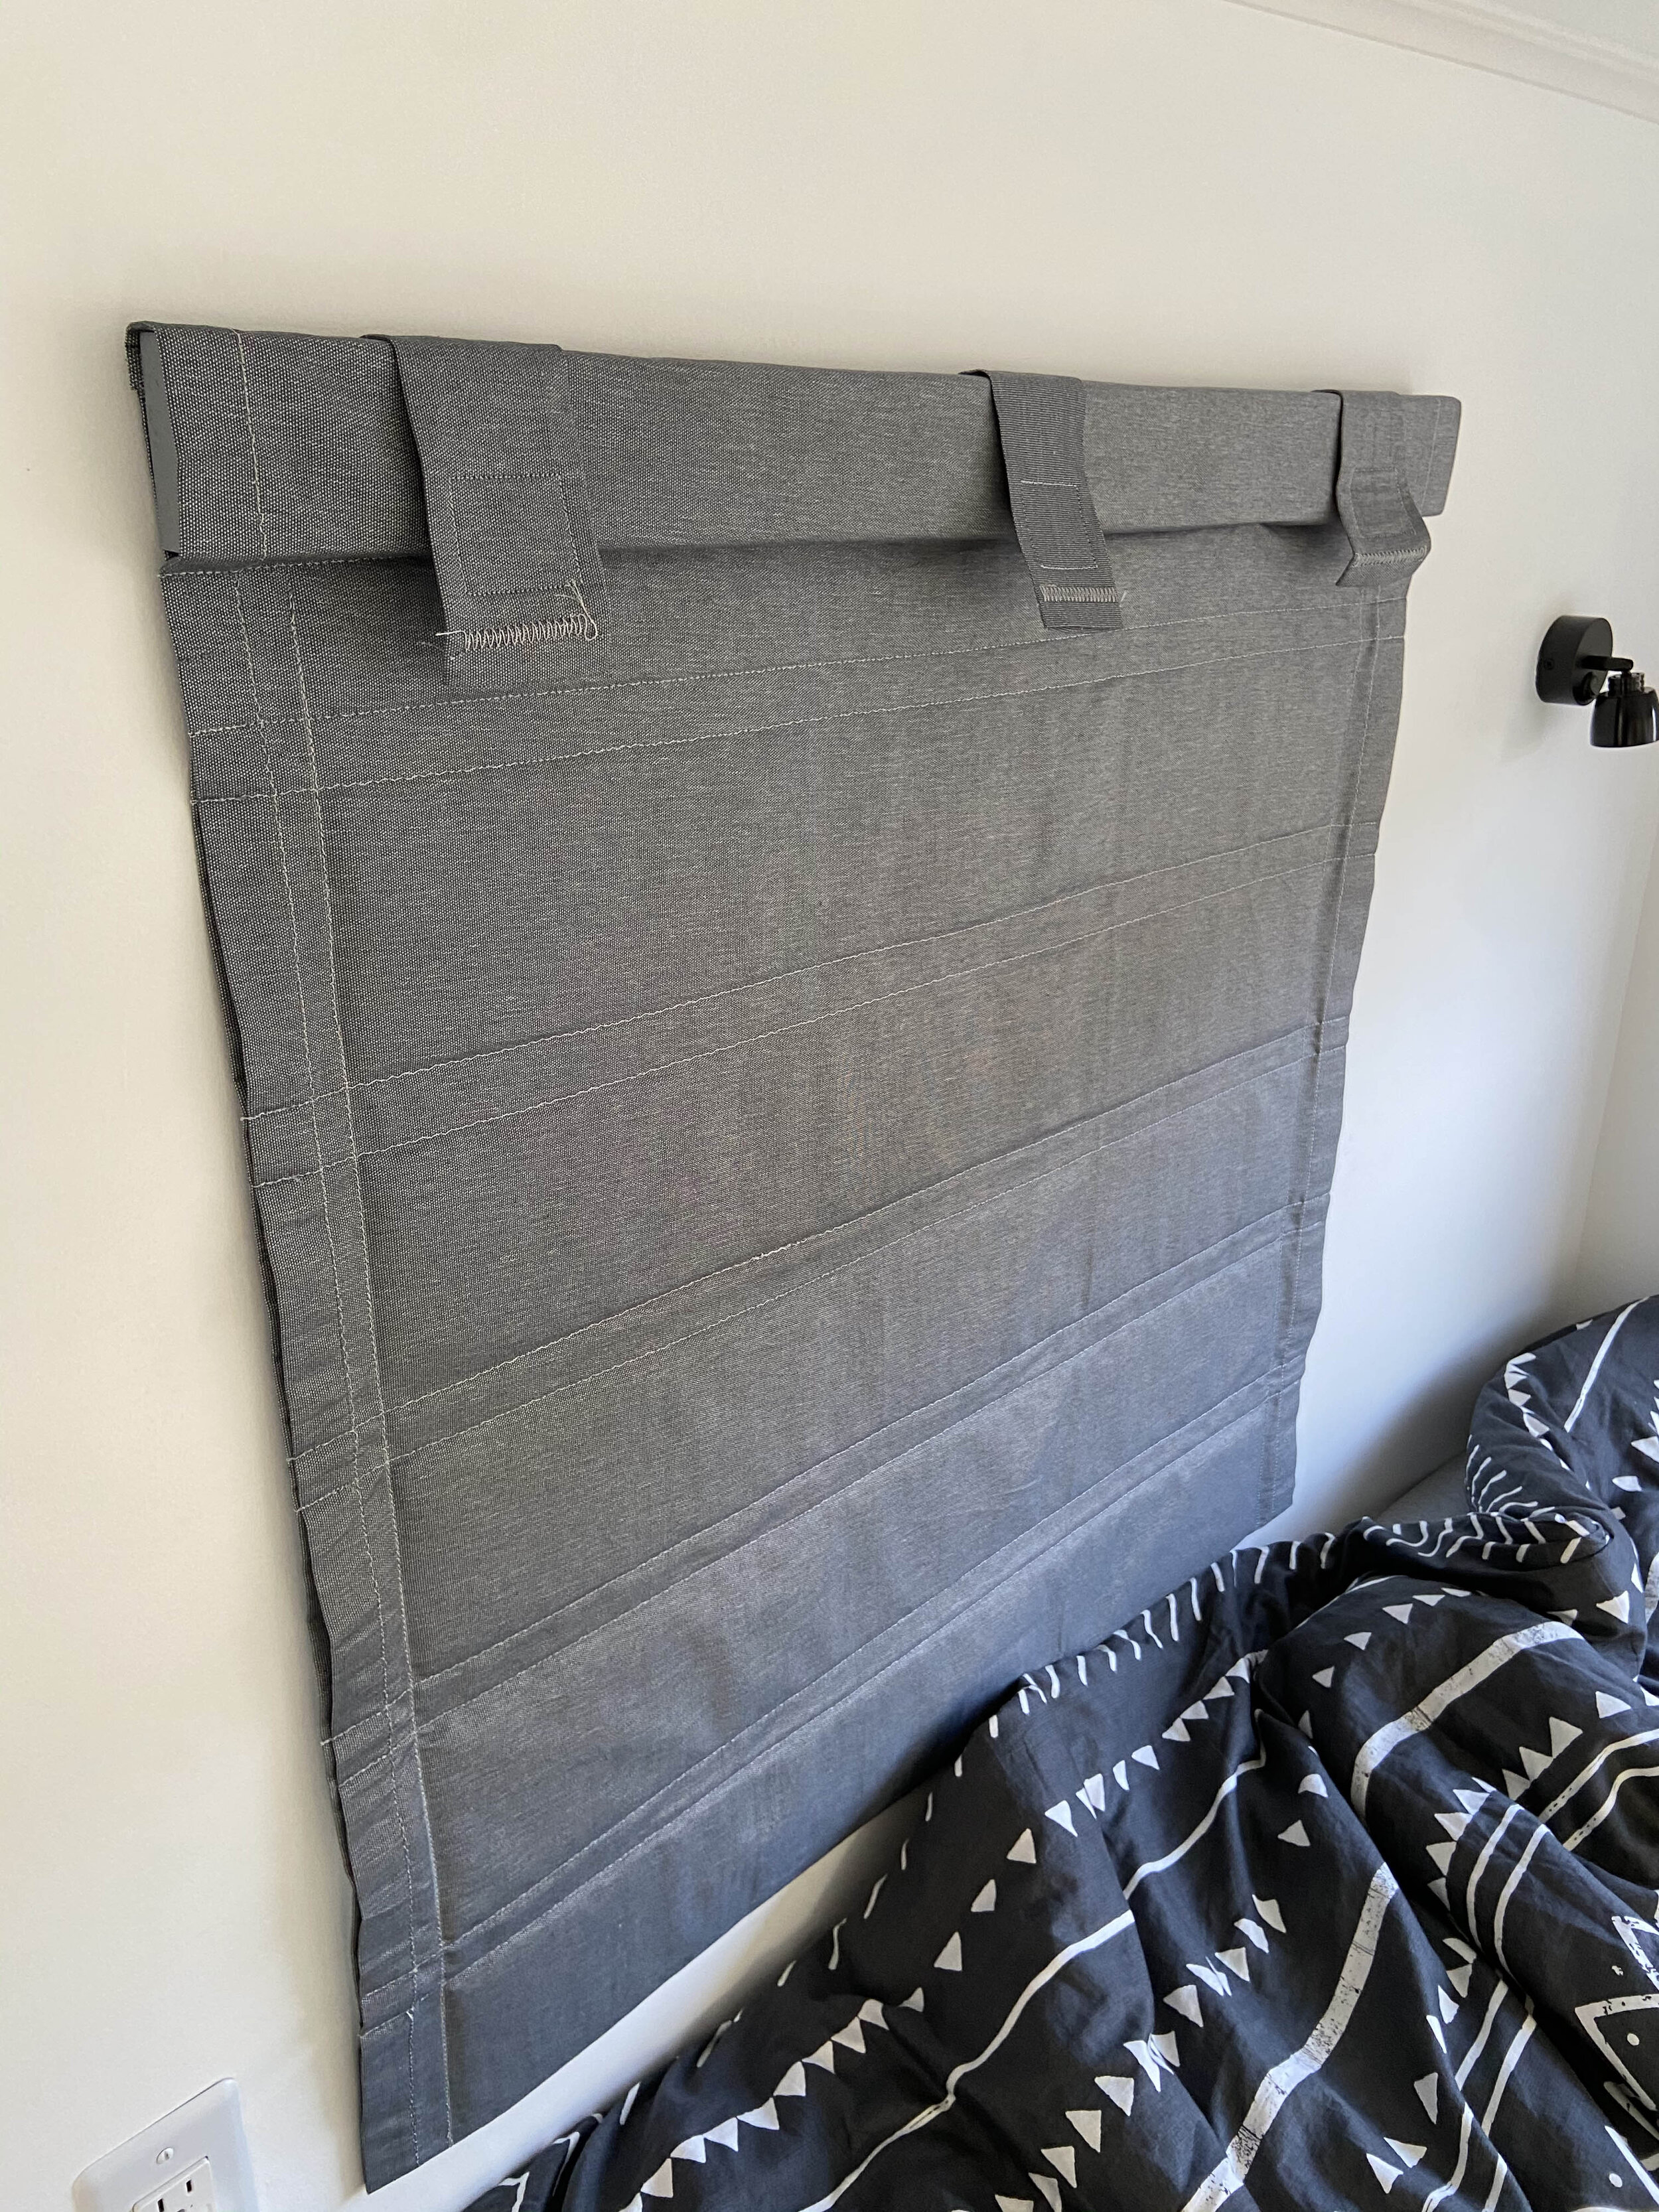
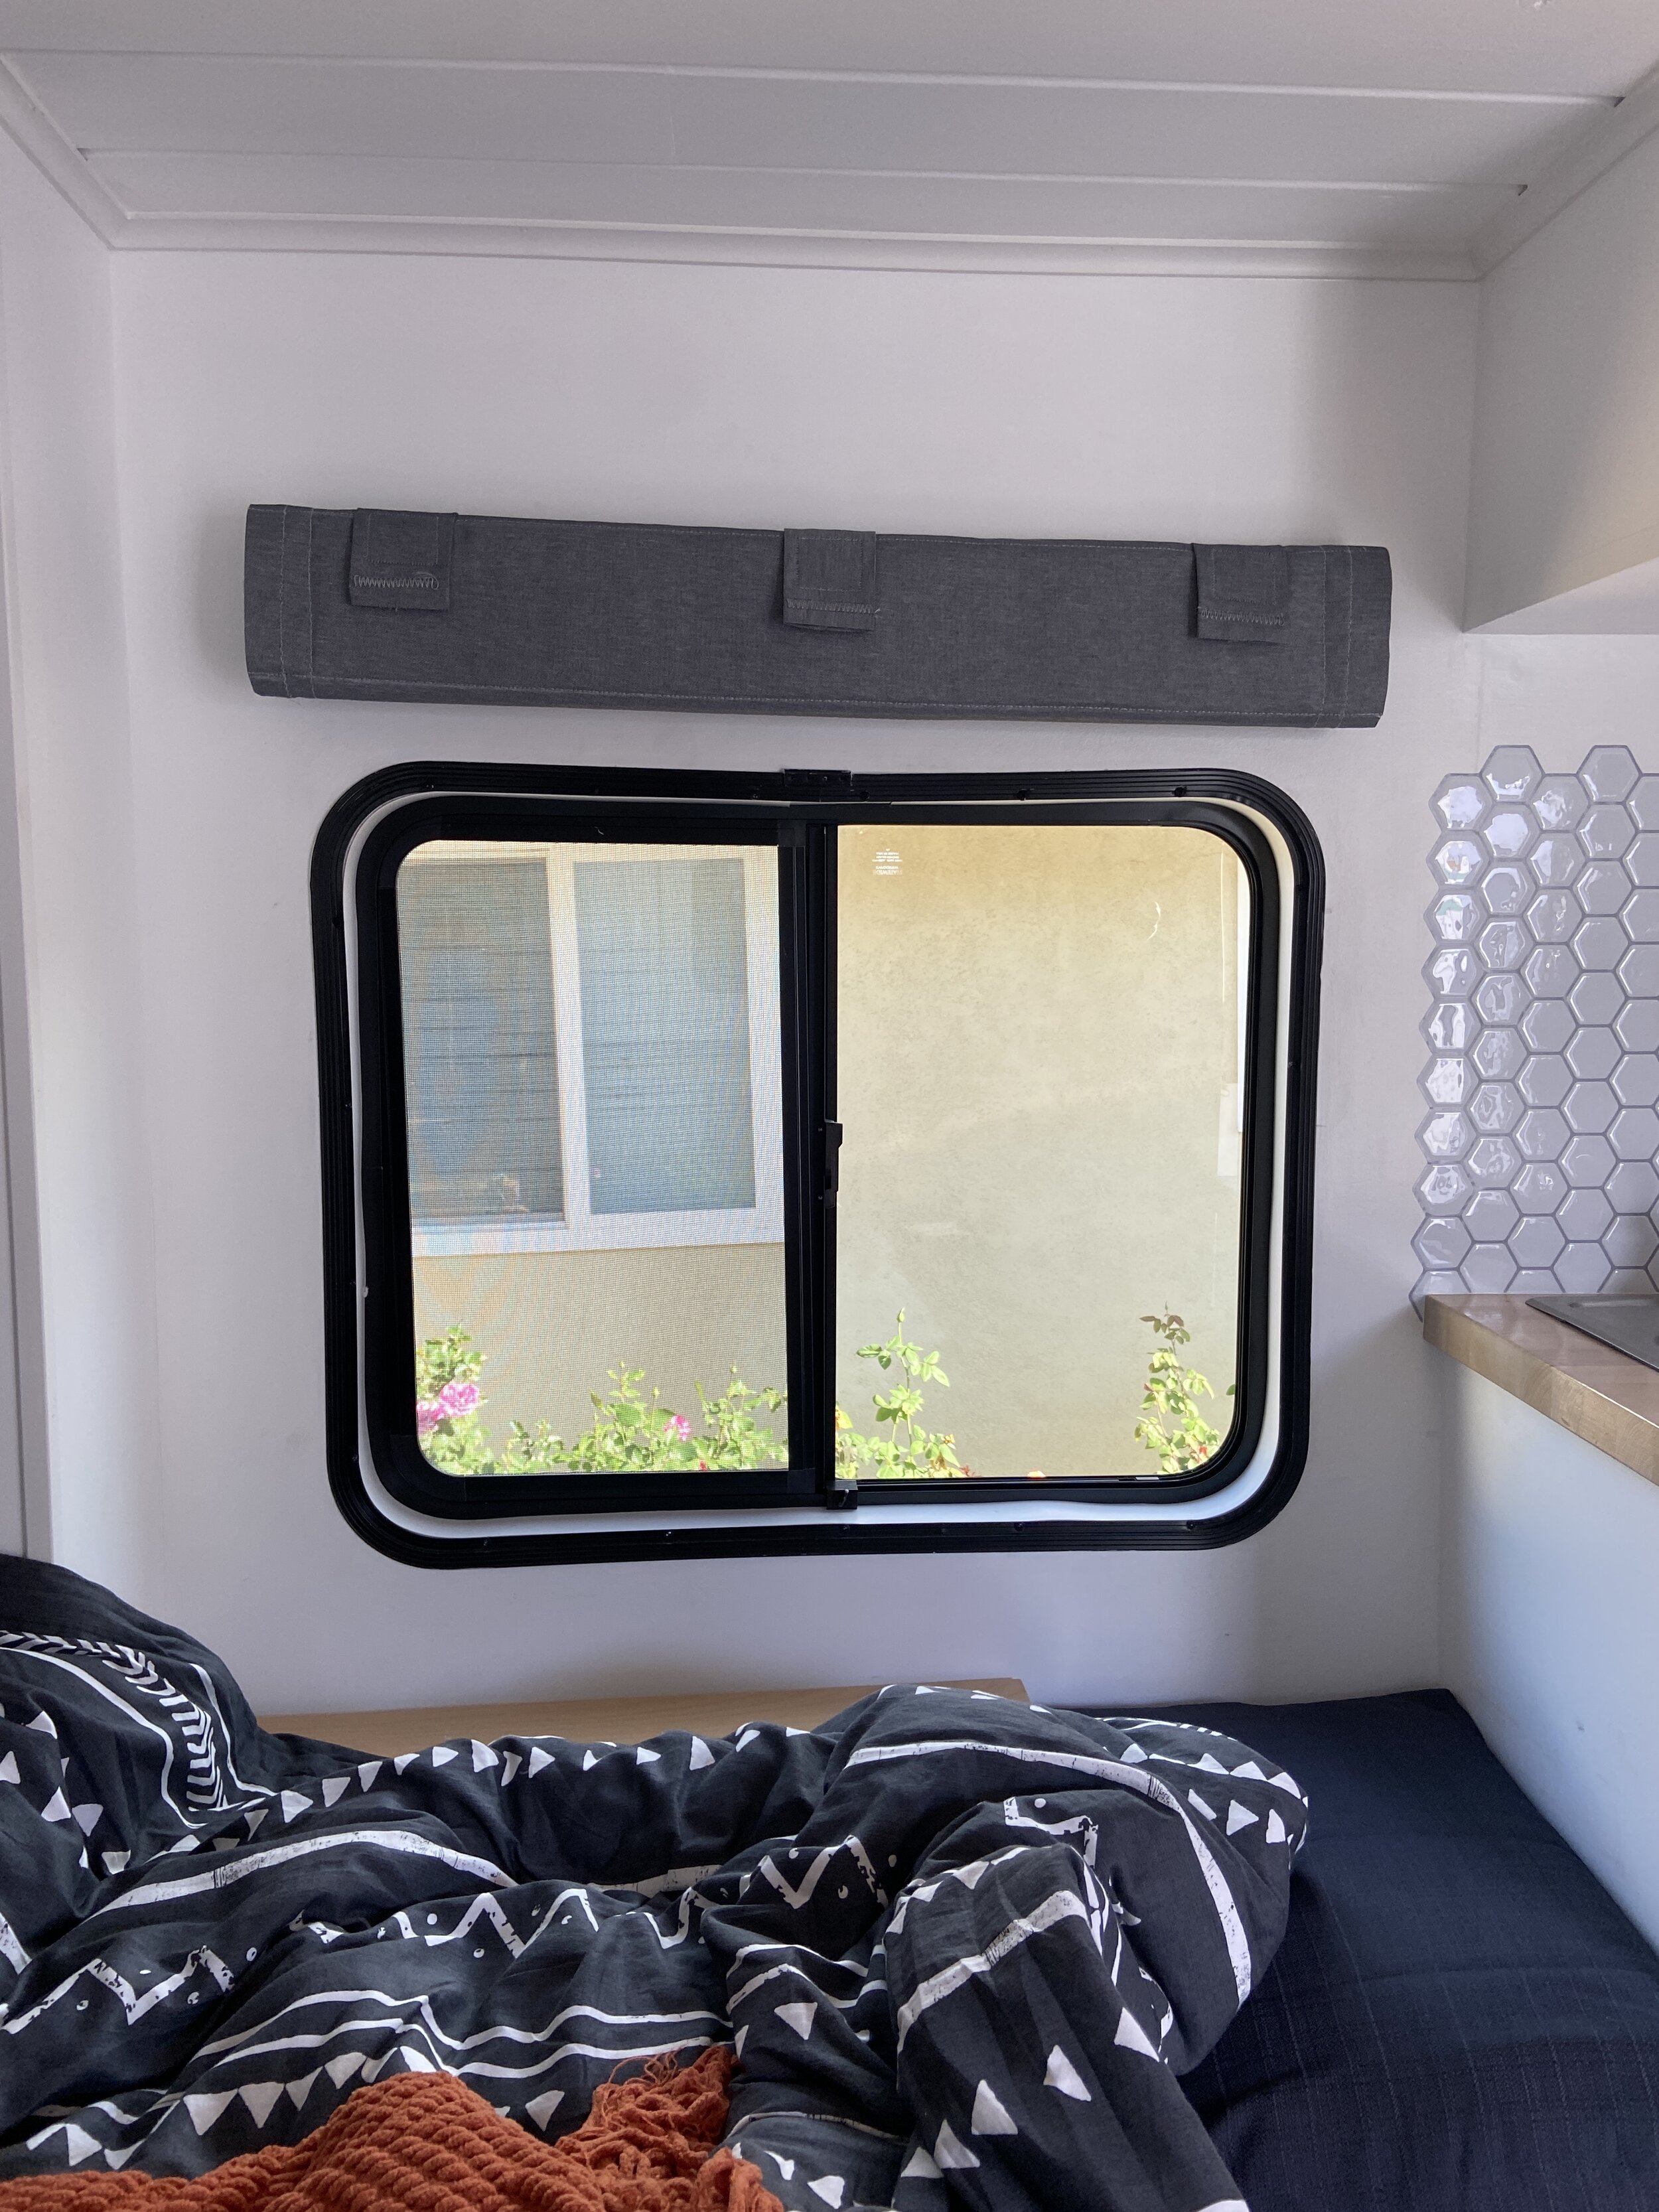
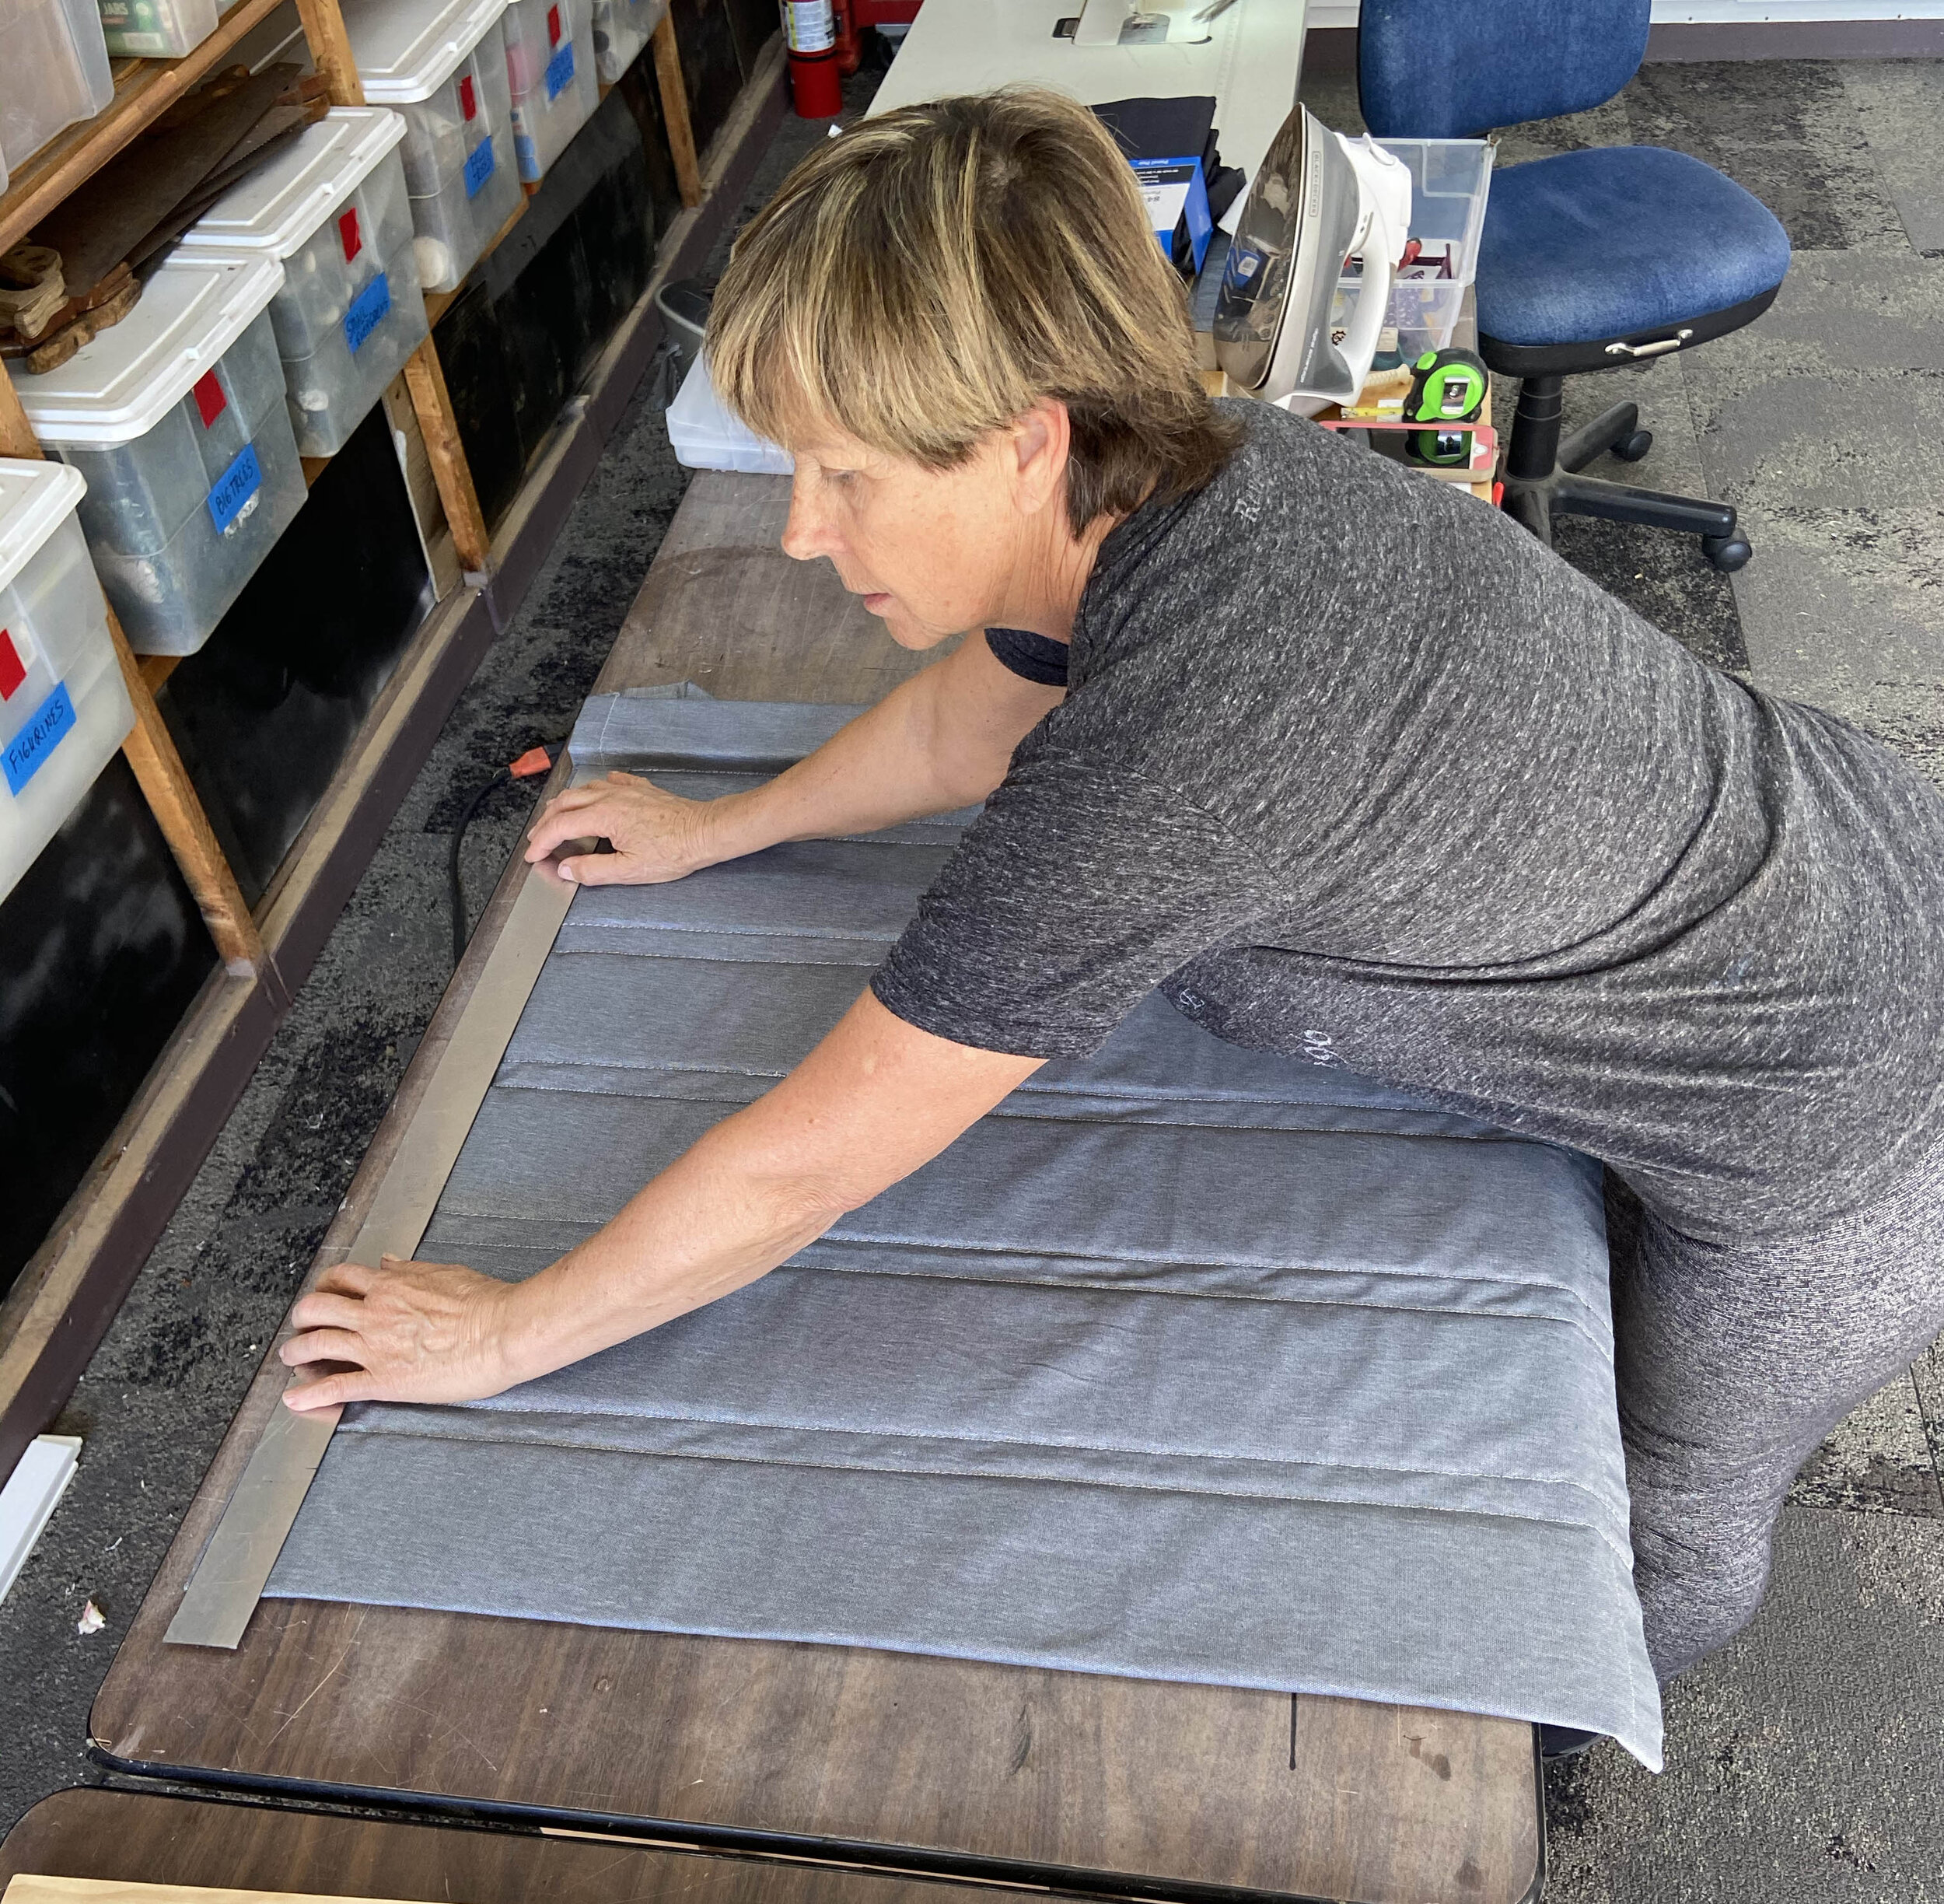
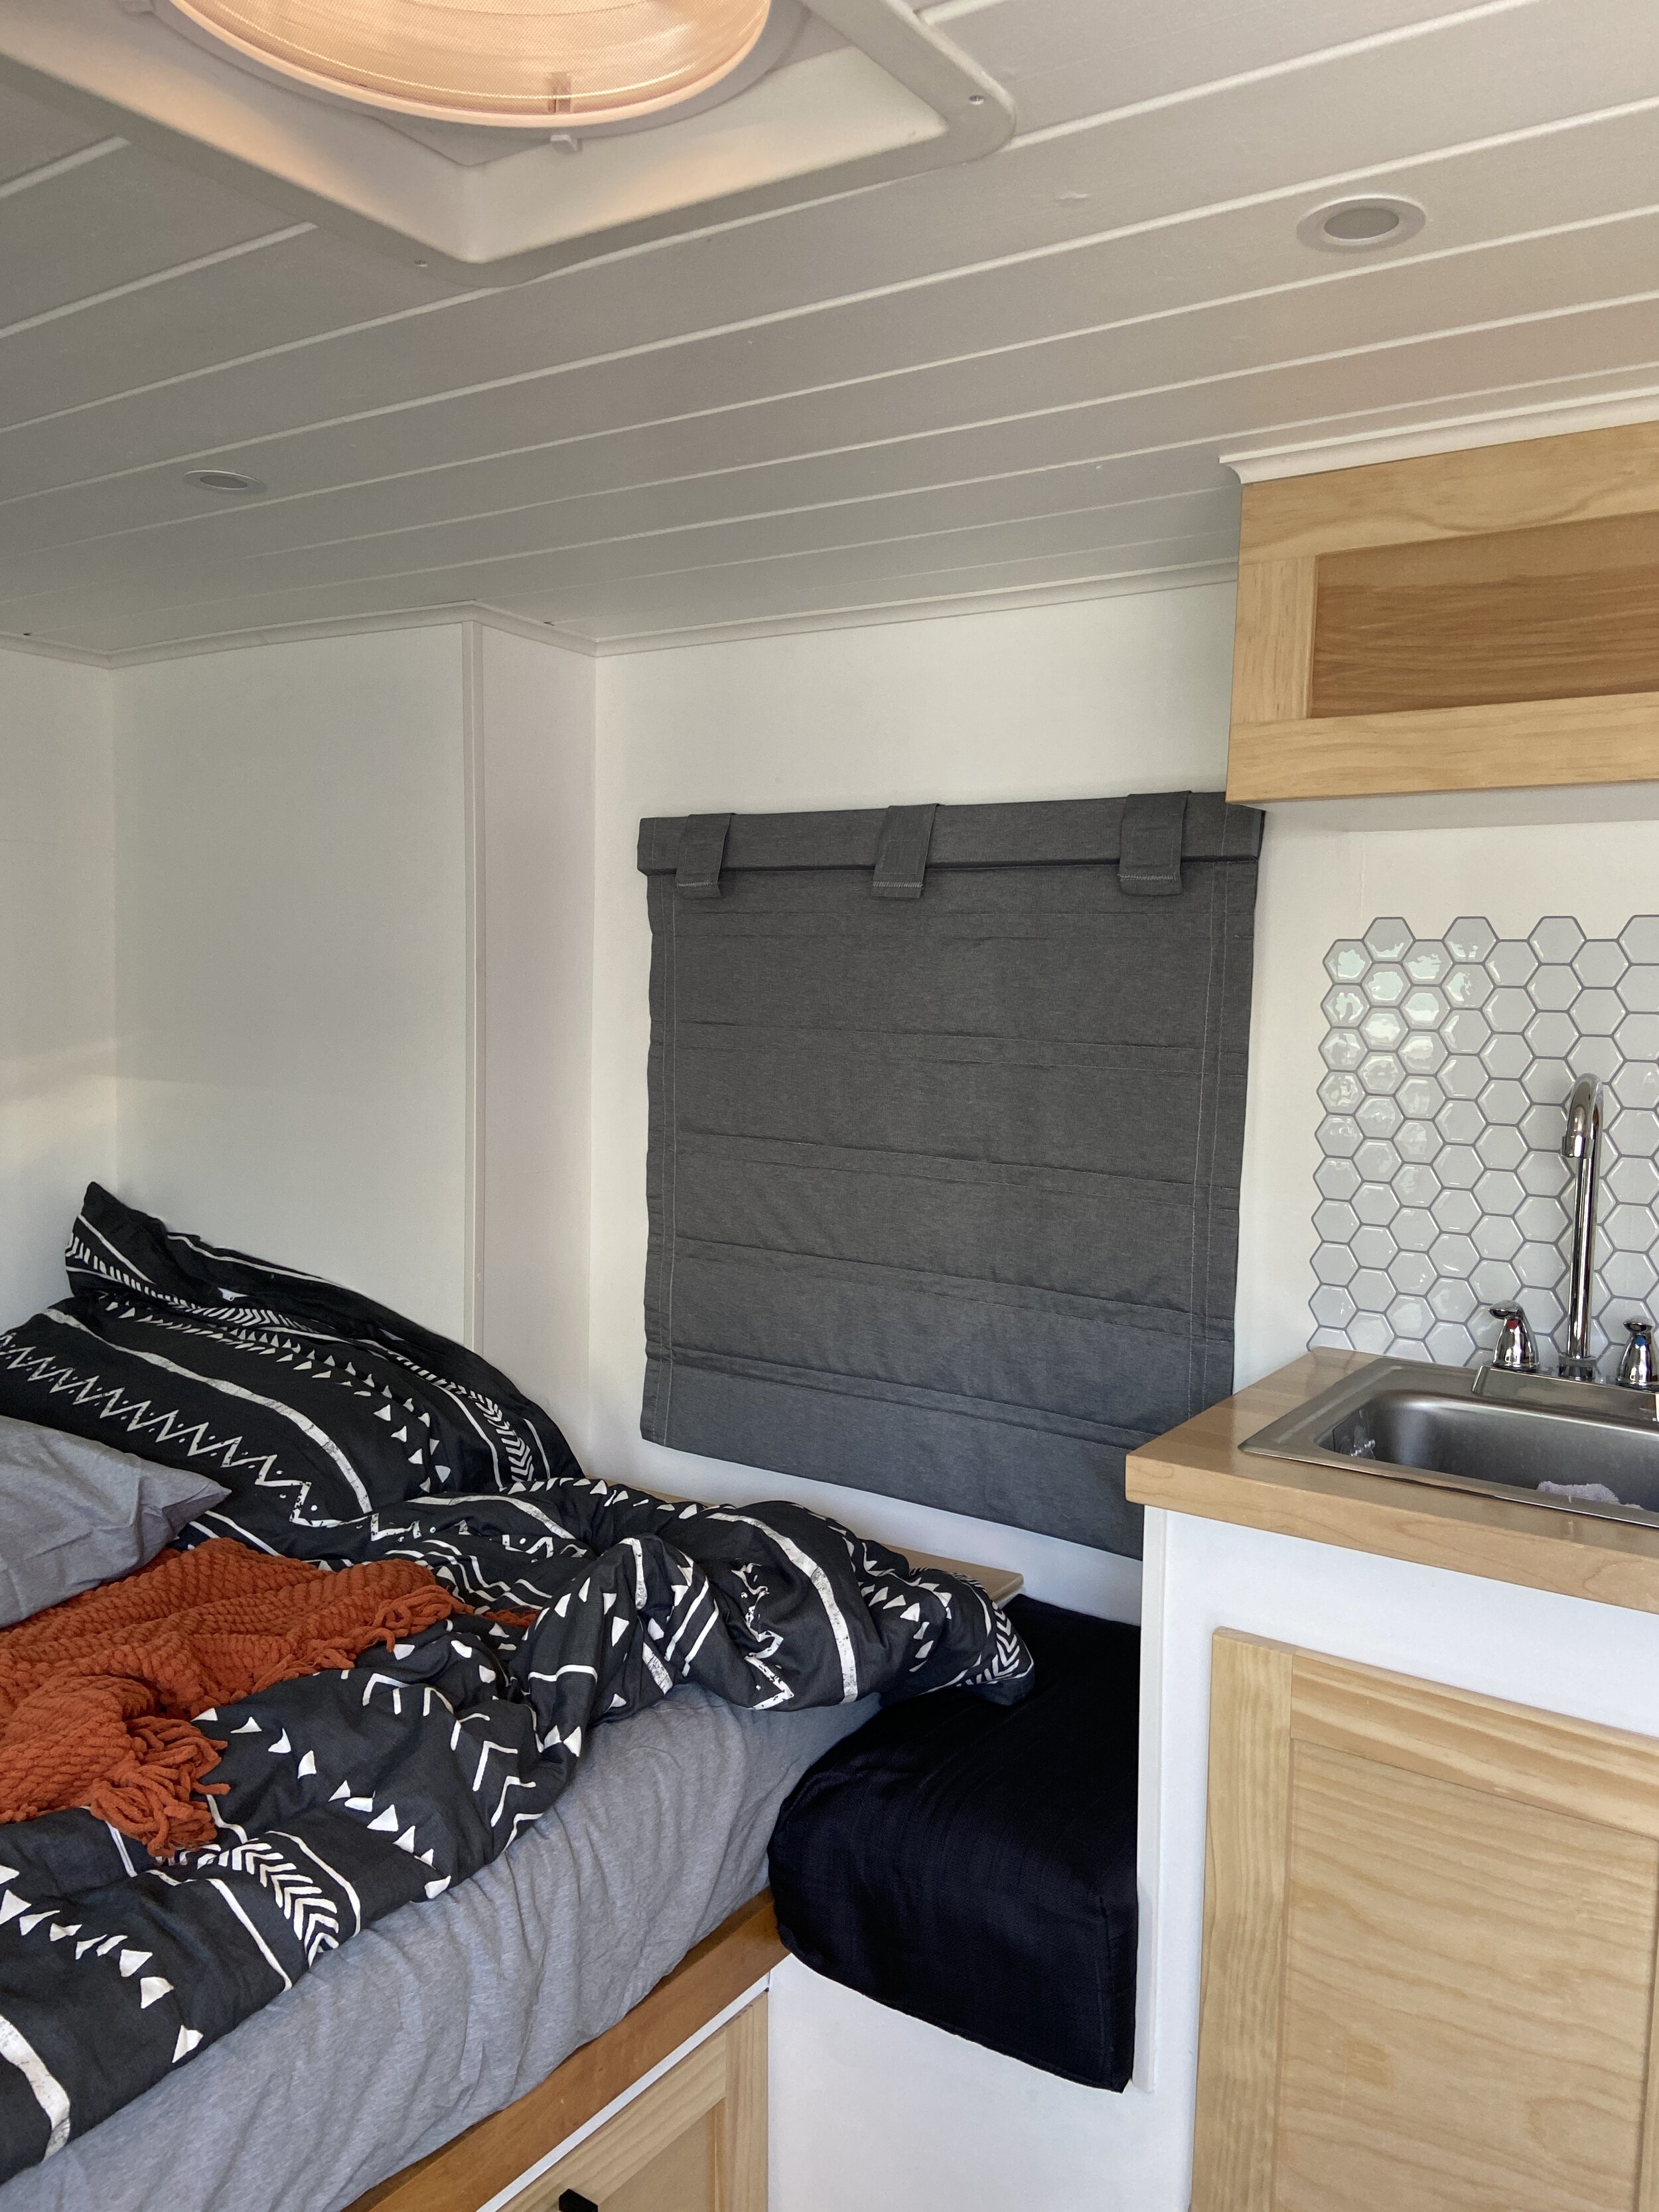
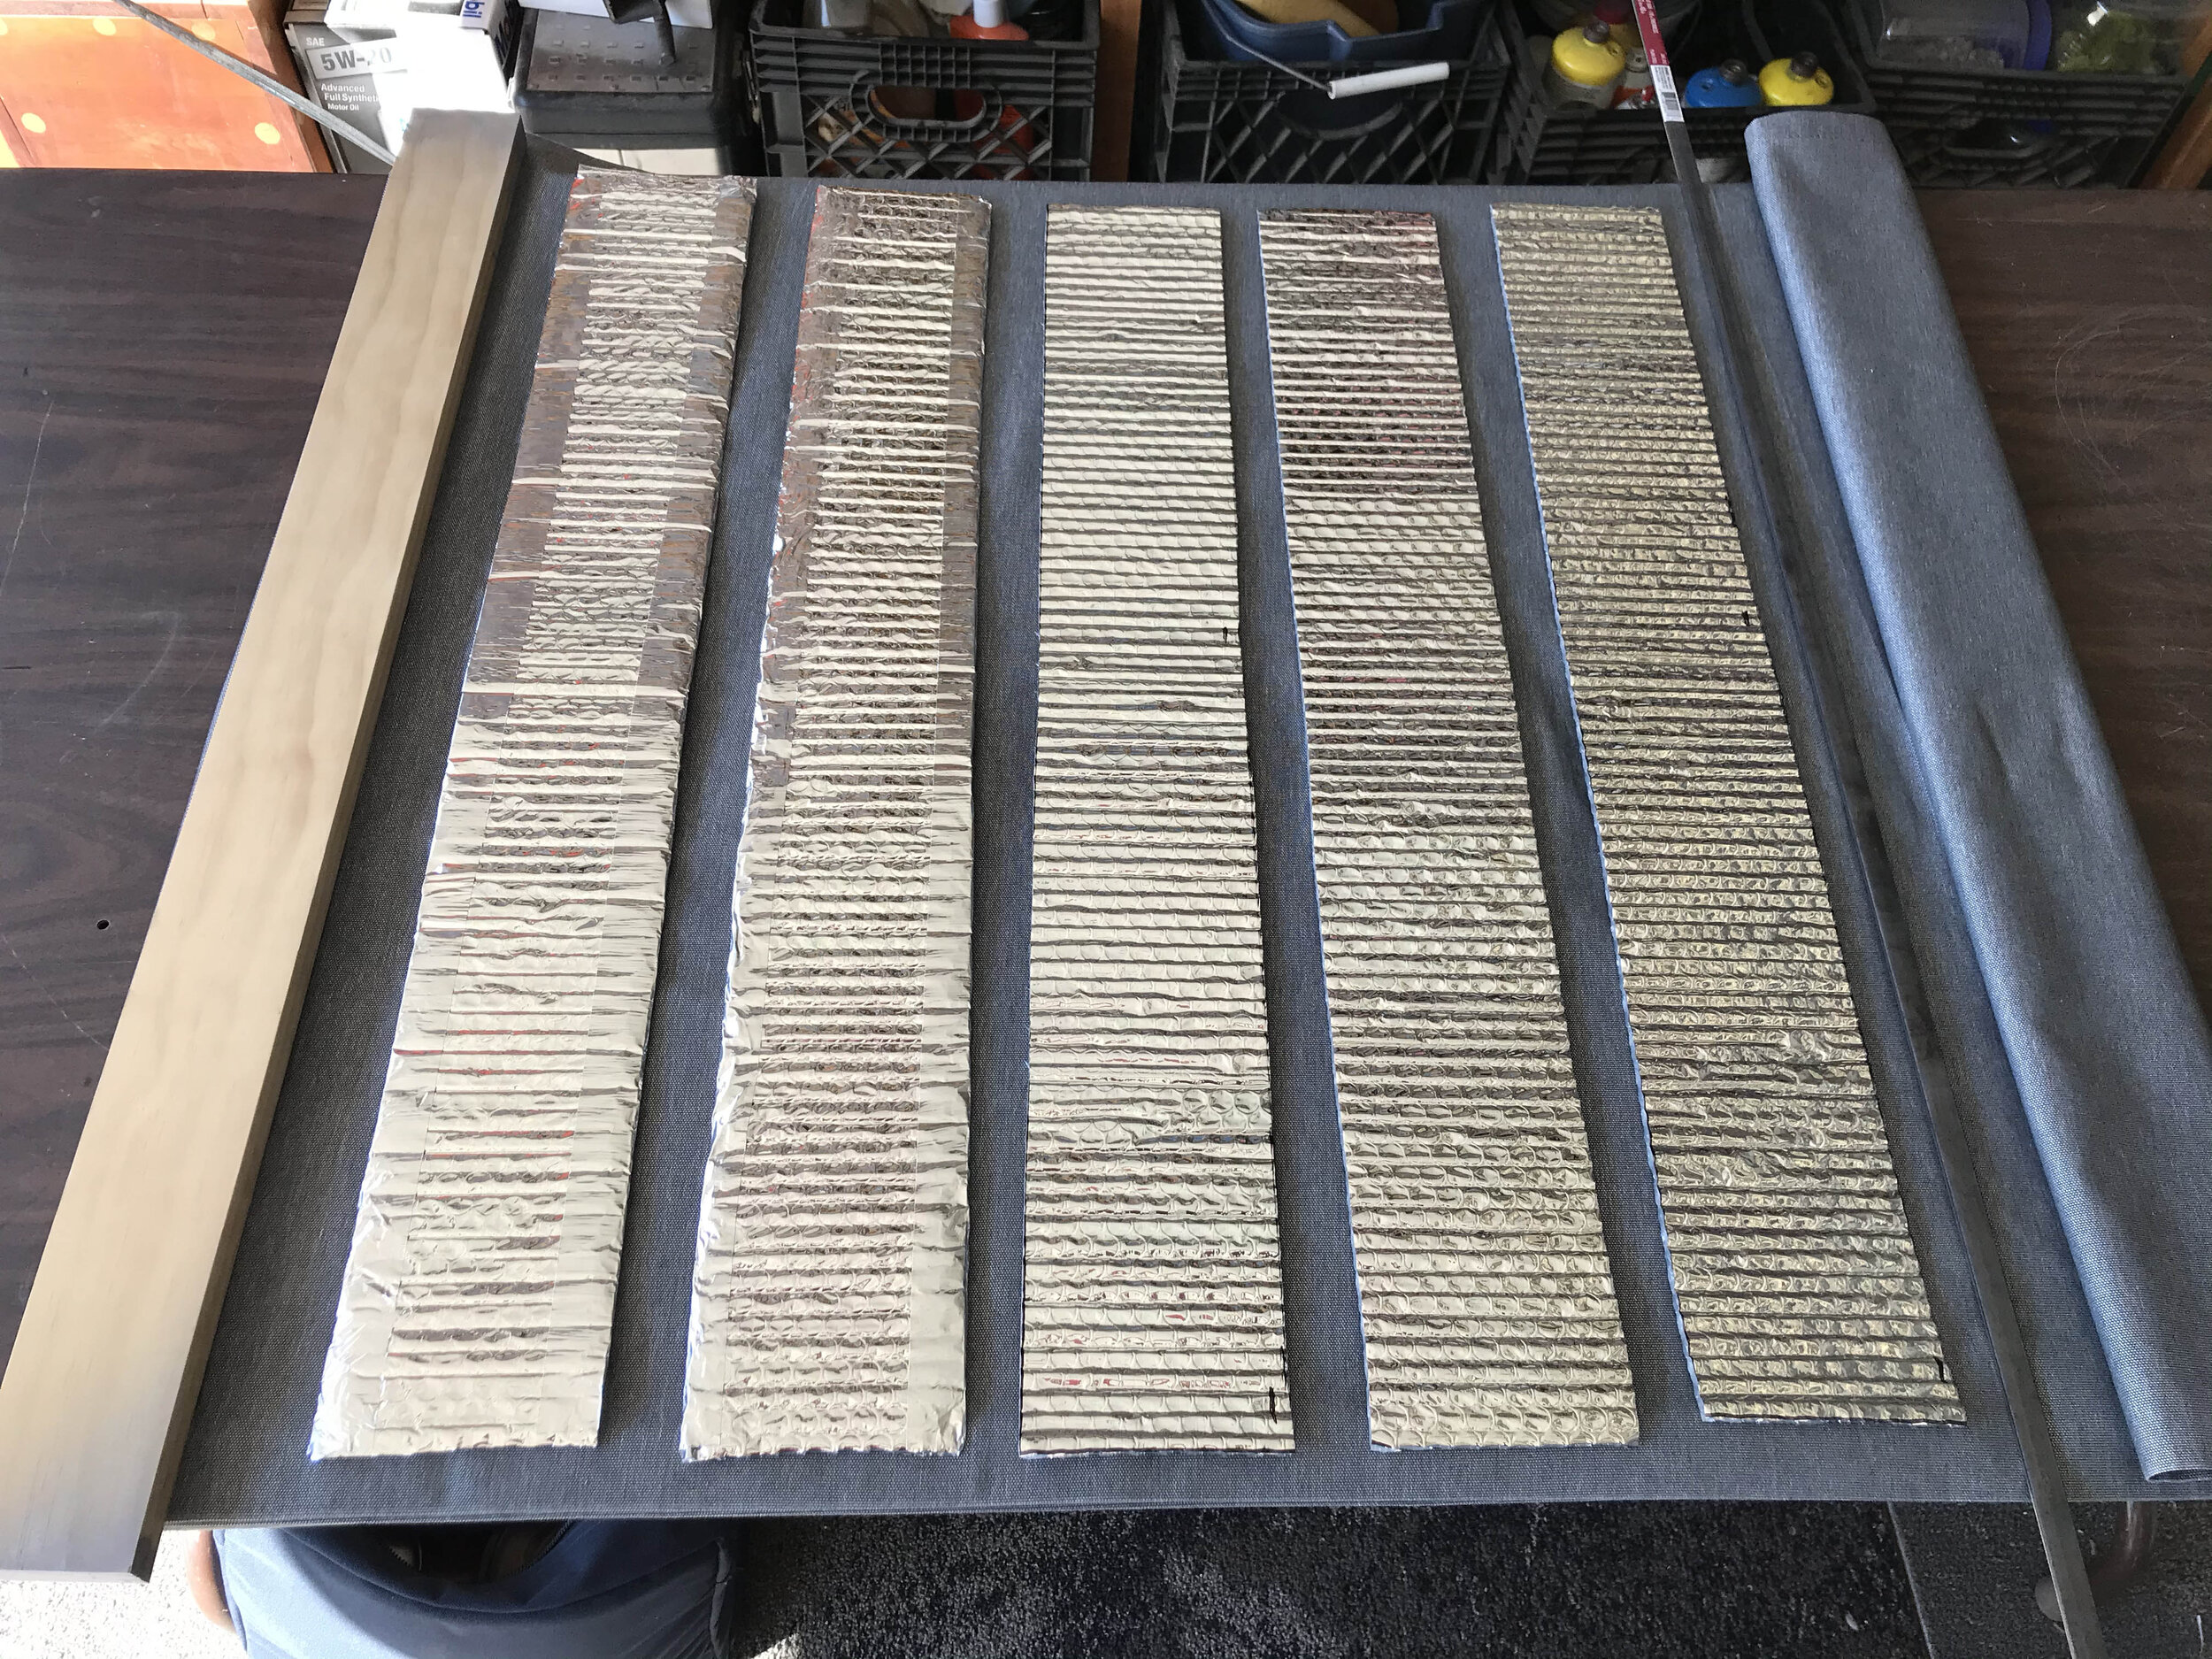
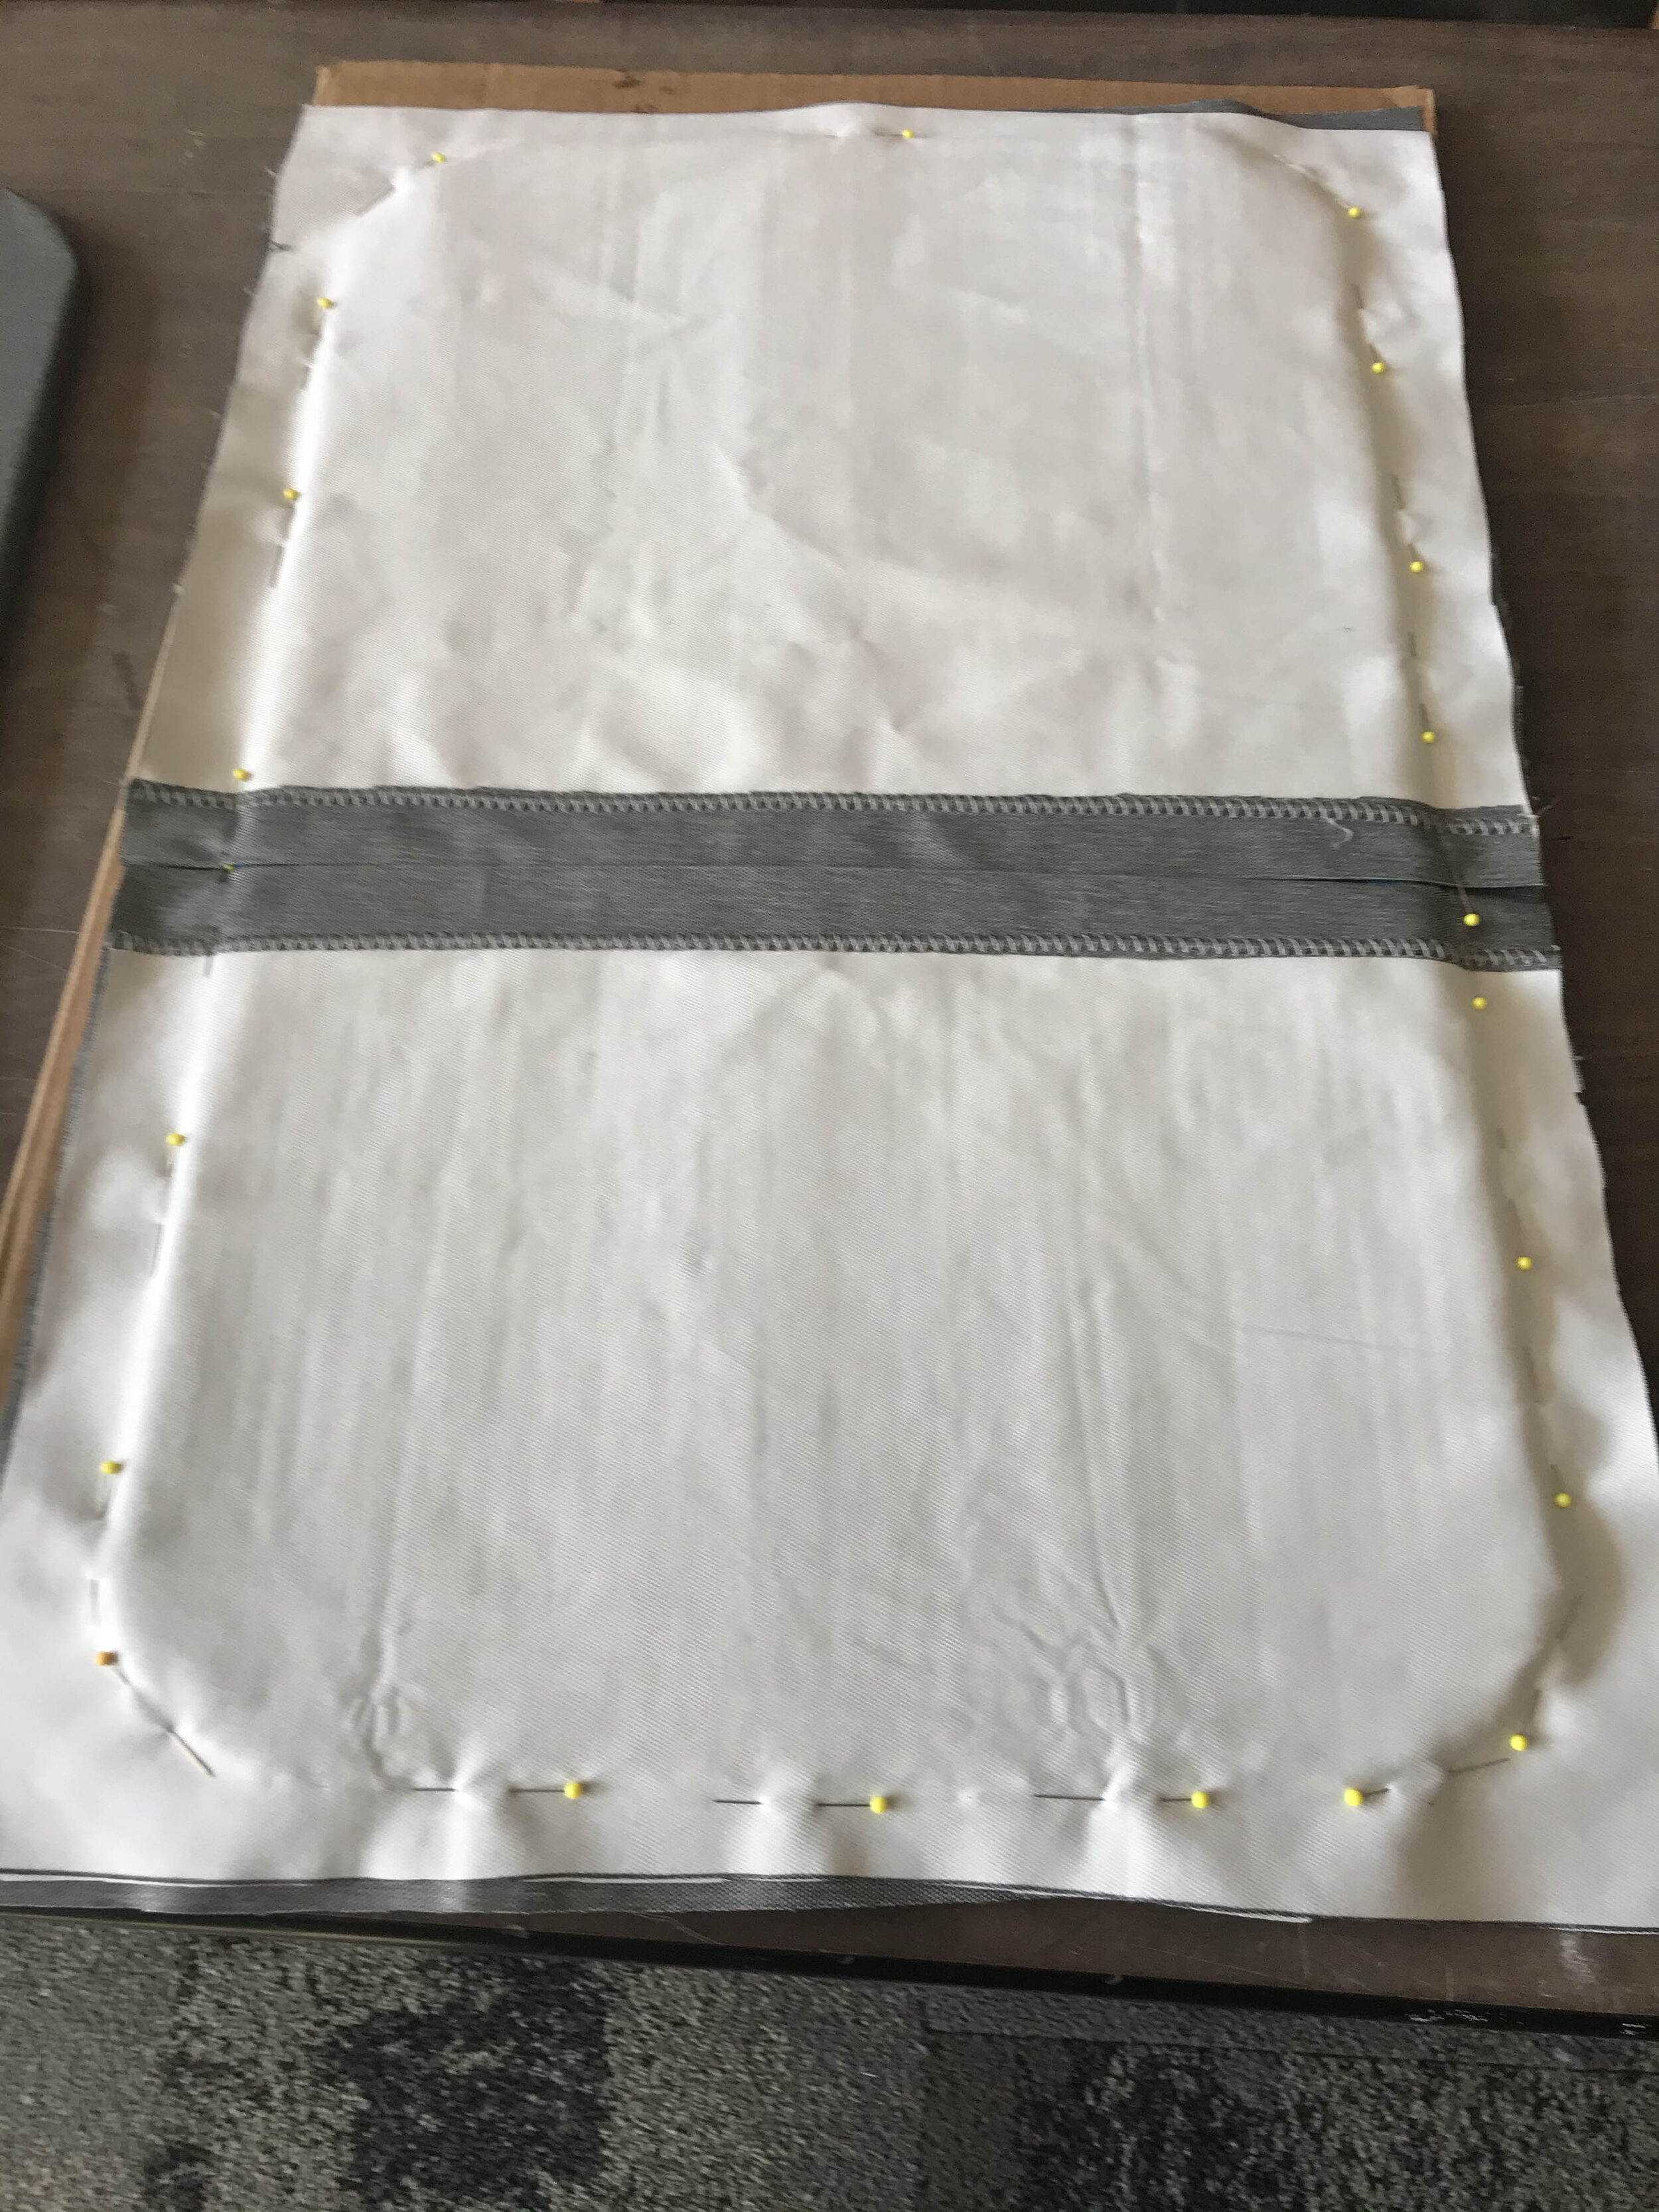
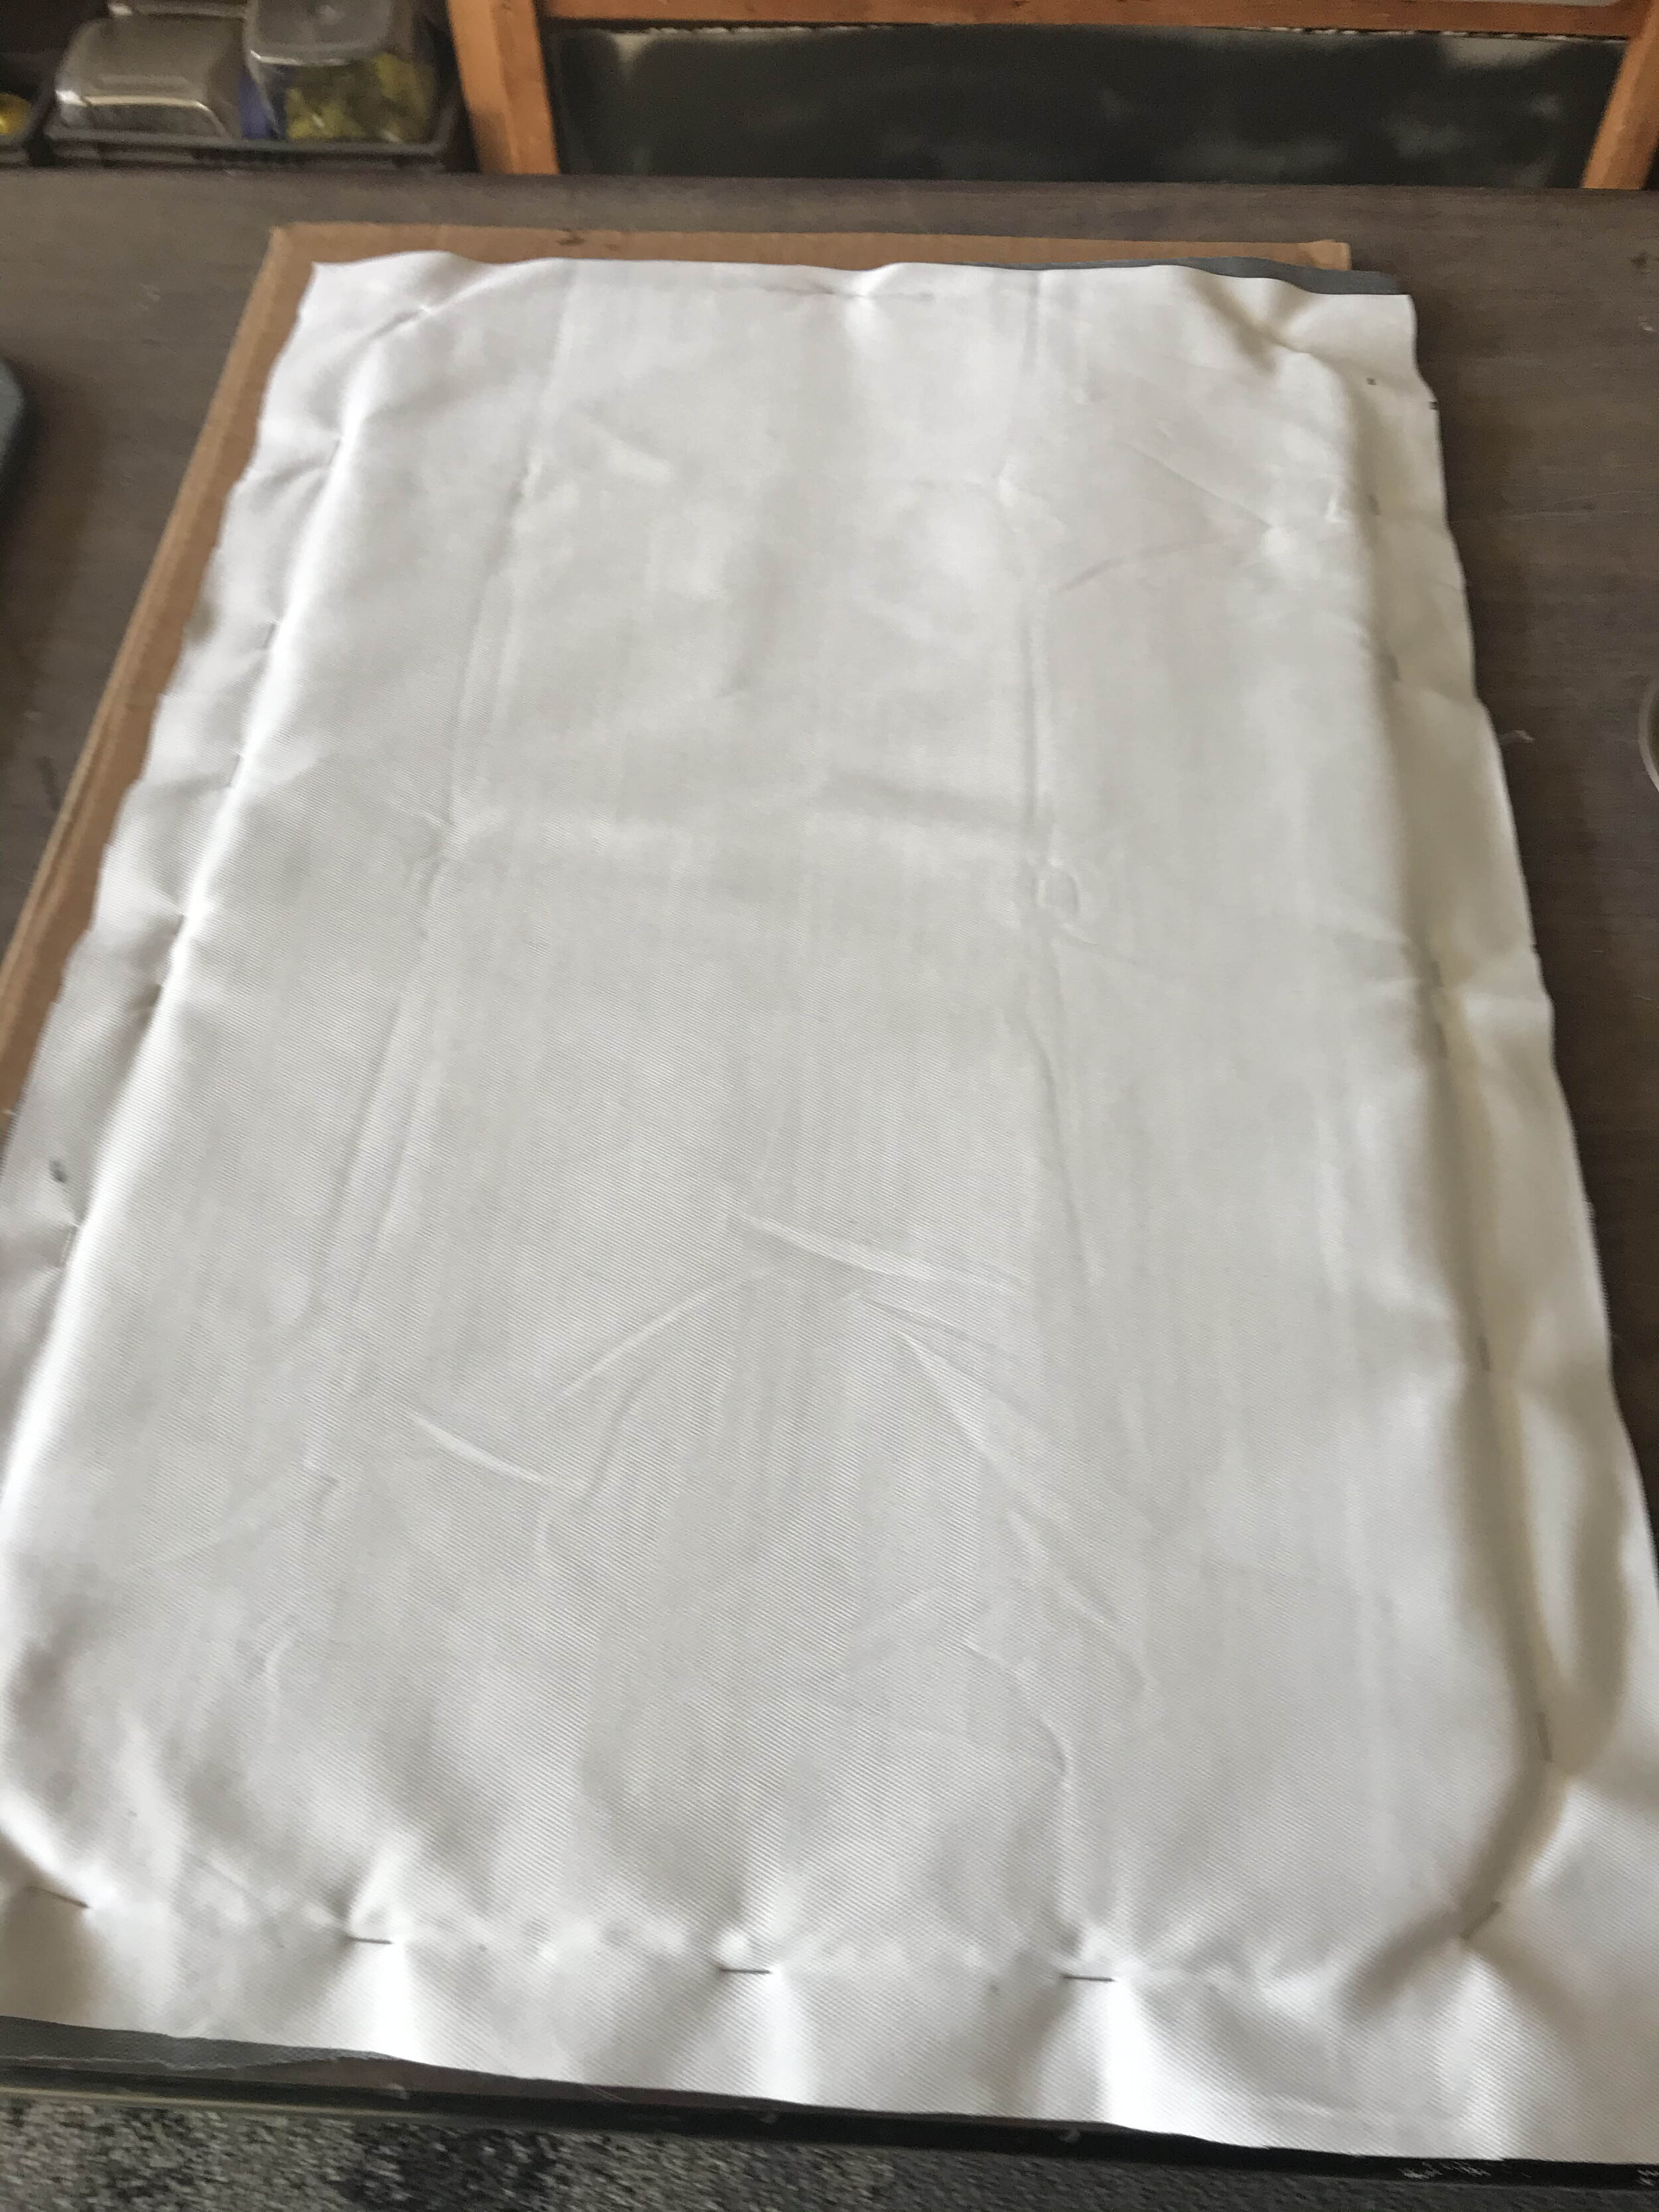
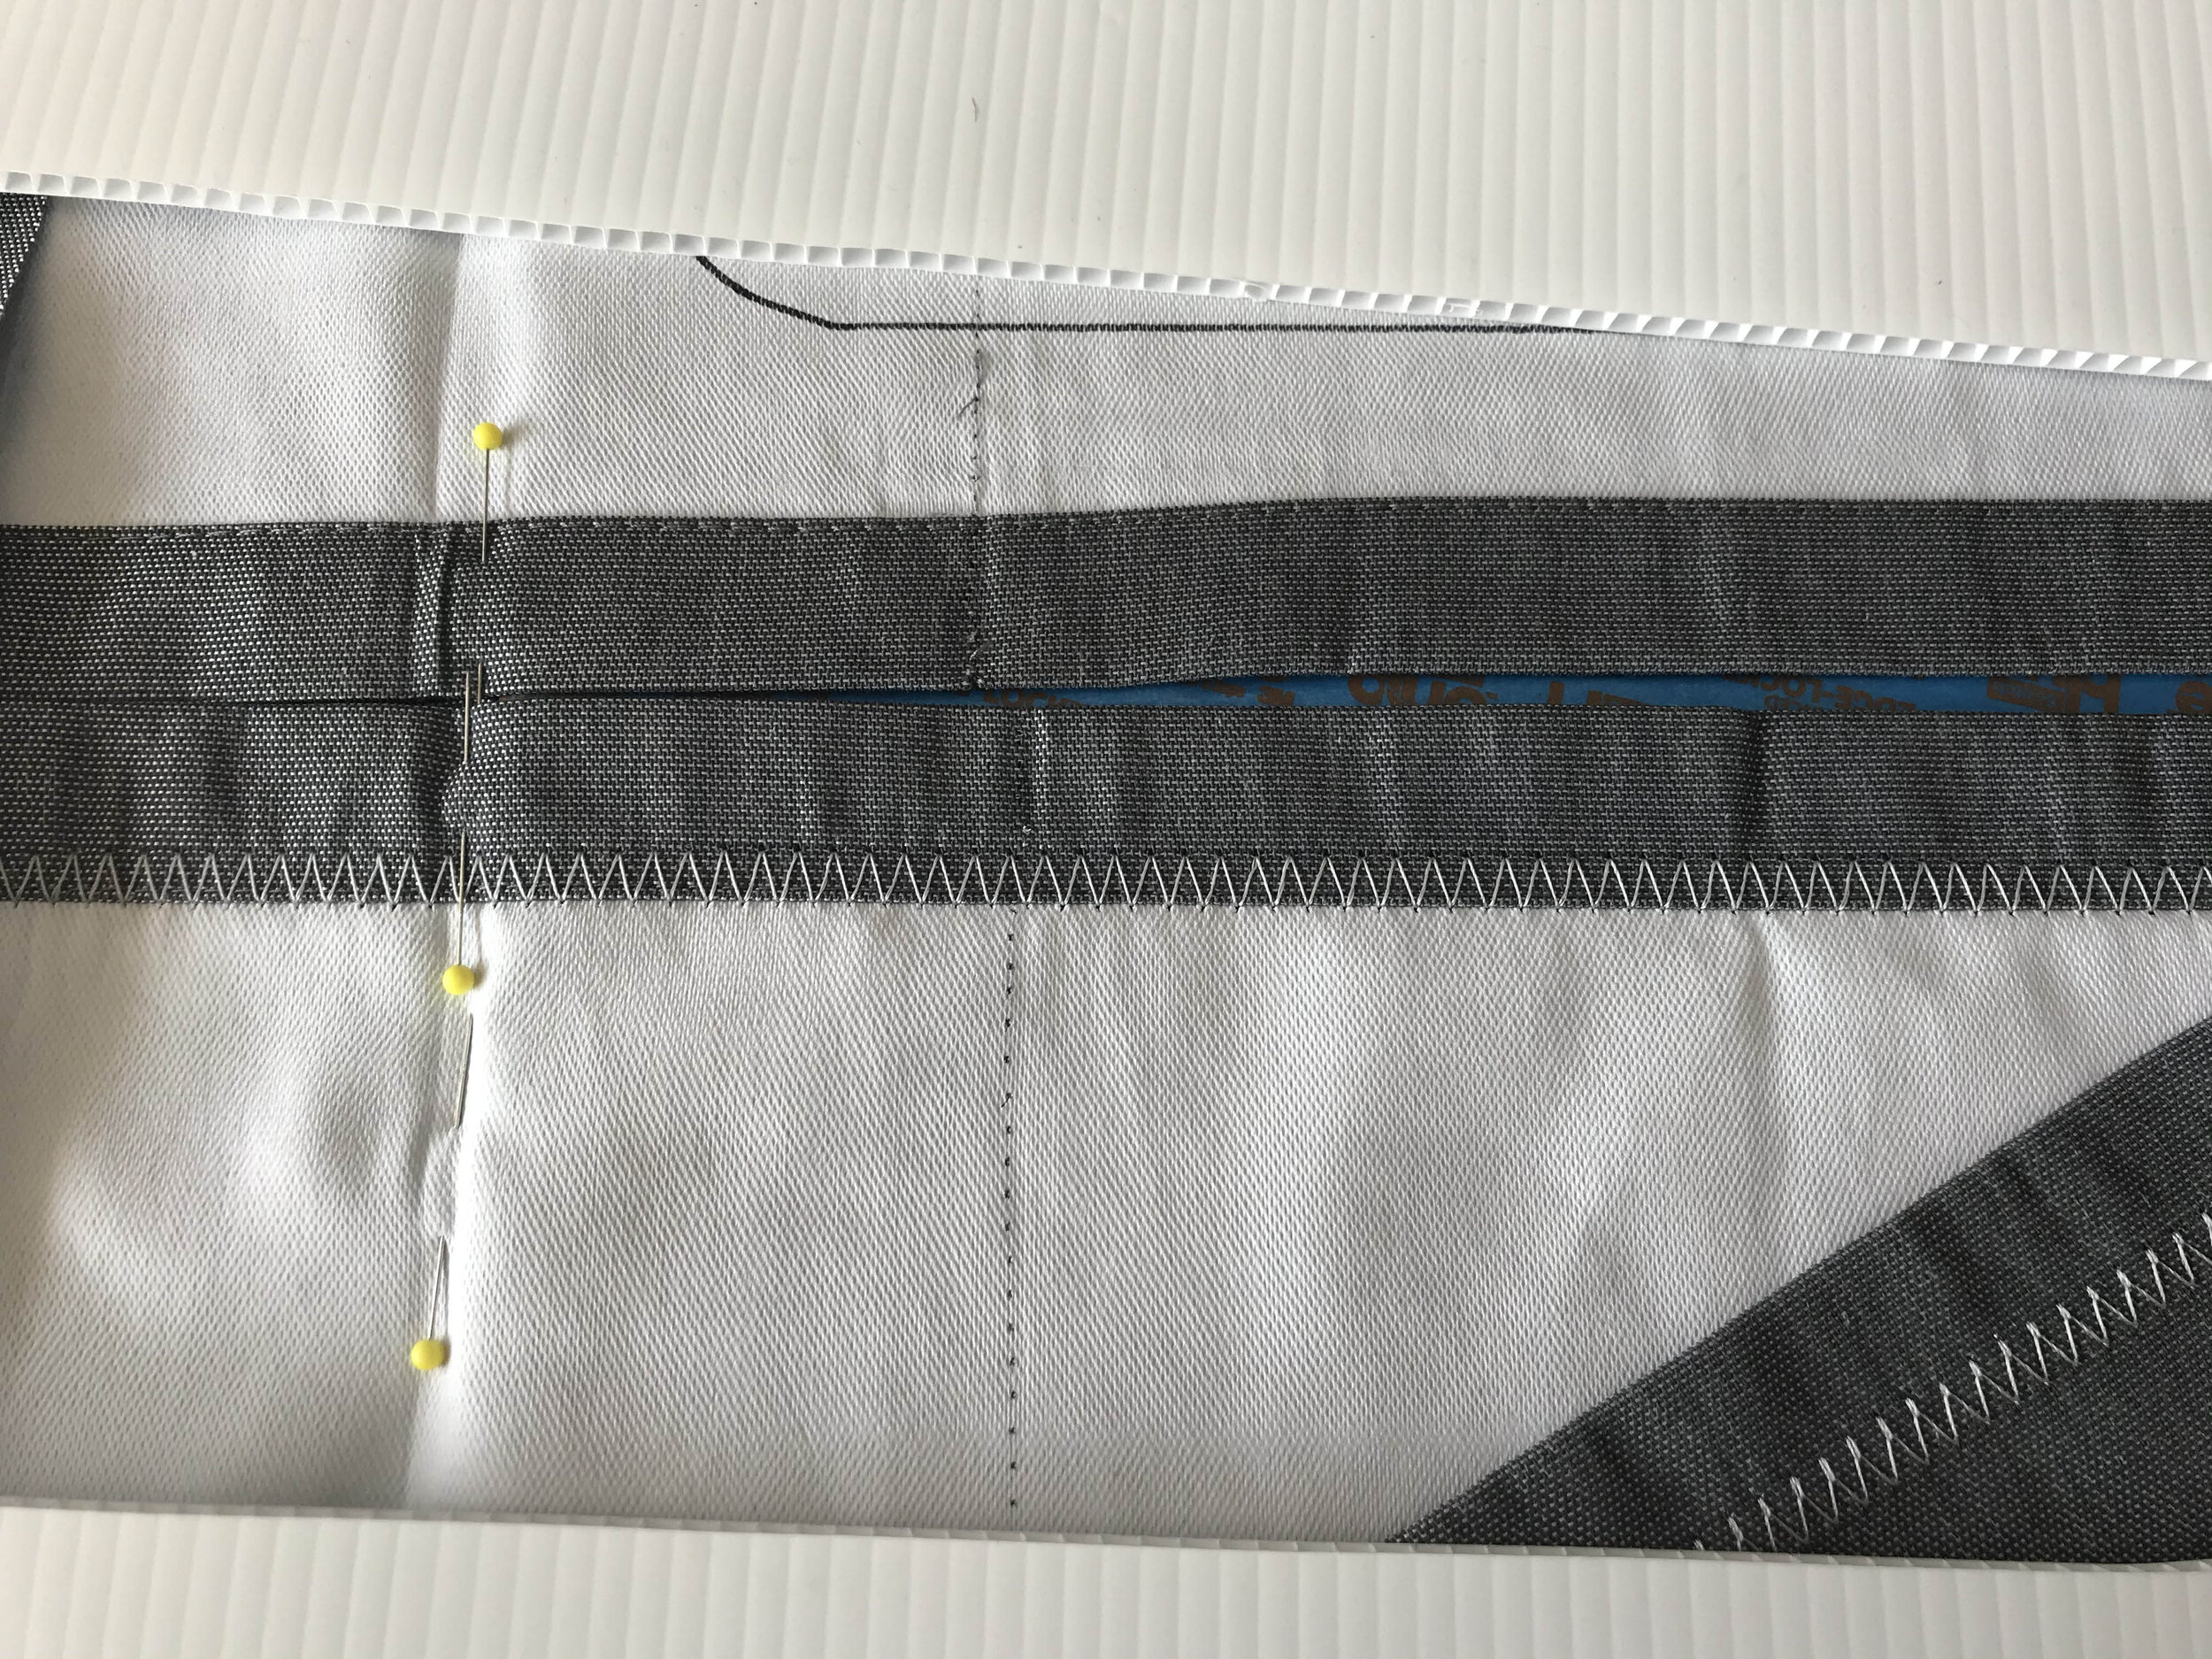
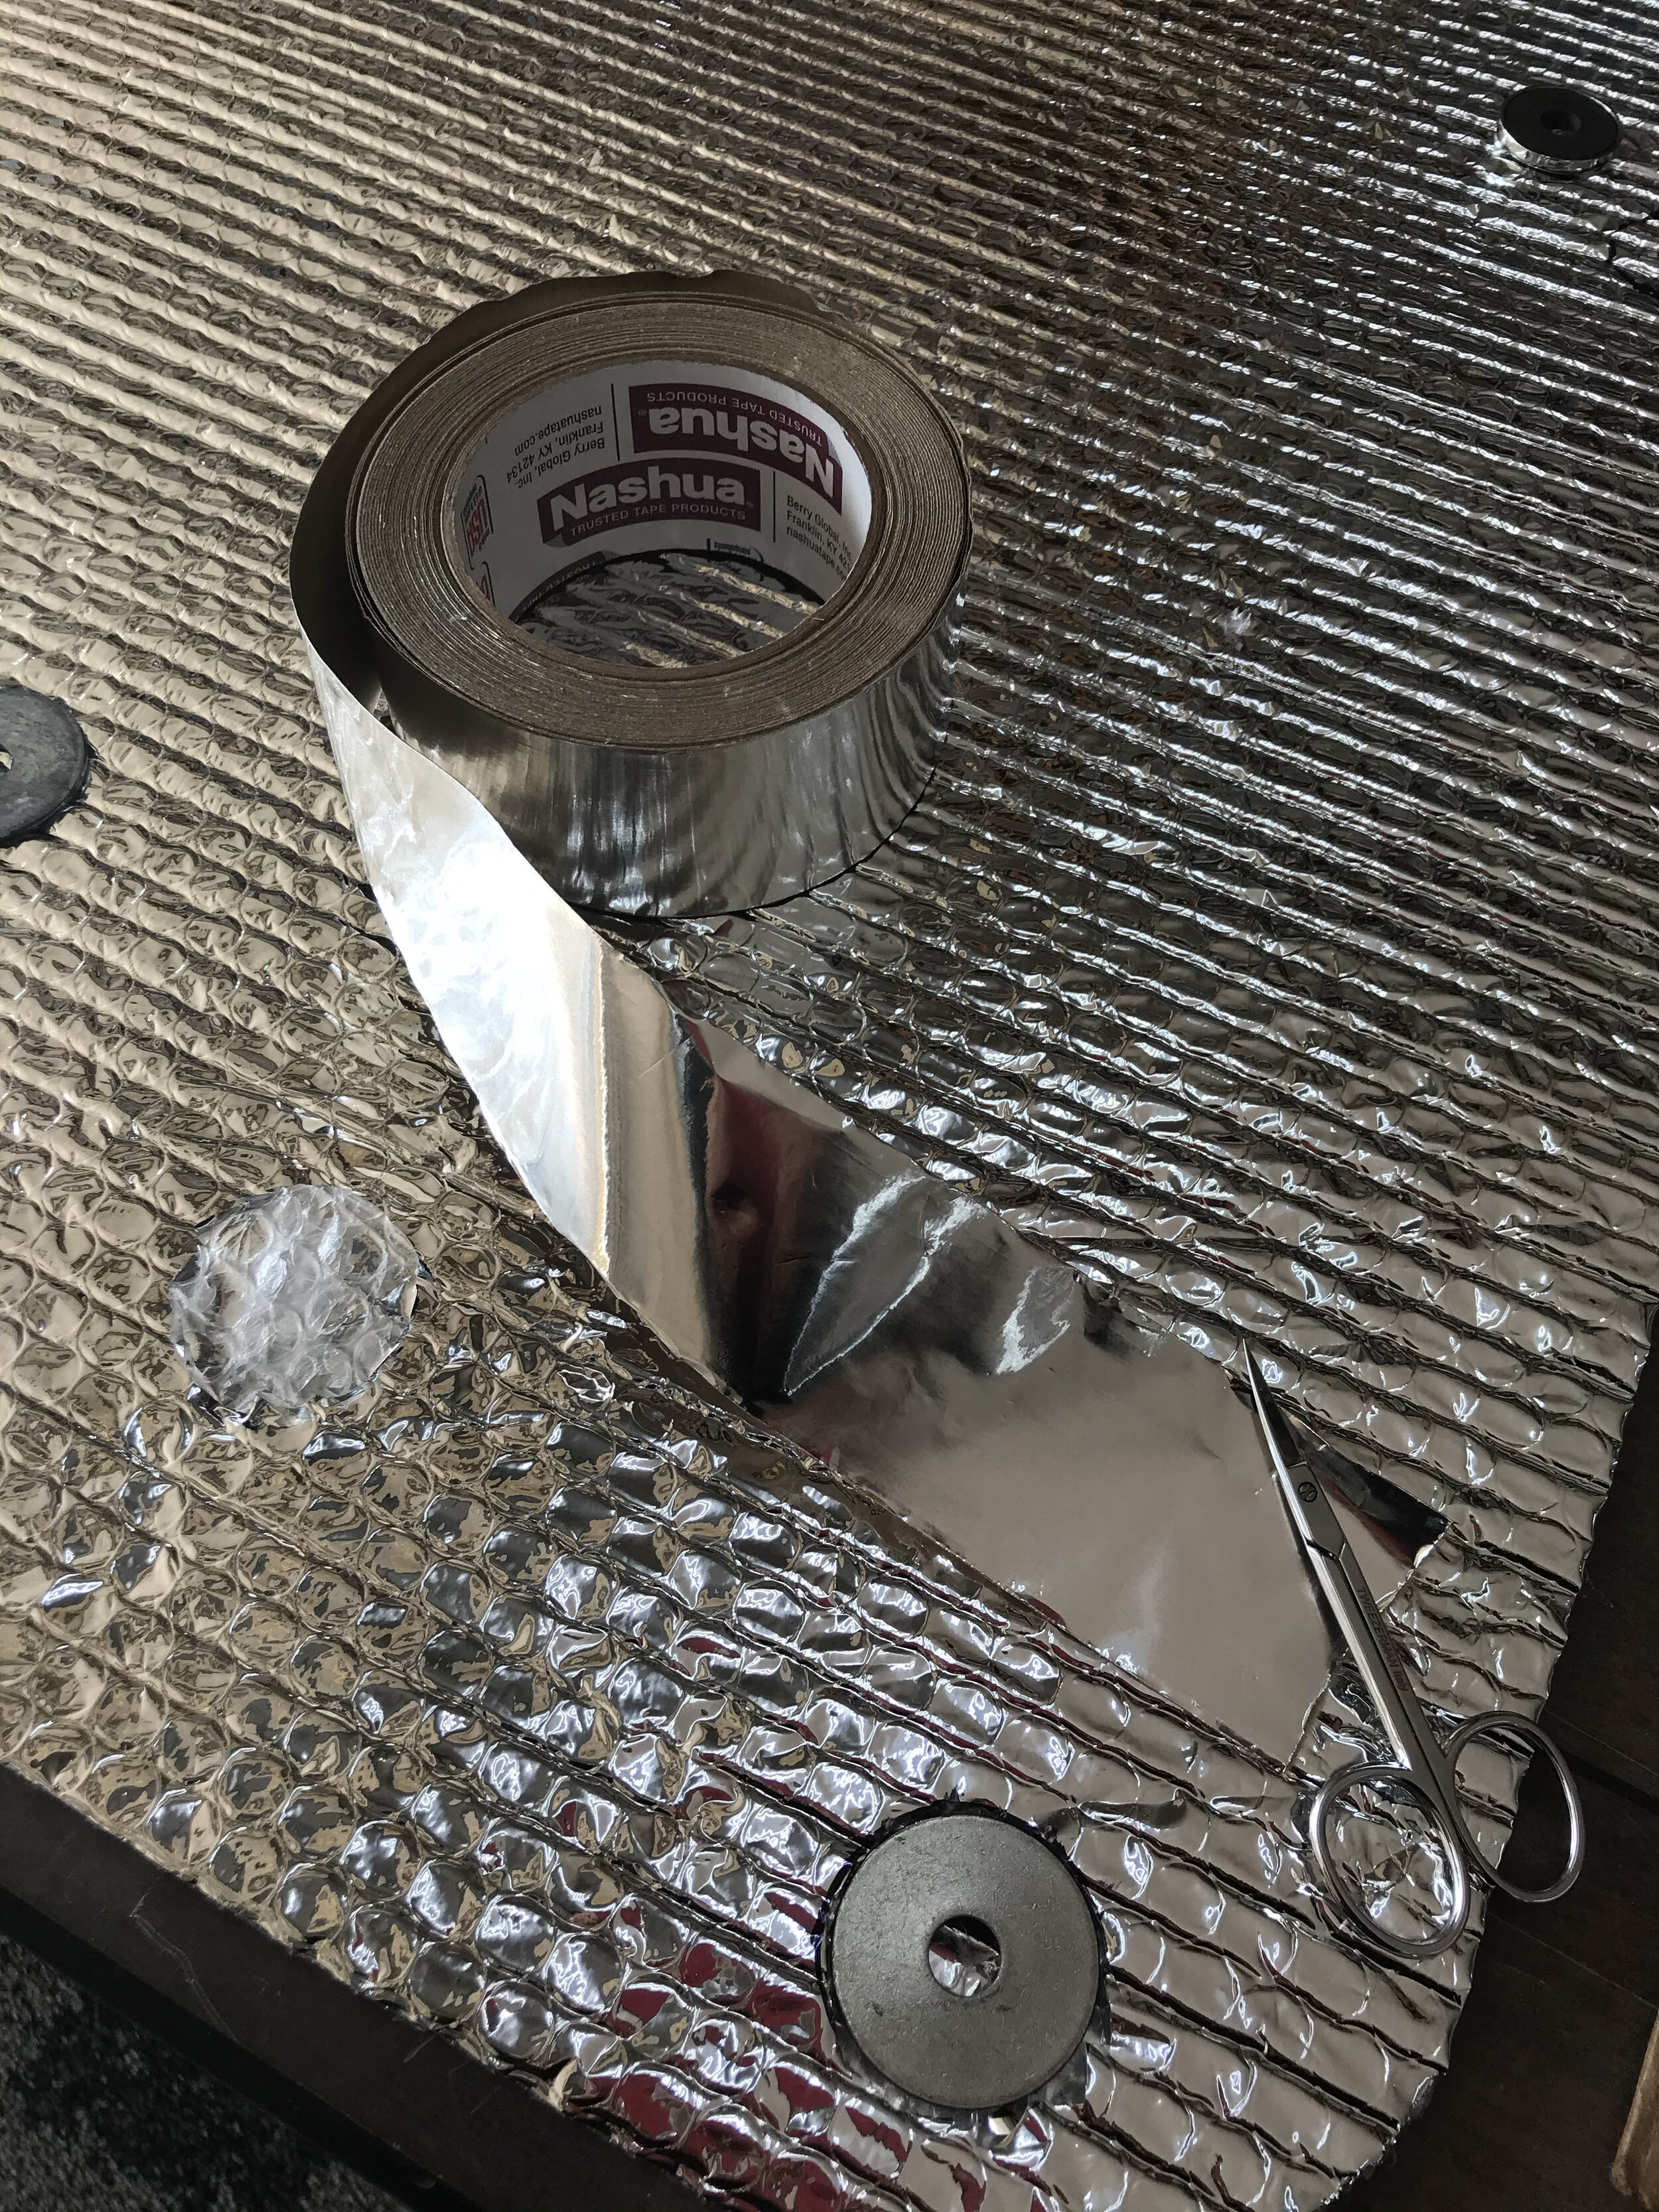
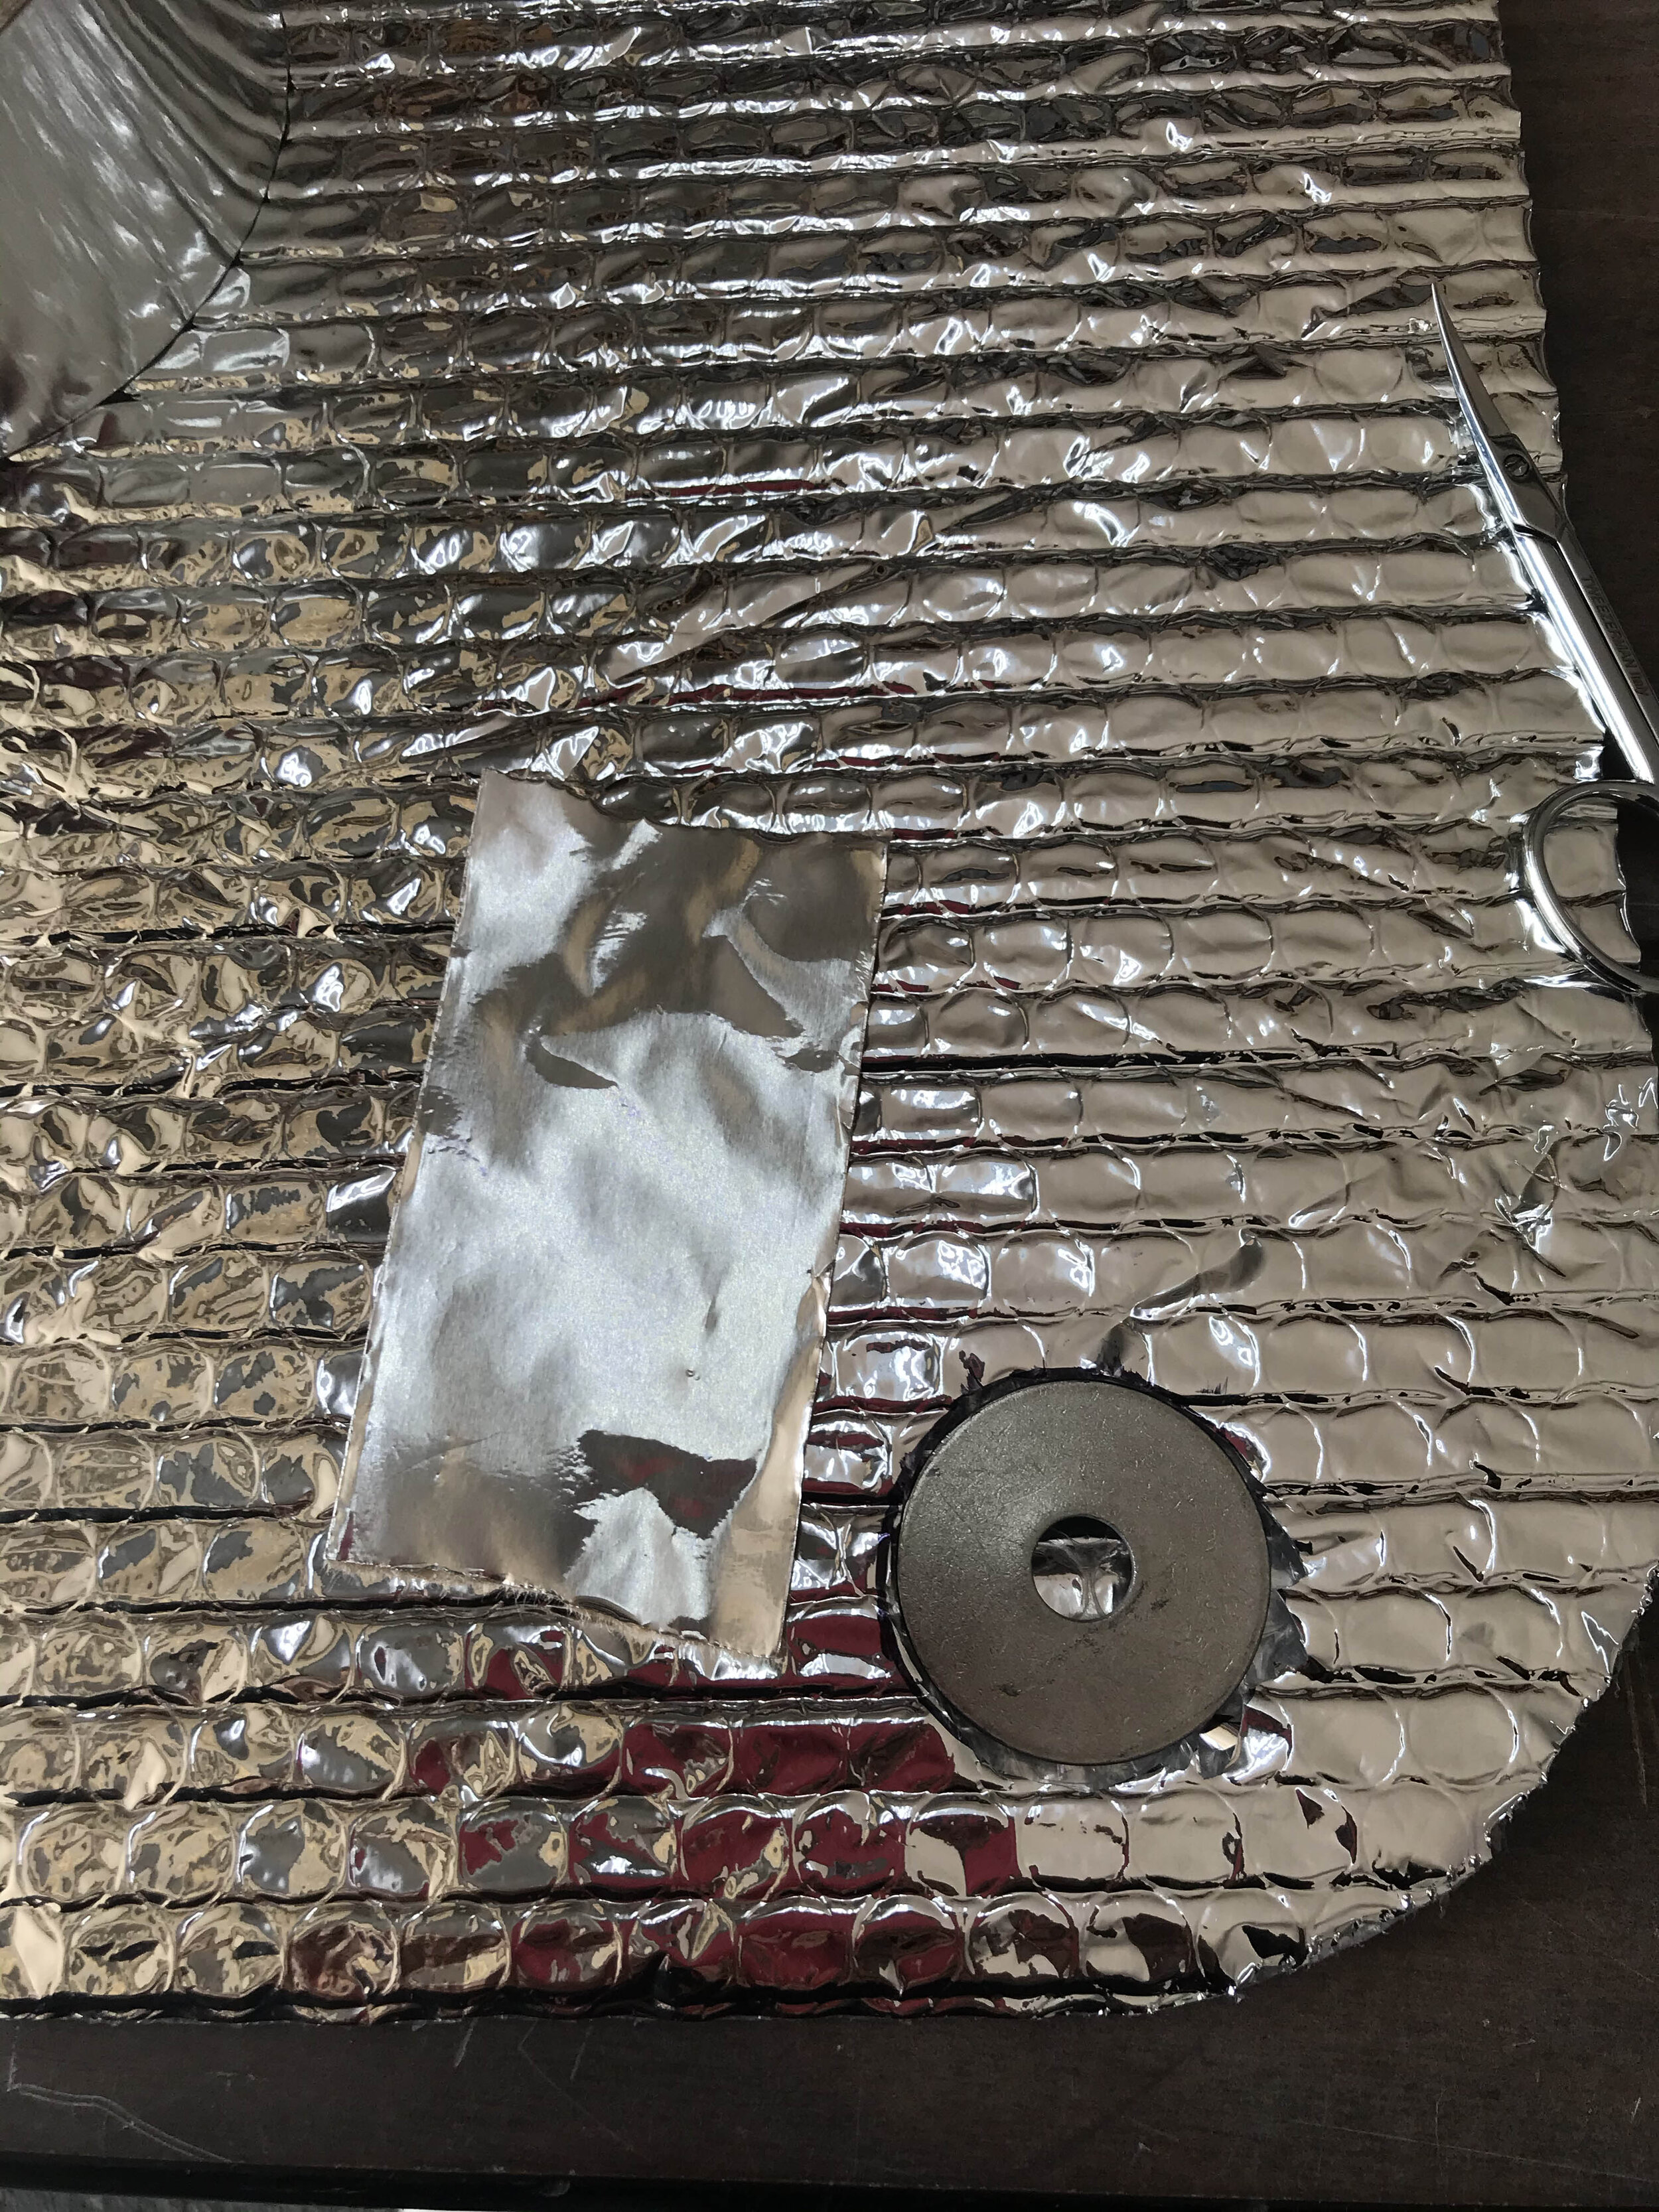
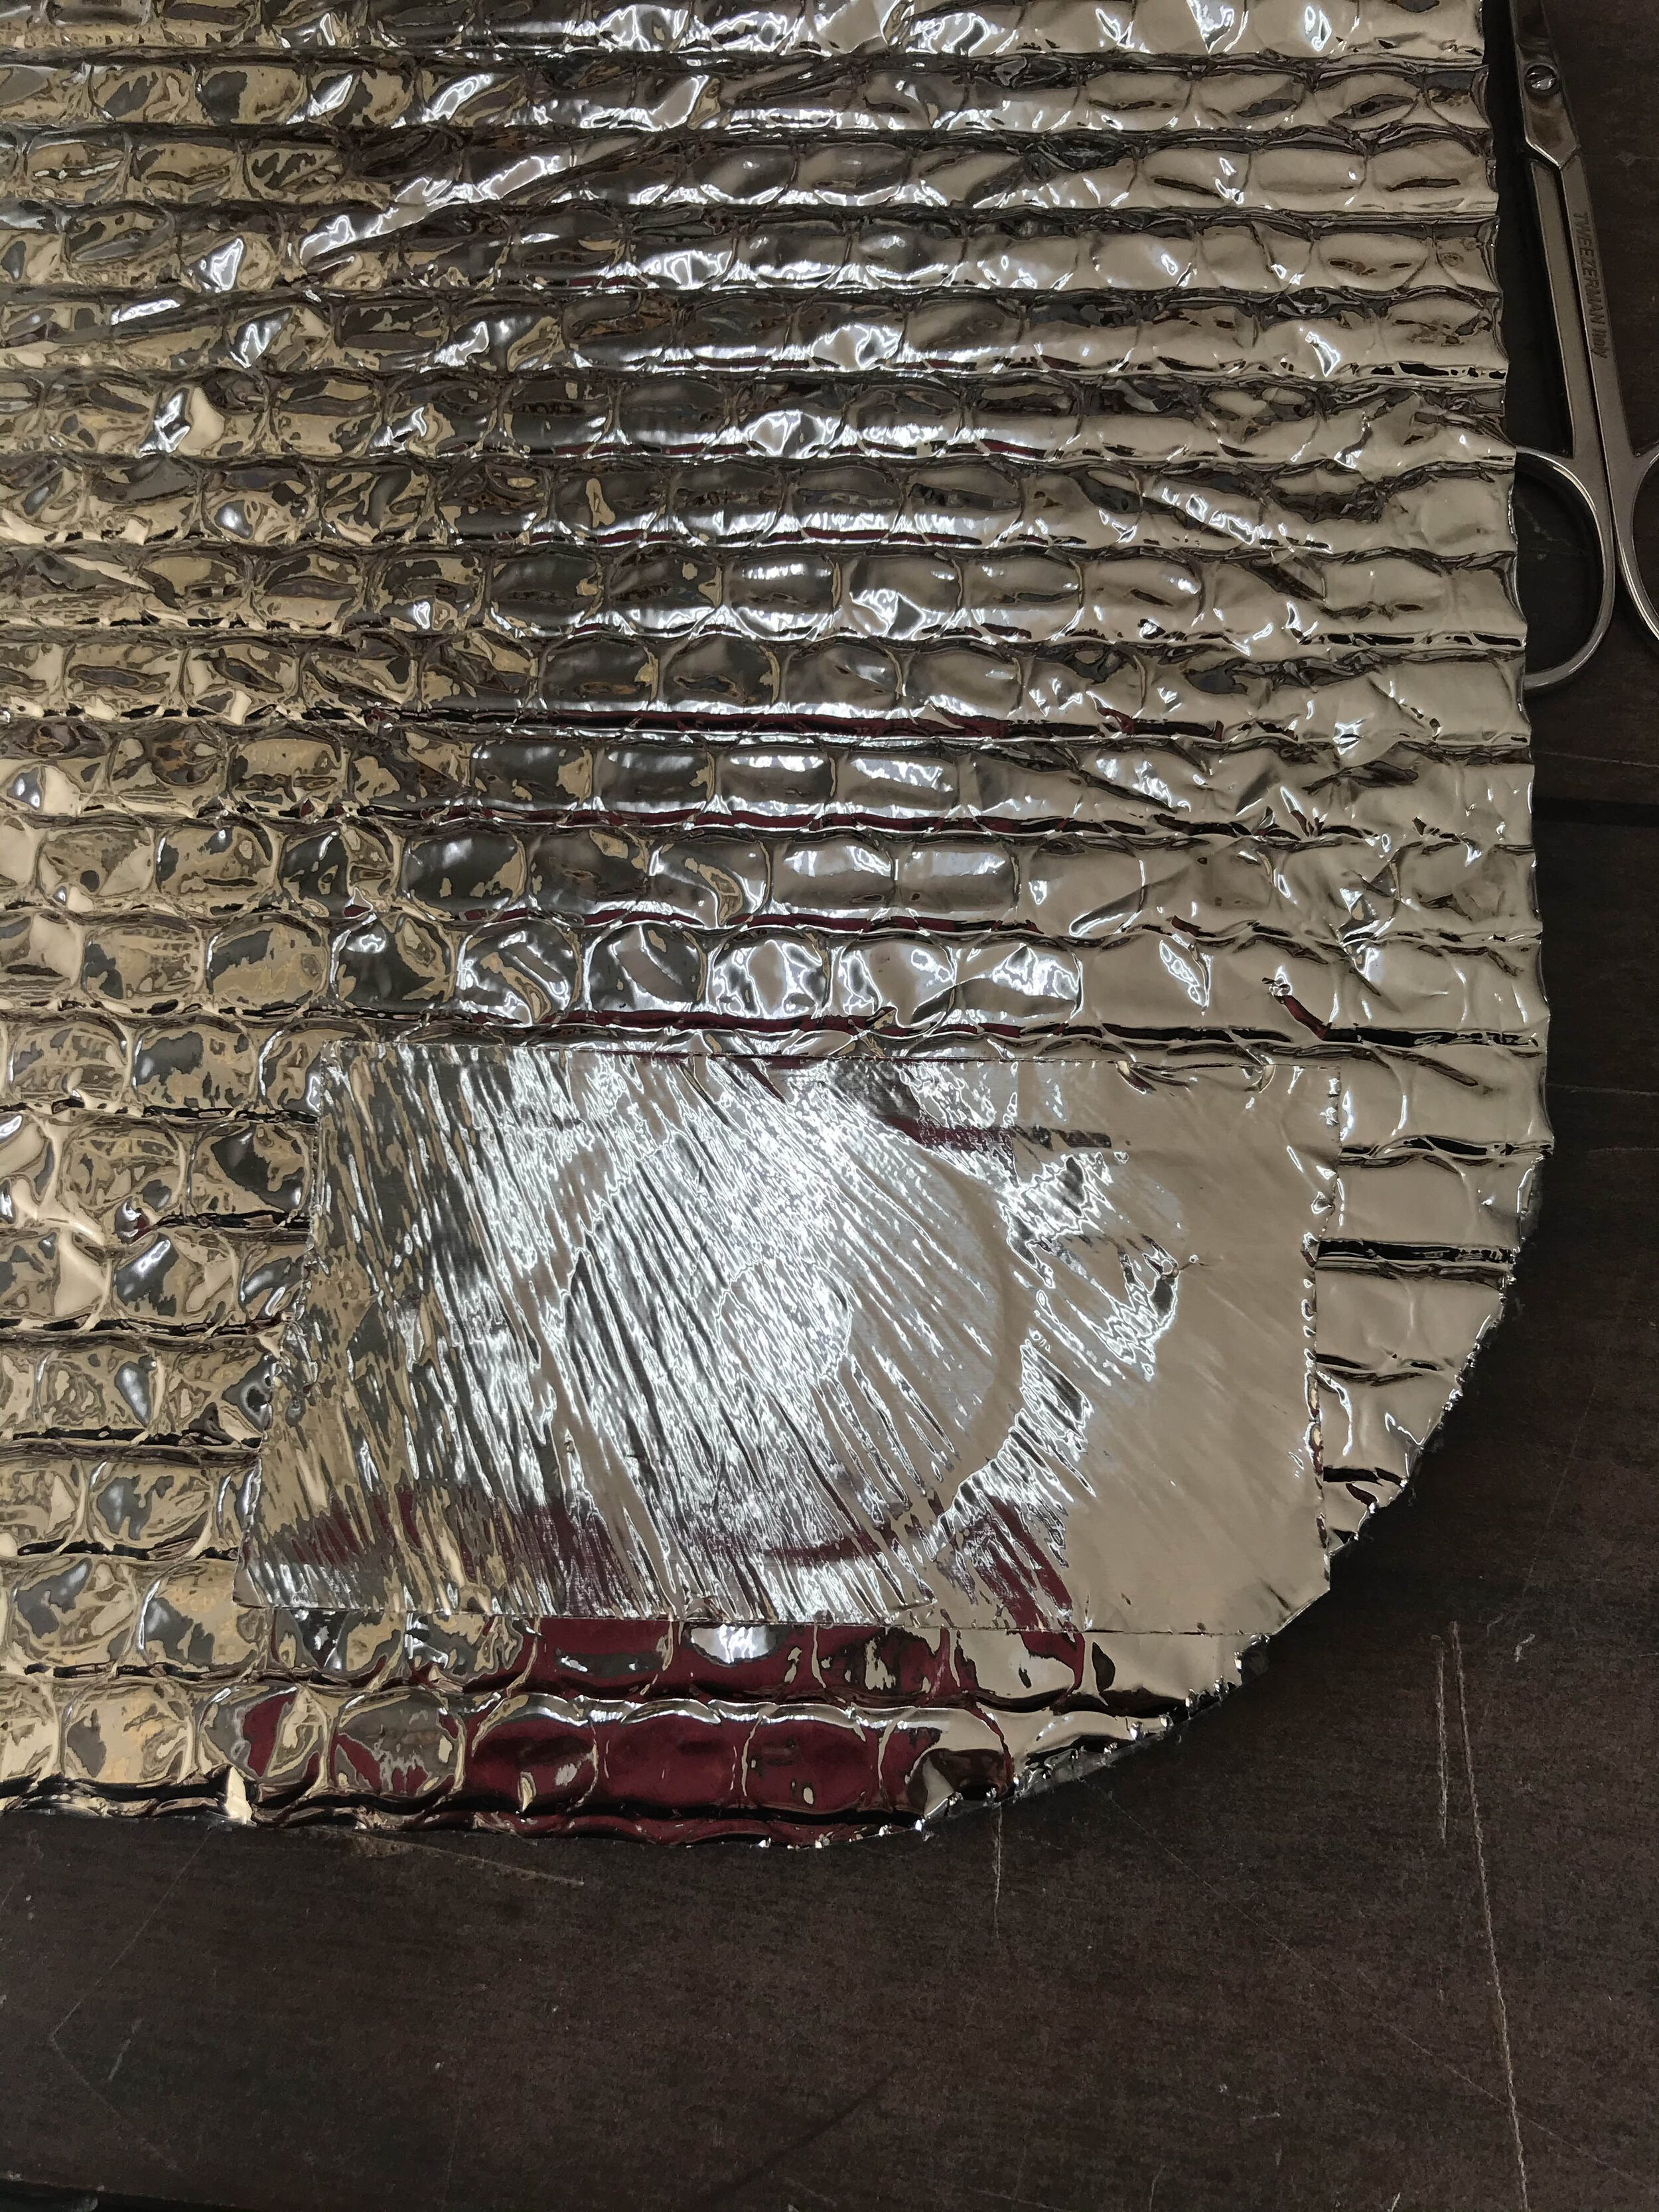
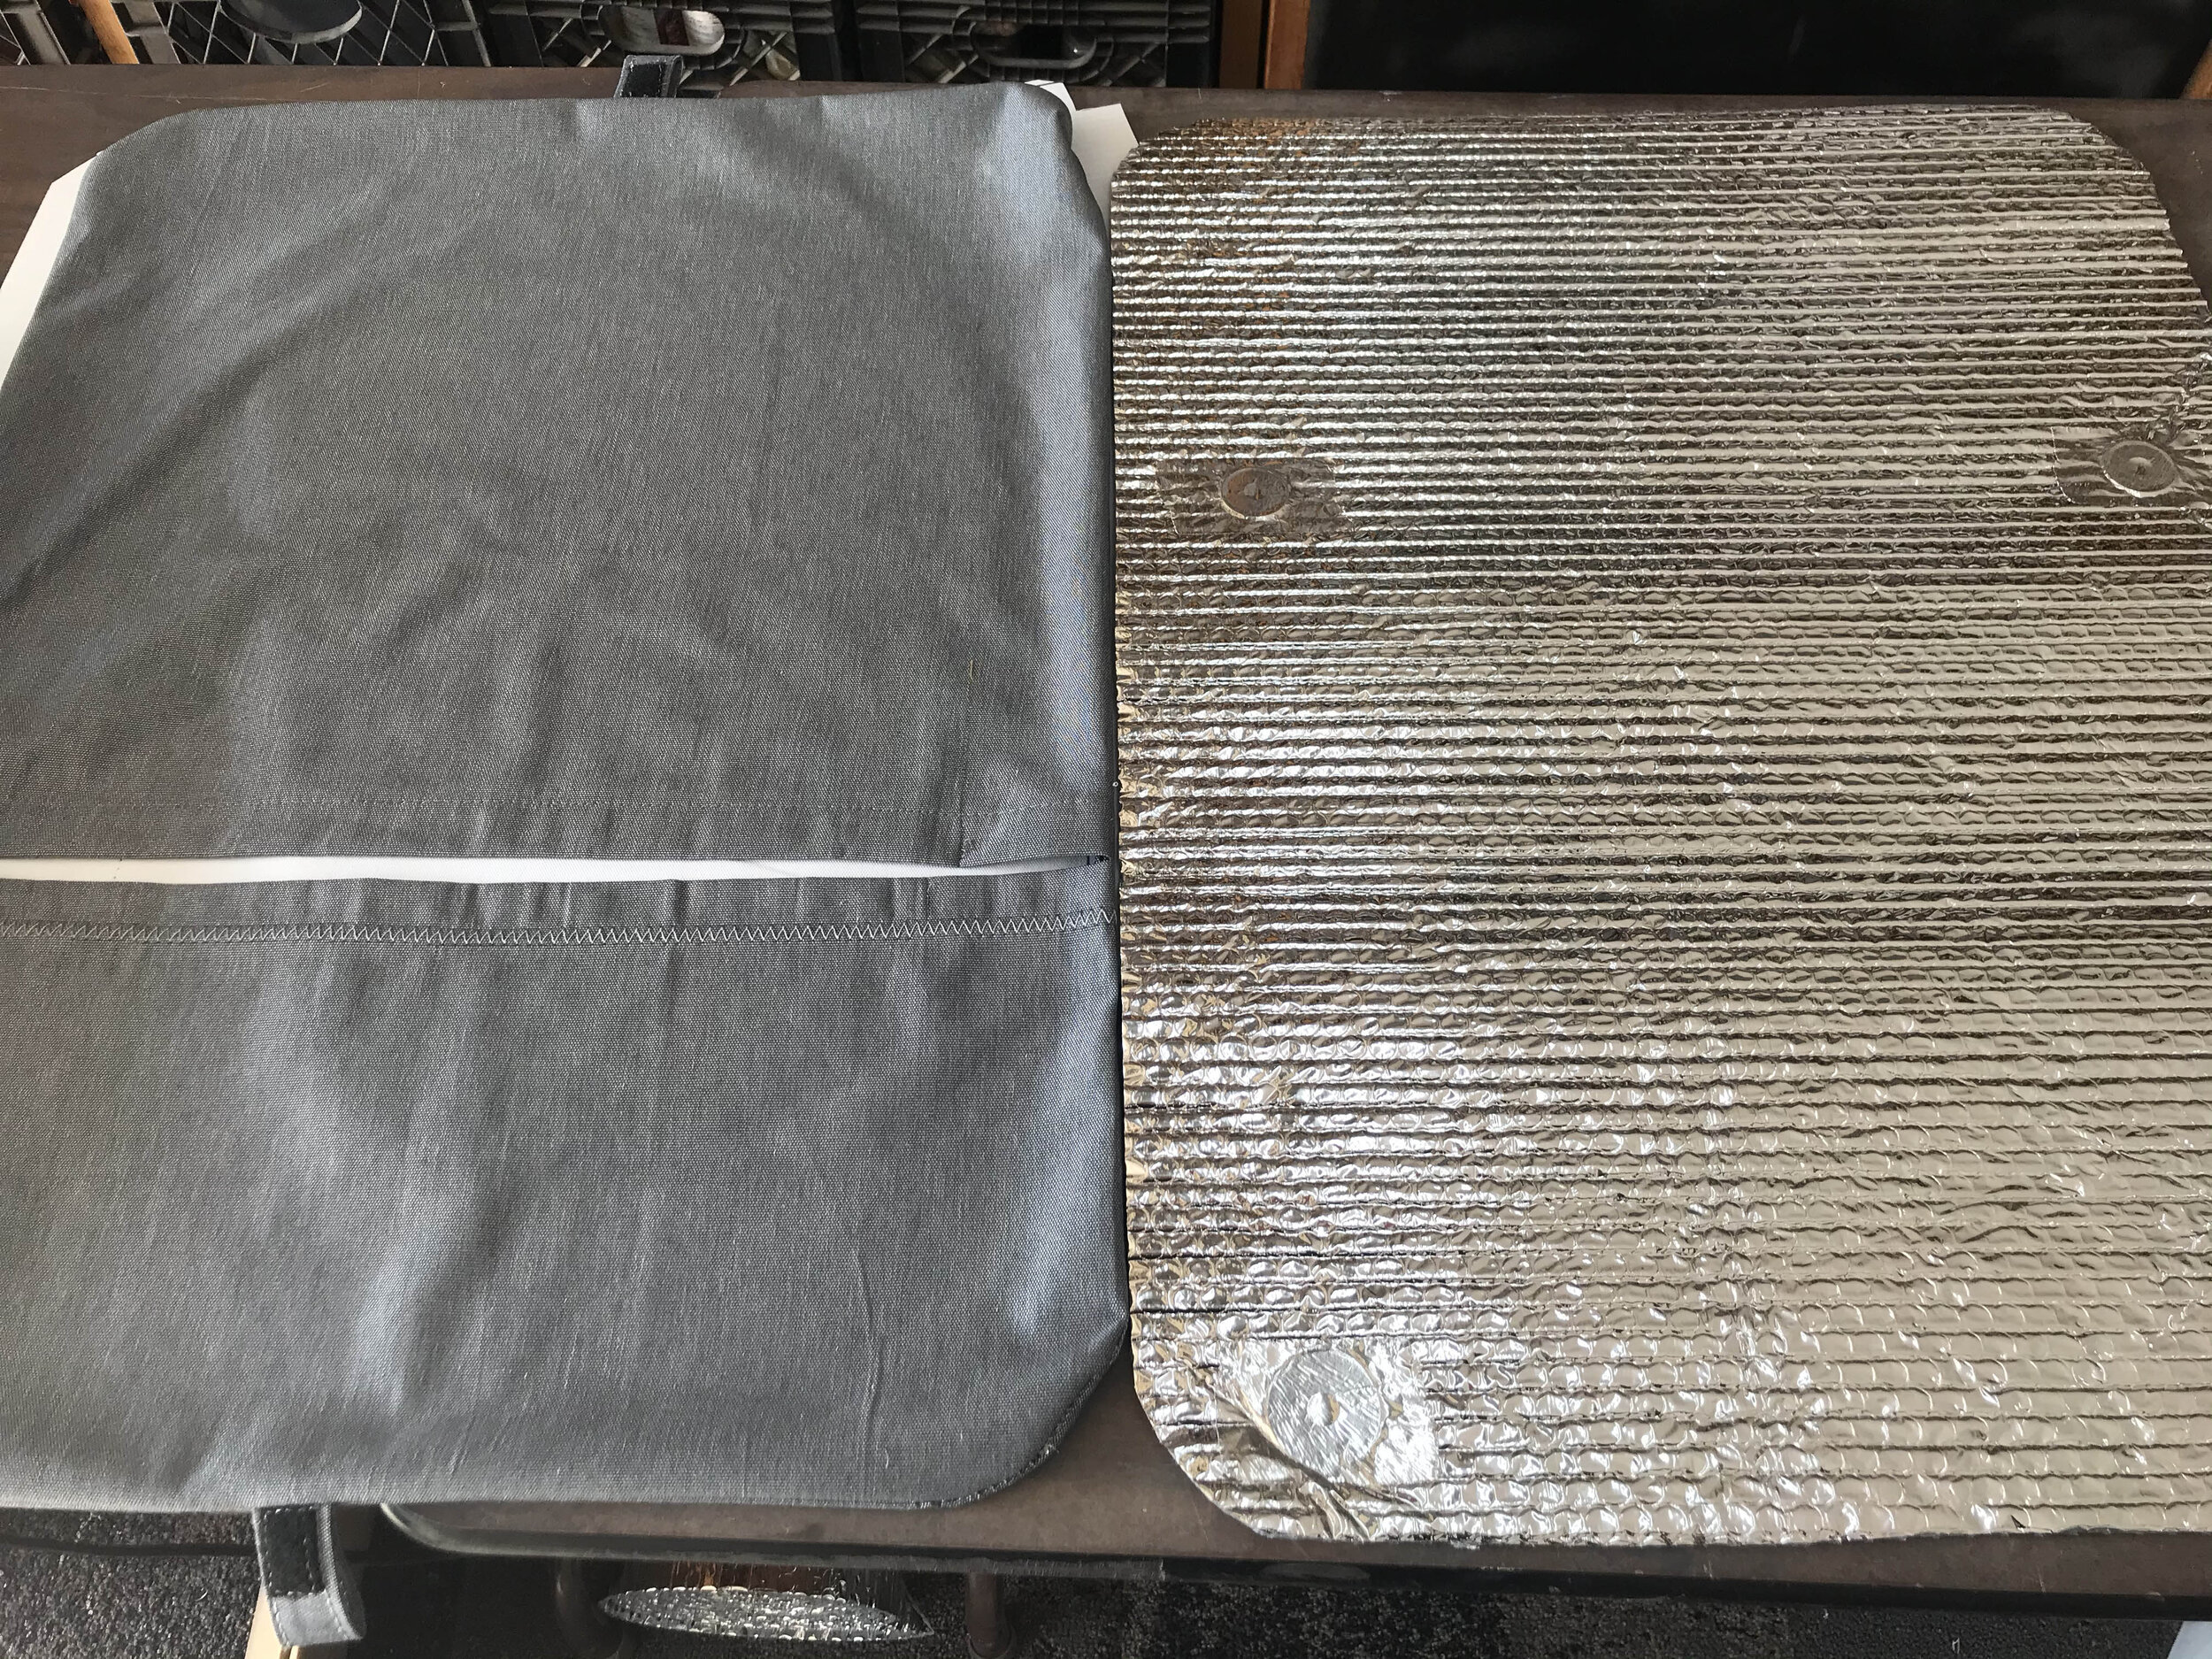
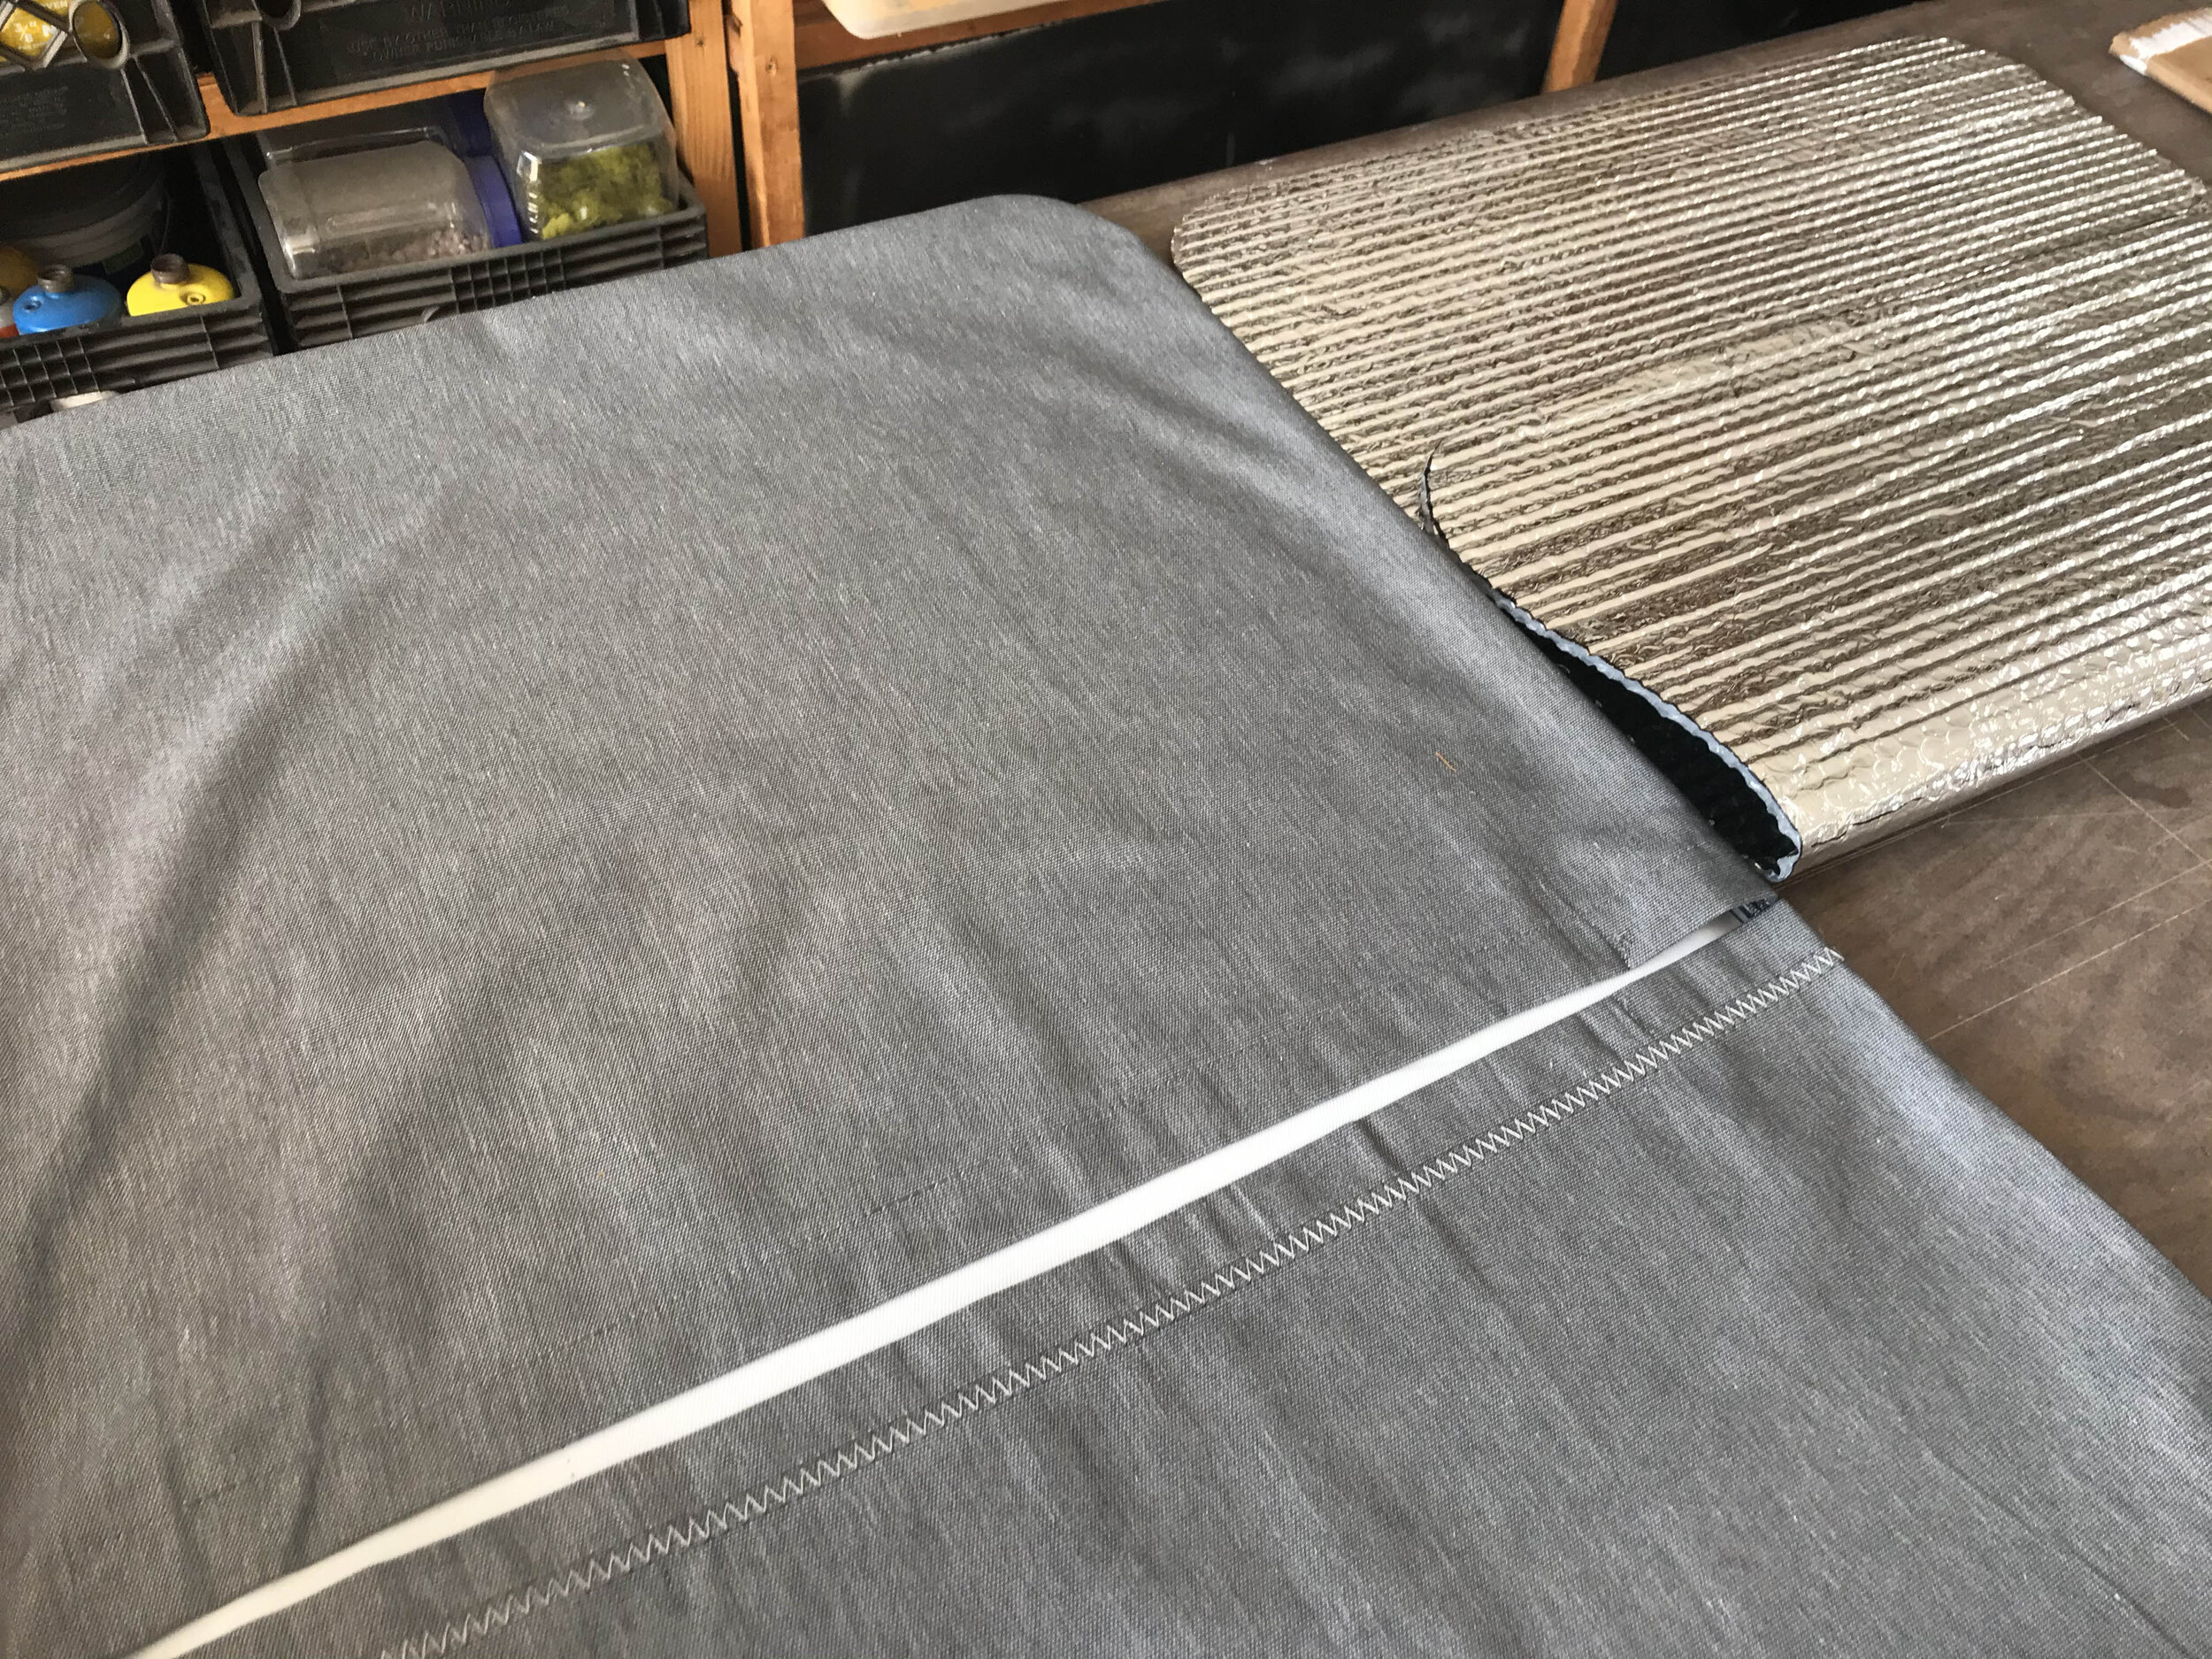
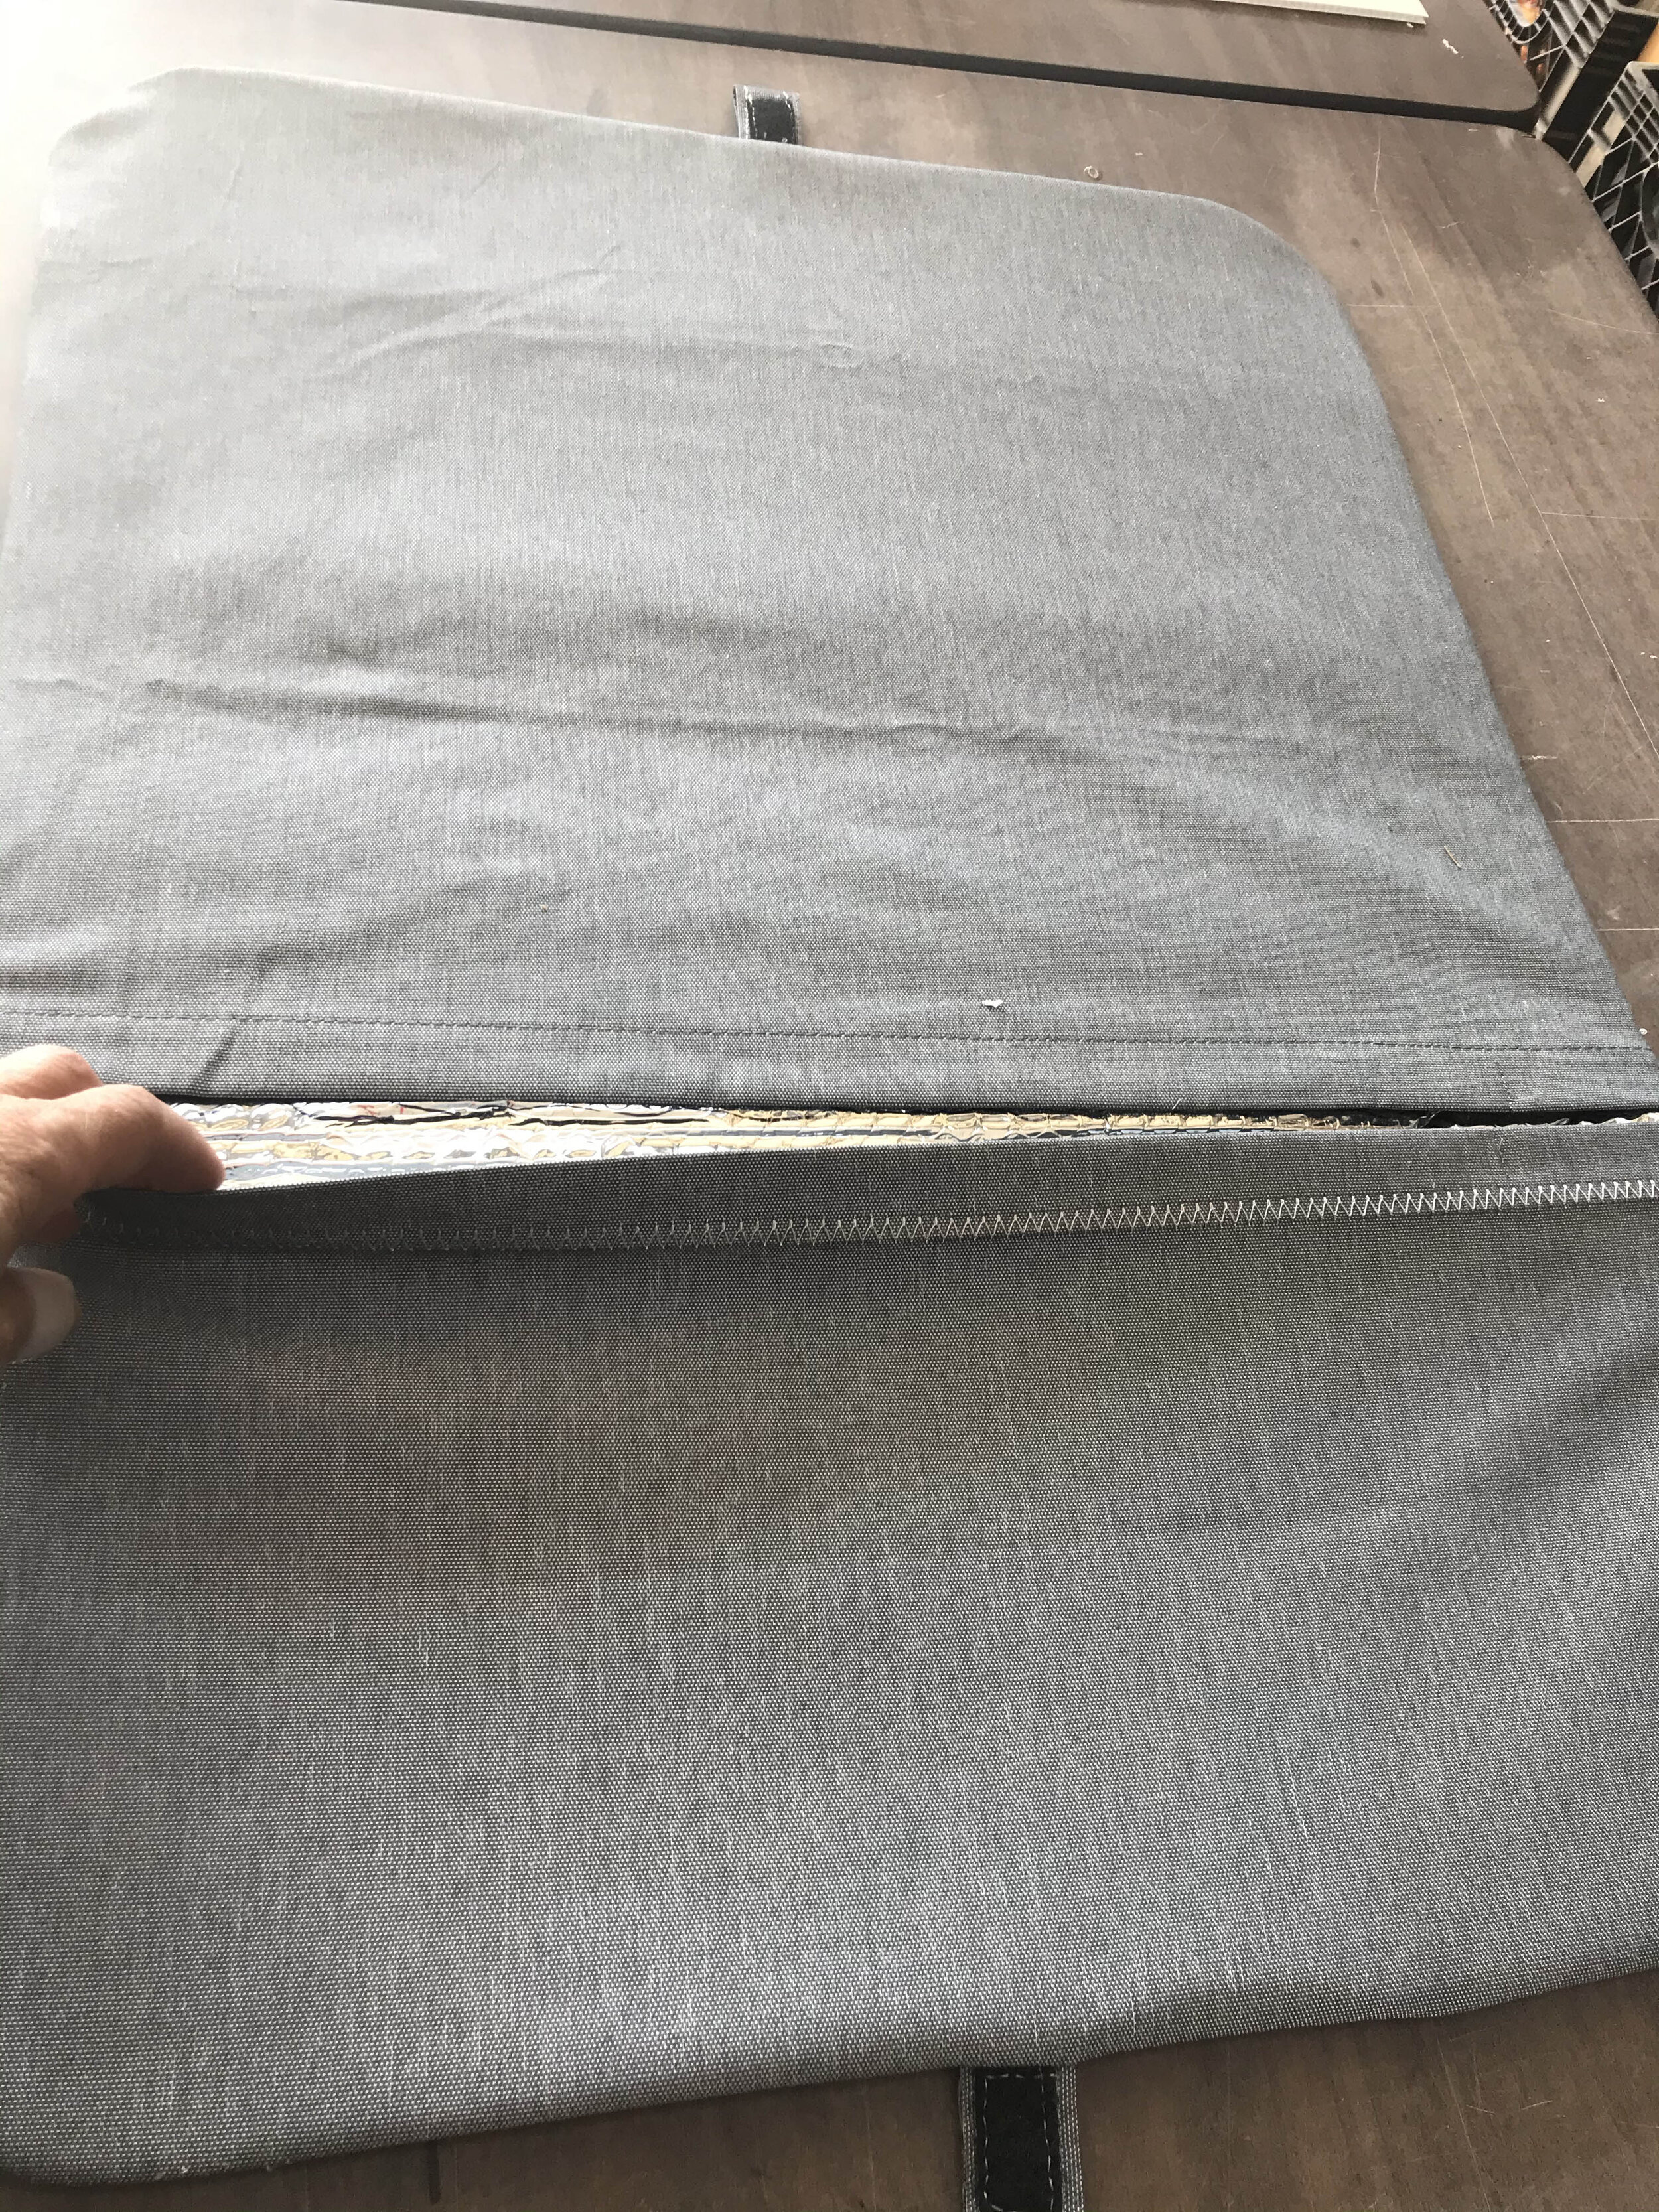
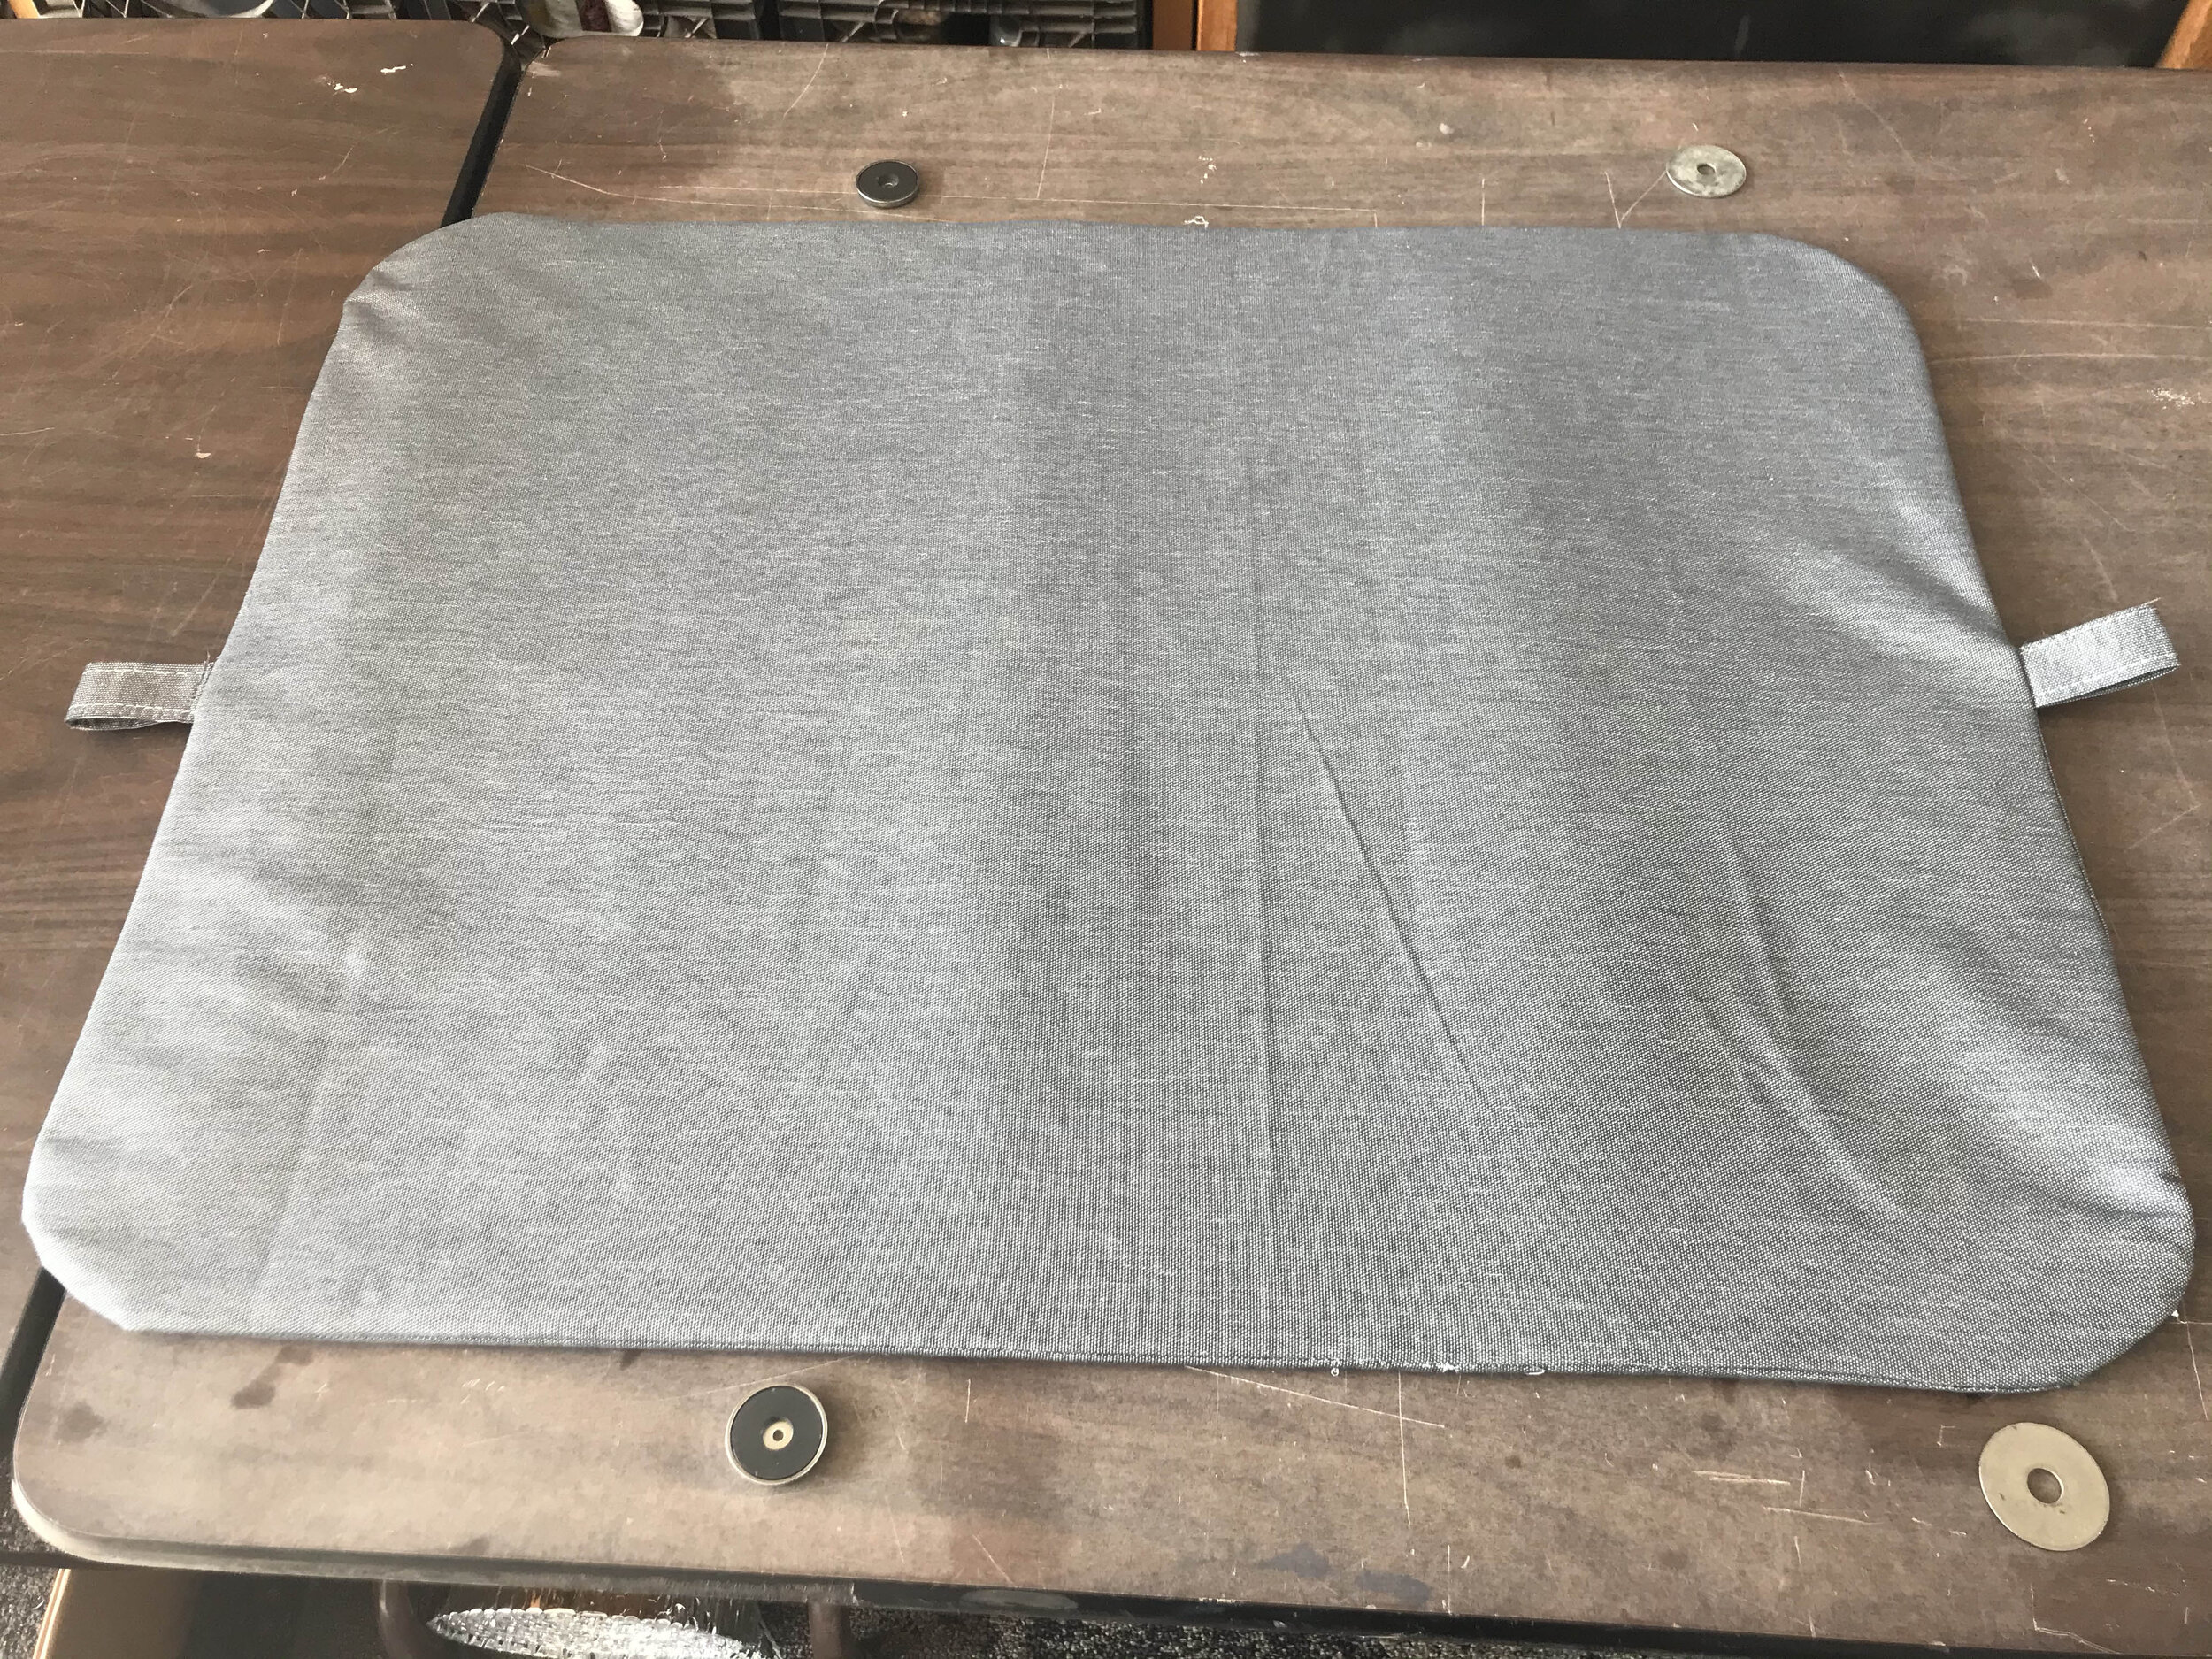
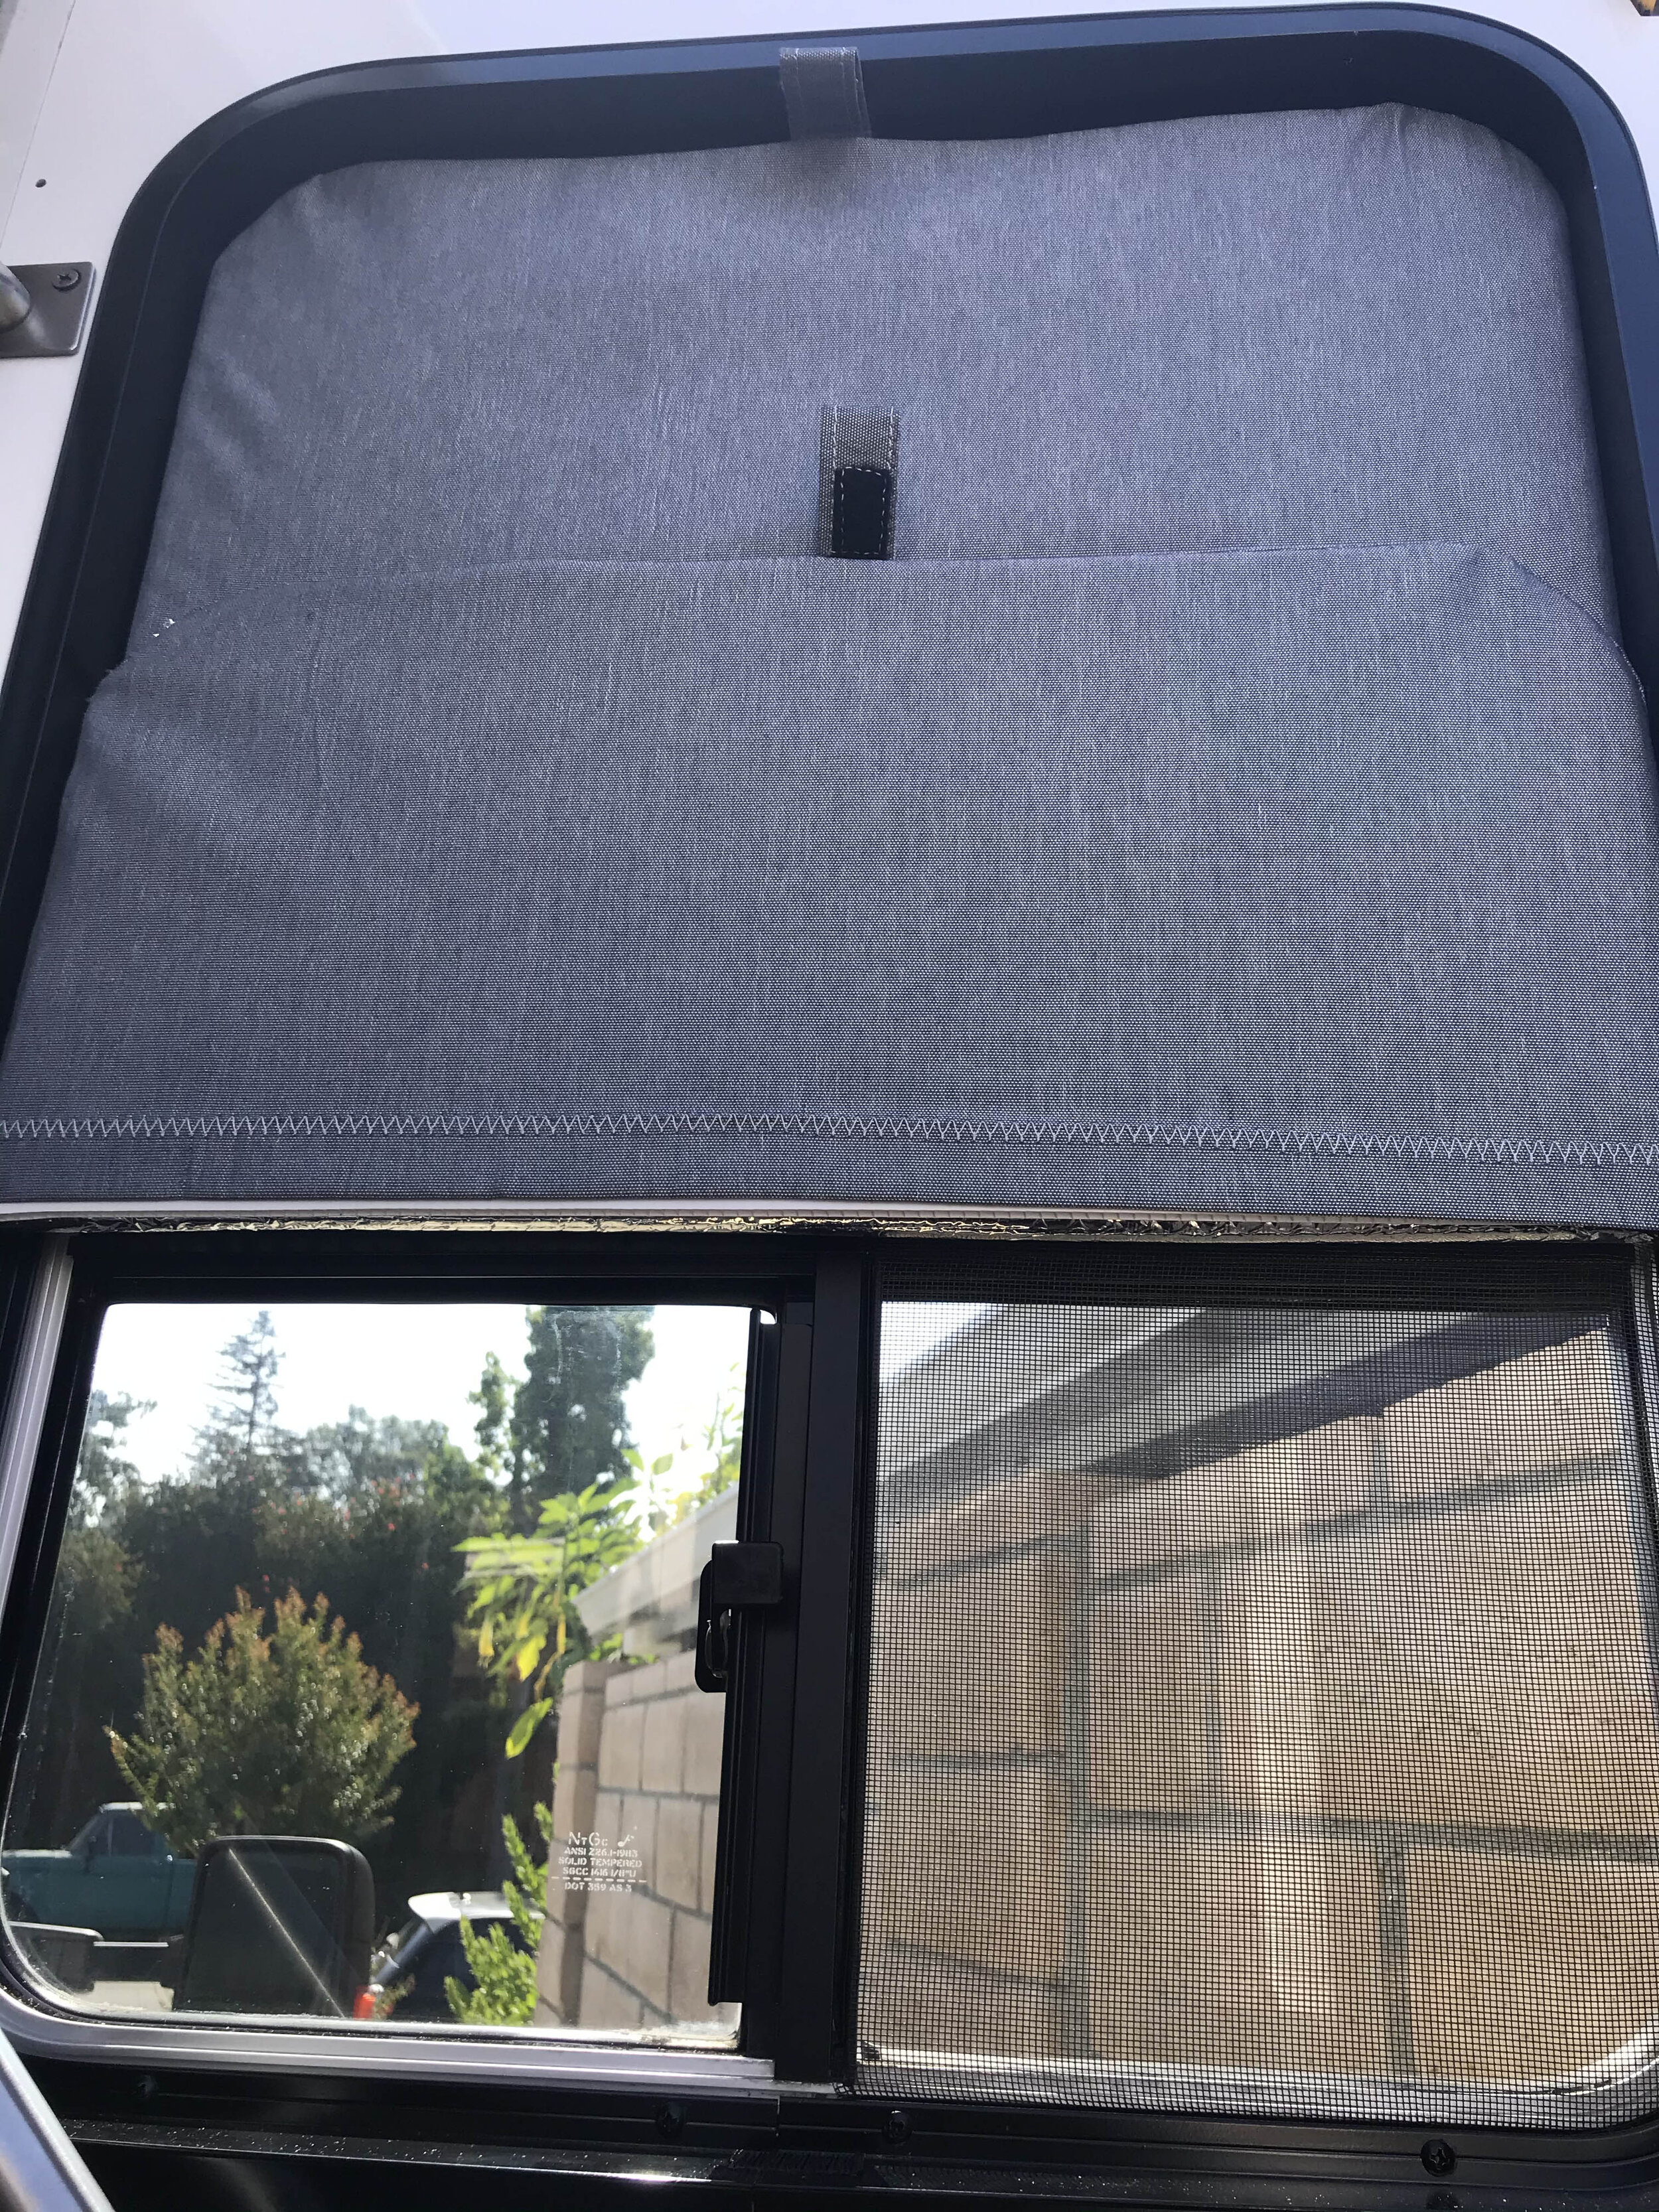
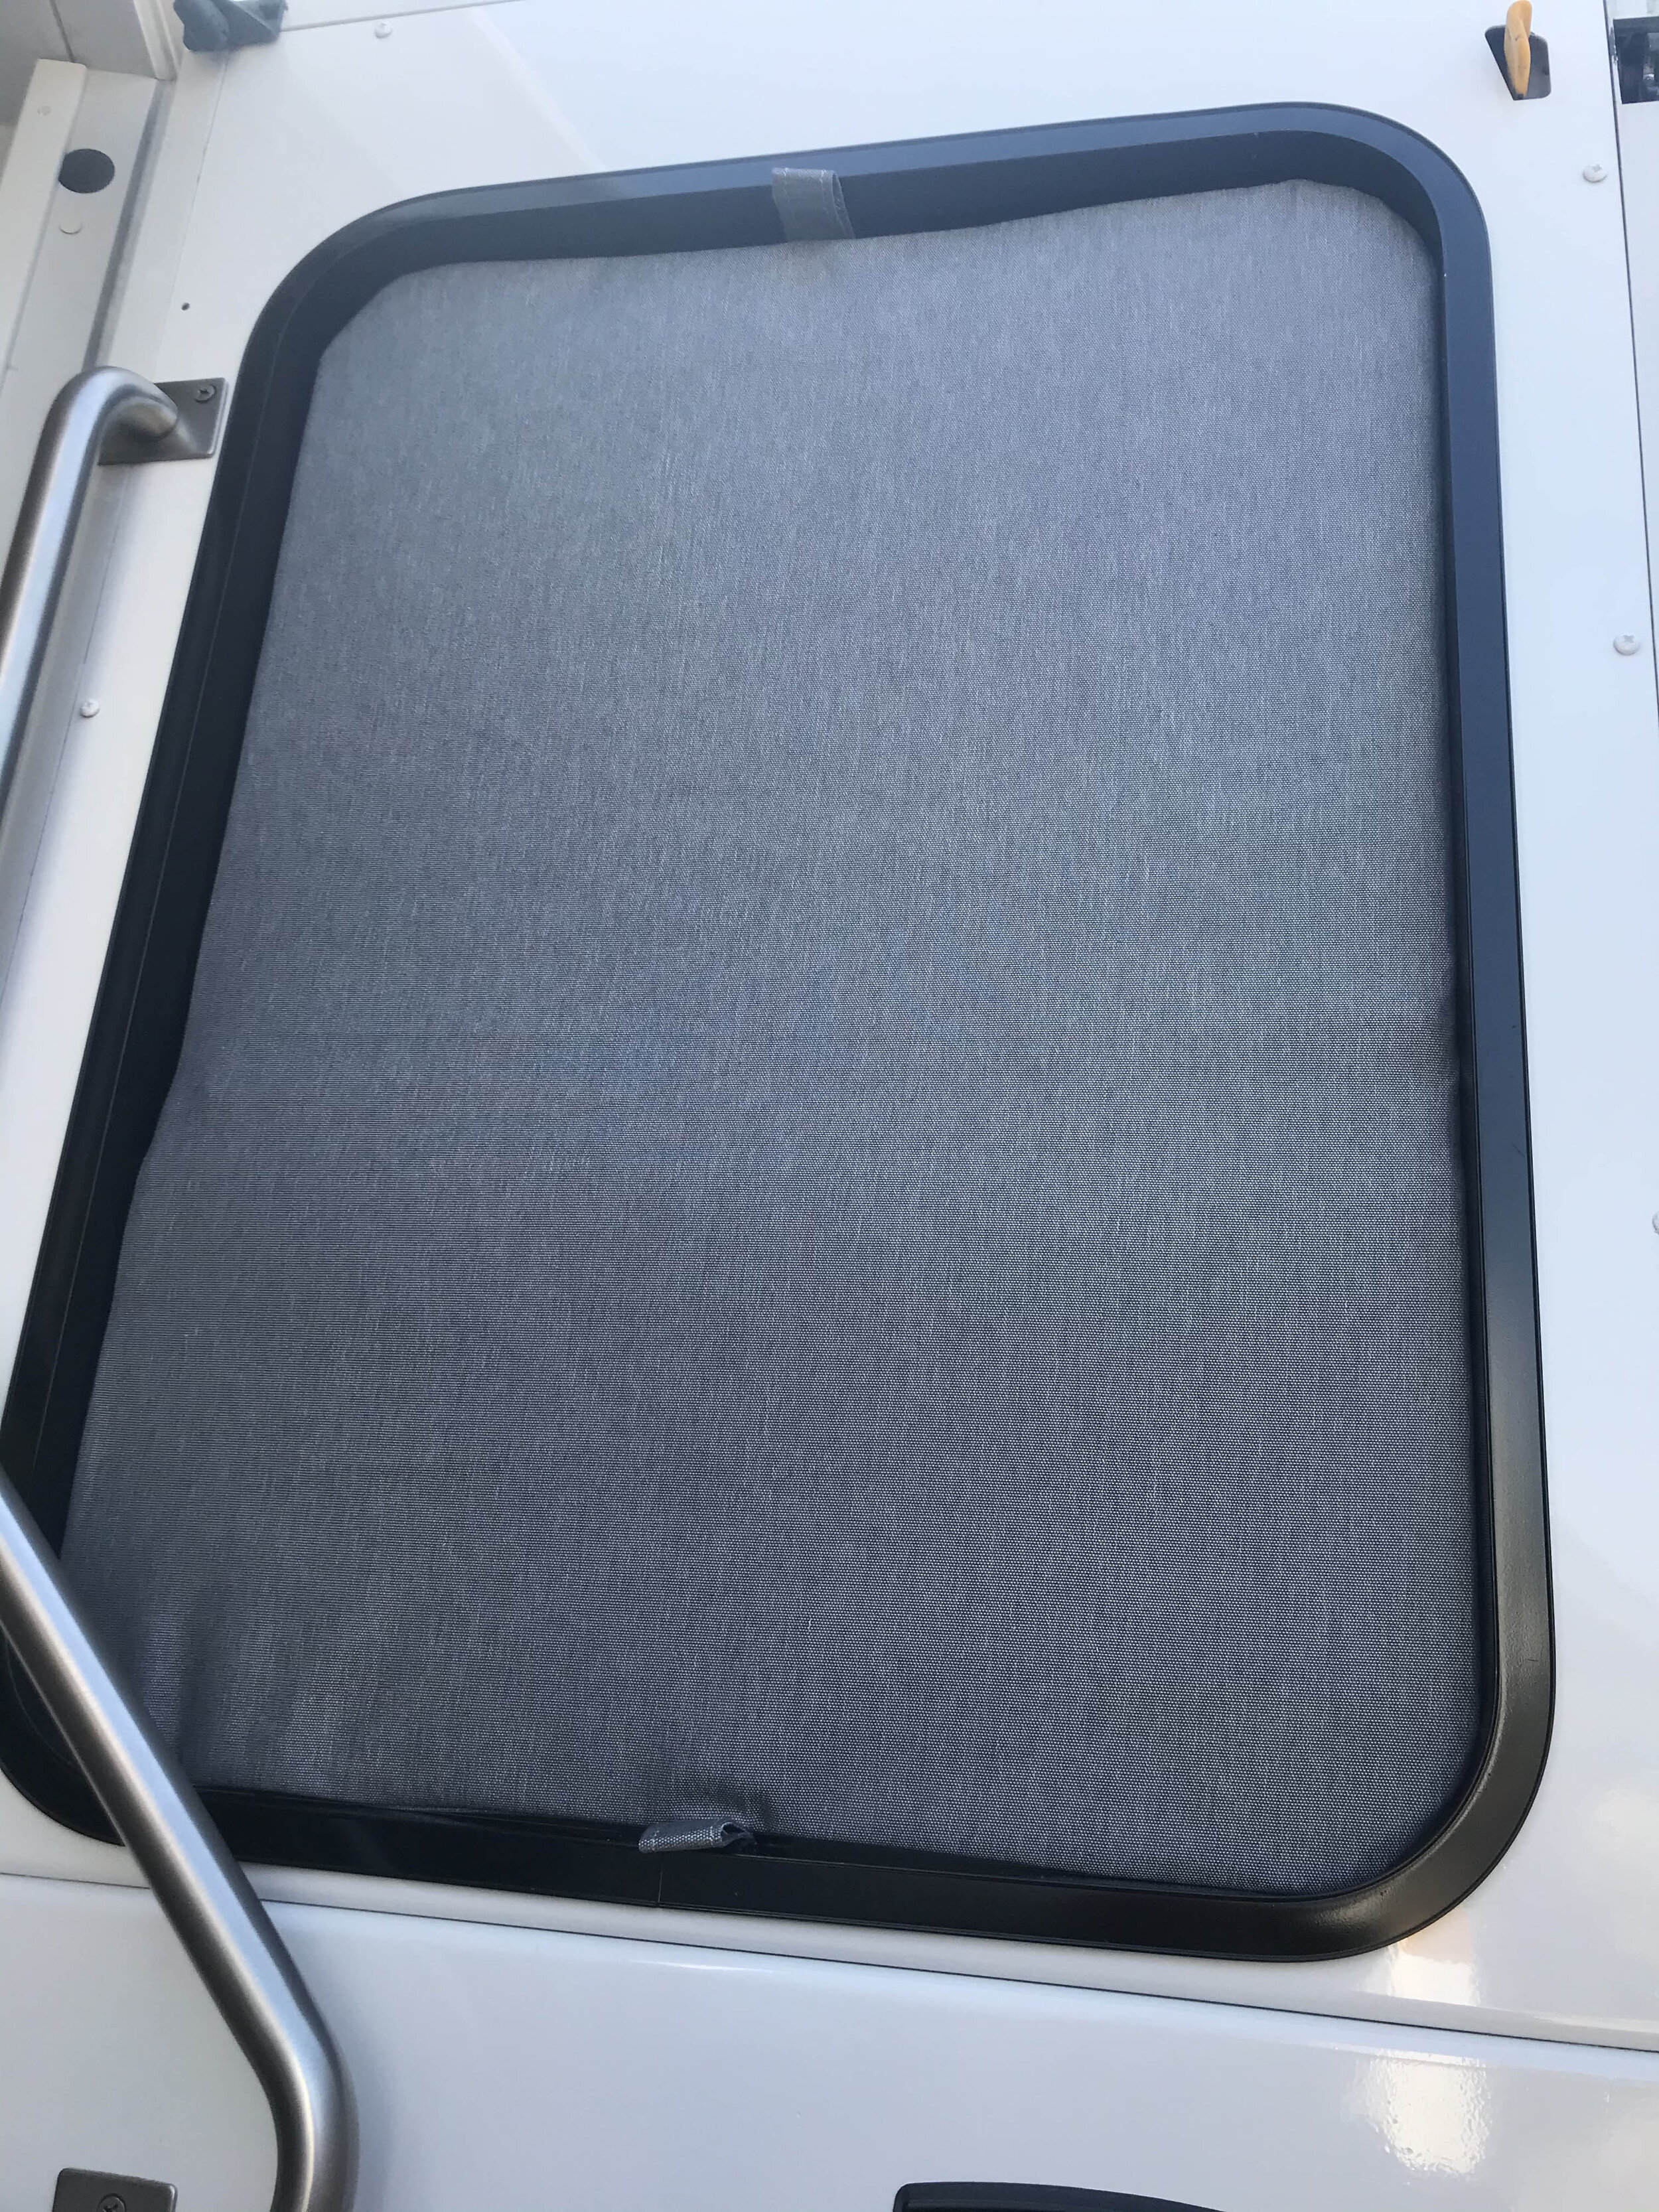
10-30-2020 - The window covers are made of blackout material, Reflectix and for the inserts we added expanded plastic to retain the structure. The inserts are also held in place with velcro tabs. The two side windows are held up with cleats. The cleats can be found at Home Depot or Lowes. I added VHB (Very High Bond) Tape.
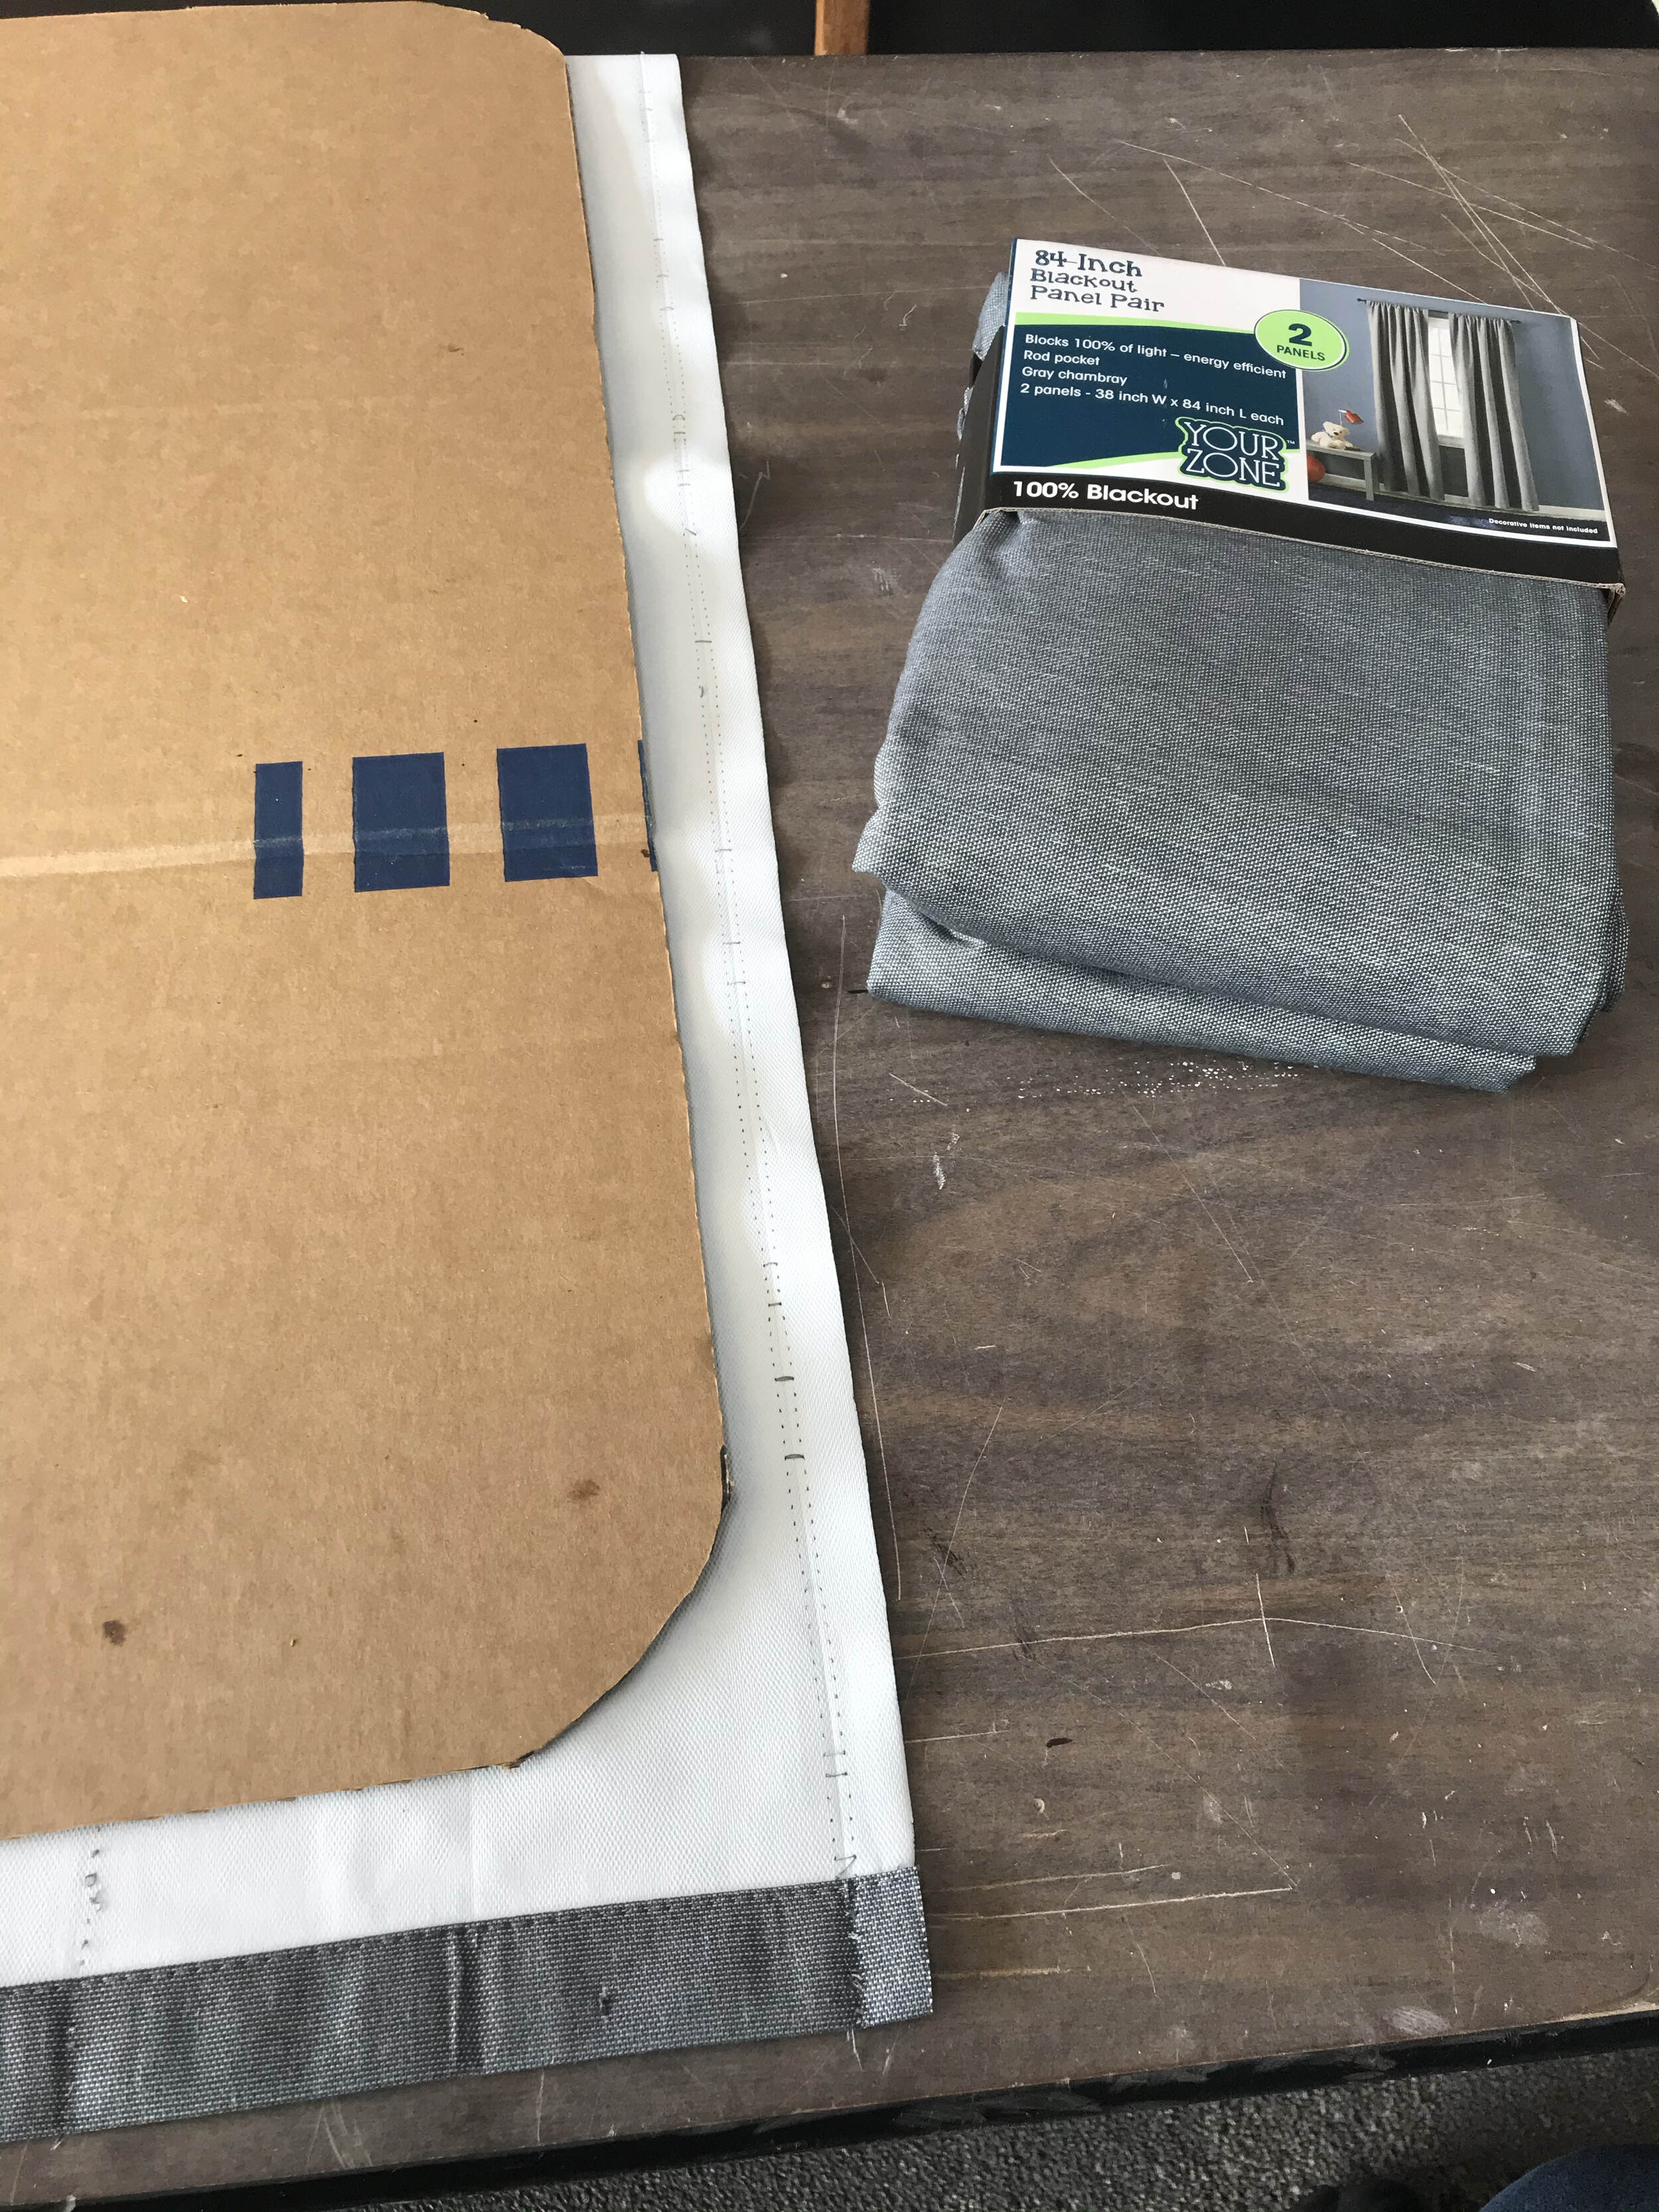
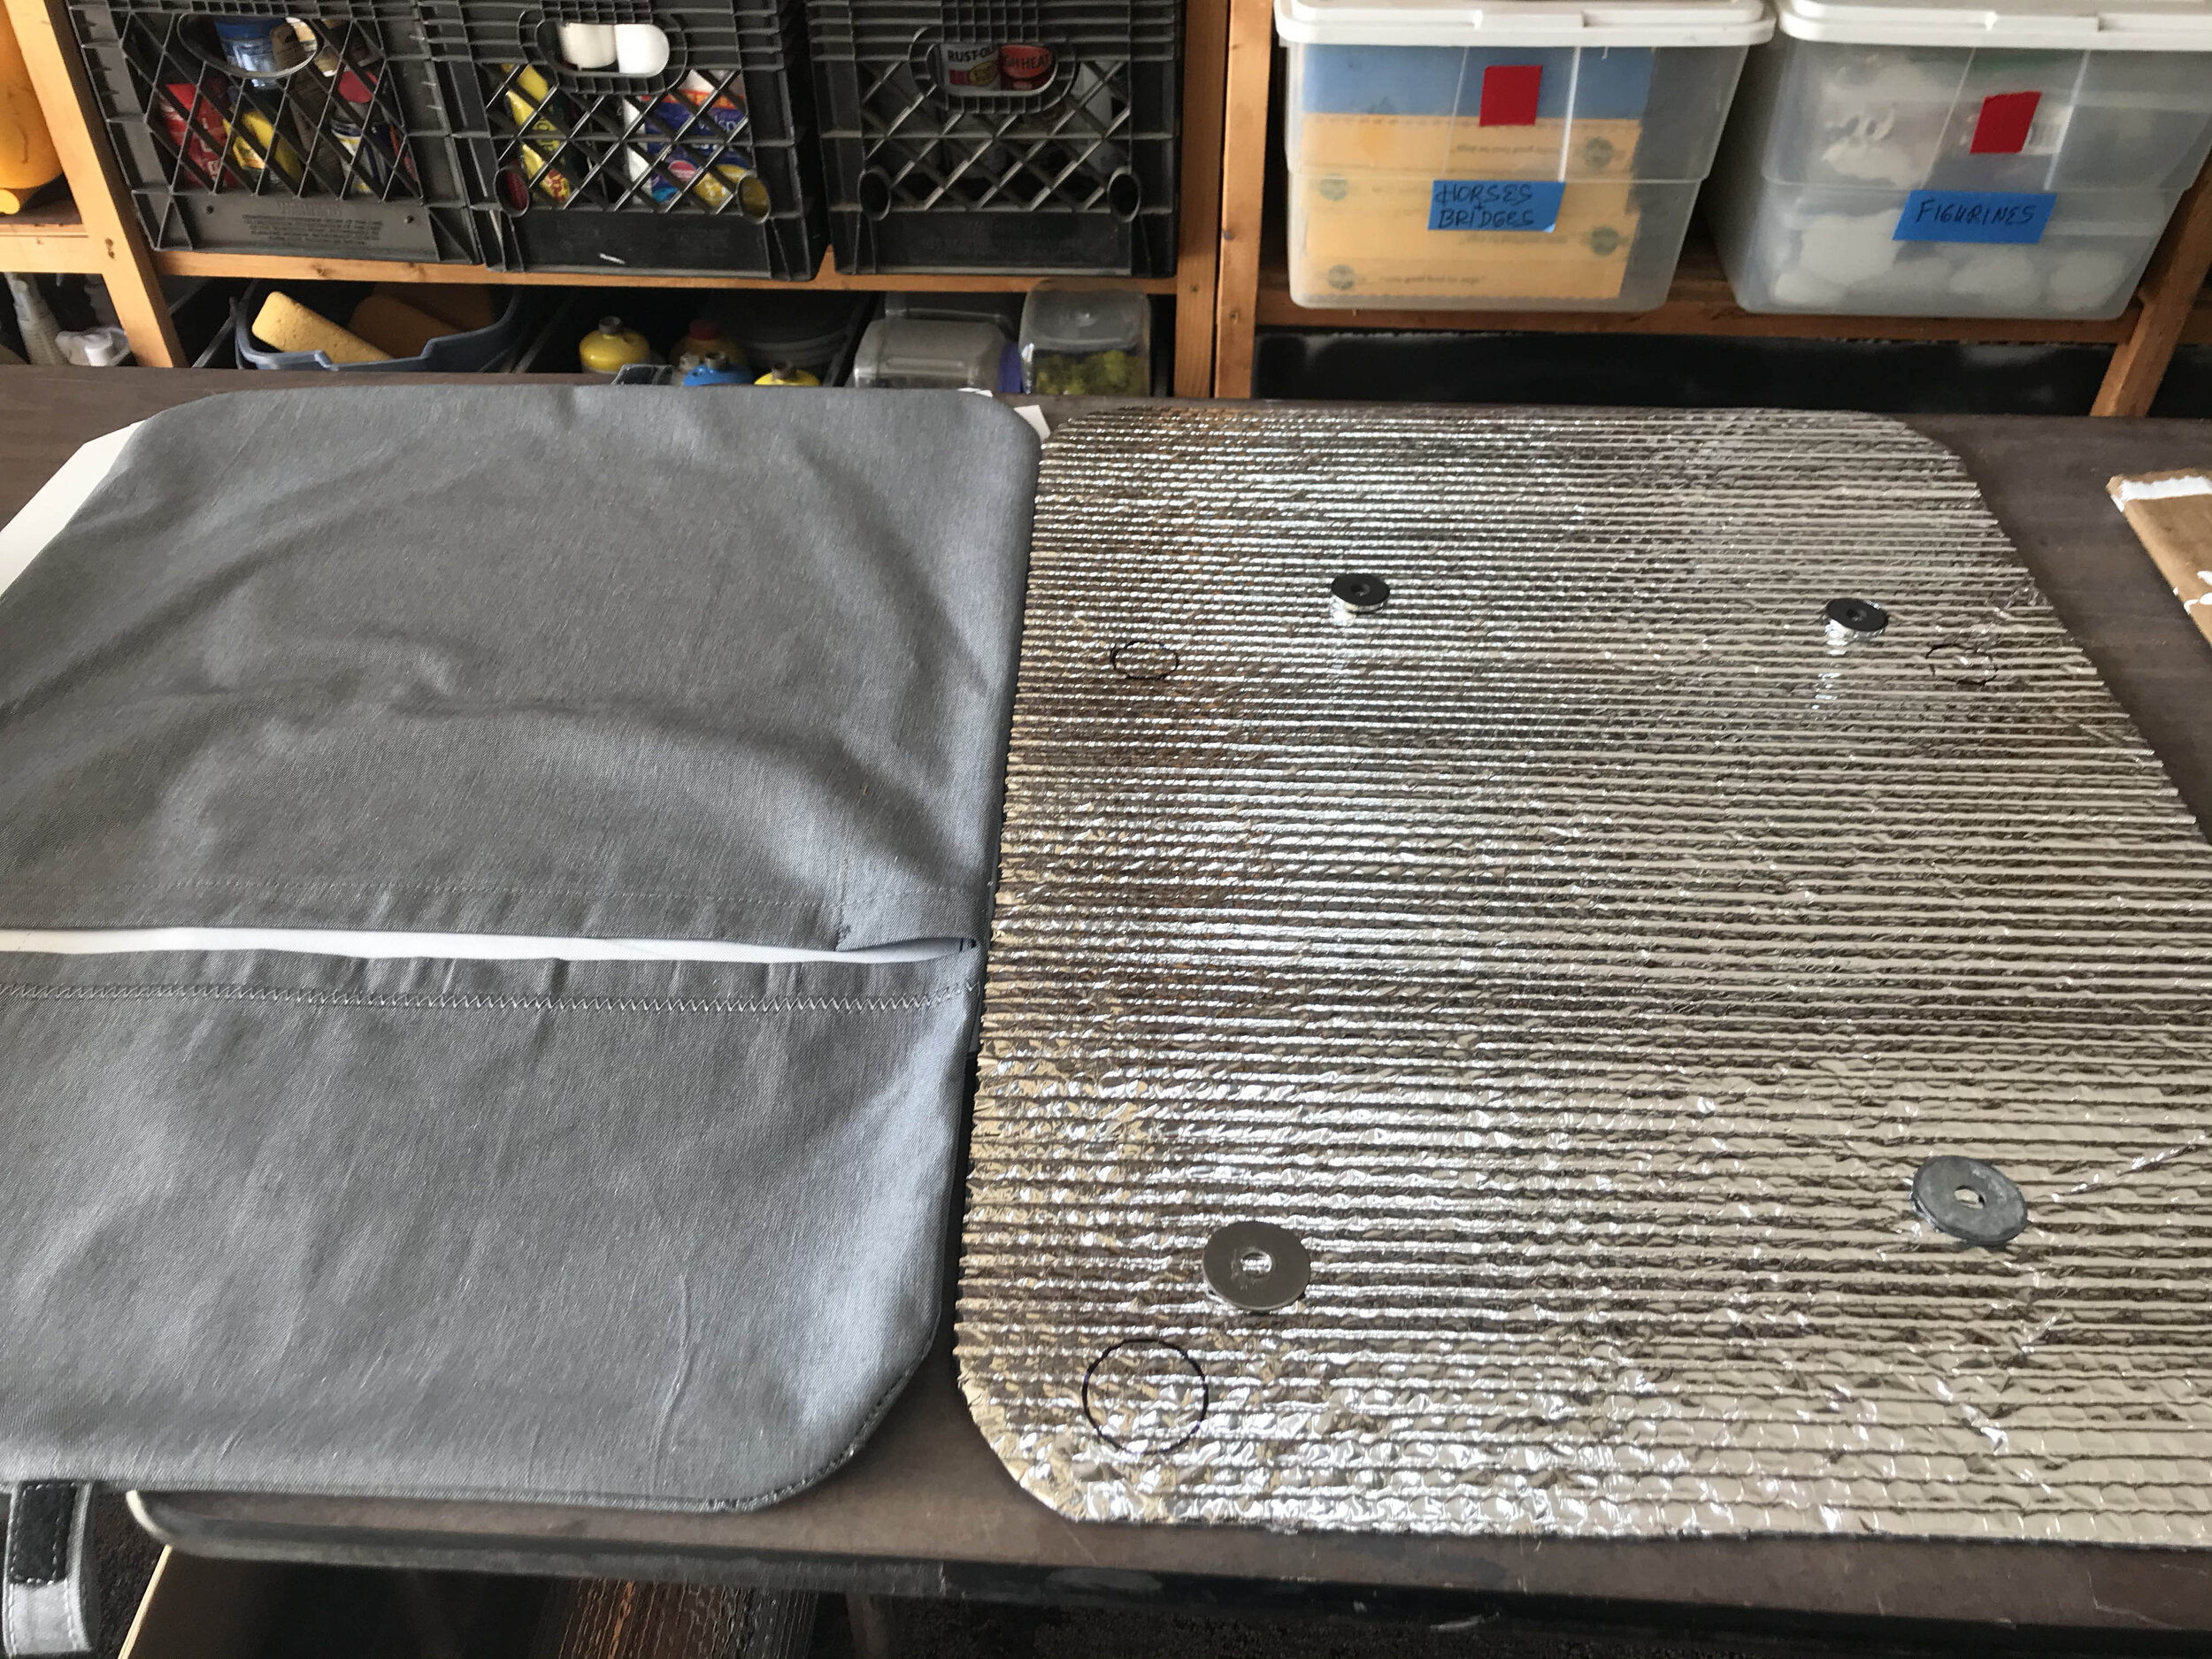
The Blackout grey cloth was purchased form Walmart. They are pre-made window shades for home. It is far cheaper to purchase these shades from walmart rather than going to a place like Joanns Fabrics and buying it from the roll. You will have to pull the stitching out of the original window covers and iron the material to ensure it lays flat and the dimensions are correct for your particular window.
The Reflectix comes in small and large rolls from either Lowes or Home Depot. The window inserts have a complete layer of Reflectix inside whereas the larger windows on the drivers/passenger side have 4-5” strips of the Reflectix material. This allows them to be folded up in a more compact manner.
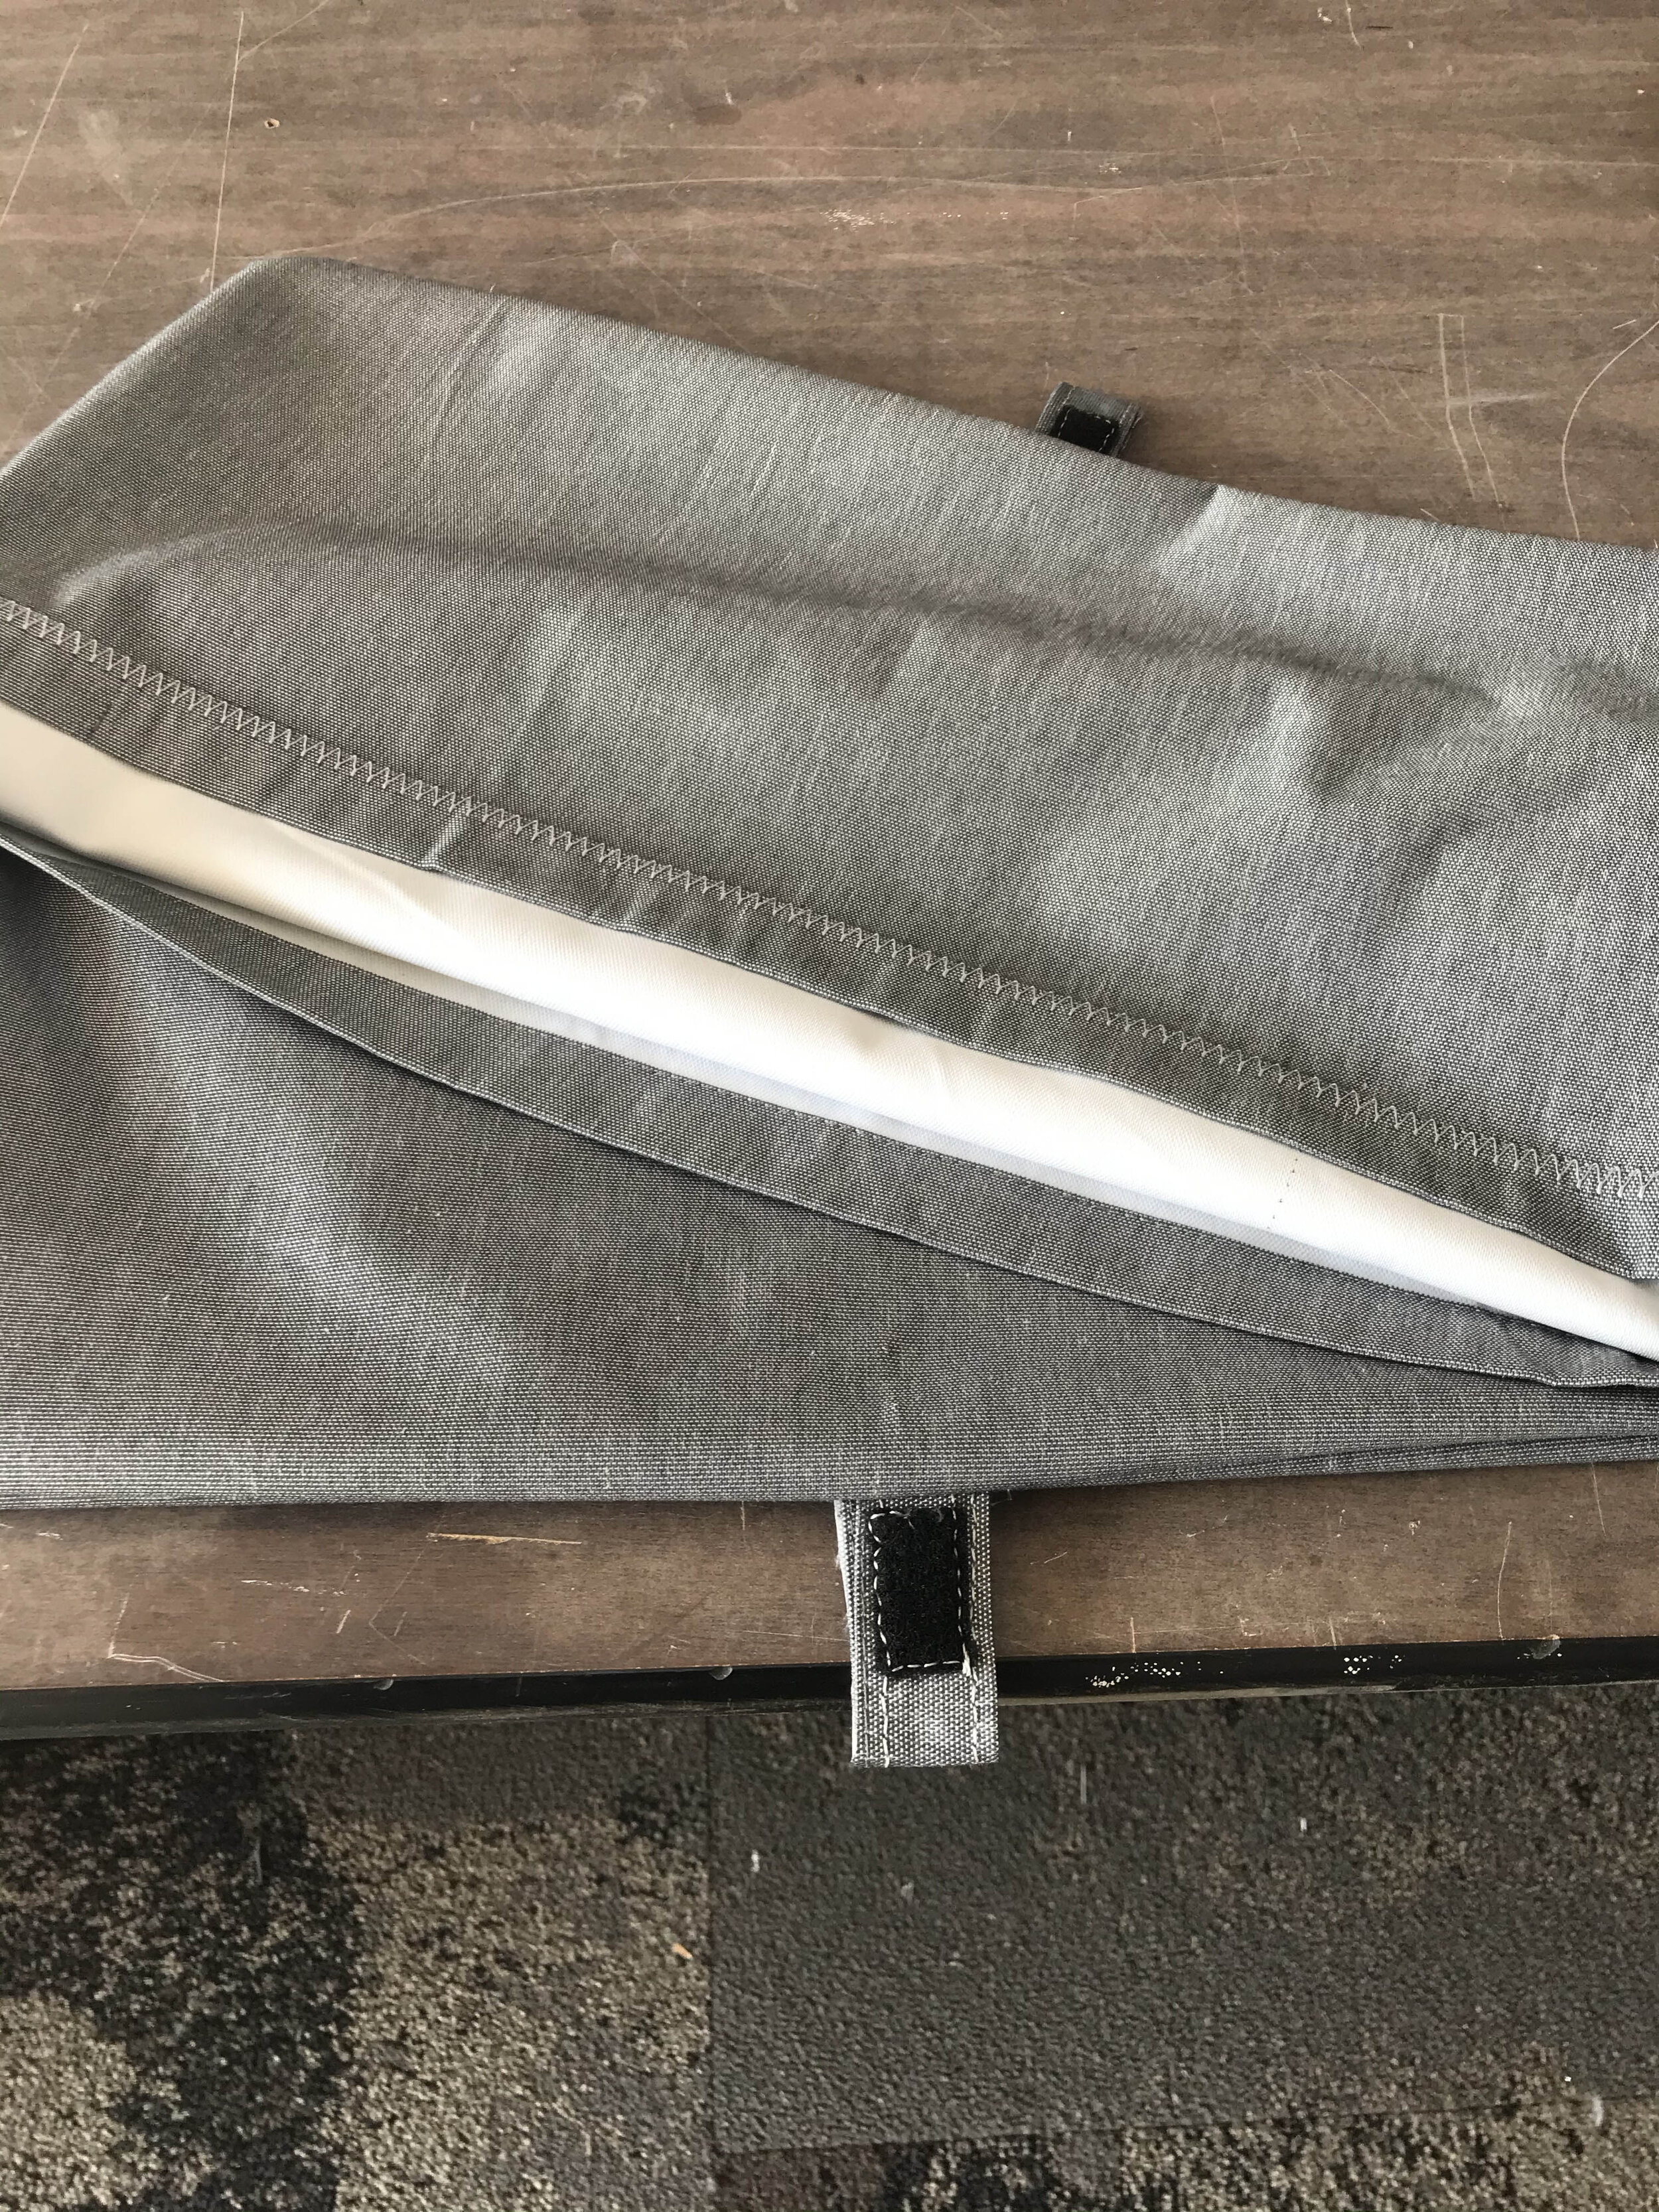
The Cleats come with very thin foam on the side that makes contact with the wall. I removed the foam and replaced it with the VHB tape by 3M. I bored out (5) of the screw holes and added screws to attach the cleats to the wall. This combined with the VHB tape made for a very secure bond to the wall. The part of the cleat that attaches to the window cover was simply screwed into the 1”x2” lumber inside the top of the window cover.
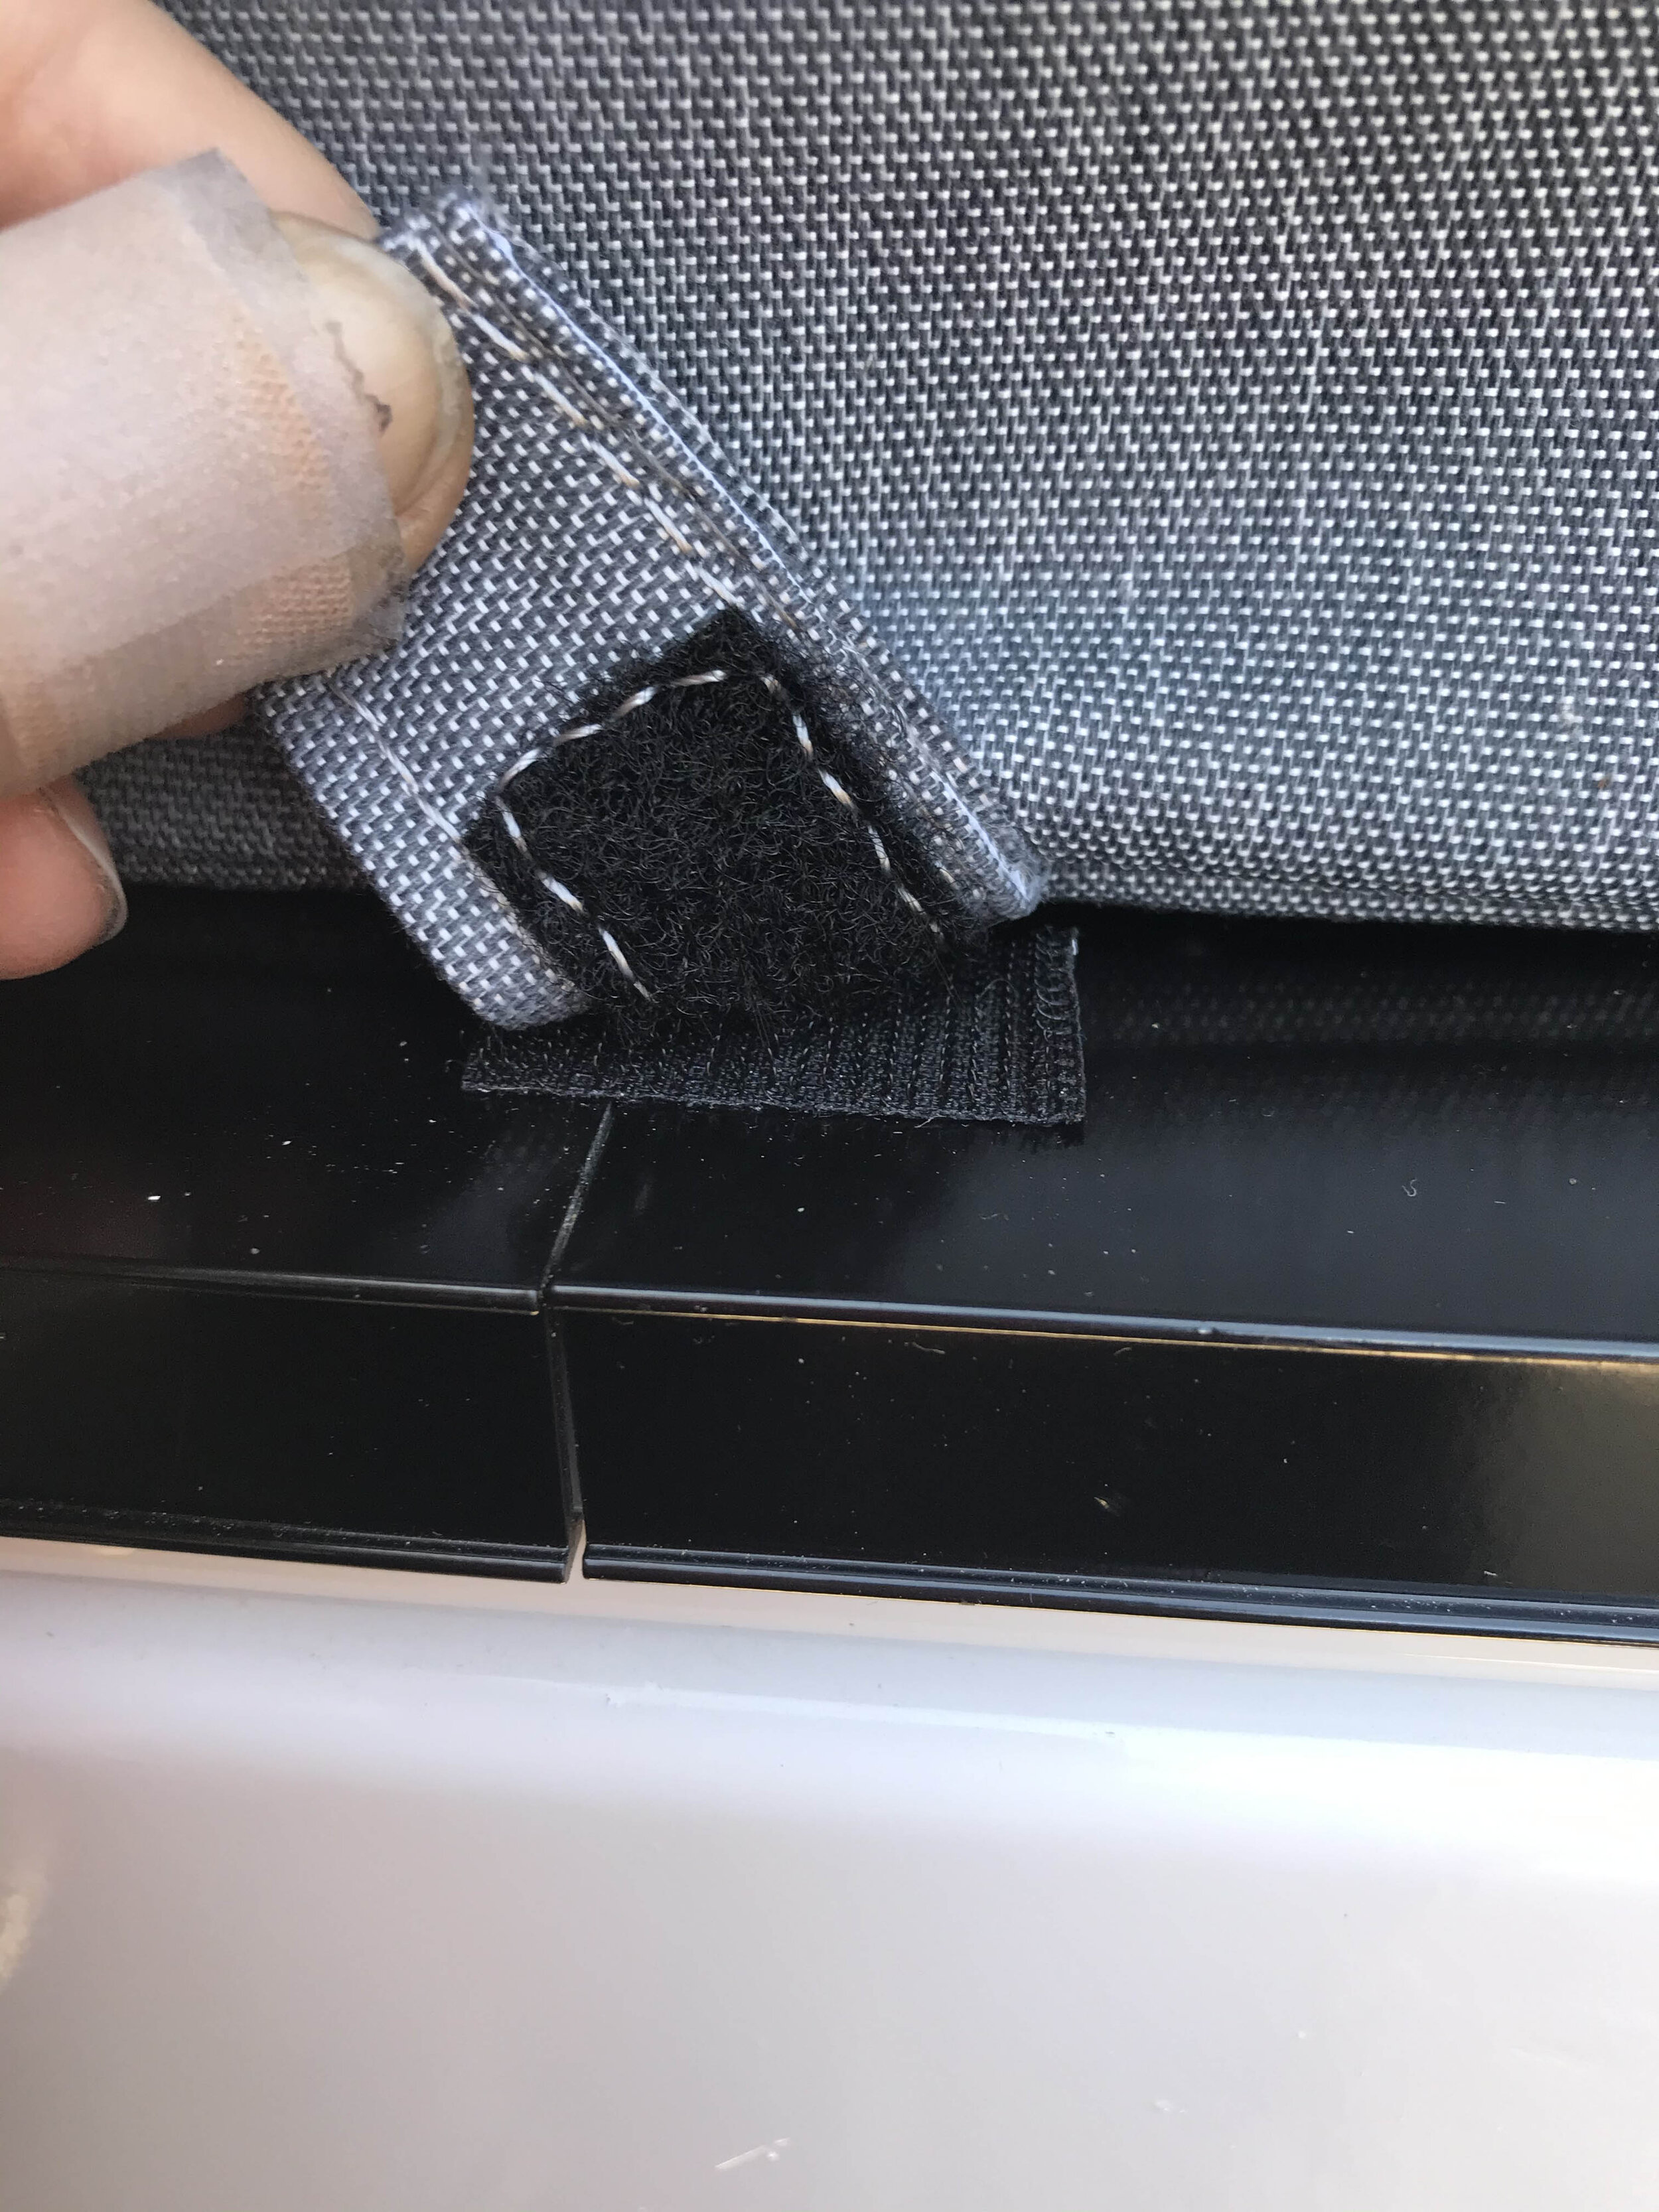
The large side windows are set up so that you can have them all the way up, half way and completely covered. We accomplished this by adding 2”x2” velcro tabs where needed.
The expanded plastic pieces in the window inserts can be purchased from Lowes or Home Depot. Its only added to create a structure that can retain its shape and be inserted confidently into the window. We added velcro so that they do not simply pop out while driving on rough roads.


Installing the dinner table
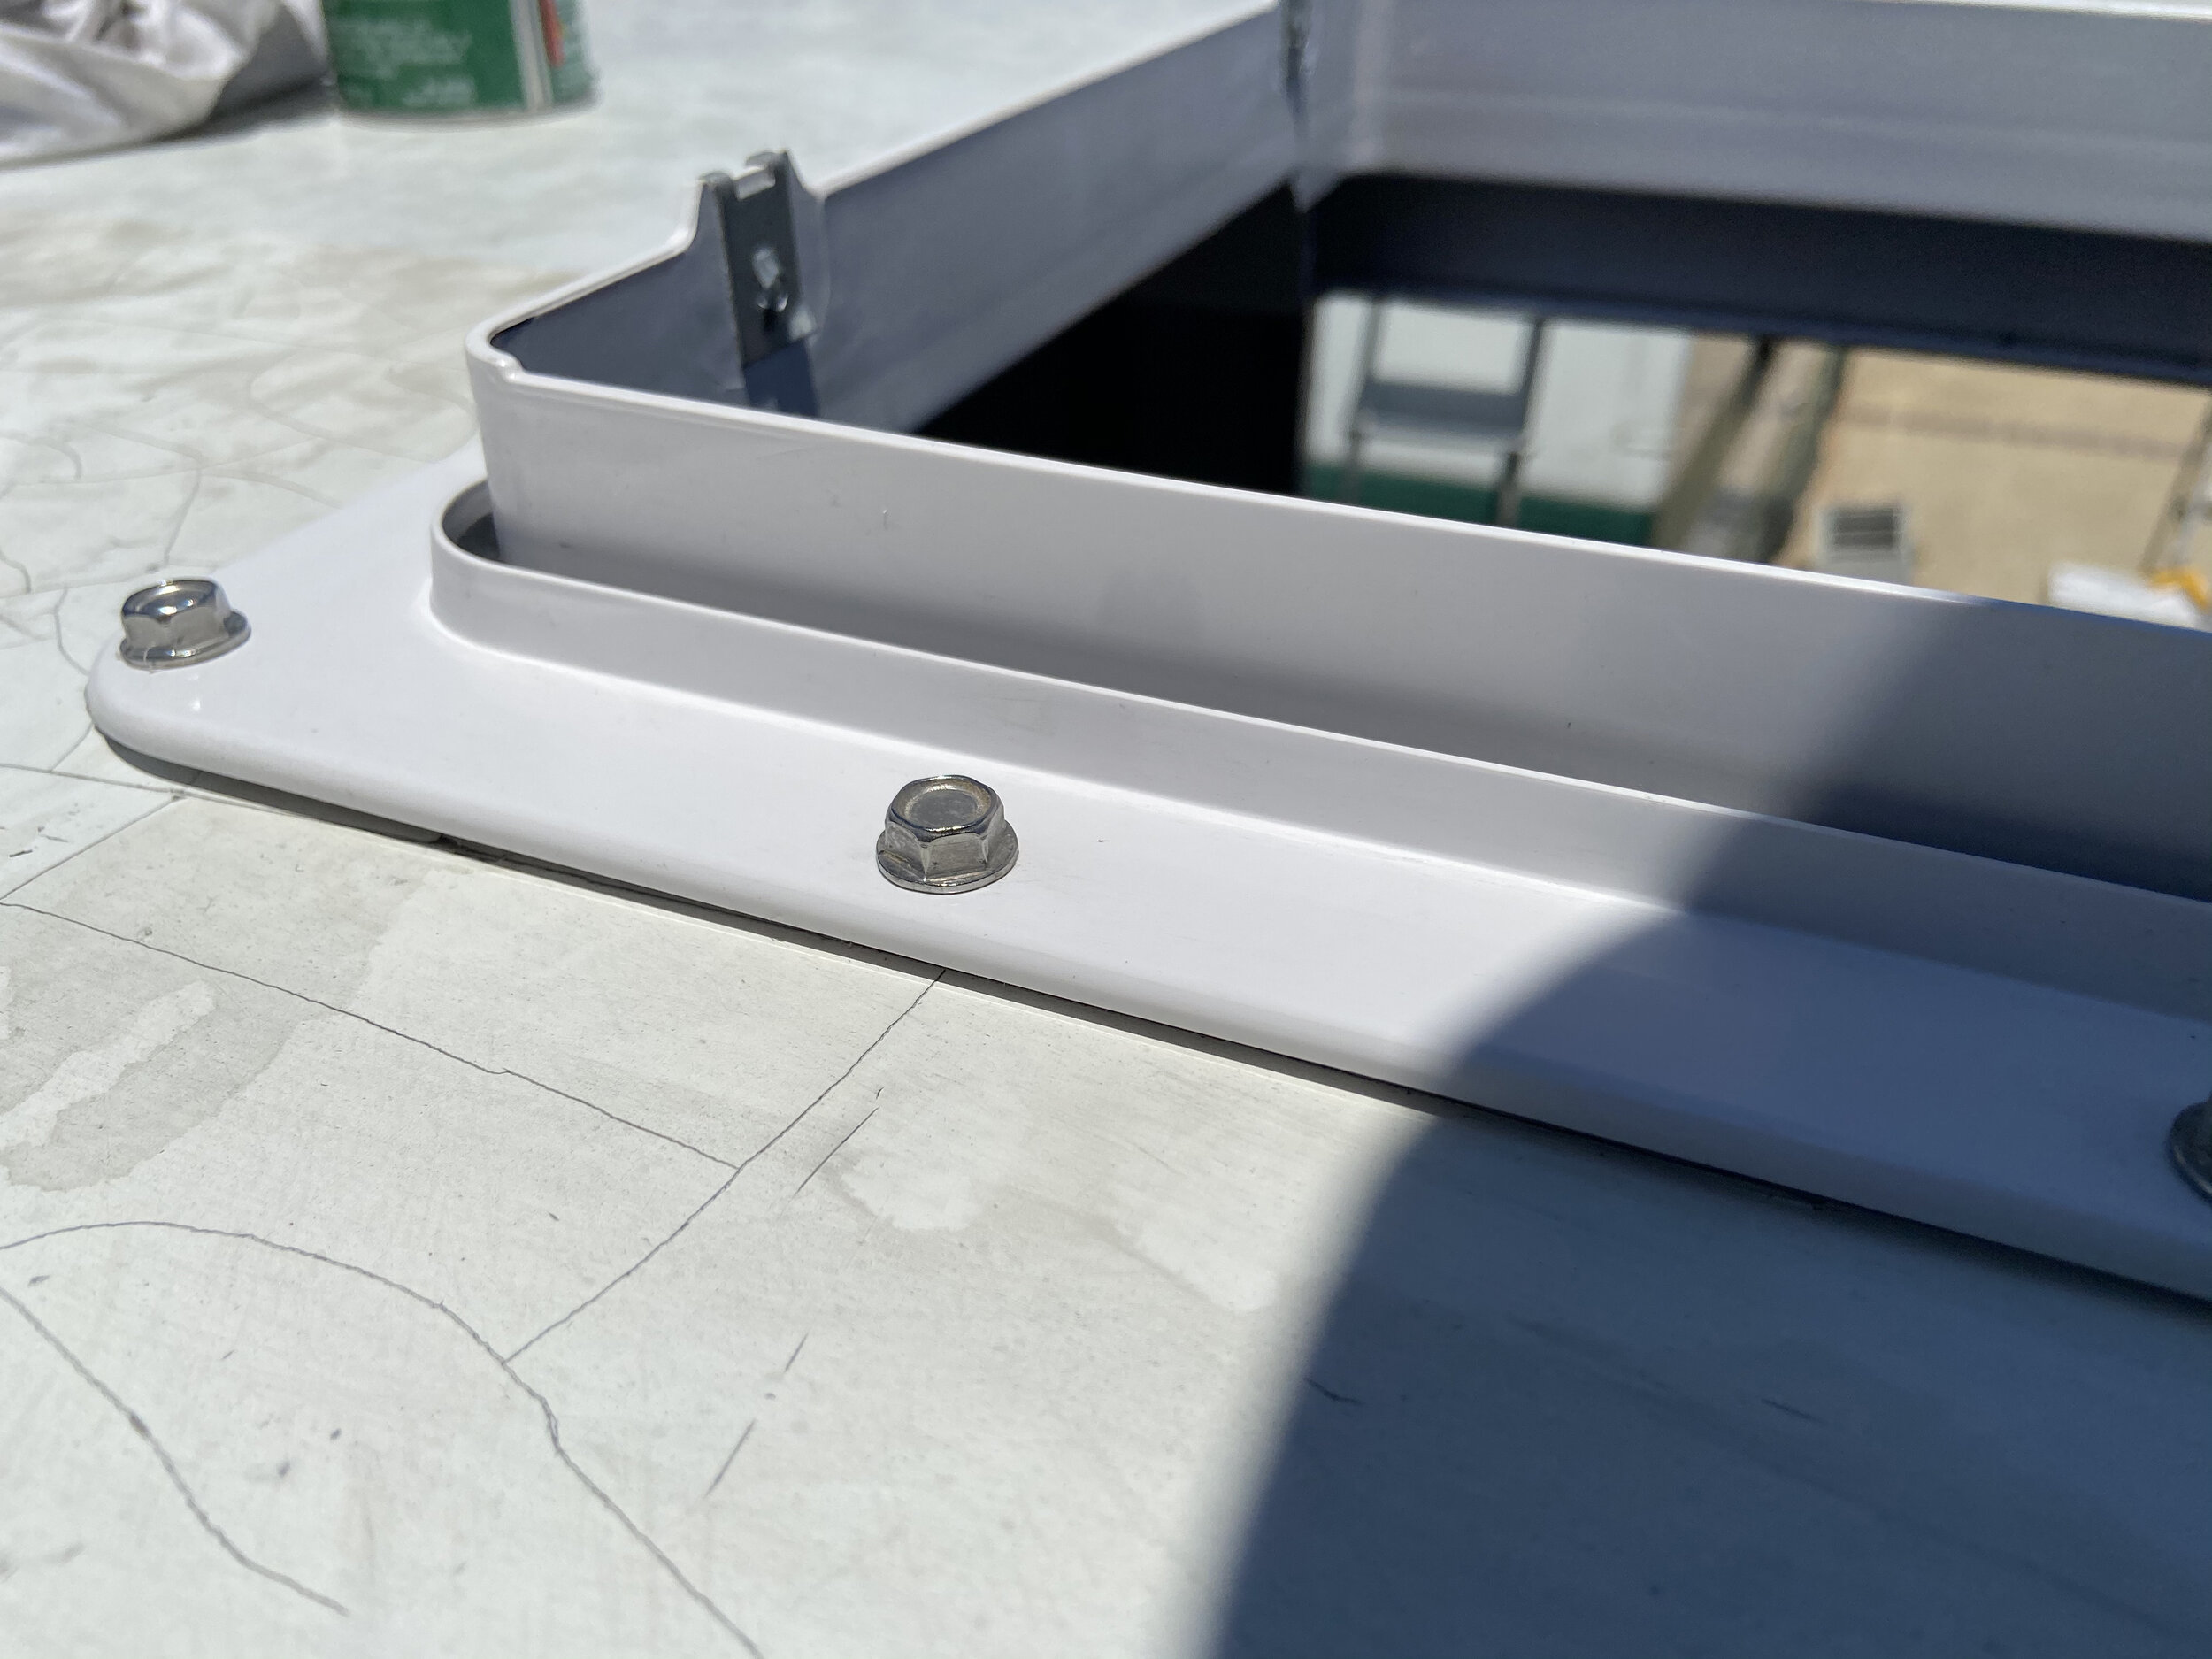
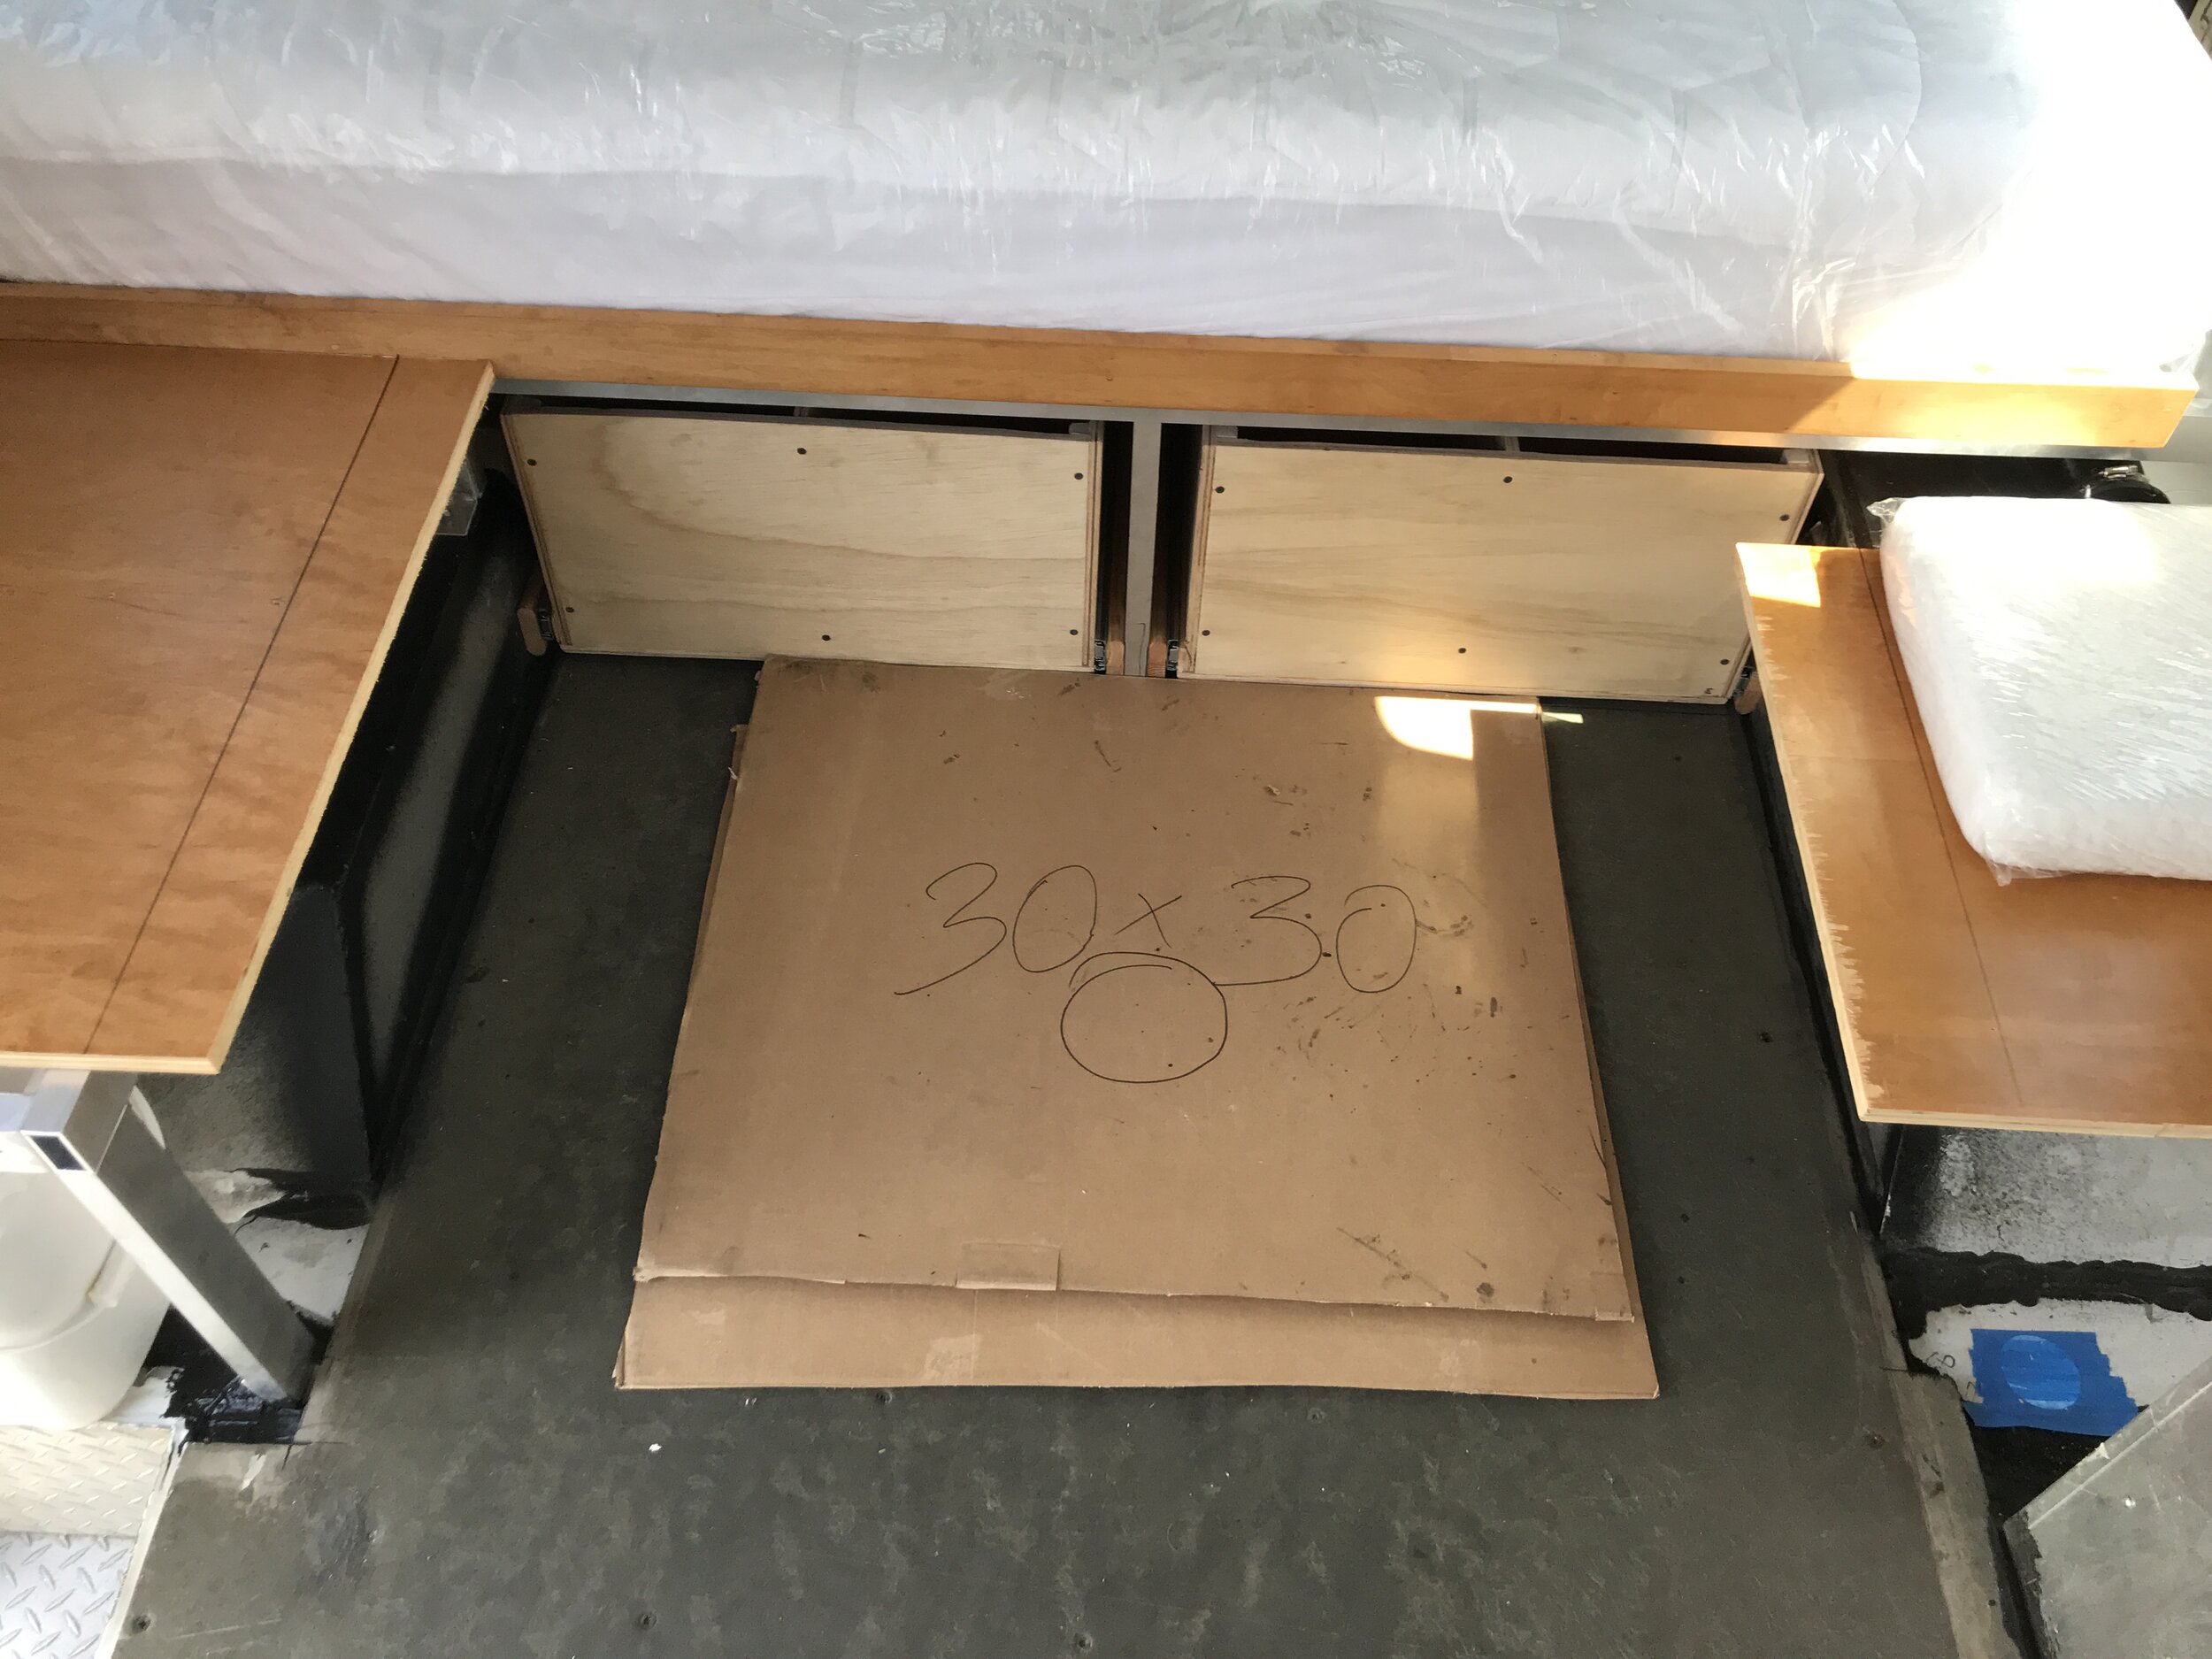
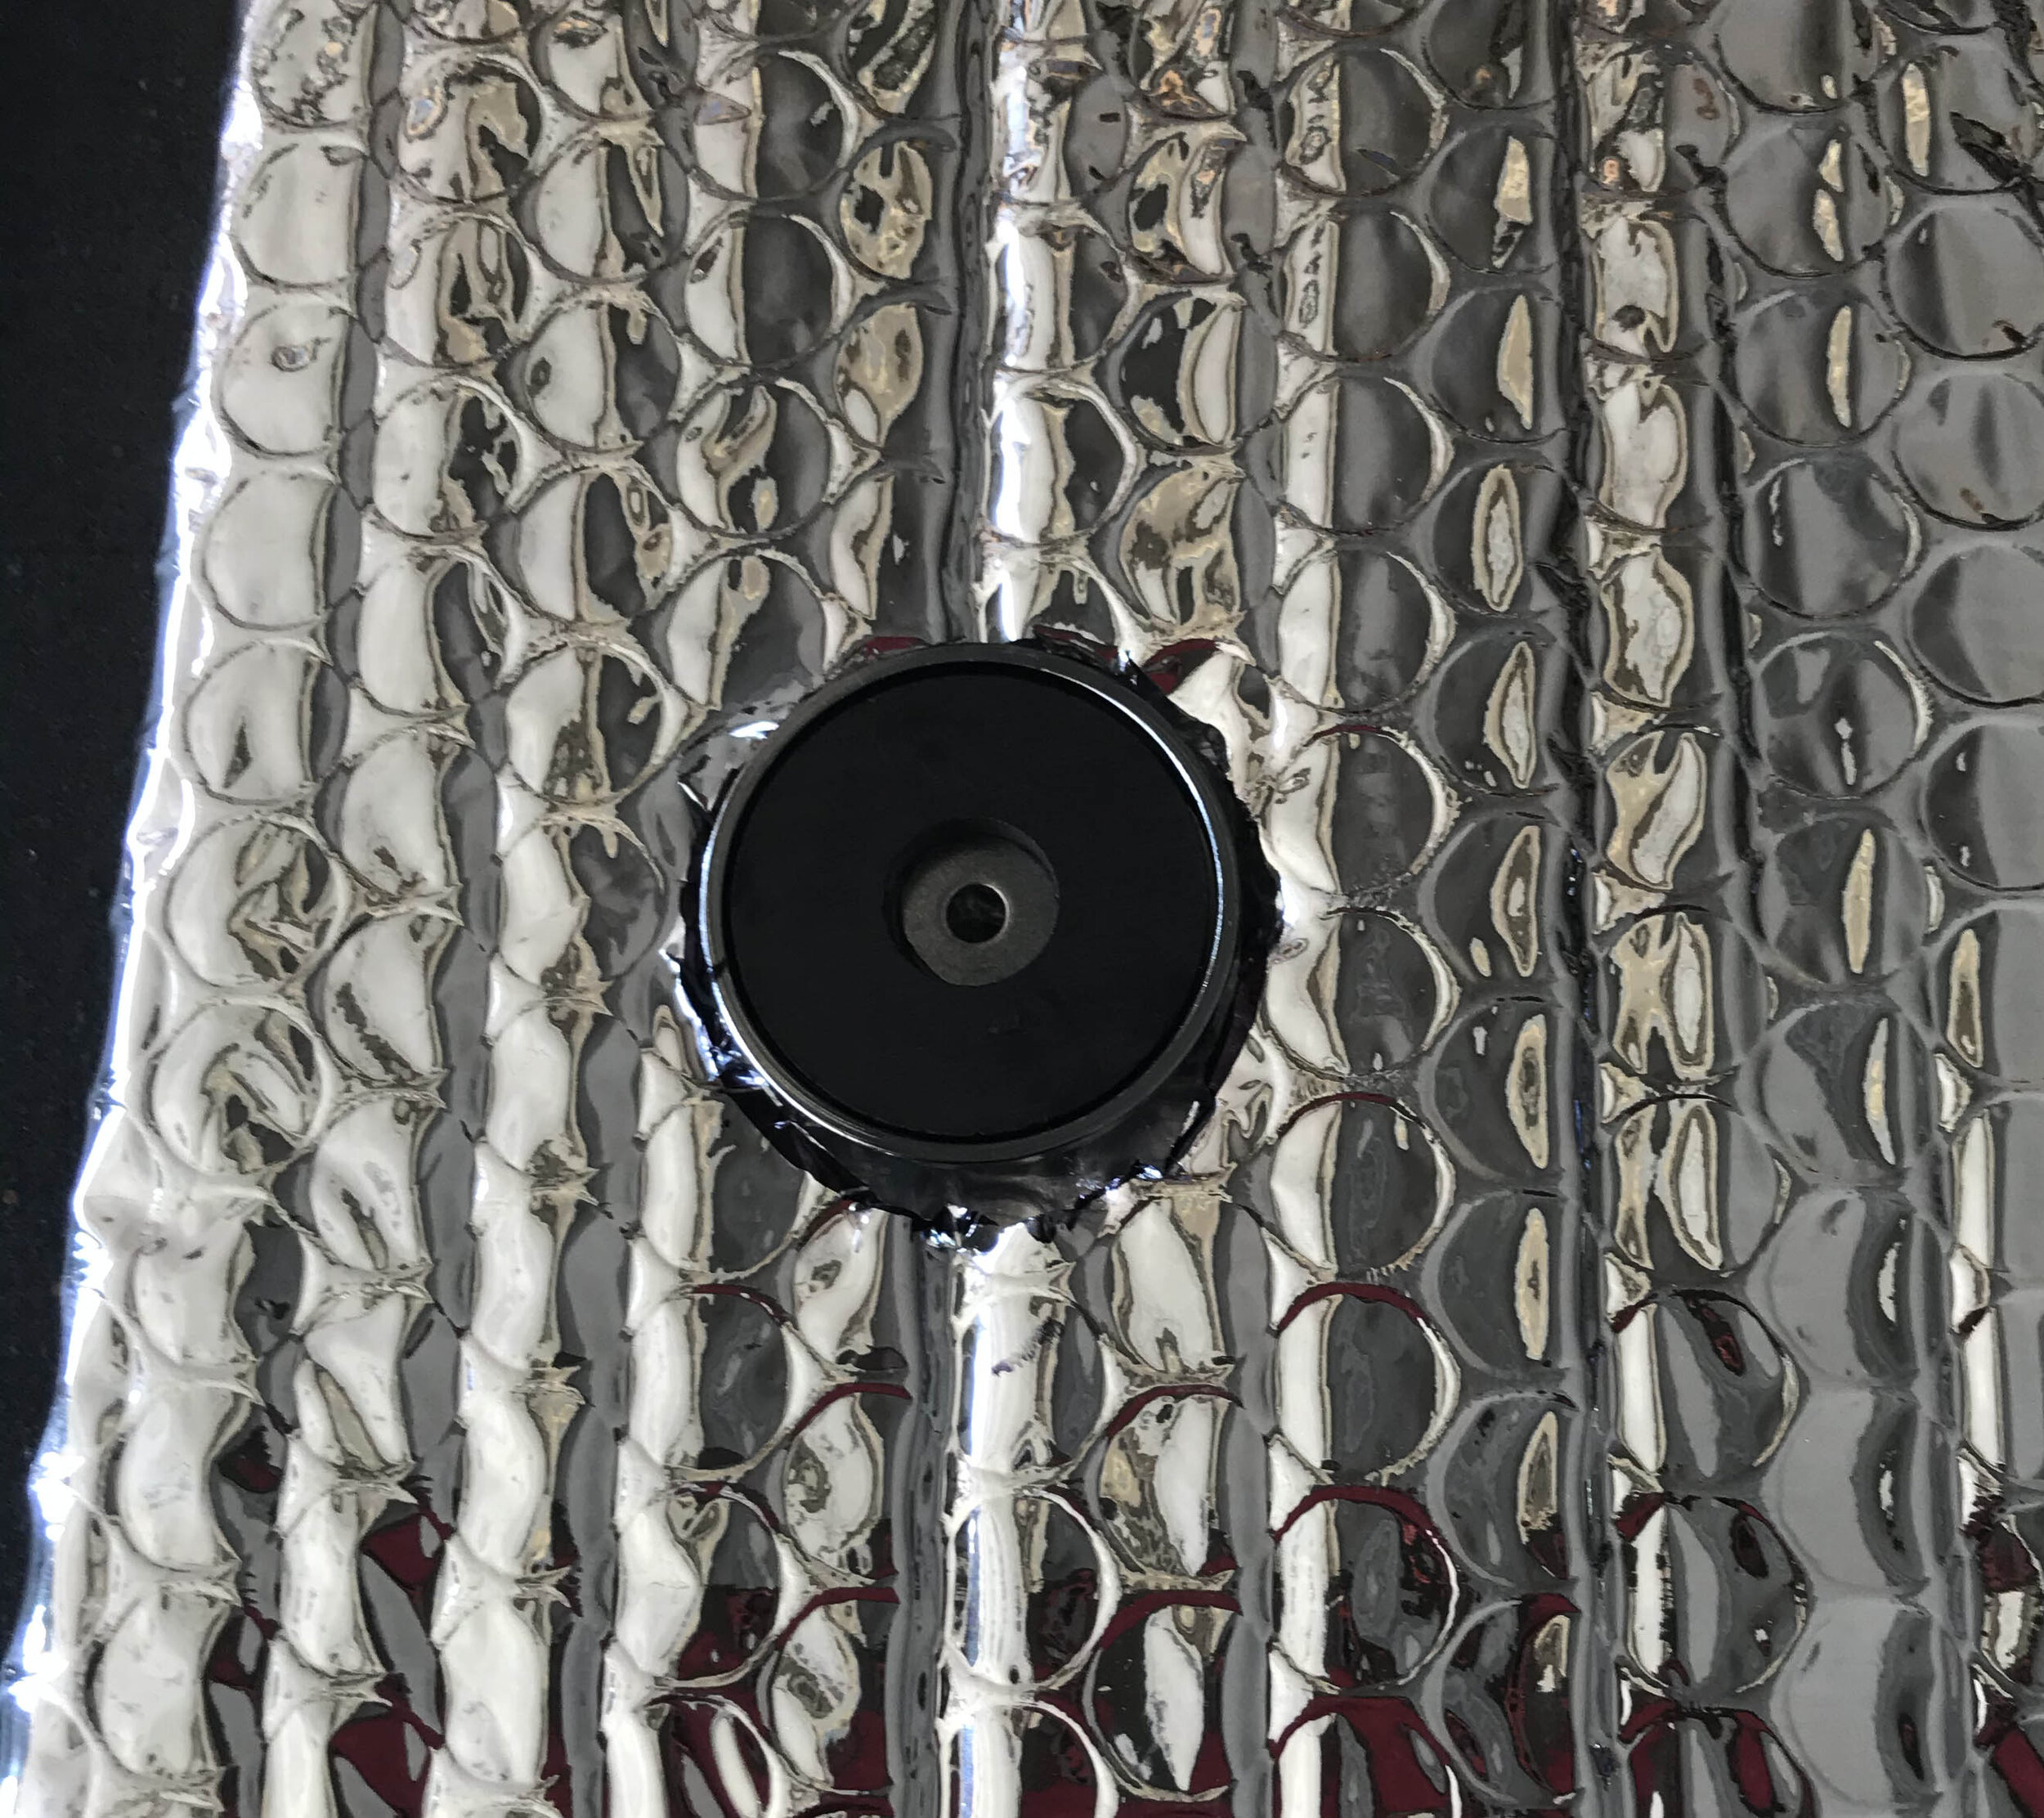
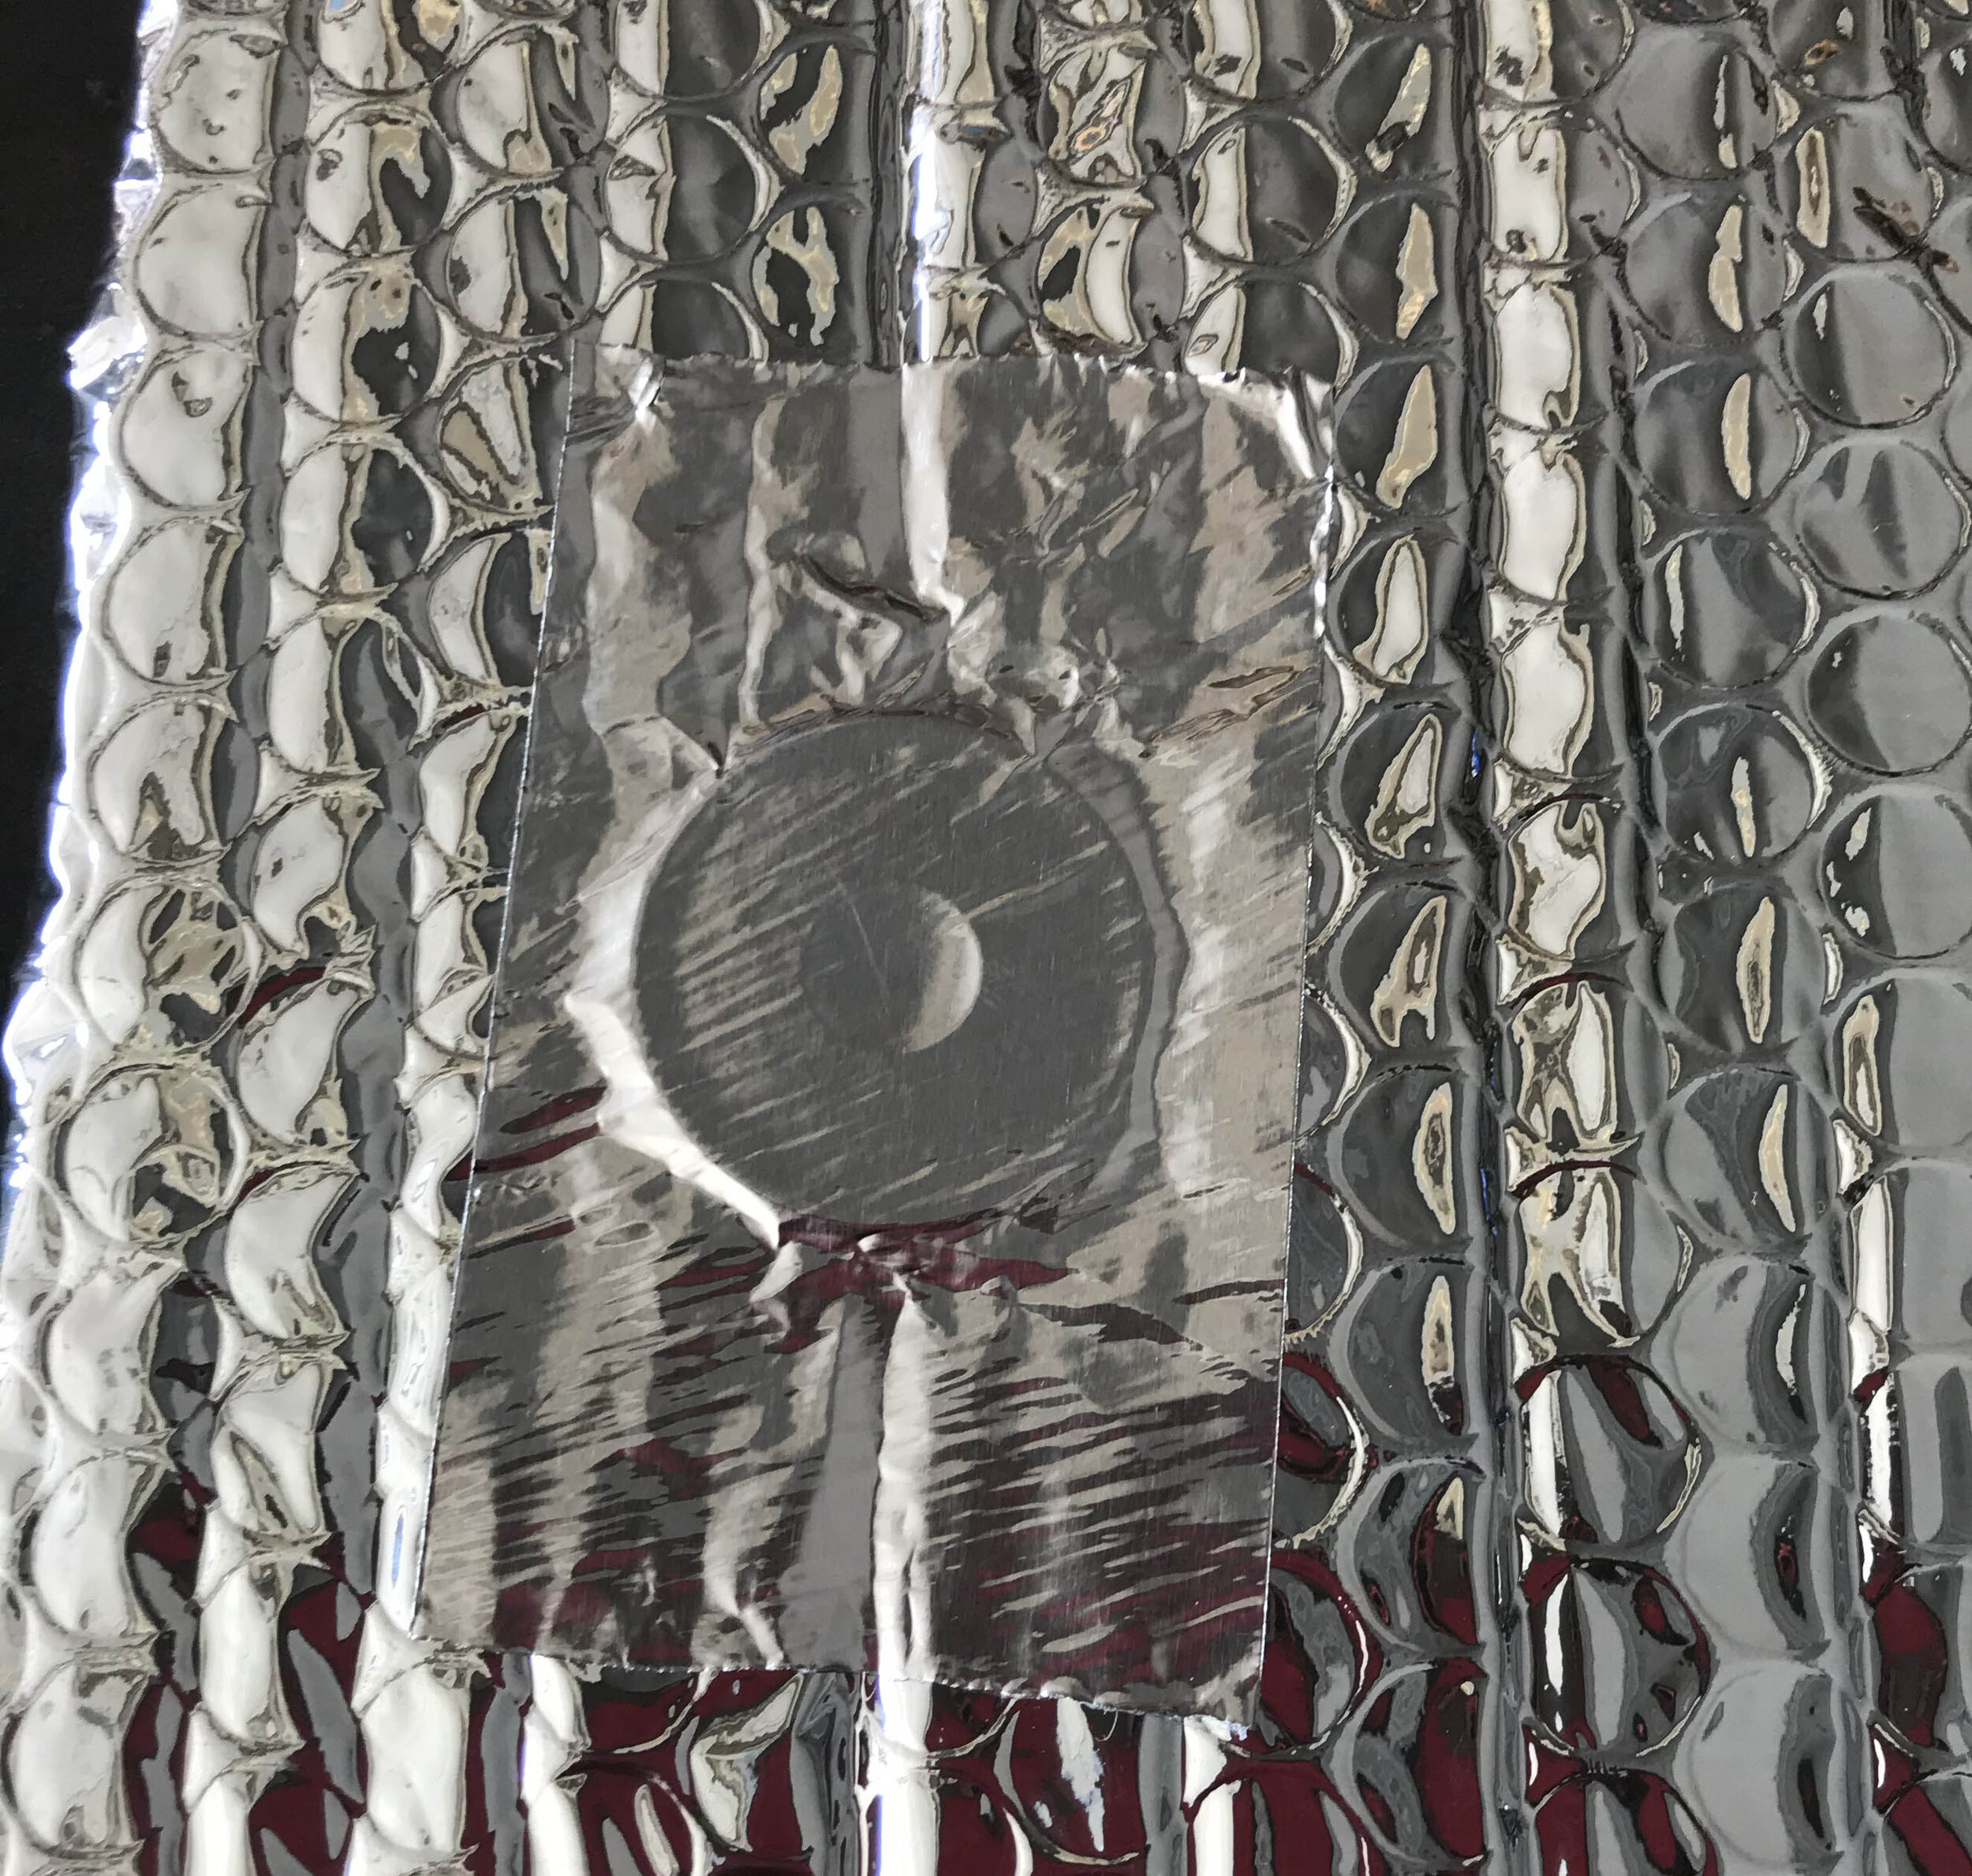
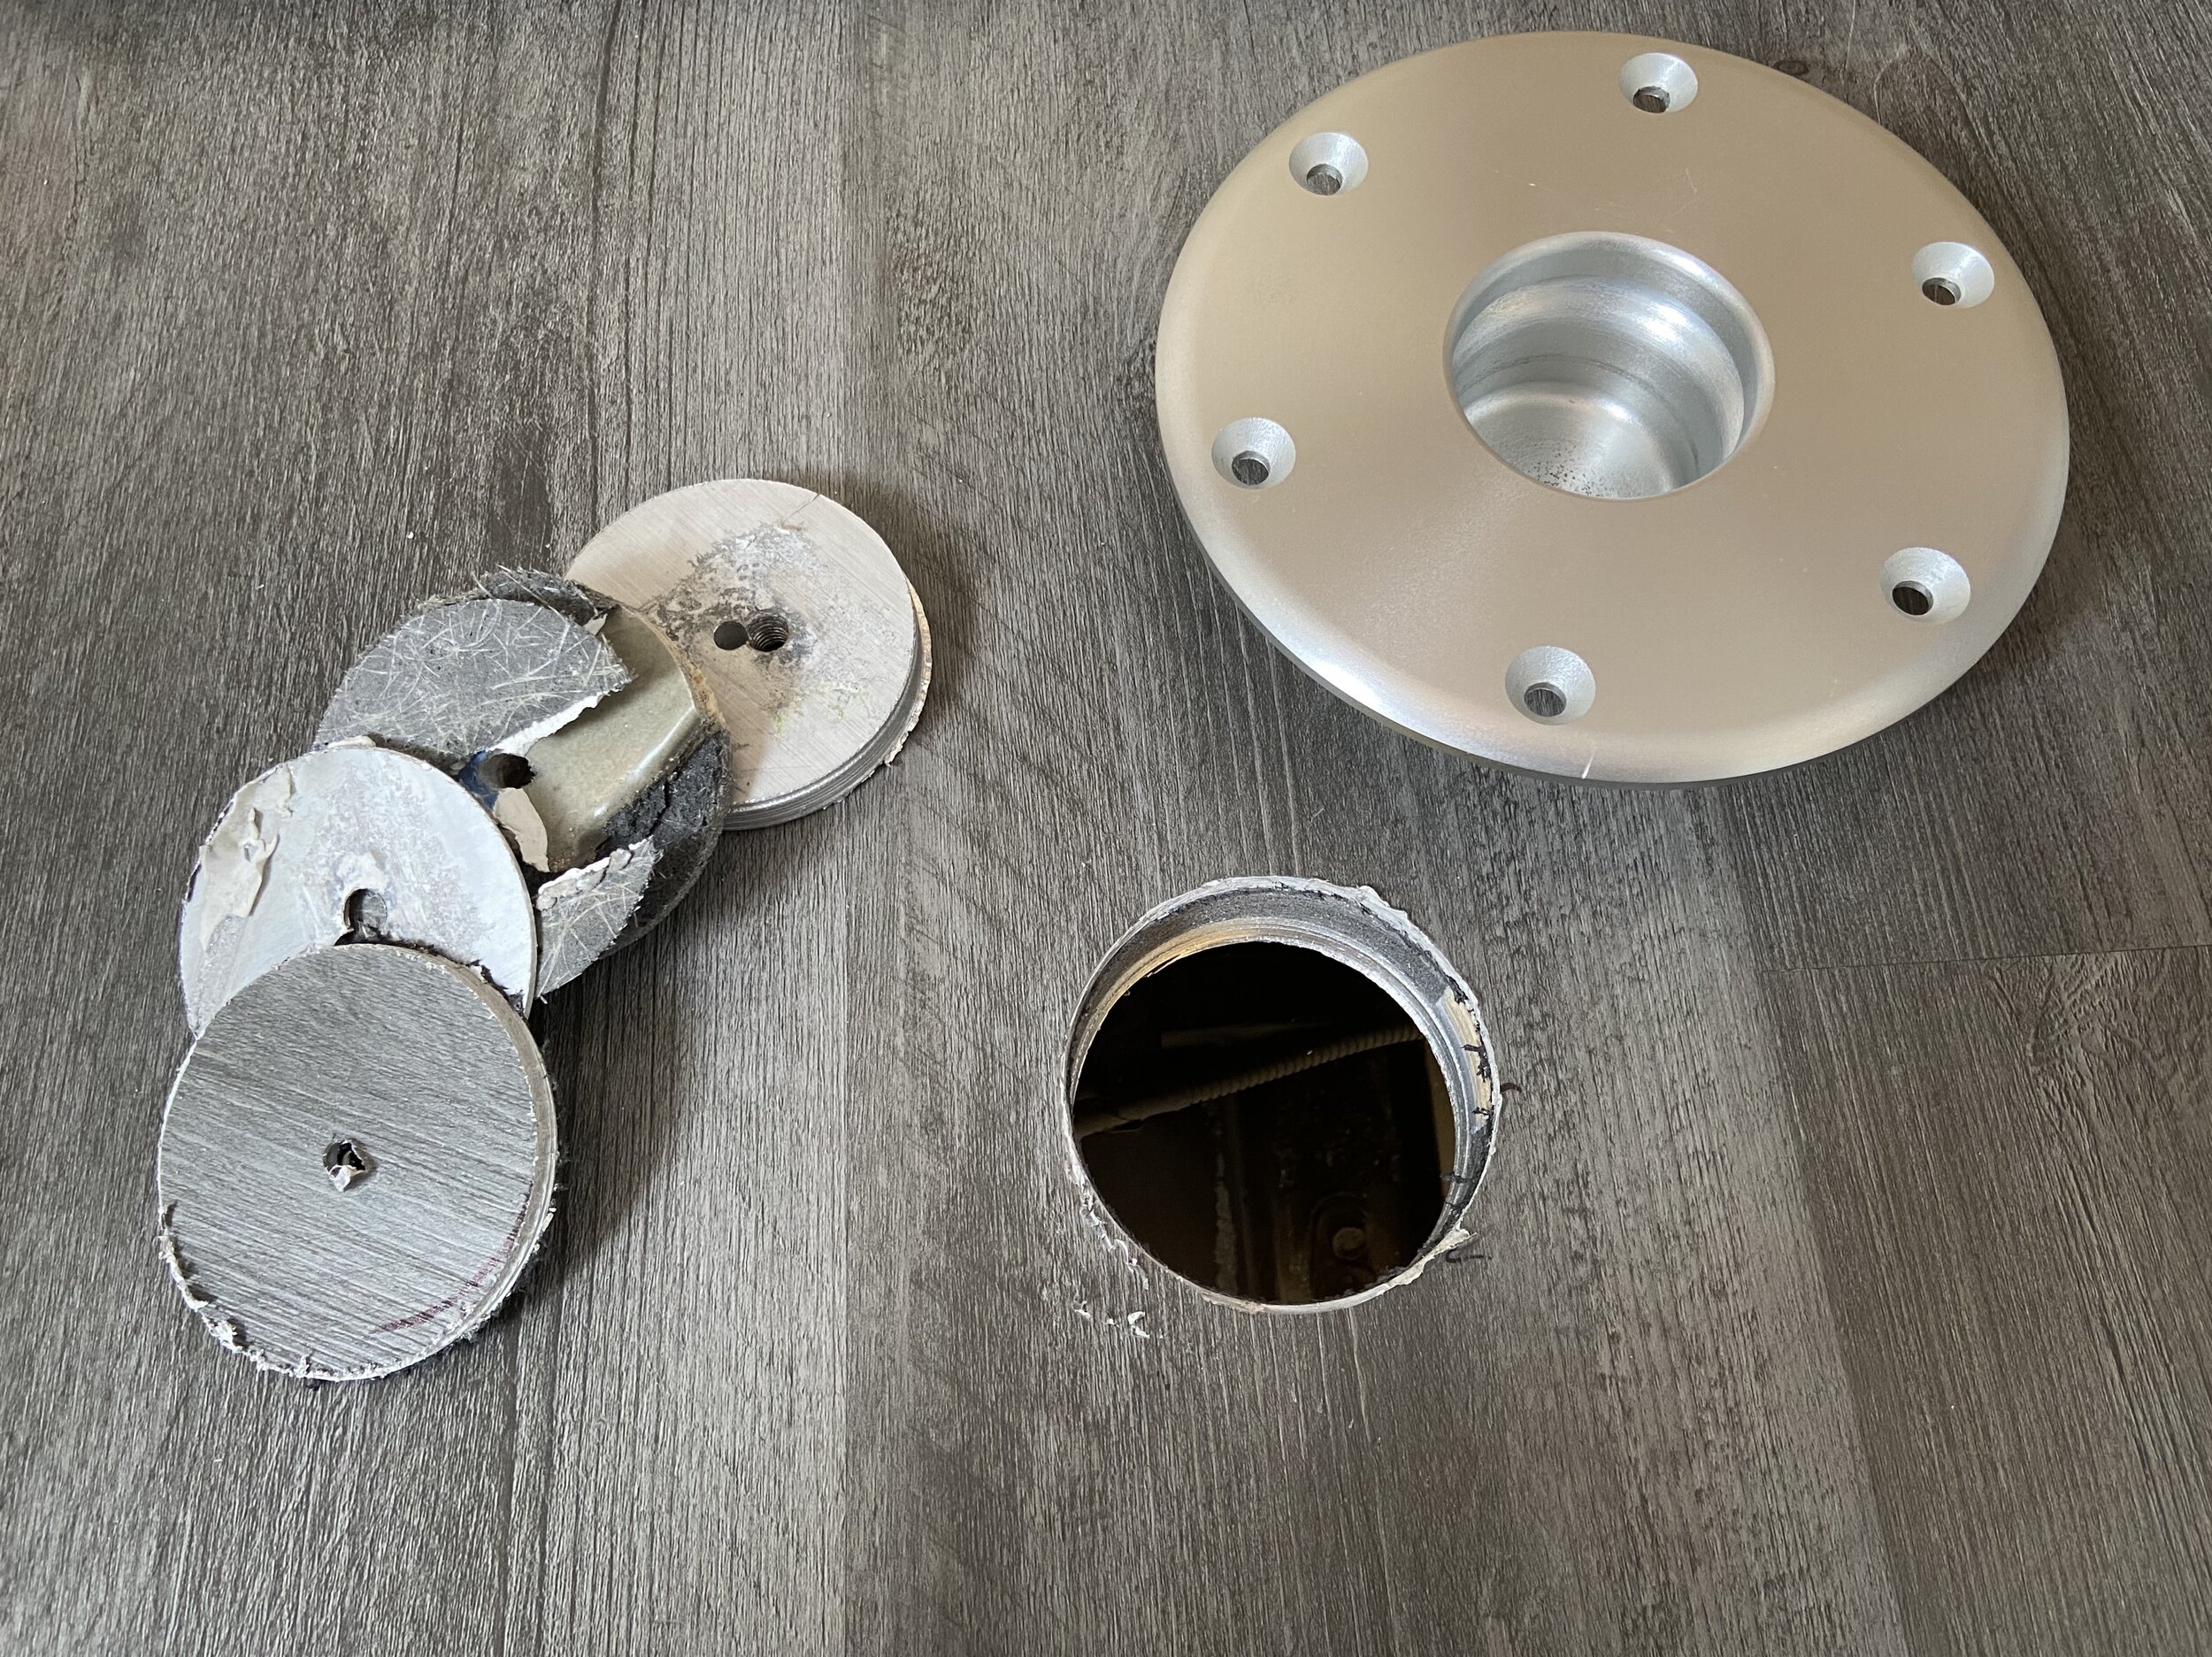
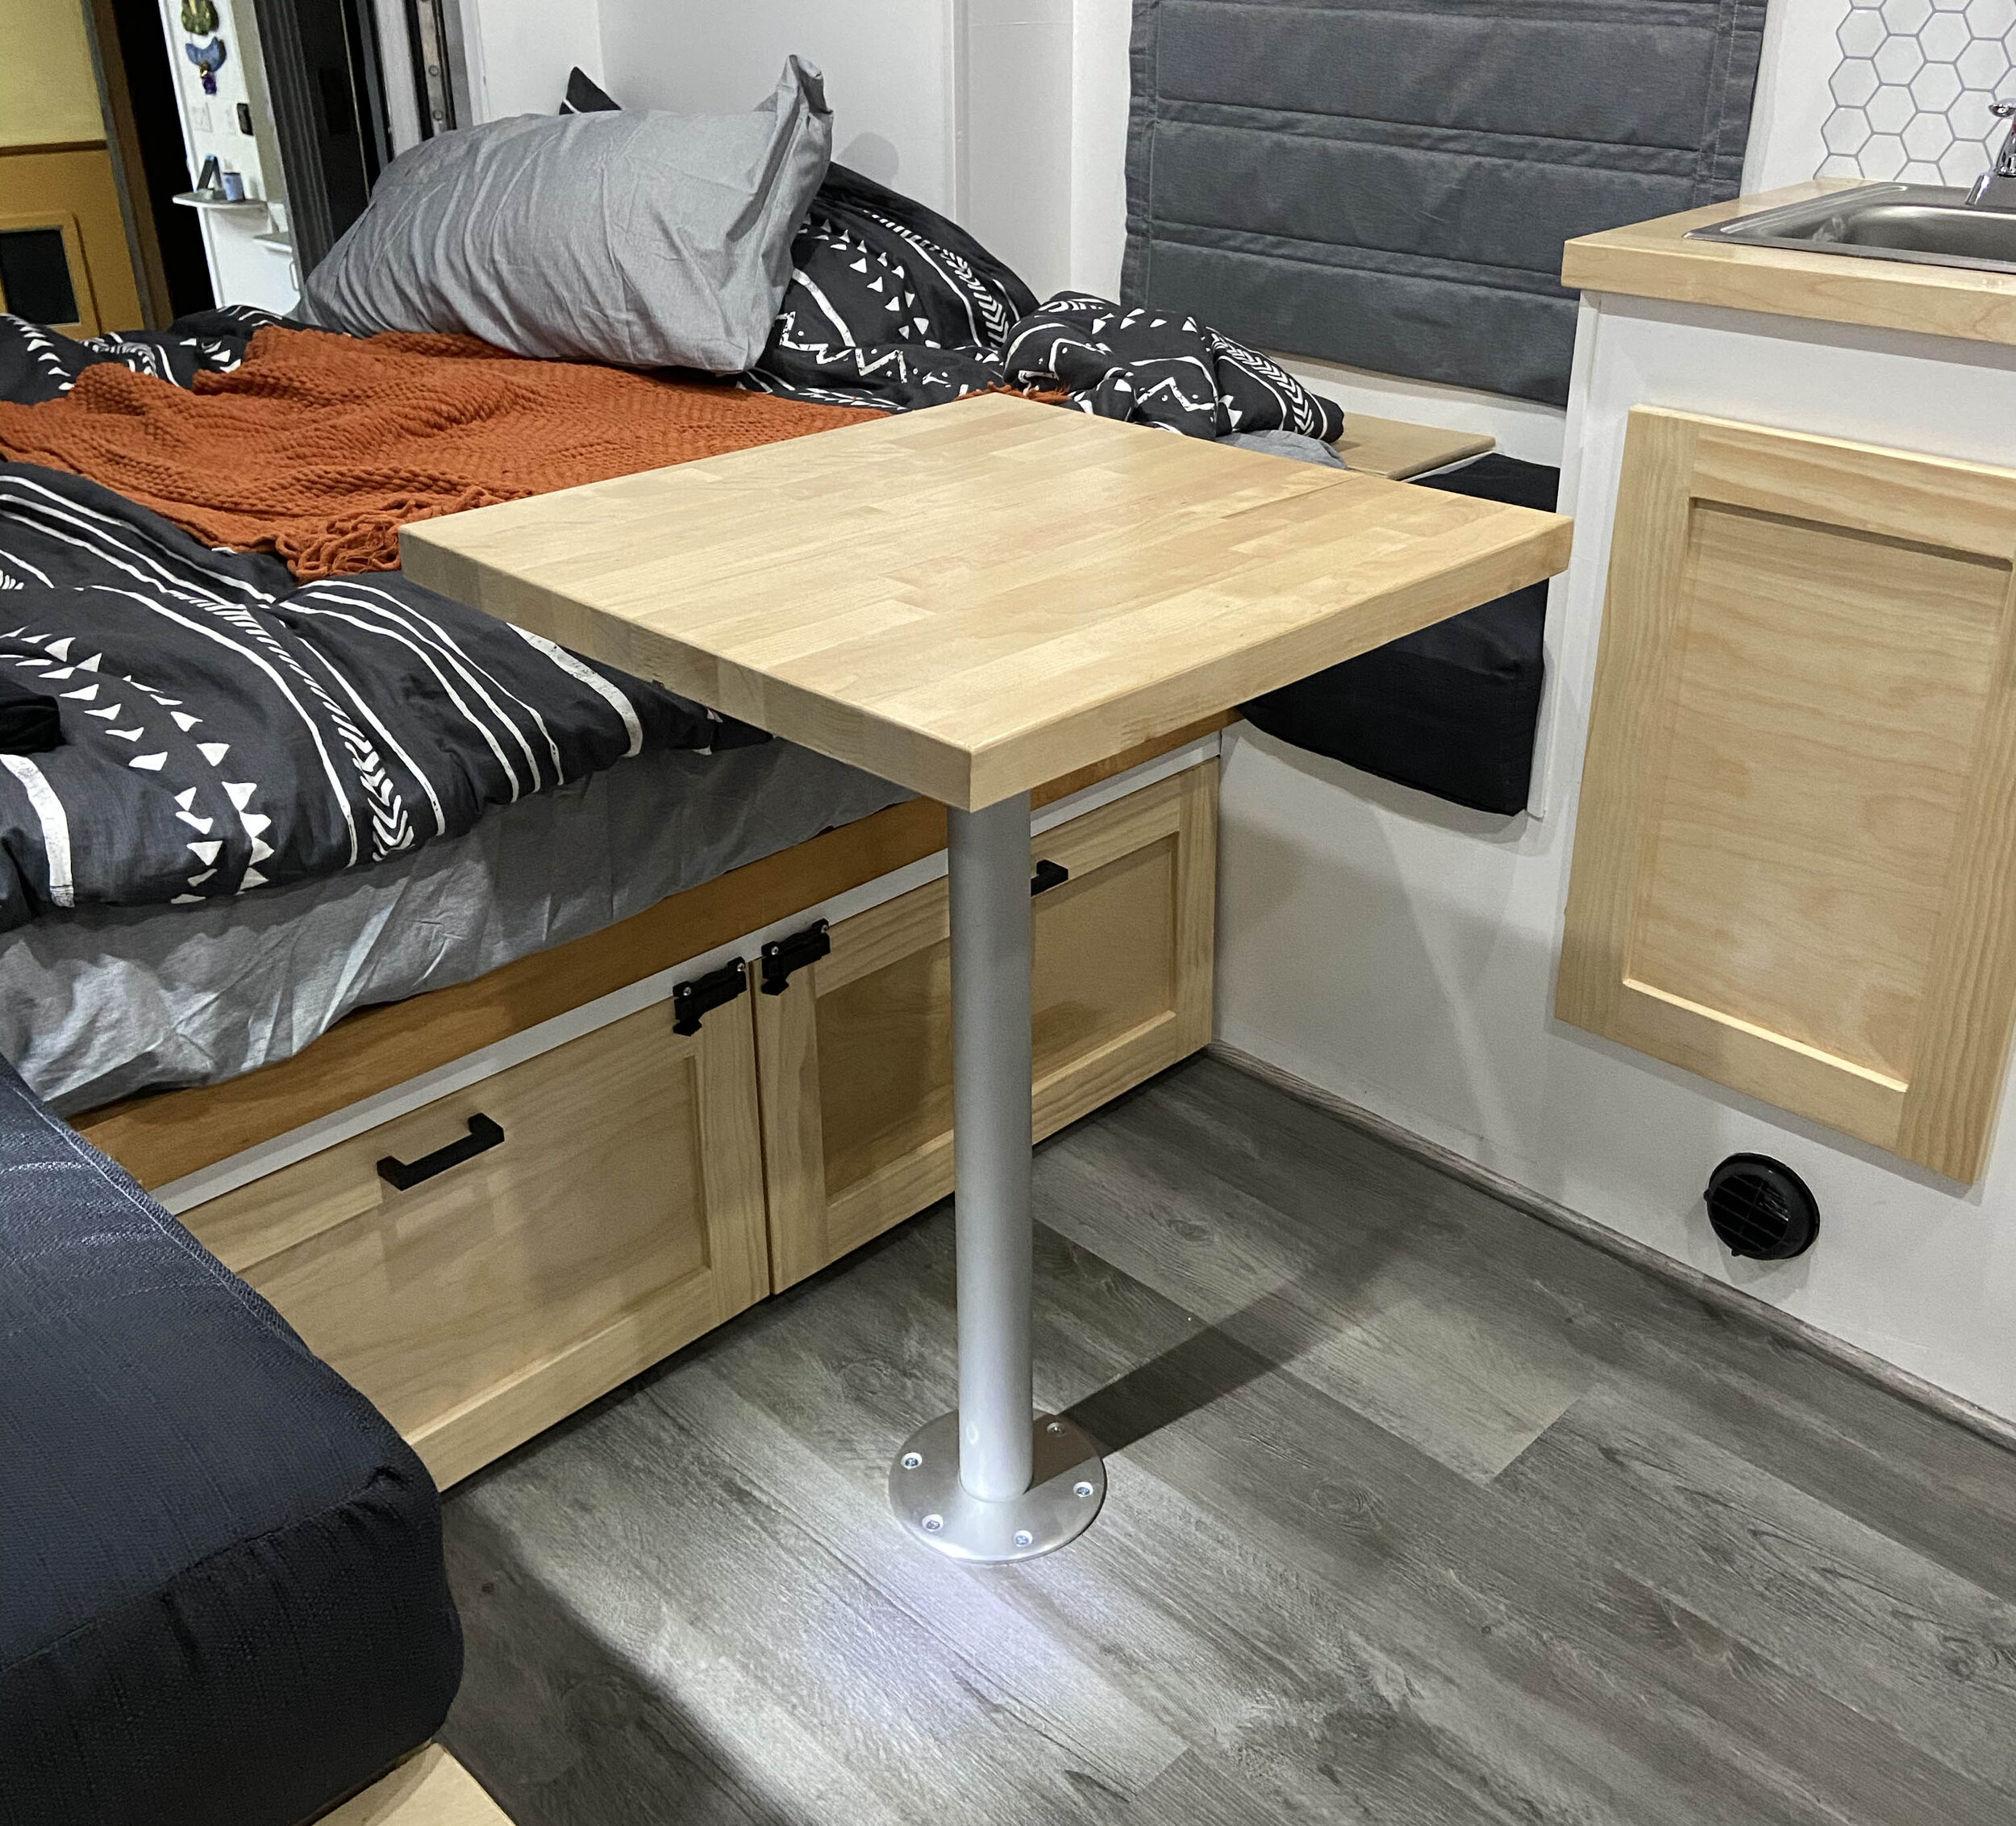
10-31-2020 - I purchased a locking boat table pedestal with a ground attachment as well as table attachment. I made the purchase from West Marine. The unit was about $100. Its 30” in height. The entire unit is made from brushed AL. It is very high quality.
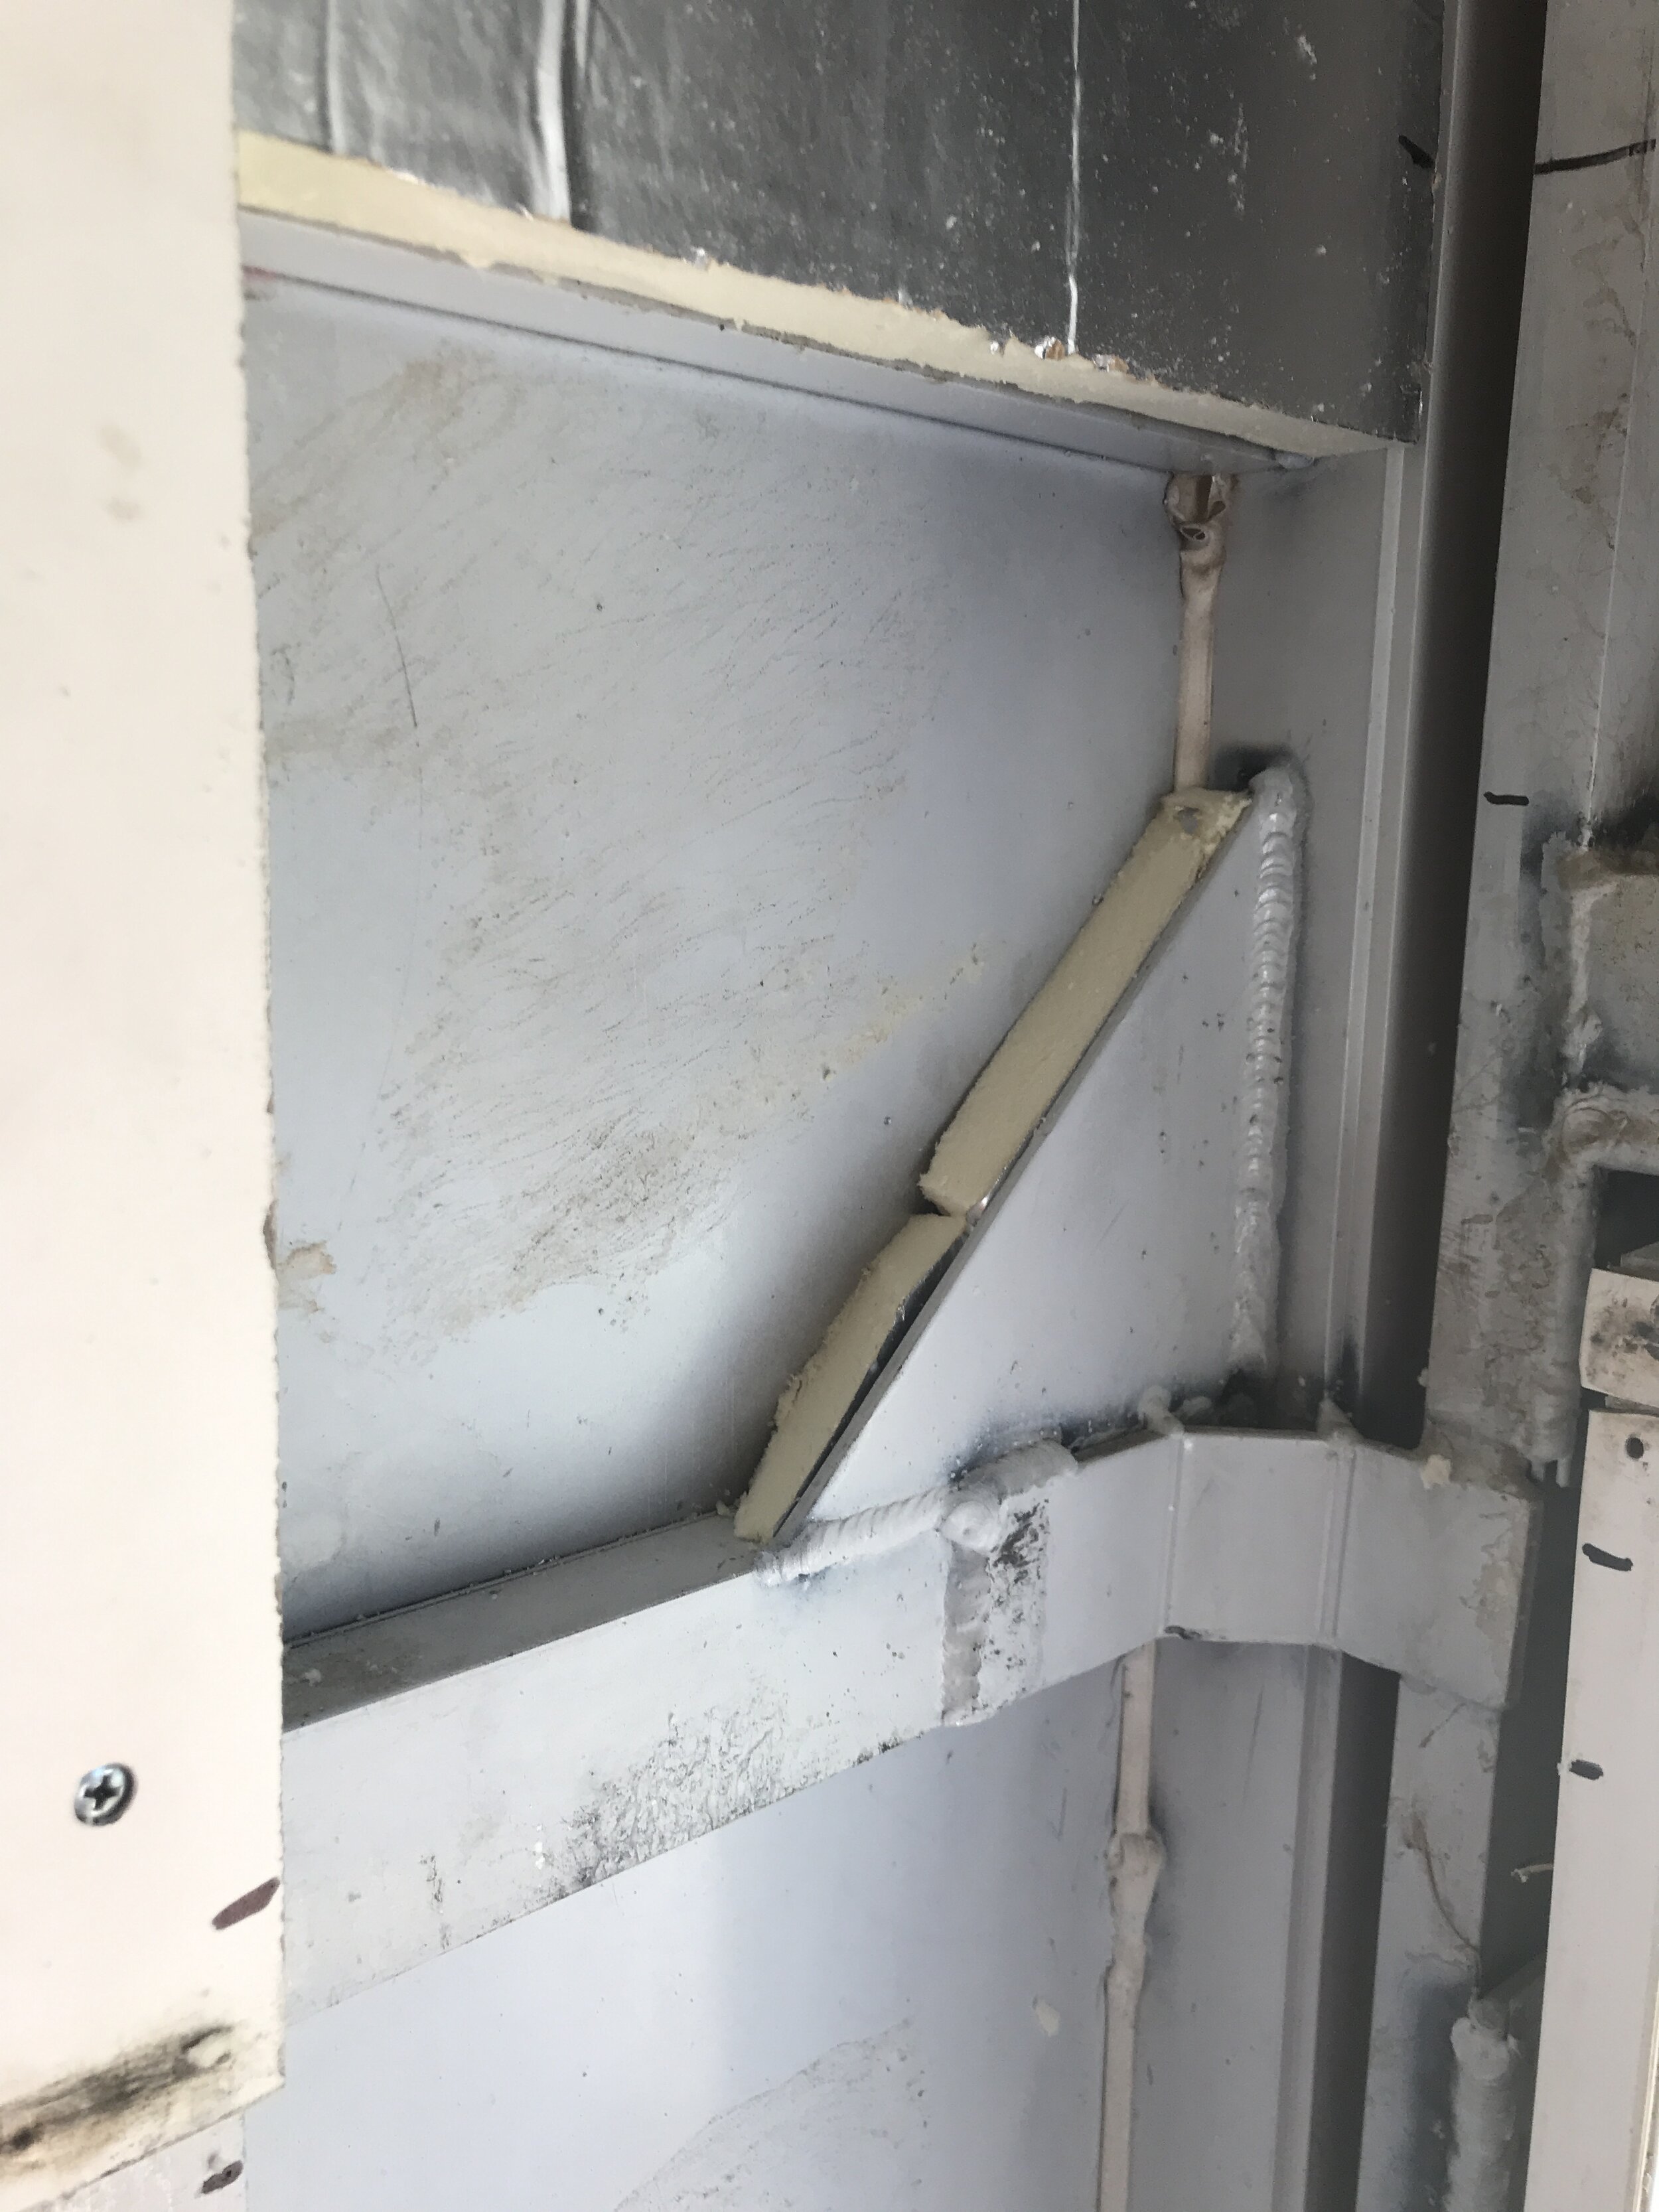
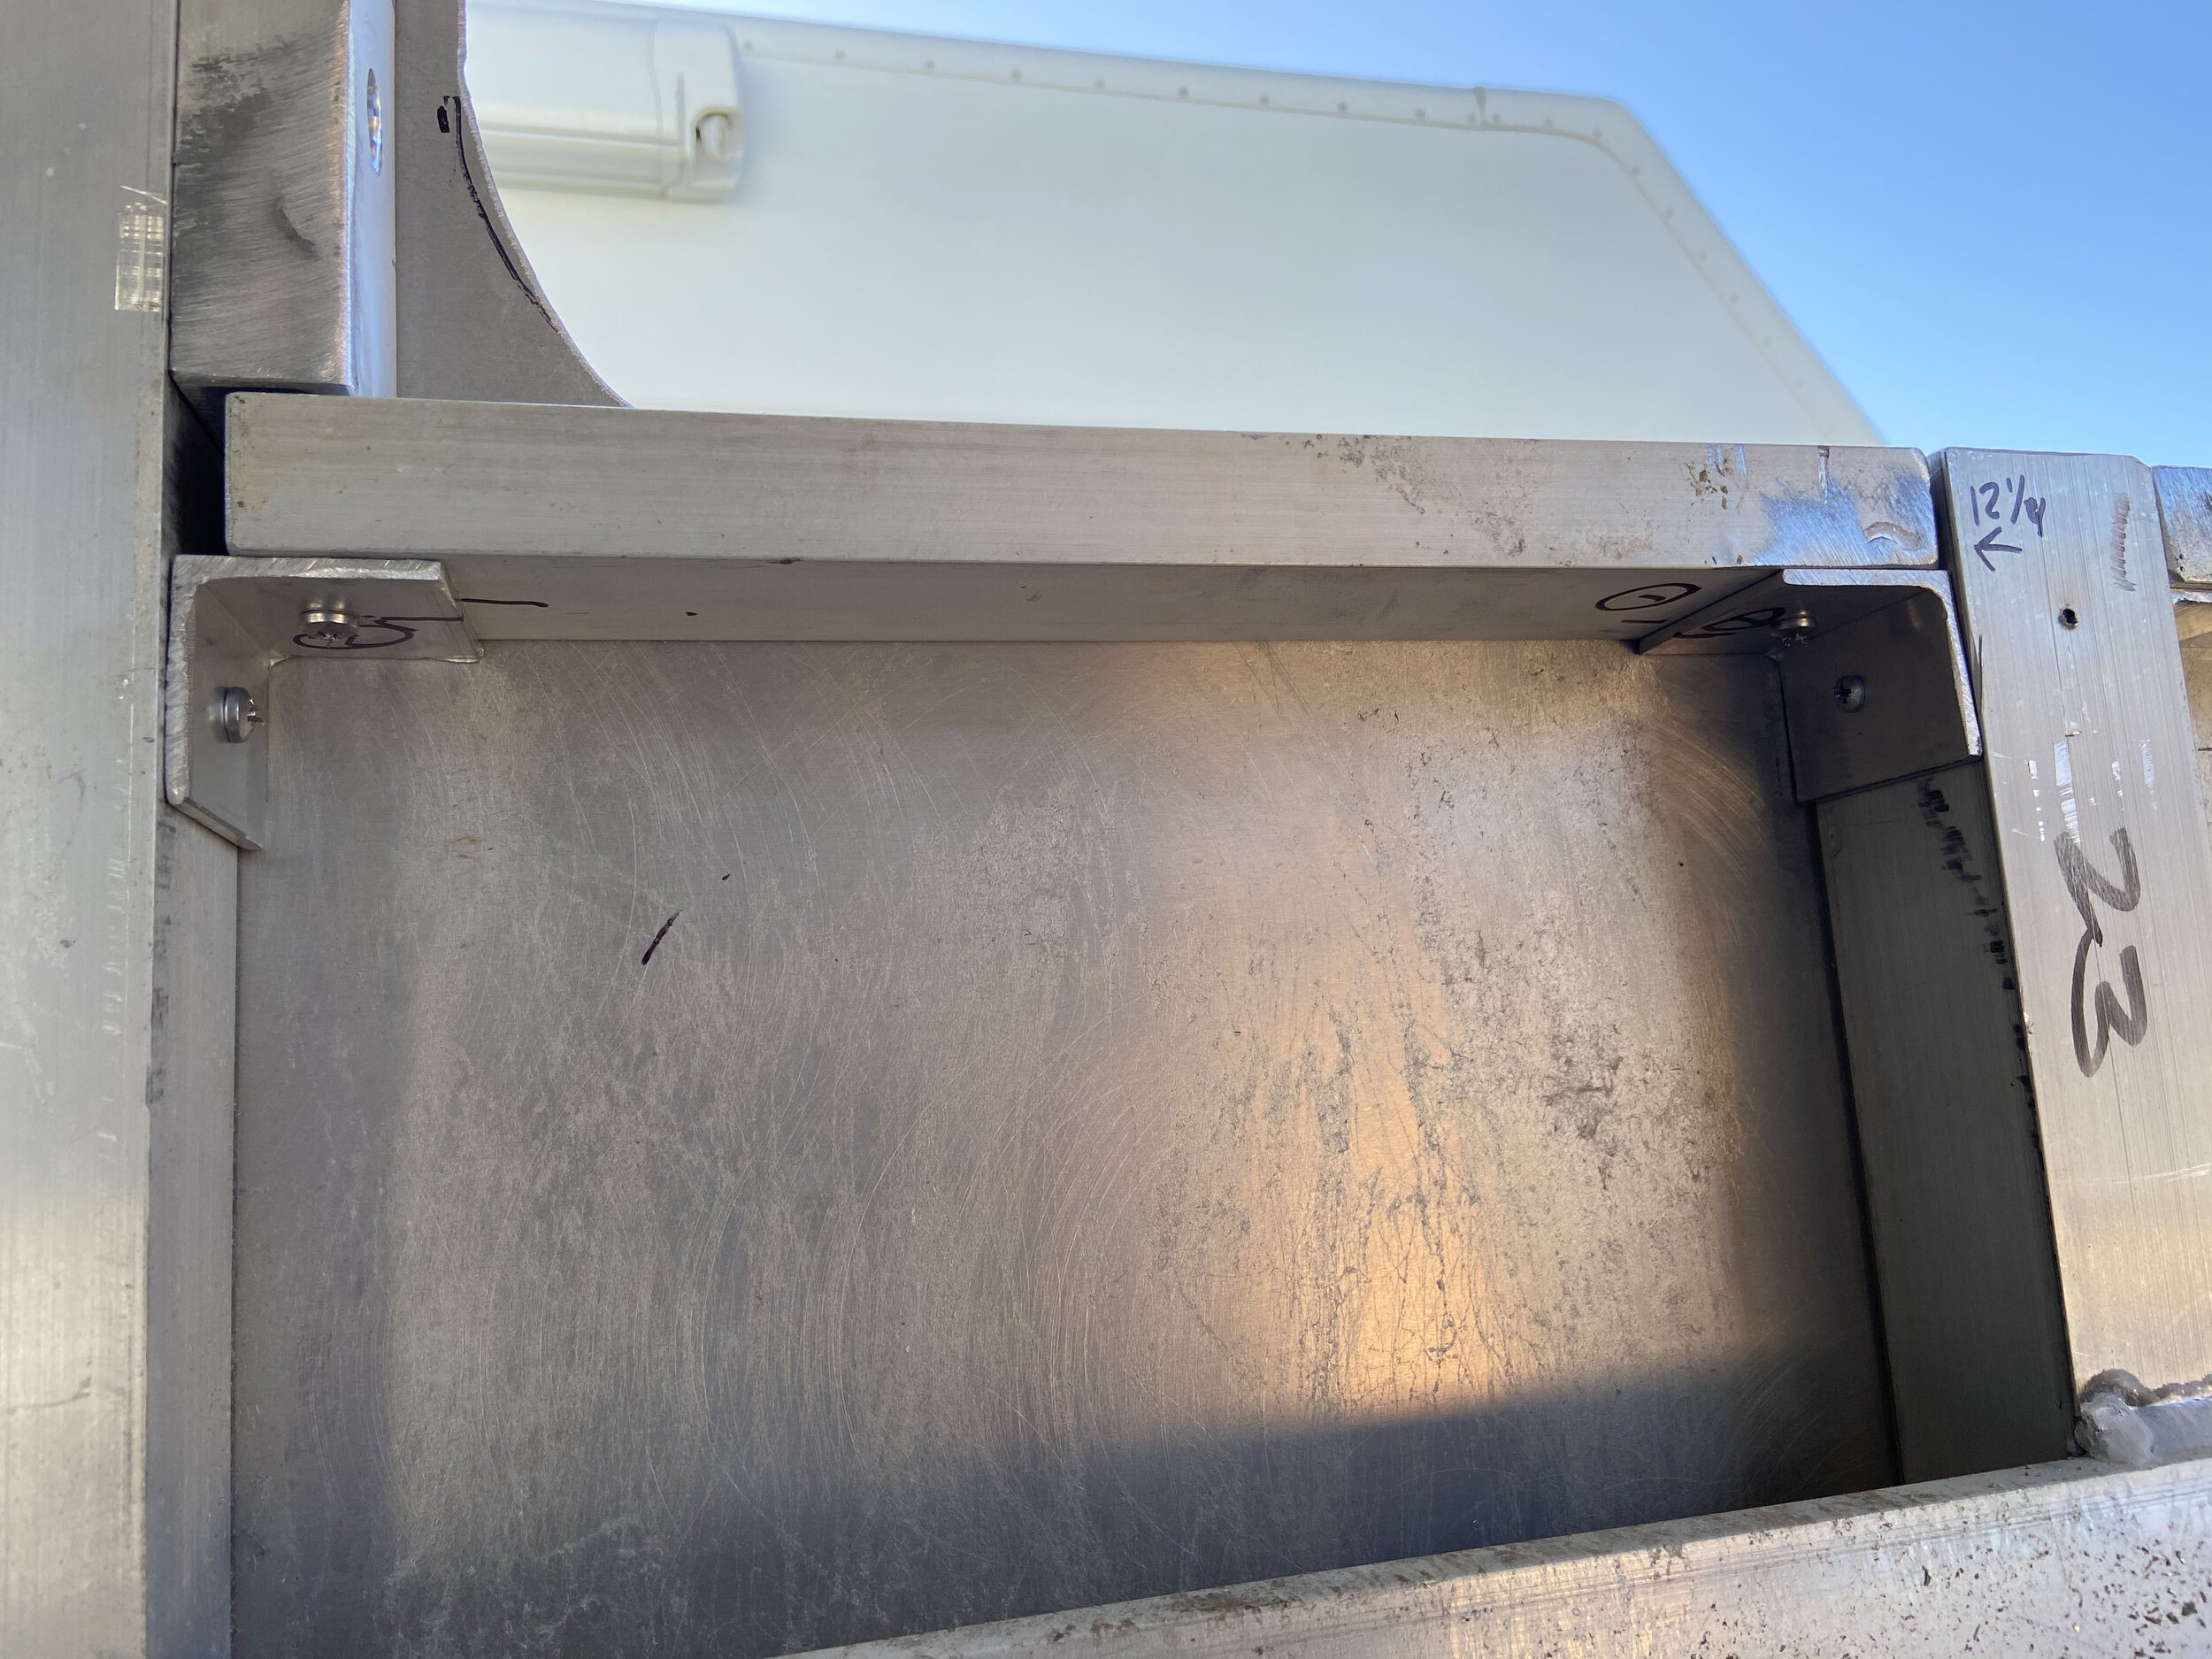
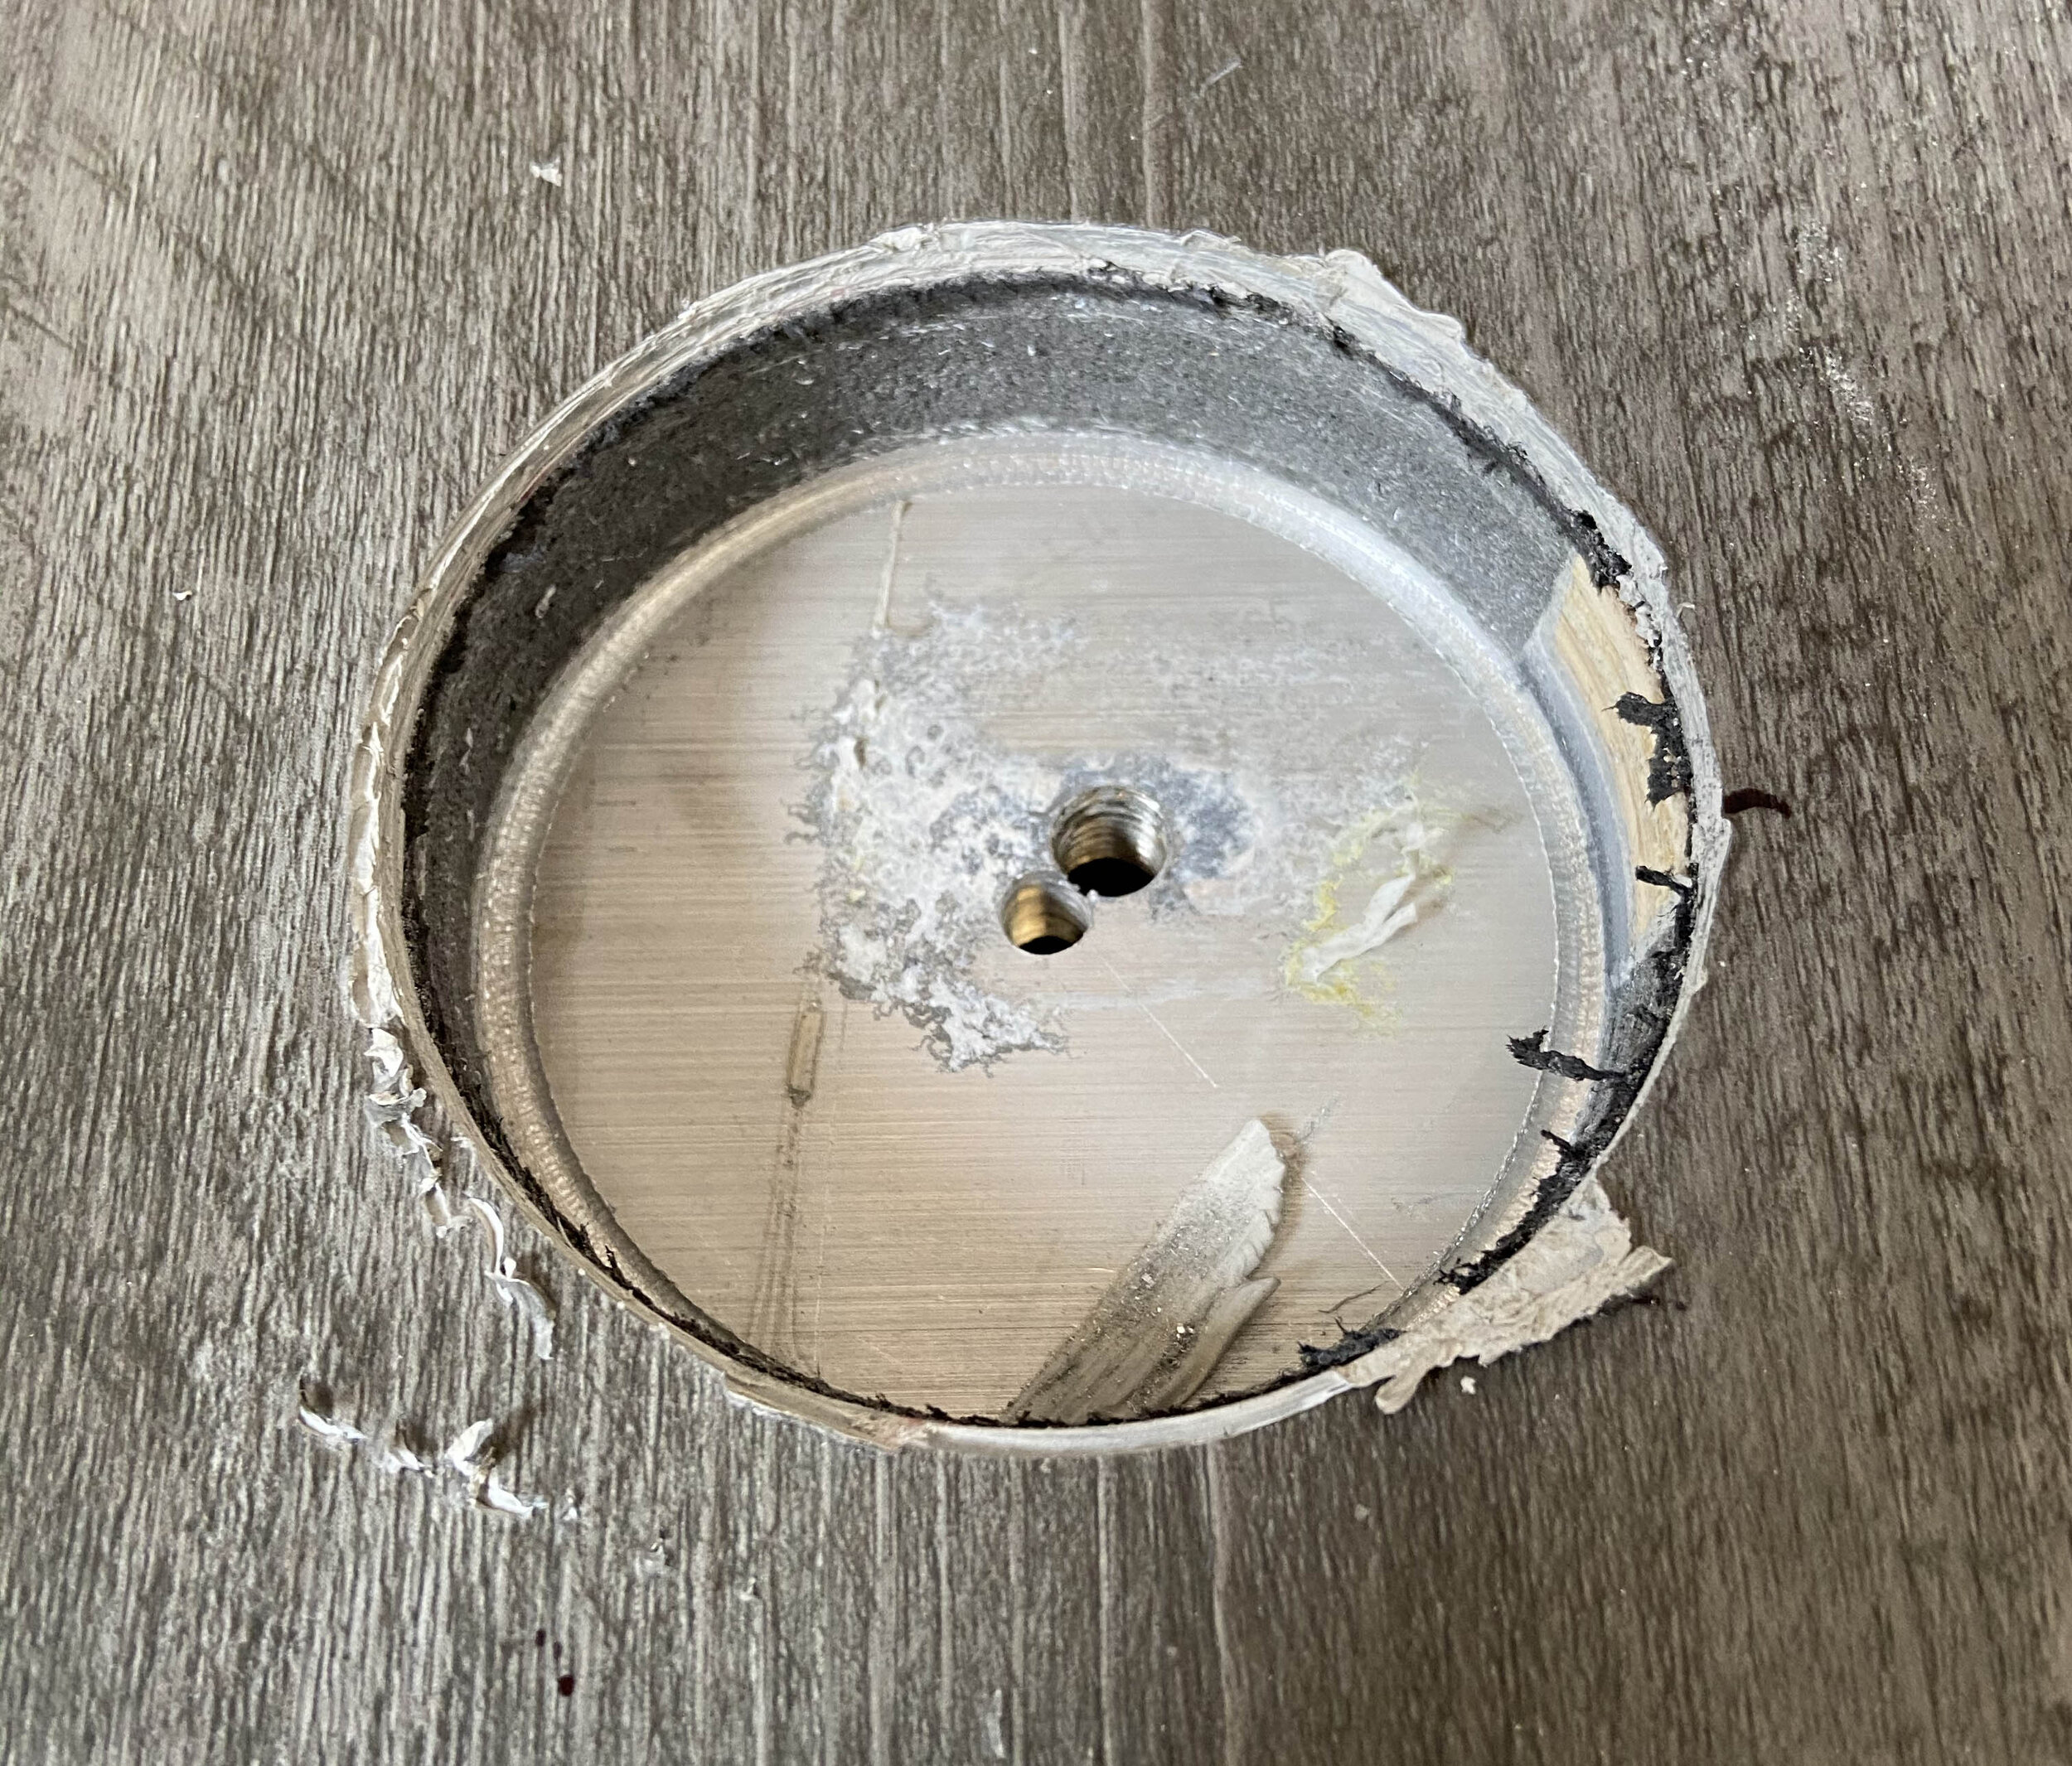
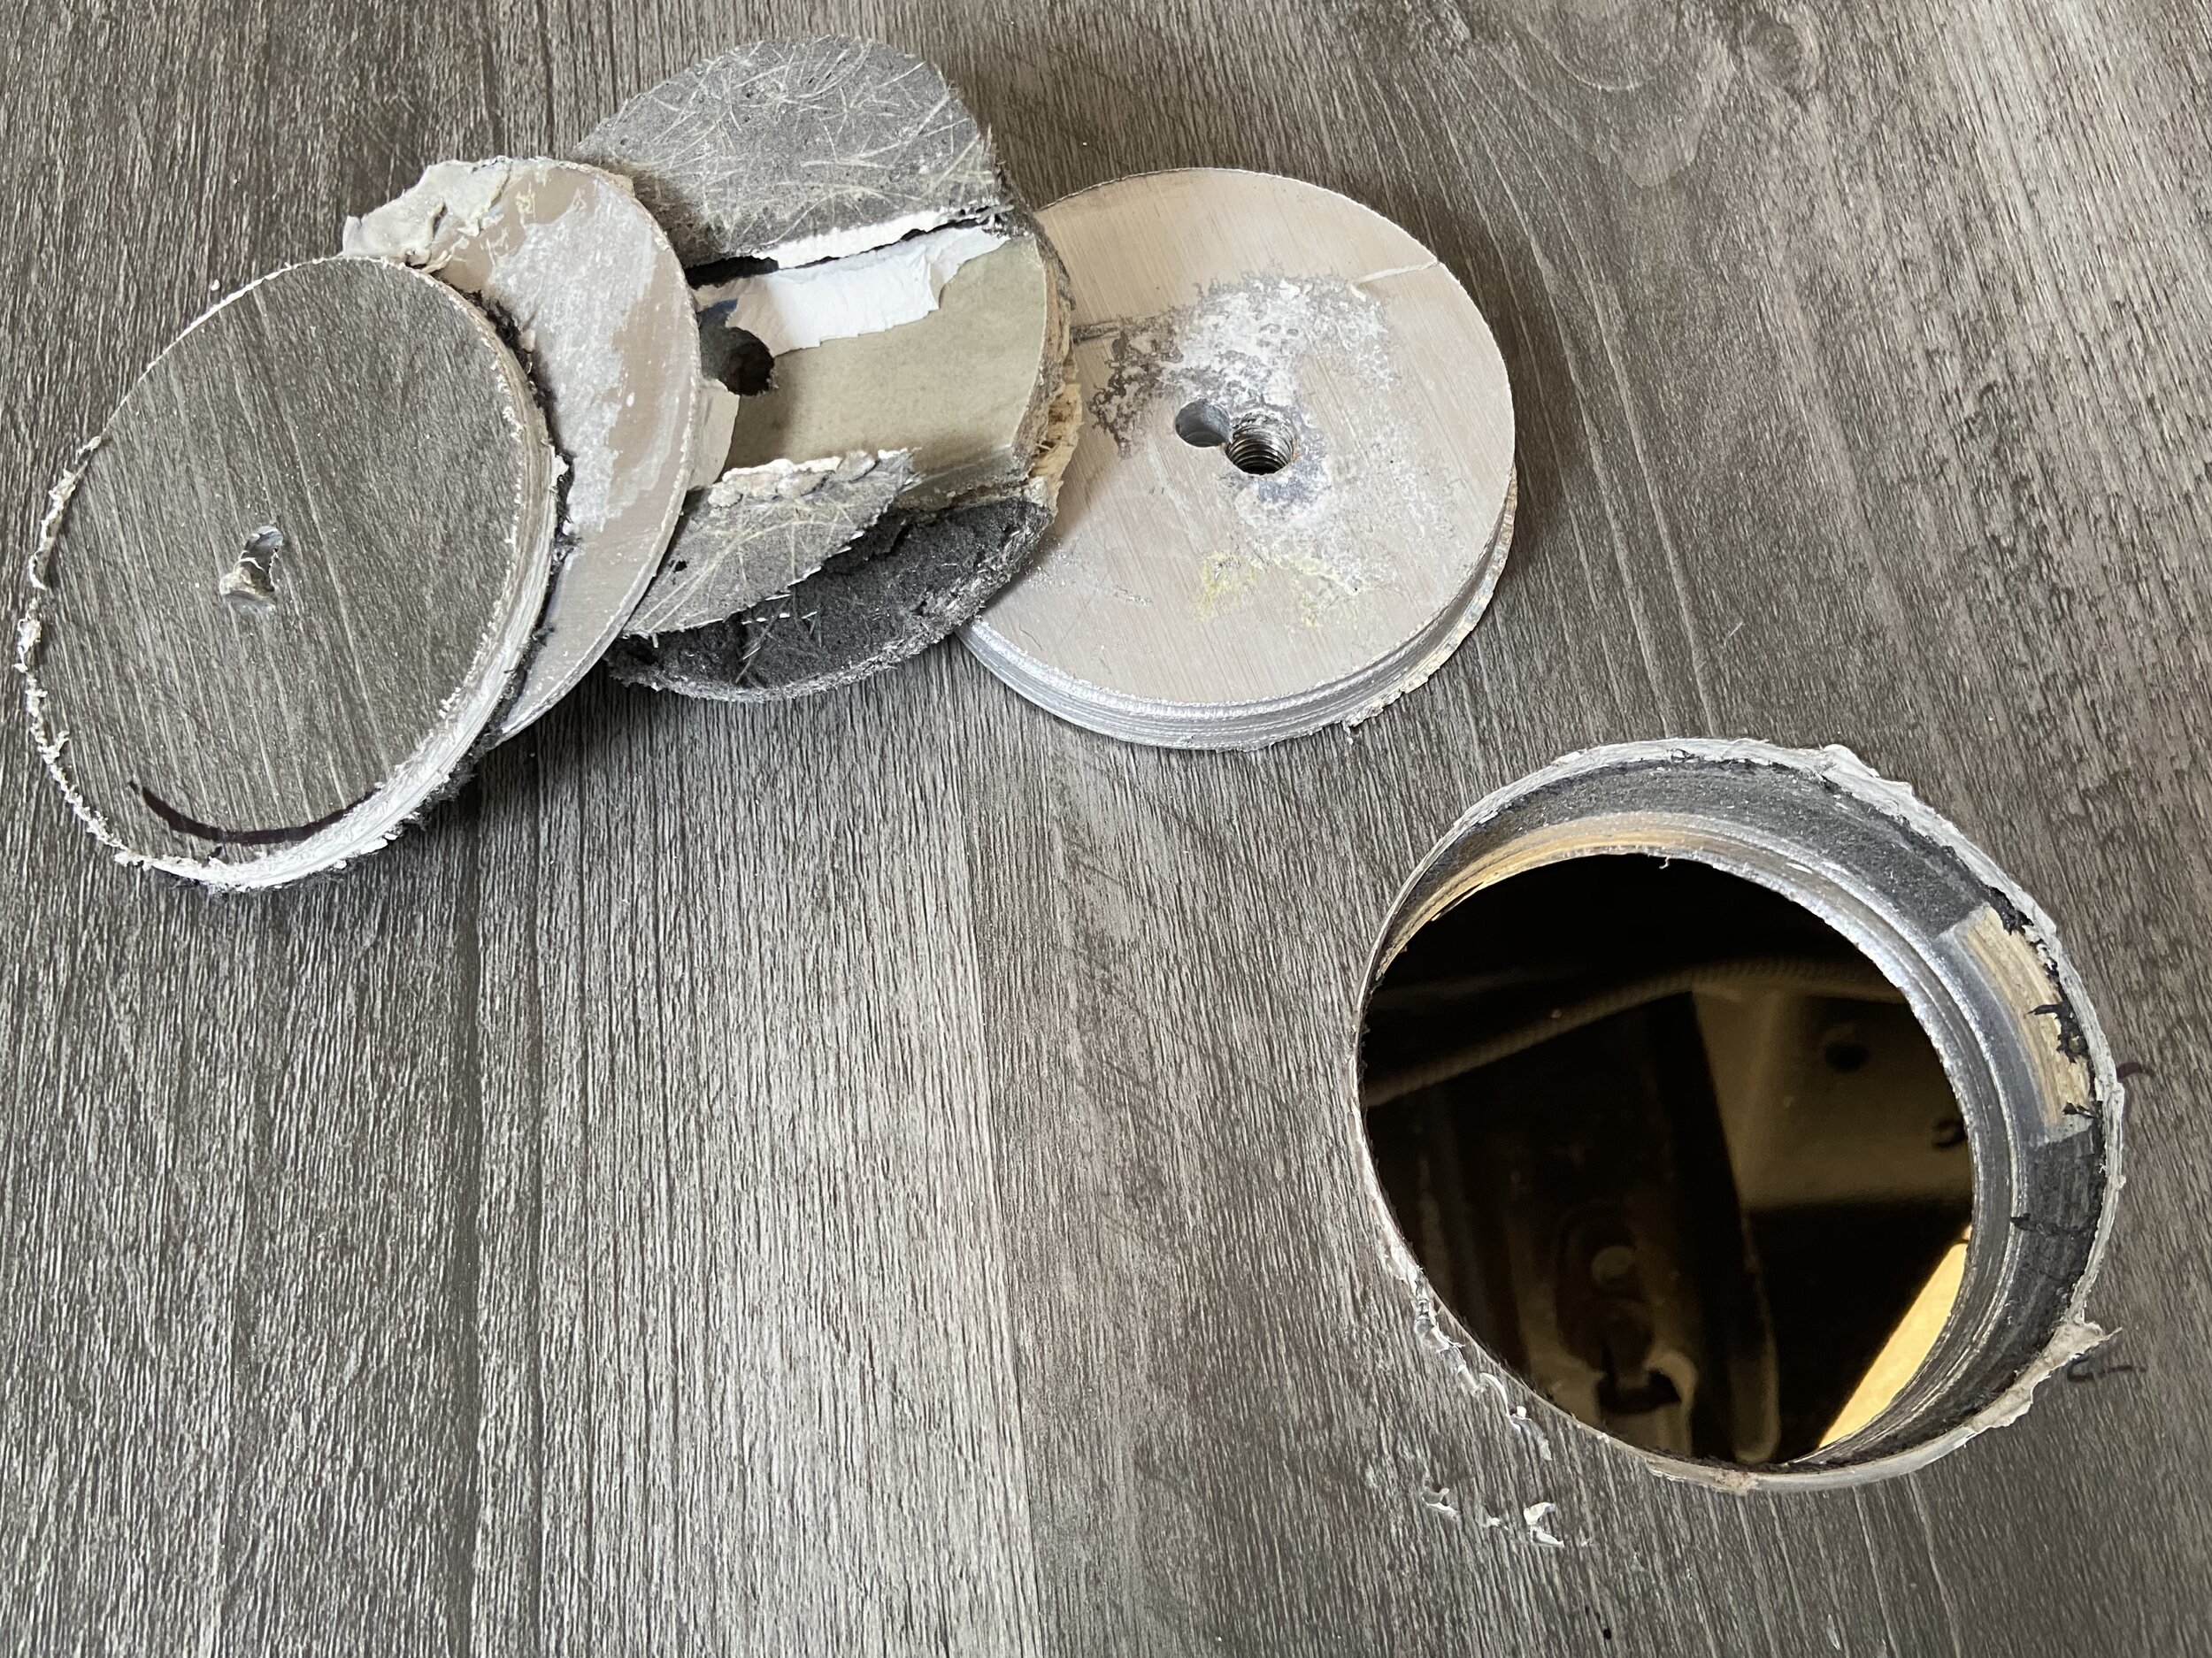
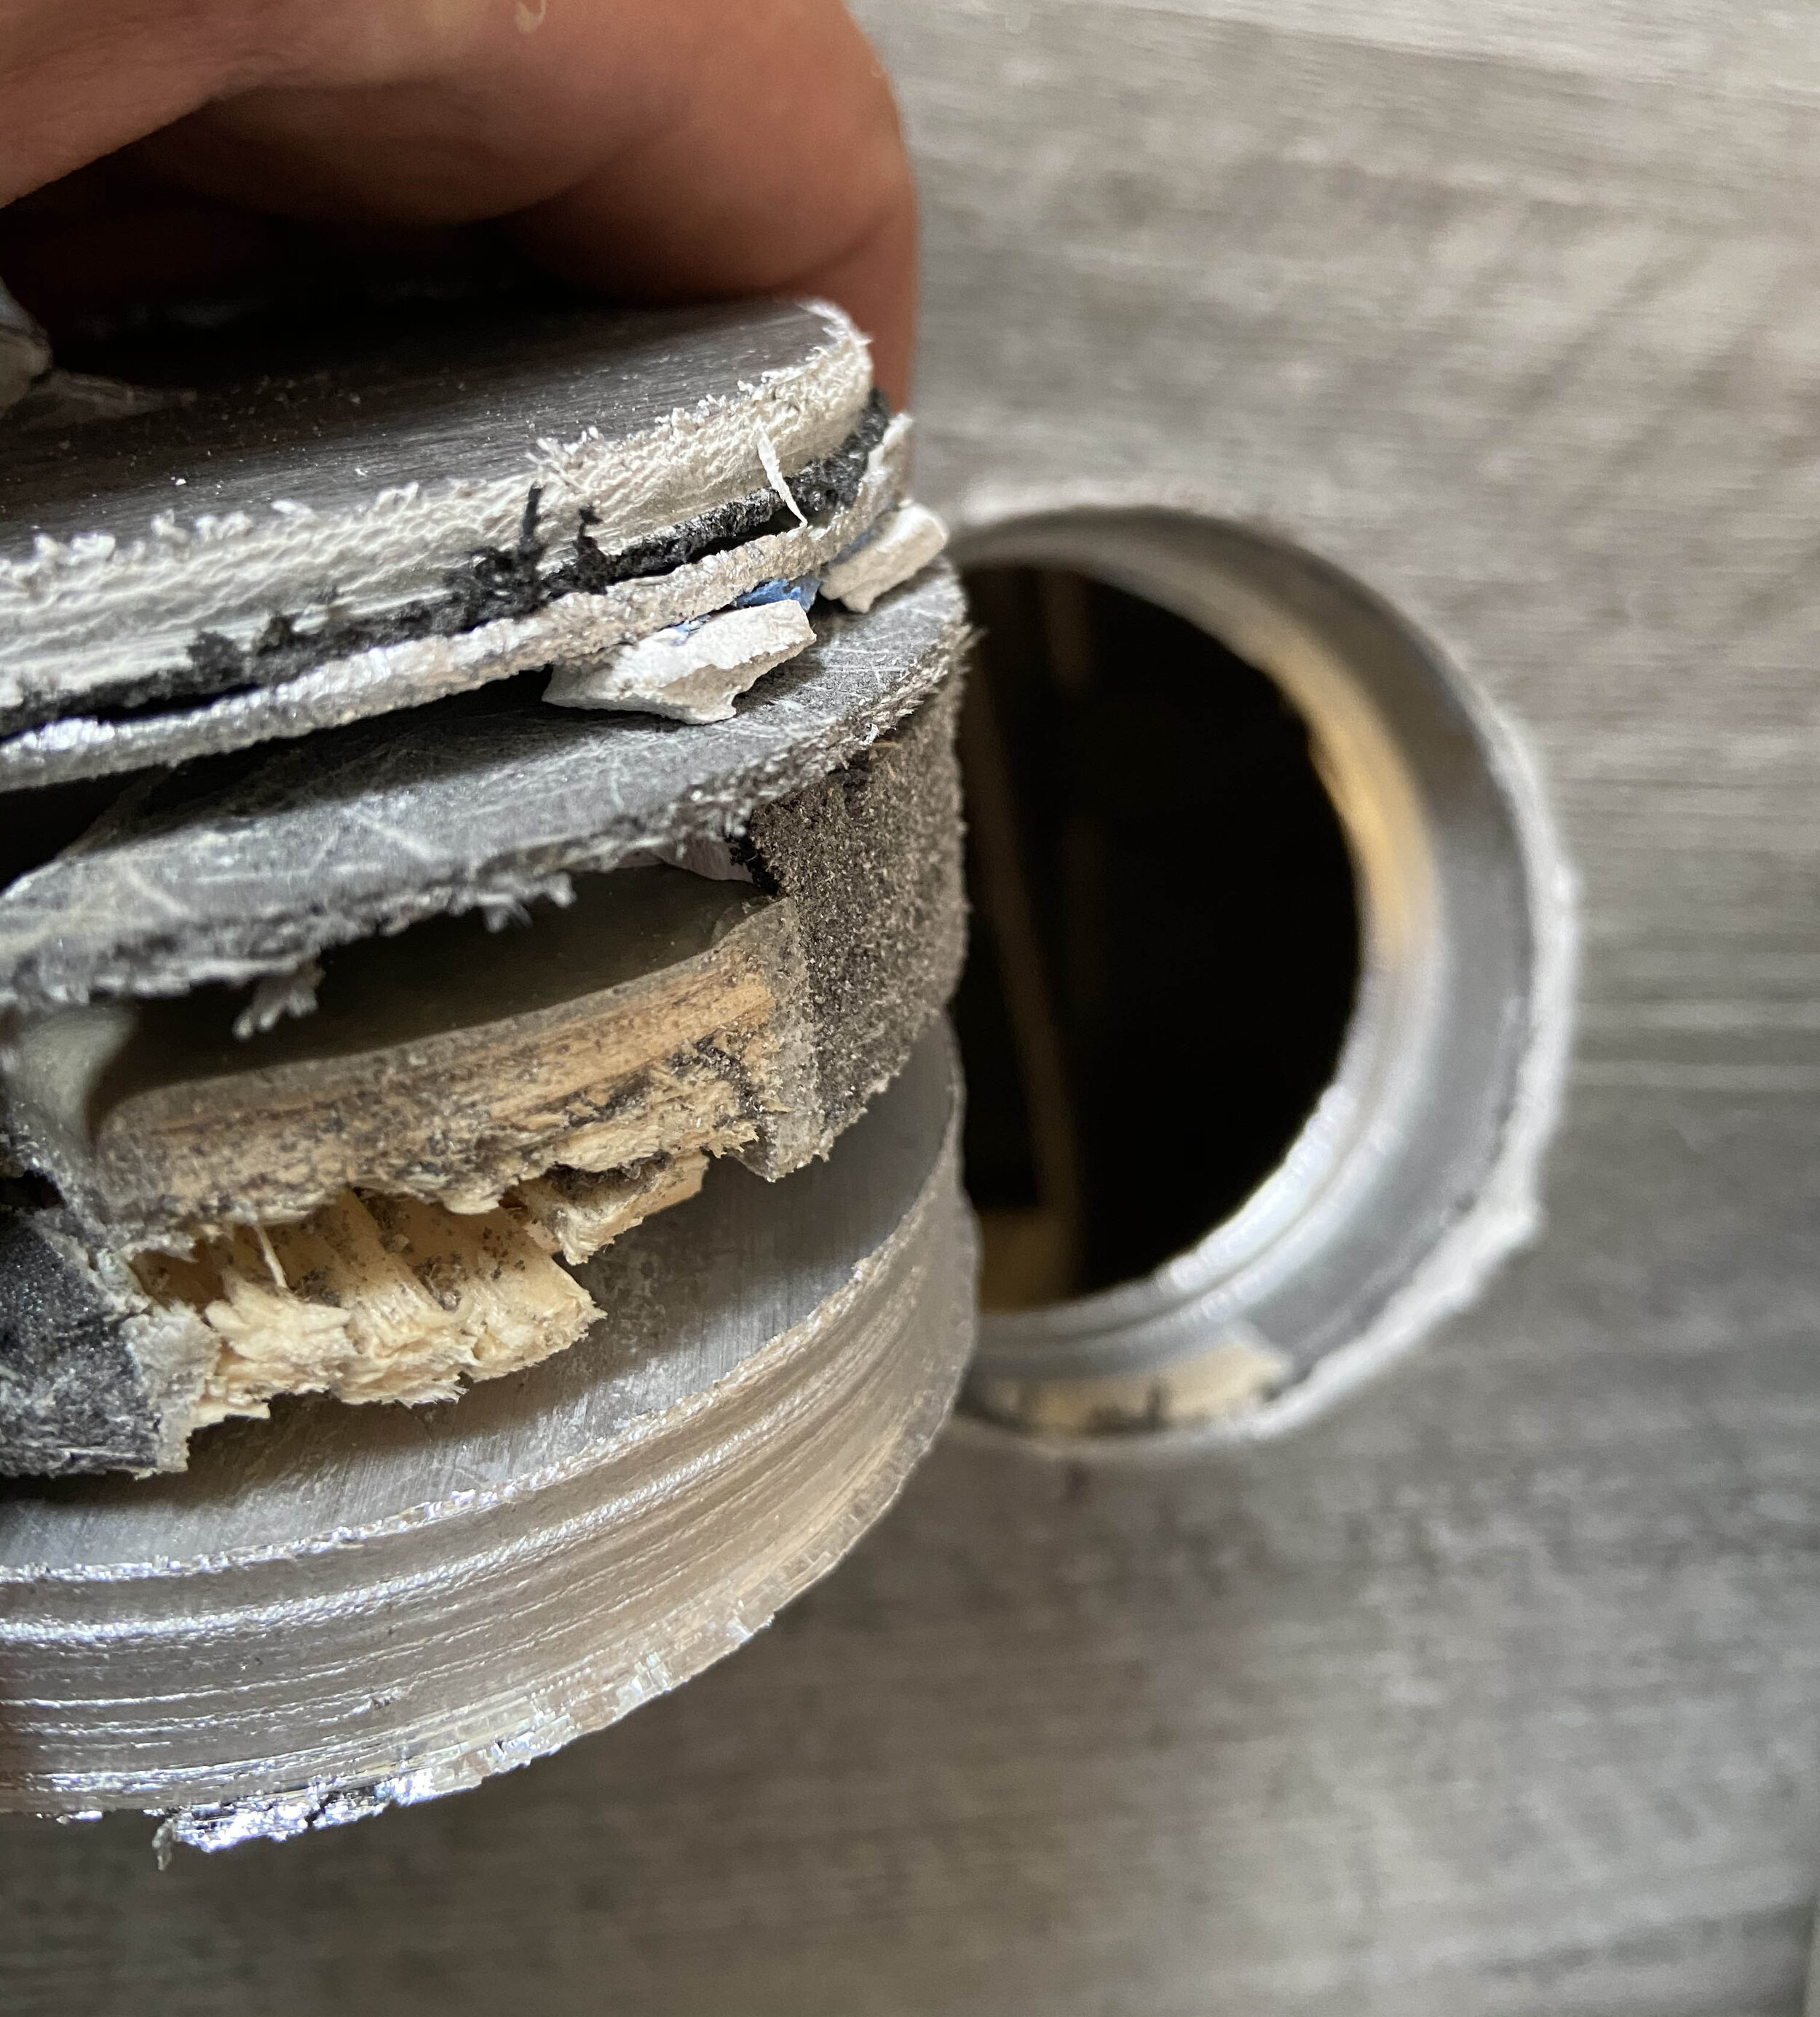
We chose the best location for the table and measured the size of the hole that would be needed. The hole saw was 3 1/4” in diameter. The bracket that goes into the floor fit perfectly. In on the photos pictured below you can see the previous hole that was used for the gurney bracket. The smaller hole being the one for the hole saw pilot hole.
It worked perfectly because below all gurney mount brackets lies a 1/2” AL plate welded to the support bracing. The AL plate was what the gurney brackets attached to. We predrilled the holes for the bolts and tapped/threaded the AL plate so that we didn’t have to add bolts underneath.
I added RTV silicone to the bottom of the bracket to ensure a good seal from the outside. I then went underneath the continued to add RTV silicone underneath at each hole including the large hole for the bracket.


total cost as of 10/30/2020 $18,280.79
INTERIOR BUILD
Chassis Components $7,454.82
Building materials
Repairing/Oil Change
Removing old hose lines
Cooking System $1067.79
Propane system
Cook Top
Lighting $387.31
Misc $291.17
Solar/Power System $2576.87
Temperature Control $930.89
Heater
Insulation
Tools $668.44
Water System $676.39
Sink
Water Tank
Initial Purchase $4000
Registration $227.11
Total build hours - approximation
INTERIOR BUILD
Interior Build - 360-400 Hours
Tear down - 40-50 hours
First trip to ensure the basics worked. doors, sink, stove, solar, etc.
10-18-2020 California Coast


SECOND TRIP TO ENSURE THE DRIVETRAIN WORKED AND THE HEATING SYSTEM WORKED. FOLLOWING THIS TRIP THE CAMPER IS READY FOR LONGER DURATIONS.
10/25/2020 Eastern Sierra CA (Yosemite)


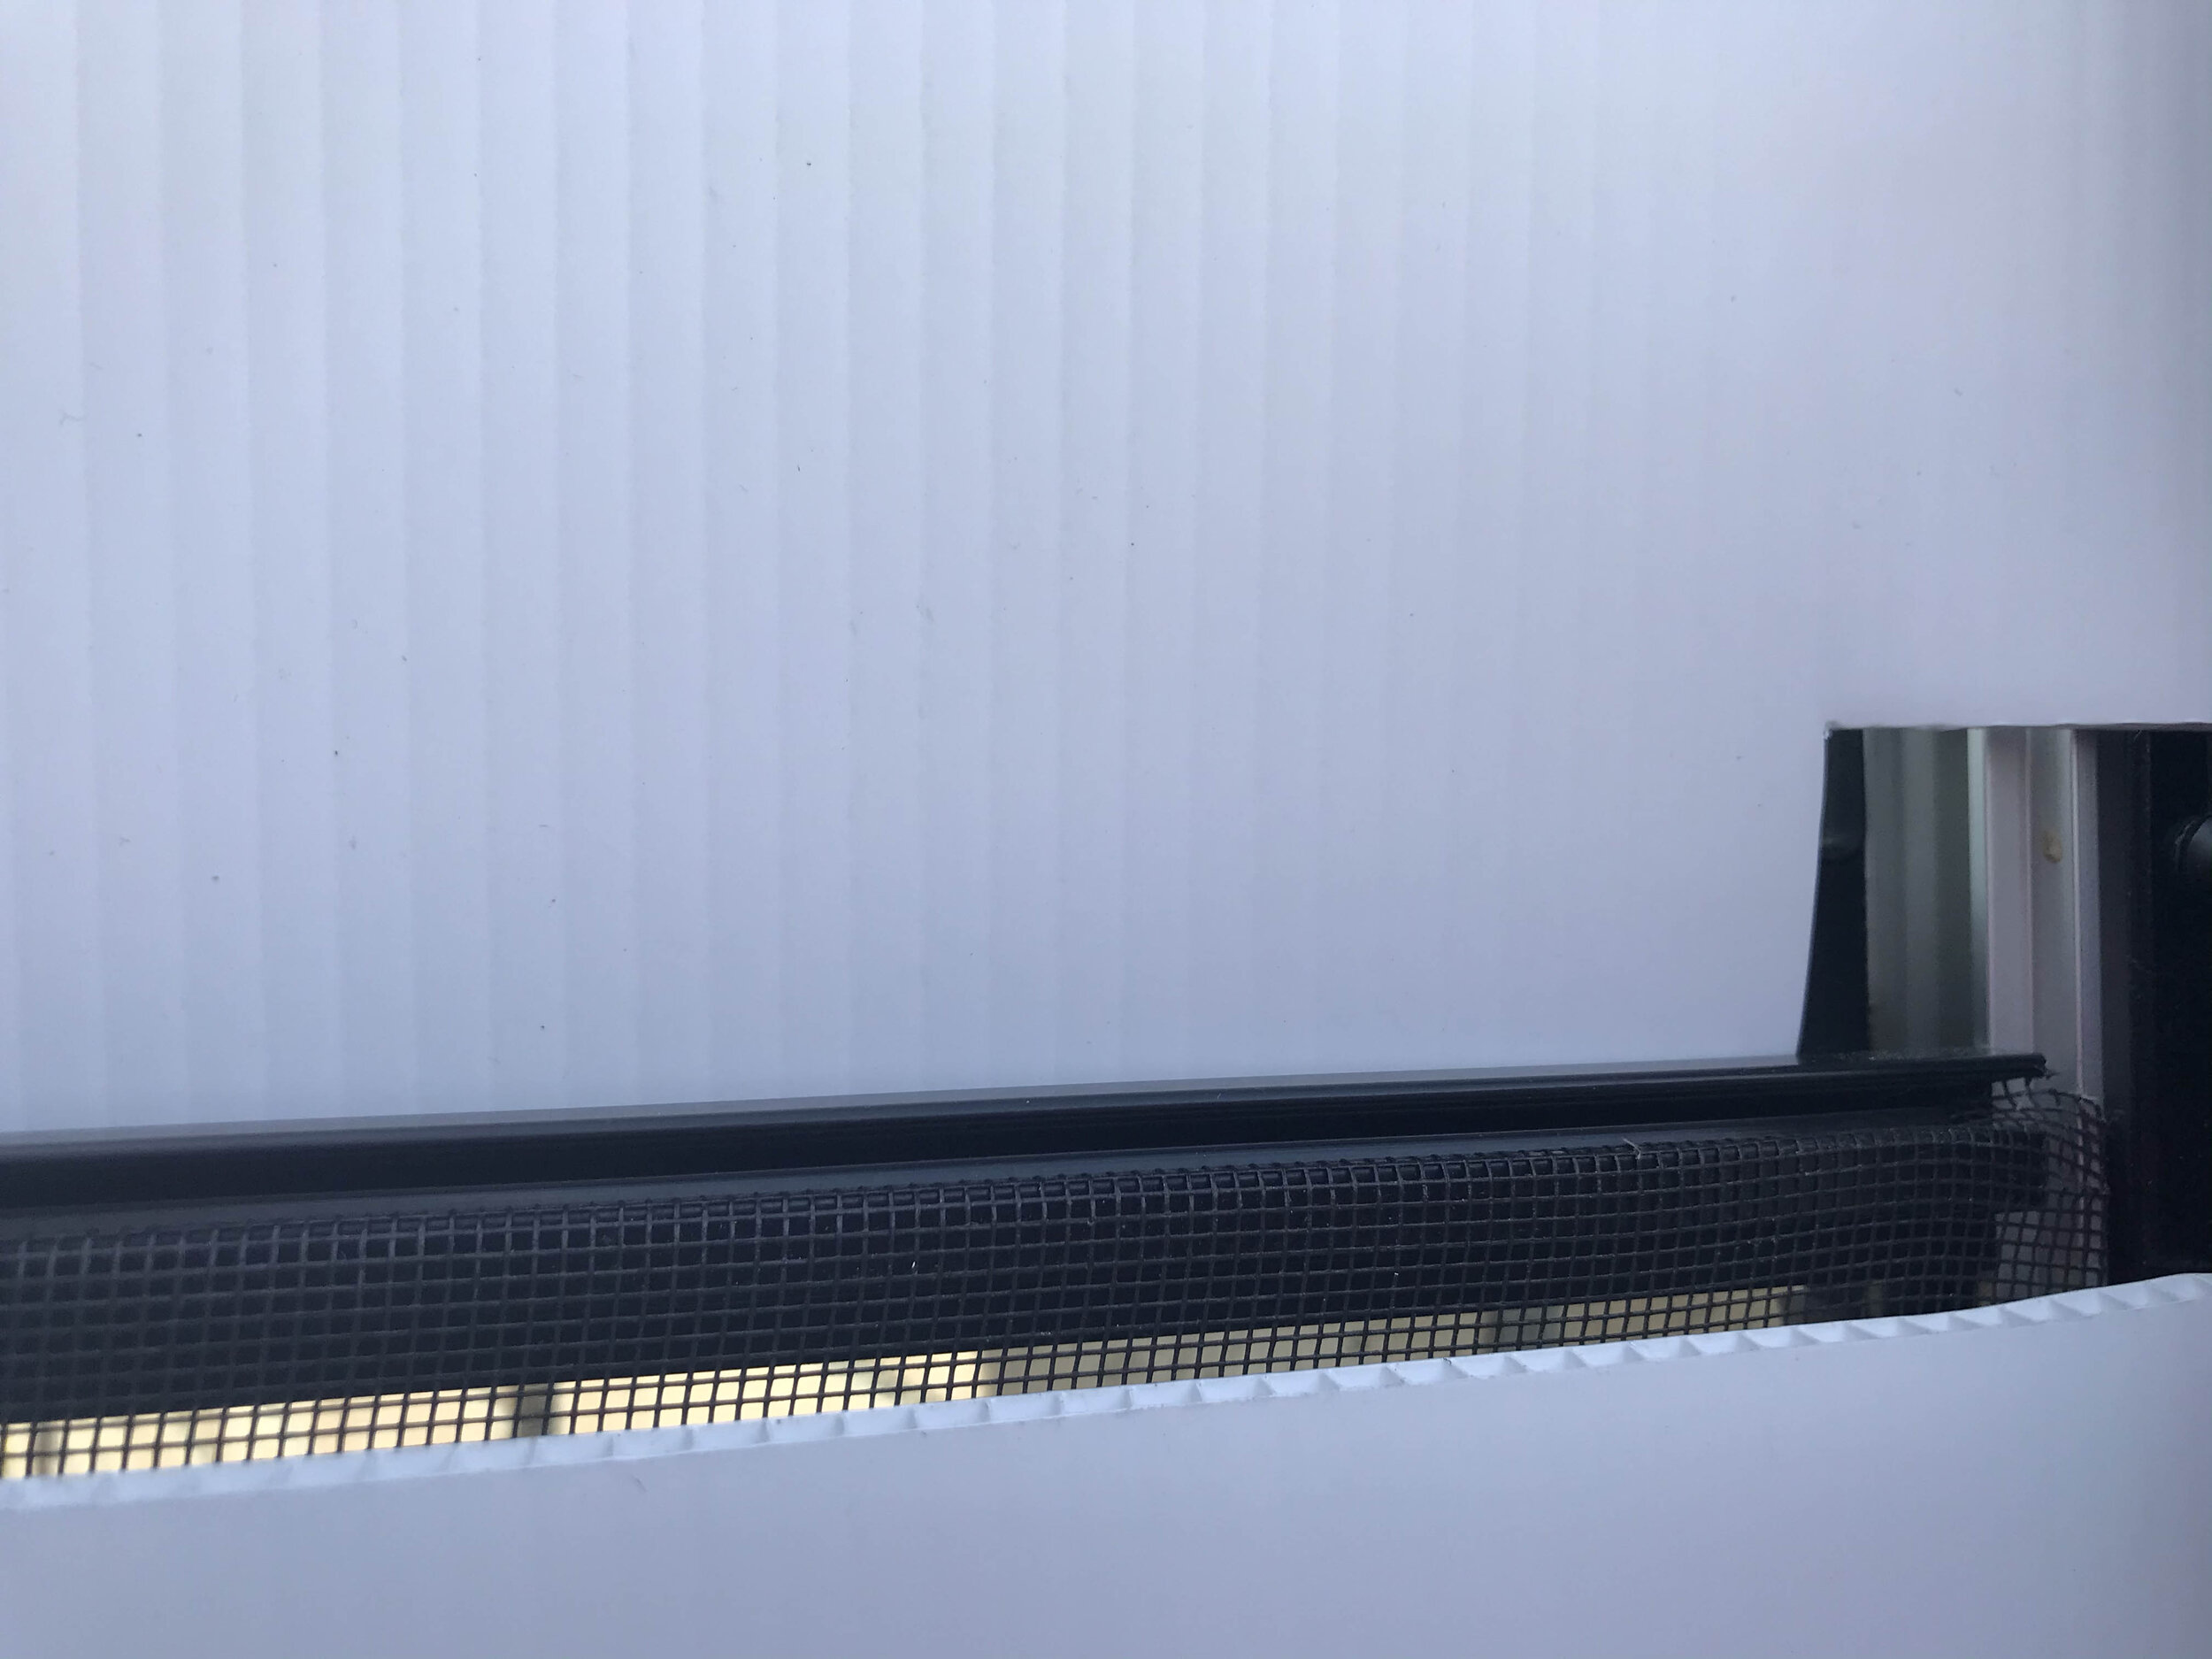
screen door installation
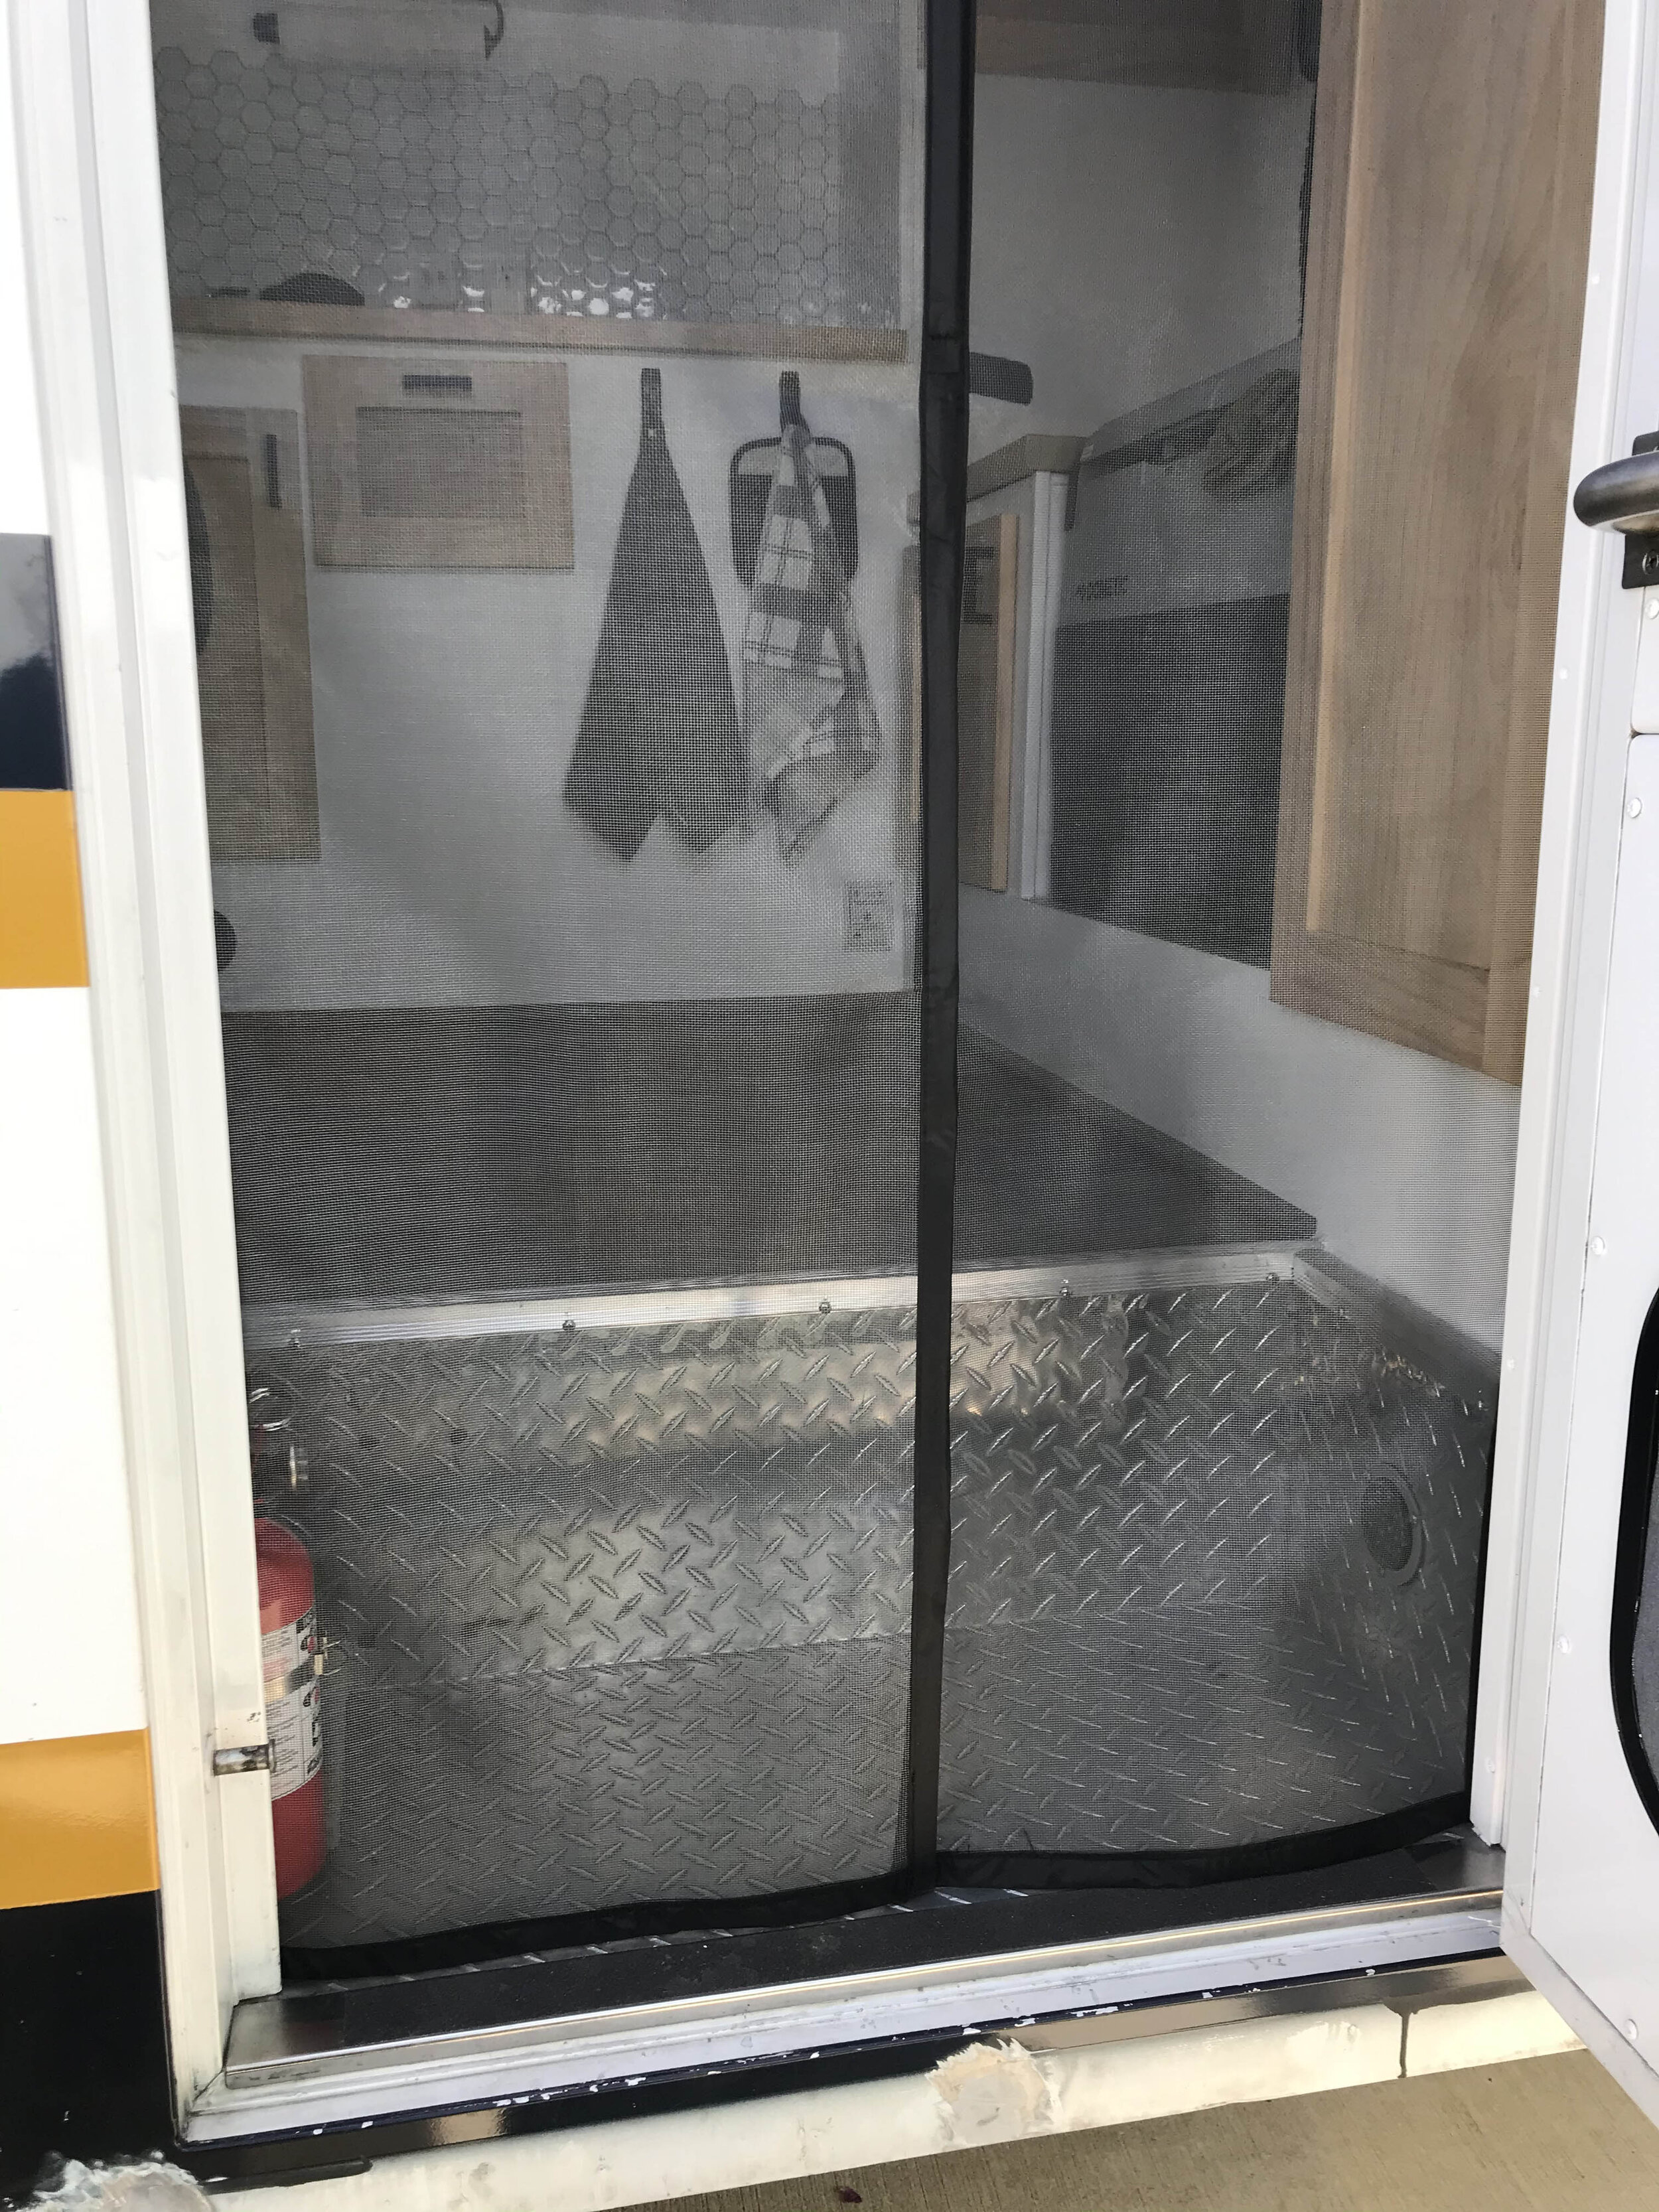
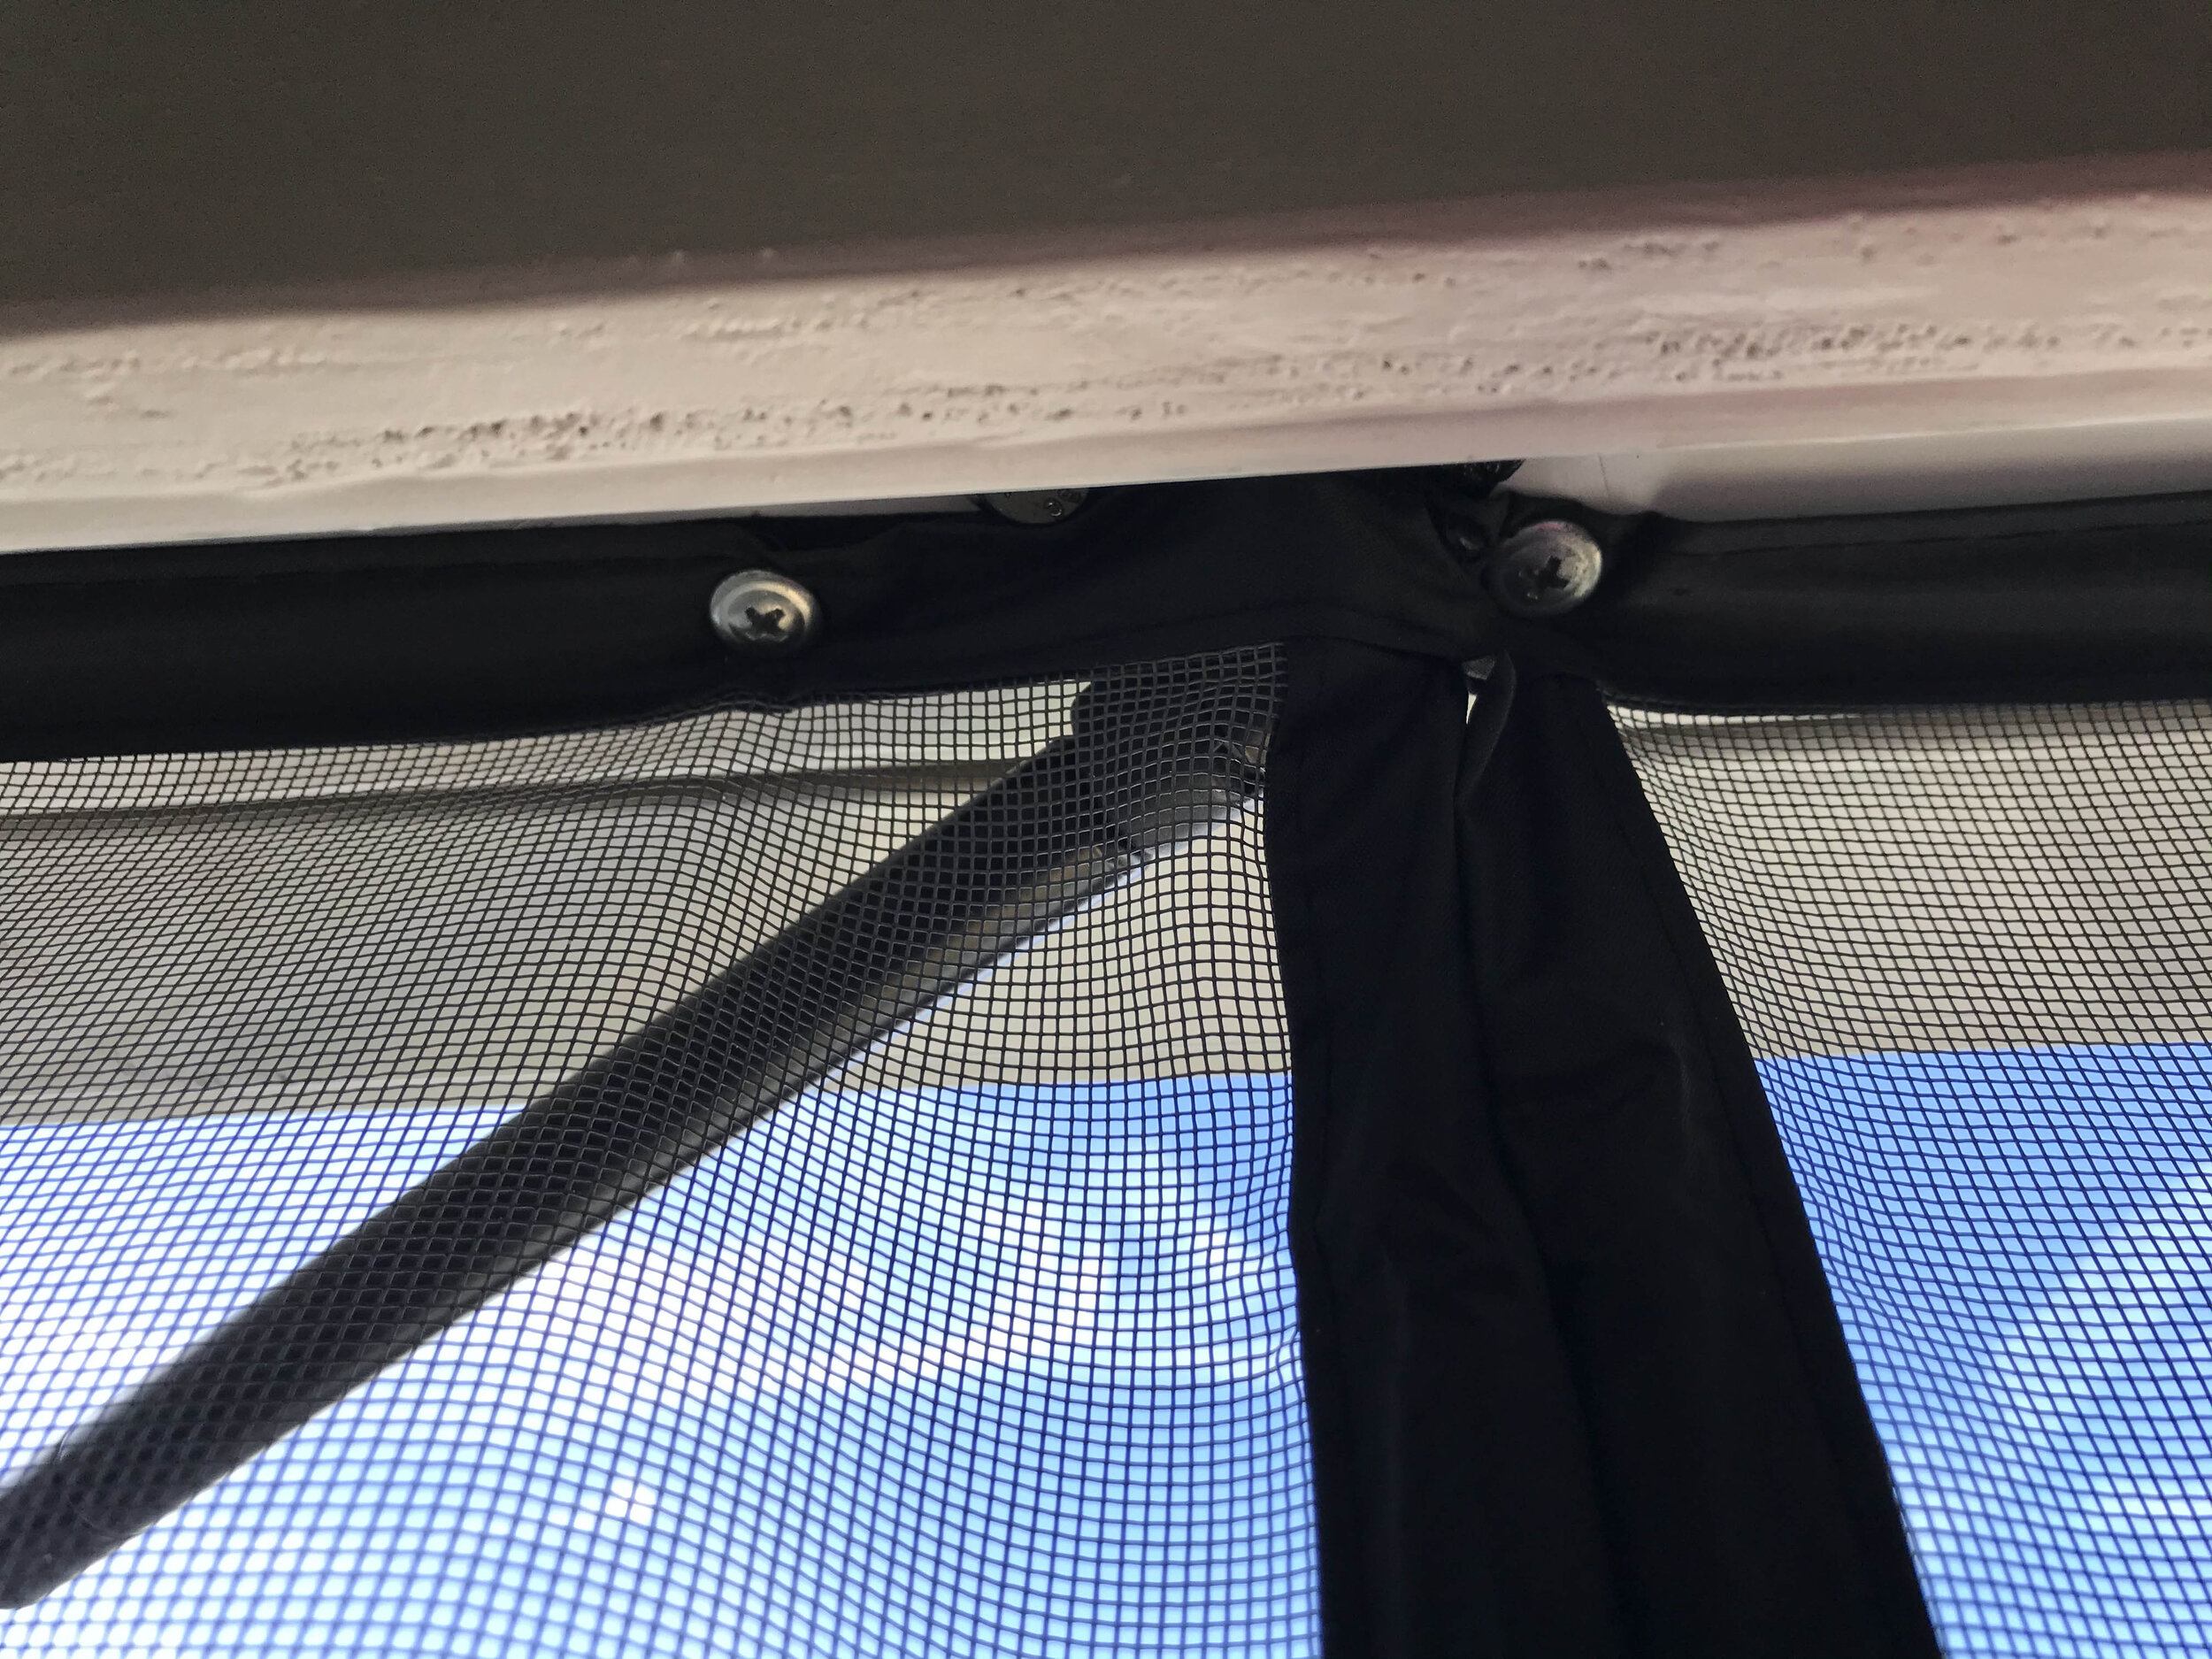
11-20-2020 - So after the first two trips we found that we tended to want the doors open for airflow and to add the feeling of being outdoors. It was nice to have the doors open when we were cooking inside. I ordered a screen door from amazon. Our door was 30" wide and 80” long. The width was perfect but the length required my amazing mother to get behind the sewing machine again.
The side door screen system came with the velcro and maganets. The rear doors simply velcro all the way around the rear door. I added stainless screws and washers to the top of the doors where the velcro attaches. This ensured longevity in that the doors wouldn’t tend to pull off the ceiling. The side door screen is made by MAGZO. It is a fiberglass material.


EXTERIOR BUILD
Exterior Windows
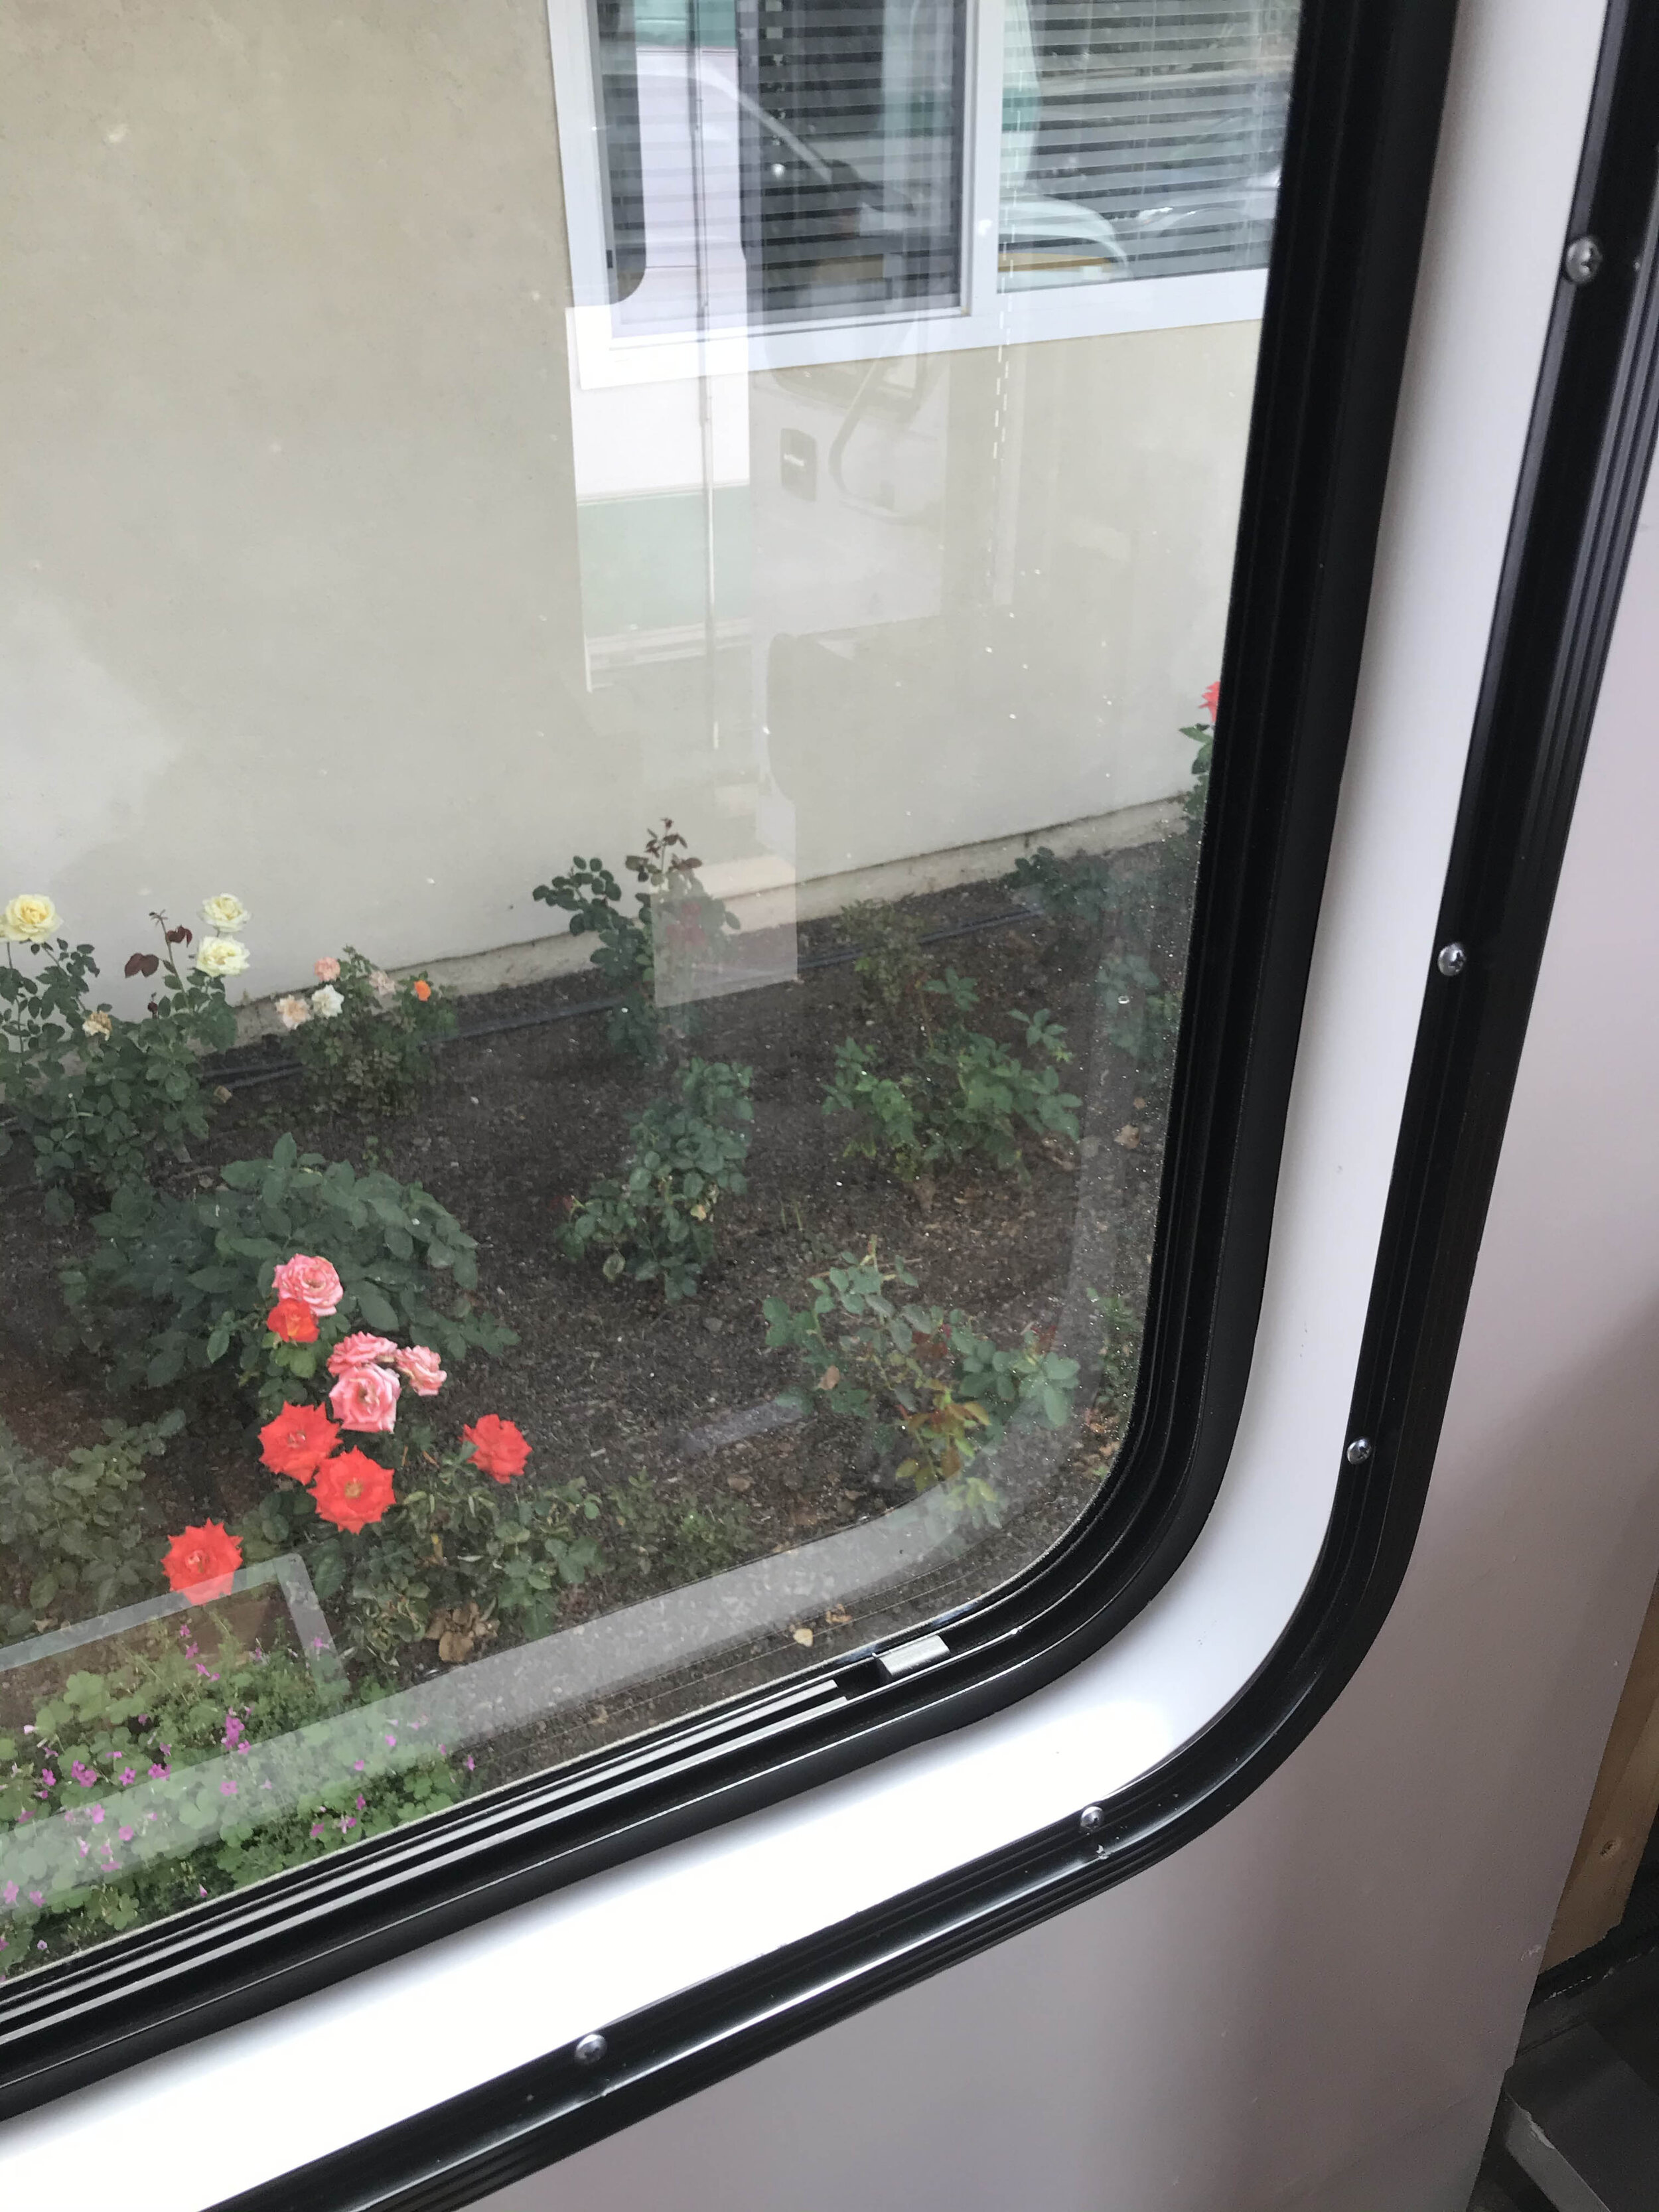
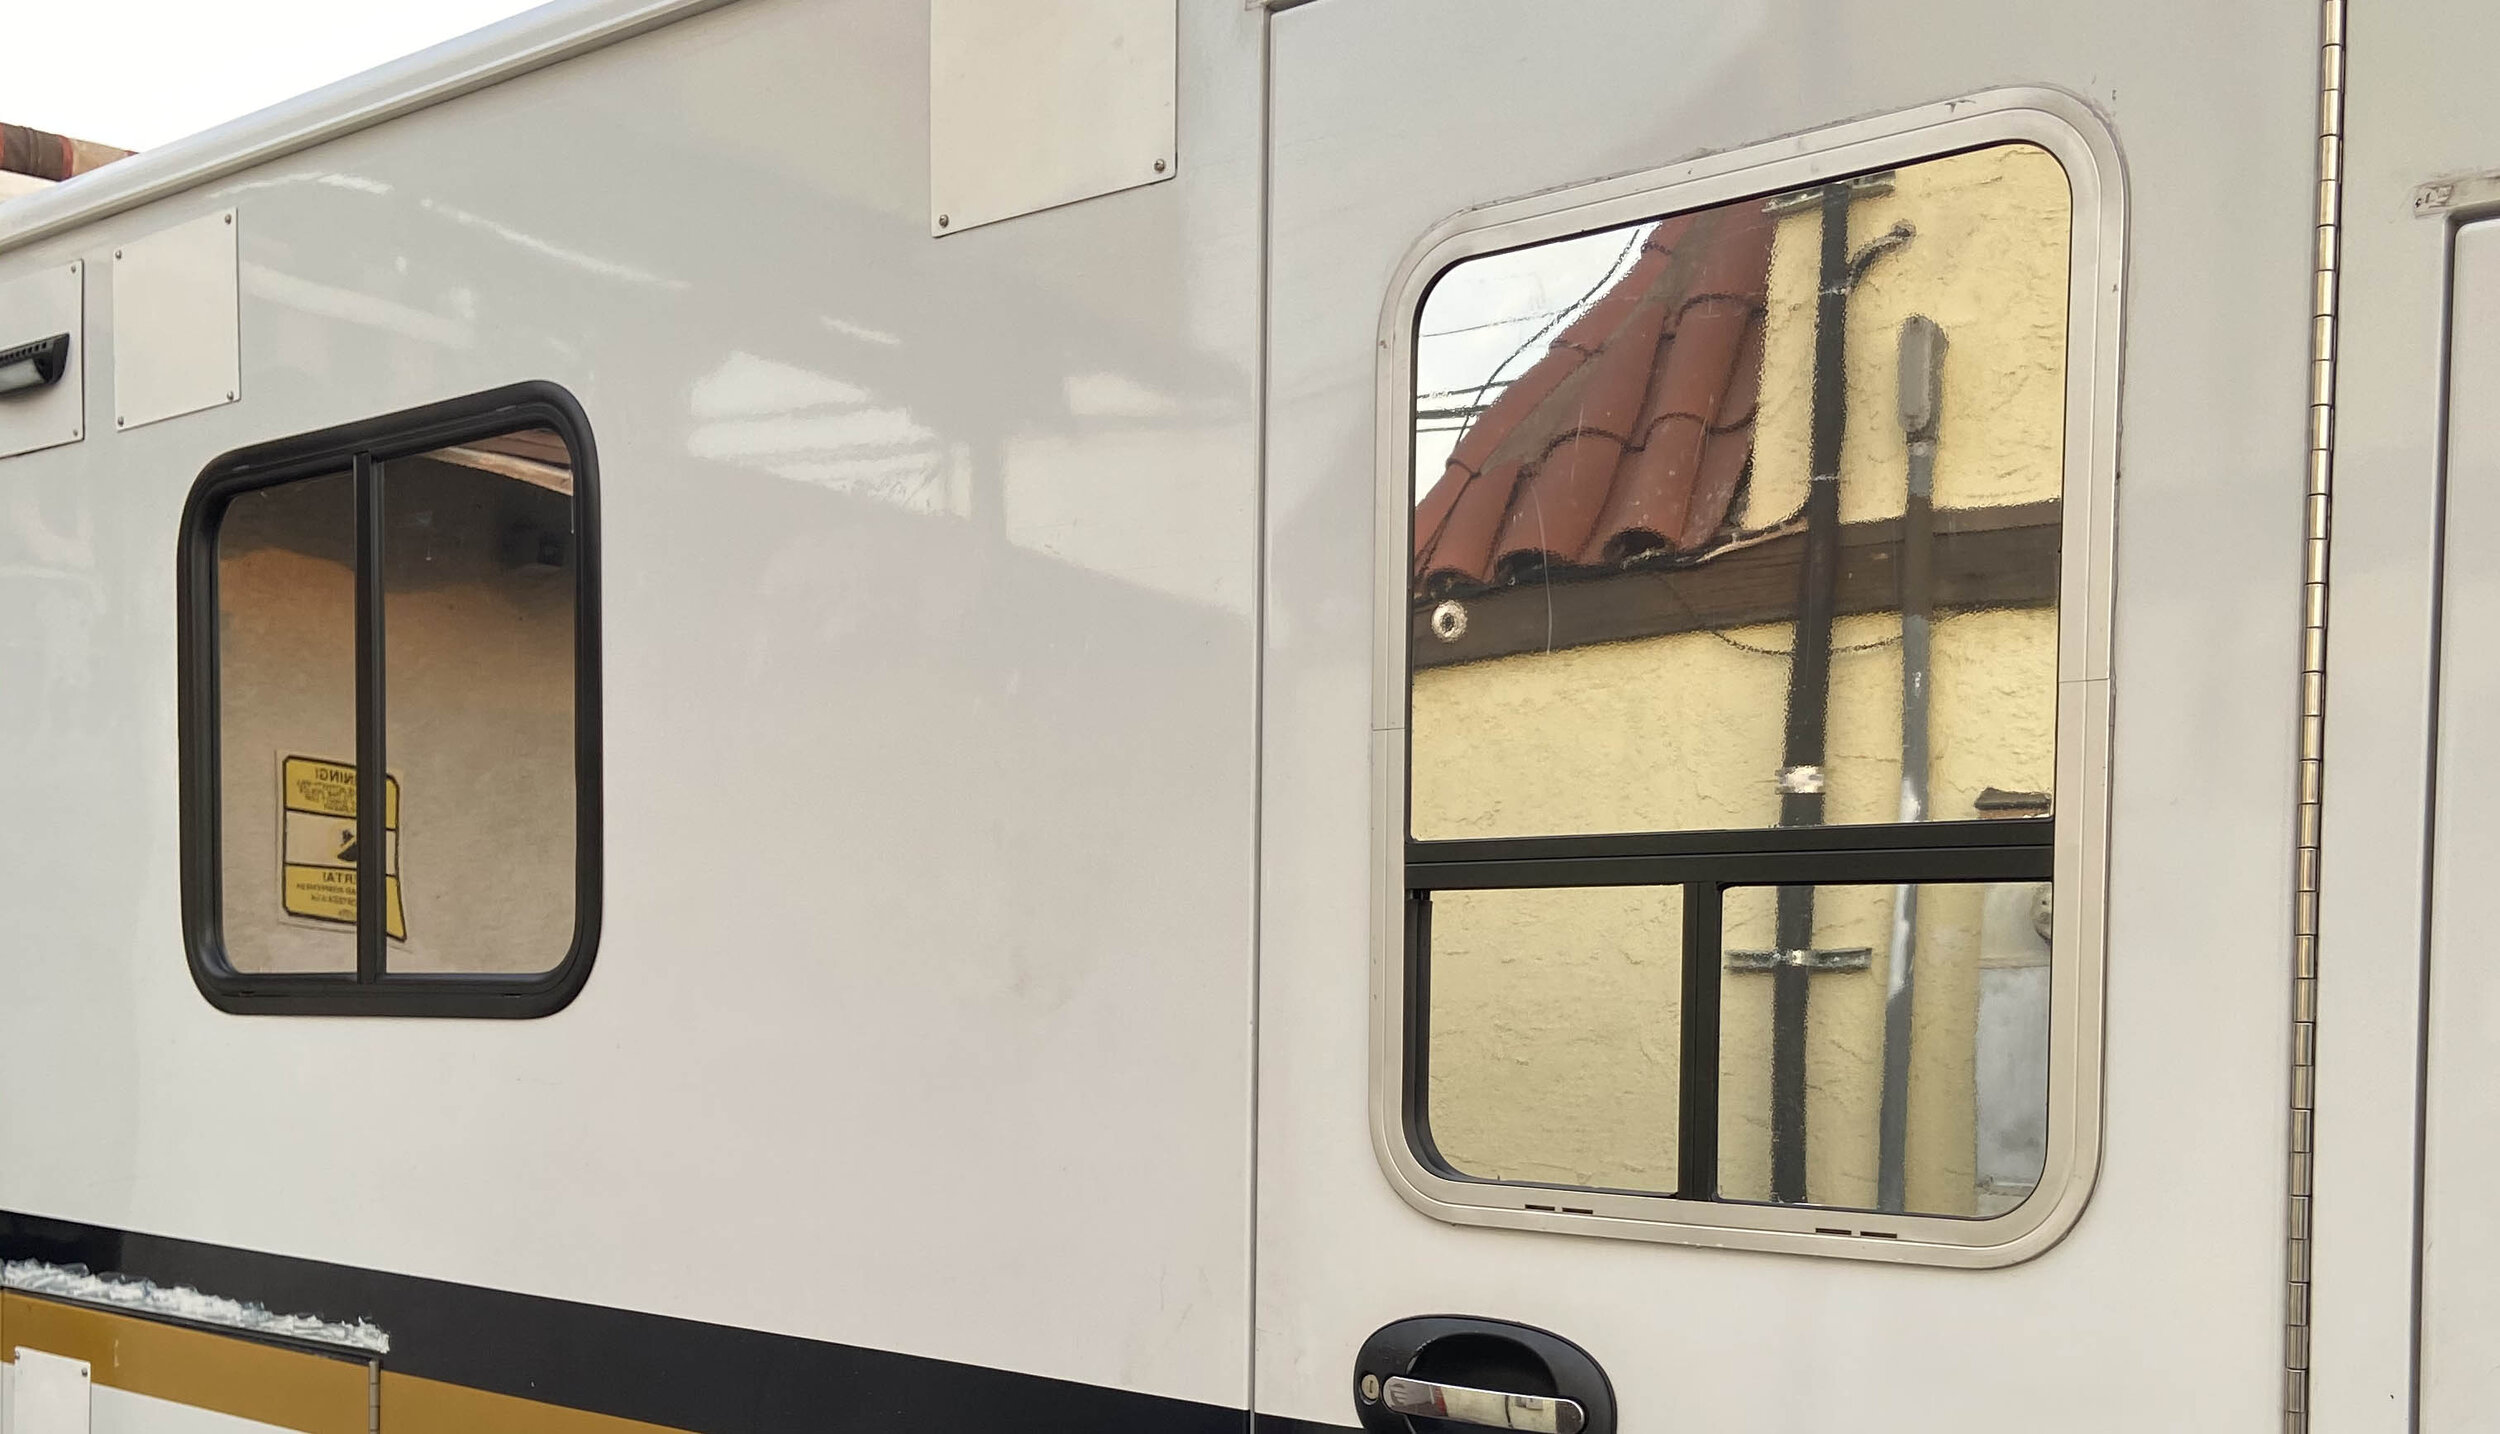
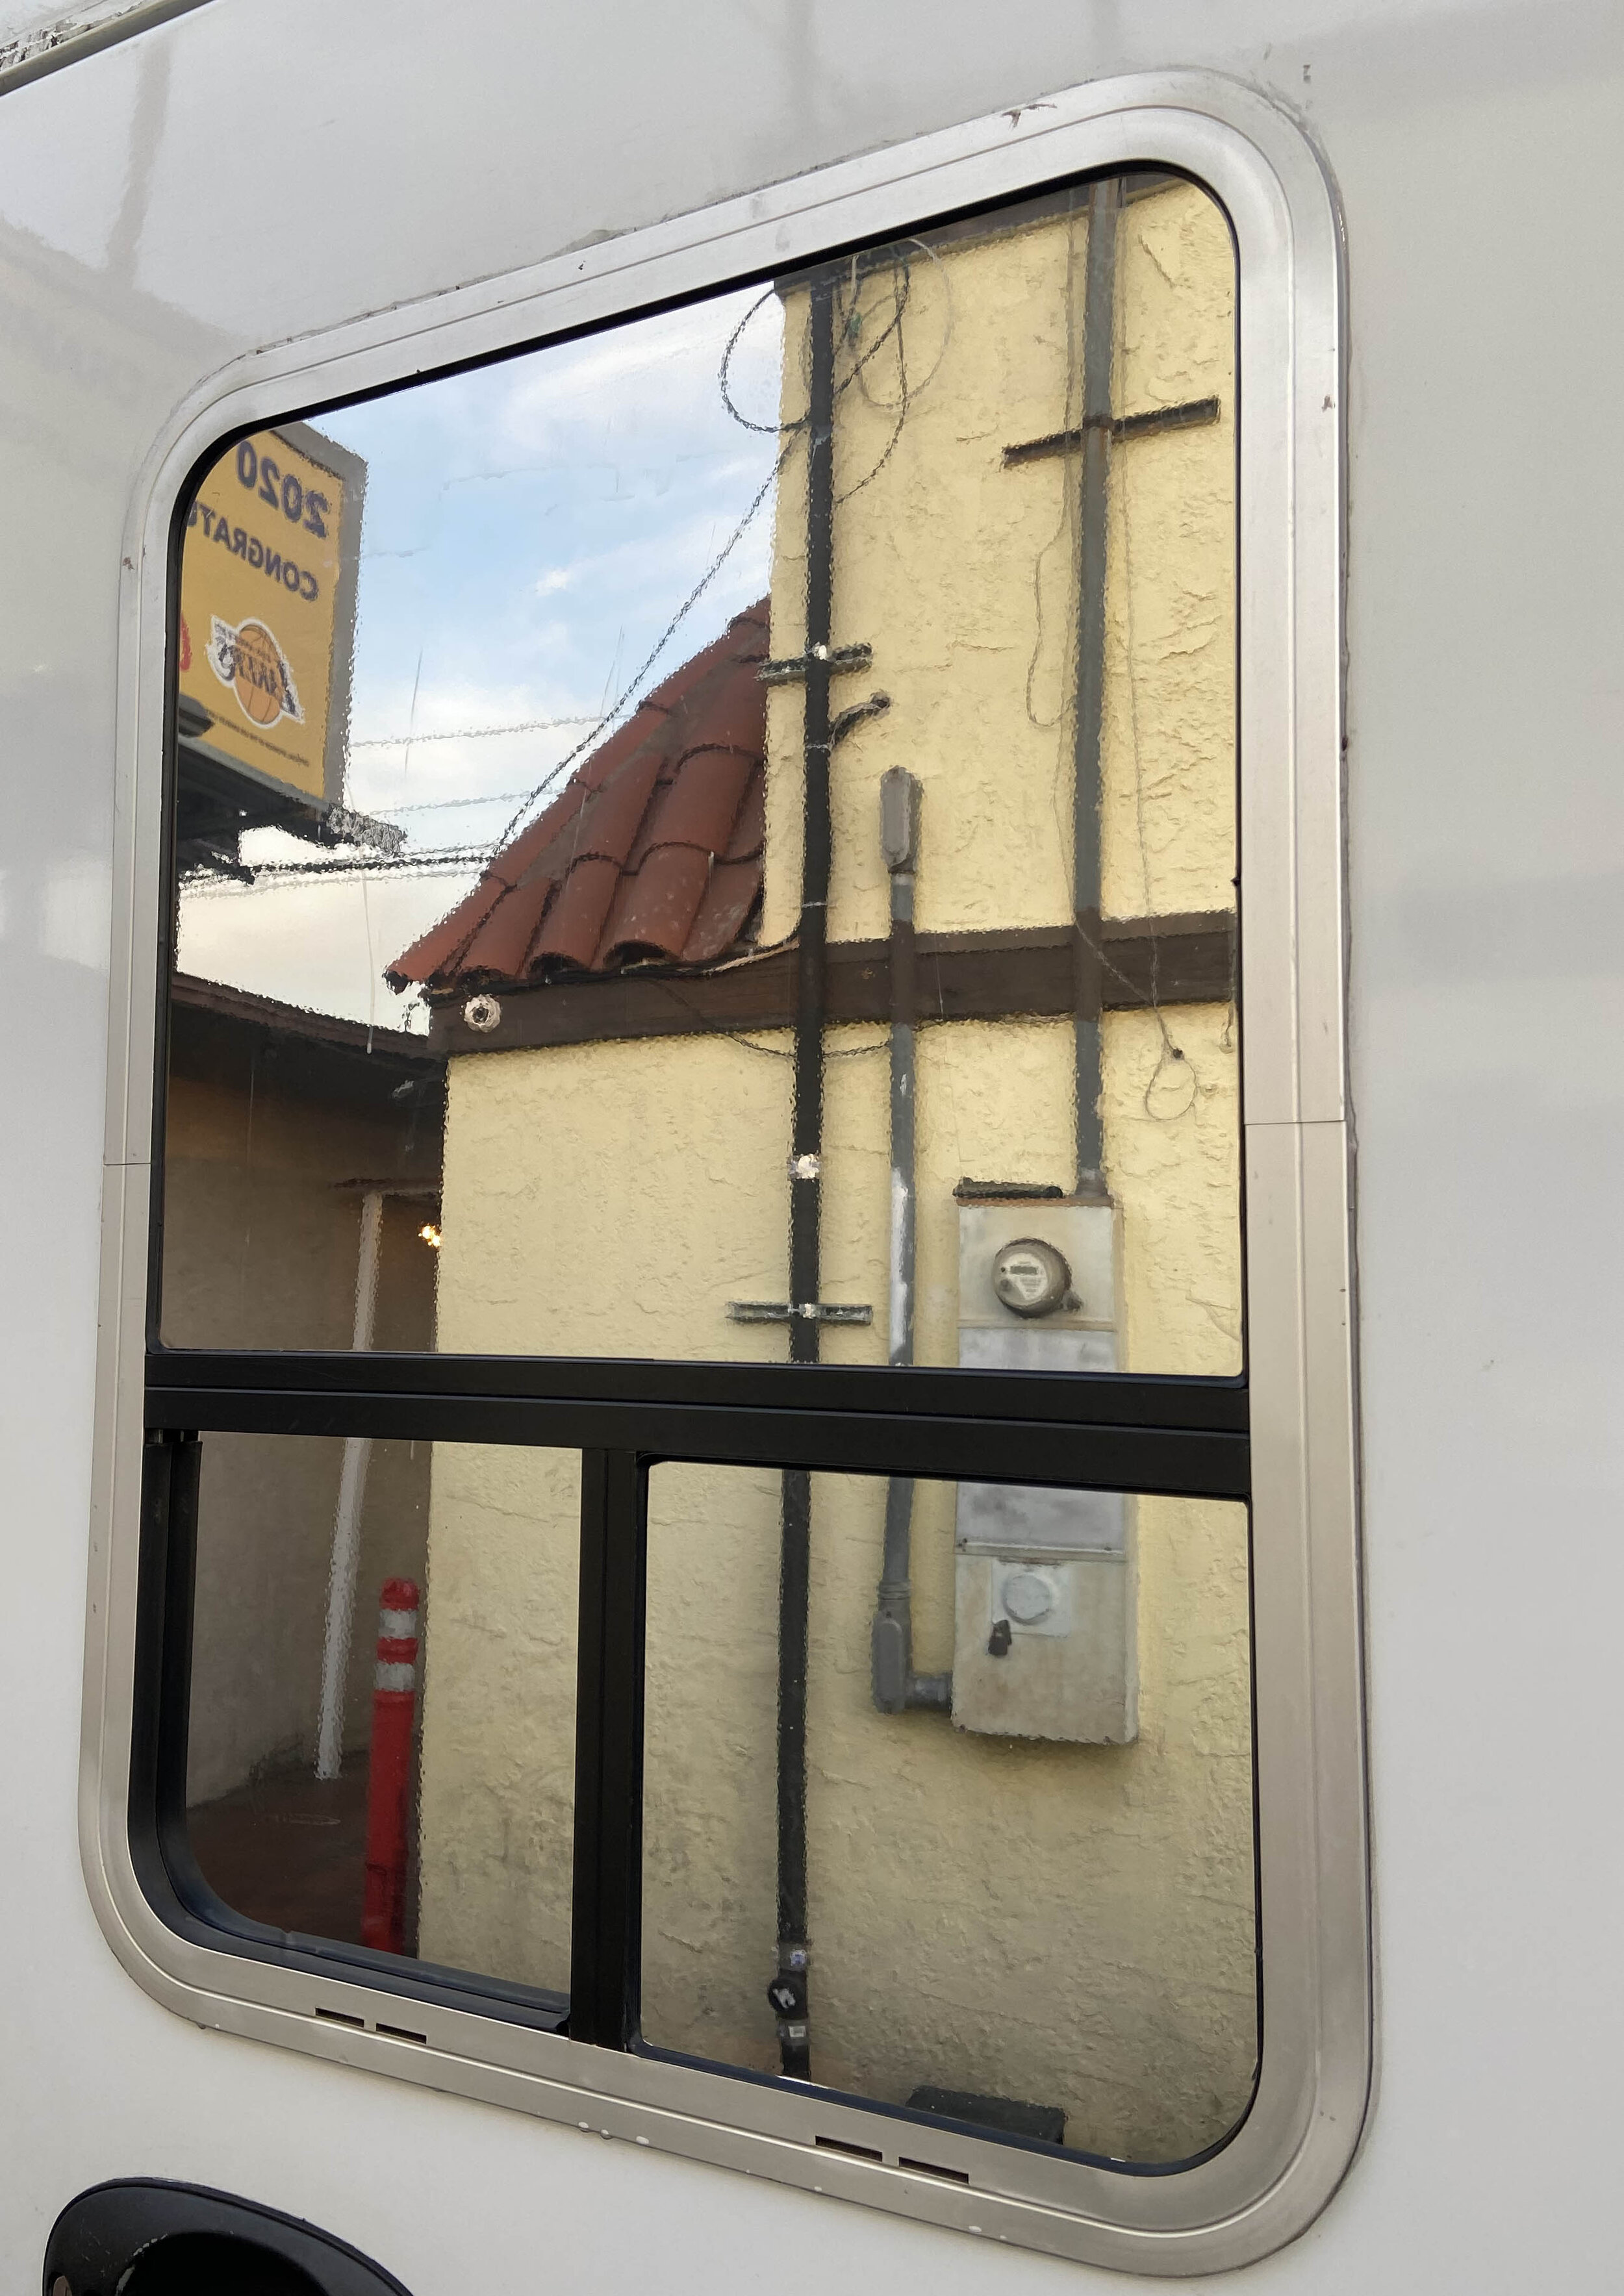
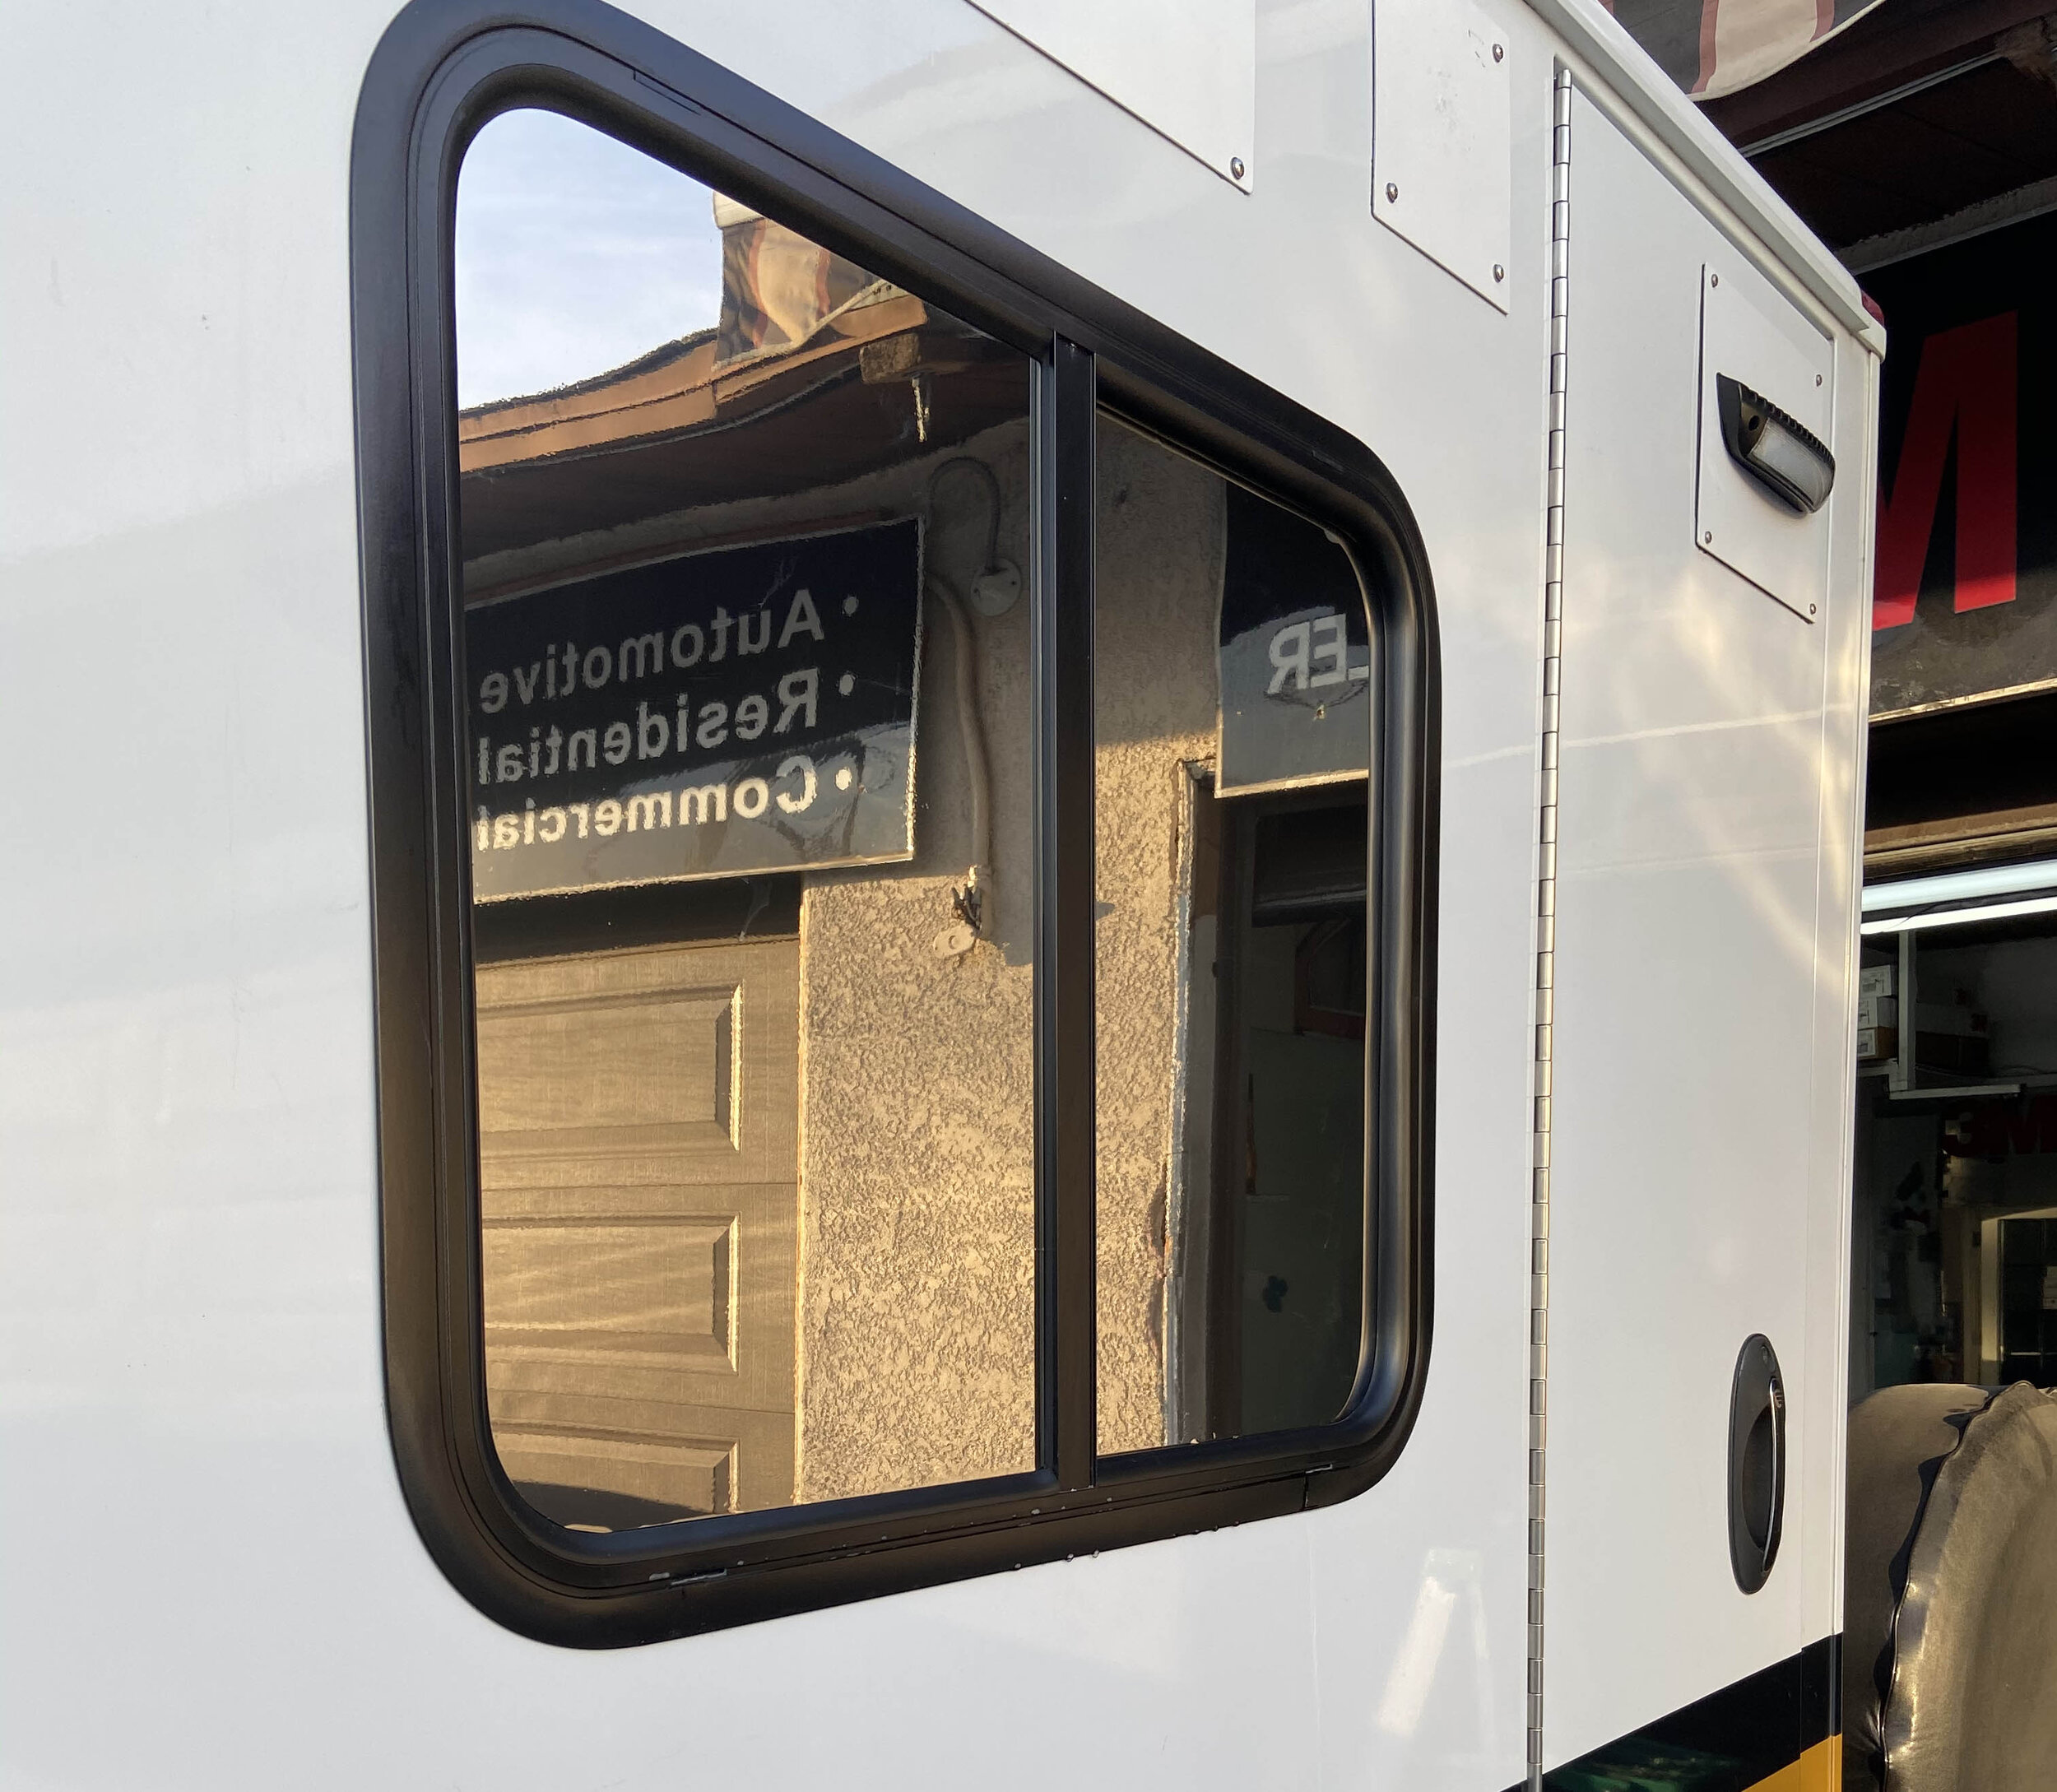
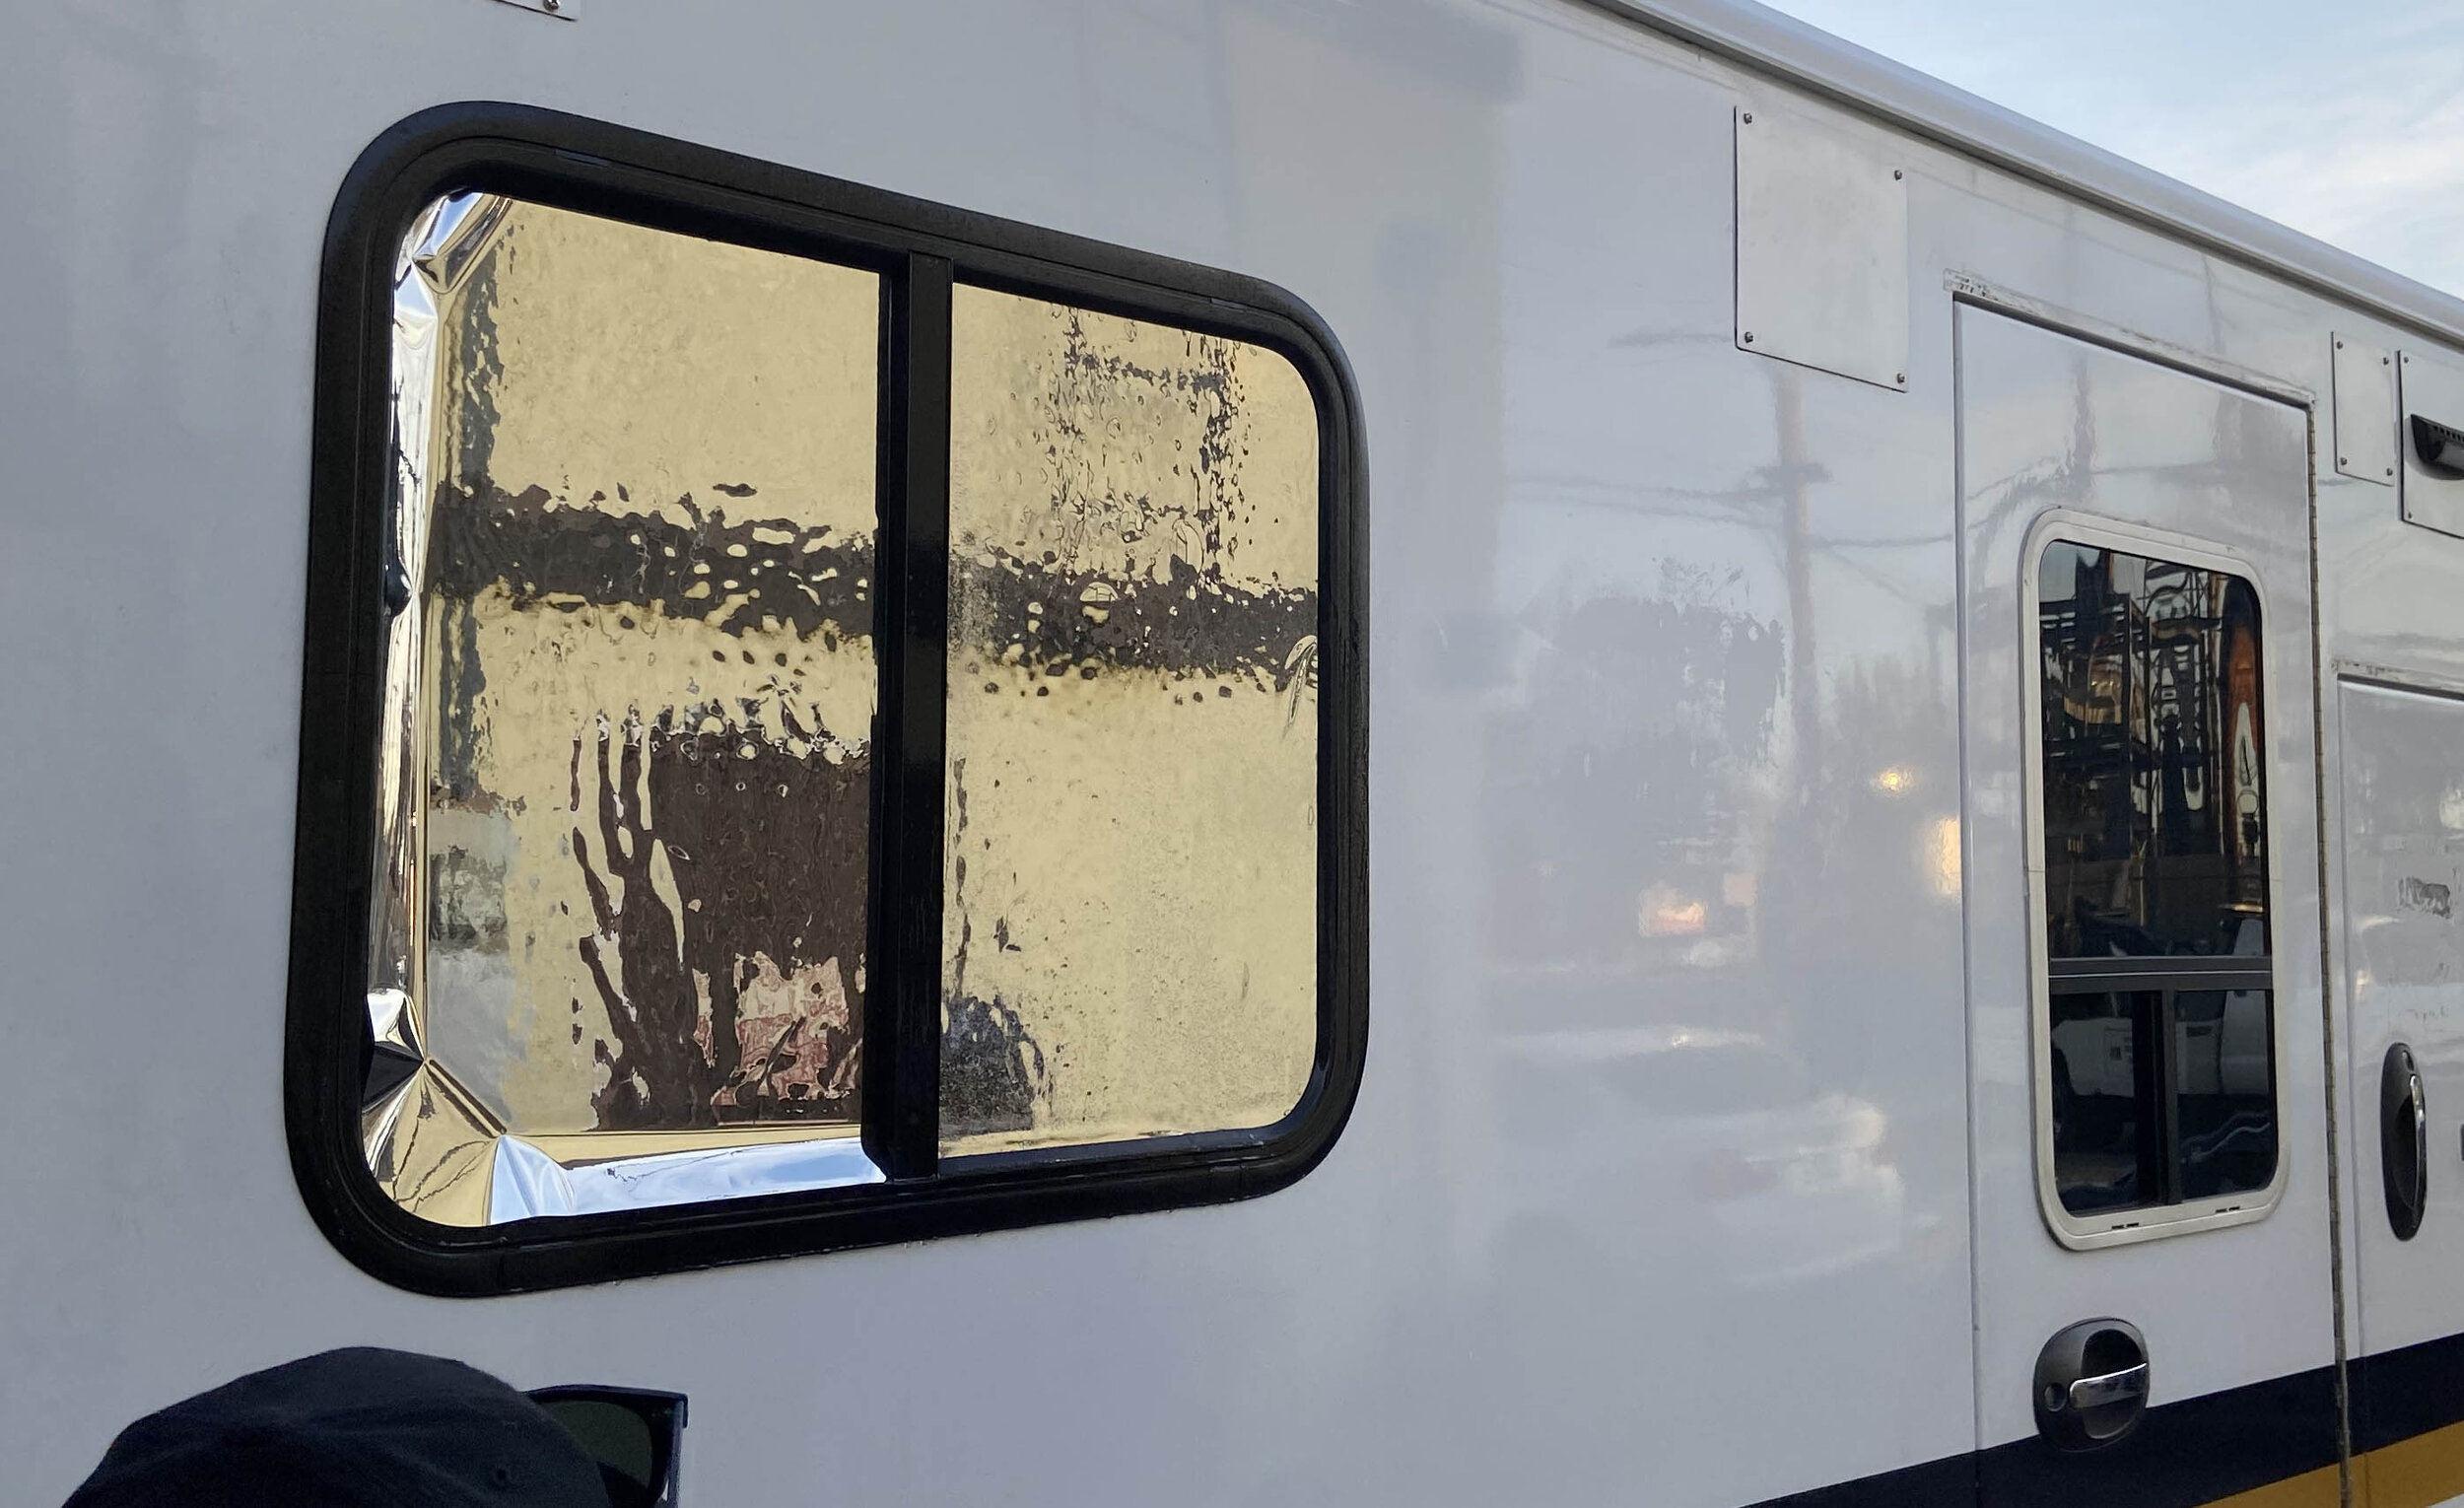
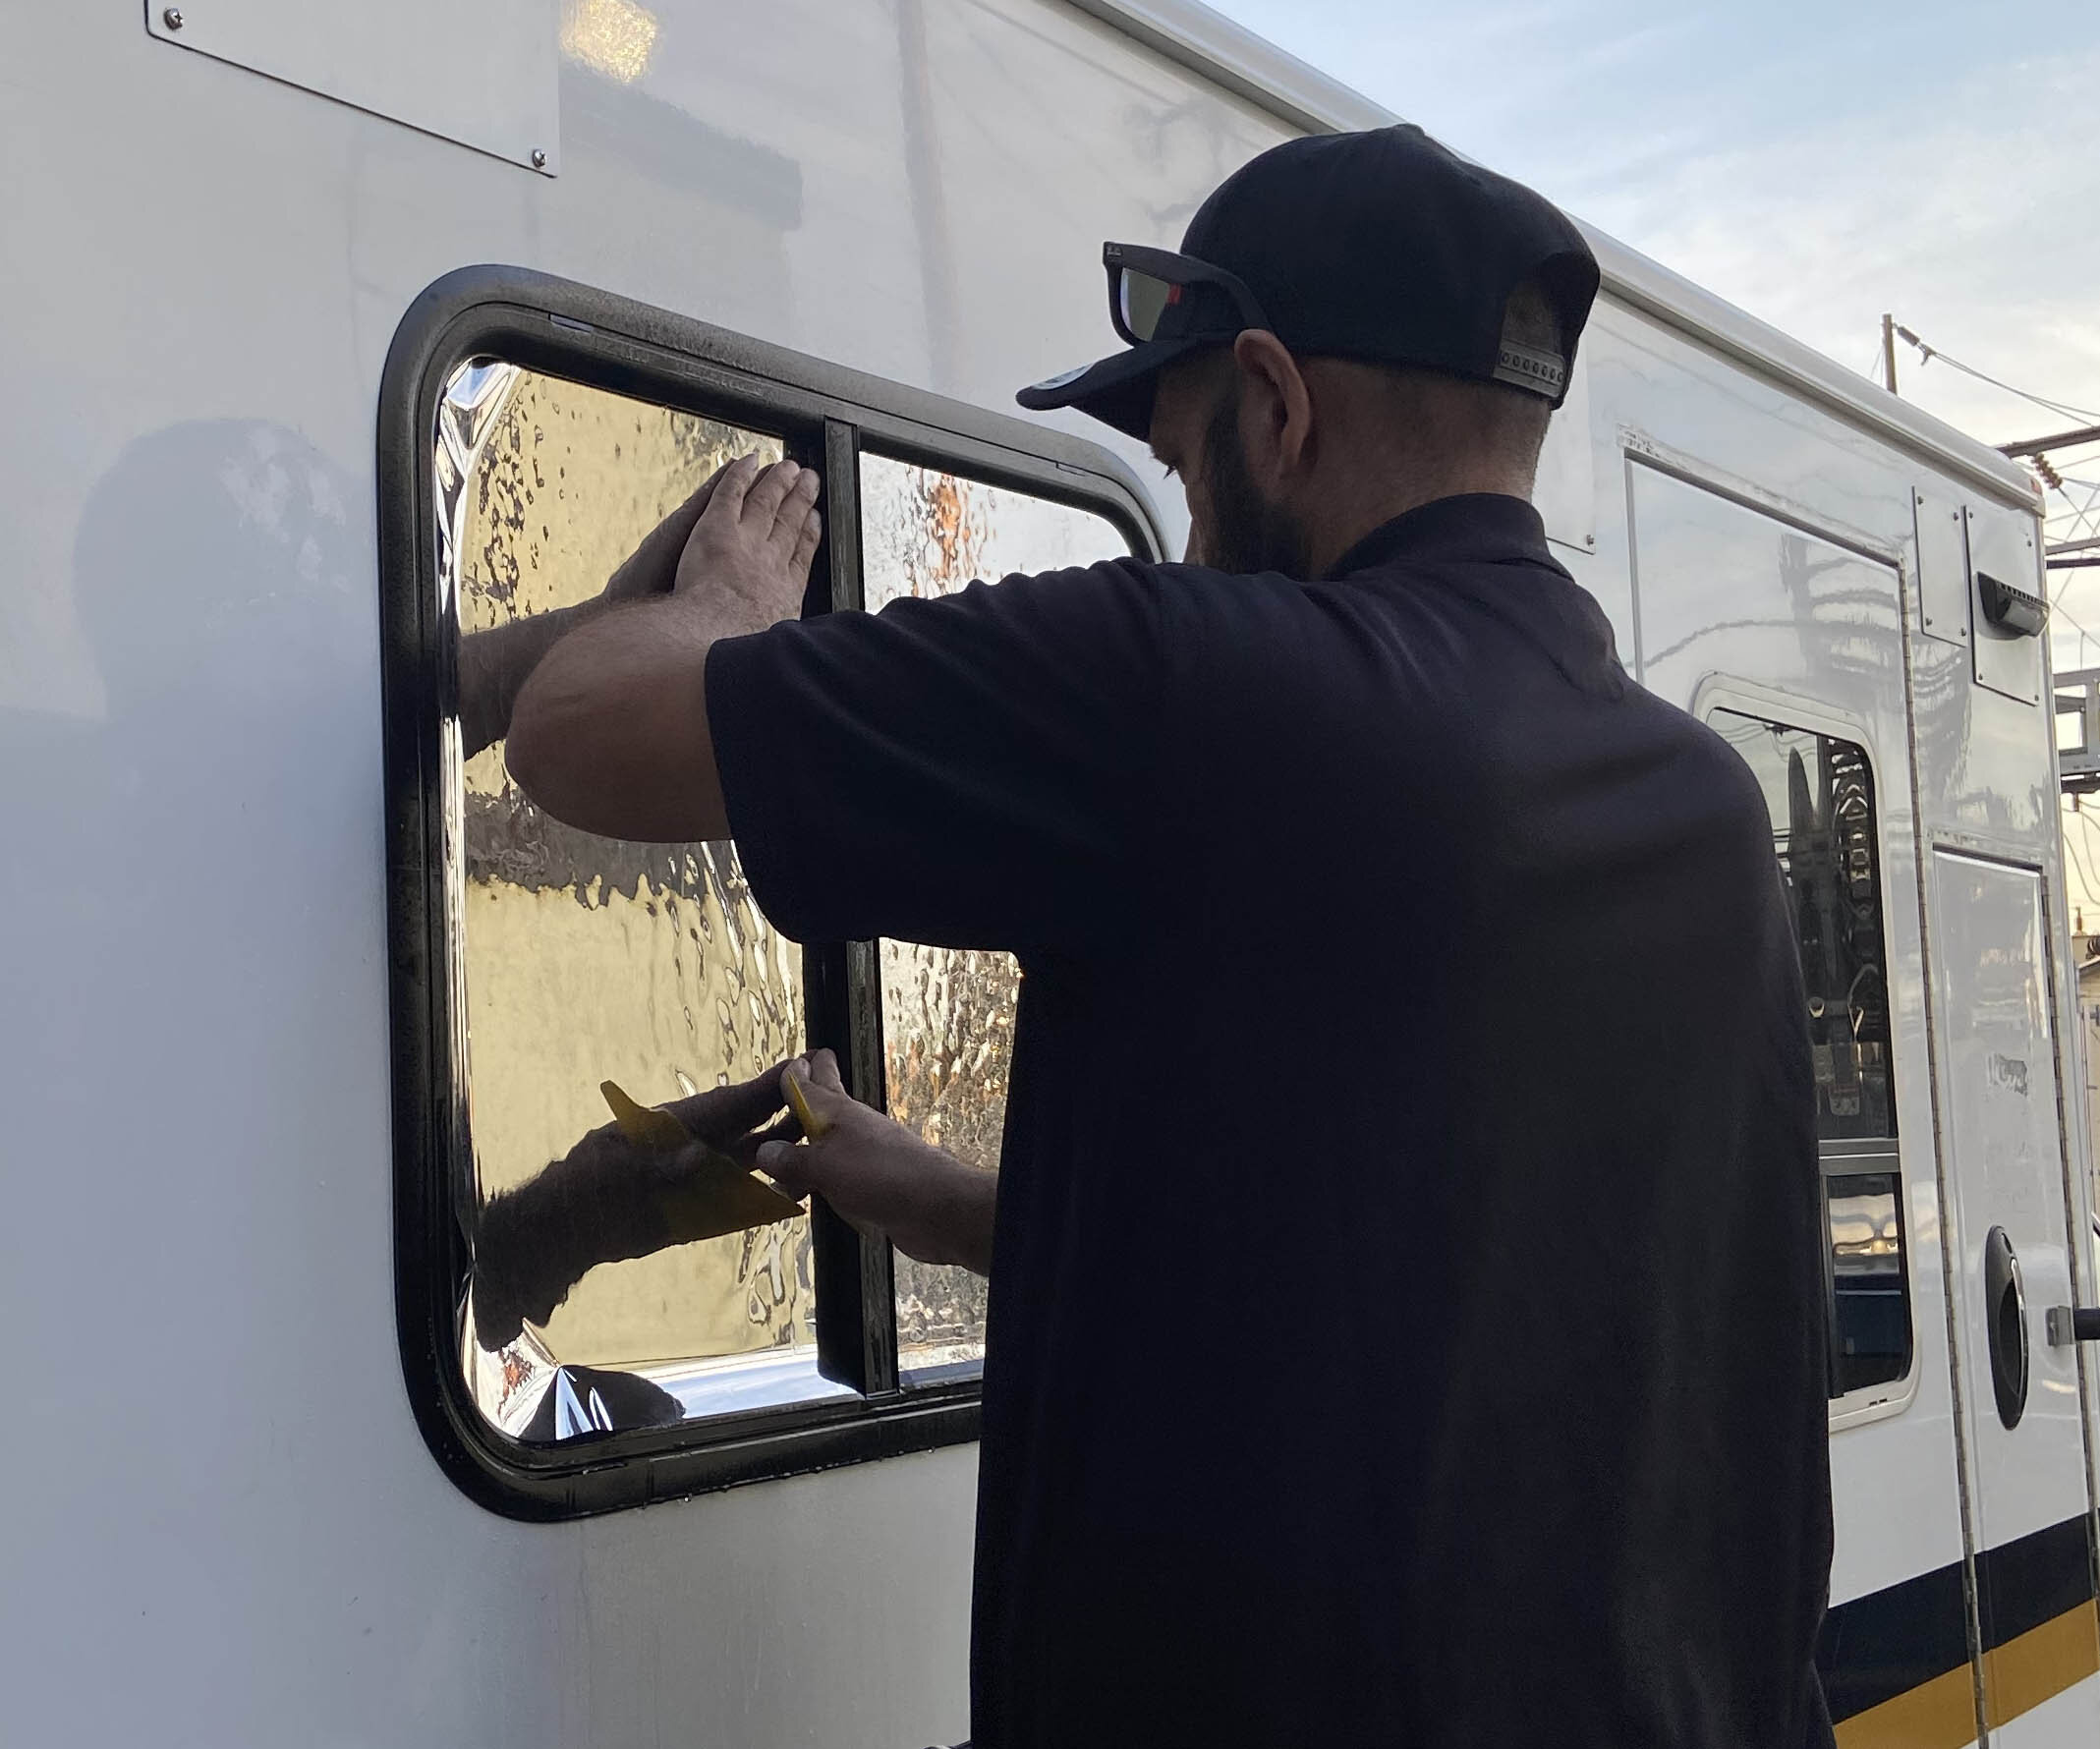
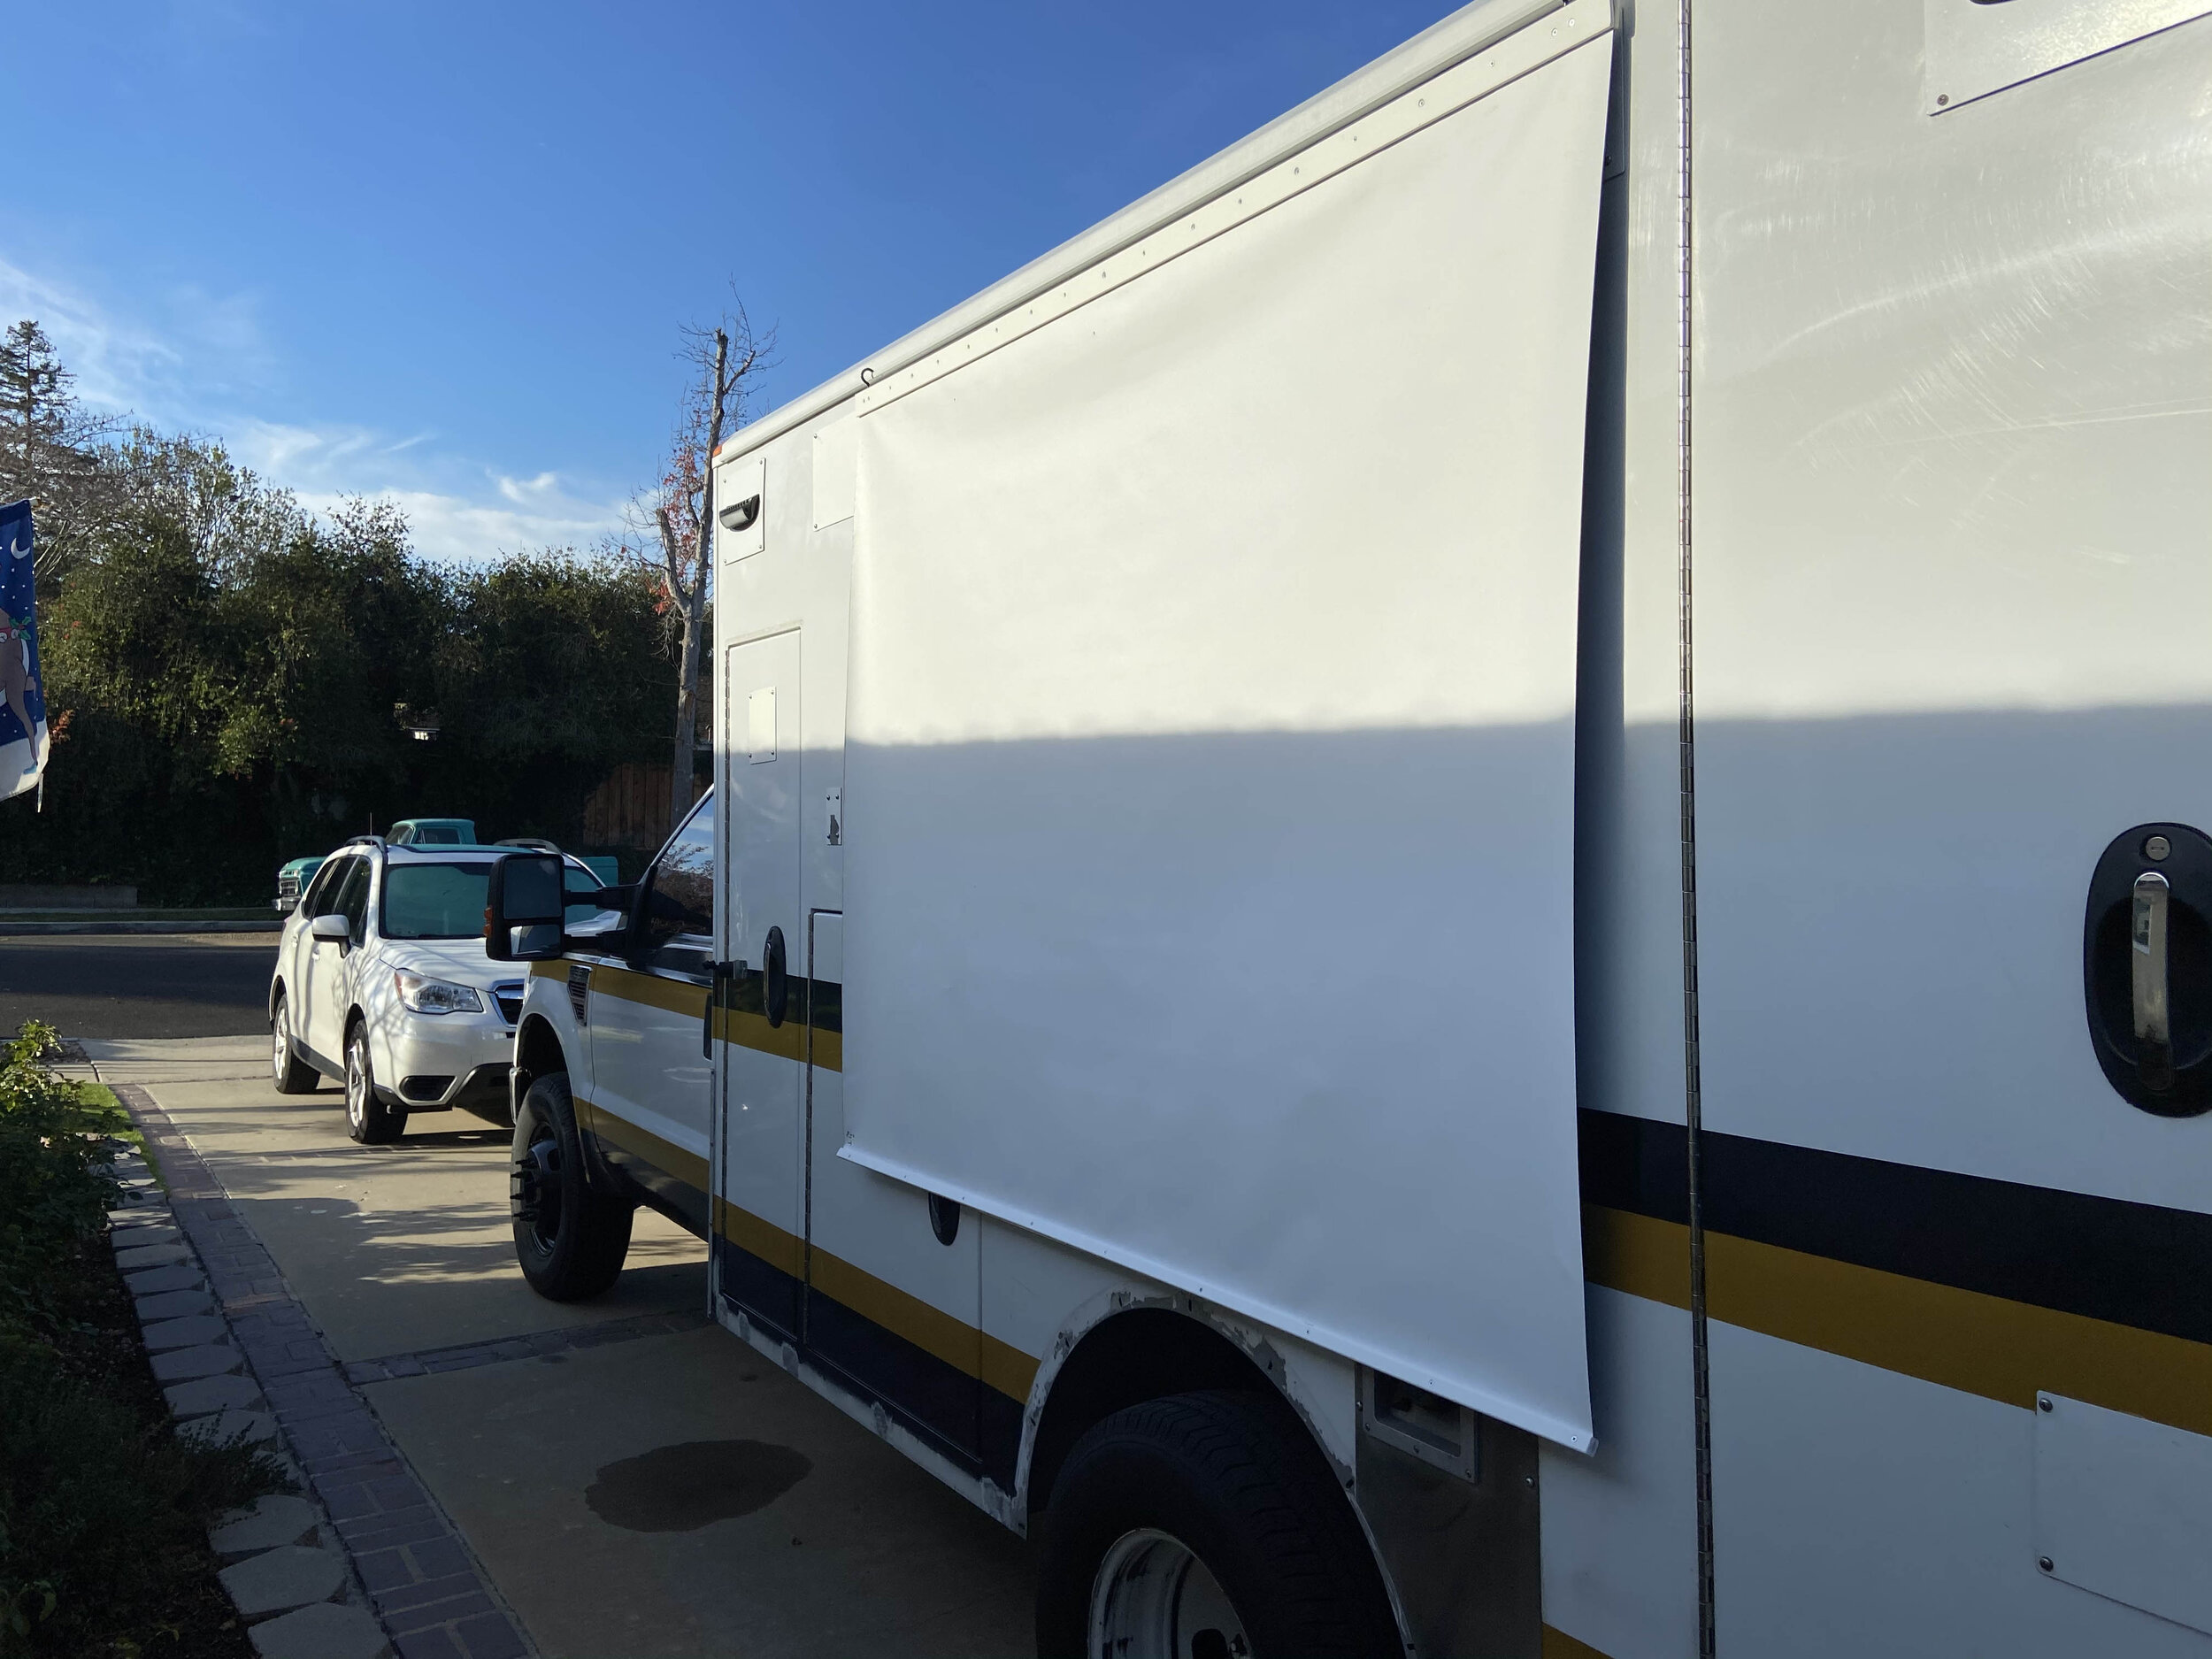
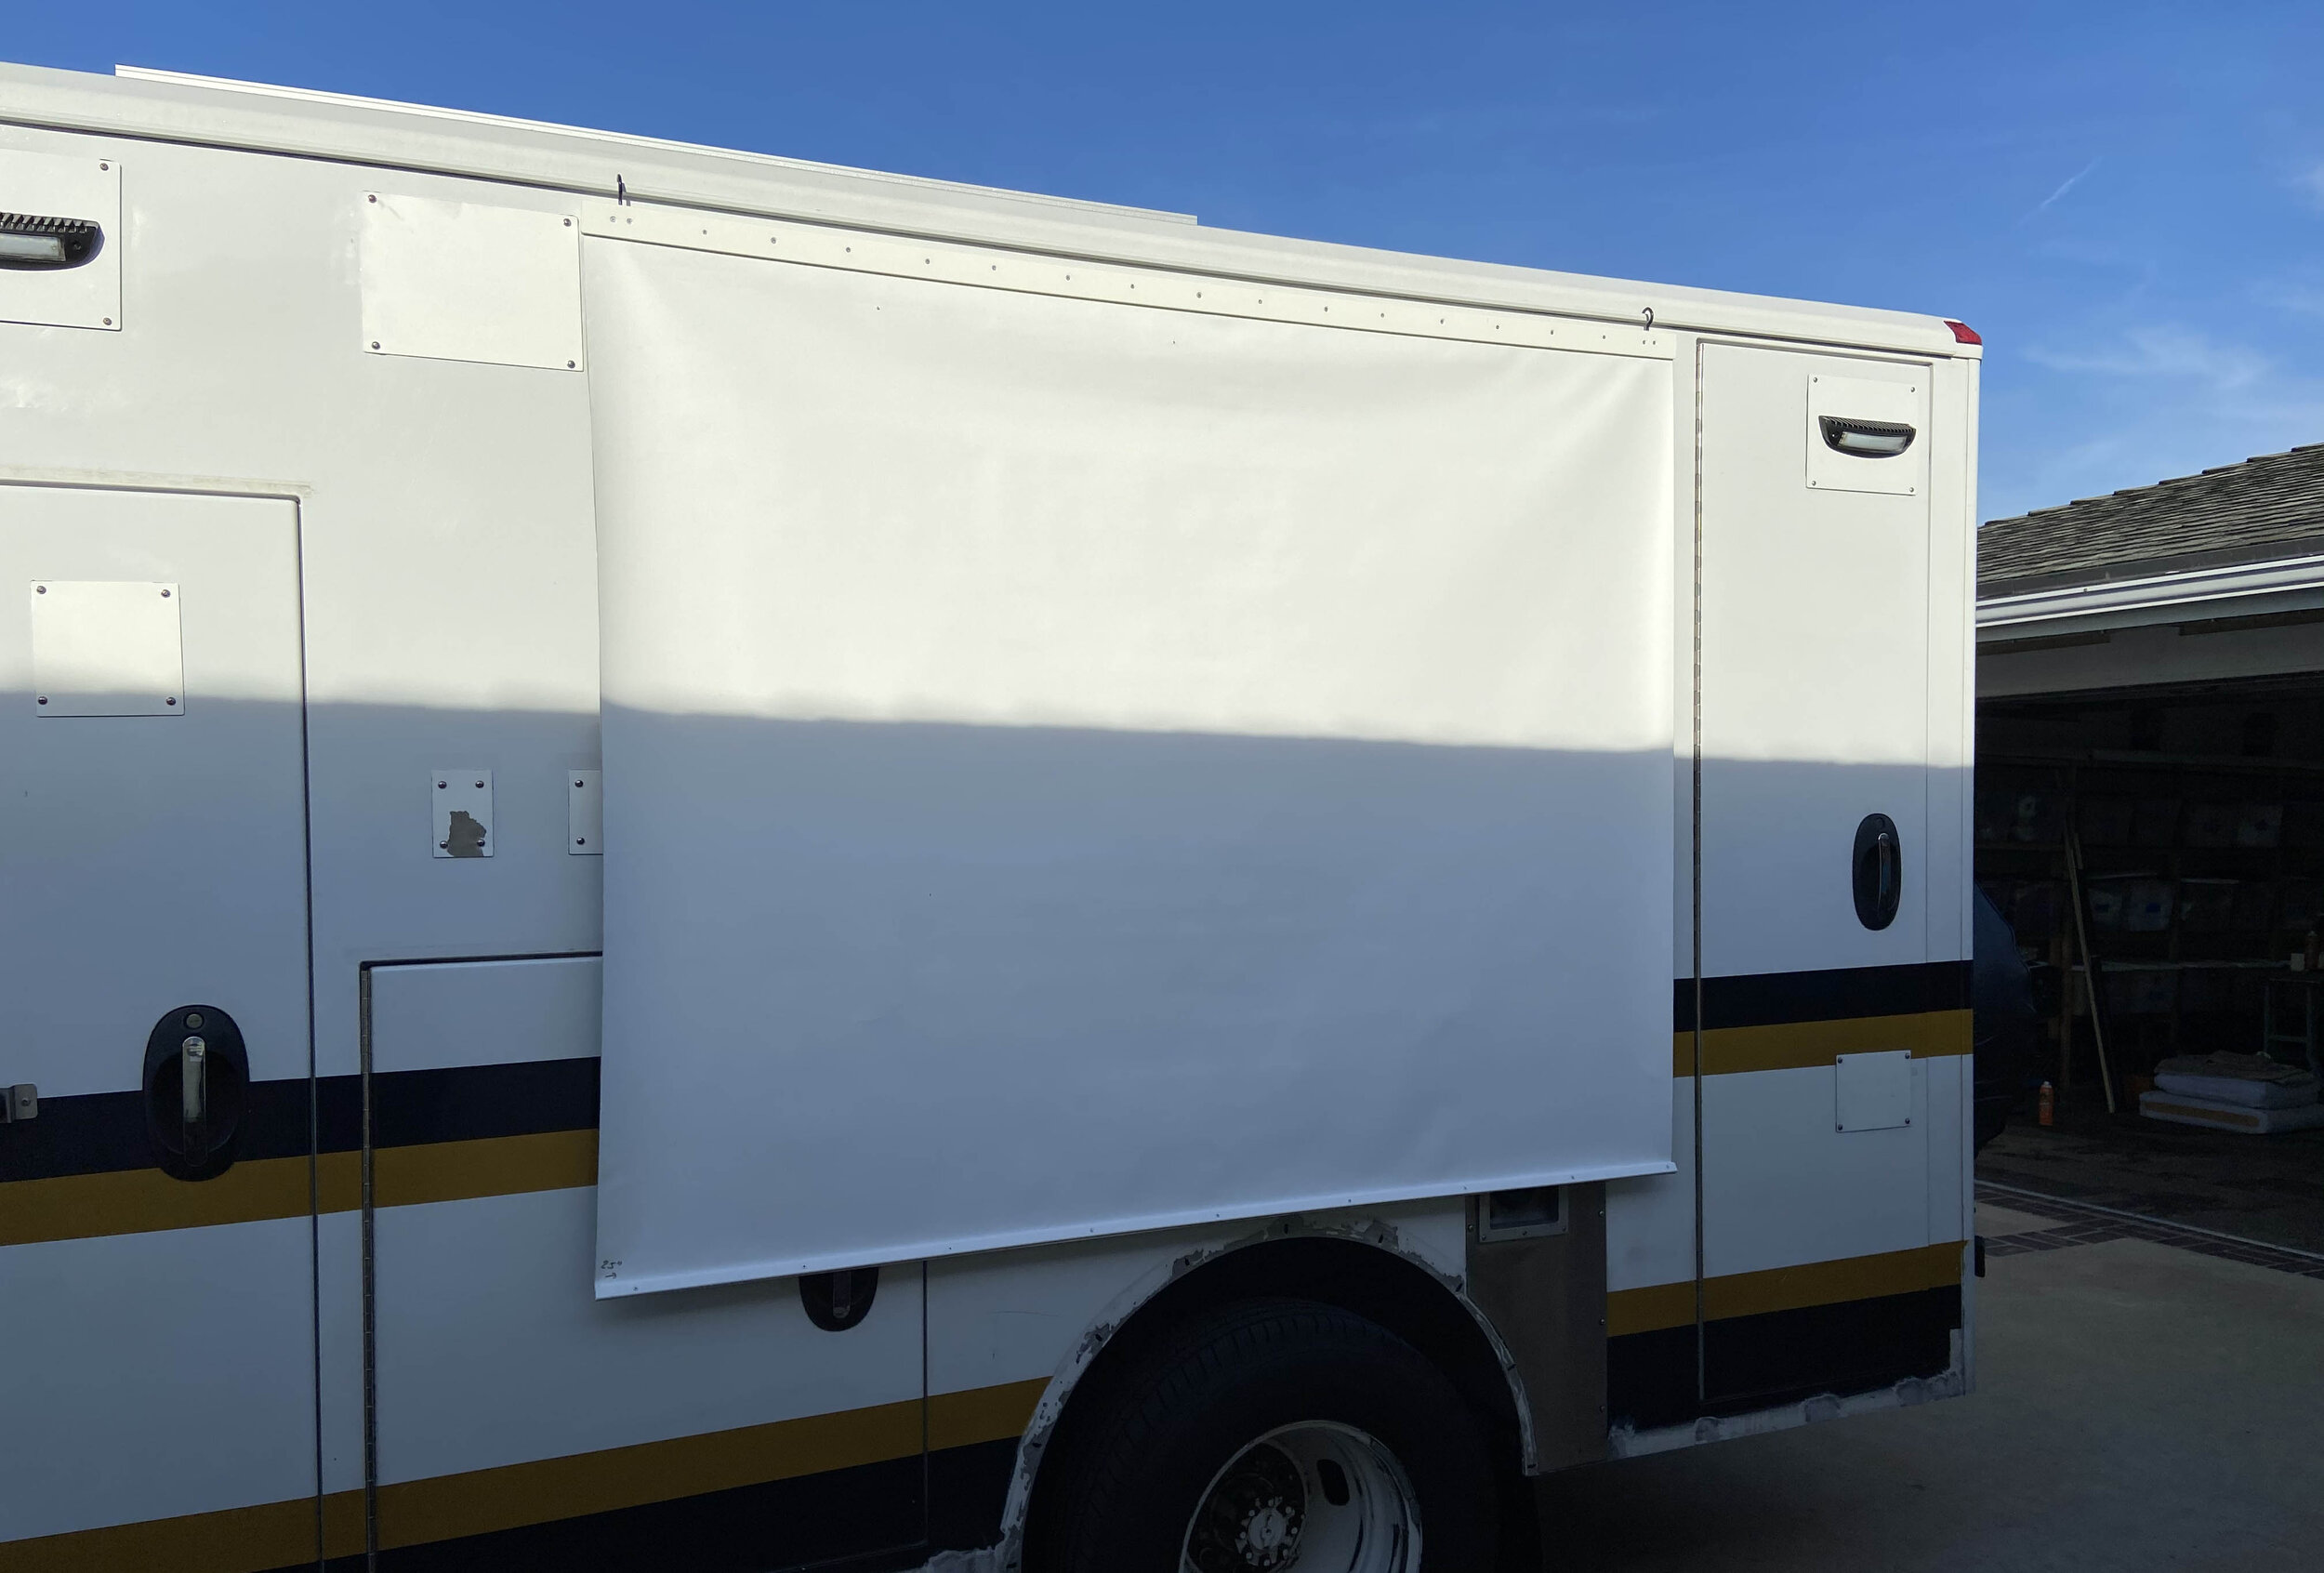
12-9-2020 - I have seen ambulances and other vehicles in the past with reflective tint on the windows and I liked the idea of not being able to see inside the camper from the outside while still being able to see outward. I did some research on how this is done and there were two options. High Performance glass (has reflective properties built into the glass) OR have reflective tint applied to the outside.
The High Performance glass was $$$$ and the reflective tint applied to the outside was $200. A local shop got me a deal on the application. You can buy a roll online and try to apply it yourself however I’m not a tint application expert and figured at that price point it would be worth having a pro install it.
The reflective tint has a max life of about 10 years. You have to wax it like you would the paint on the exterior of your car and you have to be careful with pressure washers as they can peel the tint back. Scratch resistance is an issue as well but seeing as this is a type one ambulance conversion I don’t think I’m gonna be mobbing through the wilderness any time soon. The pro’s outweighed the cons. Below are photos of the install.
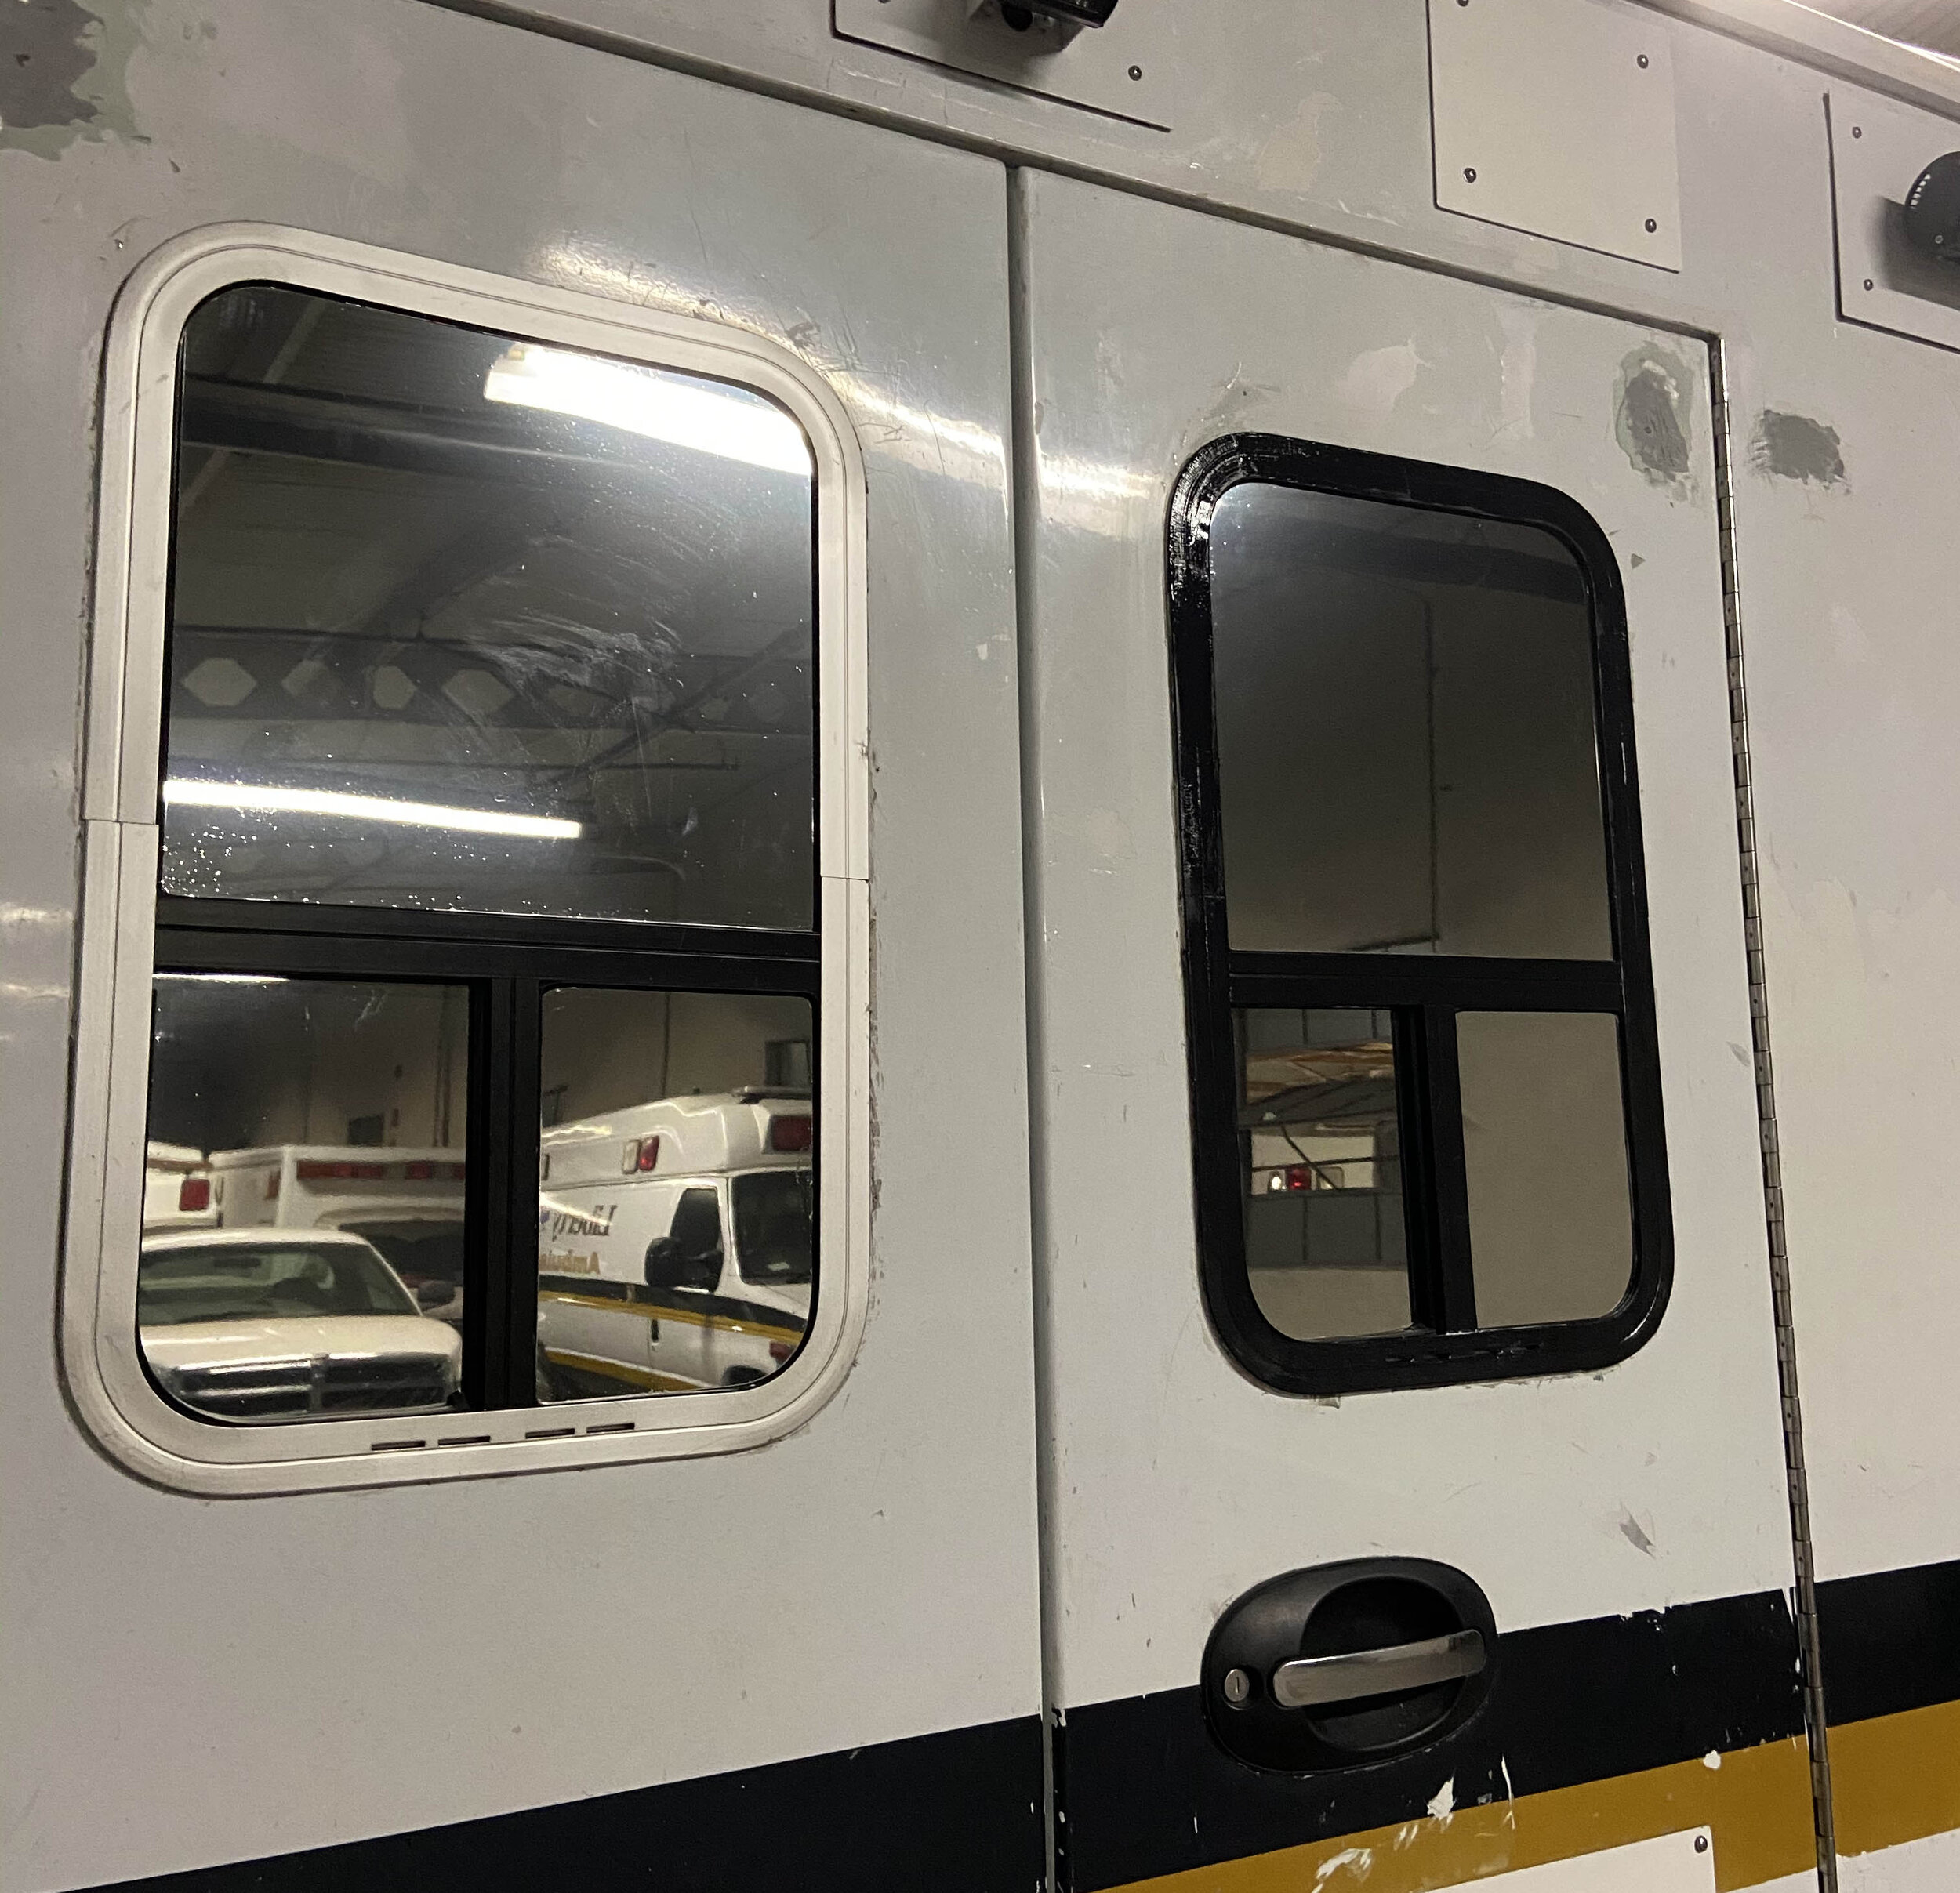
12-15-2020 - I decided that I wanted all the exterior trim to match. I spent $50 at the home depot and had the primer, paint, sandpaper, and (2) 2’ paint brushes in hand. I sanded the surfaces of the AL trim and used a solvent to remove any grease/oil. Photos below show the process.
12-23-2020 - Update; Took the camper up to Oregon. Weather was consistent rain for 4 days straight and overnight temps were 23 degrees each night. The paint surrounding the windows began to bubble. Ill have to repaint the trim. :-( To be fair the AL panels I painted with a rattle can began to blister too. When I have the exterior painted by a pro I will have them professionally paint the spots I attempted to paint myself.

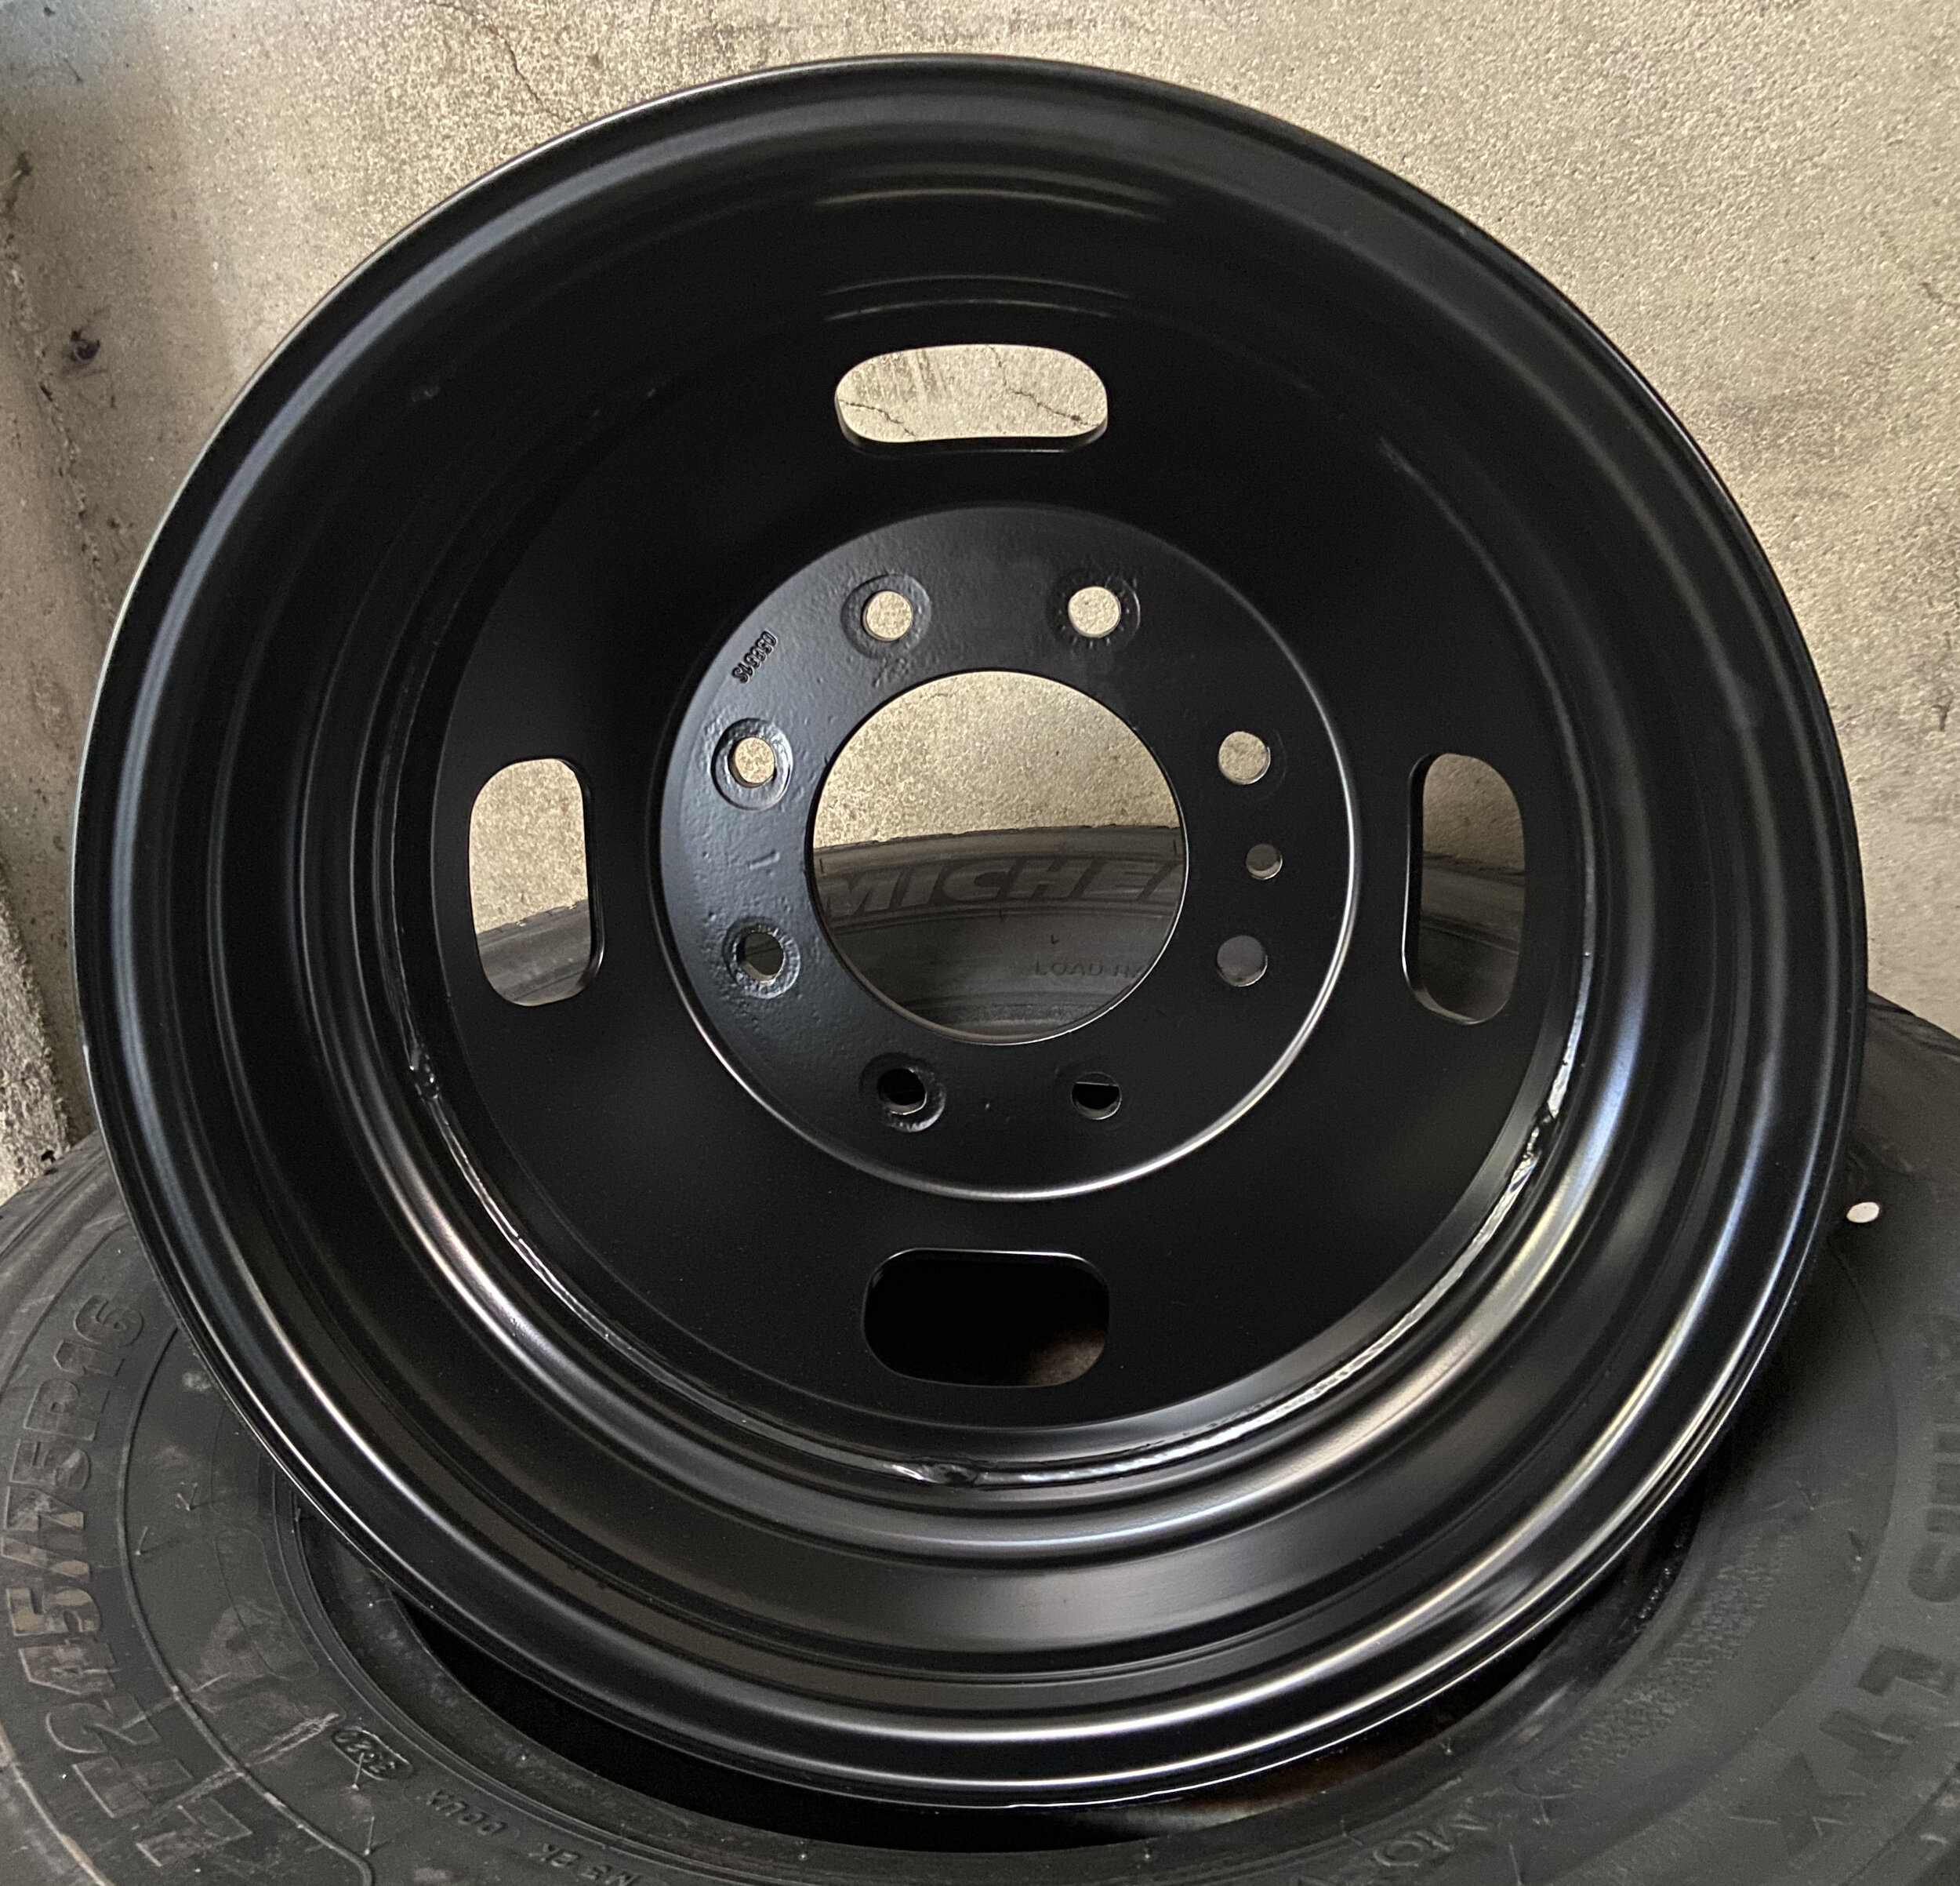
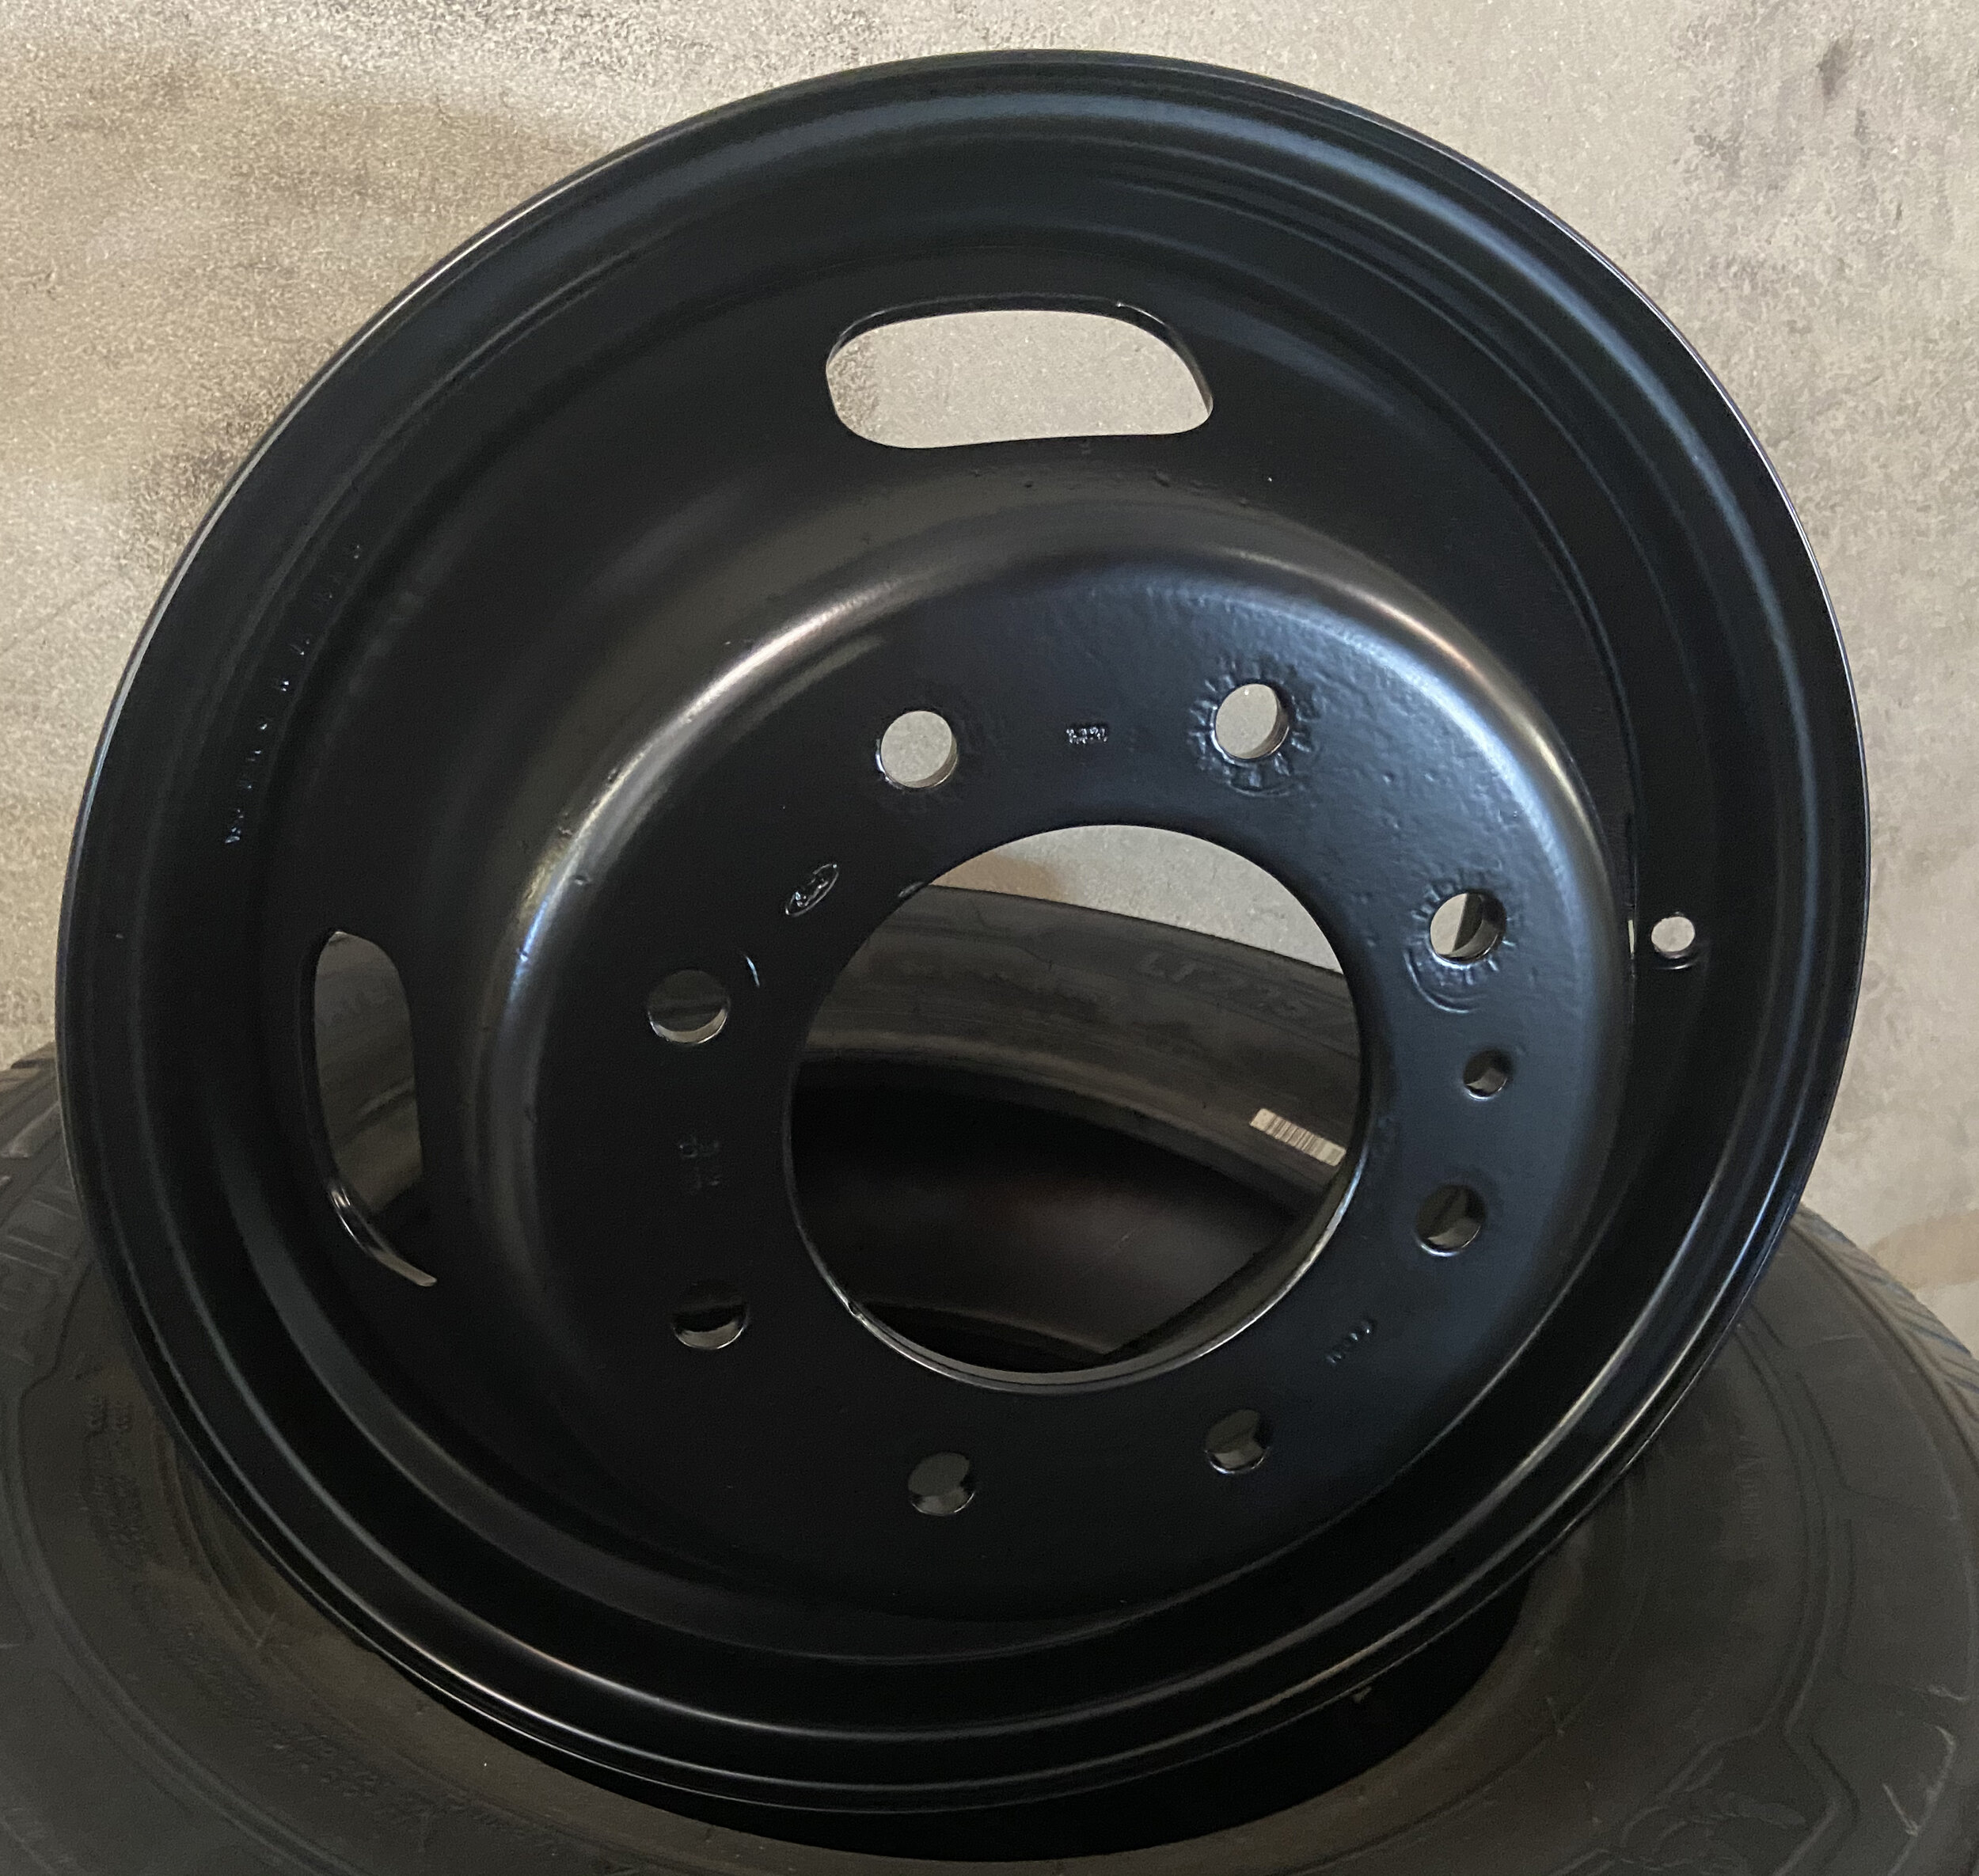
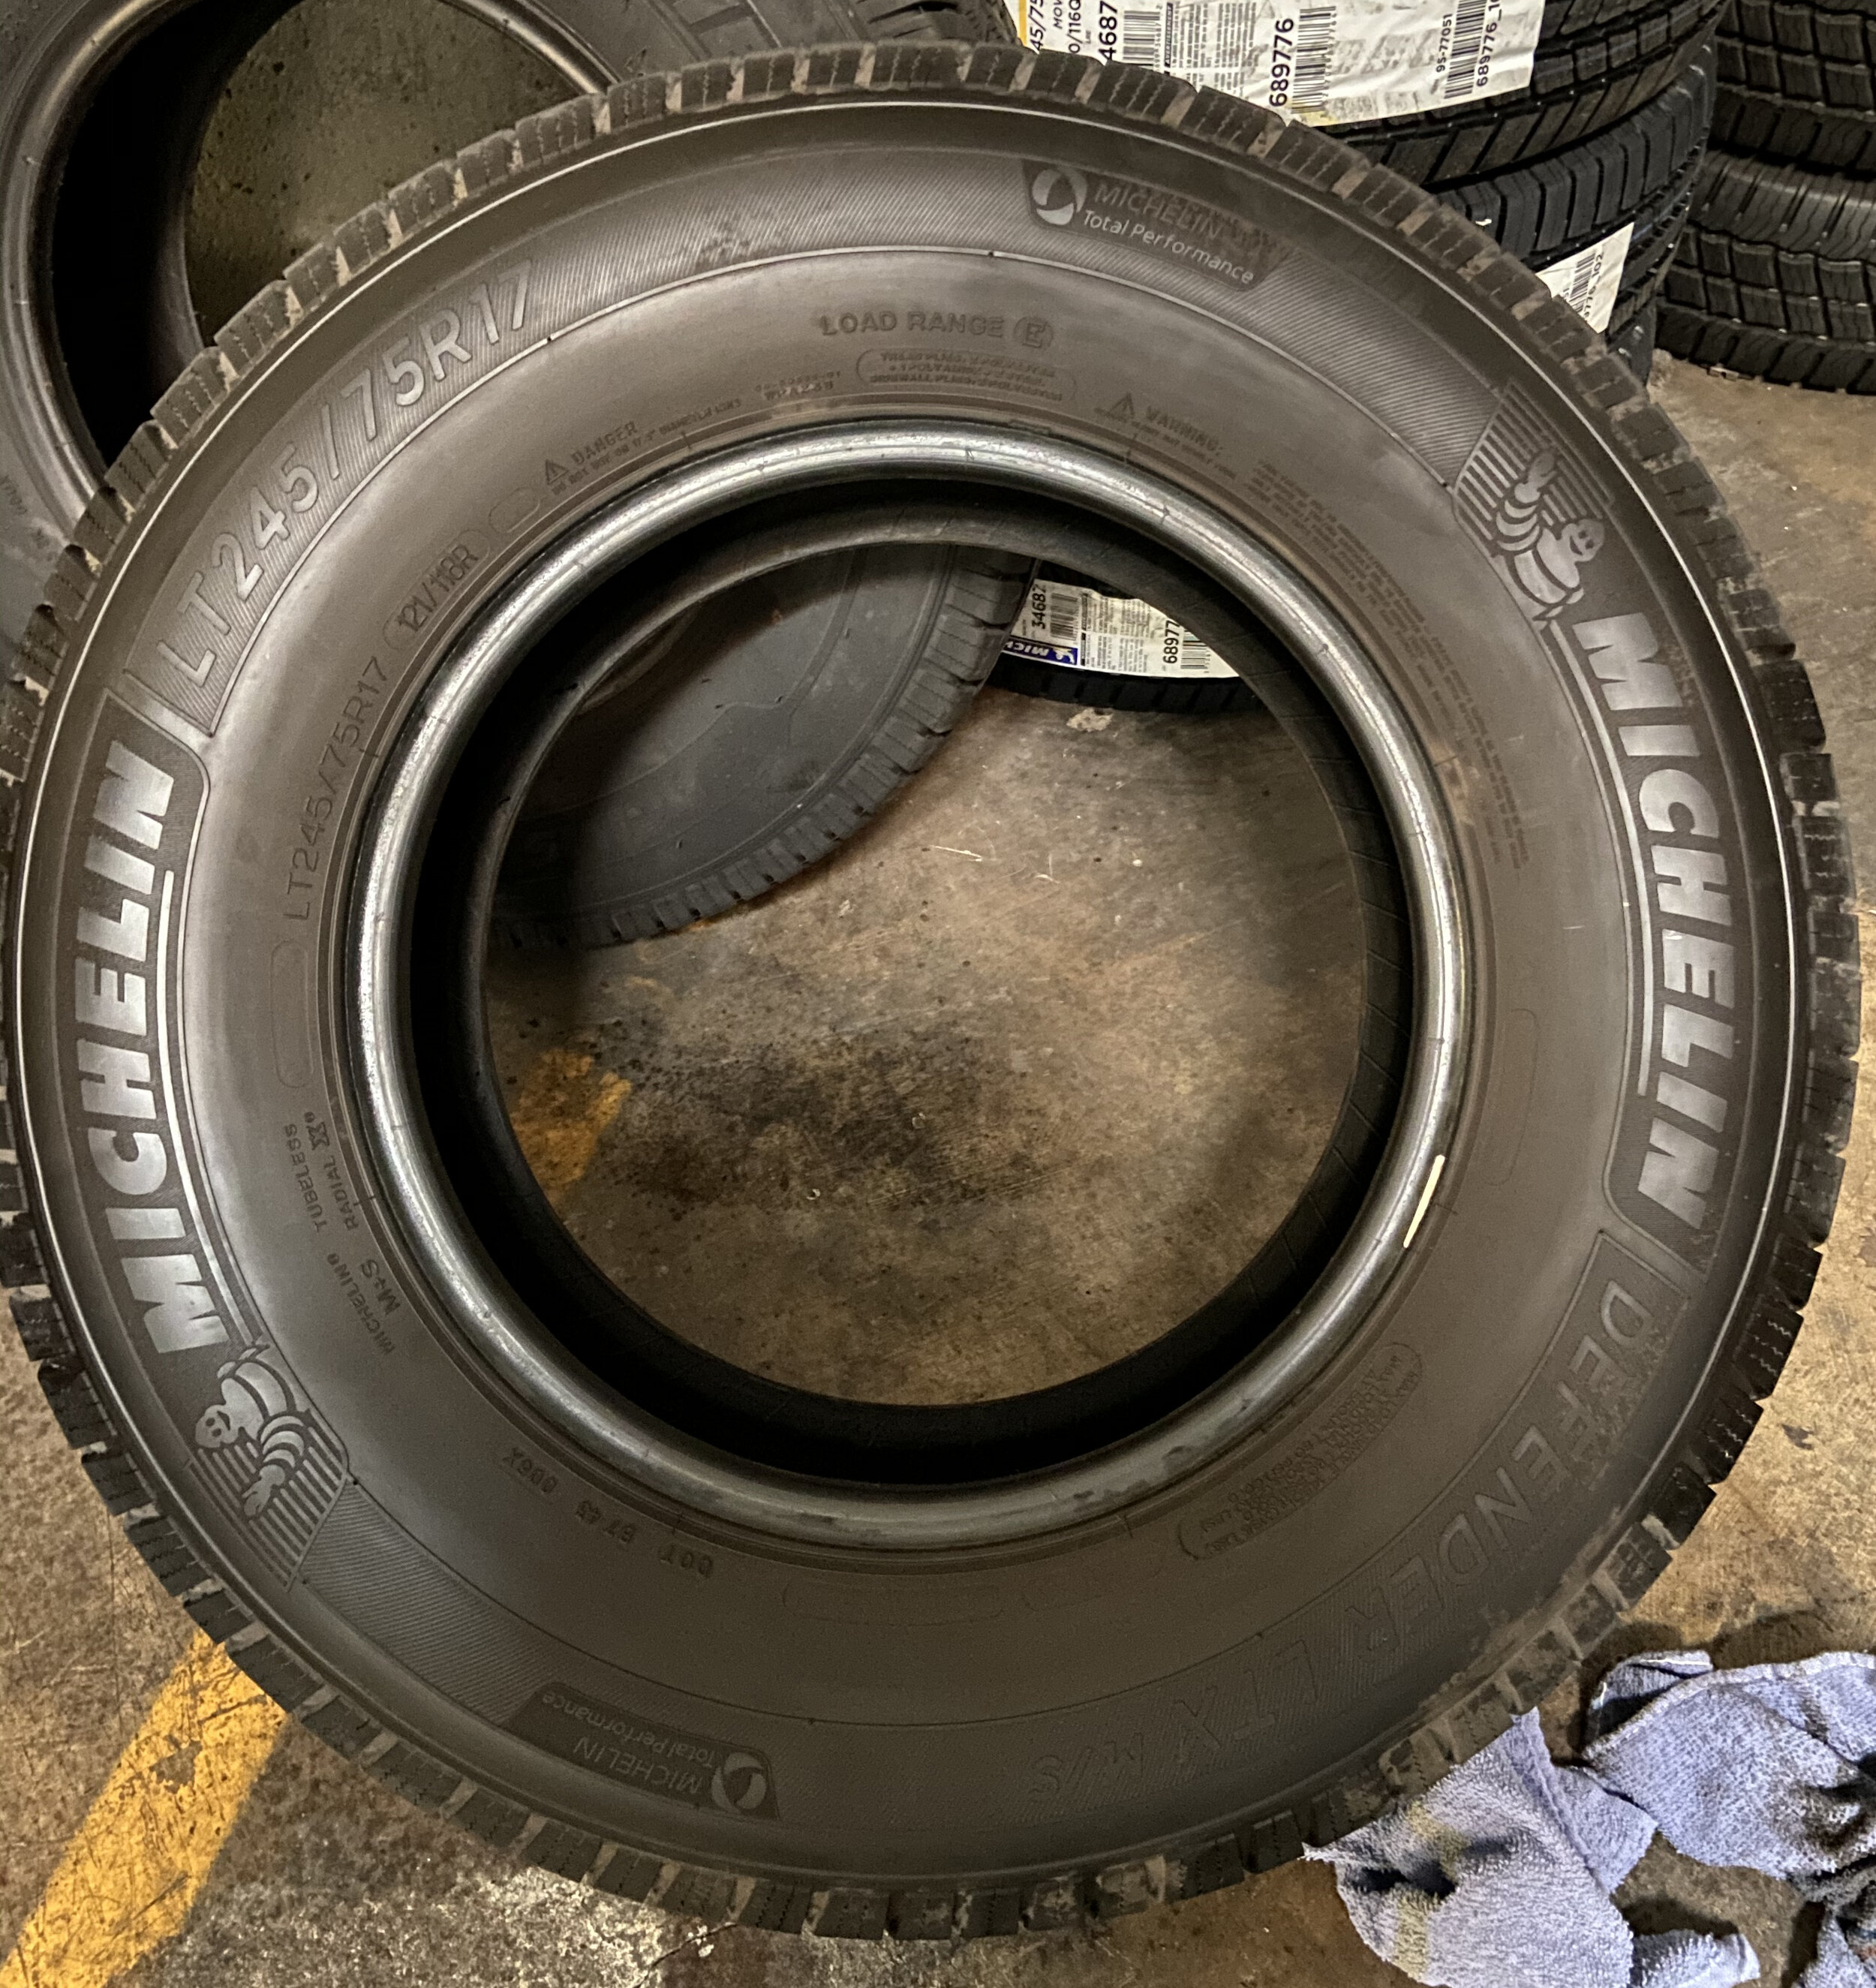
12-23-2020 - Had (2) of the (4) steel rims powder coated. Looks great and reseals the steel rims. Cost was $100 per rim. I still have (2) more to powder coat after the holidays. Here are the tires I went with as well as the rims in their satin black new look.

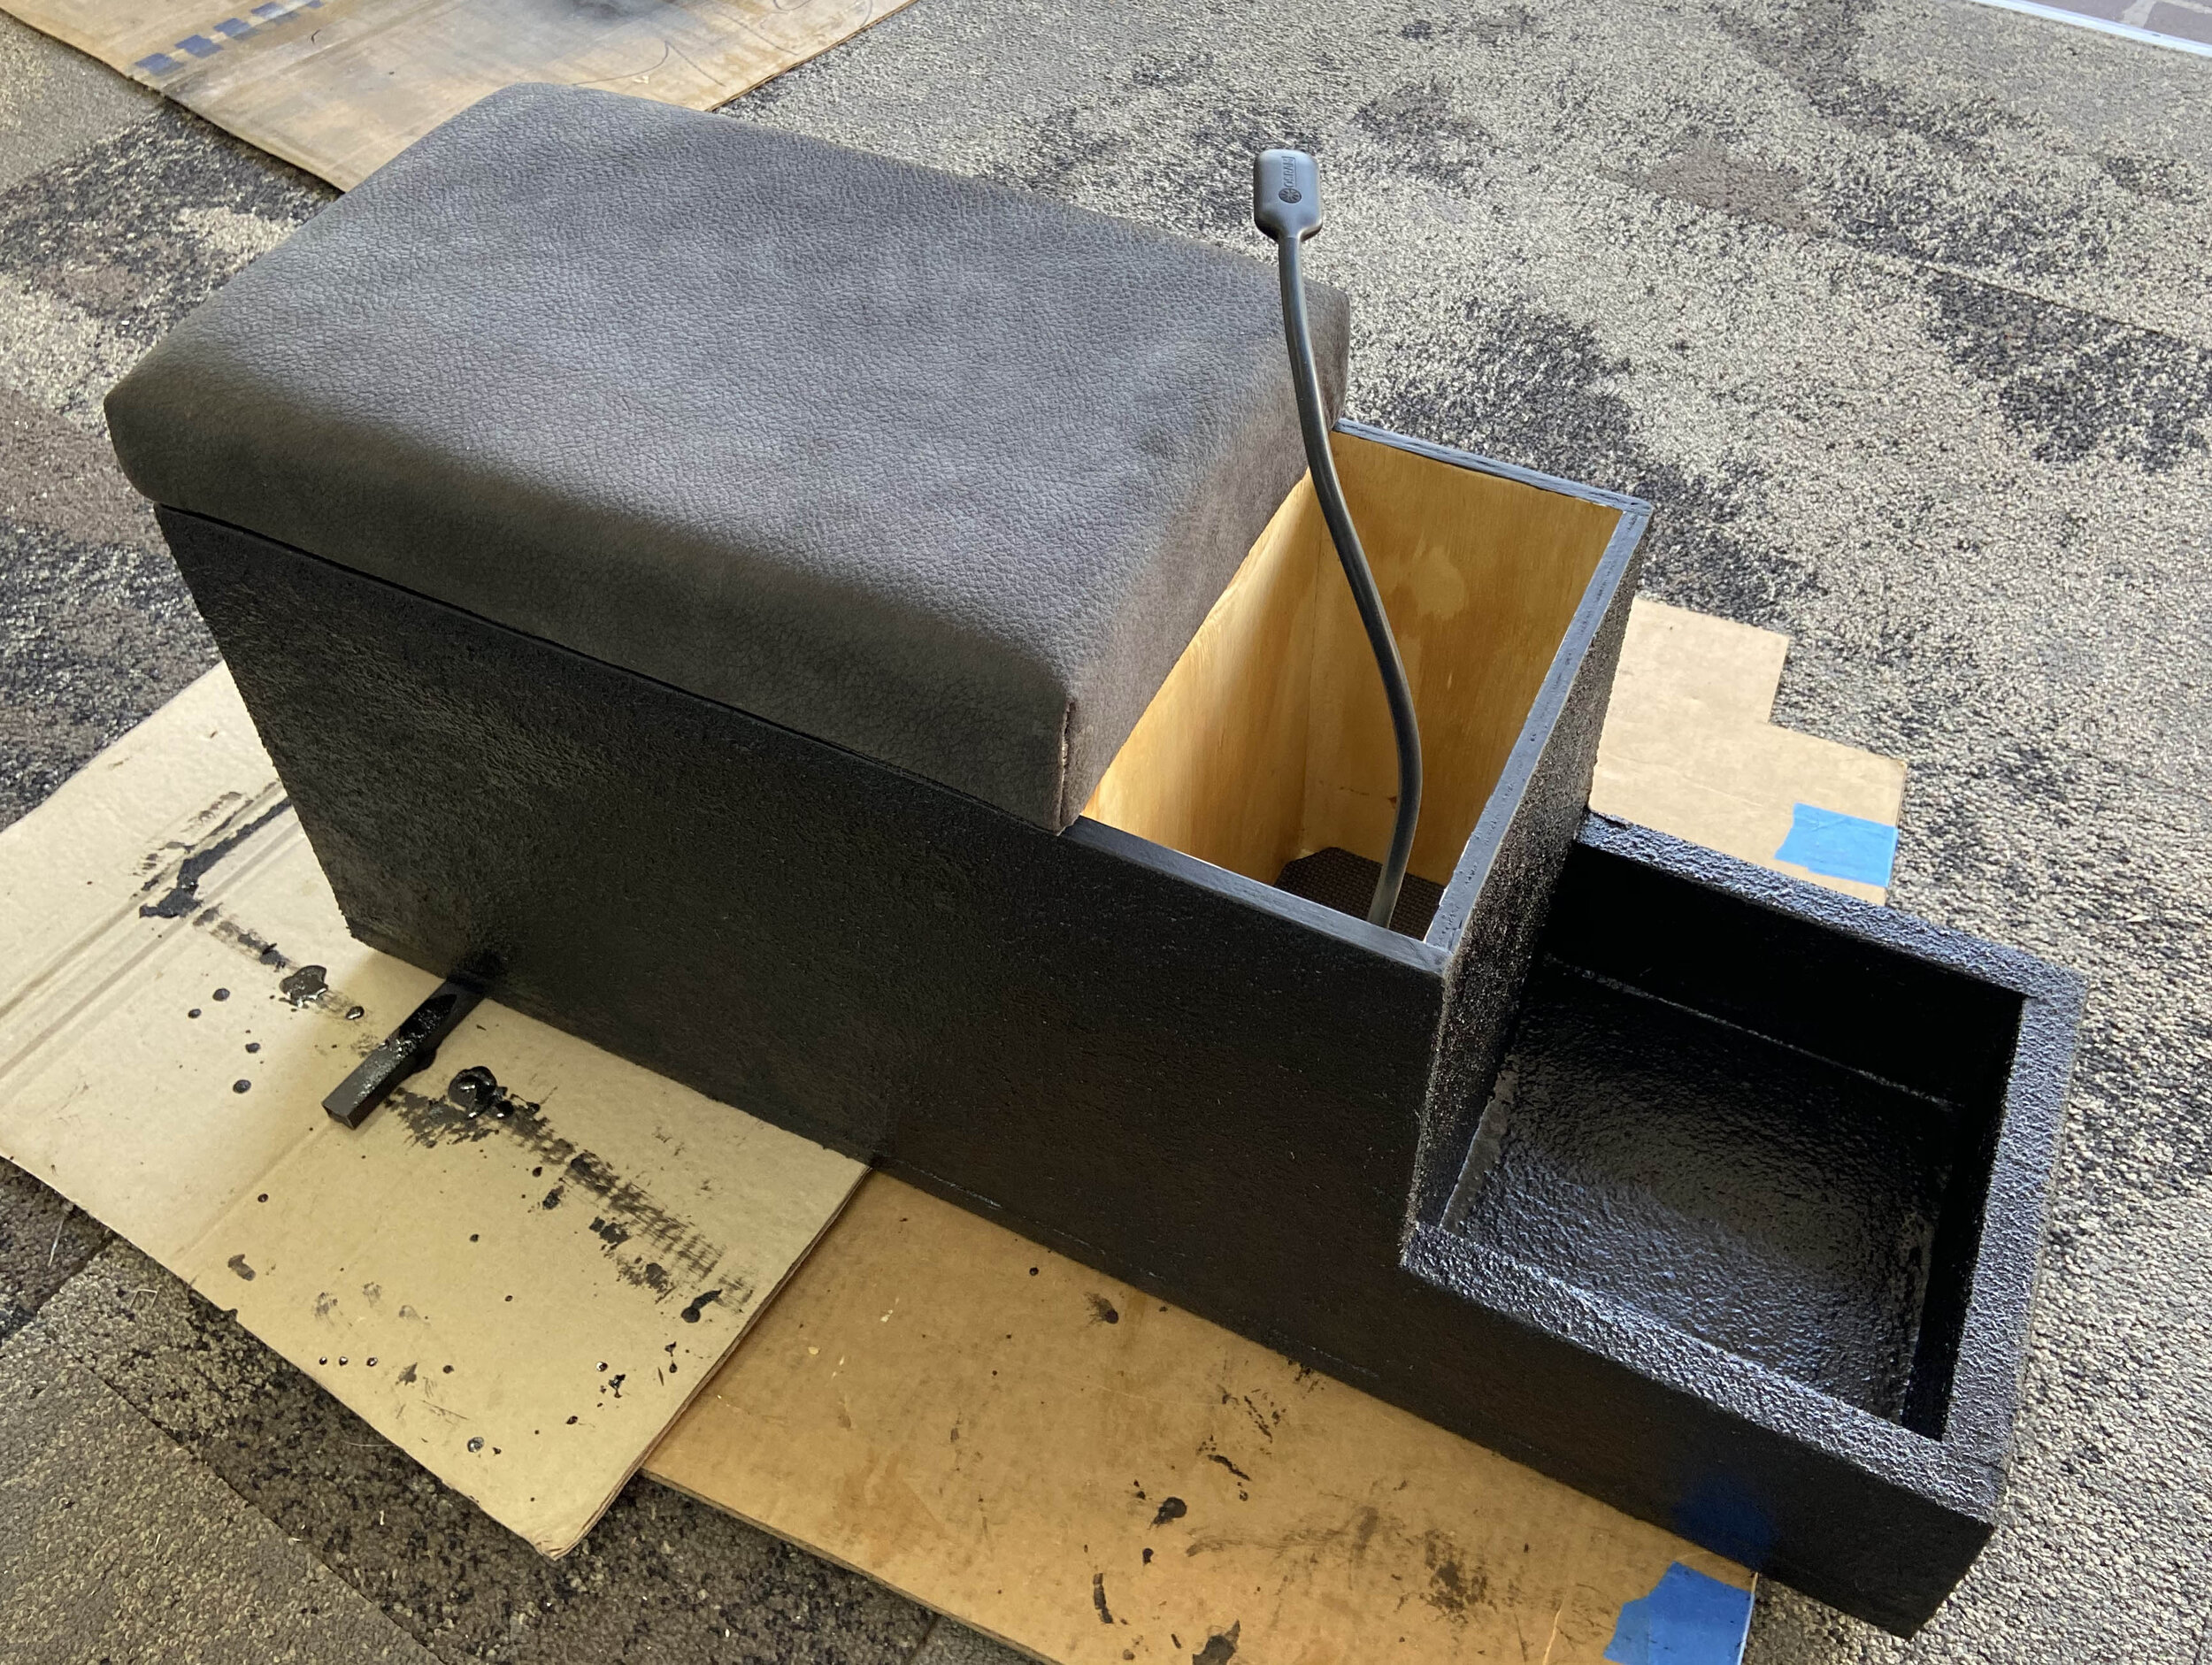
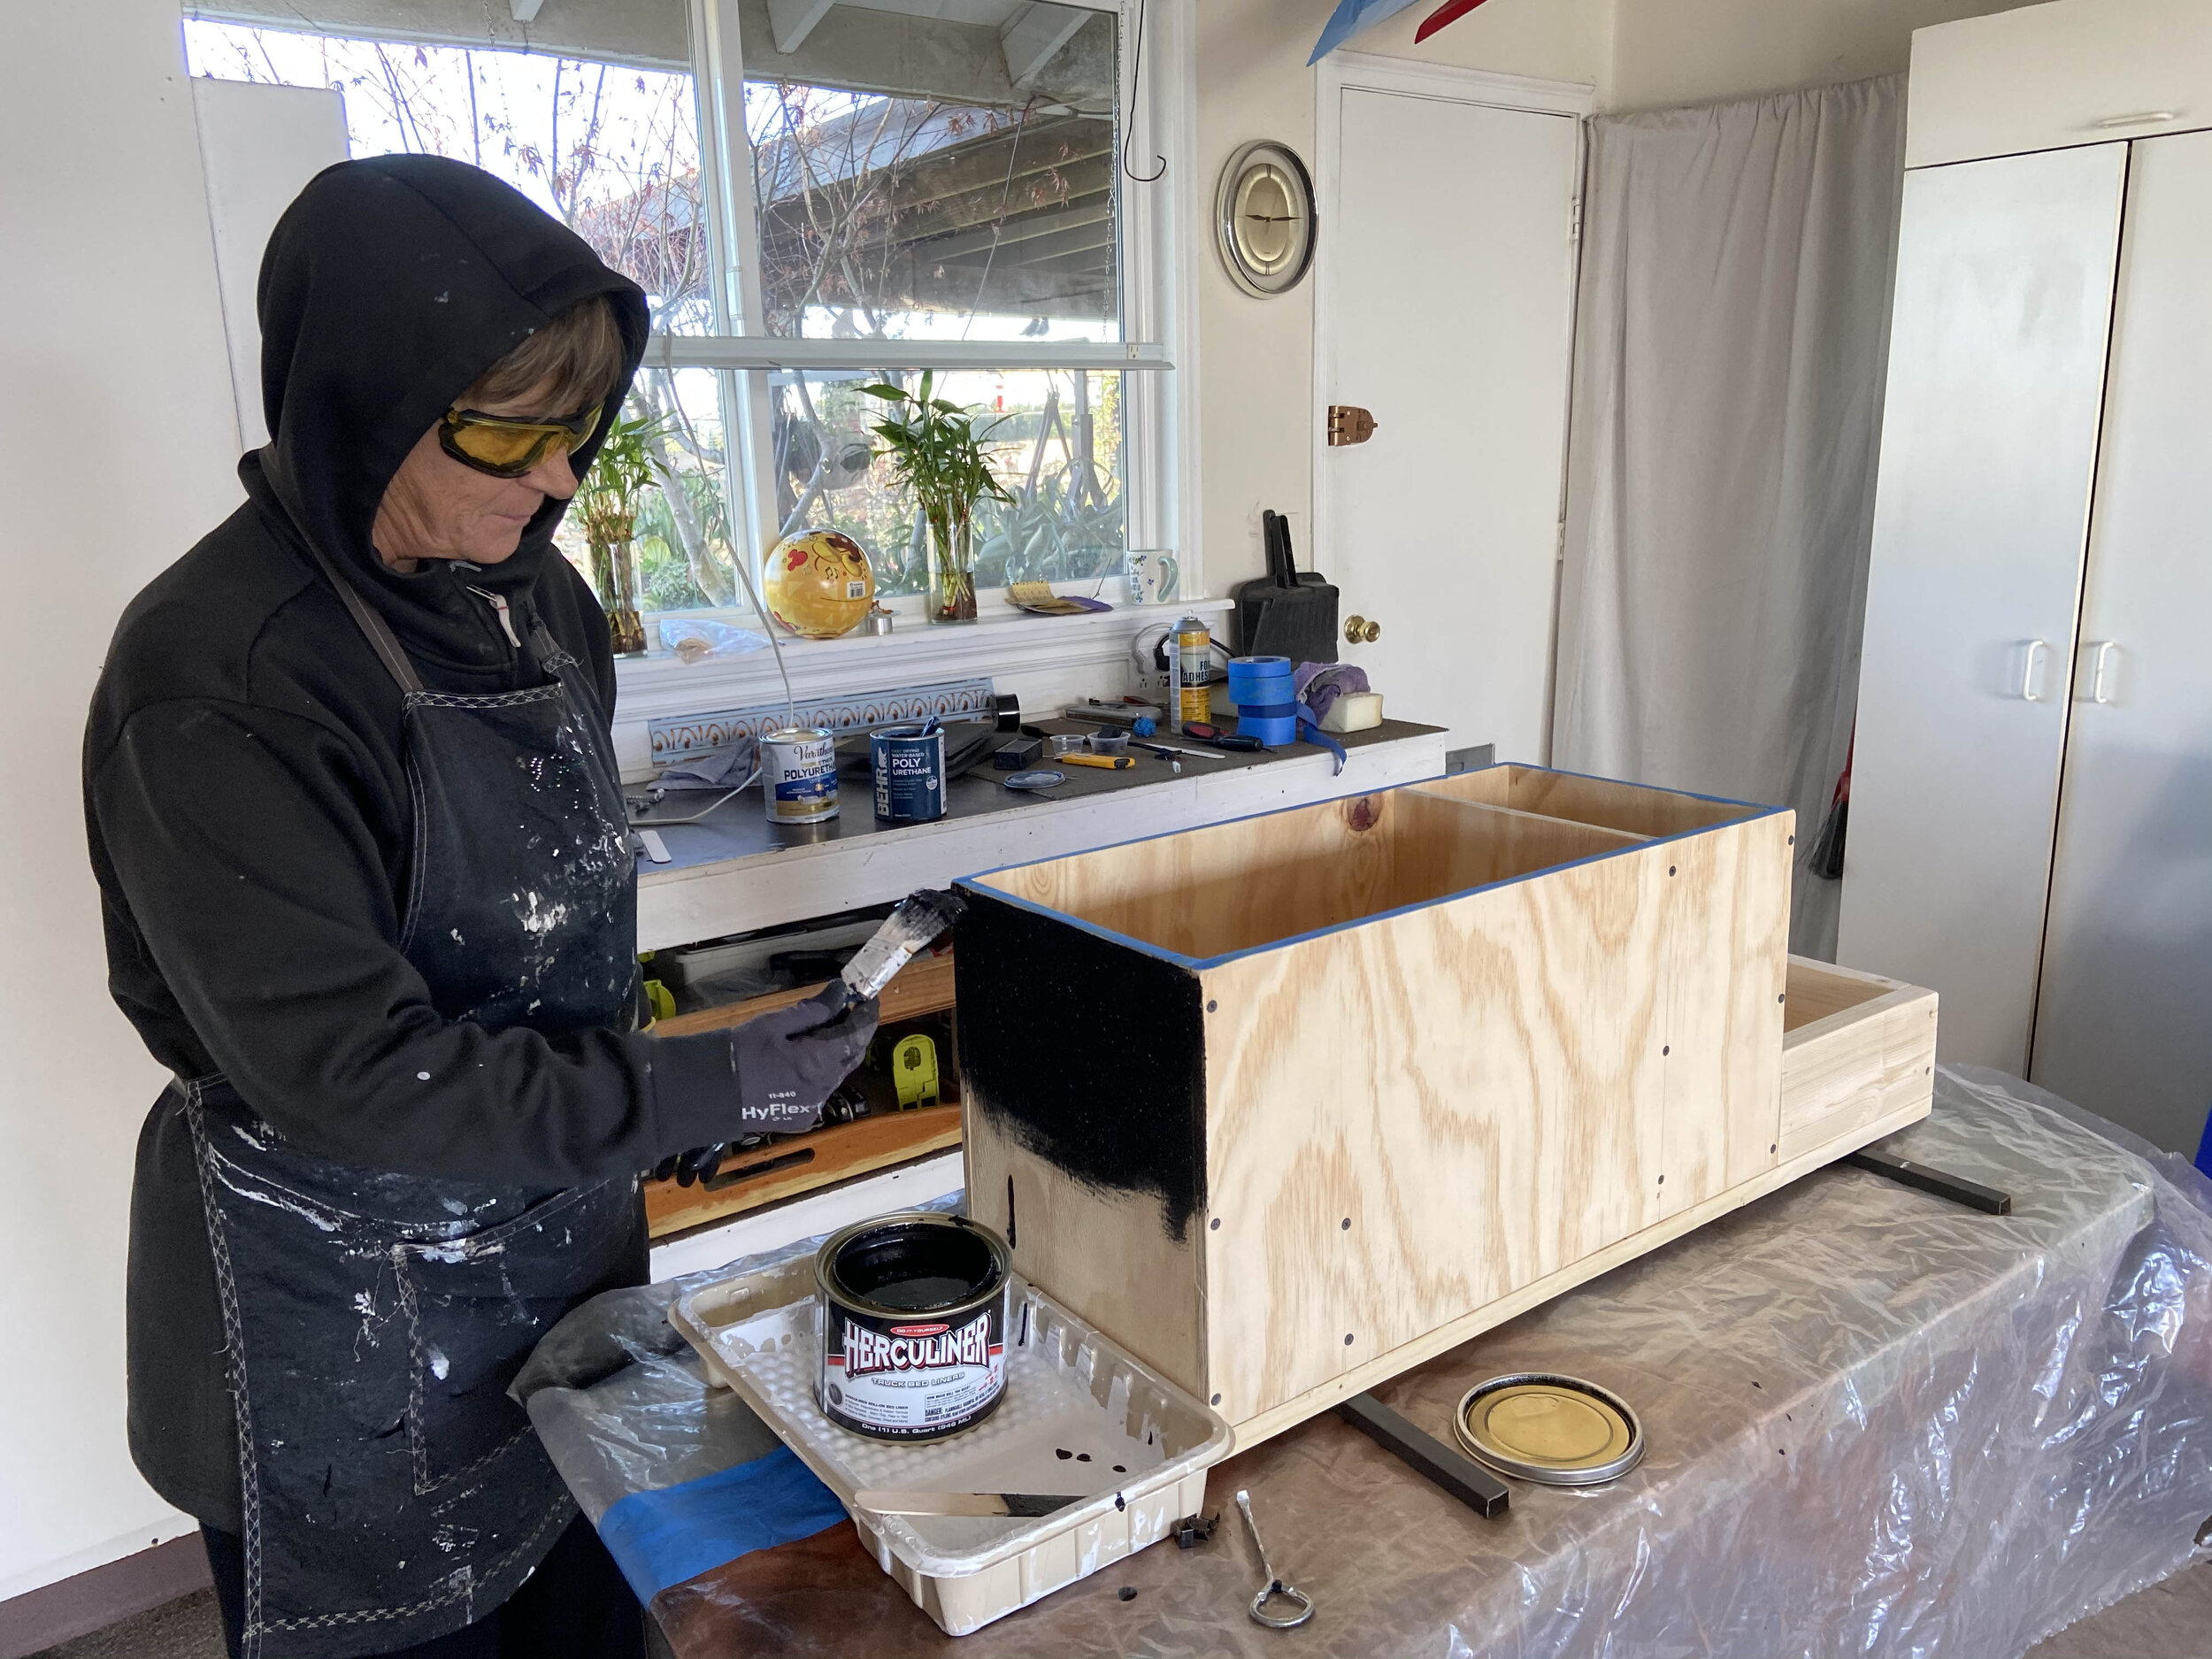
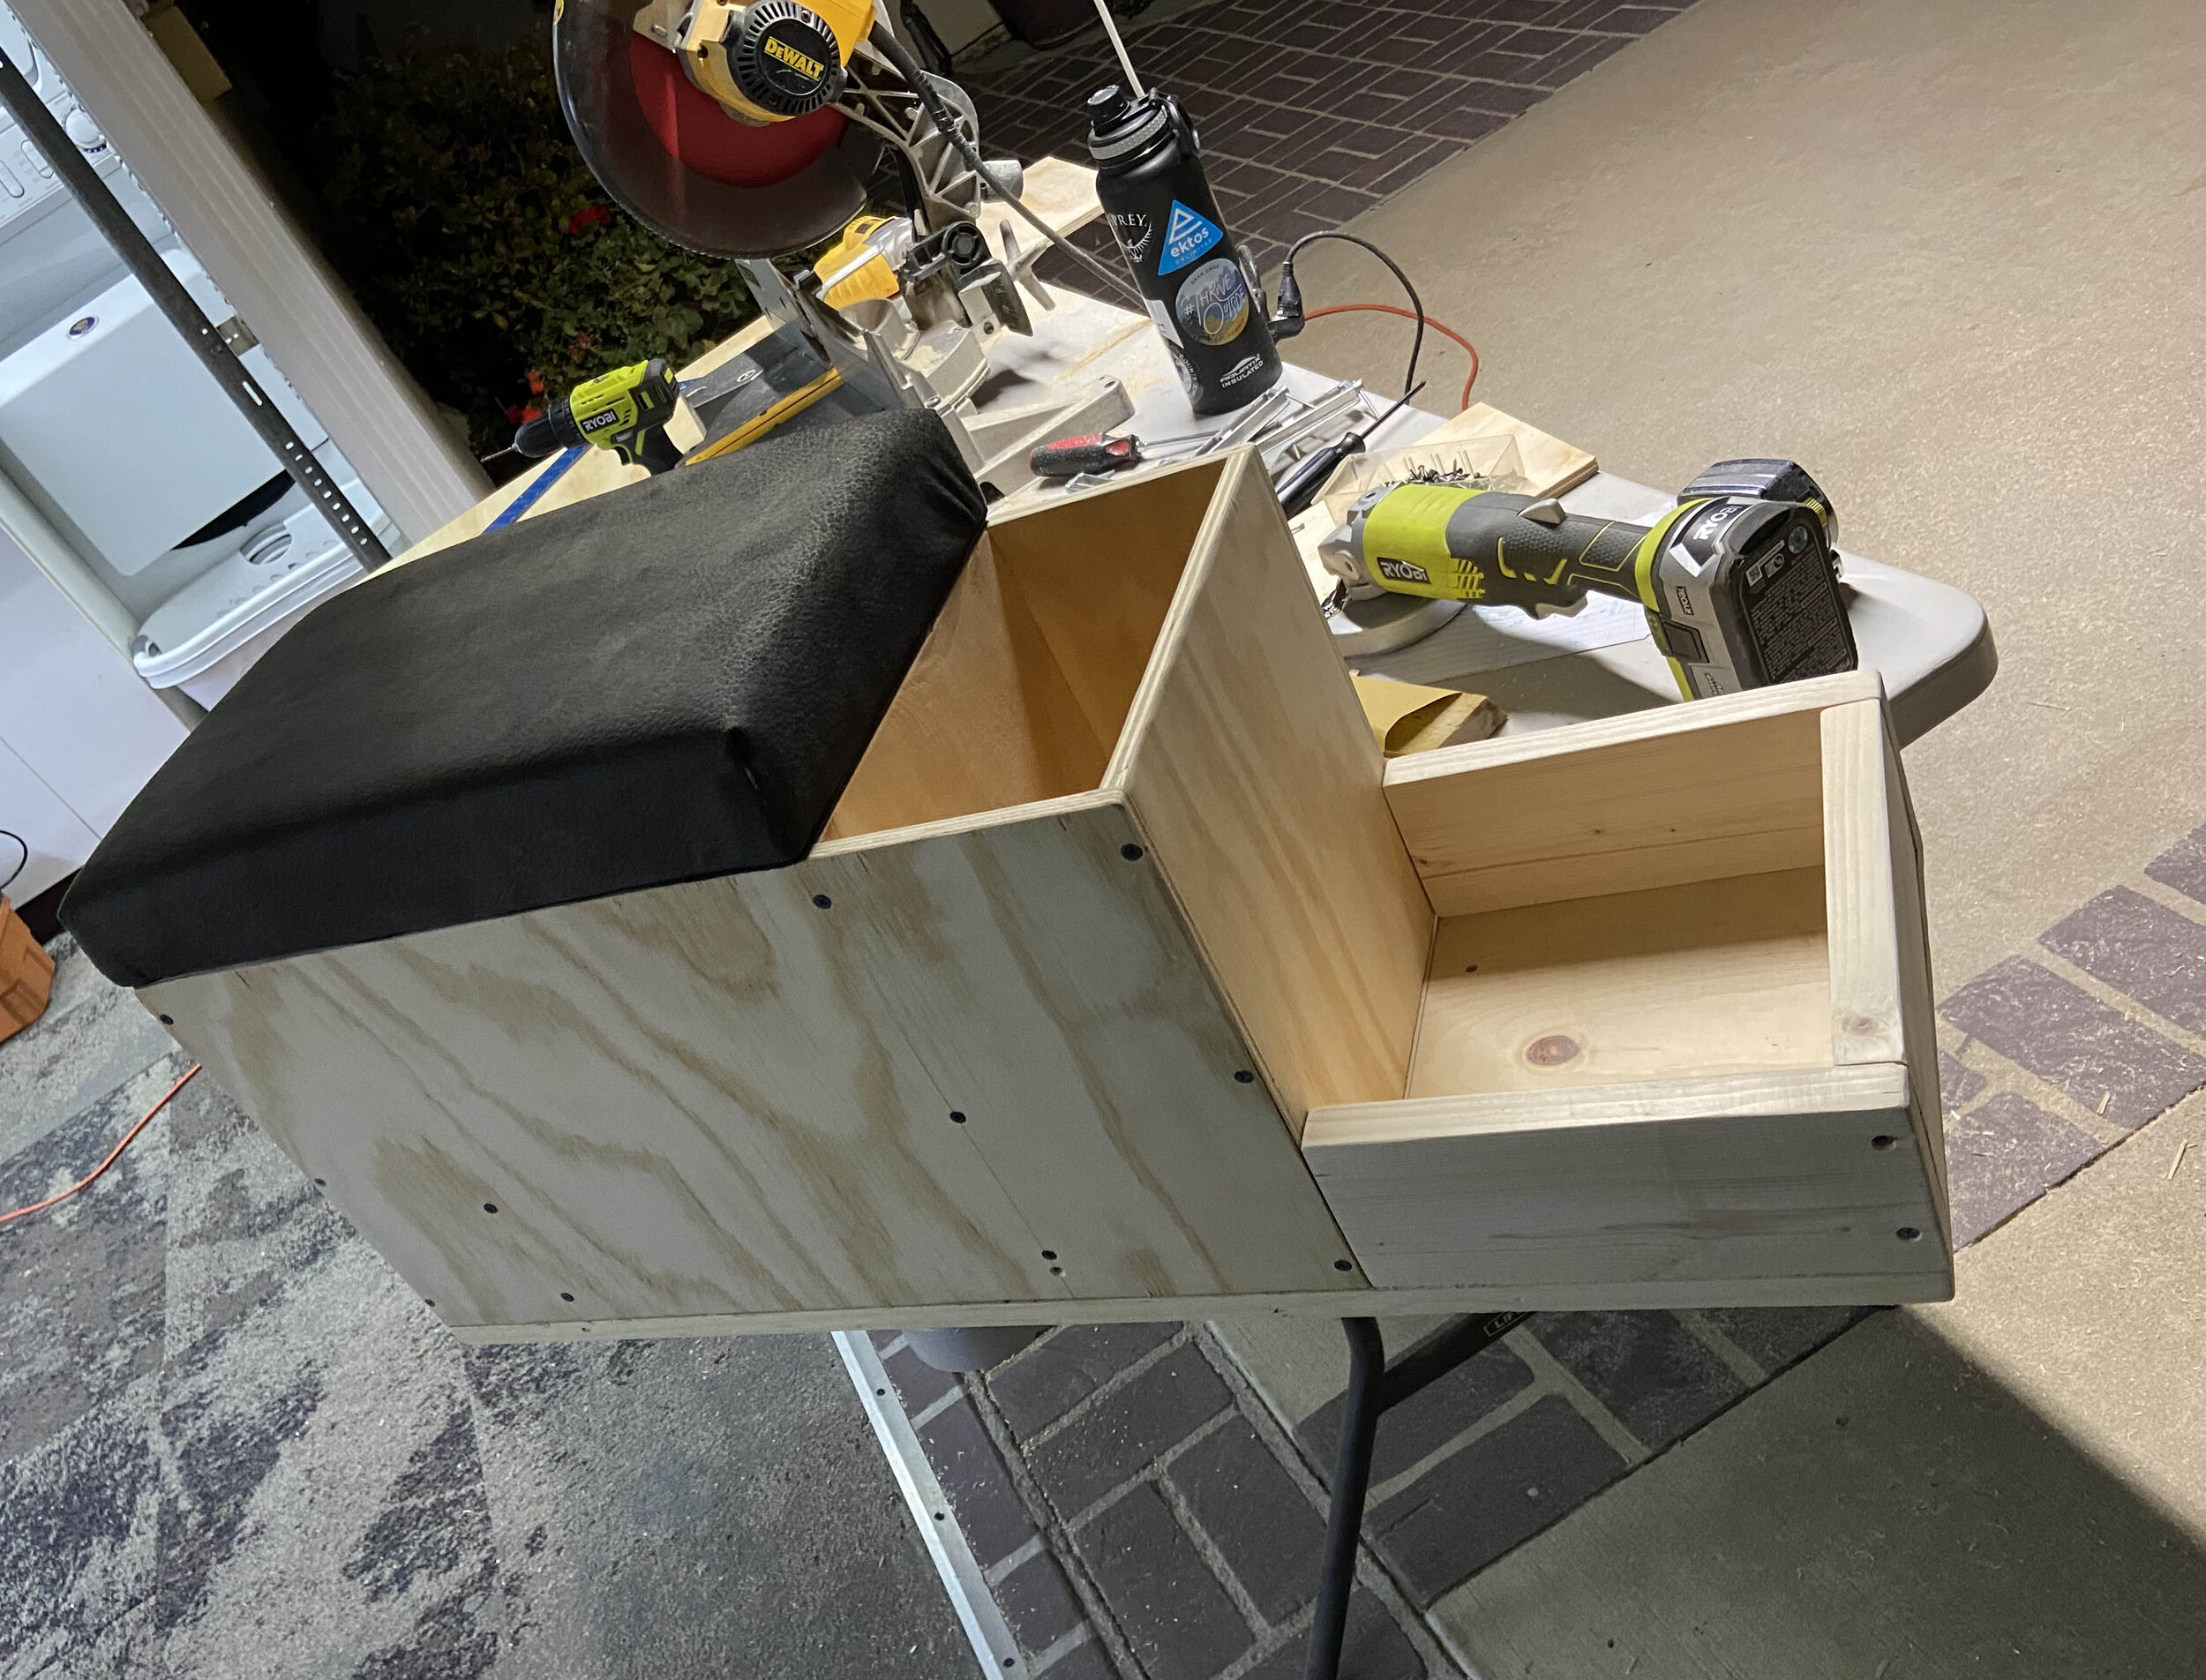
1-1-2021 - Center console that came with the ambulance was a really useless ambulance center console that did not look good either. It did not have enough storage space for what I needed. 2010 F350 factory consoles cost approx. $400-$800. I was able to build one for $160. Materials used were Herculiner, 1/2” birch plywood and polyurethane. The total build time was 1.5 days. Mostly due to having to allow the Herculiner to dry. Below are some photos of the project. The foam used for the armrest was from the rear jumpseat when it was still an ambulance. The material for the armrest was from Joans Fabrics.
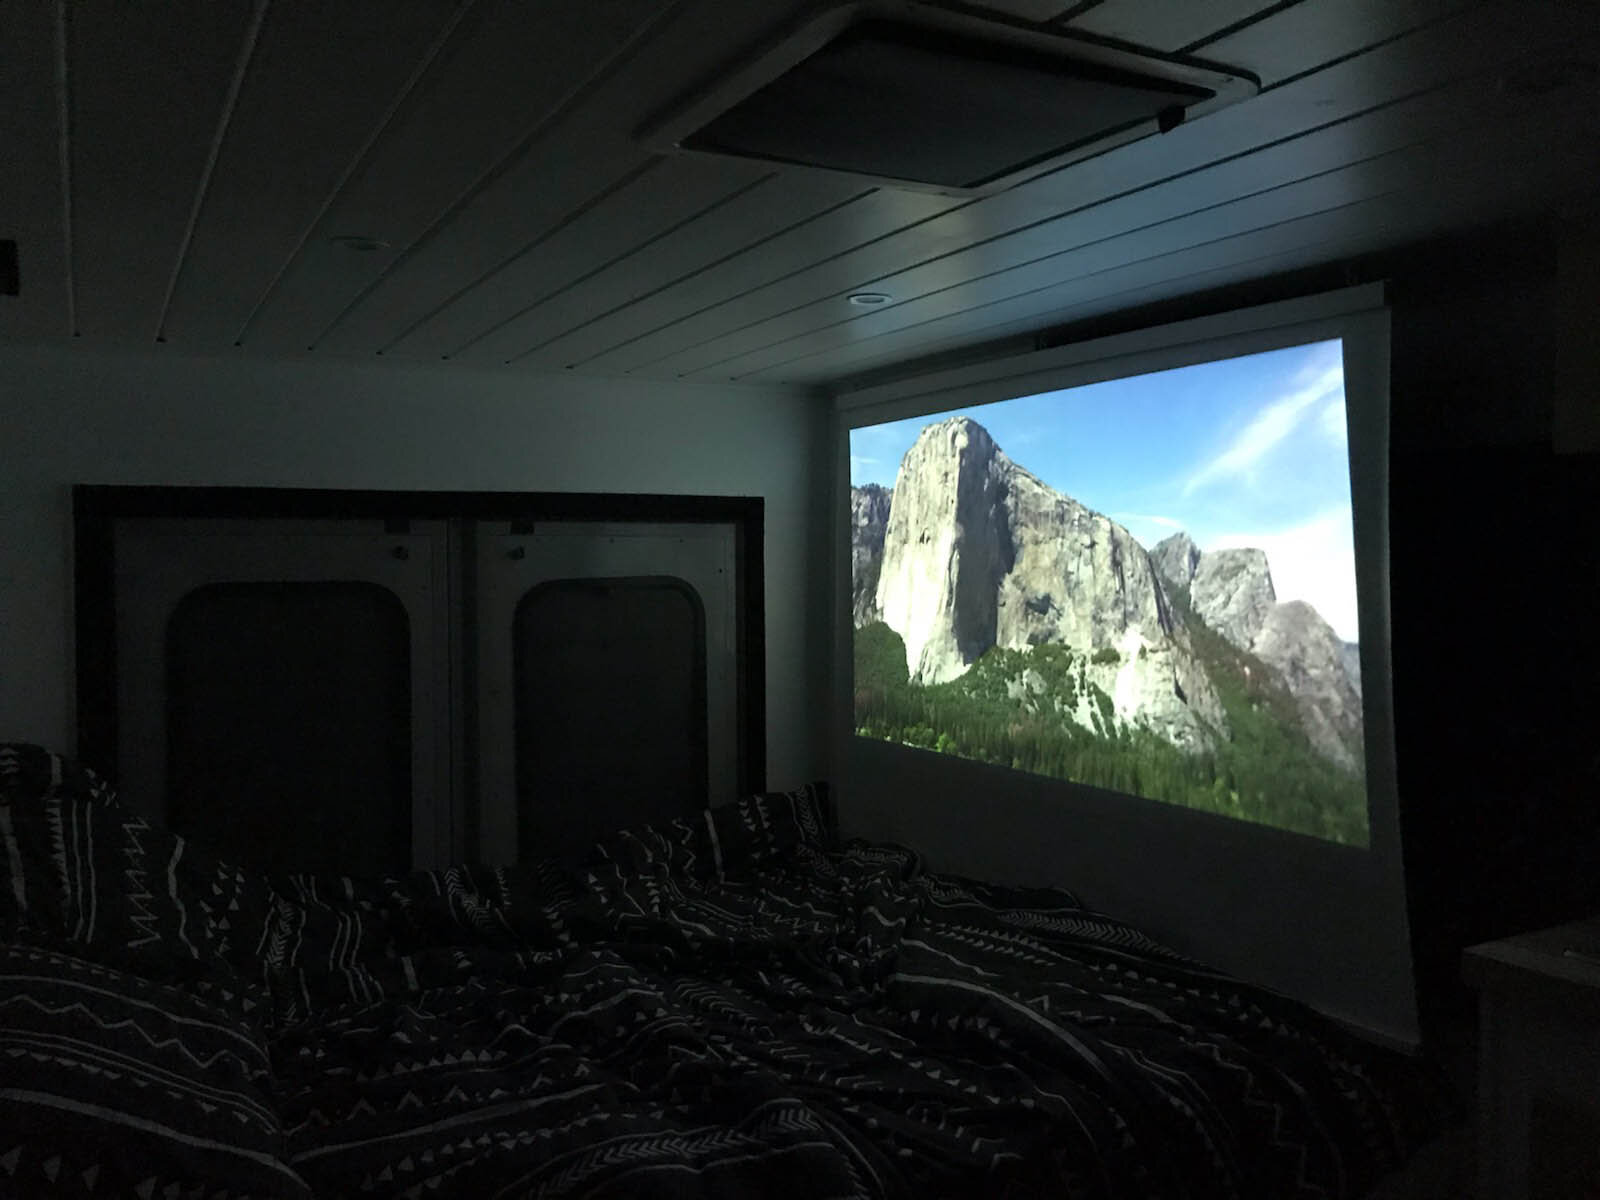
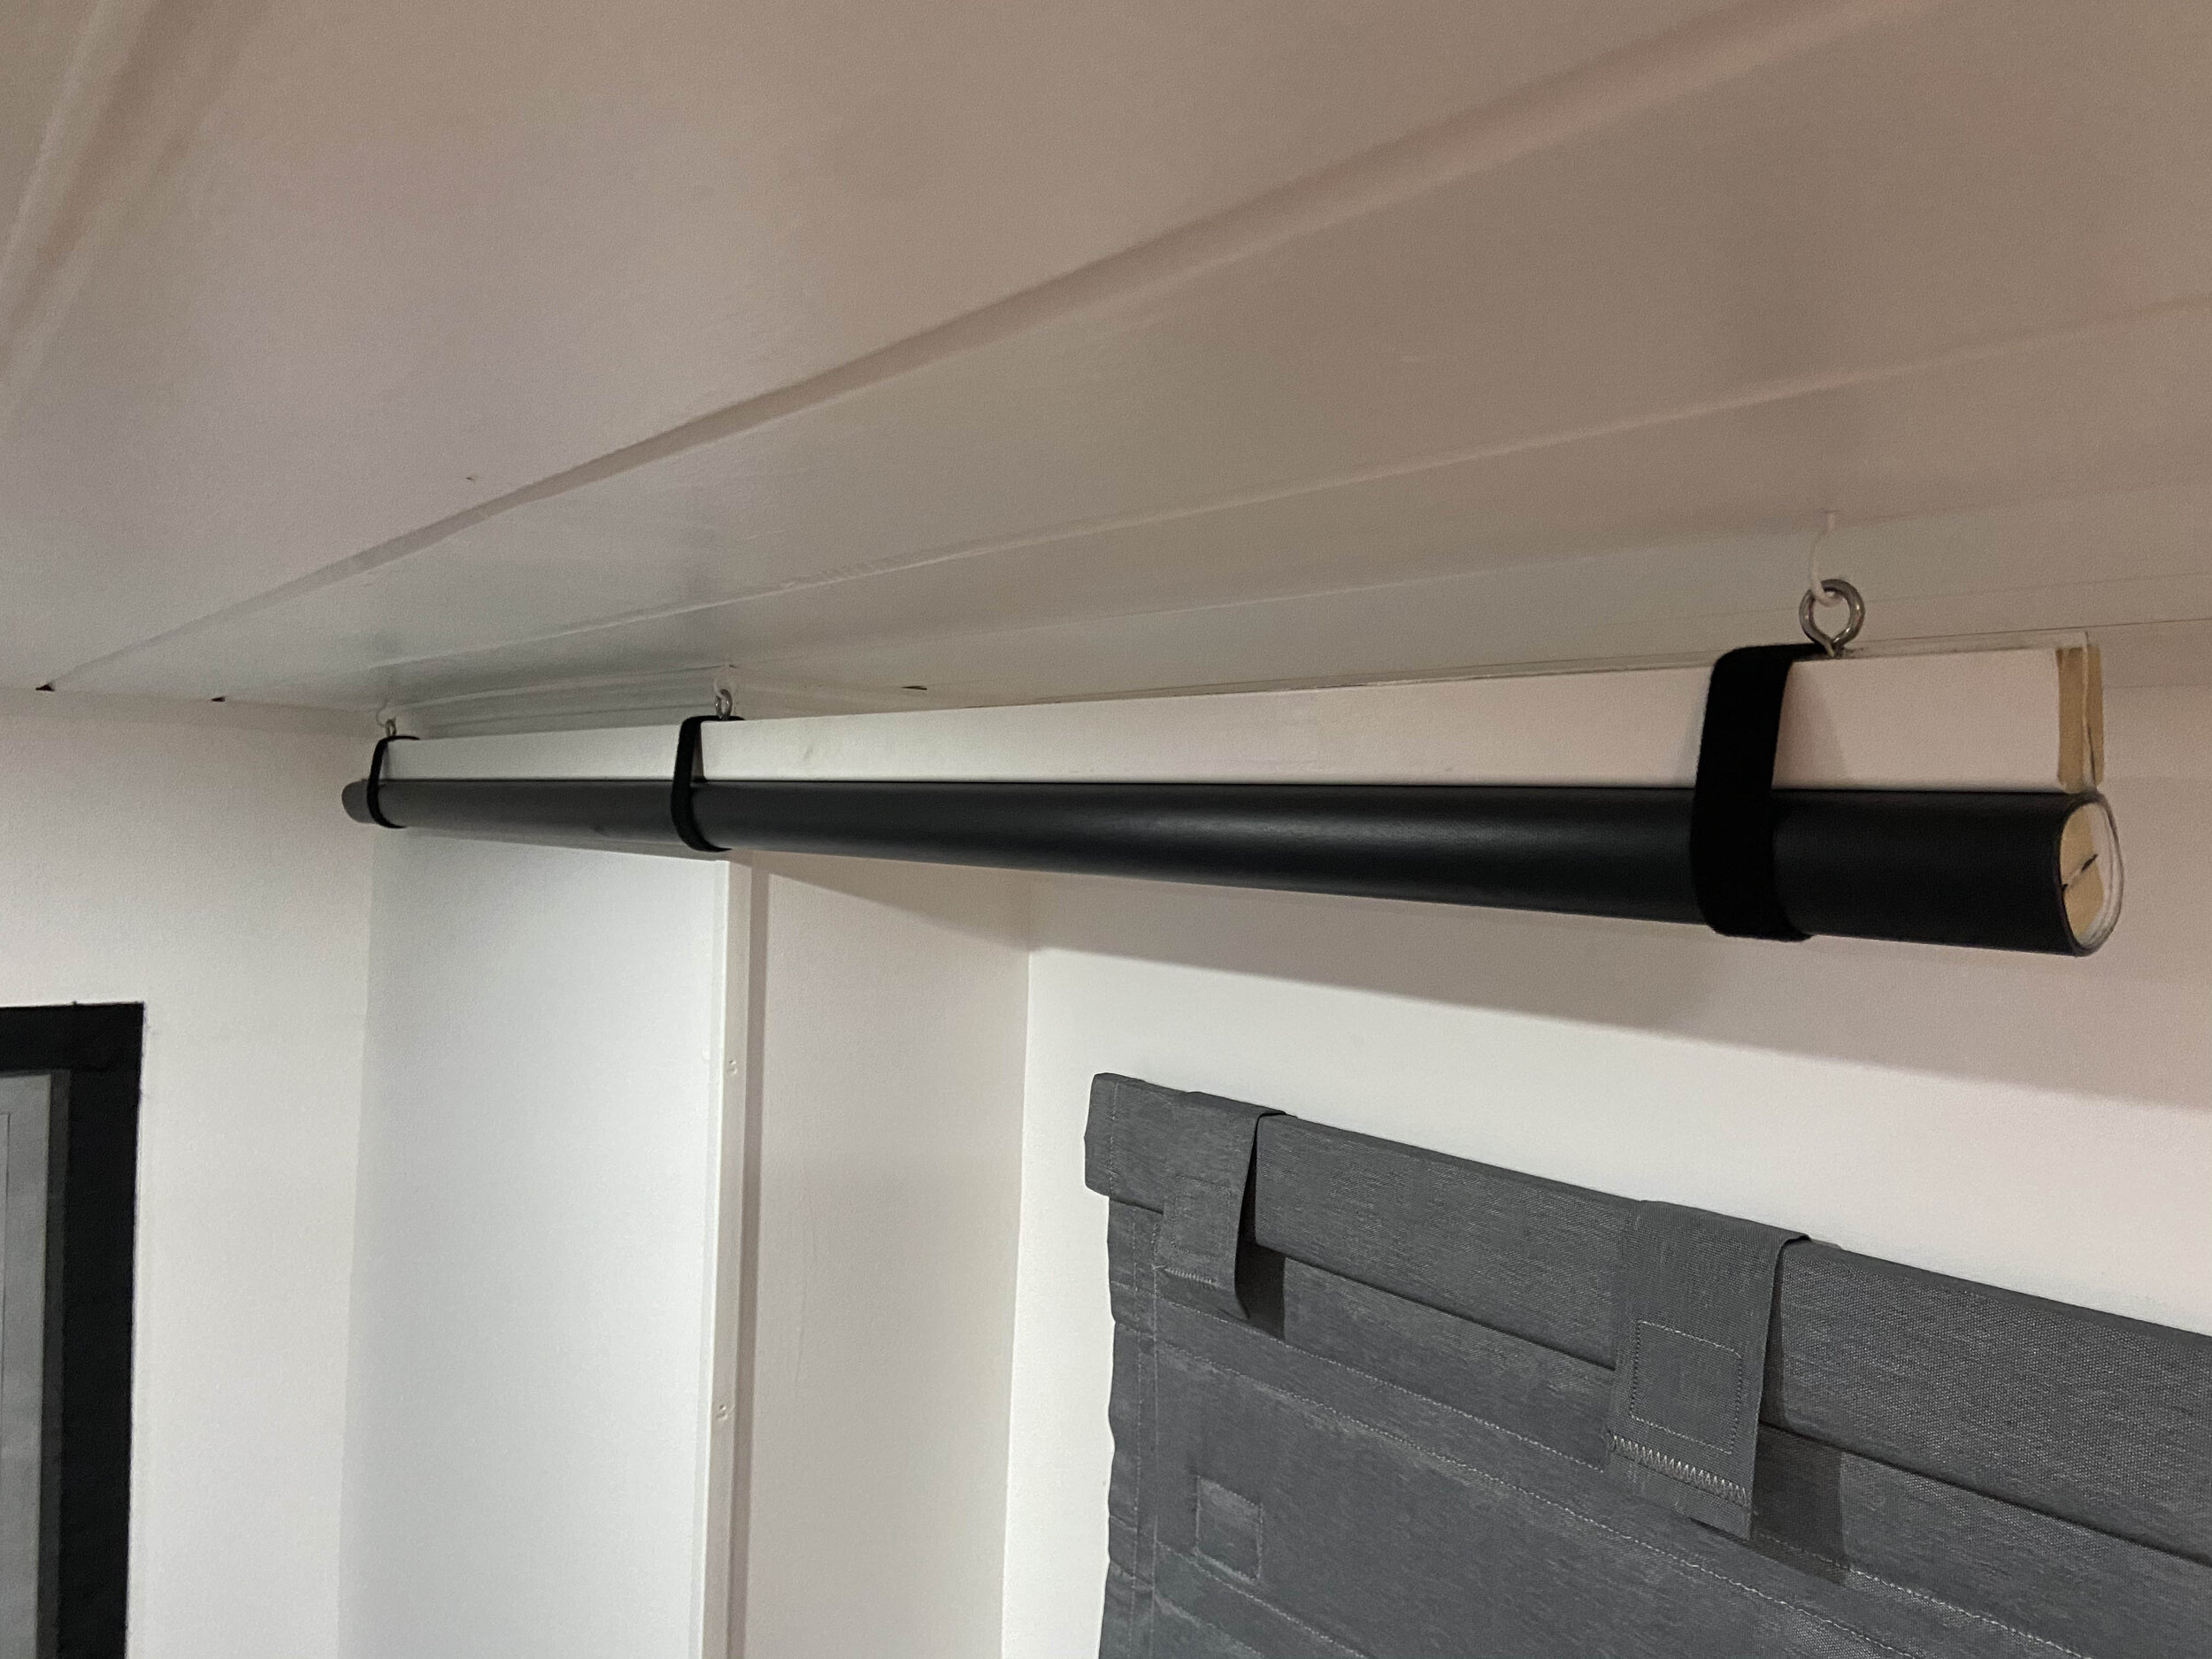
1-3-2021 - I wanted to be able to project movies onto the side of the camper at night. I’ve seen people simply project onto their campers with no screen and the windows, trim etc. just made the movies unwatchable. I took a screen and cut it to a manageable size that could be stored in the tall compartment. Came out to about a 130” size screen. We used (2) pieces 1/8th” by 2” plastic moulding, glued and sandwiched the screen and followed that with 1/2” screws to secure the screen.
In order to hold the screen down and weight it down we used 1/4” plastic moulding on the bottom. Same “sandwich” method was used here too. The screen is held up by adding (3) 1” rubber coated metal hooks. These hook onto the rain gutter at the top of the camper. Costs were the hooks and plastic moulding. Total was about $14. The screen was free.
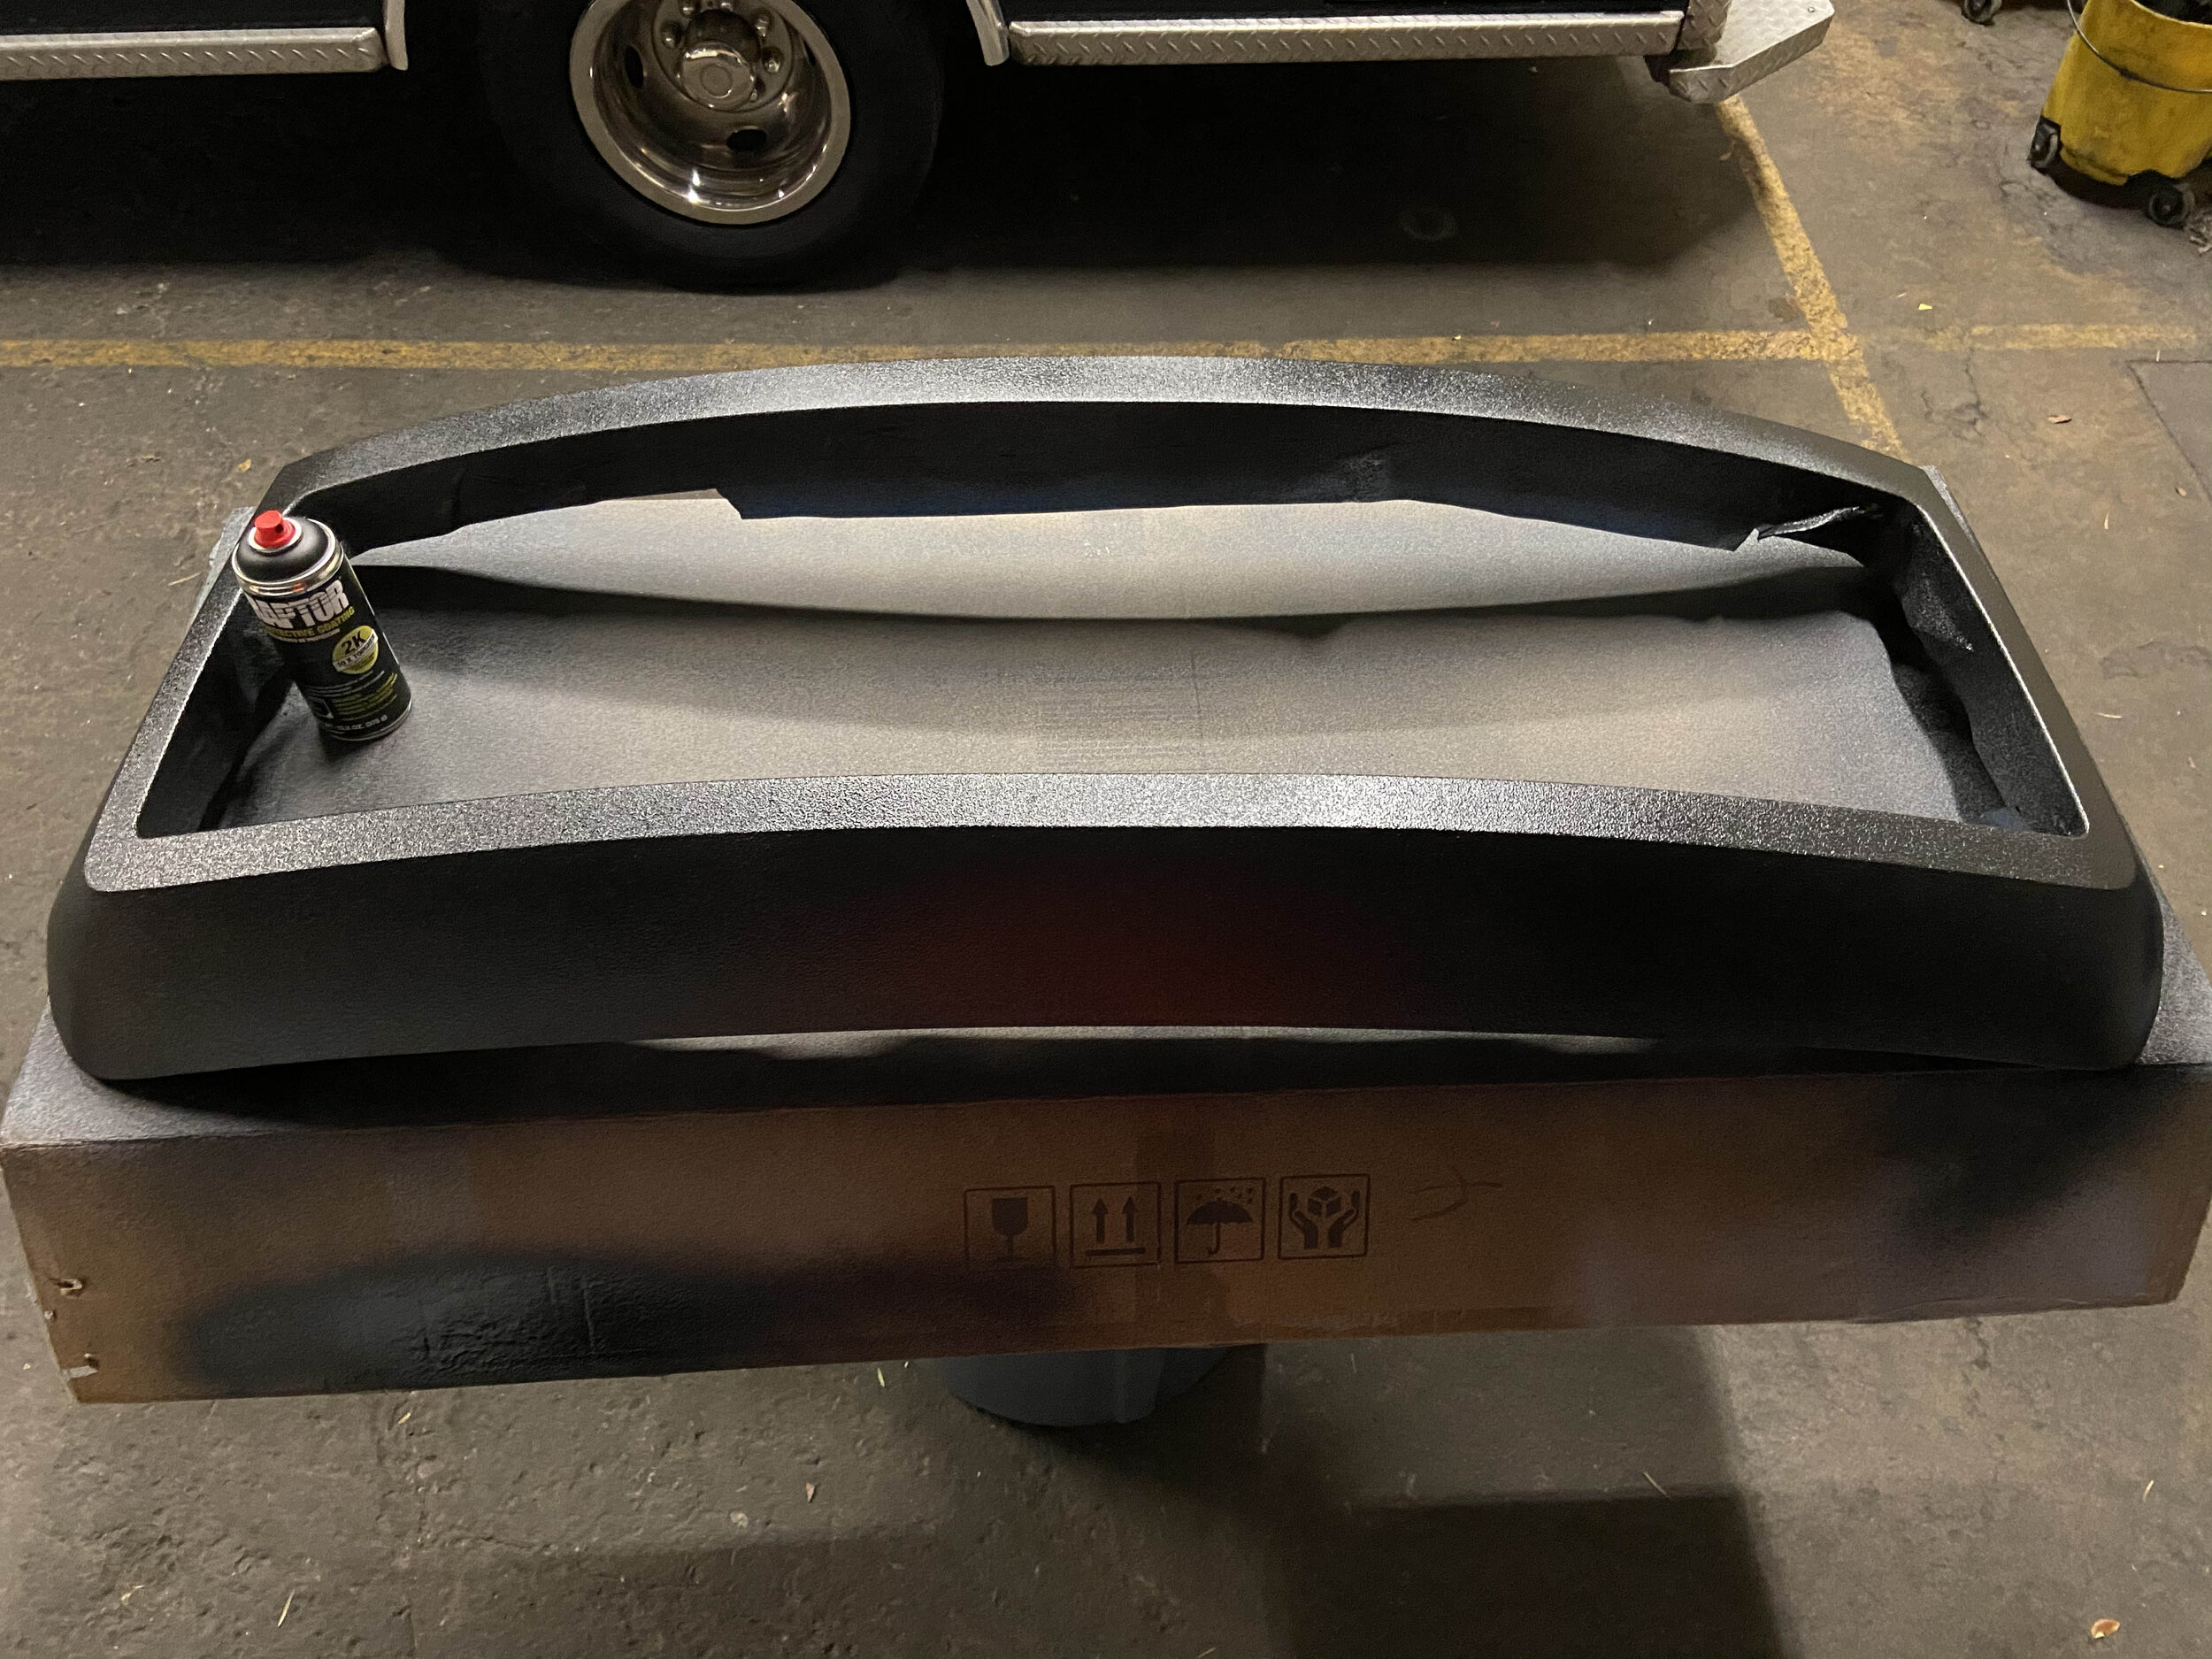
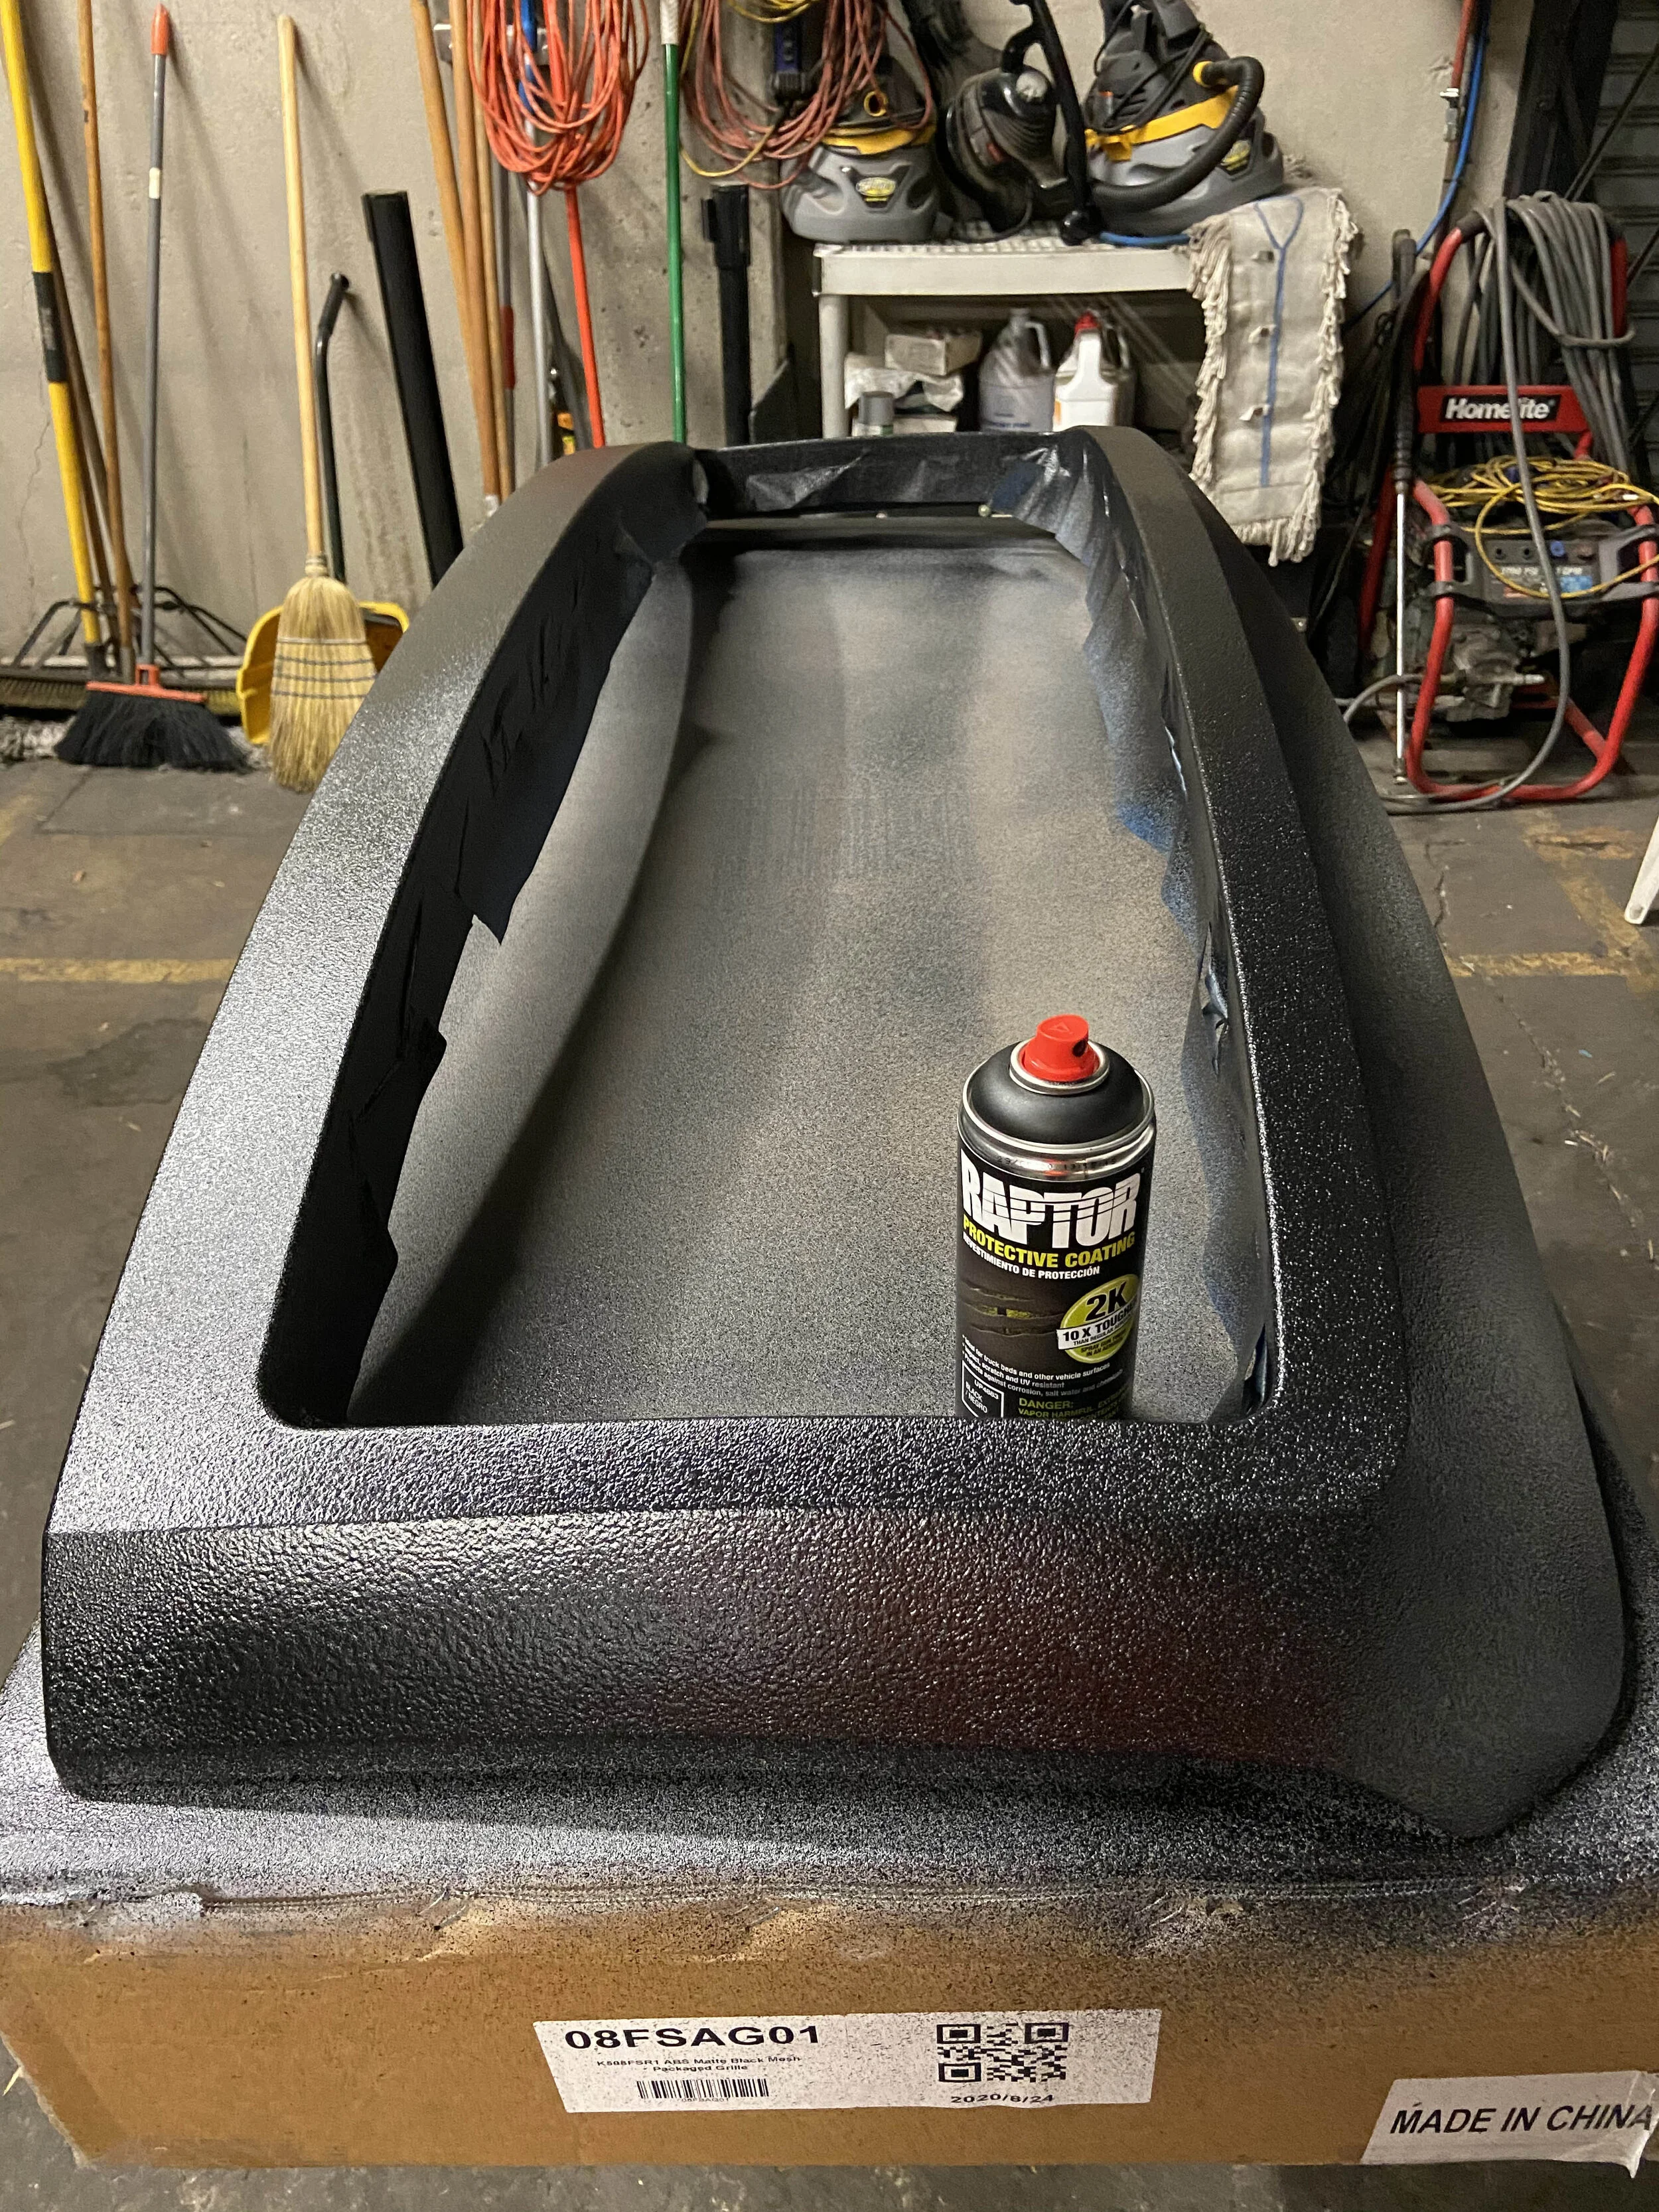
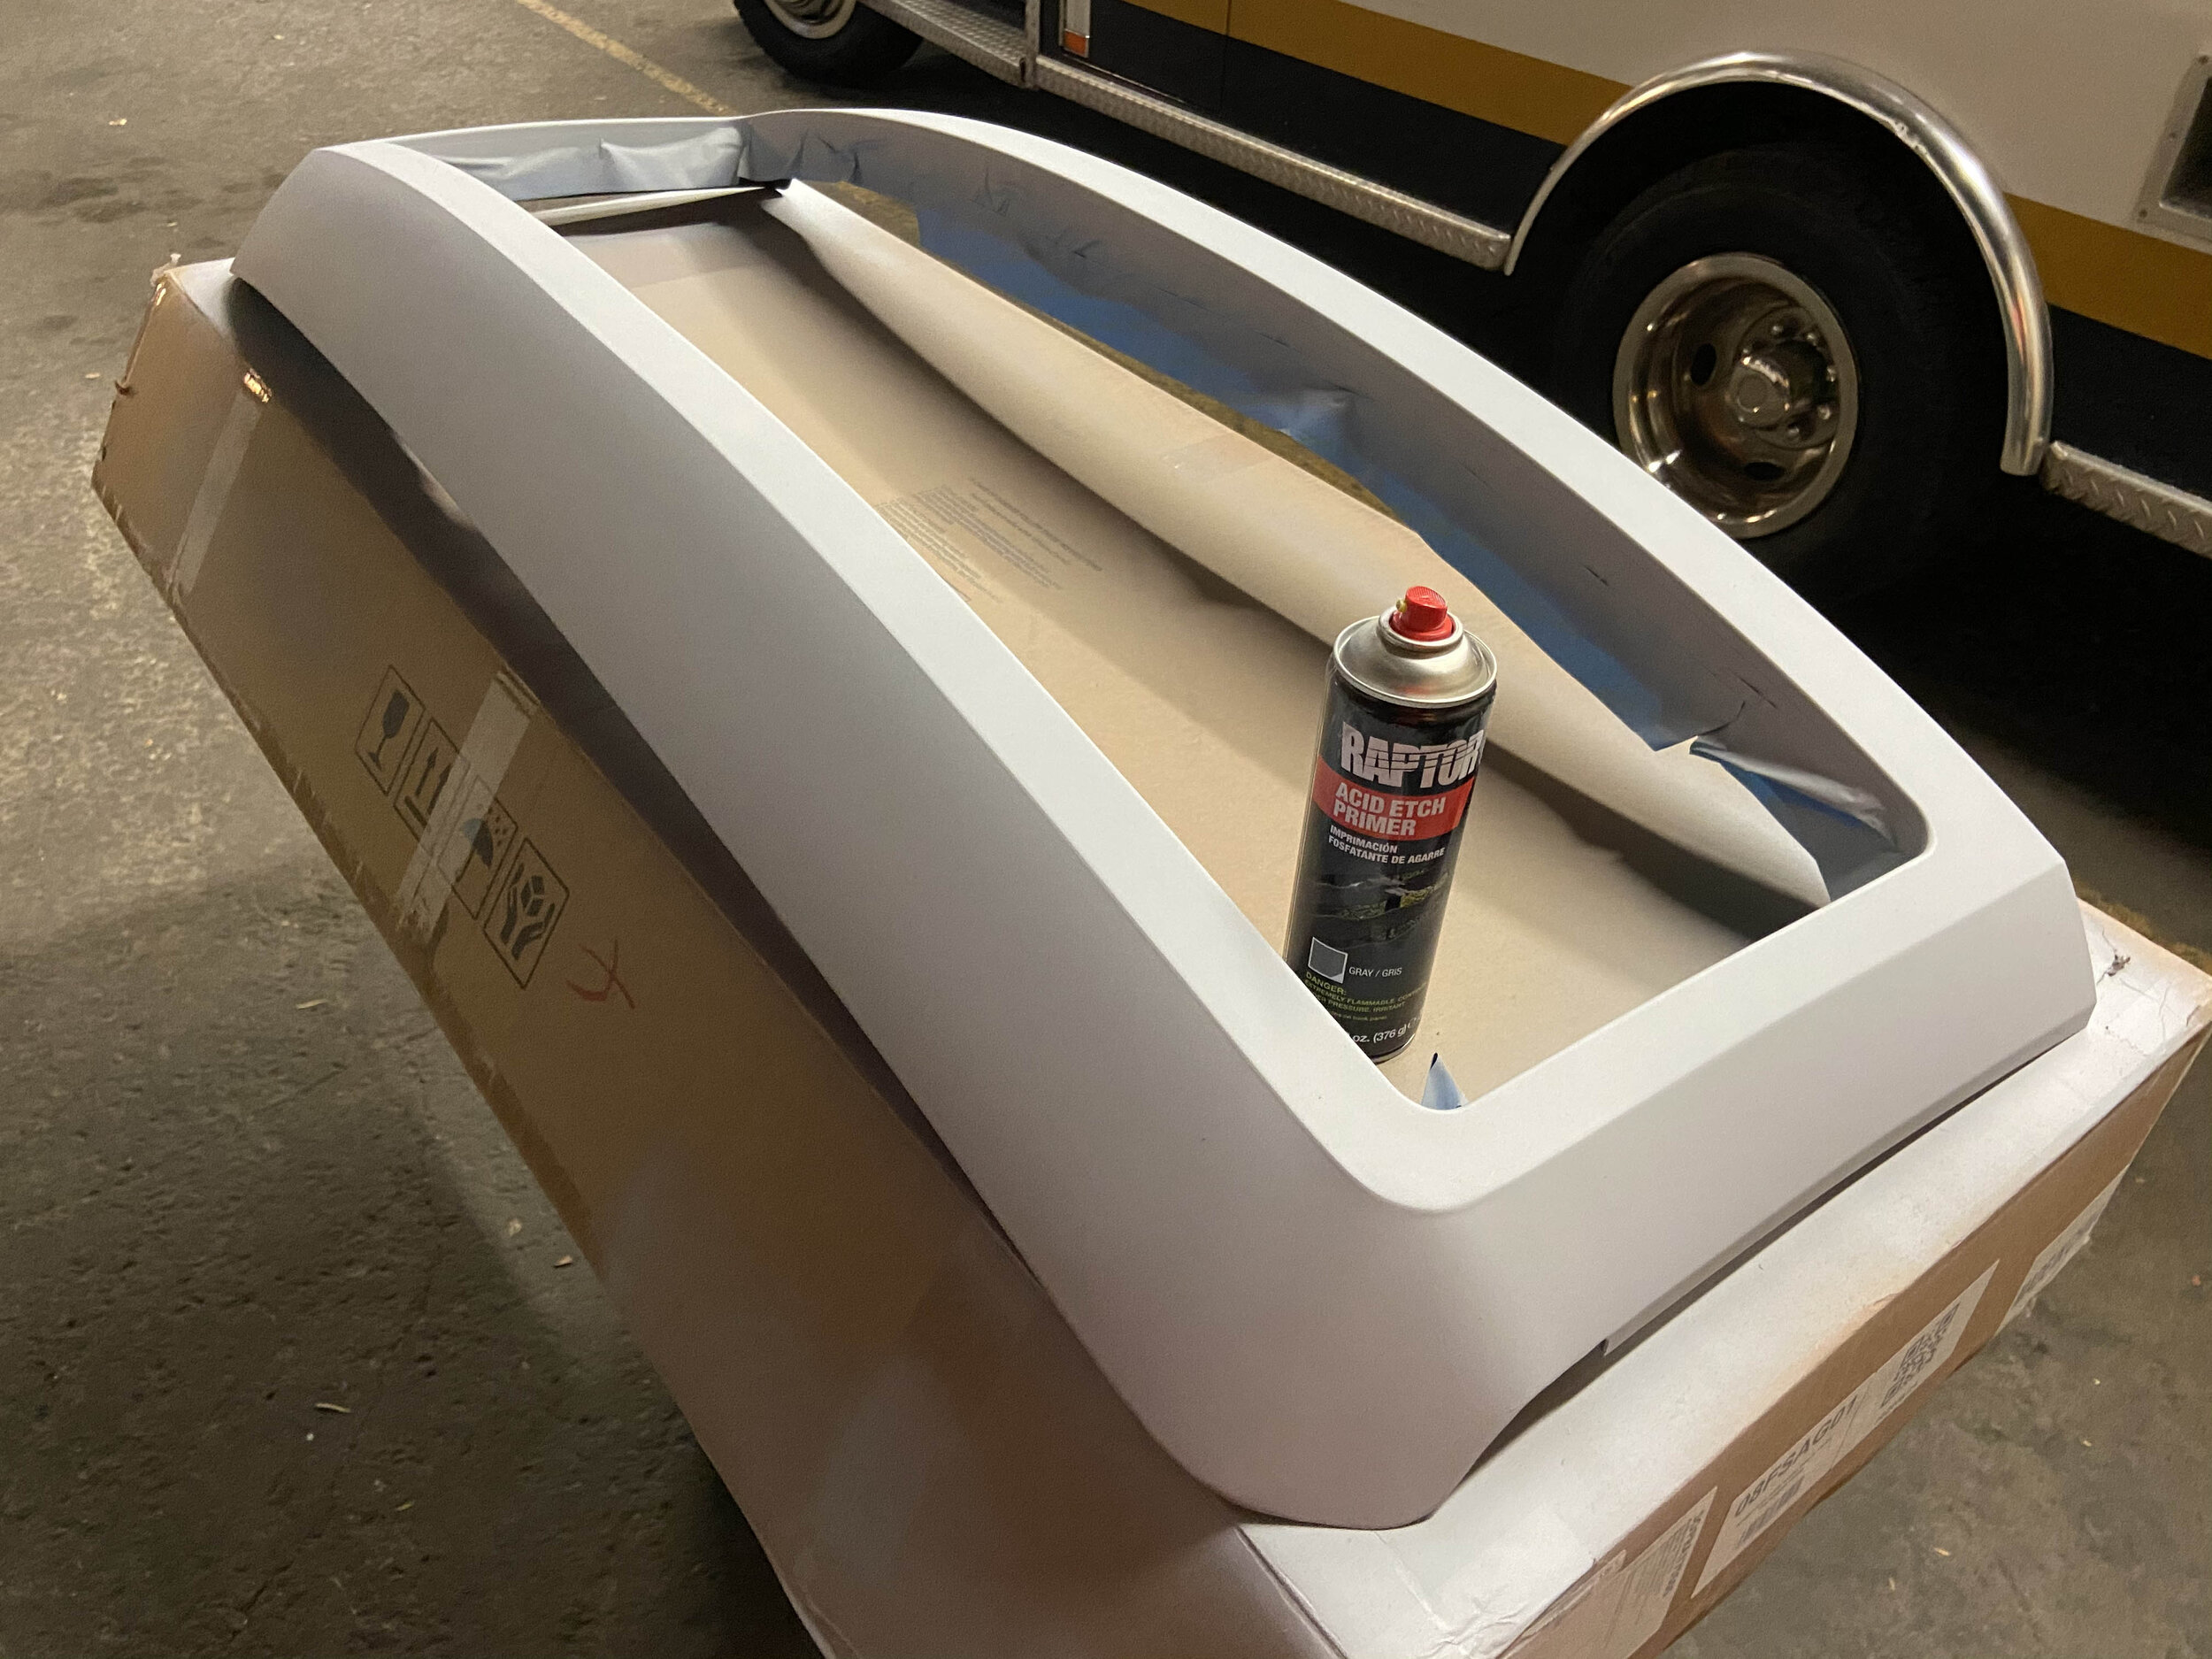
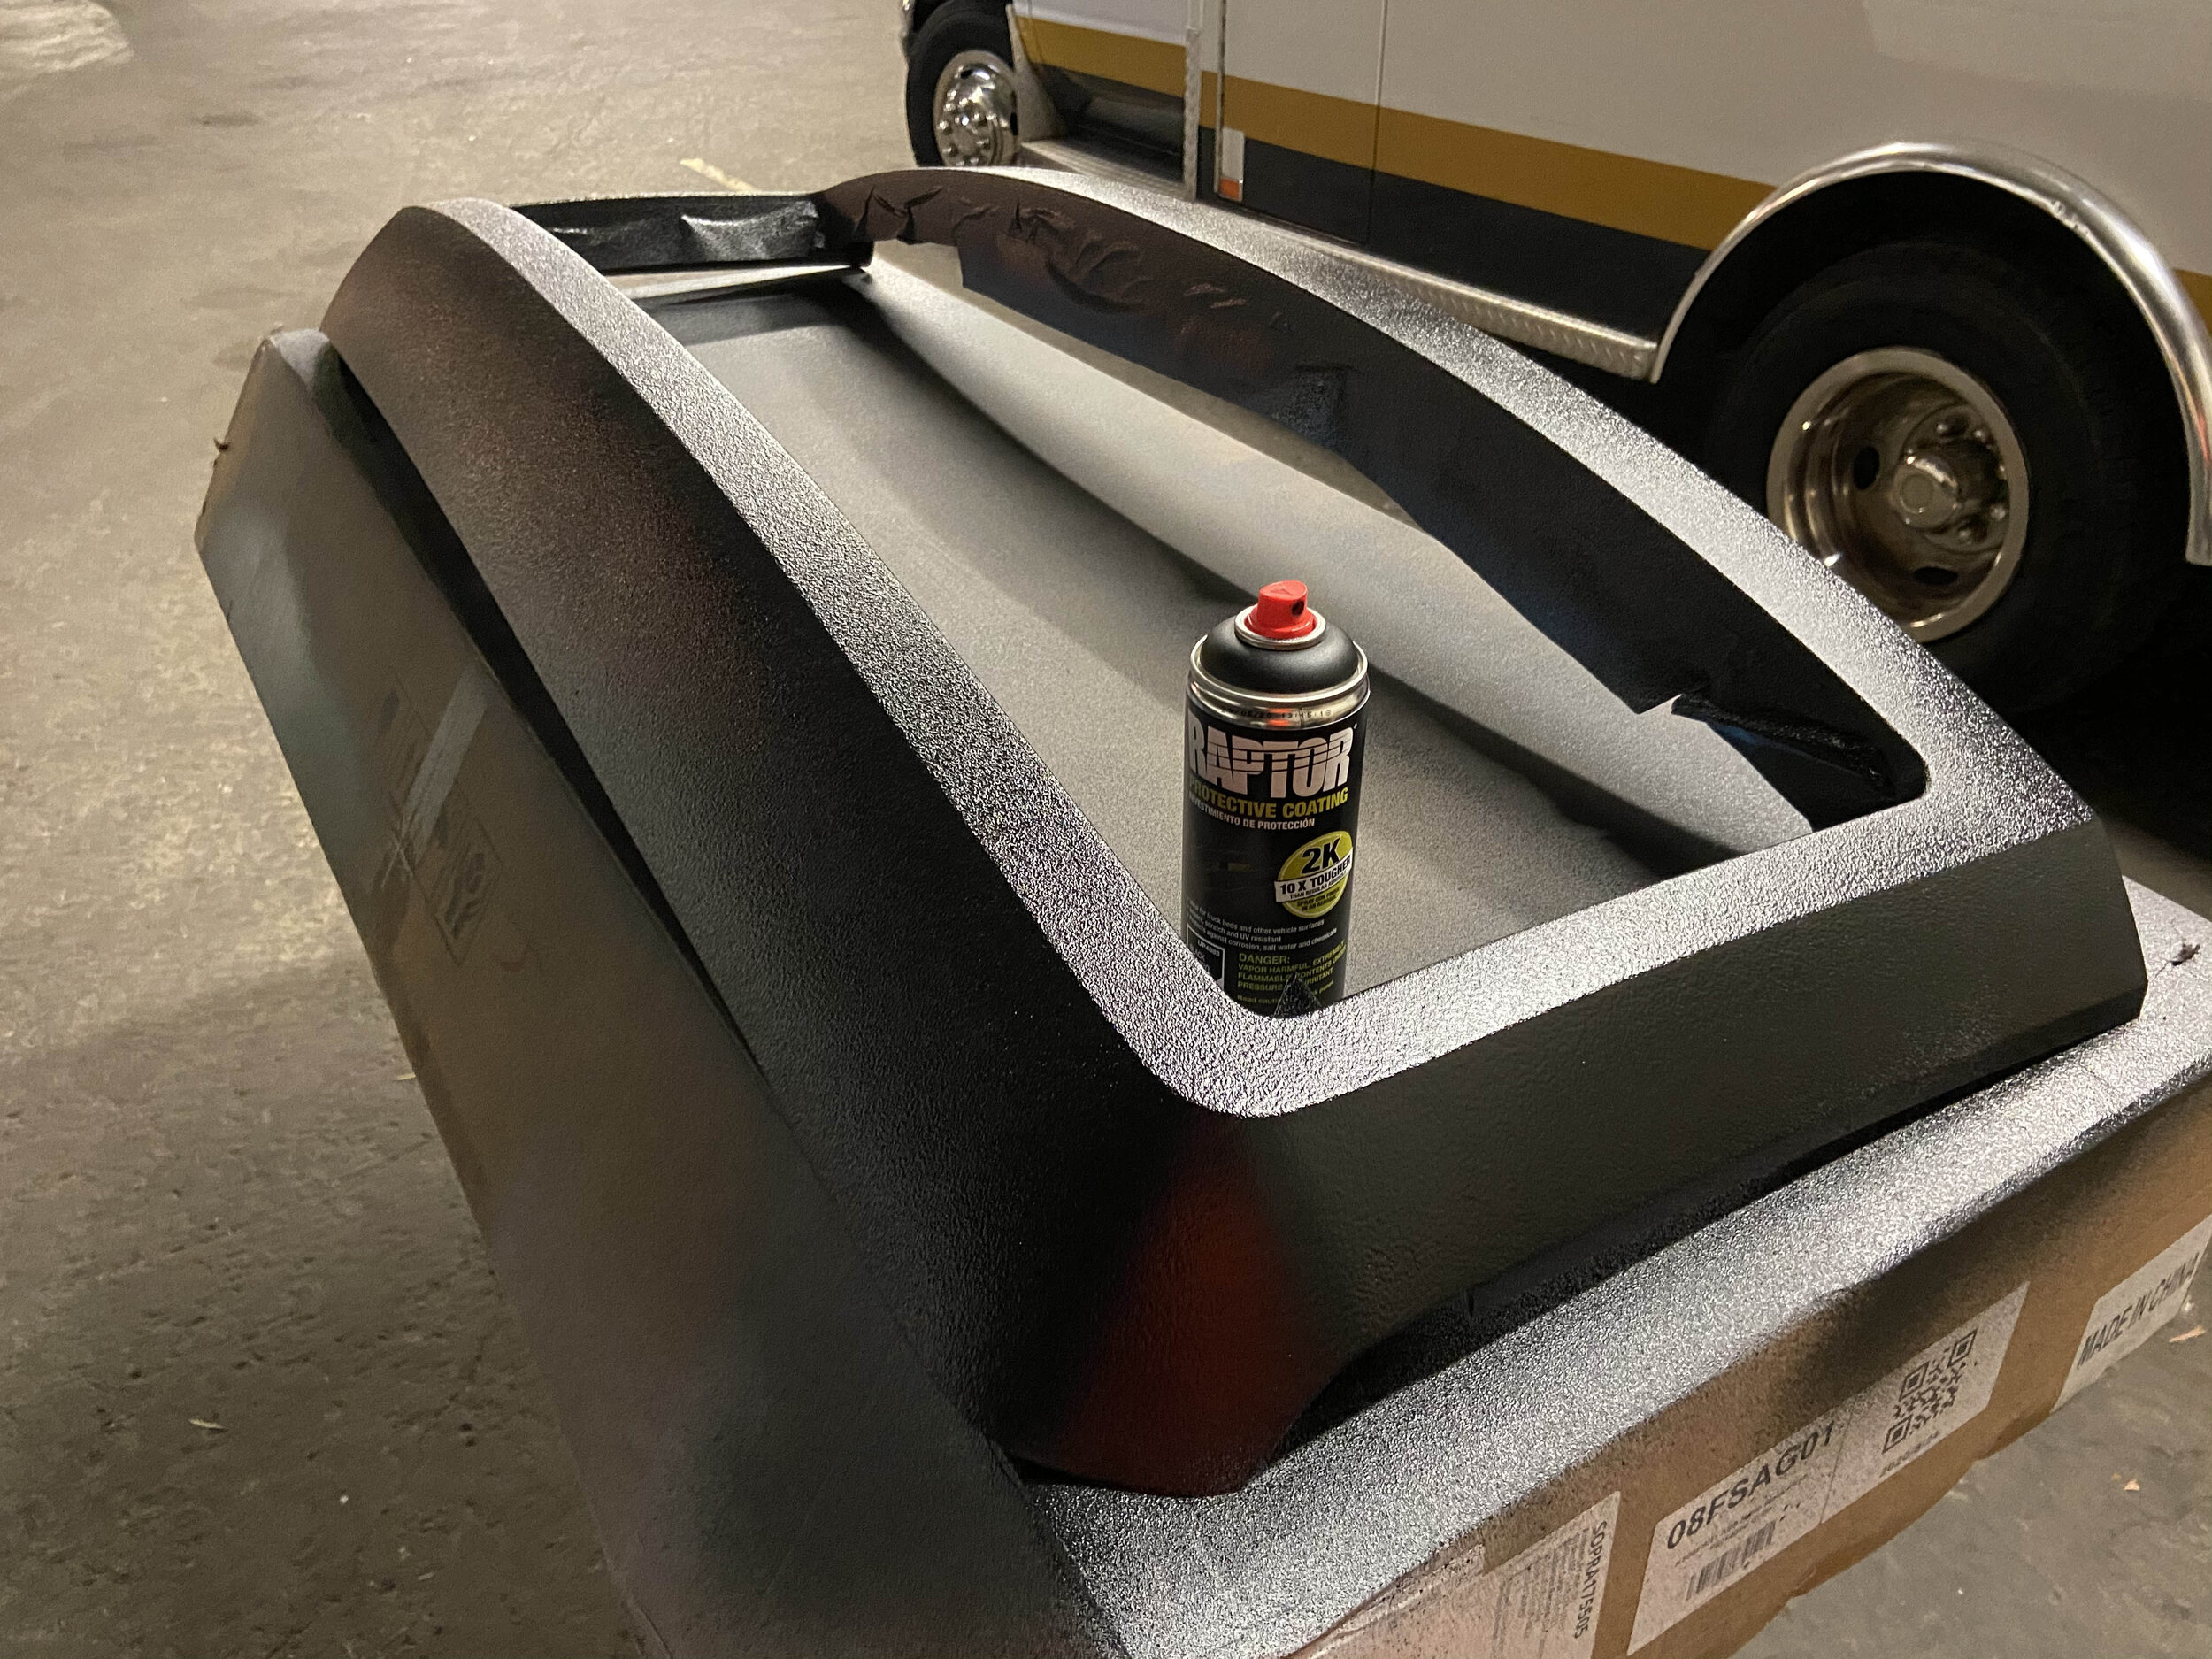
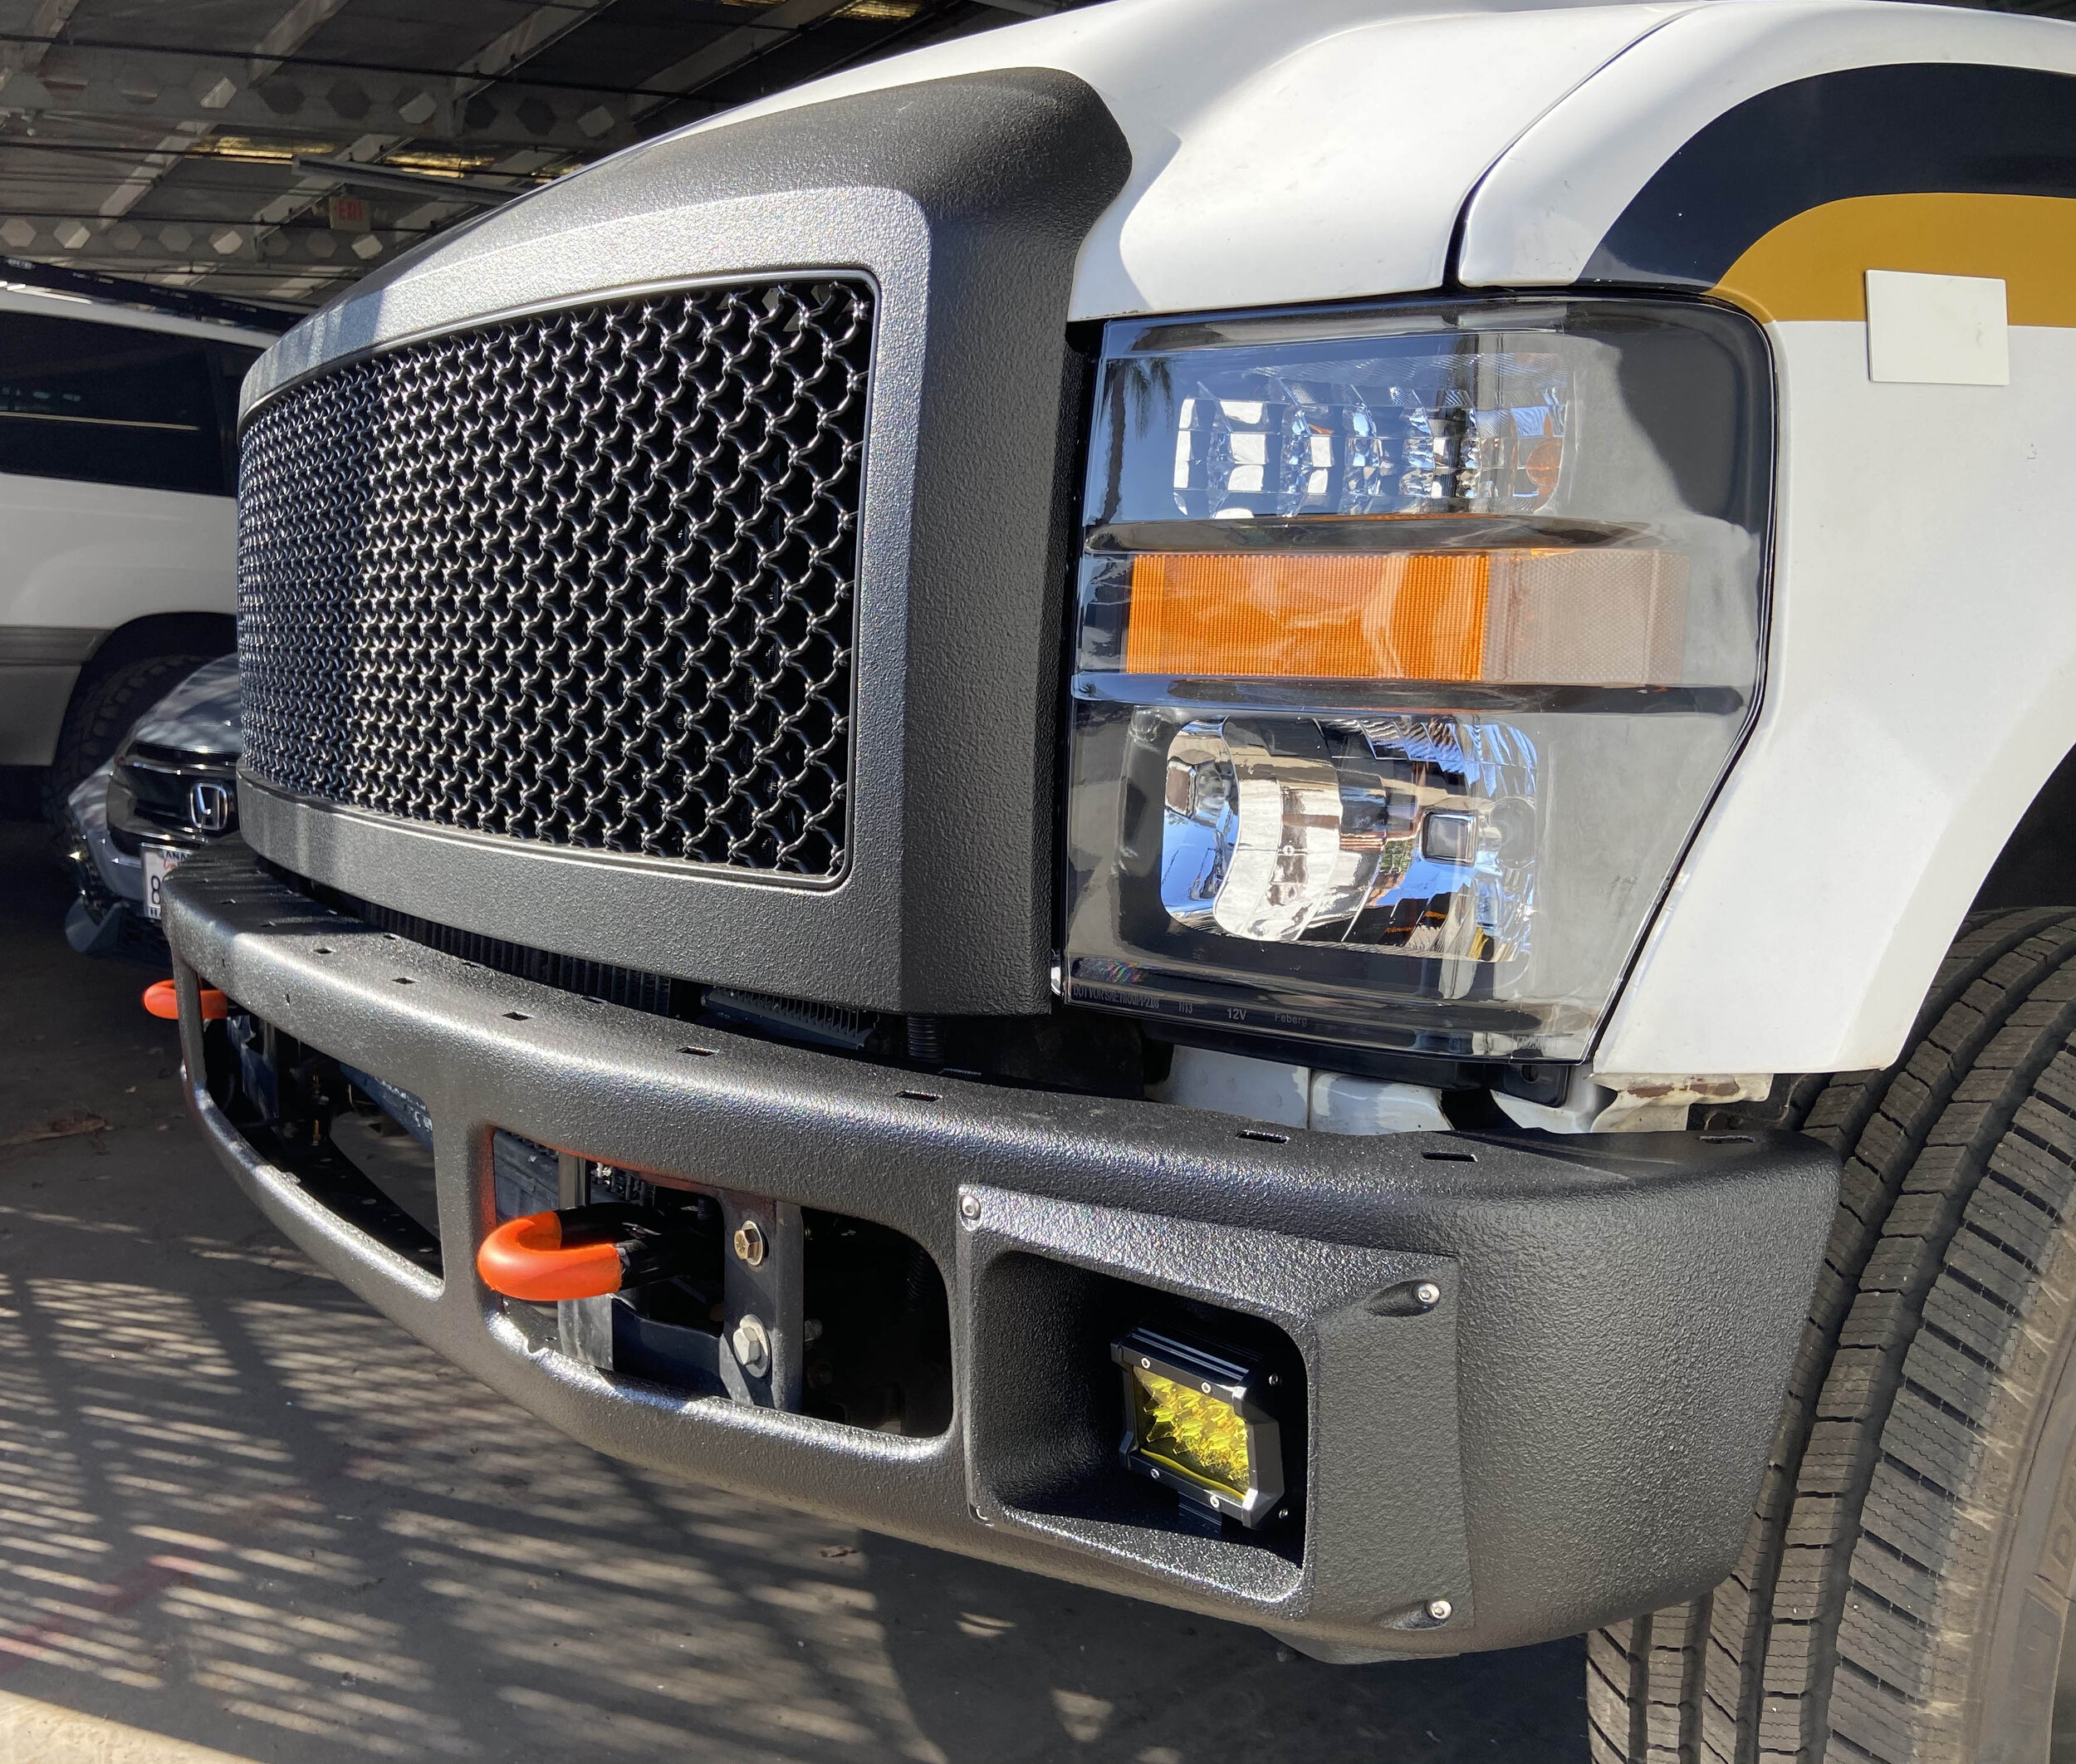
1-5-2021 - I purchased a new grill on amazon for $160. It was unfinished and ready for paint. I decided to try Raptor Liner. It took (2) cans at $38 each for two full coats. I used the UPol etching primer to prep the surface along with 300 grit sandpaper so that the primer and Raptor Liner had a surface to adhere to. Below are a few photos of the process. I gave the Raptor Liner 72 hours to cure before I moved the grill. I taped off the interior portion of the grill prior to painting the surface. I have to say the finished product came out awesome. It’s as advertised. A really great product.

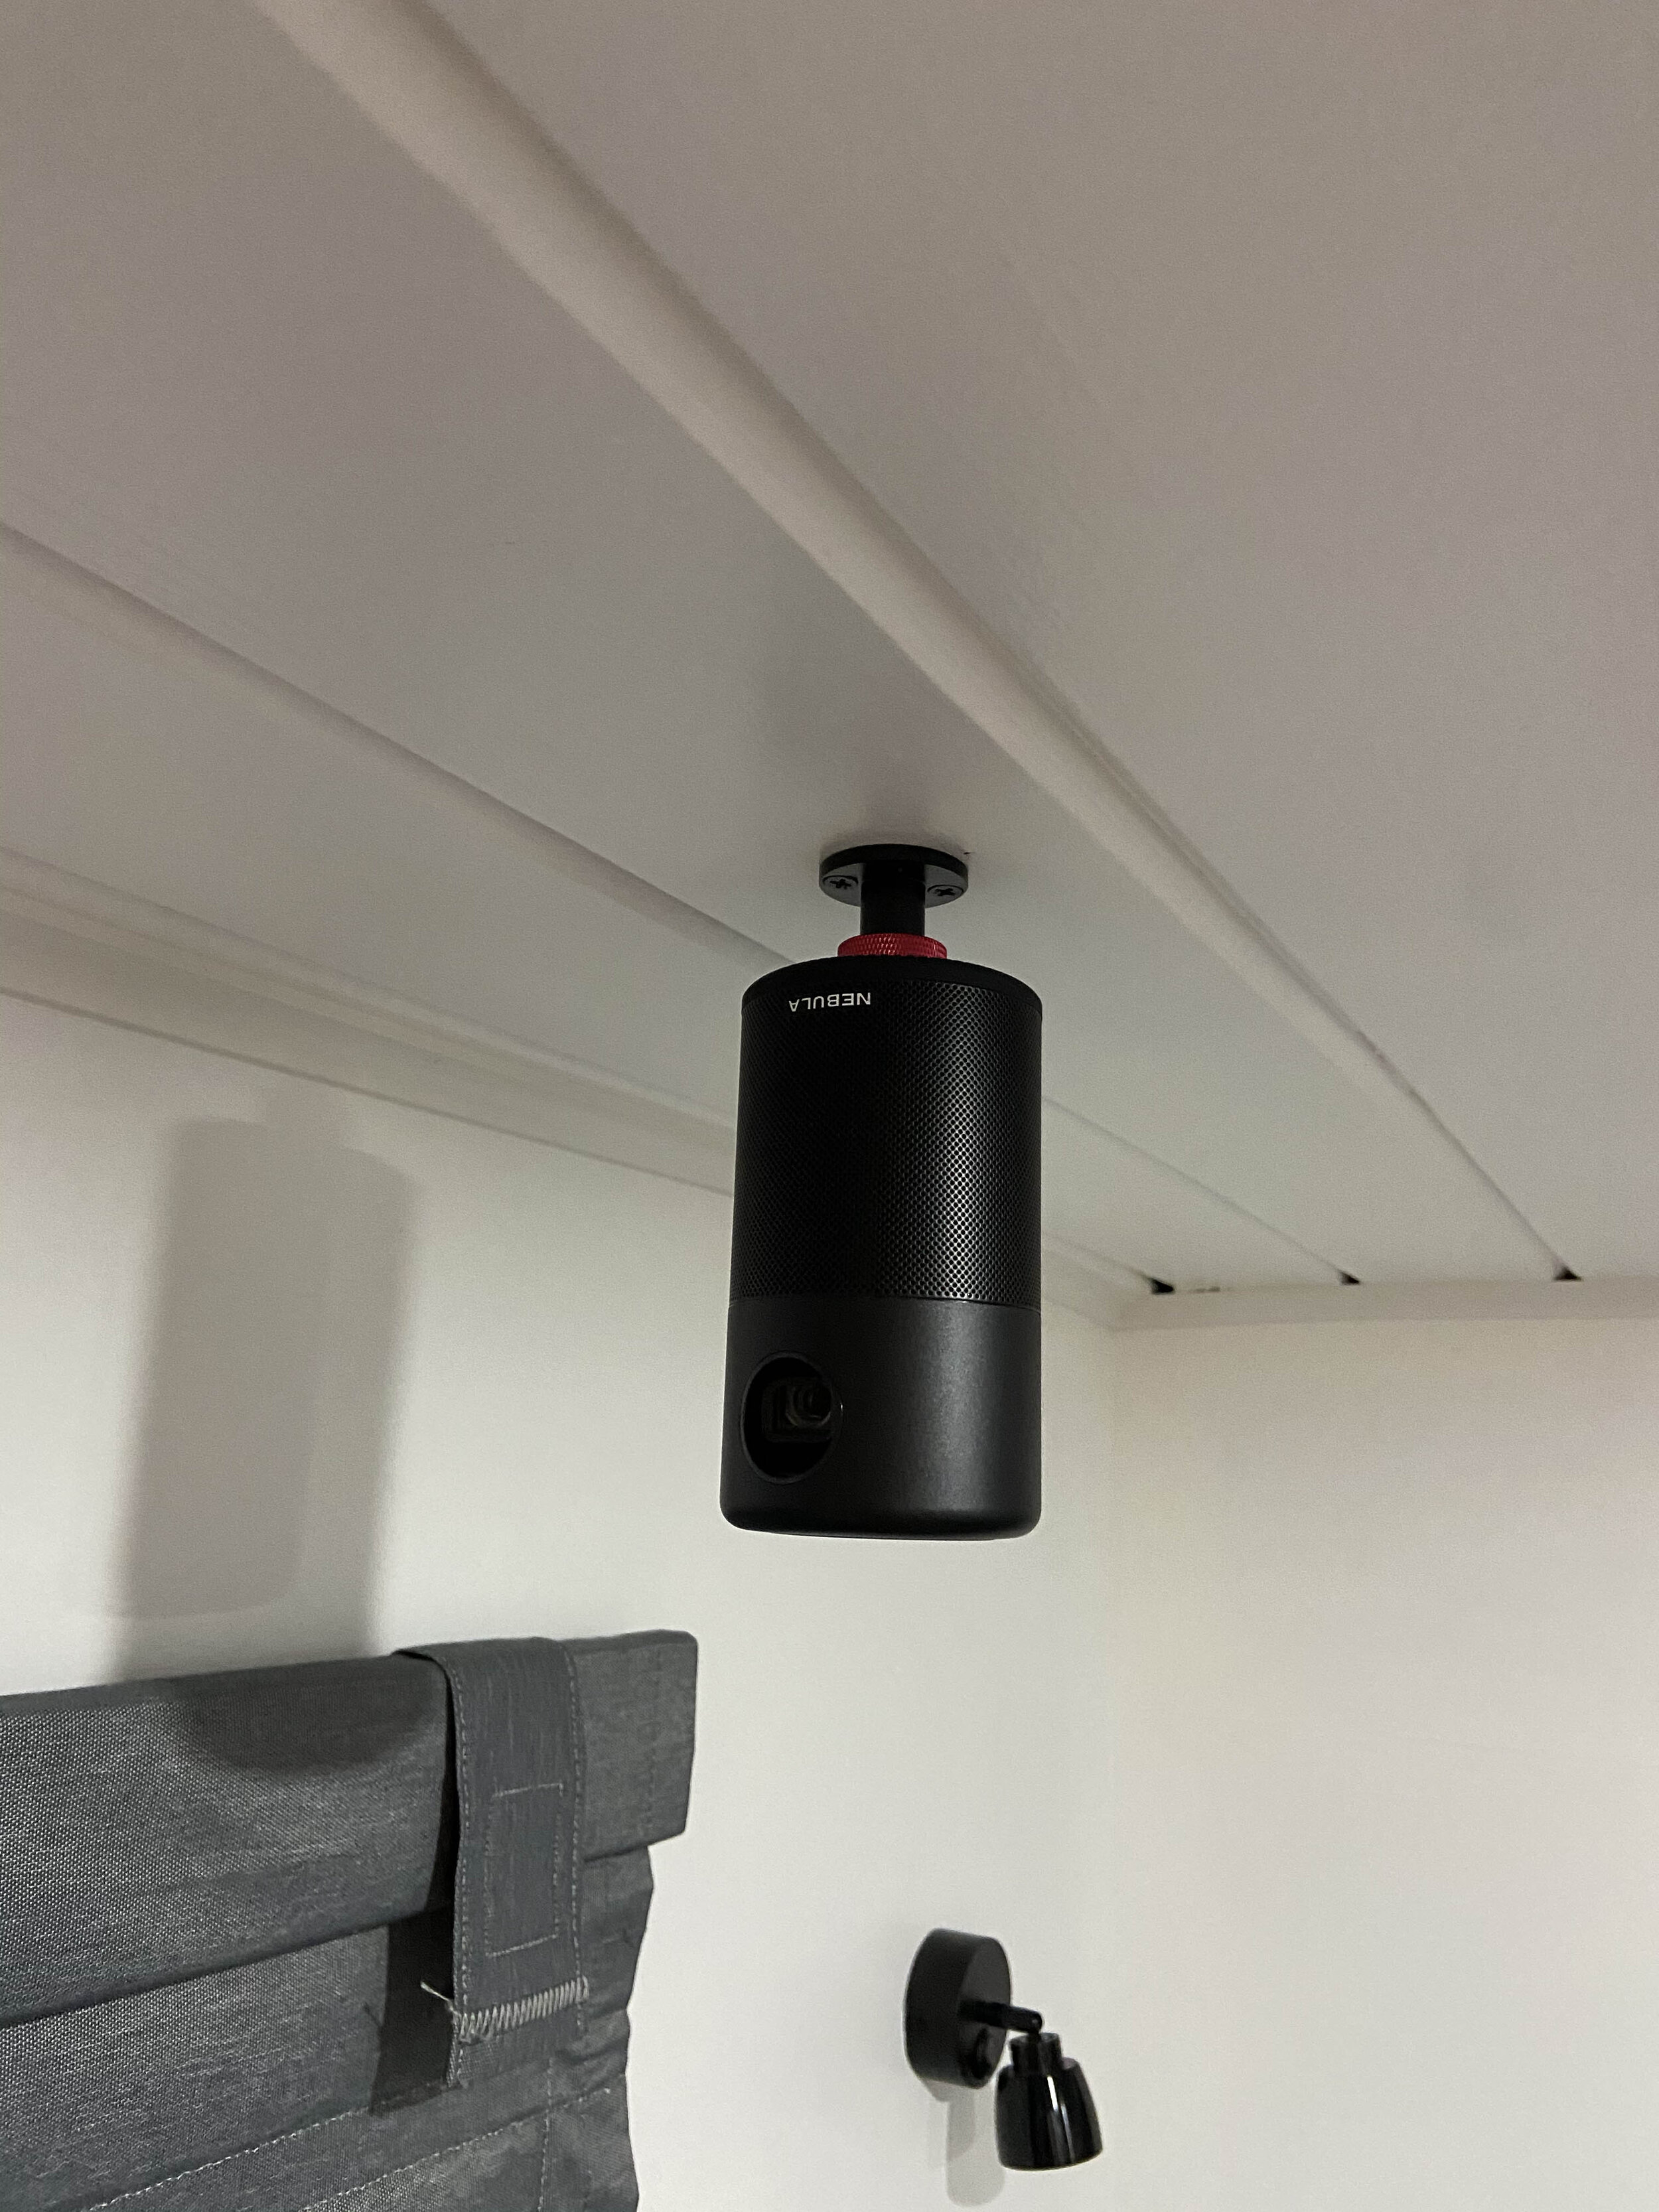
1-26-2021 - Finished the interior projector set up, repurposed the from siren fixtures and powder coated the rear rims, and painted the hubs. The projector is the Anker Nebula (original - $234 Amazon) and I created a 65” Projector screen out of another screen used in a conference room. The mount for the projector is a 1/4” threaded camera wall mount. Tons of these on Amazon. The projector is literally the size of a coke can has 4.5 hours of built in battery life. The speakers in the Nebula work just fine in the camper. Plenty loud enough. The system tucks away very nicely. Out of sight until in use.
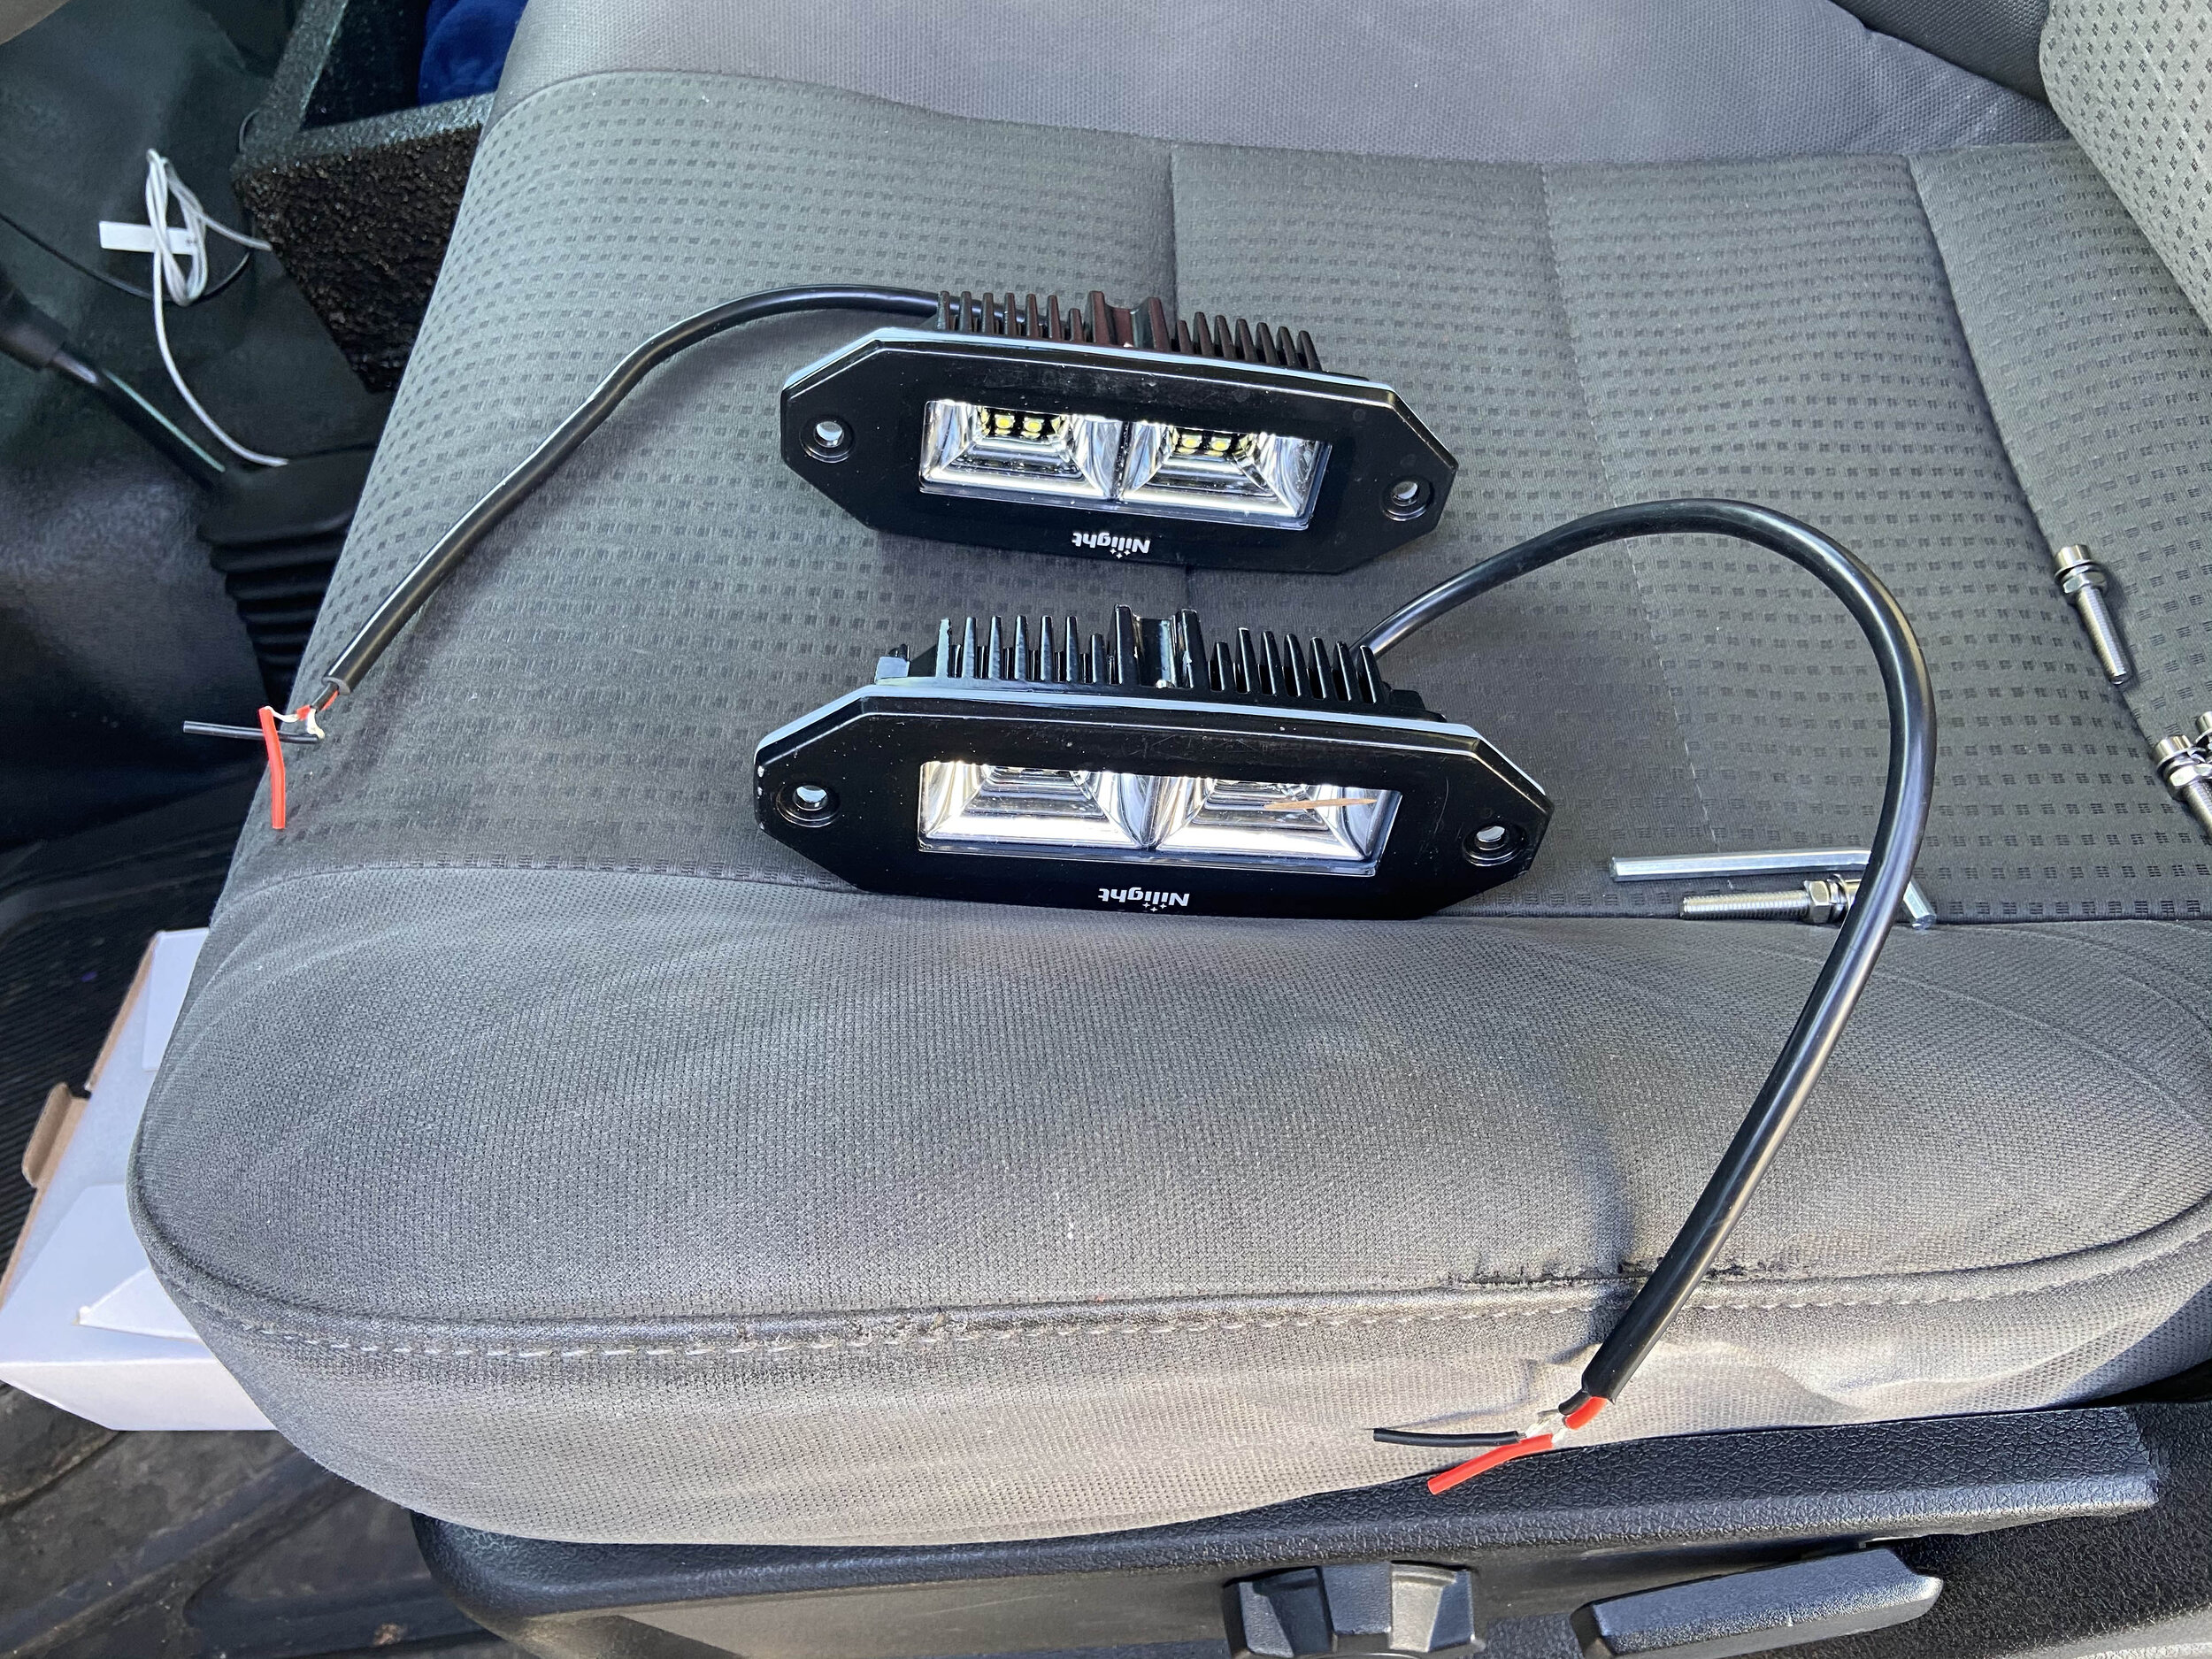
The housings for the sirens are now the housings for (2) 2000 Lumen fog lights. After driving in the Pacific North West this year (2020) I realized that I need much better lighting in the front. The stock lights are not enough! I sanded, Raptor Lined, and mounted the fog lights. The lights are the standard Amazon Nilight fog lights. If they go bad I may upgrade to Baja Designs in the future. So far they work great.
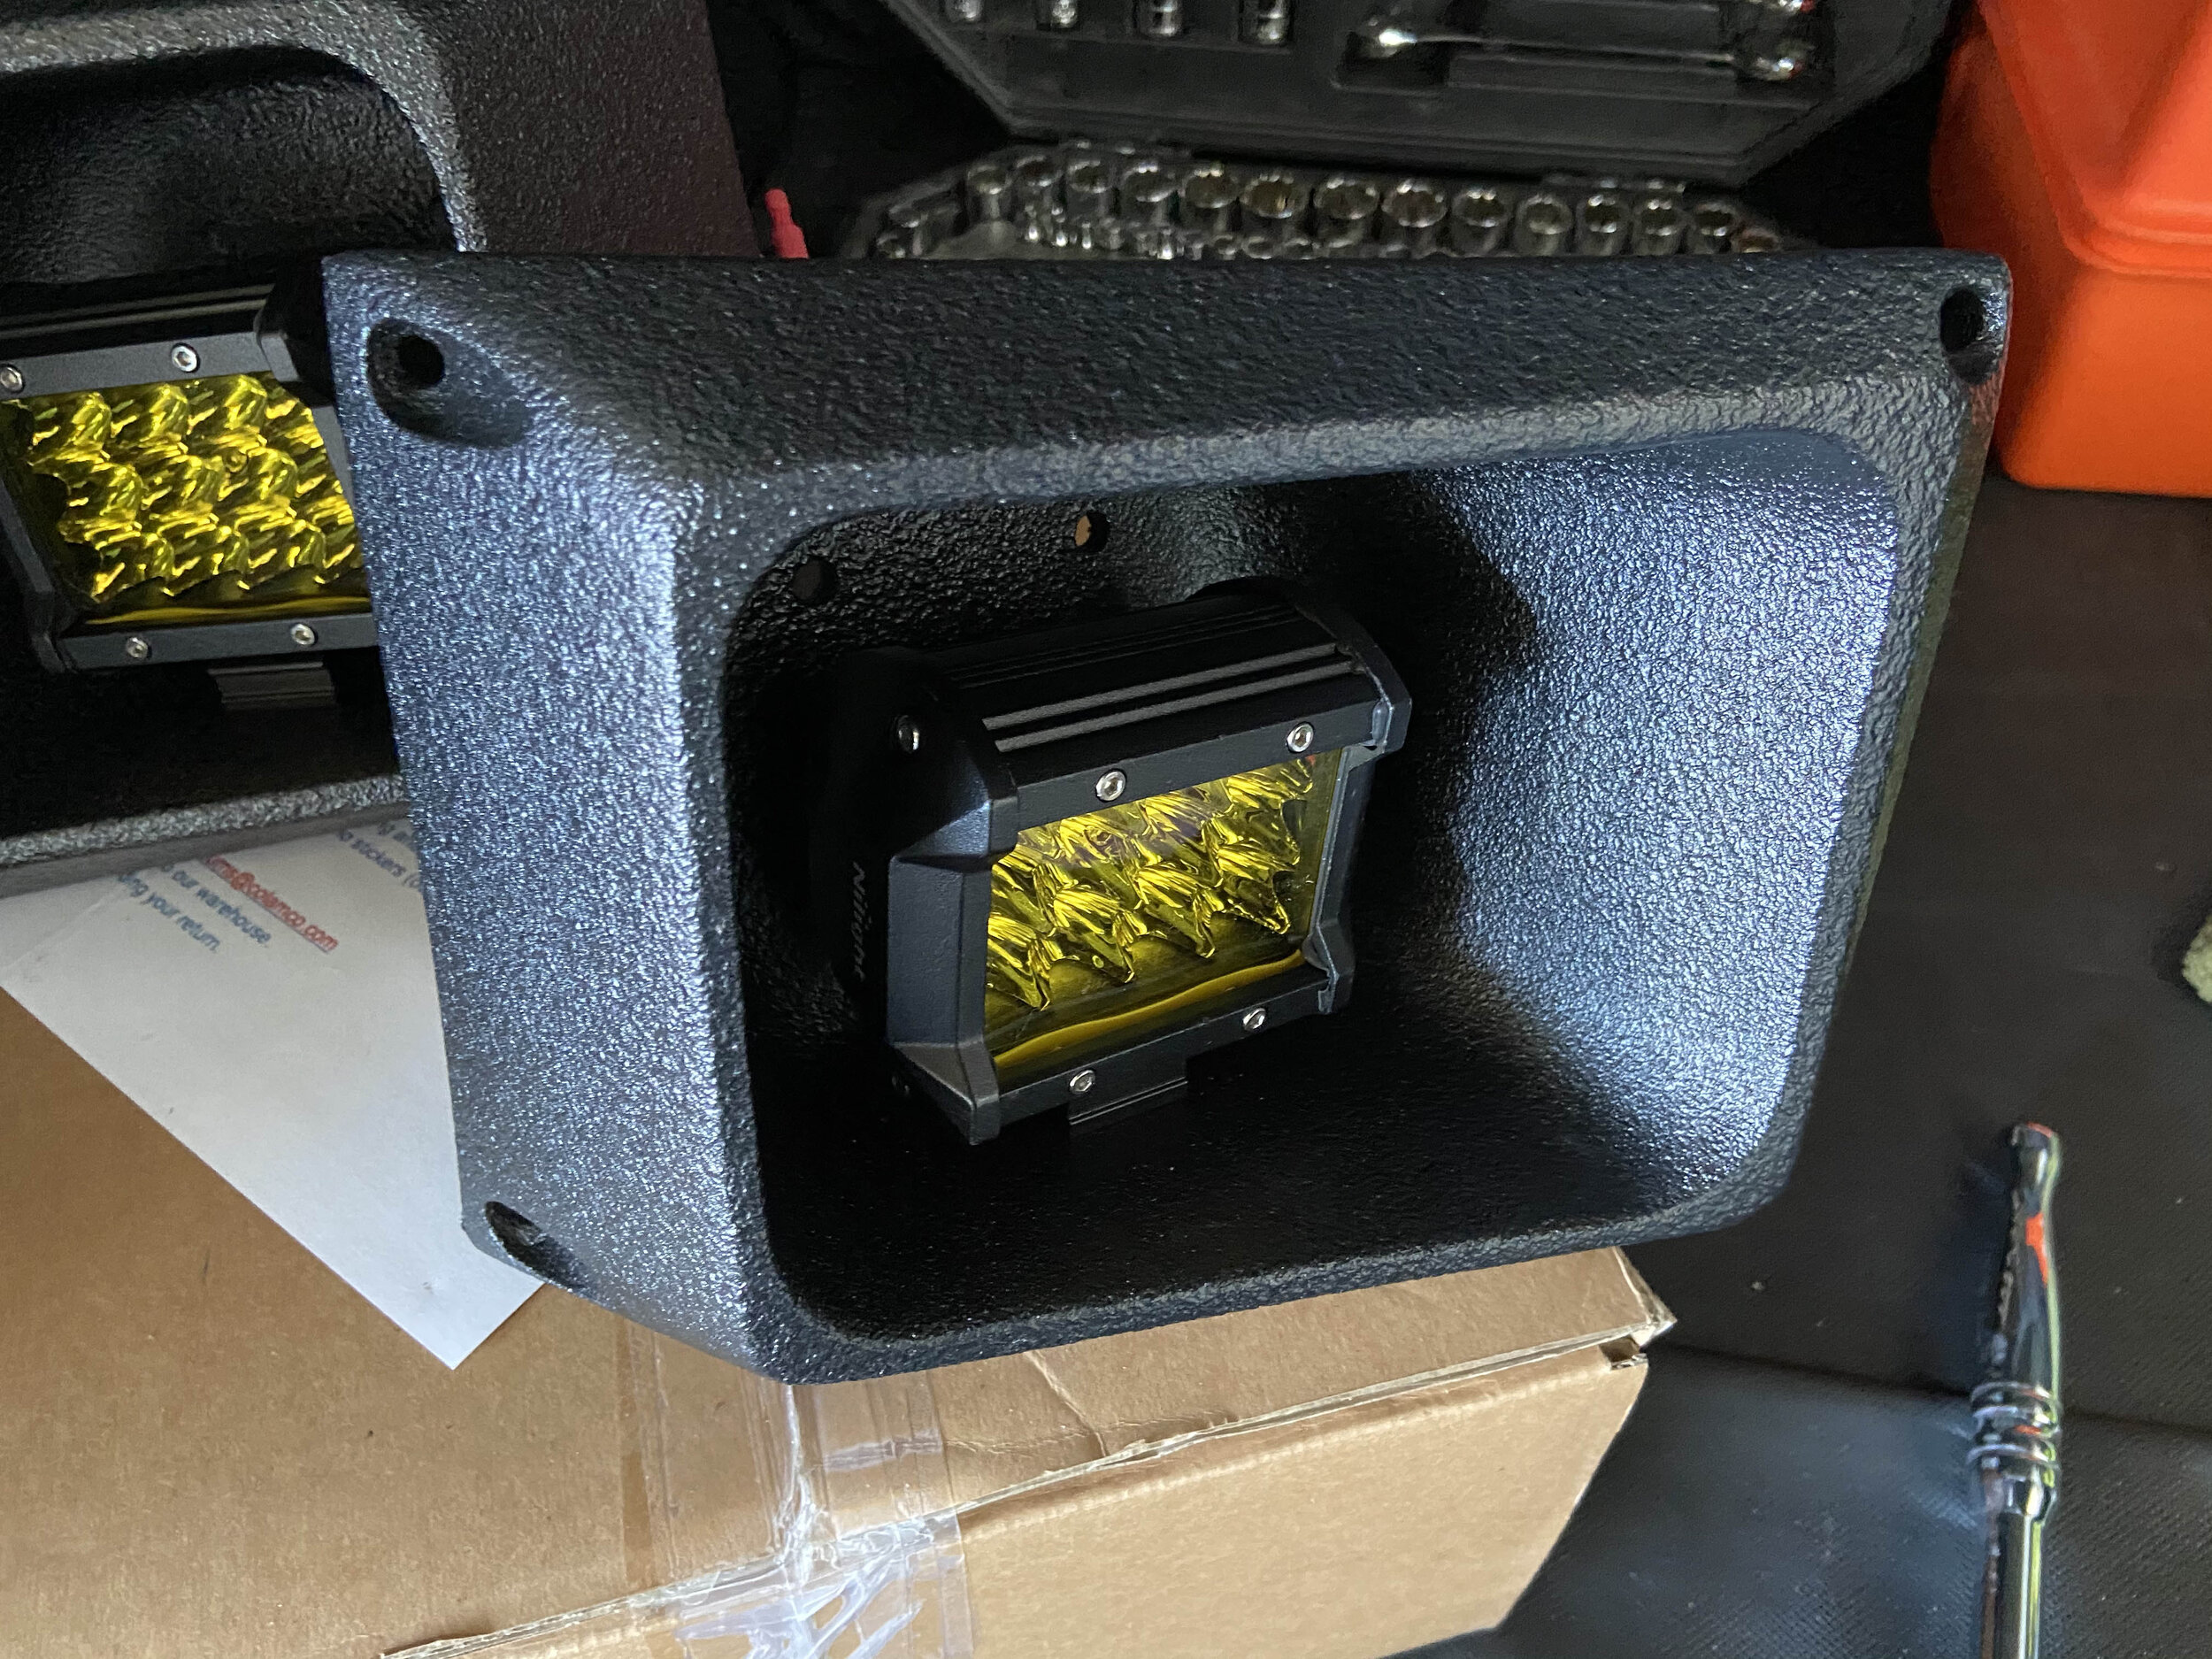

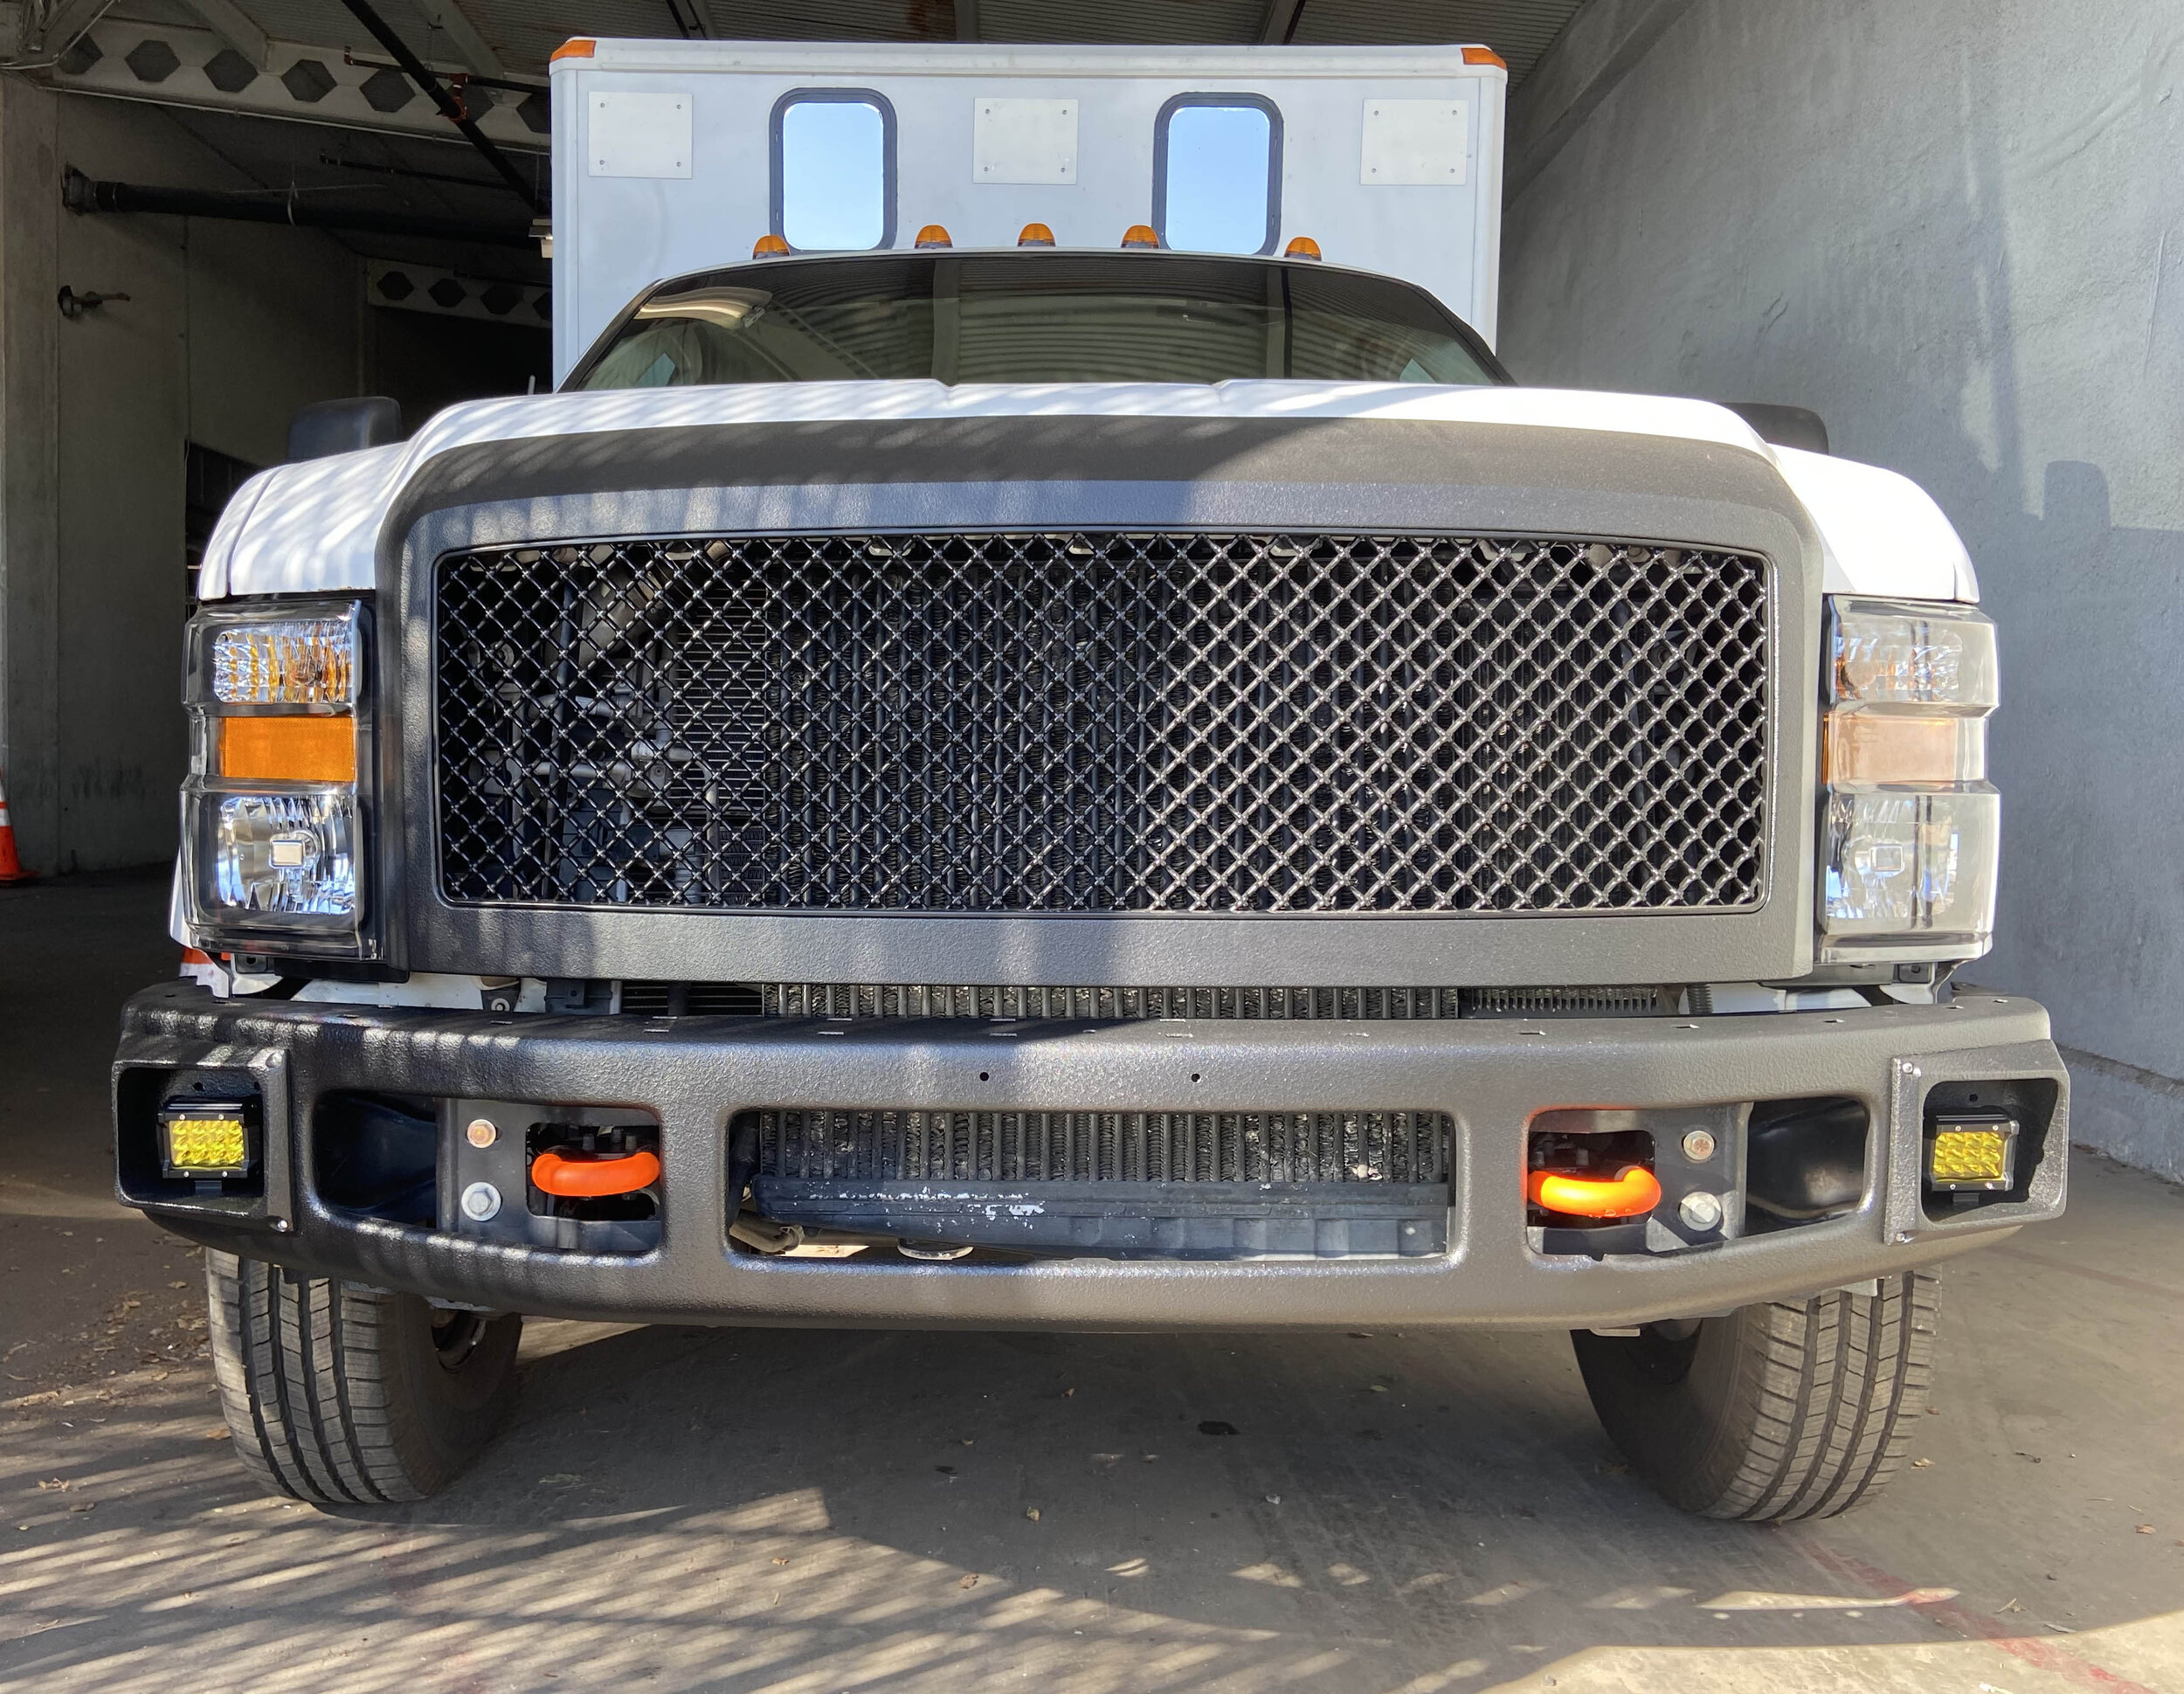
2-5-2021 - Front bumper, Grill, and old repurposed siren bumper housings installed. The bumper was chrome when I bought it. I hate chrome. So I sent it out to get sandblasted ($45). I used (2) cans of Raptor Black ($38 each) and refinished the bumper. The (2) Nilight “Amazon” fog lights were about $30 each. In the end I am very happy with the results. The exterior is slowly coming together.

Additional costs for exterior/interior modifications
$3007.15 has been spent between january 1st and march 1st for misc. interior and exterior modifications. this includes the exterior/interior projector system and bumper/grill modifications. total cost as of march 1, 2021 $21,938.00
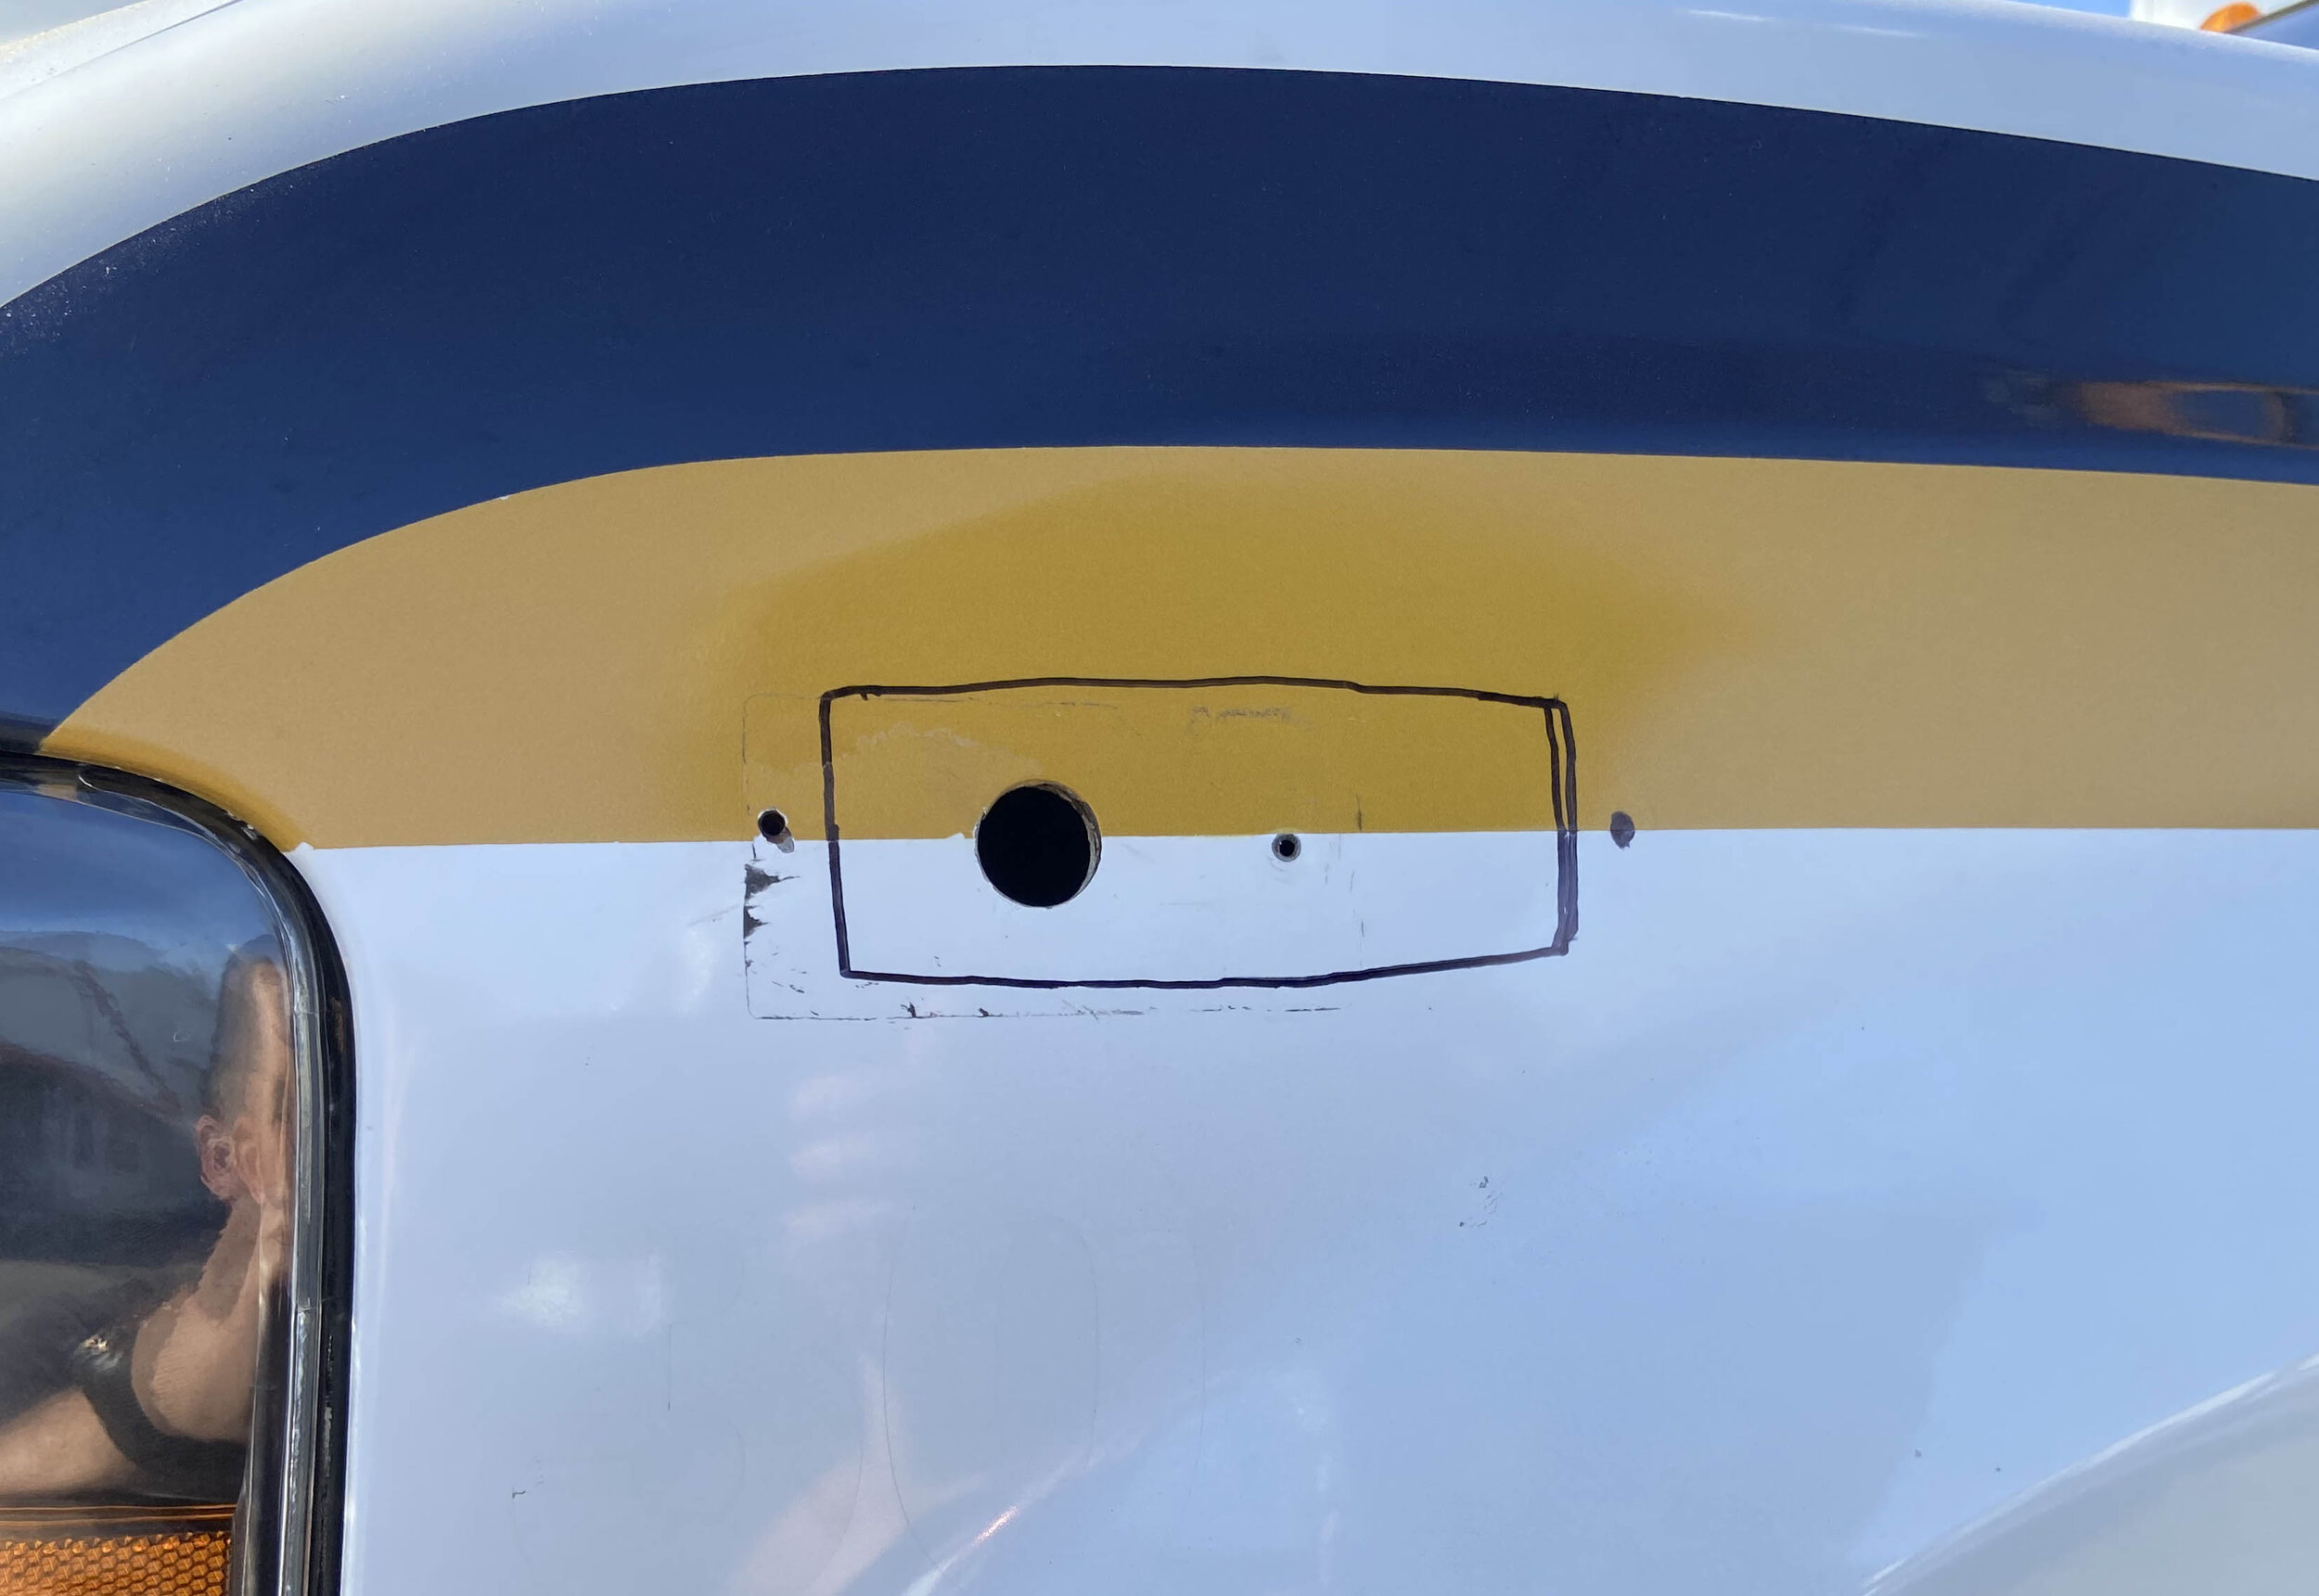
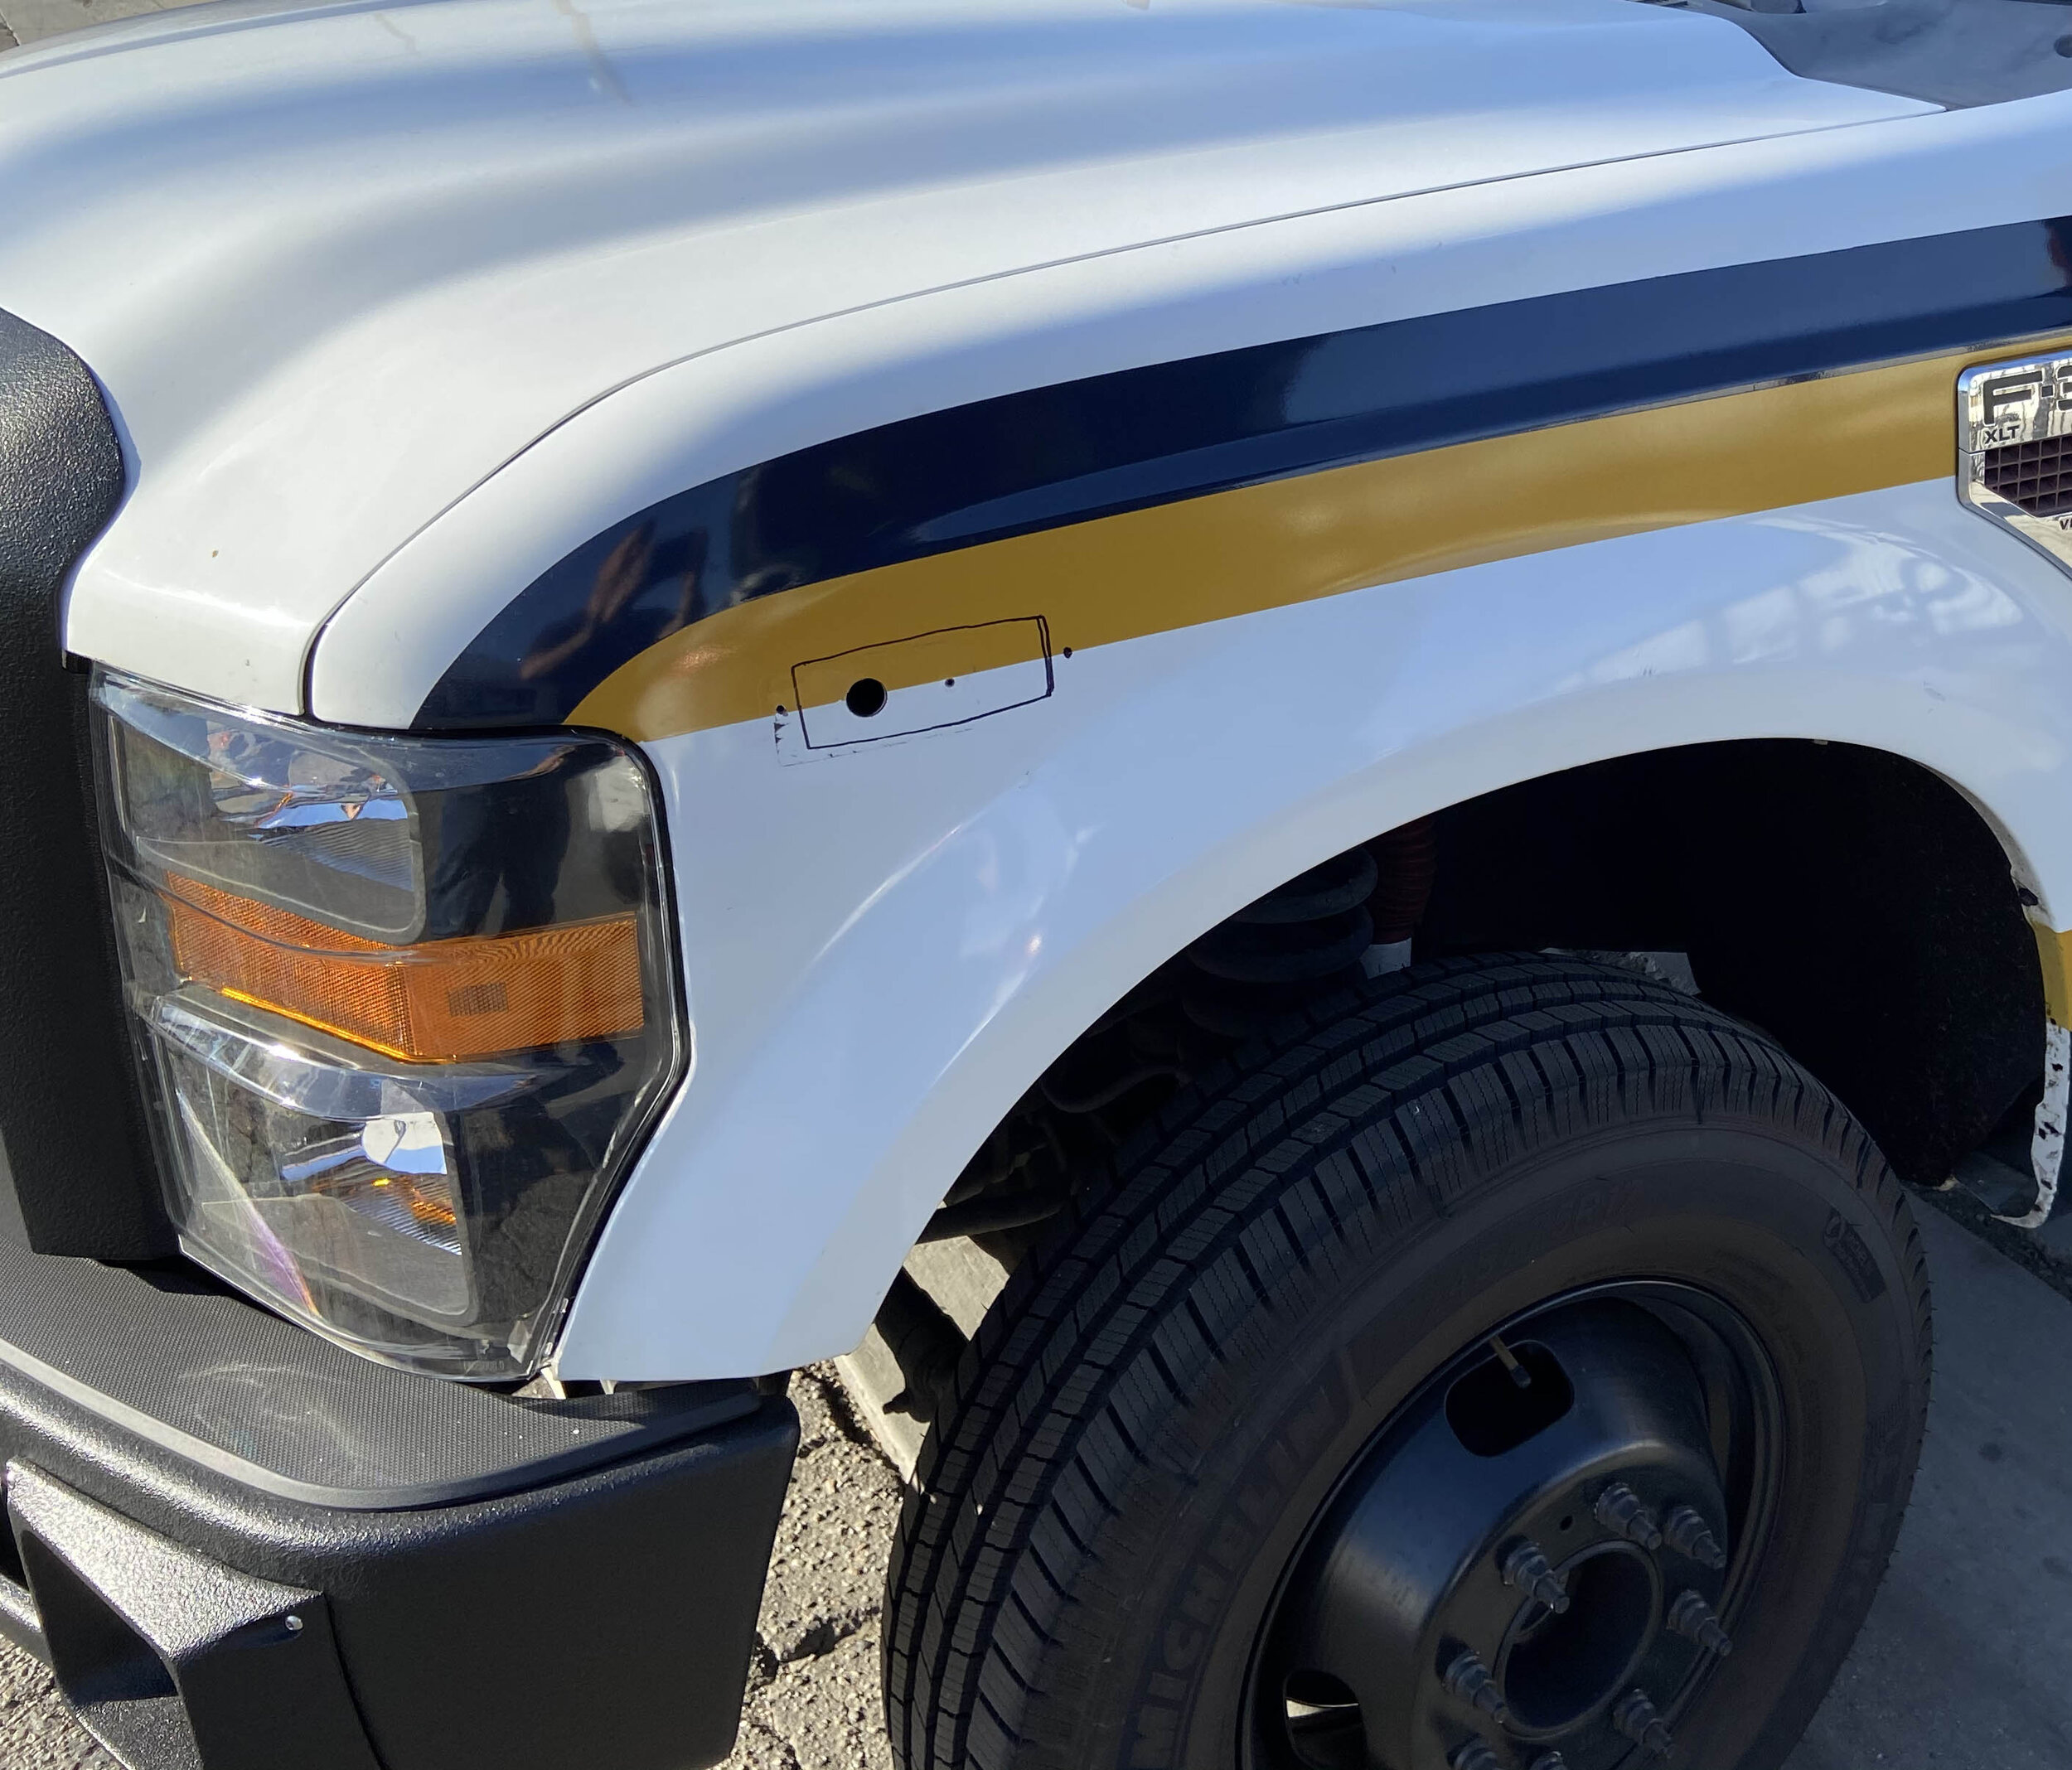
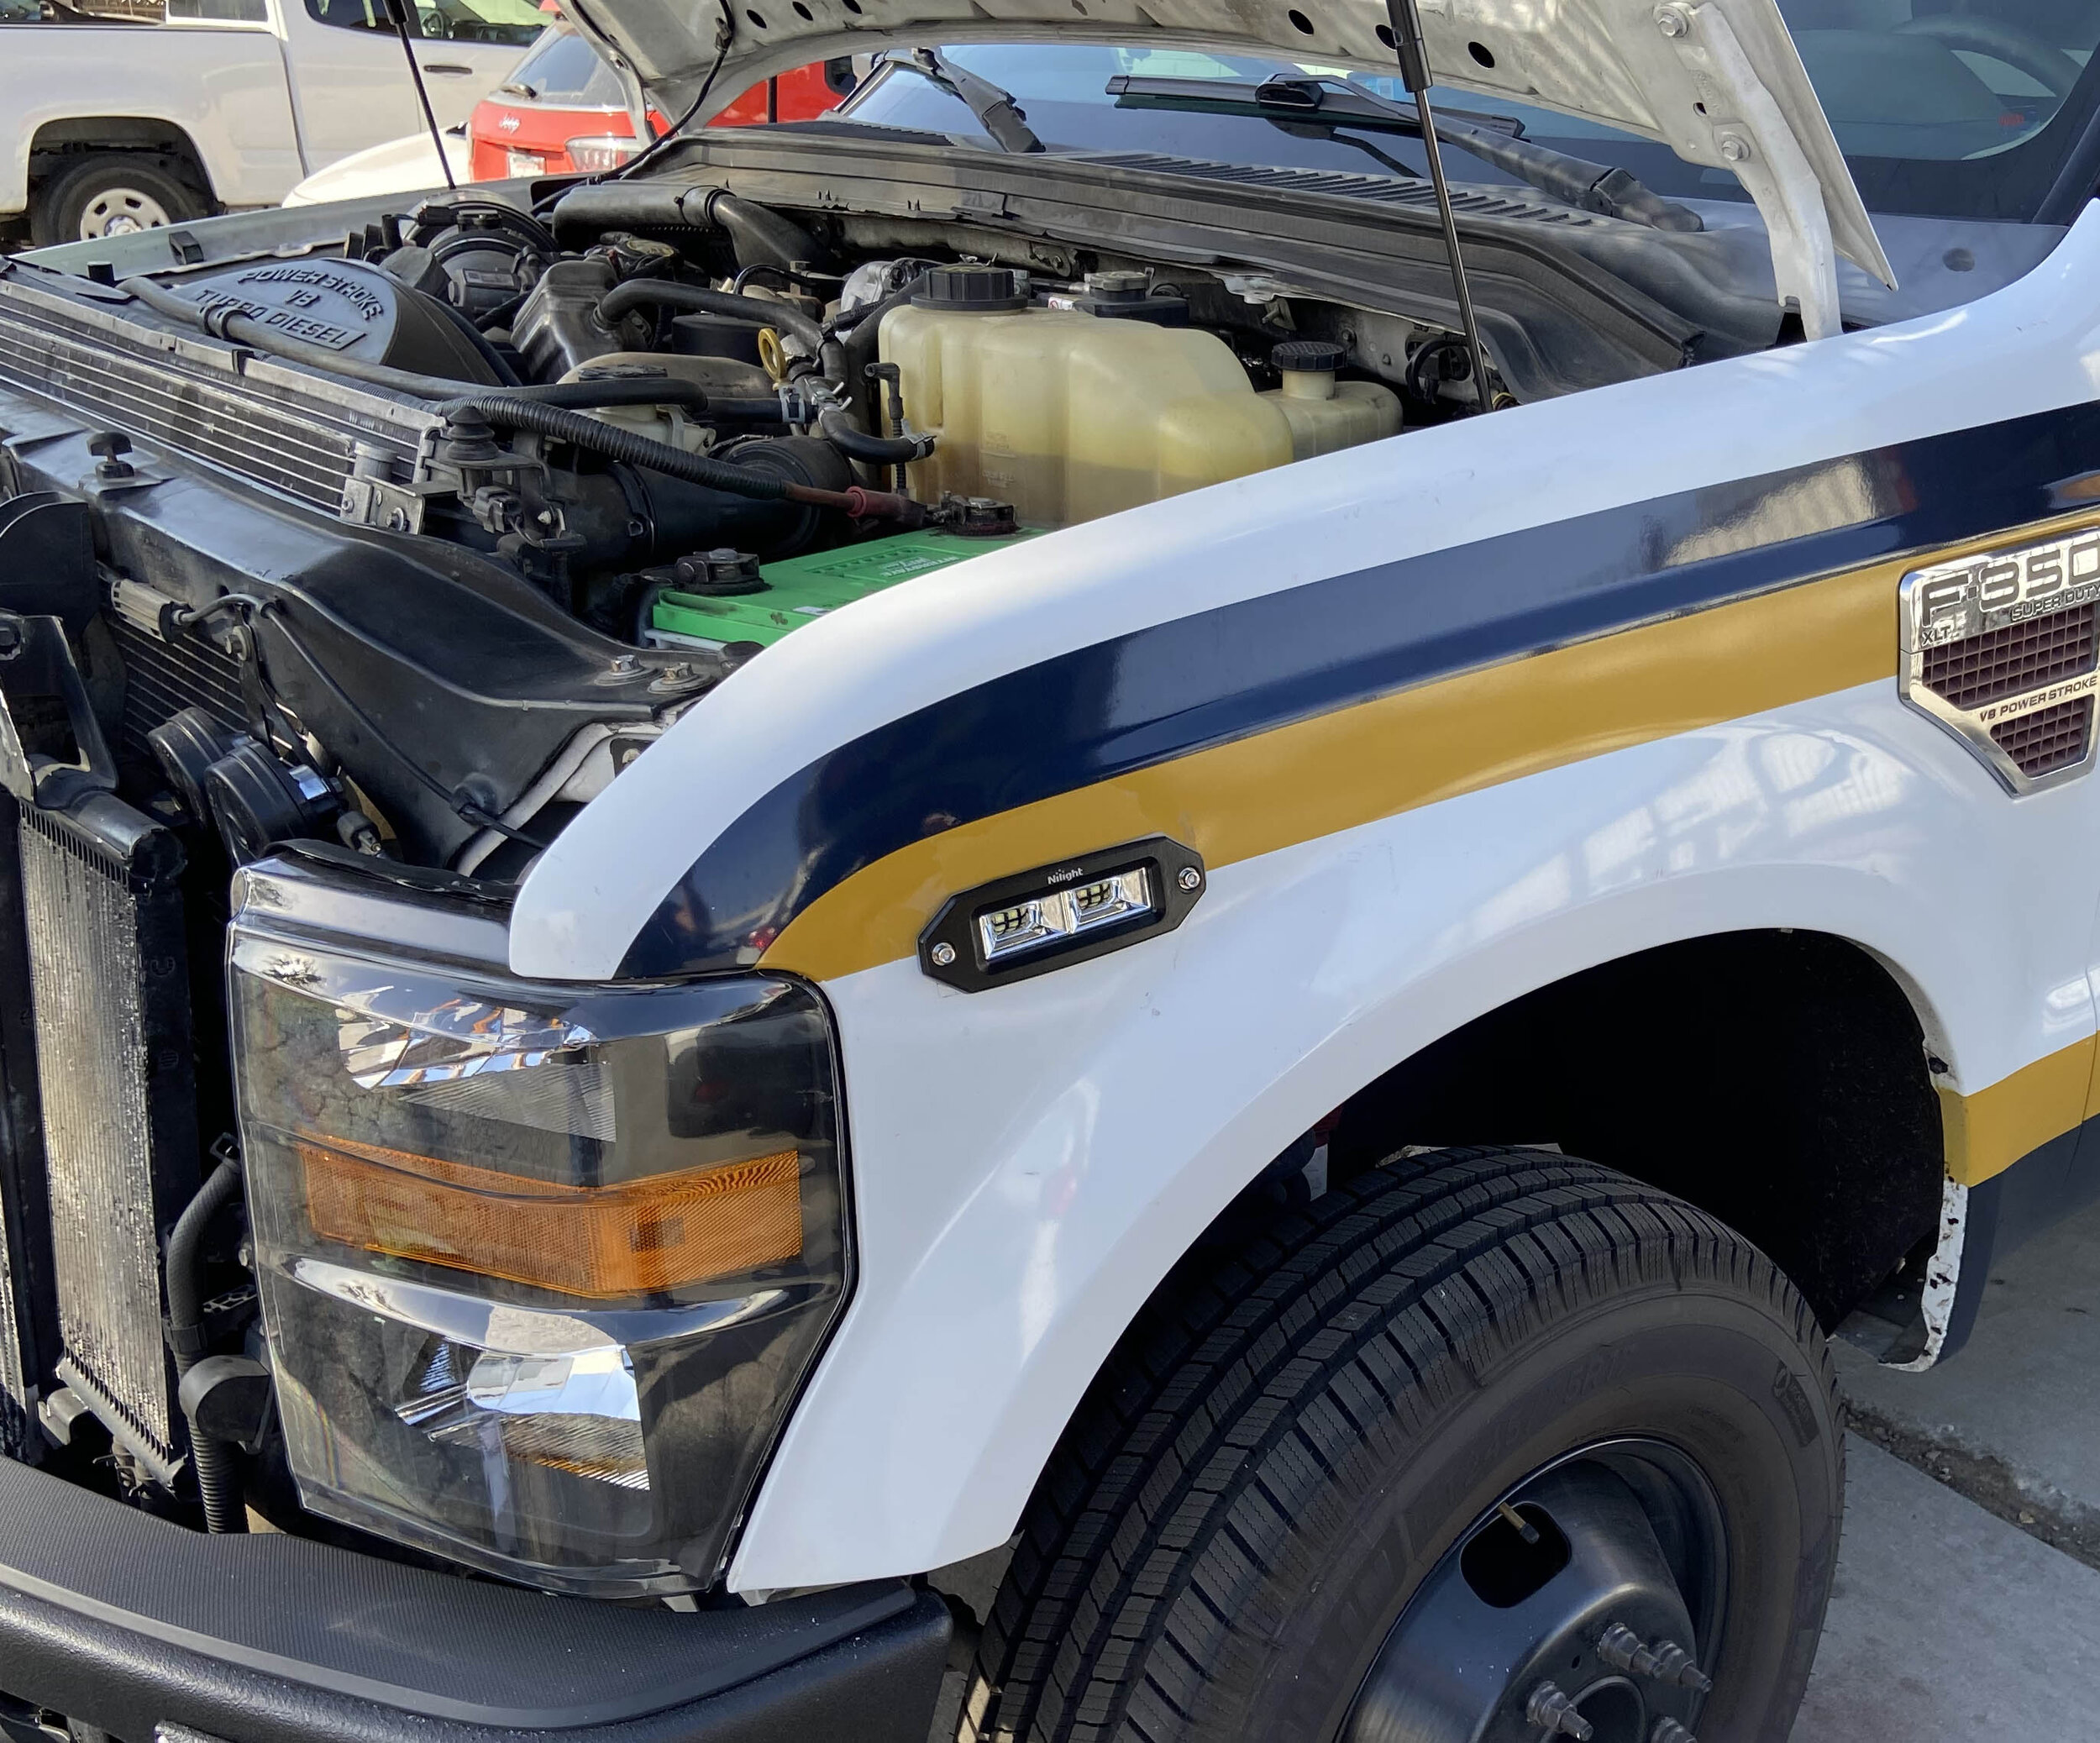
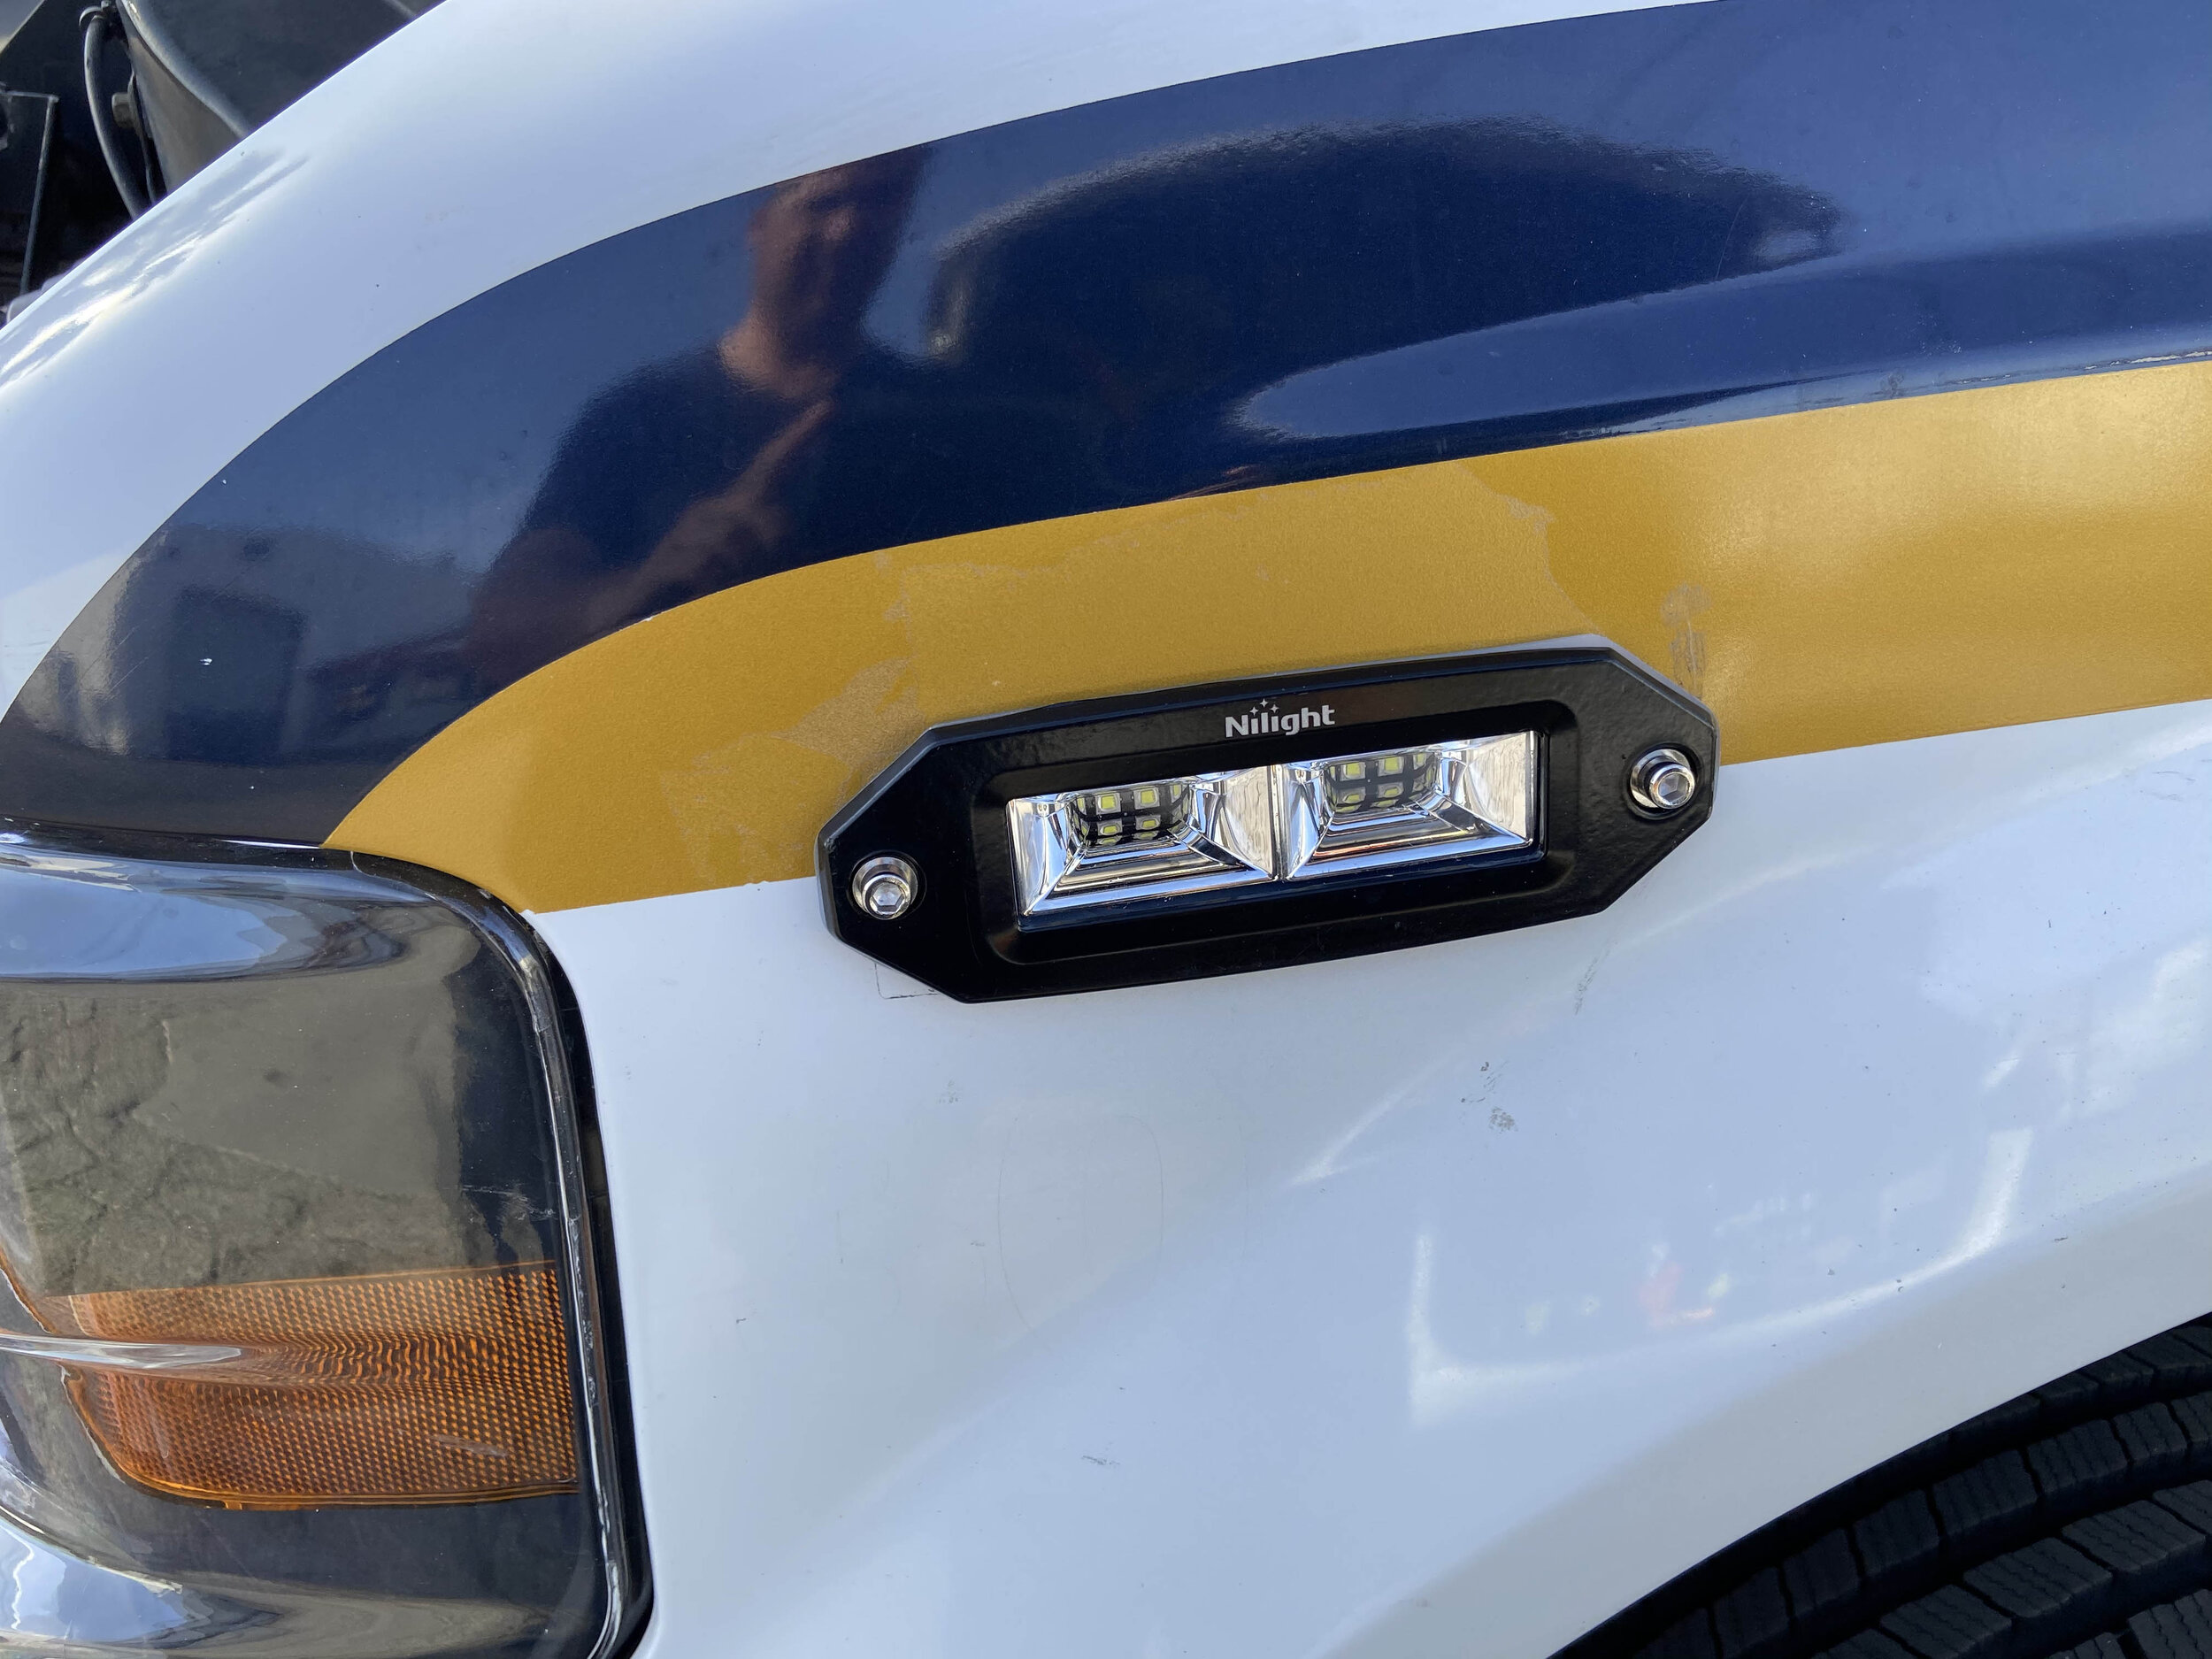
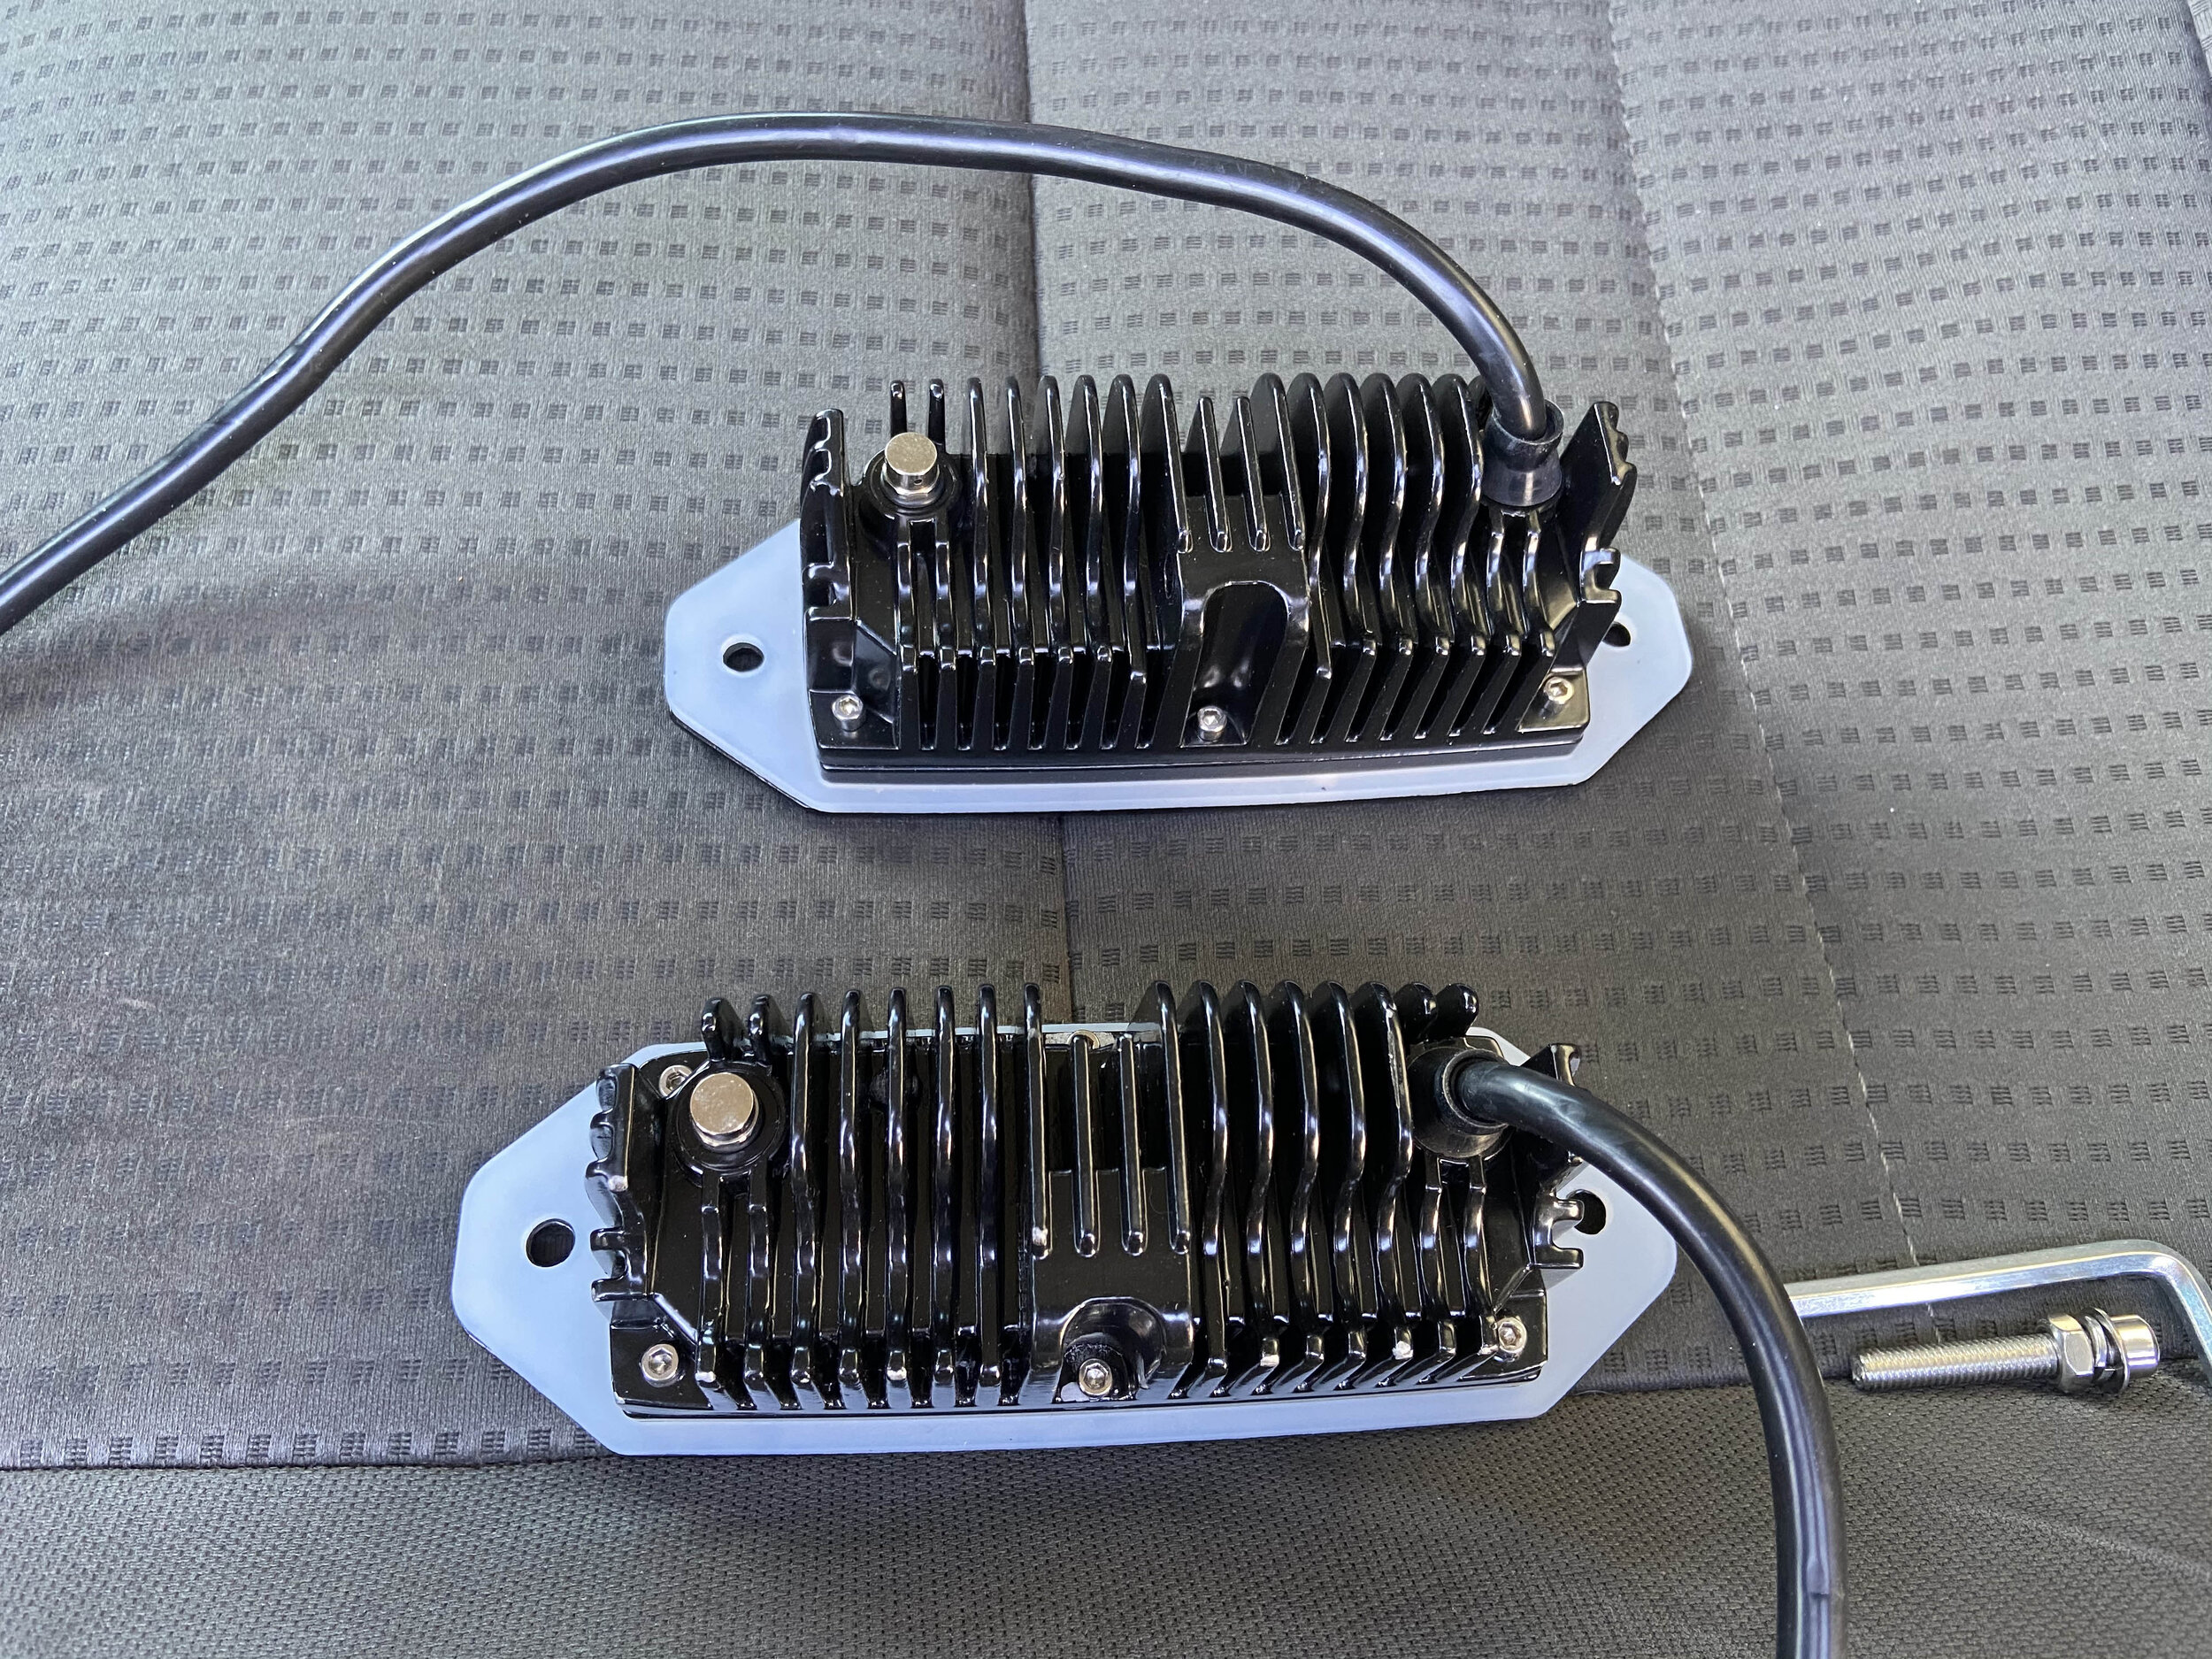
3-1-2021 - There were two emergency lights in the front 1/4 panels and when I removed them there was a hole left behind. I decided rather than having body work done to cover them up I would add side scene lights instead. It ended up actually being the same cost. The flush mount Nilight’s were approx. $48 on Amazon and I connected them to the overhead side scene lights located on the camper box itself. As it turns out they added a considerable amount of scene lighting in the front.
I made a template for the hole, lined it up with the preexisting hole and cut out the hole with a jigsaw. It was actually a really simple process. The lights fit in perfectly and the surface of the body was flat which made the mounting much easier.
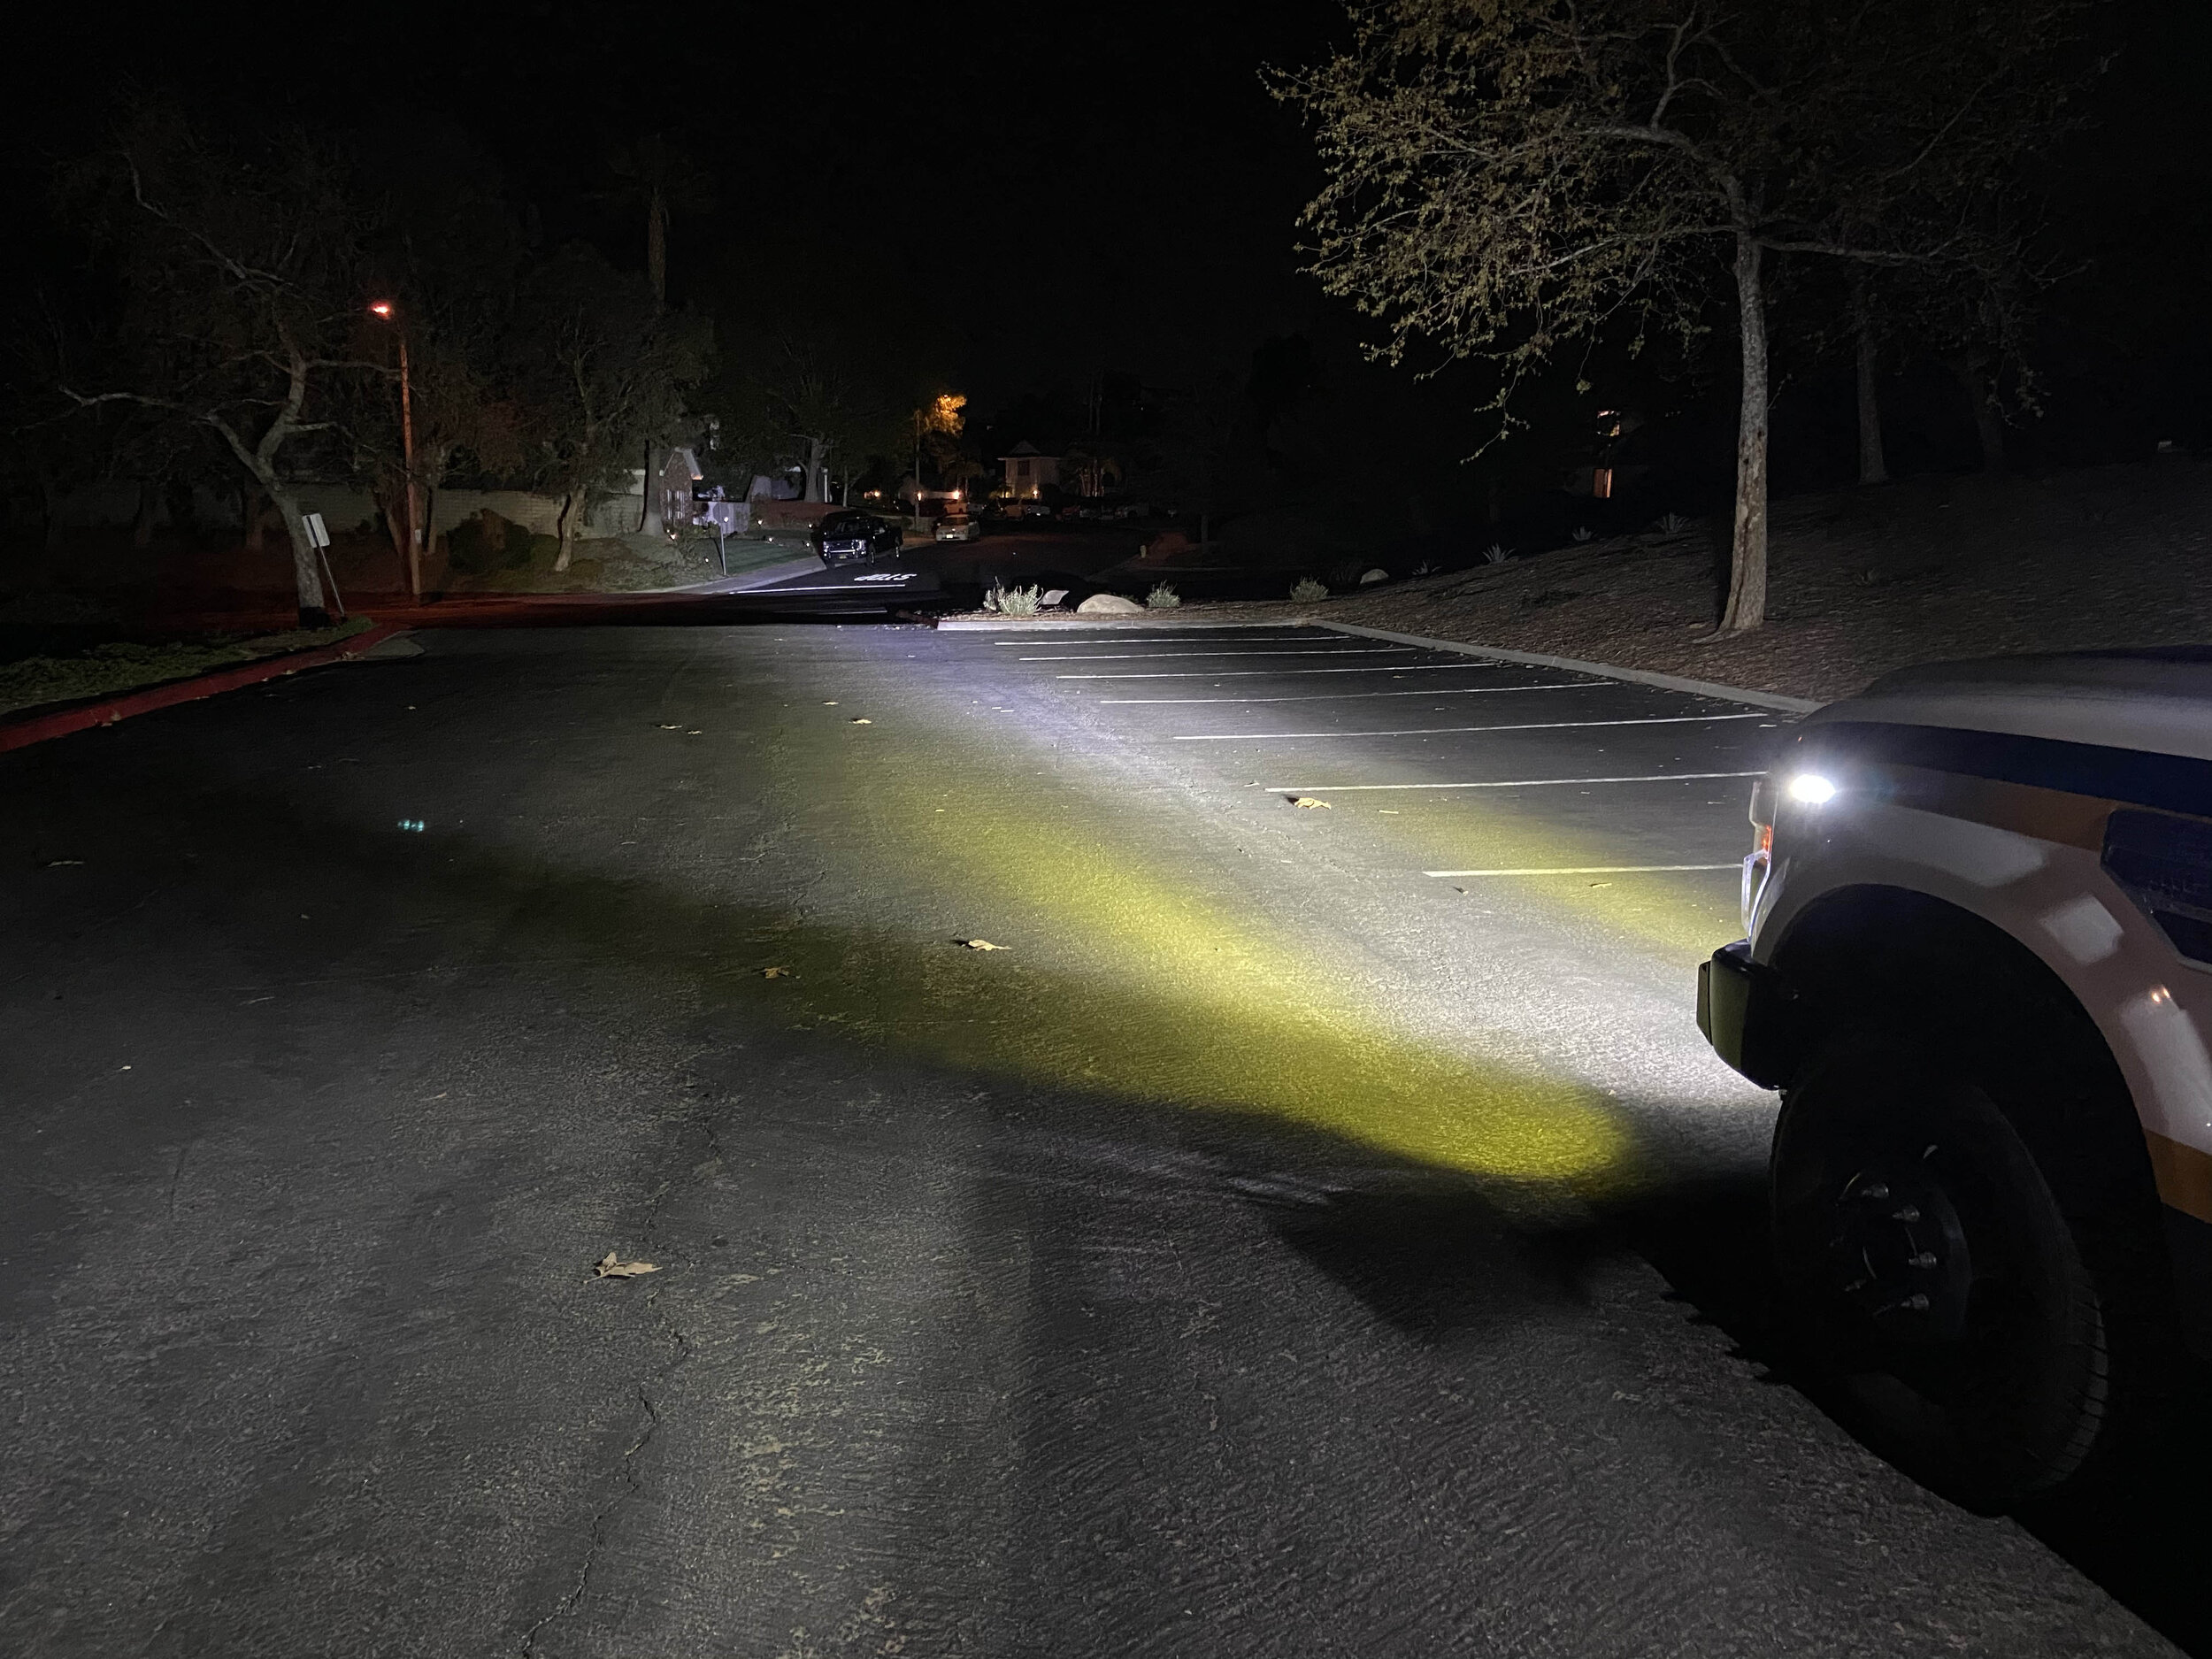
3-3-2021 - I had all the new lighting in the front end professionally wired at a local shop. Total cost for the installation of the wiring was $320. They installed wiring relays and resistors. They added plugs for each light (lights did not come with plugs) so that they can be simply removed in the future. They installed a separate fog light switch for the bumper LED fog lights. They did a MUCH better job than I could ever do. Here are the results. I drove to a pitch black parking lot and took scene light photos. Night becomes day with the new lighting…….


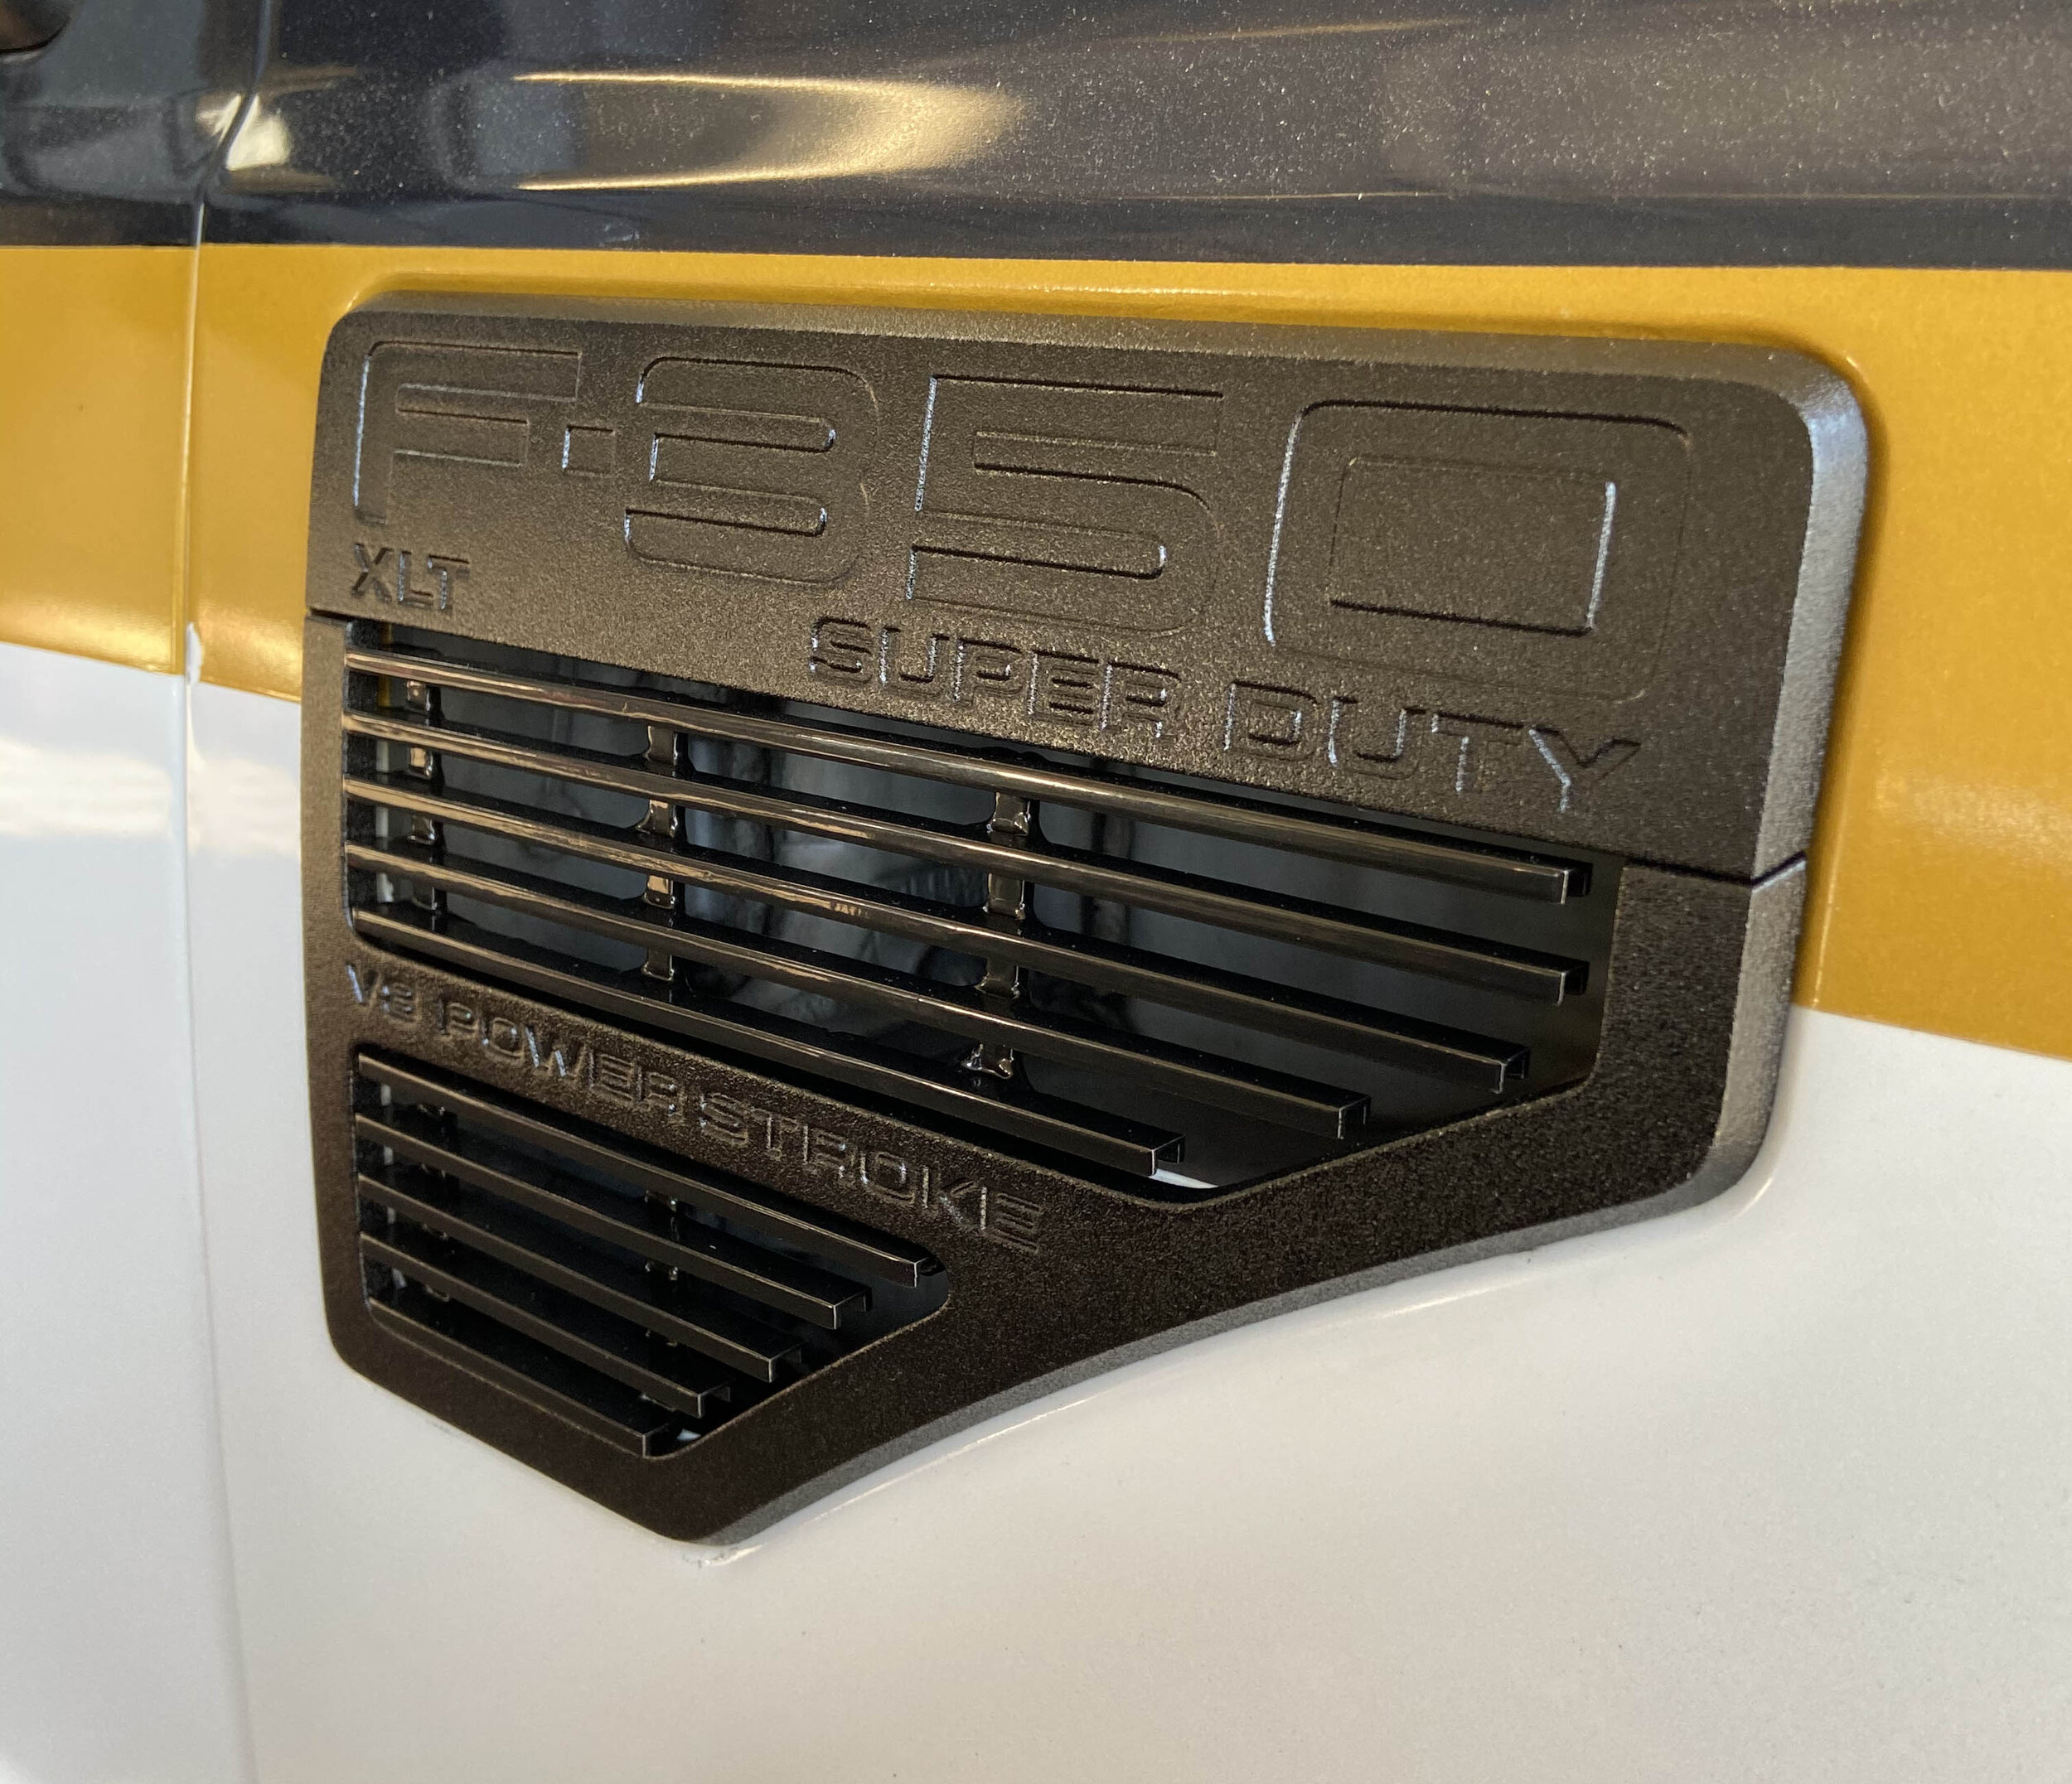
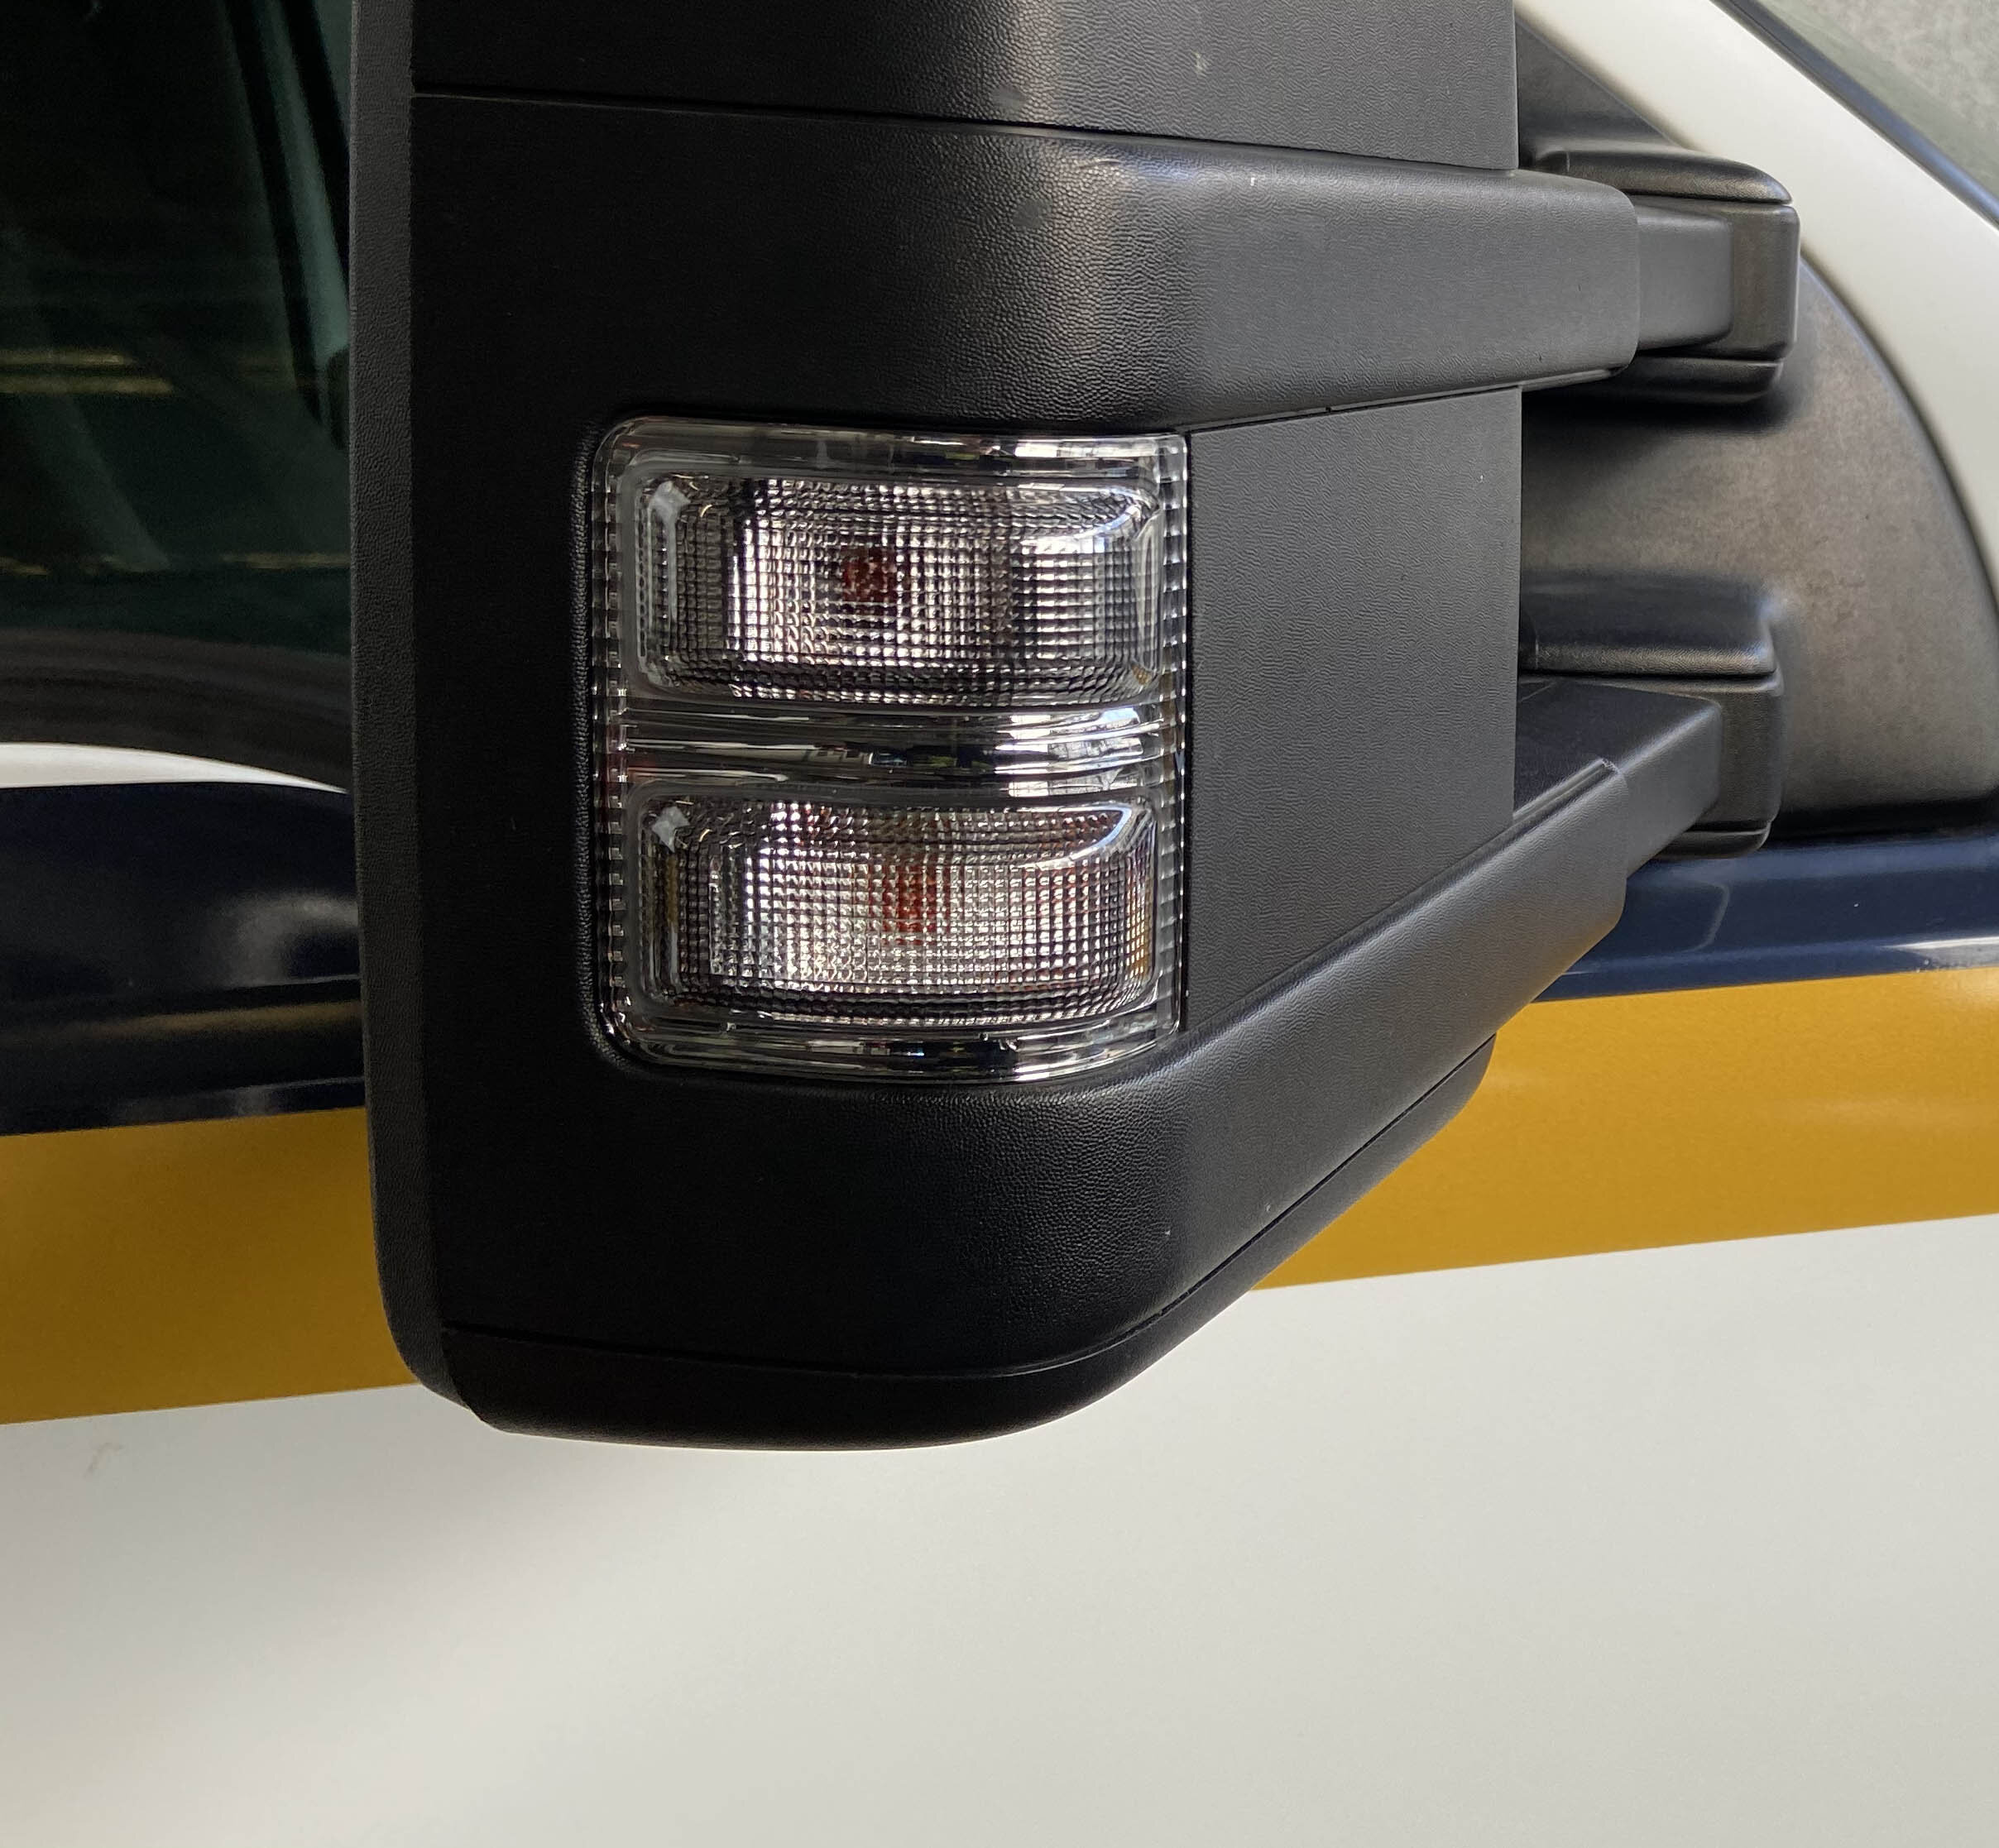
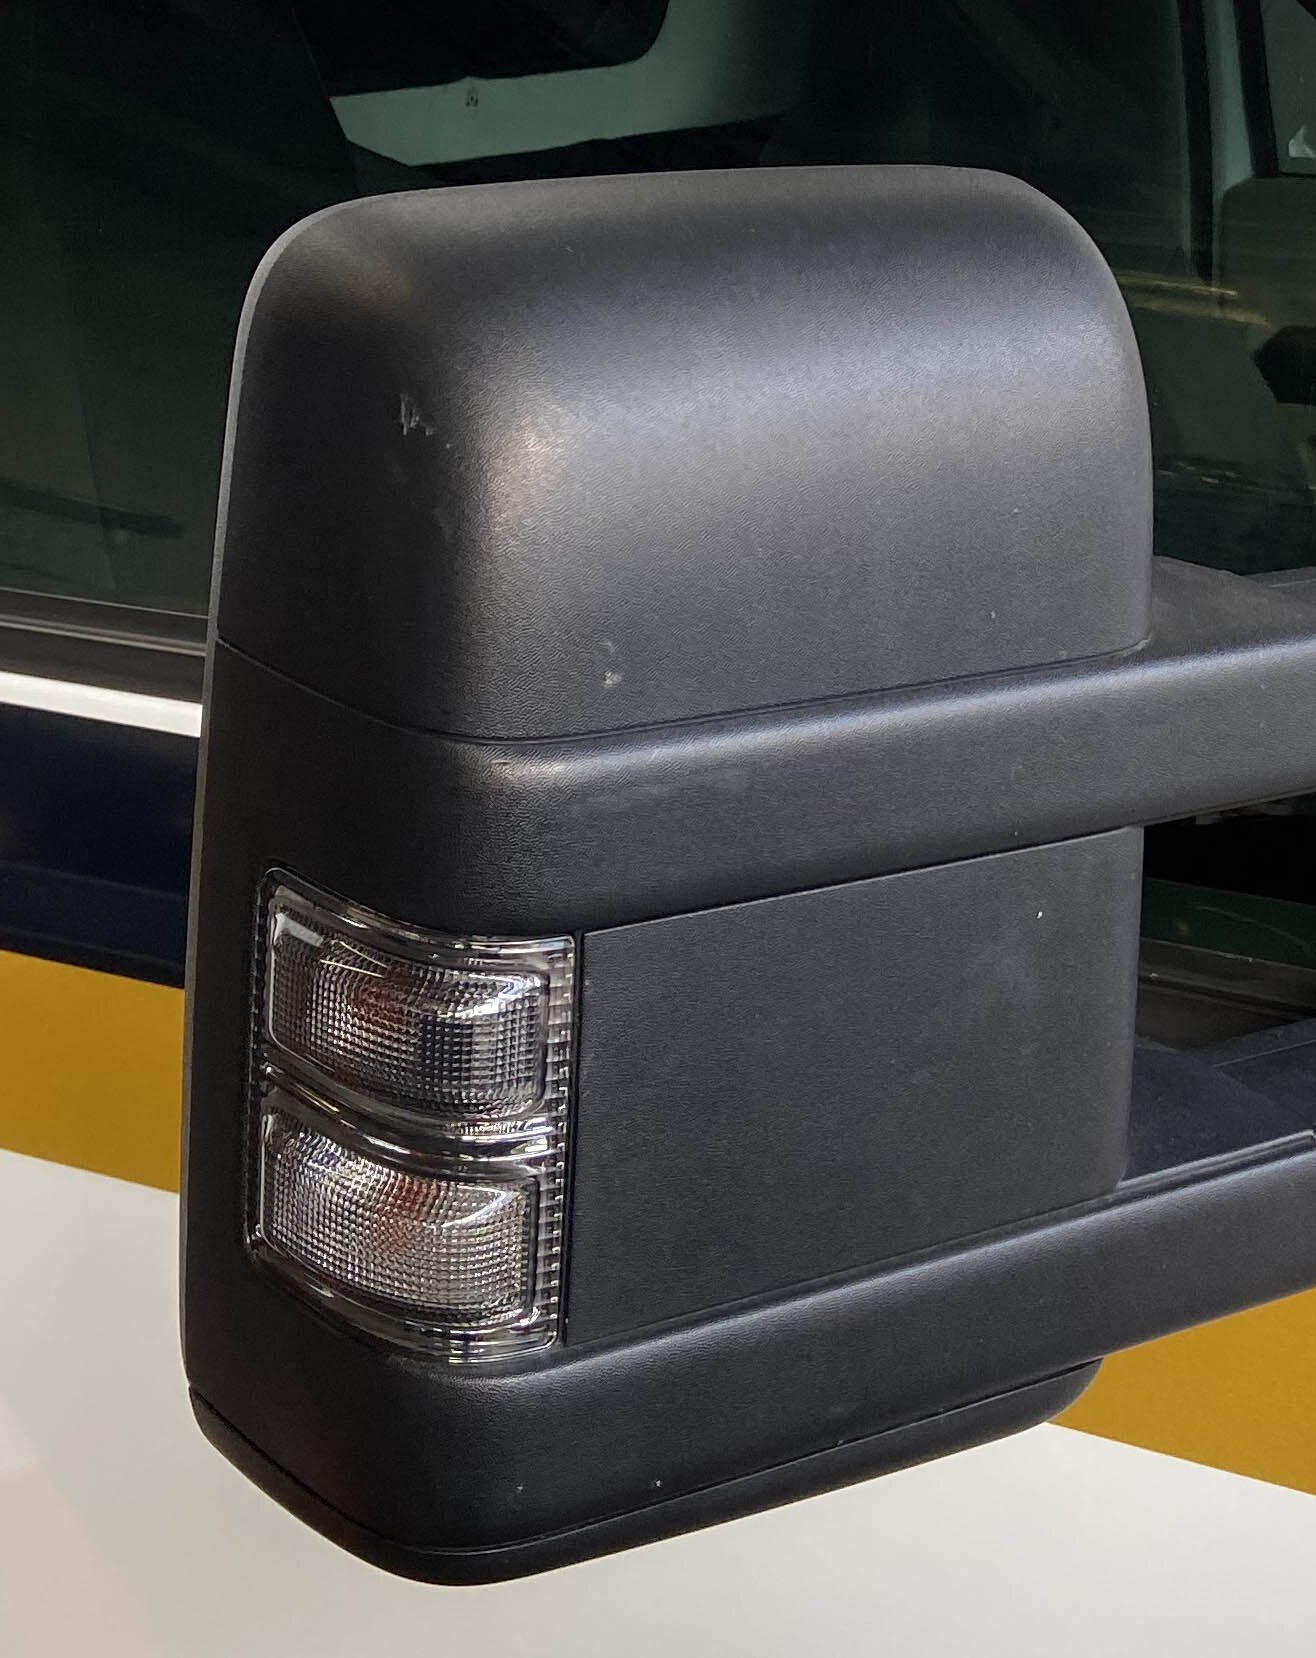
3-12-2021 - I HATE CHROME……. and orange lenses. So I went on Amazon and Ebay and purchased replacement LED bulbs and smoke lenses for the rear view mirrors and cab clearance lights. I also blacked out the F-350 badges on the front 1/4 panels. The badges were sanded down, adhesion promoter applied, 2 coats of “self etching primer” applied as well as Rustolium truck bedliner (3 coats). I purchased inserts for the badge to improve the look over the honey comb stock look. Below are the results……..


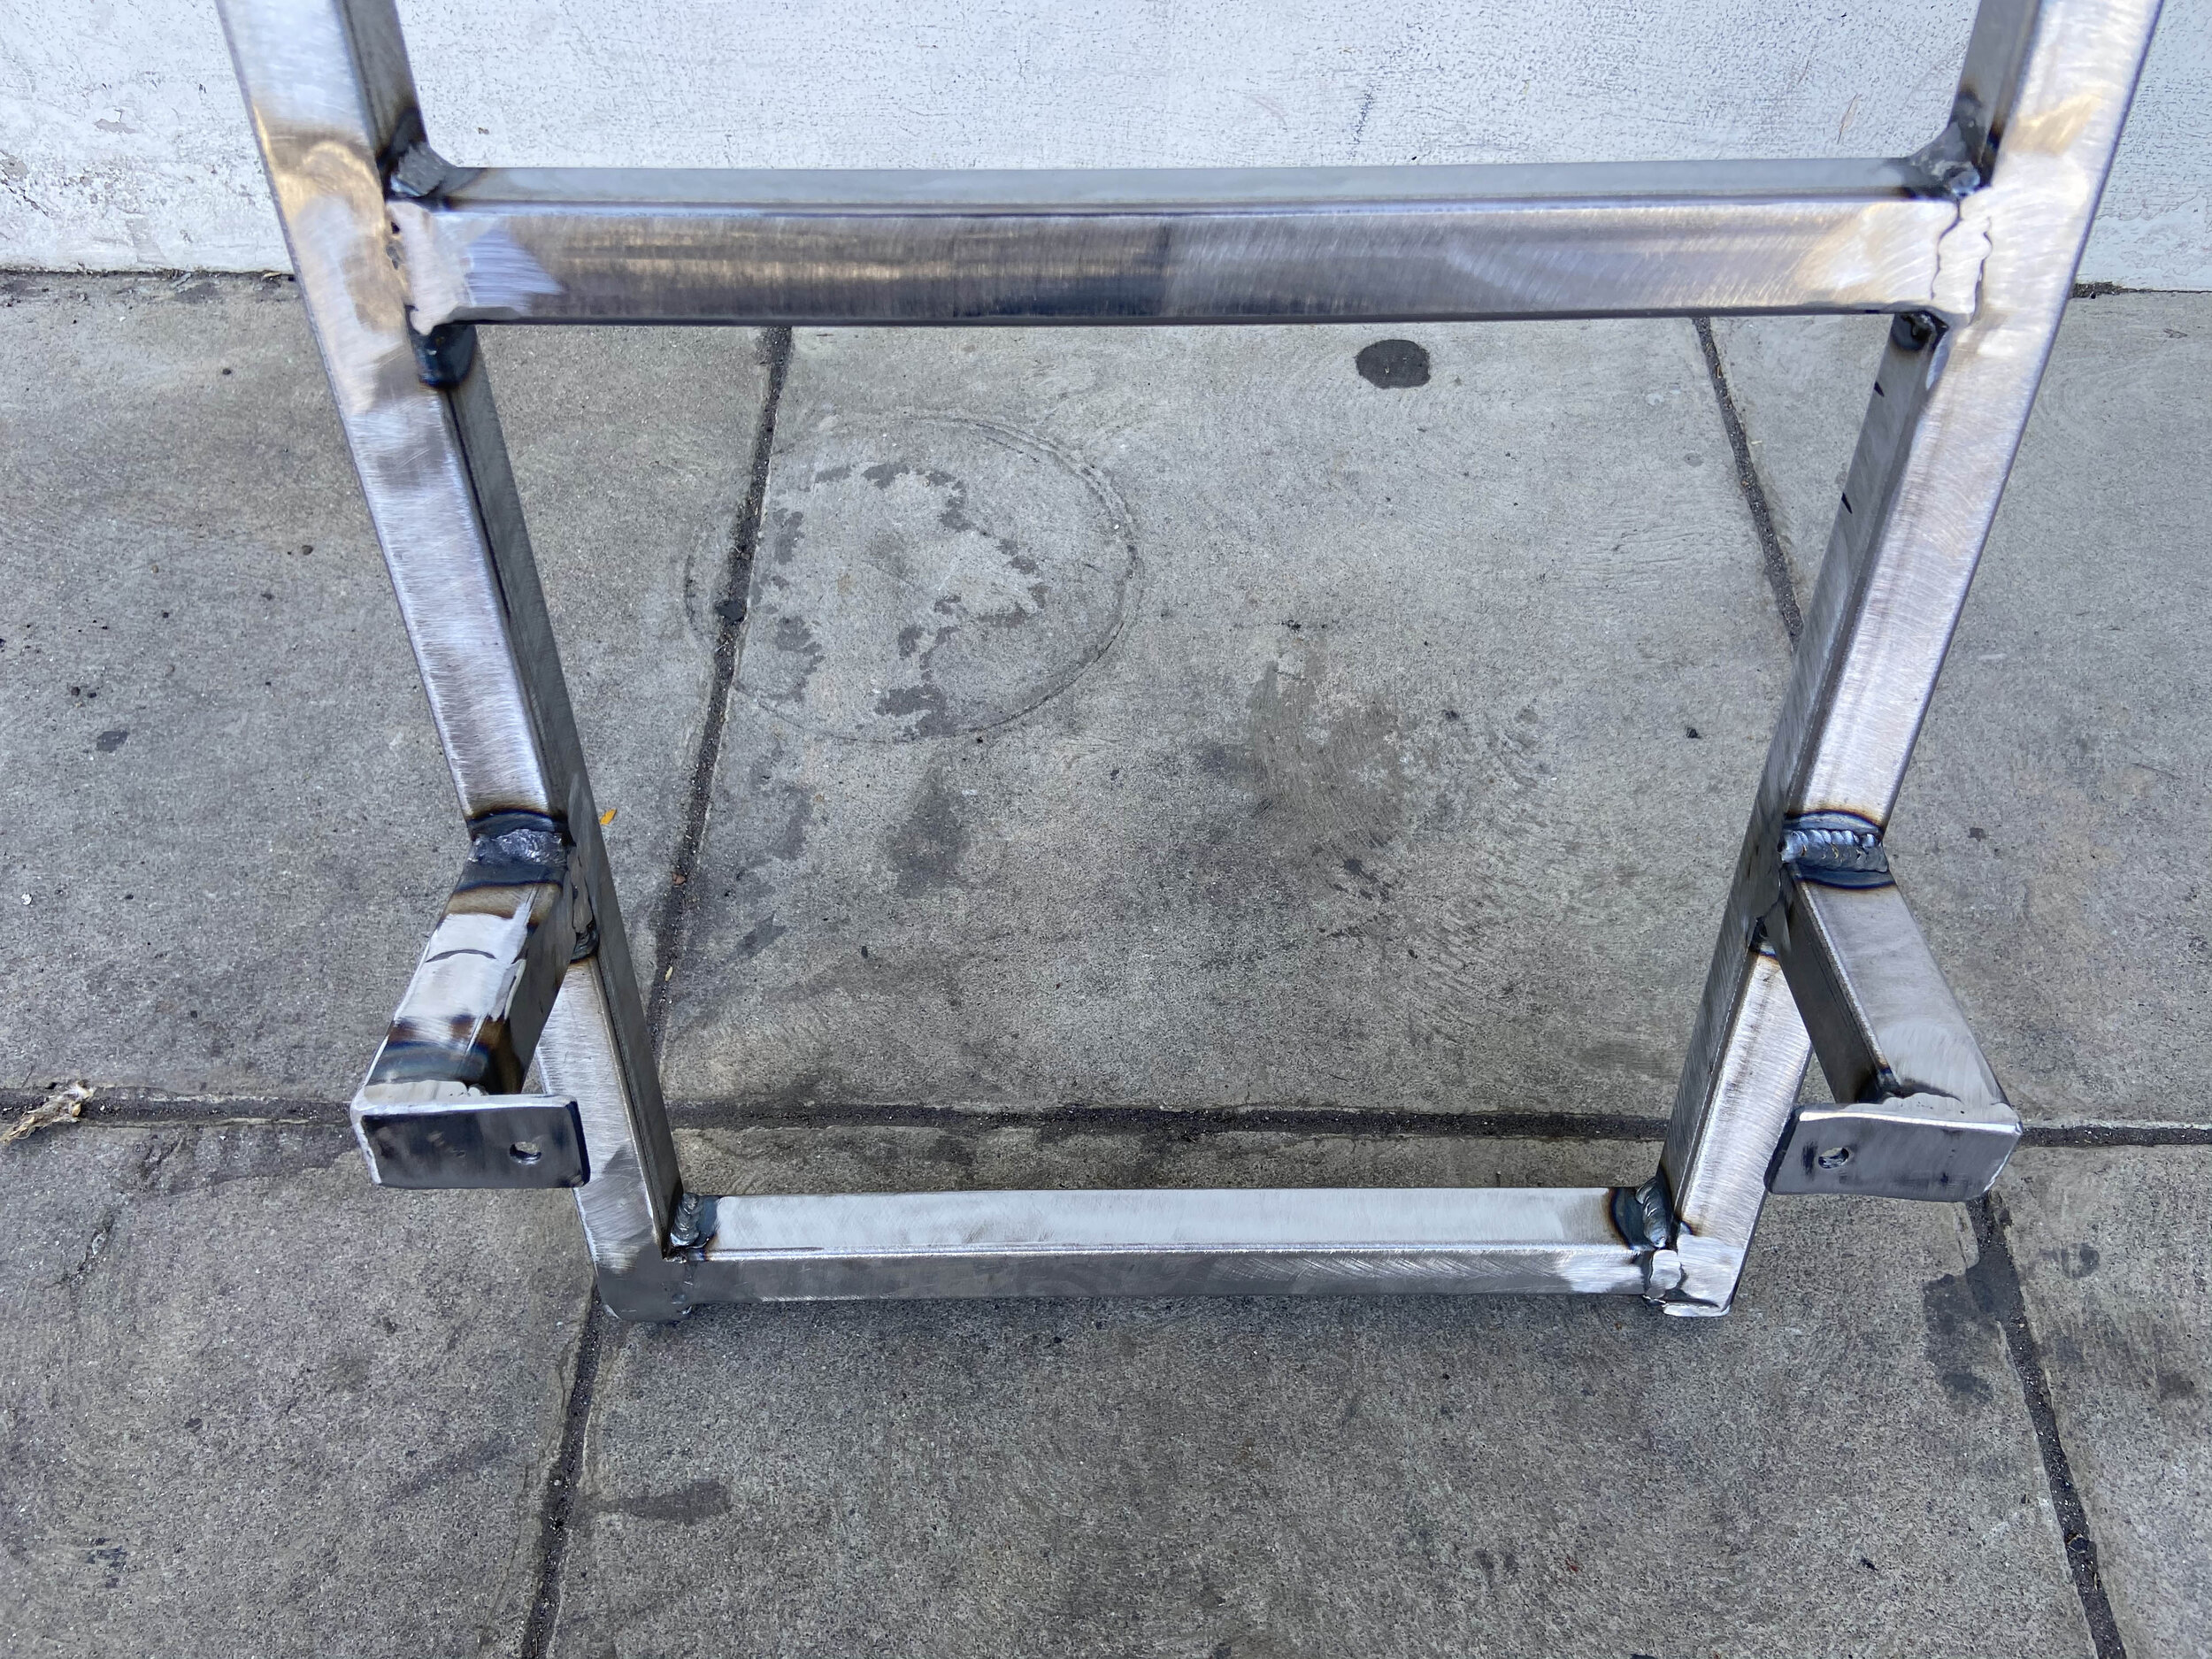
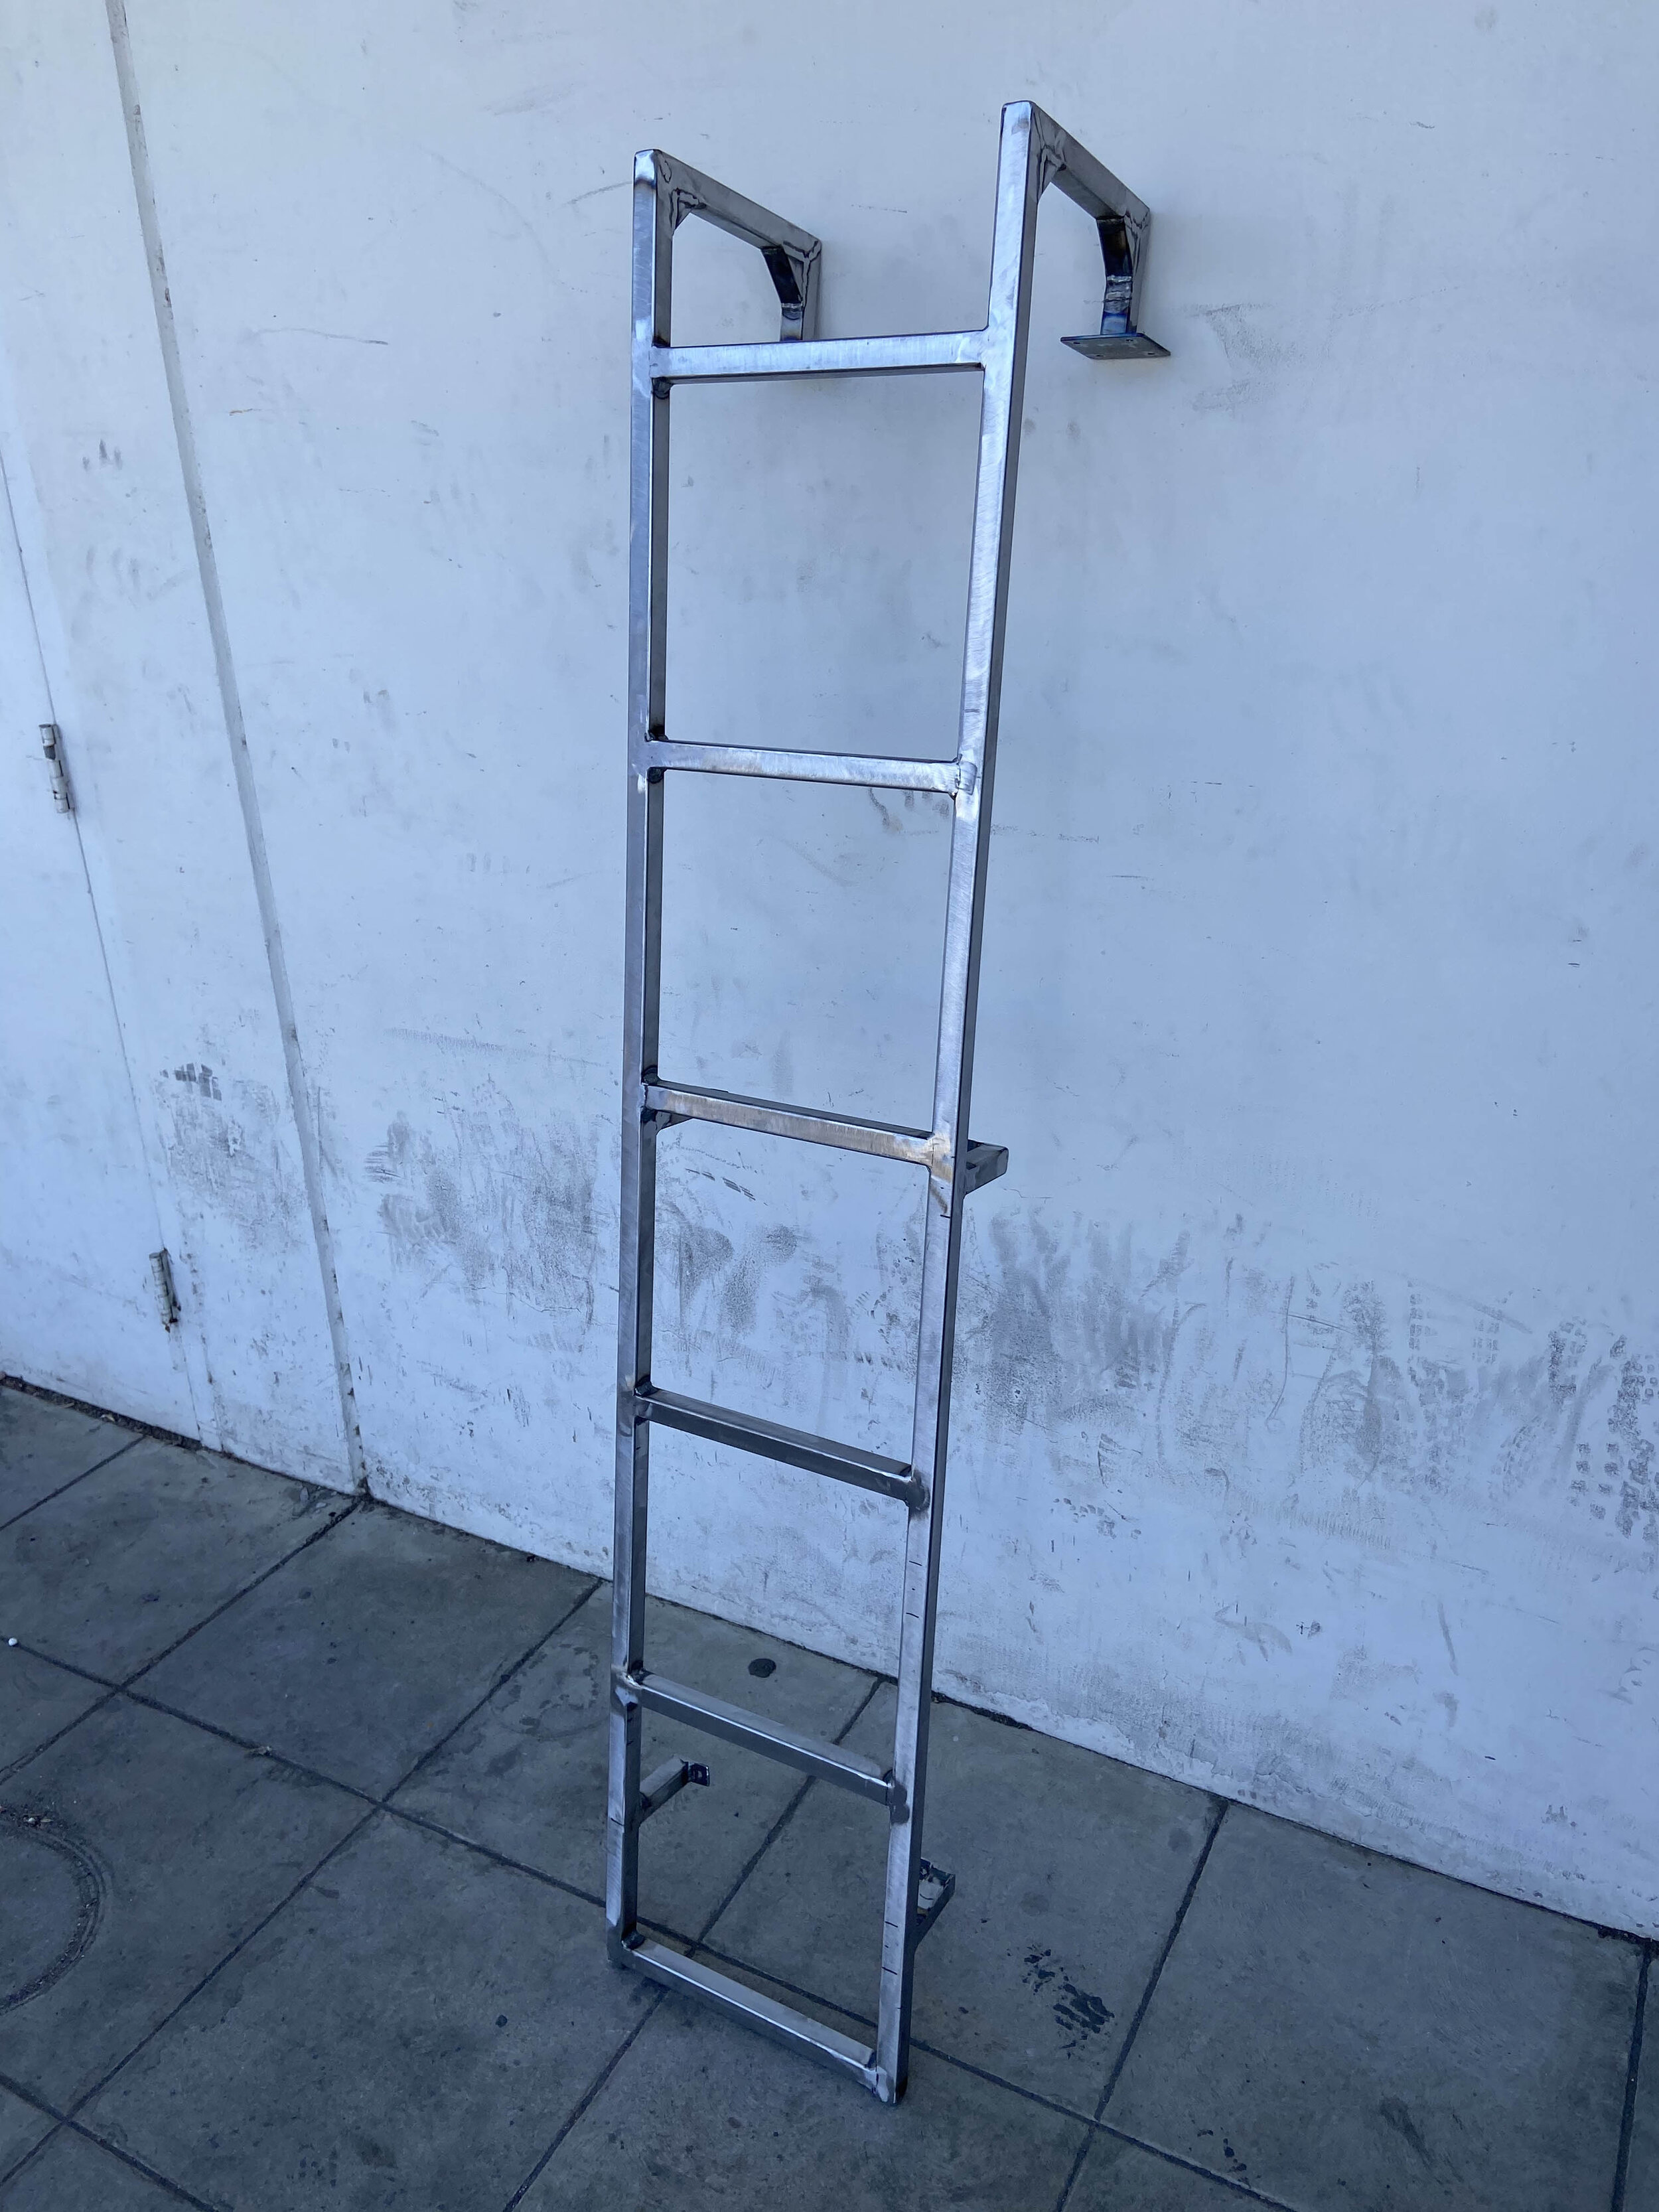
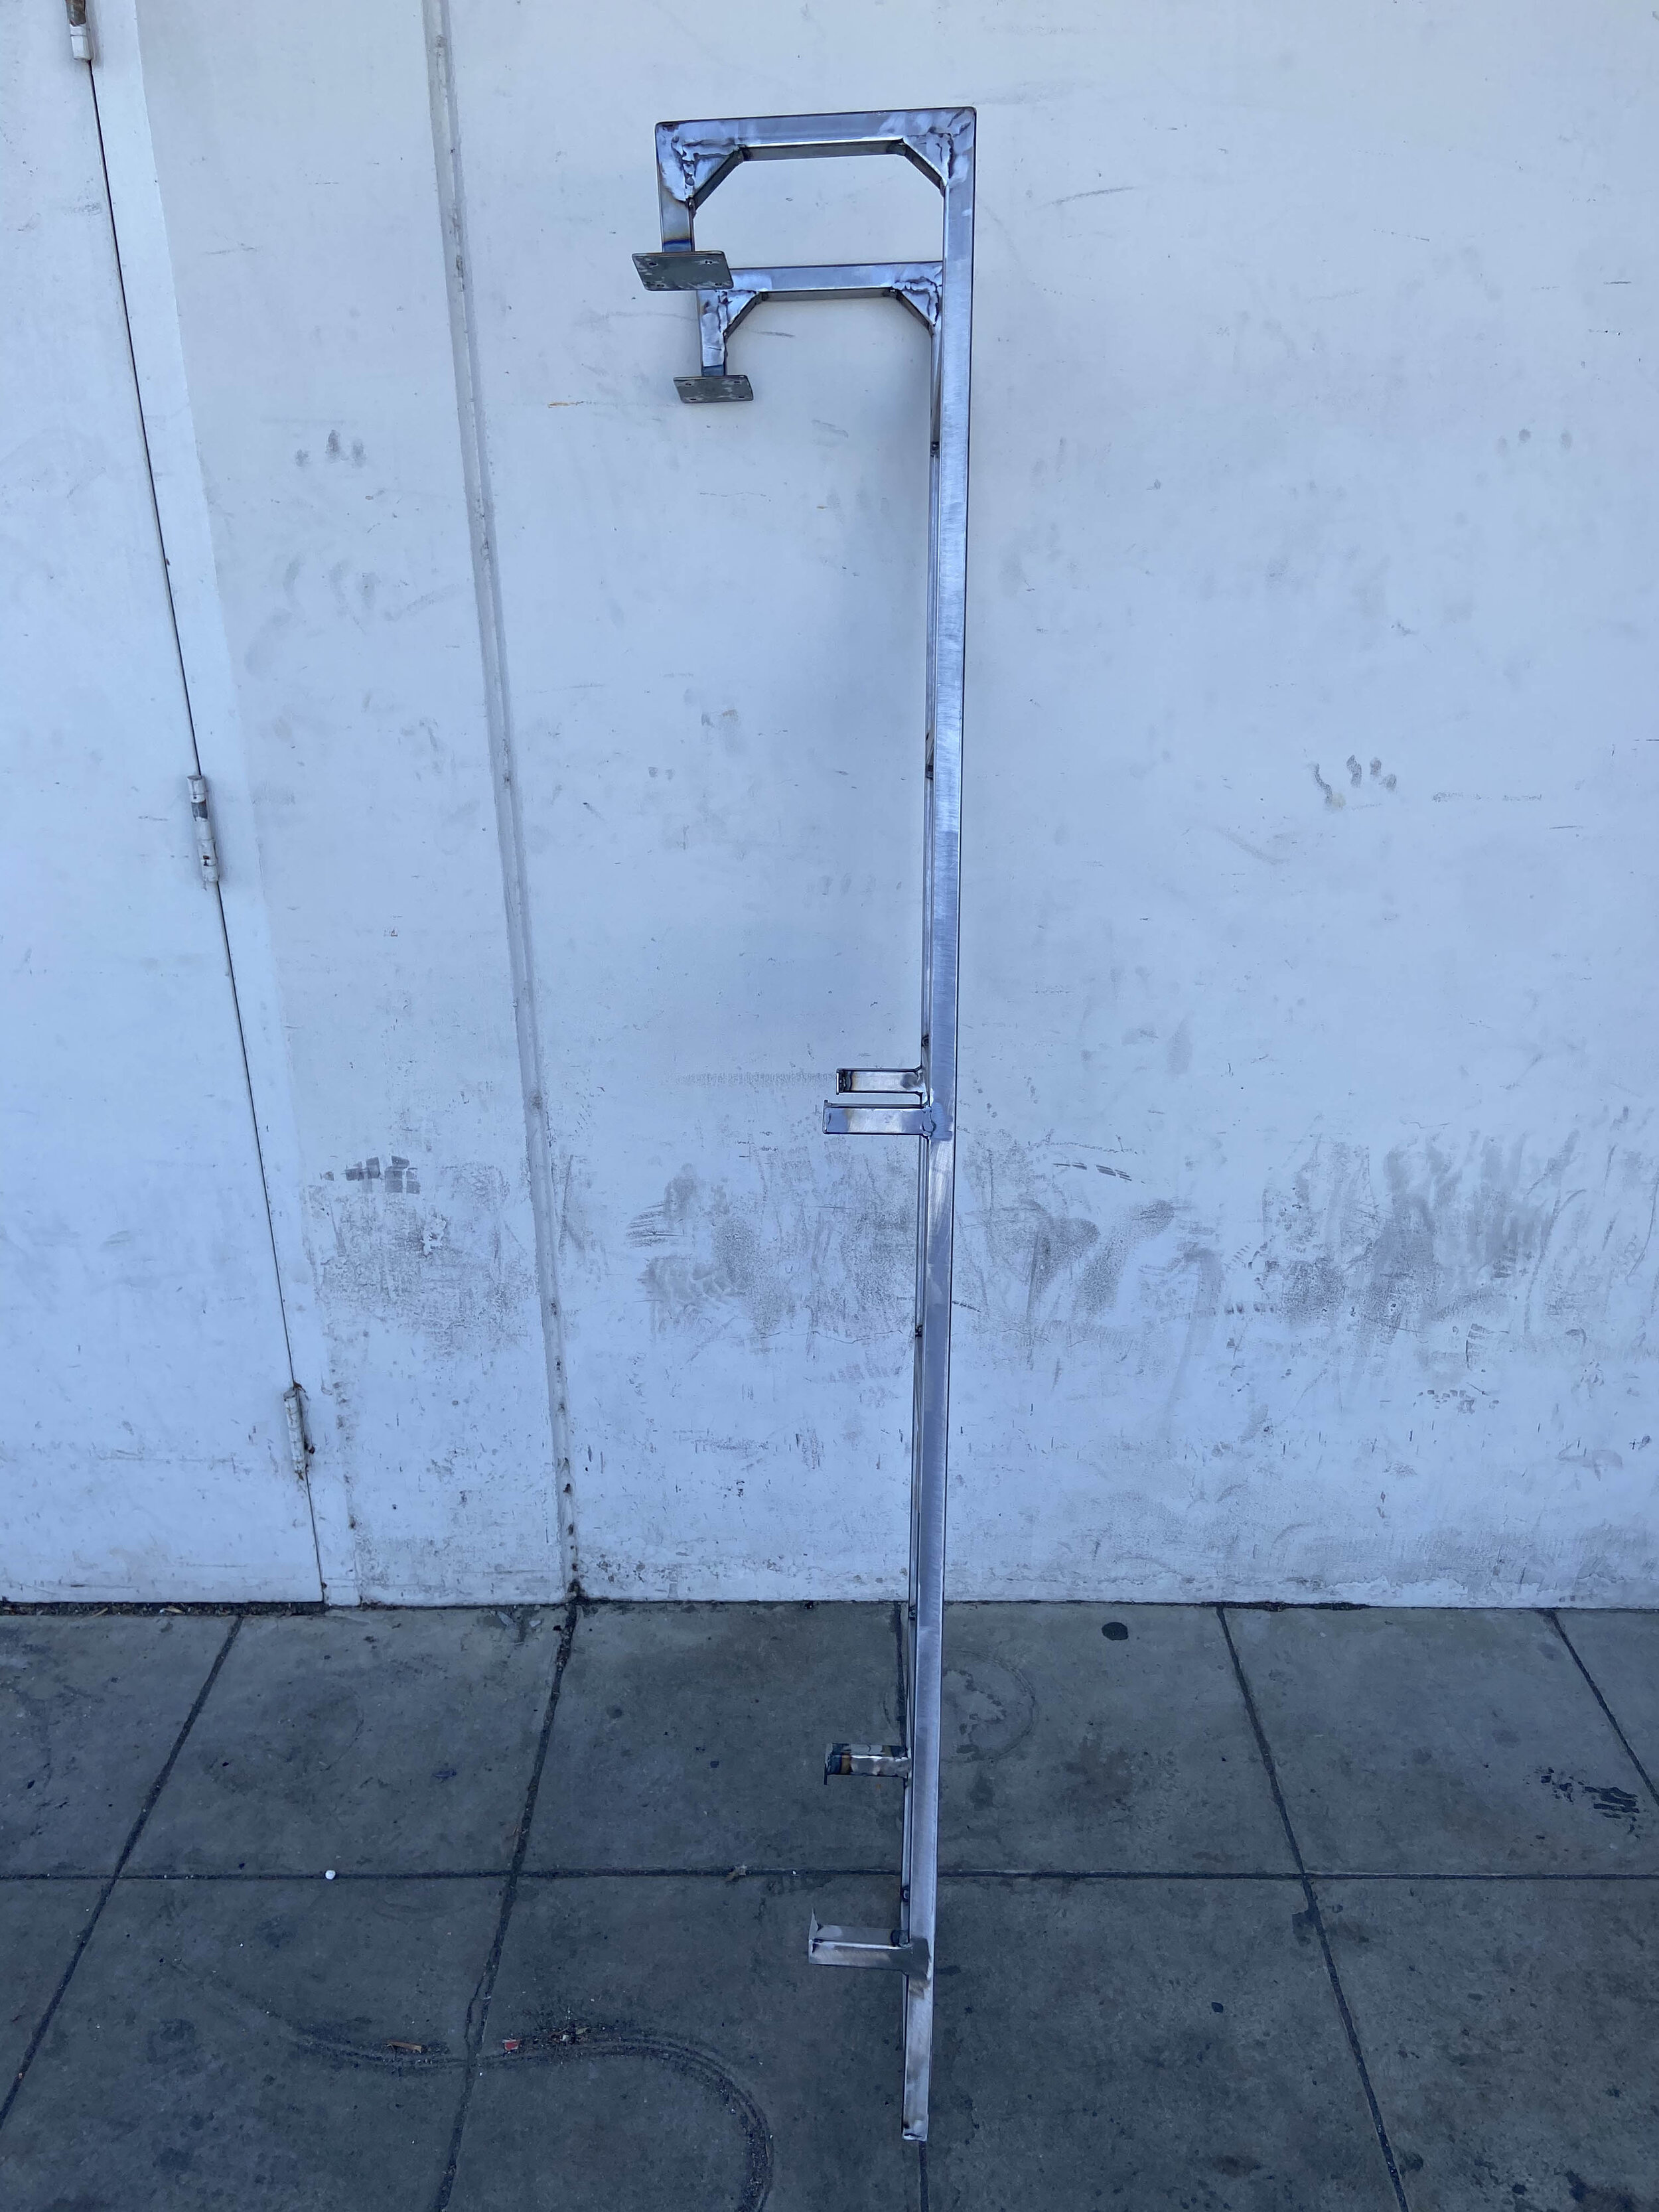
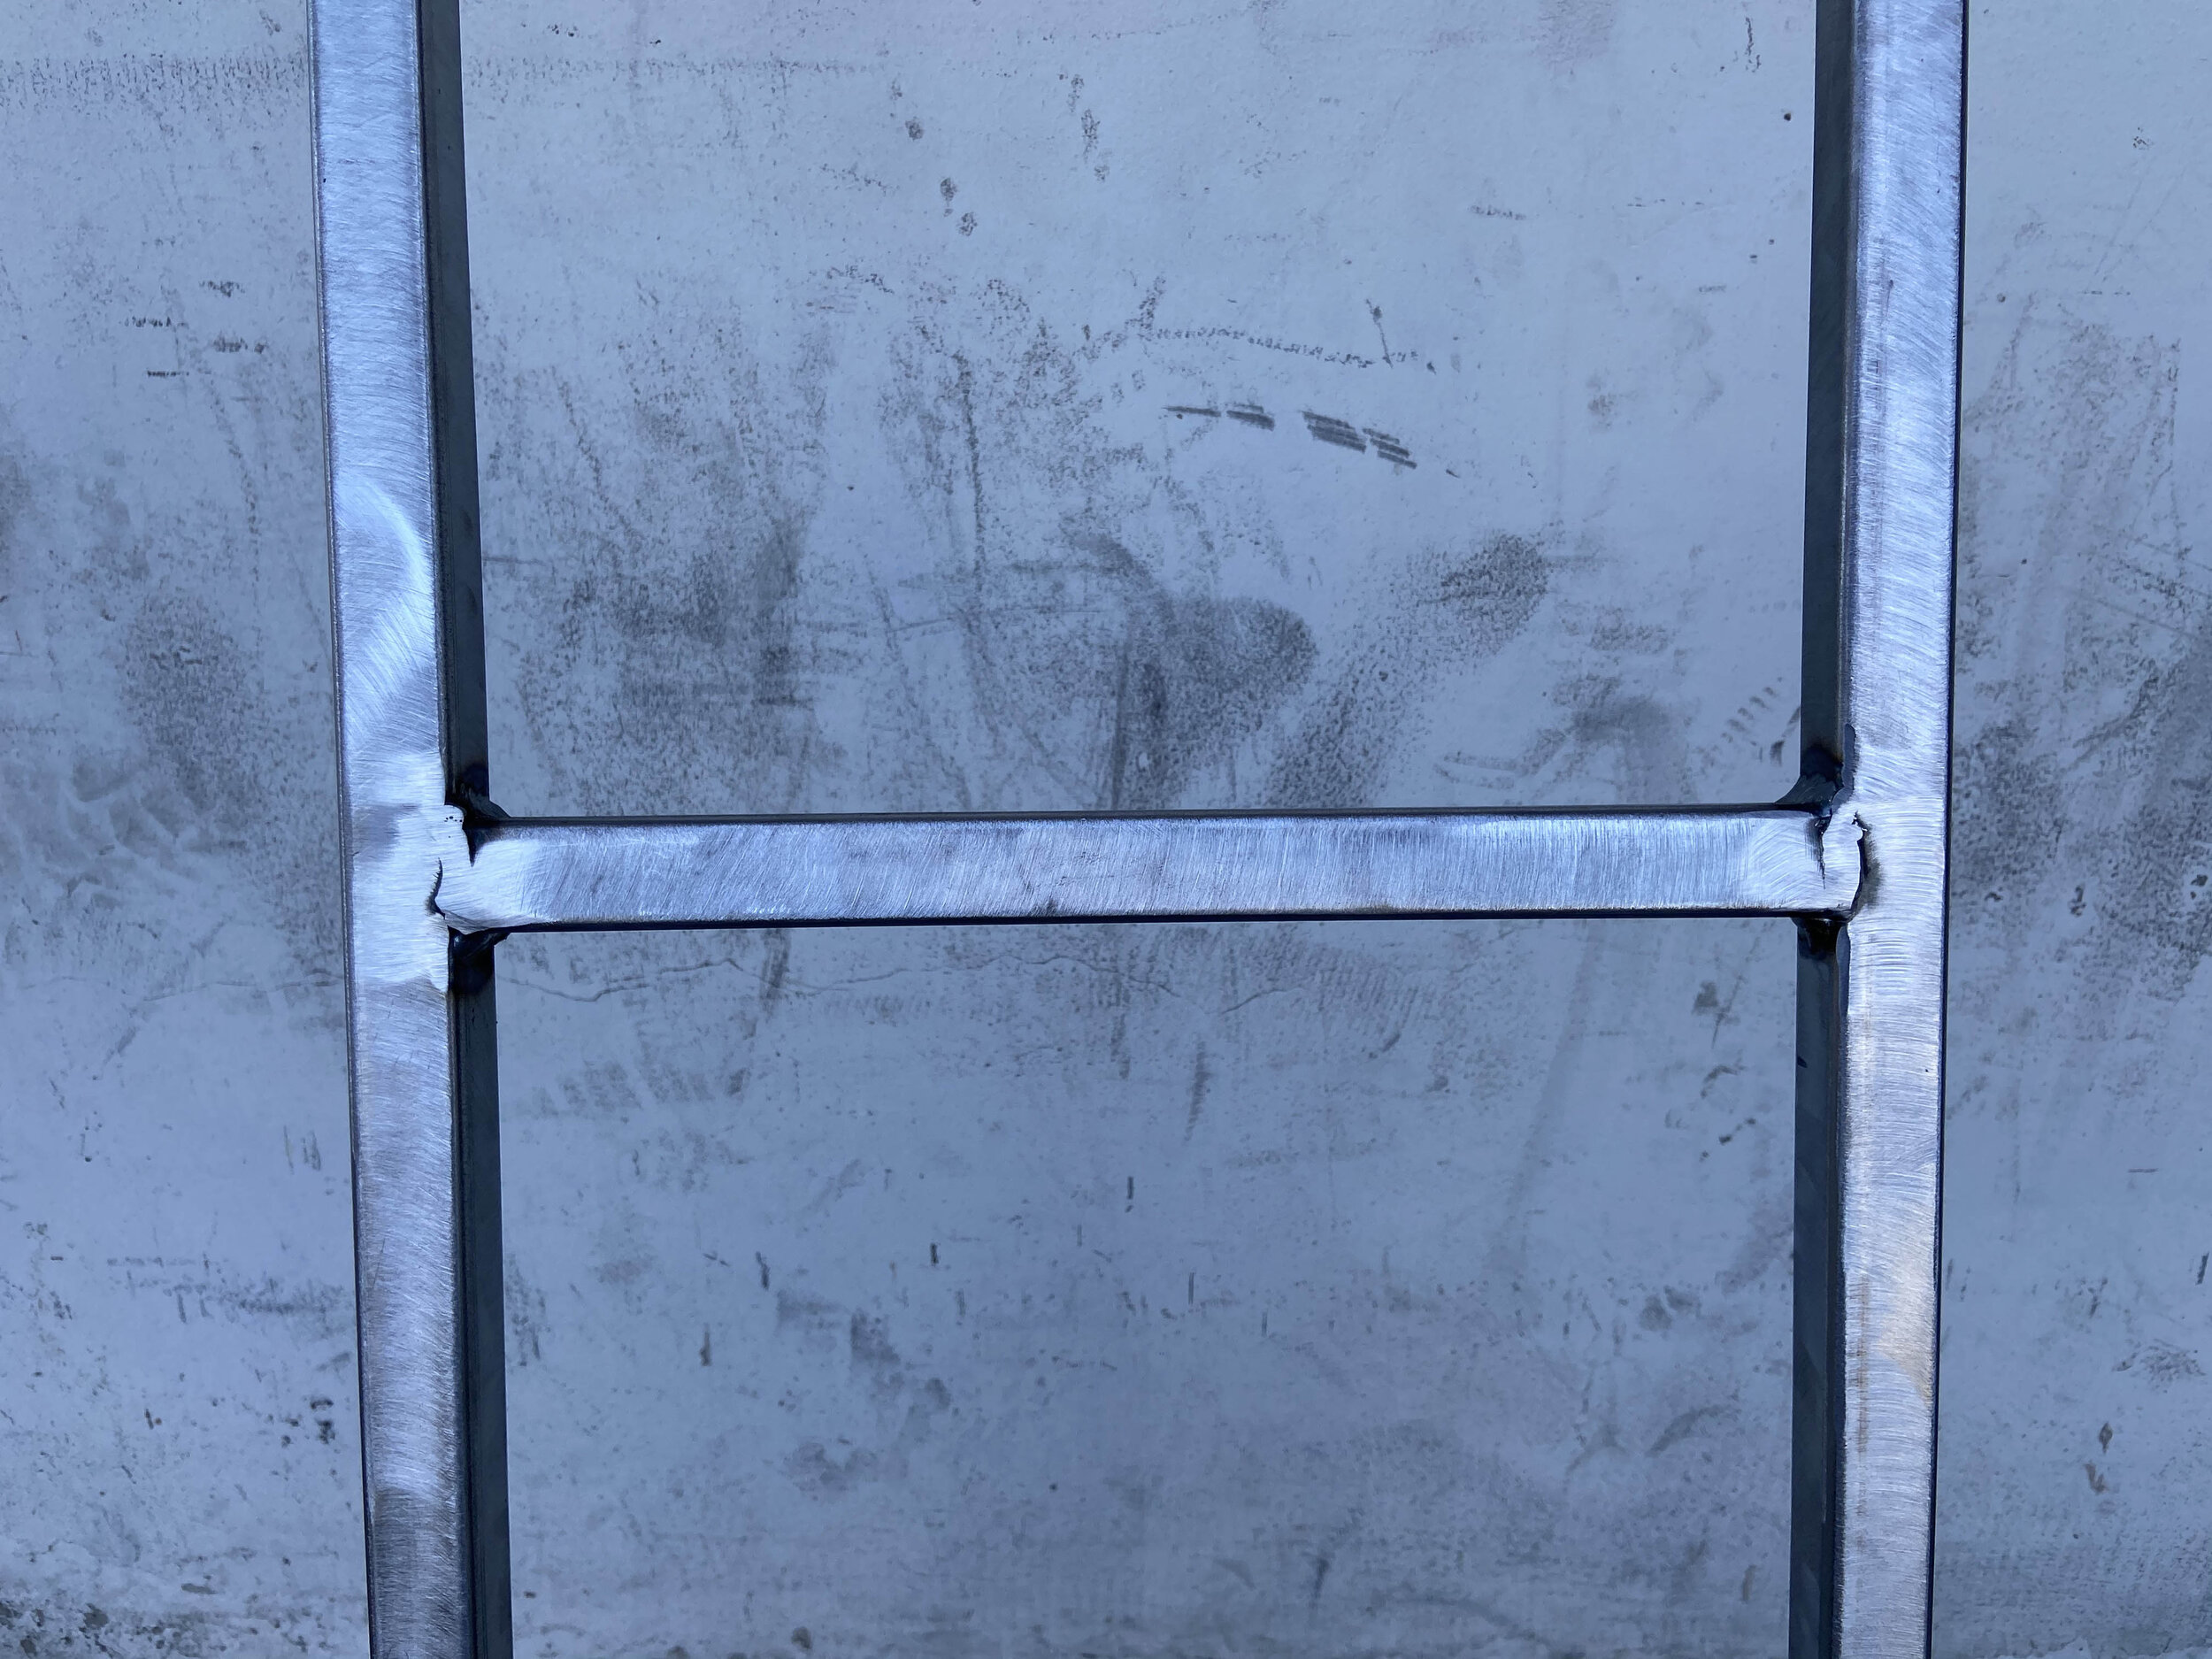
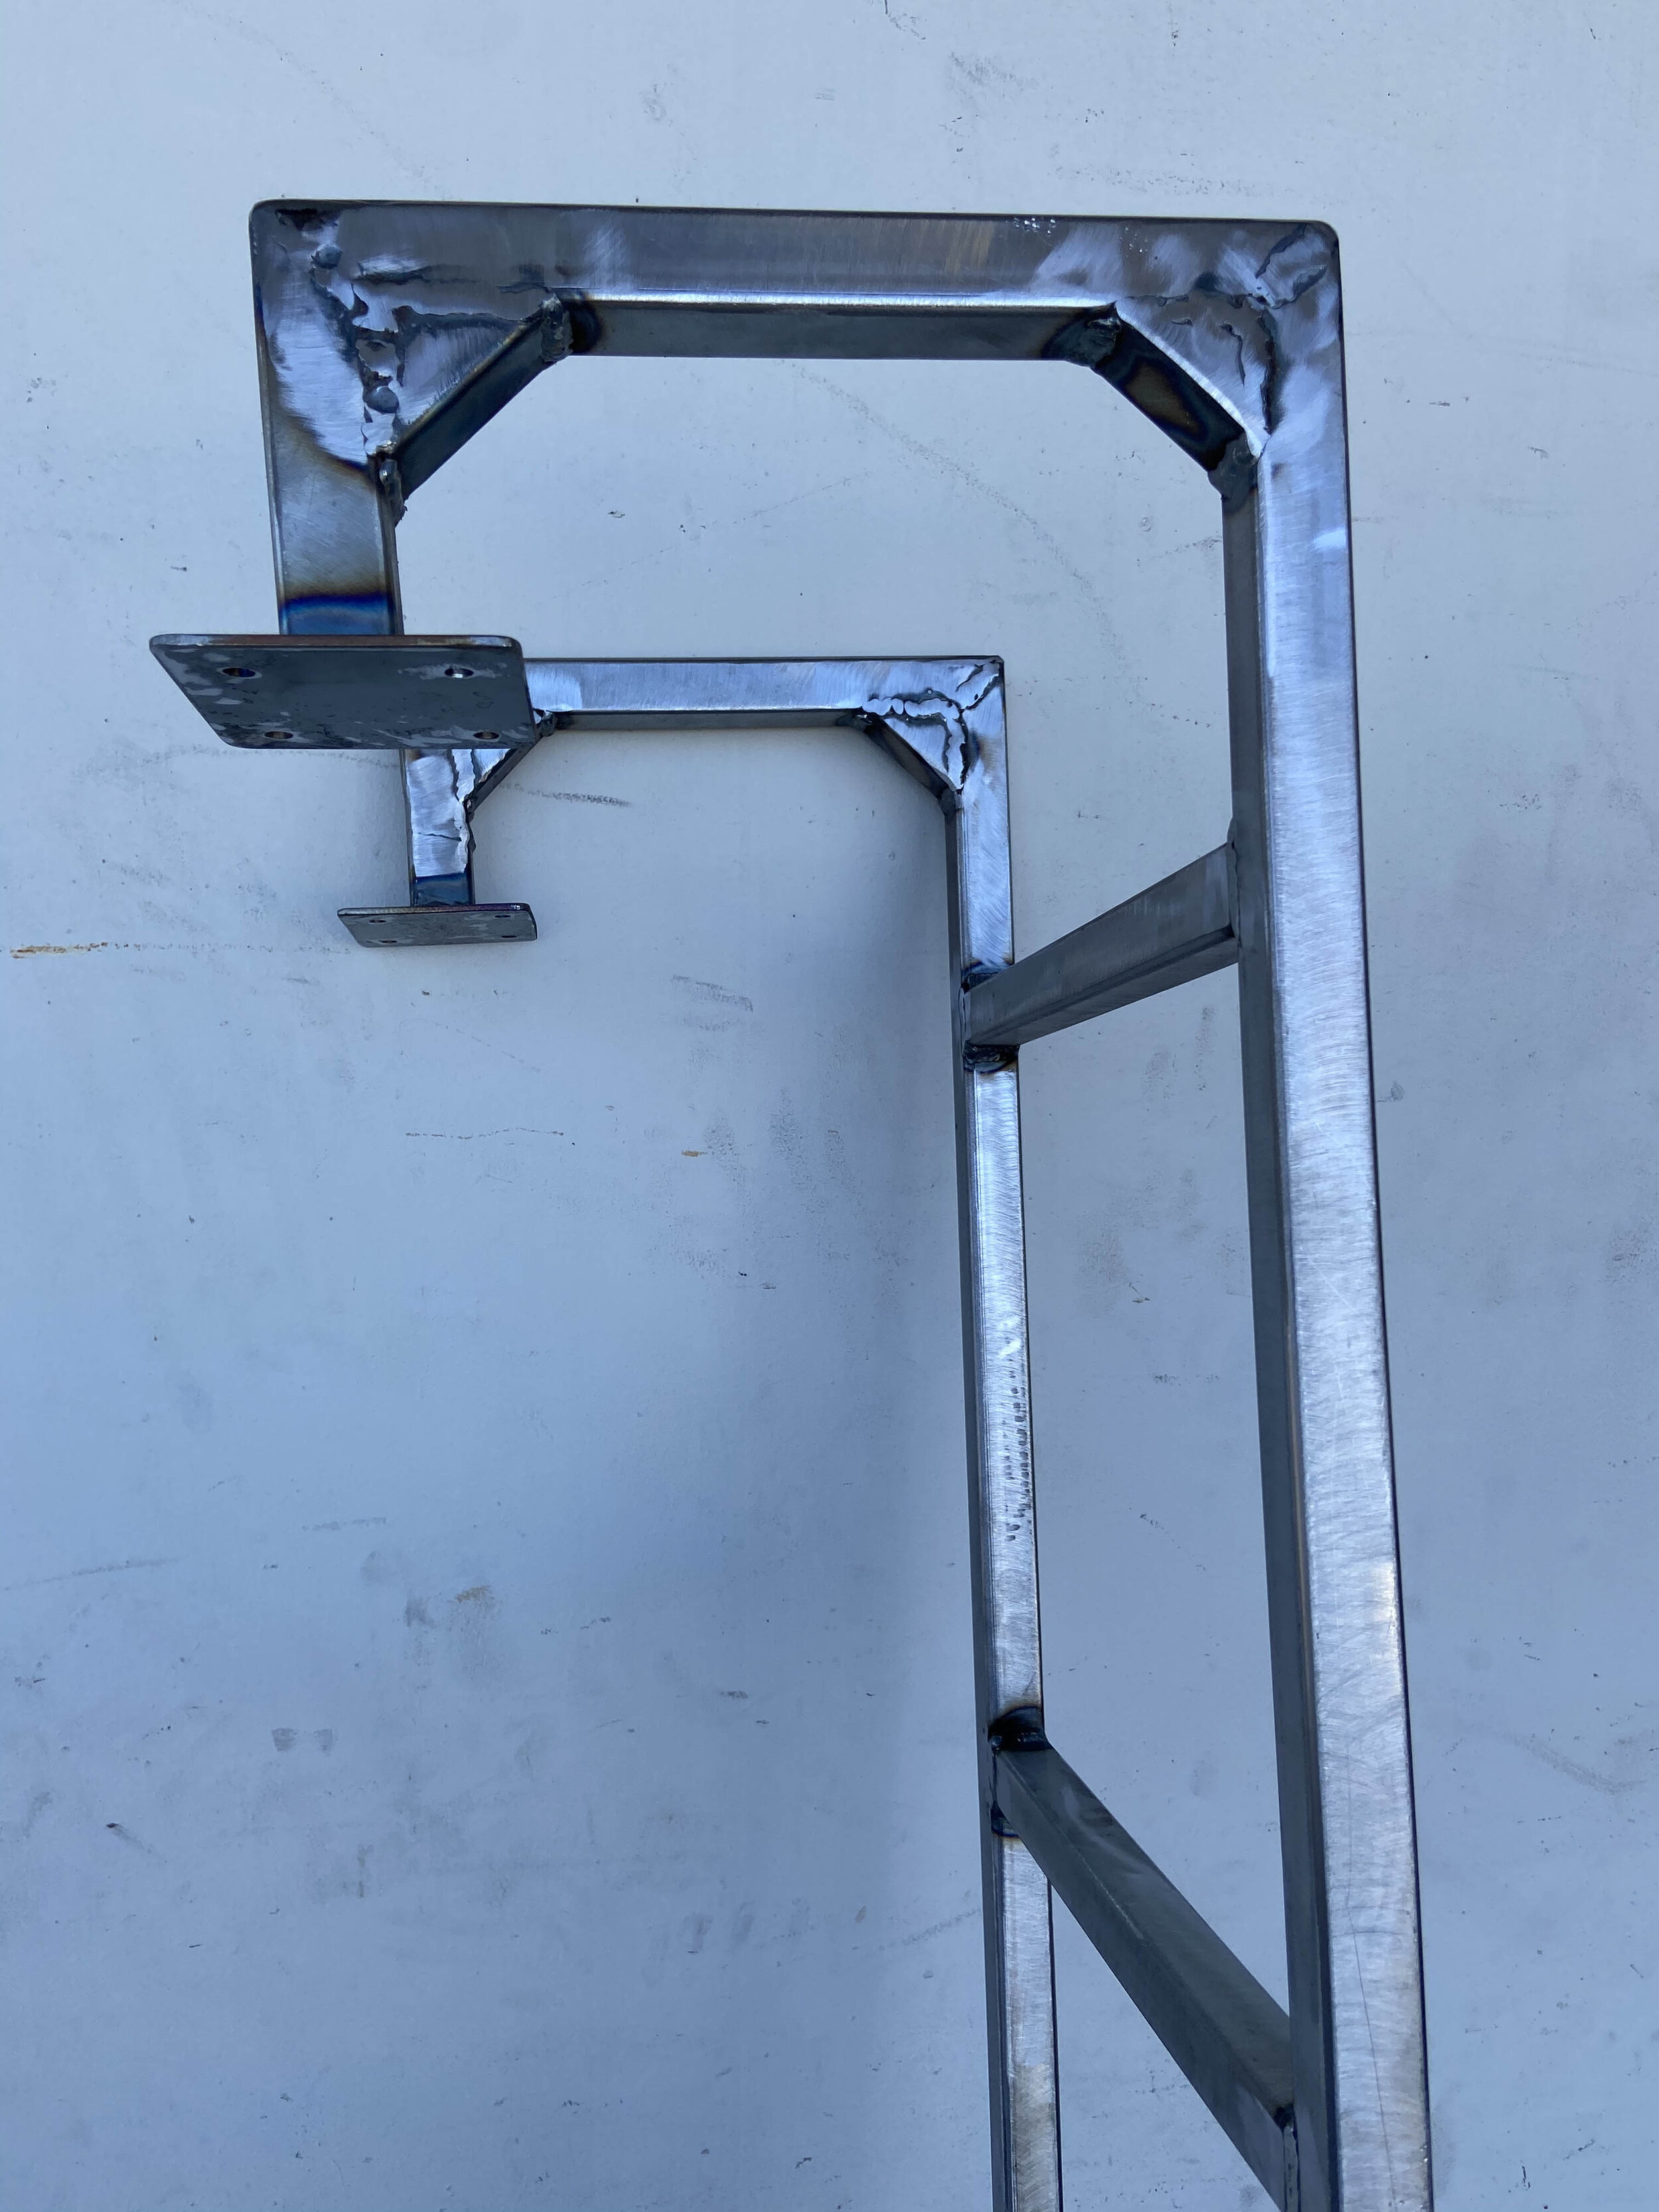
4-8-2021 - My brother has a a protege that welds very well so I asked if he could weld up a ladder for me. $200 bucks and a few days later the build was complete. I dropped it off at the Powder Coat shop. It came out exactly as I needed it. :-)


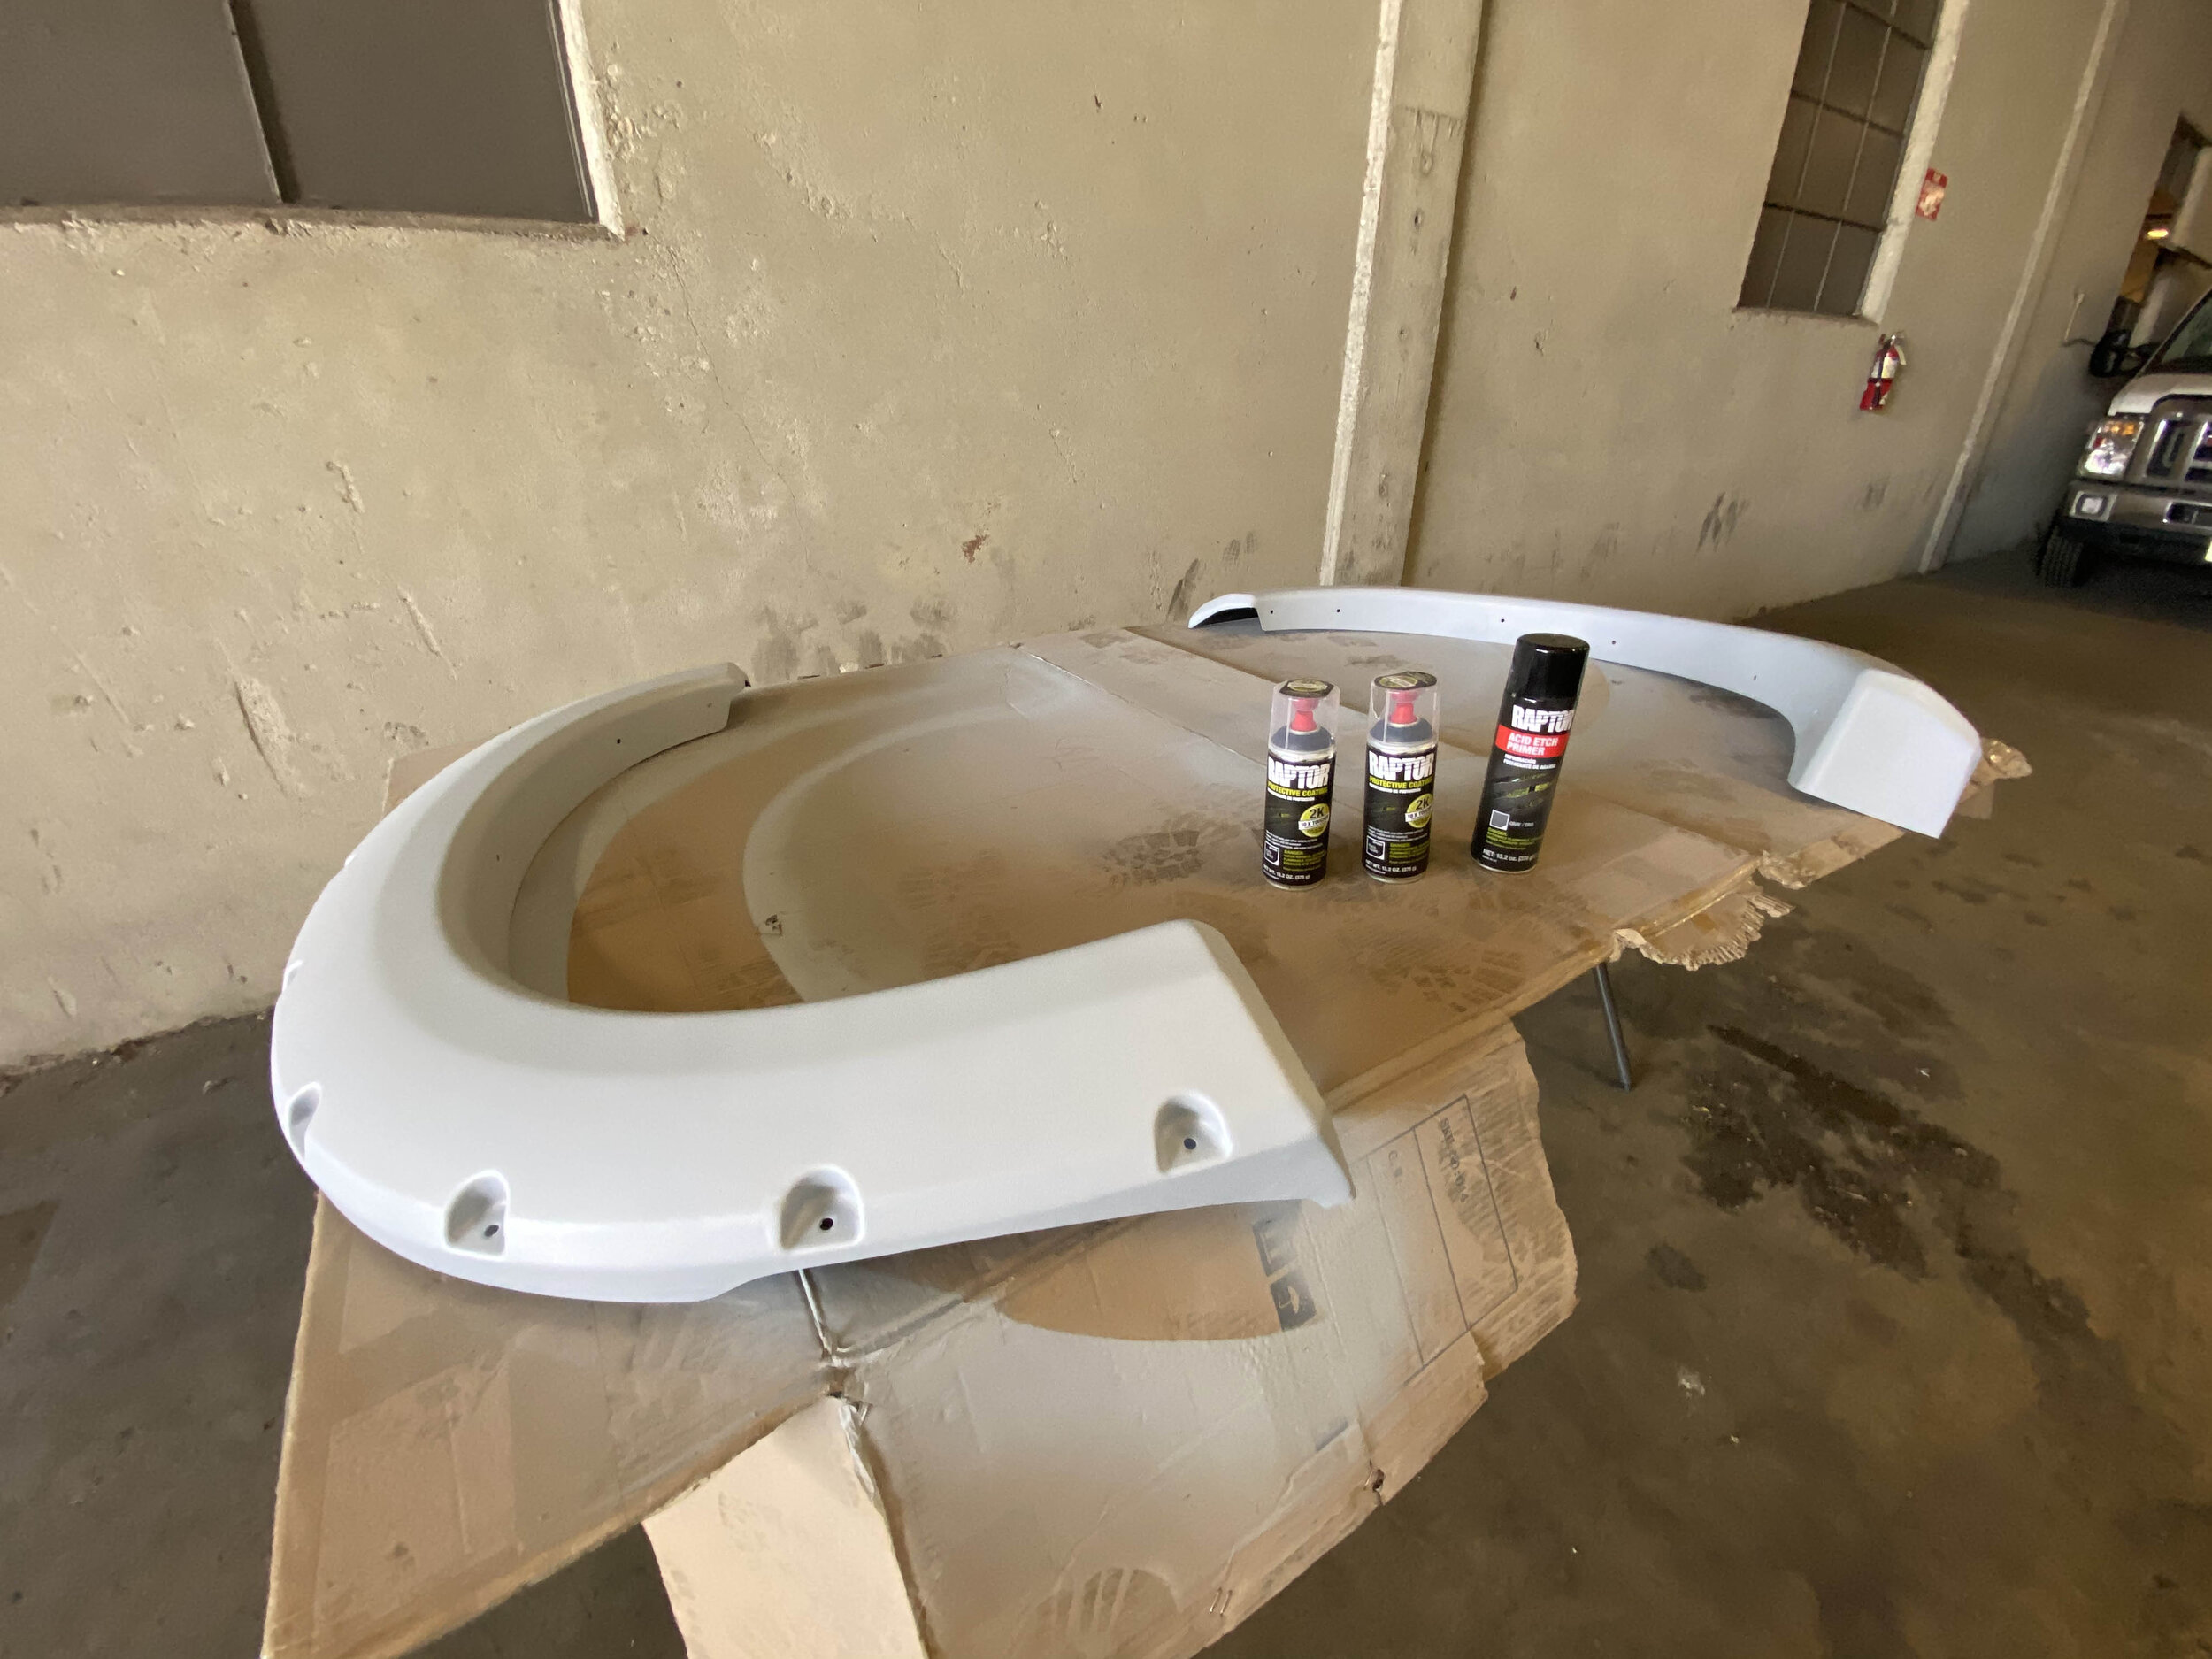
4-16-2021 - Fenders on amazon, $156, two cans of Raptor liner $80, and one can of Upol self etching primer $18. This took about 1.5 days only because of the dry time for the Raptor liner. First I dry fit the fenders and replaced all of the “U Clips” and fender bolts. The old ones were ok however I wanted new hardware so that I could depend on it moving forward and not worry about them coming undone. The total cost for the fender bolts and U clips was $22. I had to go to Auto Zone, Orielys, and Pep Boys to gather the hardware as no one store had what I needed in the quantity I needed. Below are photos of the process. The fenders come in a set of (4). Front and rear. Im not going to use the rear fenders so they are going on Ebay for $50.
1) Dry Fit,
2) Sand as much as you can while mounted (easier to sand)
3) Wipe down fenders with Soap/Water
4) Self Etching primer (one coat)
5) (2) Coats of Raptor Liner
6) Rubber trim applied and remounted to fender. Done.